ENGLISH VERSION
♥️Hello DIYHUB community!♥️
This Christmas, in addition to having a new house to decorate, I also have a pet, my beloved Mathías who I rescued 2 and a half months ago, he is part of the family, my home and my heart.
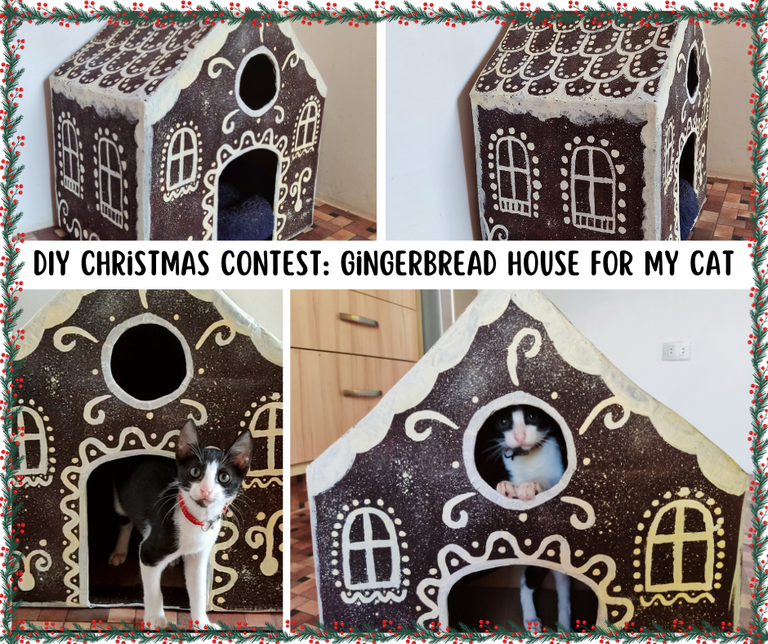
That is why I decided to make him a bigger house, since he was growing and no longer fit into his old little box. And since the theme of this contest is Christmas, I came up with the great idea of making a gingerbread house for Mathías.
It took me about 5 days to build it, since I used paper mache to strengthen it and here I will show you the entire process of construction and manual elaboration of my cat's new home and Christmas decoration of my house.
Materials:
- 1 medium box
- Scotch tape
- Paper
- Cold paint (Brown and white)
- Brush
- Pencil
- Ruler
- Scissors
- Cutter
- Toothbrush that you don't use
To make homemade glue:
- ¼ cup wheat flour
- 1 tablespoon of salt
- ¾ cup of water
- ¼ cup of disinfectant or dish soap (So the ants don't eat it)
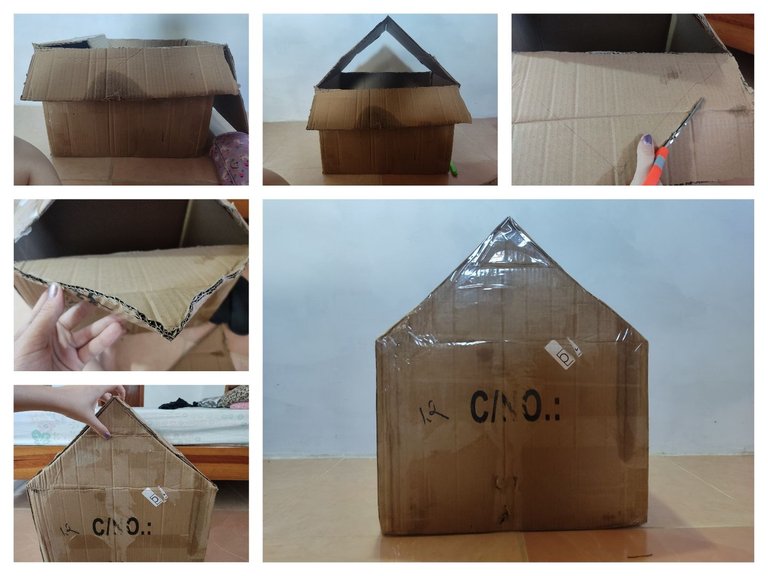
I started by joining two sides of the box lids to assemble the triangle-shaped roof and then with the other two lids and the help of scissors I sealed them and wrapped them in adhesive tape to secure everything very well.
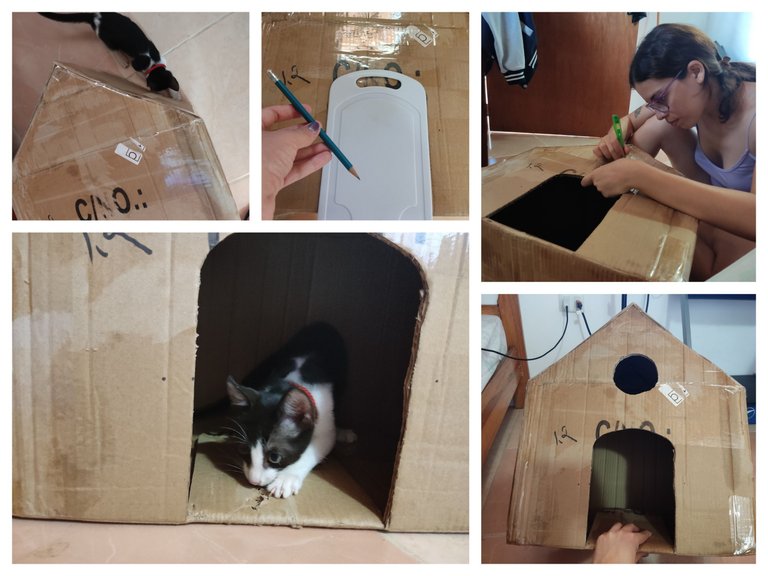
After having the entire house firm, I used the cutter and some molds to make the hole for the door and window.
Always making sure that Matías likes his new home.
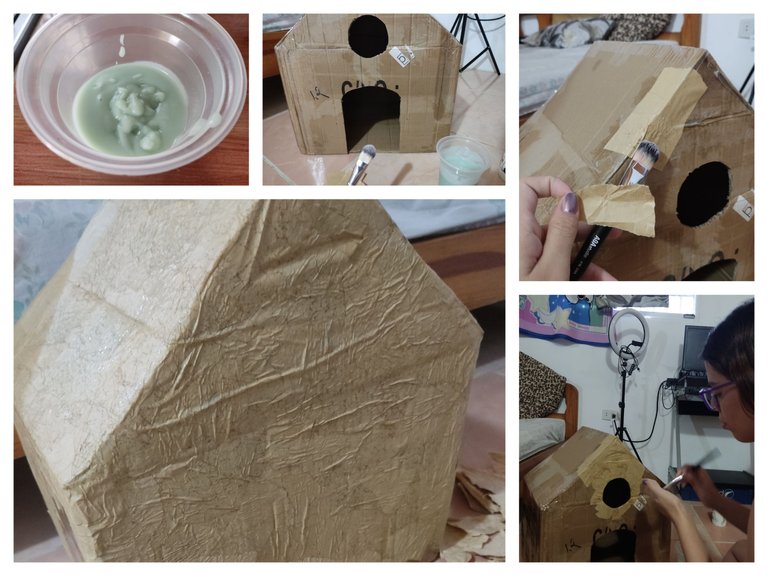
After having this ready, I prepared the homemade glue, combining the previous ingredients in a pot and stirring over low heat until waiting. Now with our warm glue we can start gluing paper with our hands or a brush and the glue.
There were 2 coats that I let dry well 1 day in between, so that they were very dry and rigid.
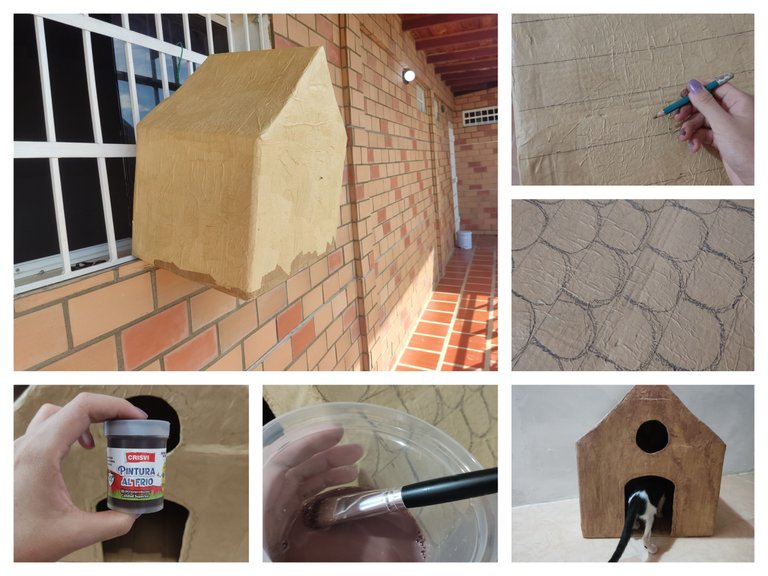
With this ready, the tedious part began, as I had only one brown paint, I started by mixing a little water with paint to give a first layer and in this way when adding the final color it would be uniform.
And as you can see, Mathias was always supervising the construction of his home.

We wait for the paint to dry well and paint with the pure brown paint. After it dries, we begin to make details with white paint as if it were a real gingerbread house and as a final touch, we use the paint brush. old teeth plus white paint to splash and simulate snow on the house.
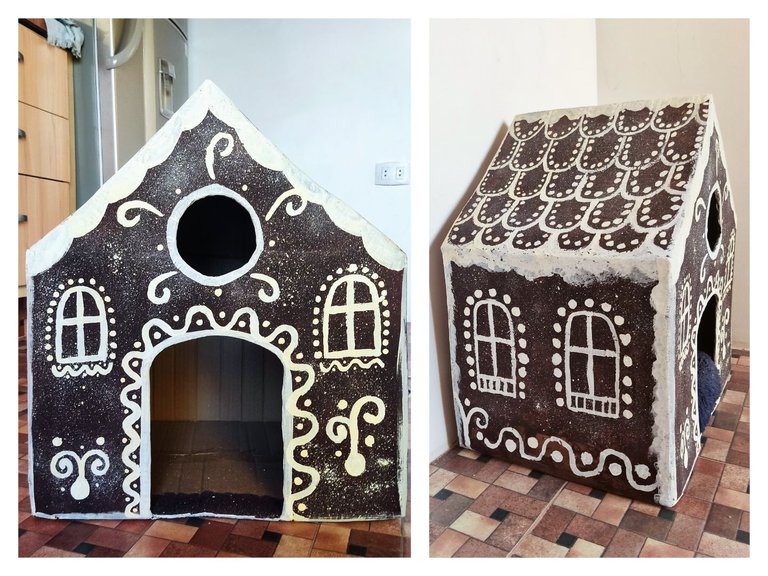
♥️This was the final result of this new home for Mathias, a beautiful gingerbread house made of cardboard!♥️
♥ ️And here you can see Matías enjoying his new house, apparently he liked it! ♥ ️

VERSIÓN EN ESPAÑOL
♥️¡Hola comunidad DIYHUB!♥️
En estas navidades además de tener una casa nueva que adornar, también tengo una mascota, mi amado Mathías quién rescaté hace ya 2 meses y medio, él es parte de la familia, de mi hogar y de mi corazón.
Es por ello, que decidí hacerle una casa más grande, ya que estaba creciendo y ya no entraba en su antigua cajita. Y como la temática de este concurso es la navidad, se me ocurrió la gran idea de hacerle una casa de jengibre a Mathías.
Tardé alrededor de 5 días construyéndola, ya que hice uso de papel maché para fortalecerla y aquí te mostraré todo el proceso de construcción y elaboración manual del nuevo hogar de mi gato y decoración navideña de mi casa.
Materiales:
- 1 caja mediana
- Cinta adhesiva
- Papel
- Pintura al frío (Marrón y blanco)
- Brocha
- Lápiz
- Regla
- Tijeras
- Cutter
- Cepillo de dientes que no uses
Para elaborar un pegamento casero:
- ¼ taza de harina de trigo
- 1 cucharada de sal
- ¾ taza de agua
- ¼ taza de desinfectante o lavavajillas (Para que las hormigas no se lo coman)
Empecé juntando dos lados de las tapas de la caja para armar el techo en forma de triángulo y luego con las otras dos tapas y ayuda de una tijera las sellé y envolví en cinta adhesiva para asegurar todo muy bien.
Después de tener toda la casita firme, utilicé el cutter y unos moldes para hacer el orificio de la puerta y la ventana.
Asegurándome siempre de que a Matías le guste su nuevo hogar.
Después de tener esto listo, preparé el pegamento casero, uniendo los ingredientes anteriores en una olla y revolviendo a fuego bajo hasta que esperara. Ya con nuestro pegamento tibio podemos empezar a pegar papel con las manos o brocha y el pegamento.
Fueron 2 capas que dejé secar bien con 1 día de por medio, para que estuvieran bien secas y rígidas.
Ya con esto listo, empezó la parte tediosa, como tenía una sola pintura marrón, empecé mezclando un poco de agua con pintura para dar una primera capa y de esta forma al agregar el color final quedara uniforme.
Y cómo pueden ver, Mathias siempre andaba supervisando la construcción de su hogar.
Esperamos a que esté bien seca la pintura y pintamos con la pintura marrón en estado puro, luego de que se seque, empezamos a hacer detalles con pintura blanca como si de una casa de jengibre real se tratara y como toque final, usamos el cepillo de dientes viejo más la pintura blanca para salpicar y simular la nieve en la casita.
♥️¡Este fue el resultado final de este nuevo hogar de Mathias, una hermosa casita de jengibre hecha de cartón!♥️
♥️¡Y aquí pueden ver a Matías disfrutando de su nueva casita, por lo visto si le gustó!♥️
Portada | Cover: Canva App
Traducción | Translate: DeepL App