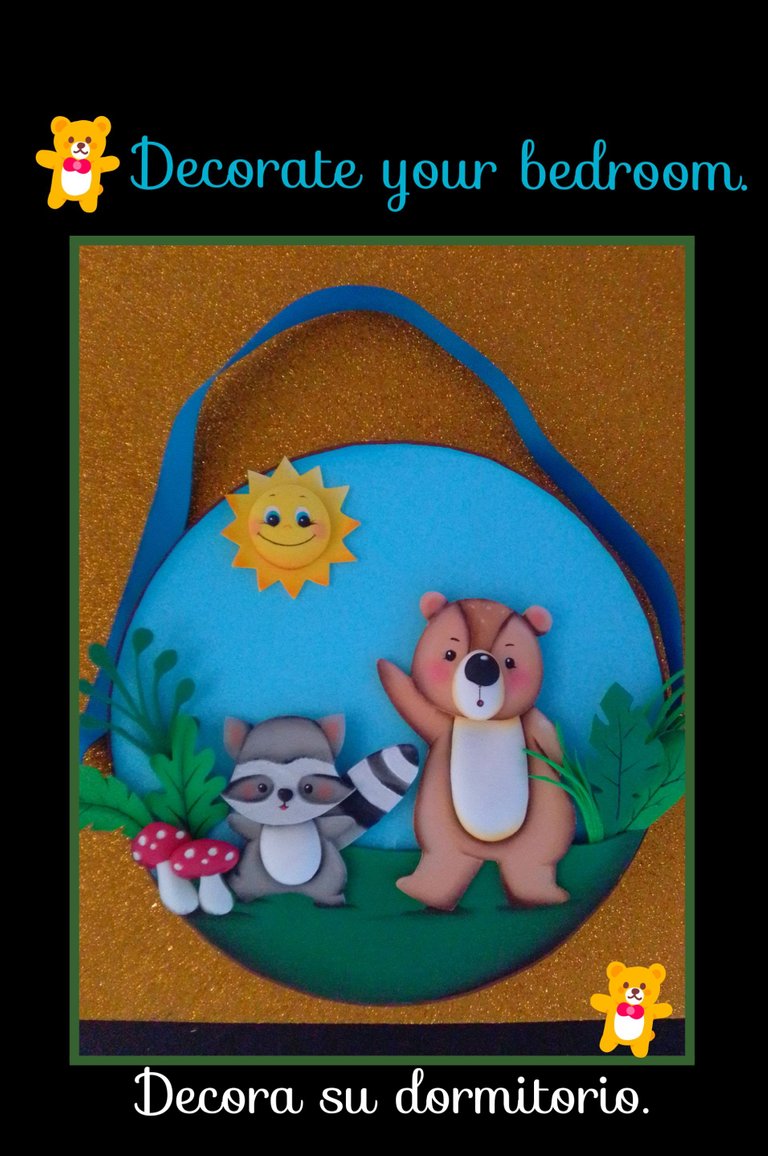
Buenas noches mis queridos amigos!
Saludos y bendiciones para todos los que hacen vida en esta linda comunidad de creadores.
De nuevo por aquí!
Necesitarás:
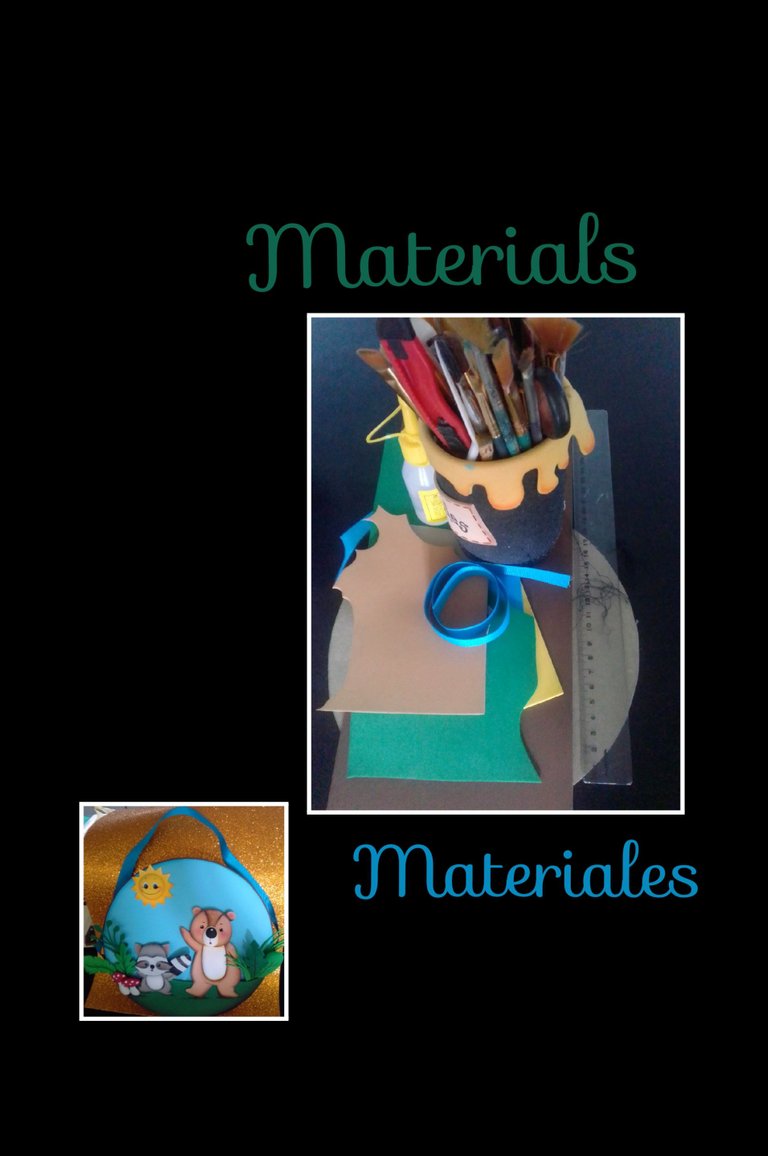
| Cartón o cartulina | Foami de colores |
|---|---|
| Cinta de tela | Bombillo led |
| Pinturas y pinceles | Tiza |
| Tijera y cuchilla | Lápiz y regla |
| Plancha eléctrica | Molde o dibujo |
Procedimiento:
Paso 1:
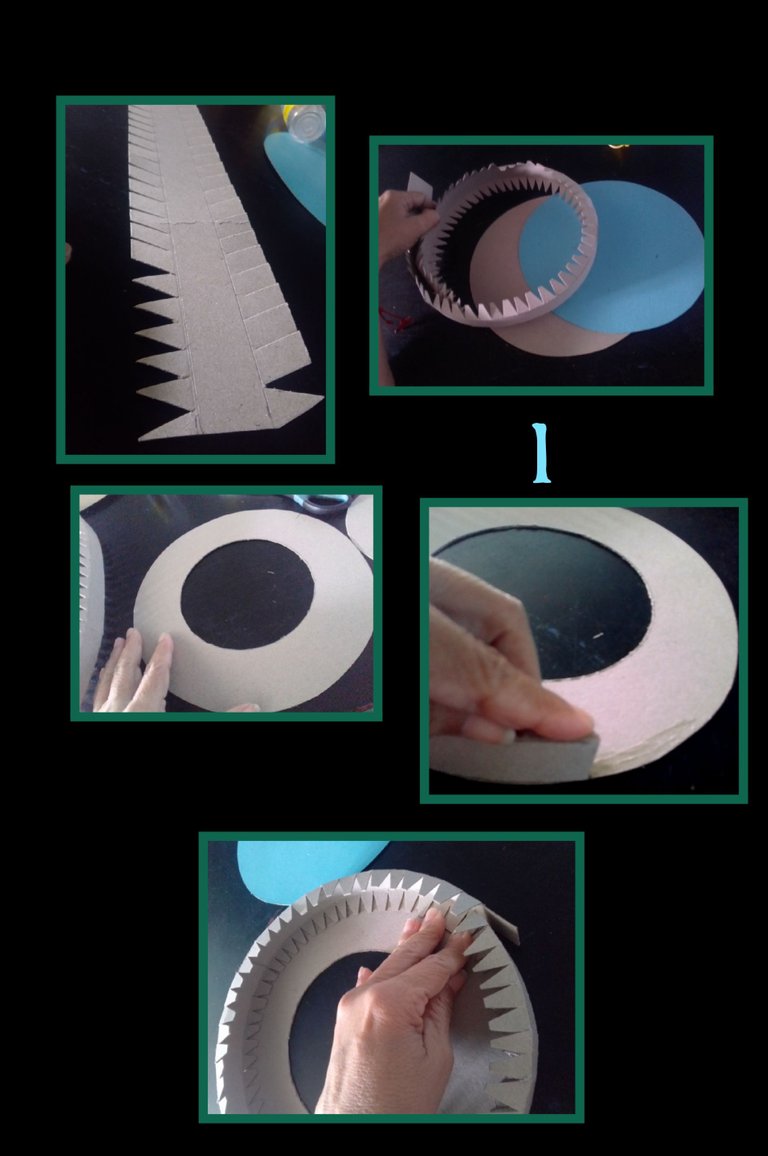
- Recorta dos círculos en cartulina del tamaño deseado, luego mide la circunferencia, marca una tira en el cartón con esa medida y al final agrega dos centímetros mas de largo y pon de altura, 5cm la cual dividiras en 3, los laterales serán de 1.5cm c/u y el centro será de 2cms de ancho, luego recorta las pestañas o laterales en forma de triángulos de 1cm c/u y con la punta de la tijera pasa remarcando las líneas para luego doblar hacia adentro.
- Si quieres poner luz a este colgante, saca el centro de uno de los círculos como se ve en la foto, luego aplica silicón por todo el contorno y pega uno de los laterales de la tira, haciendo presión sobre los triángulos para que pegue bien.
Paso 2:
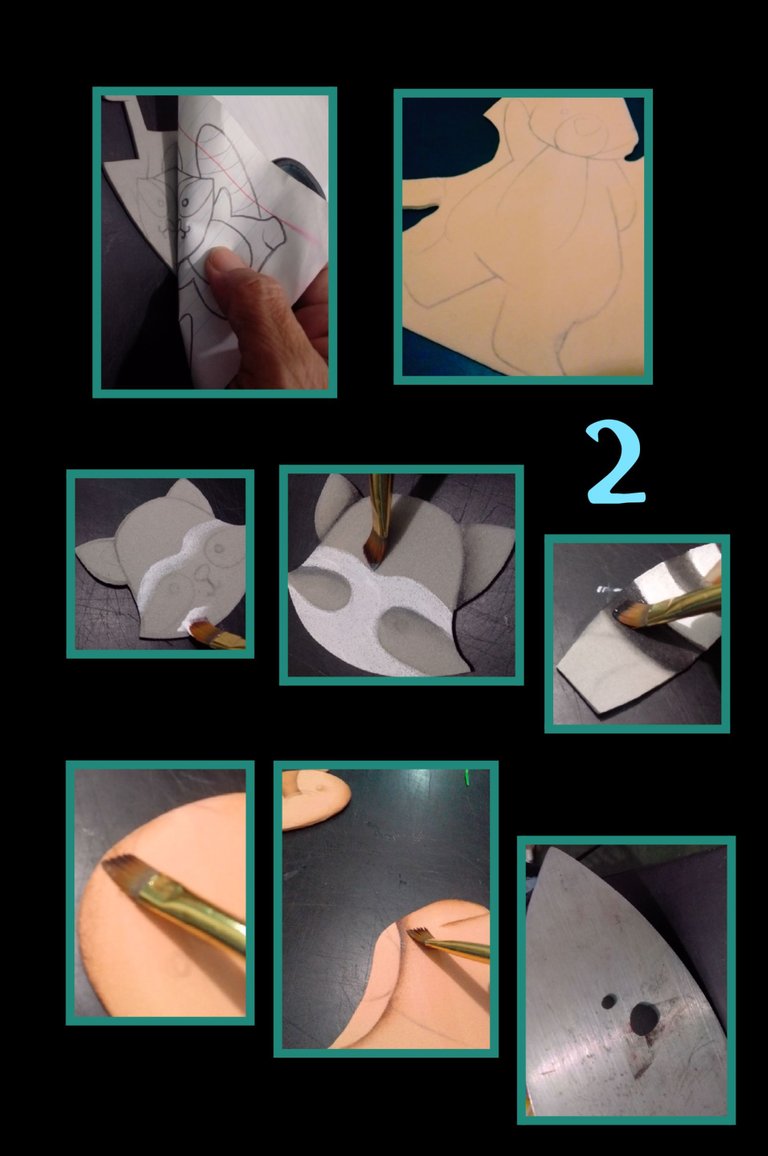
- Remarca el dibujo y transfiere al foami todas las piezas en los colores correspondientes, frotando con la ayuda de la tijera y recorta.
- Comienza a pintar las piezas rellenando con pintura, luego con un pincel pasa por el borde de las piezas con los colores respectivos.
- Luego calienta la plancha y coloca las piezas a las que quieras dar relieve, como la naríz, panza, hongos, etc. esto es opcional.
Paso 3:
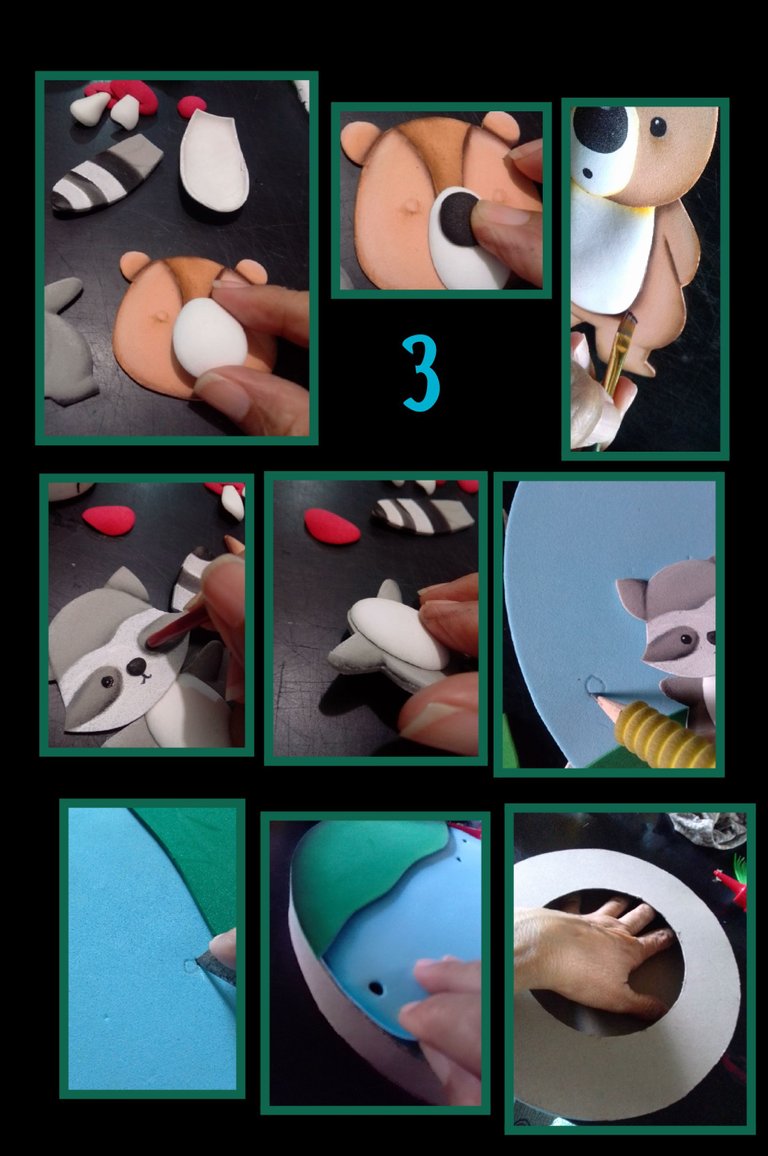
- Después de dar volumen o termoformar las piezas, aplica silicón y comienza a armar las figuras, después pinta con pintura o tiza por el contorno para dar sombra a las piezas y pinta los ojos.
- Ahora recorta un círculo en foami azul, del mismo tamano del de cartón y pega, luego recorta un pedazo en verde semejando el pasto y pega en la parte de abajo.
- Después que seque bien, marca con lápiz y saca unos pequeños orificios (para que salga la luz).
- Ahora aplica silicón a la tapa y pega a la tira de triángulos, luego voltea y haz presión metiendo la mano para pegar bien los triángulos.
Paso 4:
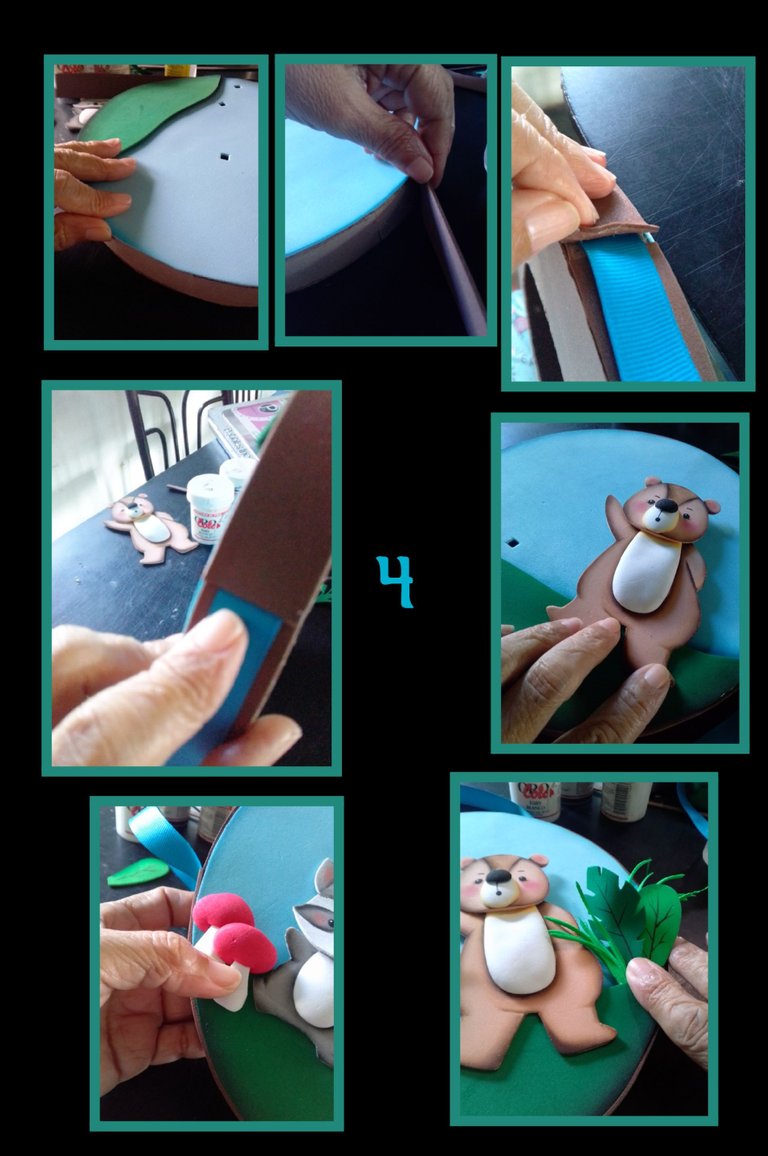
- Haz presión bien por el contorno asegurando que pegue bien la orilla, luego recorta una tira en foami marrón del ancho del círculo, aplica silicón y pega por los lados, después levanta un poco la tira de foami e inserta un extremo de la cinta y pega, así harás en ambos lados dejando el largo que quieras para colgar.
- Ahora comienza a decorar el colgante en la forma que quieras y distribuye las piezas a tu gusto,para los extremos puedes recortar hojas y pegar.
Paso 5:
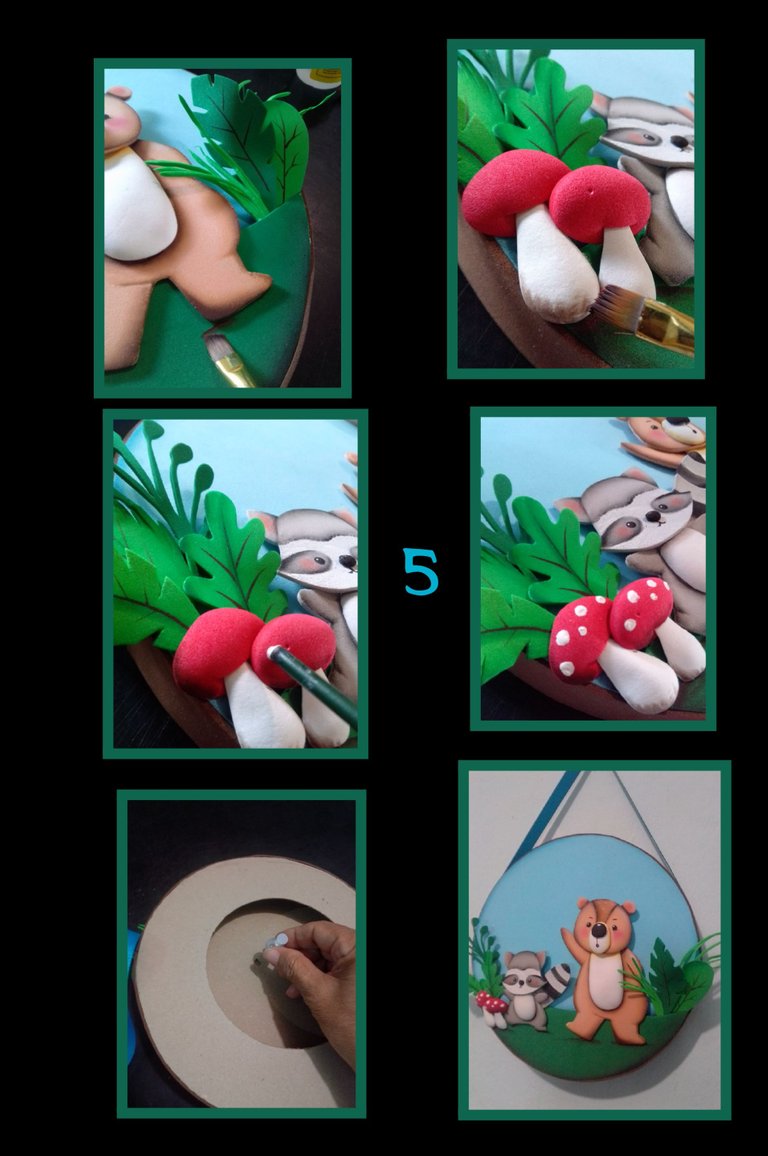
_ Después de pegar todas las piezas, pinta y da sombra a tu gusto y pinta las manchas de los hongos.
- Luego aplica un poco de silicón a la bolita o bombillo led
y pega al orificio que hiciste al círculo y que puedes tapar colocando una imagen sobre el. - Así quedará listo este lindo adorno con luz.
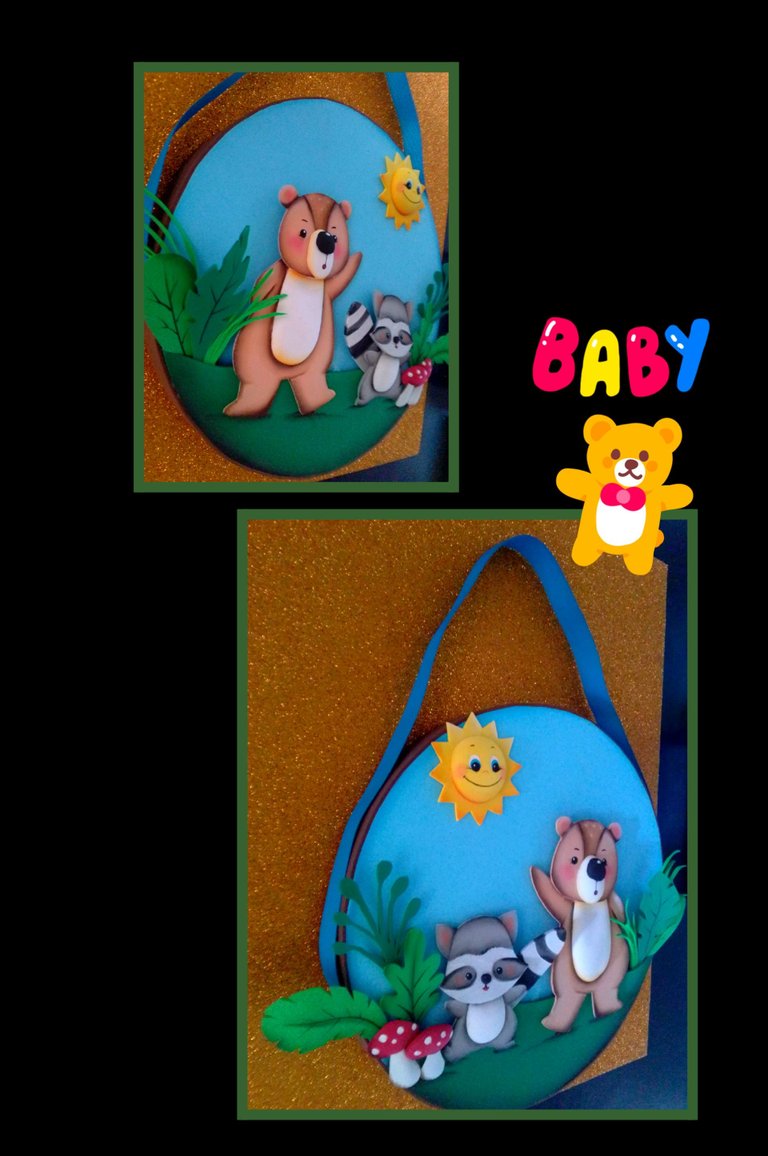
- Ahora te mostraré como se vé.
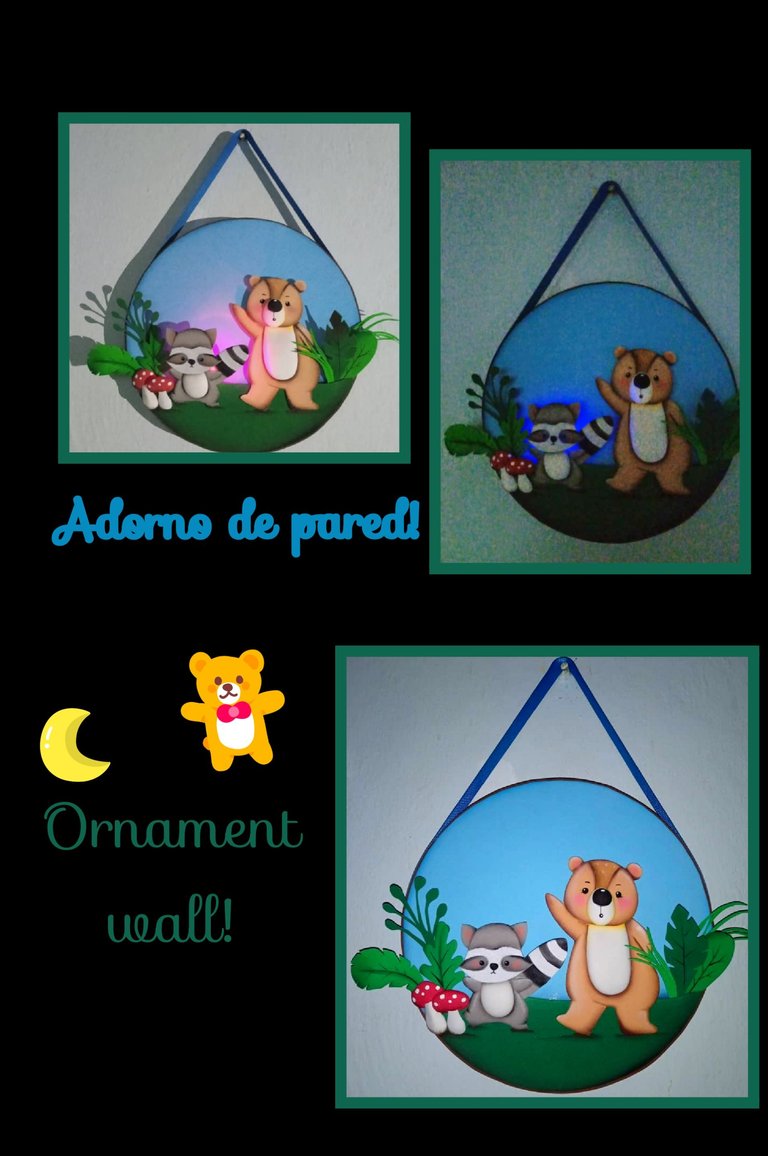
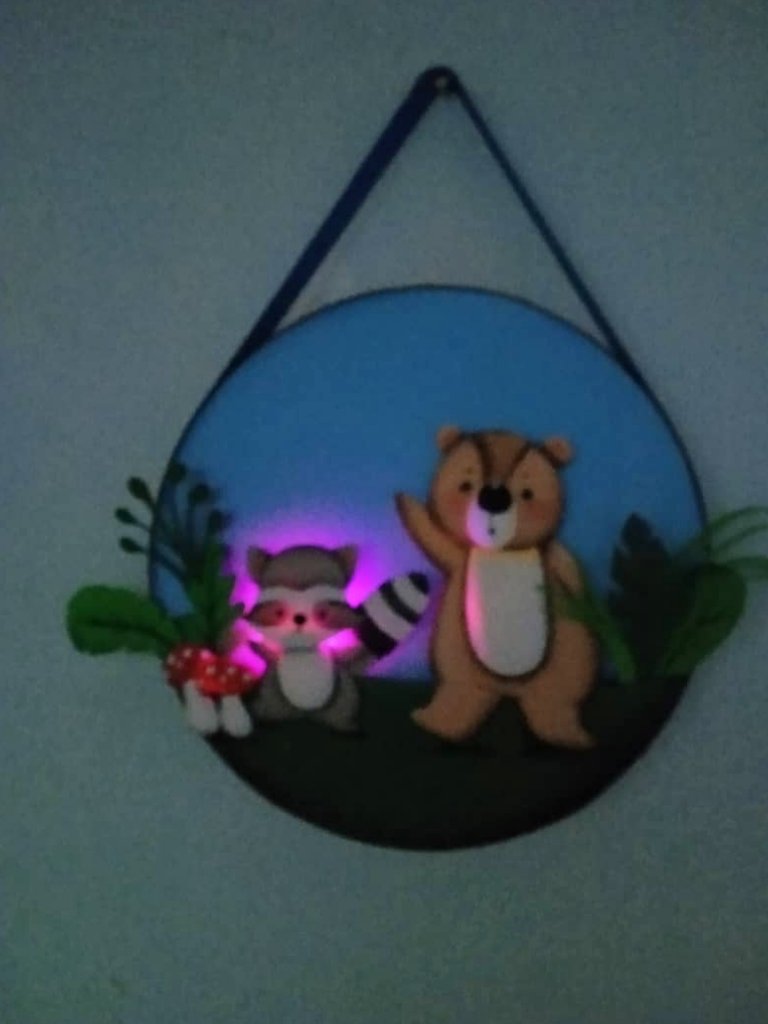
Disculpen la calidad de mis fotos jajajaja...
Paso 6:
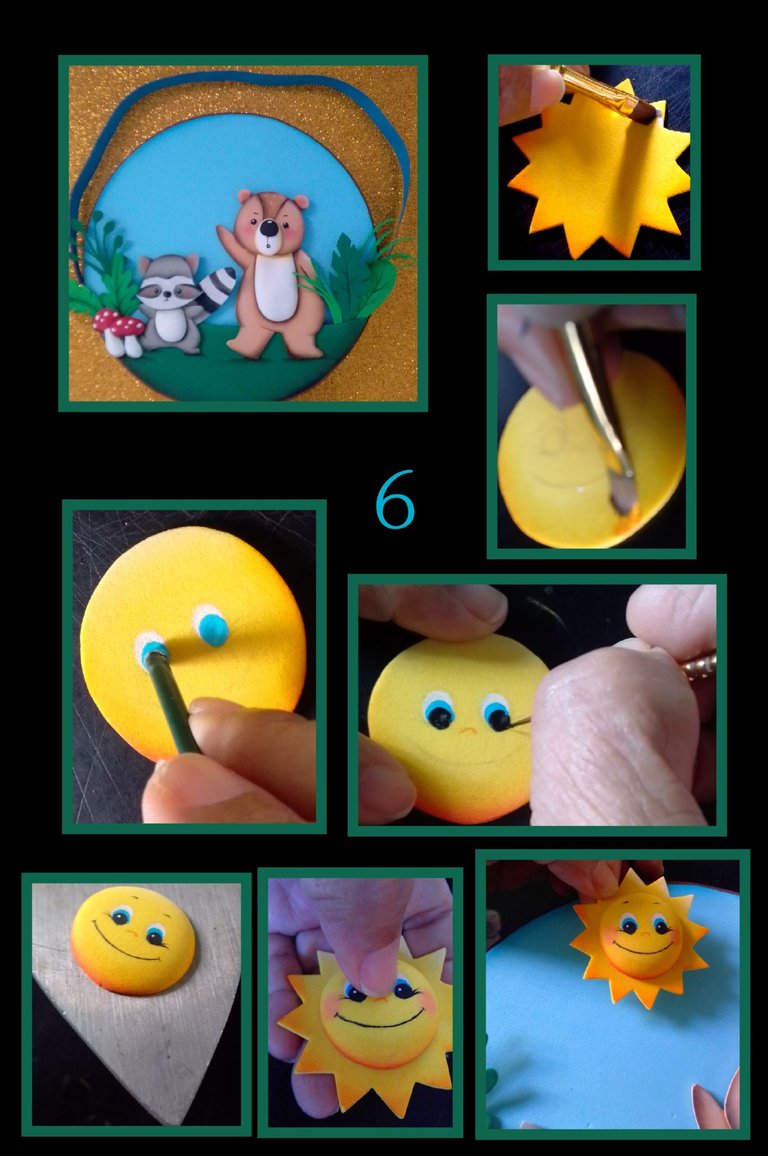
Esta es la otra opción de este colgante, a este le hice un solecito, recorte un círculo y le dí forma de estrella, luego pinté el contorno sombreando debajo con naranja y arriba apliqué pintura blanca.
- Ahora recorta otro círculo más pequeño y da sombra con pintura naranja, luego pinta los ojos con la ayuda de un pincel o marcador, deja secar y calienta la plancha.
- Coloca la carita y deja que tome forma o volumen, aplica silicón al borde y pega sobre la estrella y deja secar.
- Para terminar, aplica silicón y pega en la parte alta del círculo.
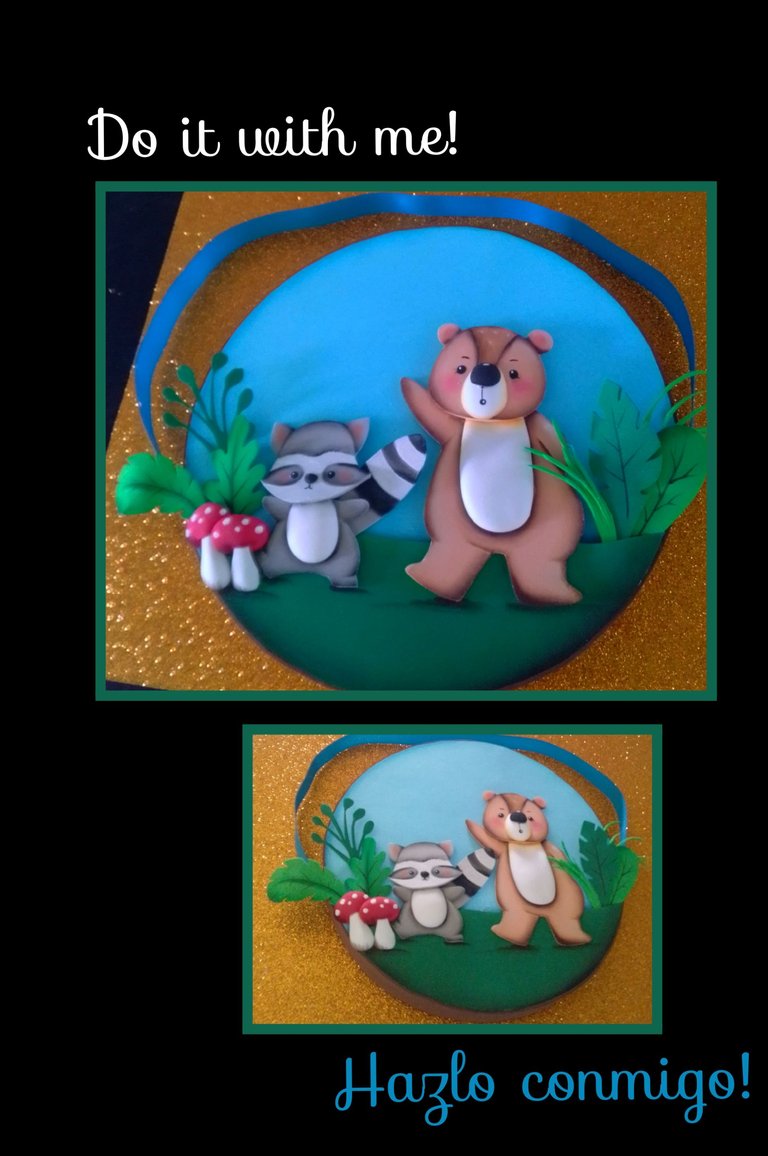
- Así queda listo!

Fuentes:
https://www.pinterest.es/pin/476255729359054102/
https://www.pinterest.es/pin/1000080660986176354/
Mi publicación la traduje con DeepL, editada con etiquetas HTML, las fotos capturadas por mi Teléfono BLU G5 y editadas con GrirdArt.
Ahora me despido deseando mi tutorial sea de tu agrado.
Muchas gracias por tu visita y apoyo.
Saludos.
English:


Good evening my dear friends!
Greetings and blessings to all who make life in this beautiful community of creators.
I'm here again!
So without wasting any more time it's time to get started.
You will need:

| Cardboard or cardboard | colored Foami |
|---|---|
| Cloth tape | LED light bulb |
| Paints and paintbrushes | Chalk |
| Scissors and razor | Pencil and ruler |
| Electric iron | Mold or drawing |
Procedure:
Step 1:

- Cut out two circles in cardboard of the desired size, then measure the circumference, mark a strip on the cardboard with that measure and at the end add two centimeters more in length and put in height, 5cm which you will divide into 3, the sides will be 1.5cm each and the center will be 2cms wide, then cut the tabs or sides in the form of triangles of 1cm each and with the tip of the scissors go through remarking the lines and then fold inward.
- If you want to add light to this pendant, remove the center of one of the circles as shown in the photo, then apply silicone all around and glue one of the sides of the strip, pressing on the triangles so that it sticks well.
Step 2:

- Outline the drawing and transfer to the foami all the pieces in the corresponding colors, rubbing with the help of the scissors and cut out.
- Start painting the pieces by filling them with paint, then with a brush go around the edge of the pieces with the respective colors.
- Then heat the iron and place the pieces you want to give relief, such as the nose, belly, mushrooms, etc. this is optional.
Step 3:

- After giving volume or thermoforming the pieces, apply silicone and begin to assemble the figures, then paint with paint or chalk around the contour to give shade to the pieces and paint the eyes.
- Now cut out a circle in blue foami, the same size as the cardboard and glue, then cut out a piece in green resembling grass and glue on the bottom.
- After it dries well, mark with a pencil and make some small holes (for the light to come out).
- Now apply silicone to the lid and glue to the strip of triangles, then turn over and press with your hand to glue the triangles together.
Step 4:

- Make pressure well around the outline making sure to glue the edge well, then cut a brown foami strip the width of the circle, apply silicone and glue on the sides, then lift the foami strip a little and insert one end of the ribbon and glue, so you will do on both sides leaving the length you want to hang.
- Now start decorating the pendant in the shape you want and distribute the pieces as you like,for the ends you can cut out leaves and glue.
Step 5:

After gluing all the pieces together, paint and shade to your liking and paint the mushroom spots.
- Then apply some silicone to the little ball or LED bulb and glue it to the hole you made in the circle.
and glue it to the hole you made in the circle, which you can cover by placing an image over it. - This way you will have a nice ornament with light.
- Now I will show you how it looks like.


Sorry for the quality of my pictures hahahahaha....
Step 6:

This is the other option for this pendant, I made a little sun, cut out a circle and gave it a star shape, then I painted the outline shading underneath with orange and on top I applied white paint.
- Now cut out another smaller circle and shade it with orange paint, then paint the eyes with the help of a brush or marker, let it dry and heat the iron.
- Place the face and let it take shape or volume, apply silicone to the edge and glue on the star and let it dry.
- To finish, apply silicone and glue on the top of the circle.
- This way it is ready!


Sources:
https://www.pinterest.es/pin/476255729359054102/
https://www.pinterest.es/pin/1000080660986176354/
My publication was translated with DeepL, edited with HTML tags, the photos captured by my BLU G5 Phone and edited with GrirdArt.
Now I say goodbye wishing my tutorial is to your liking.
Thank you very much for your visit and support.
Regards.