Buenas noches y bienvenidos sean todos mis queridos amigos y artesanos de esta comunidad.
Bienvenidos sean todos.
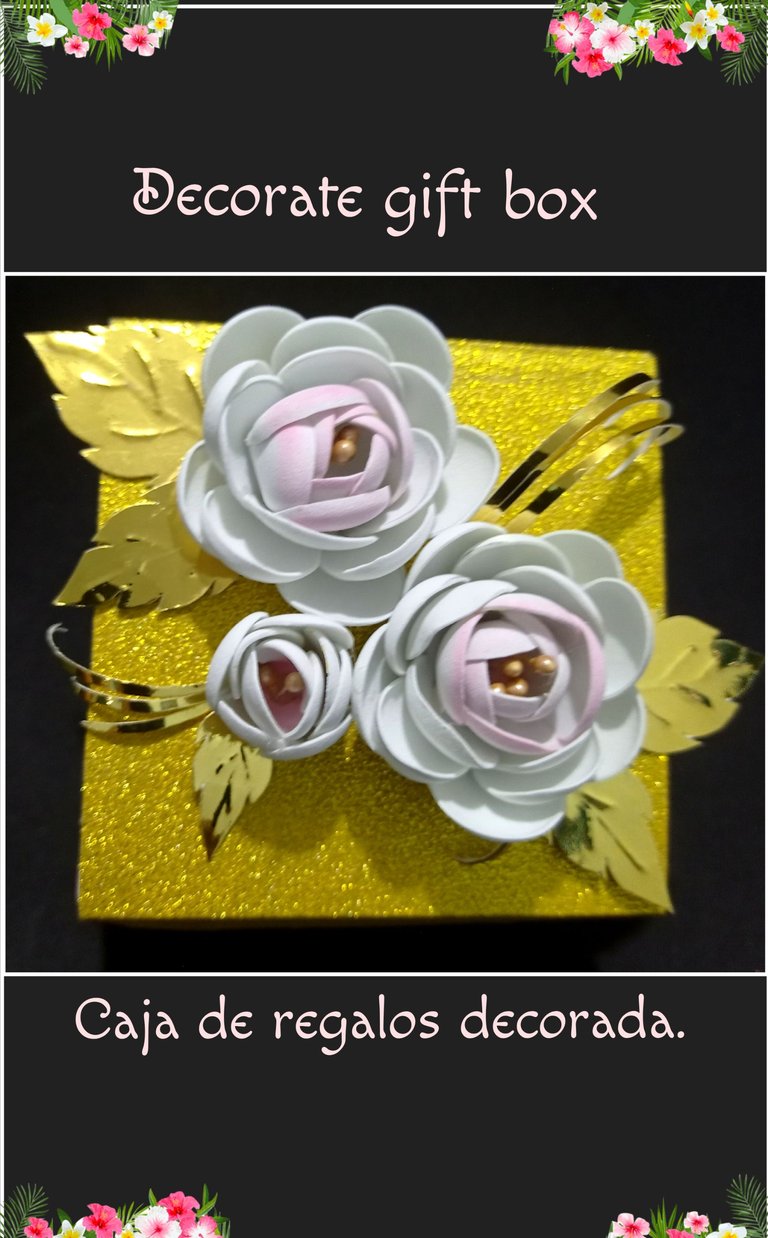
Hoy les compartiré en mi tutorial, como realizar de manera fácil y económica, unas lindas flores de foami y con ellas decorar una caja de cartón la cual reutilicé, forrando con cartulina escarchada.
De igual forma puedes hacer un hermoso ramo y decorar el espacio que desees.
Así que te invito a que me acompañes a ver el procedimiento.
Necesitas:
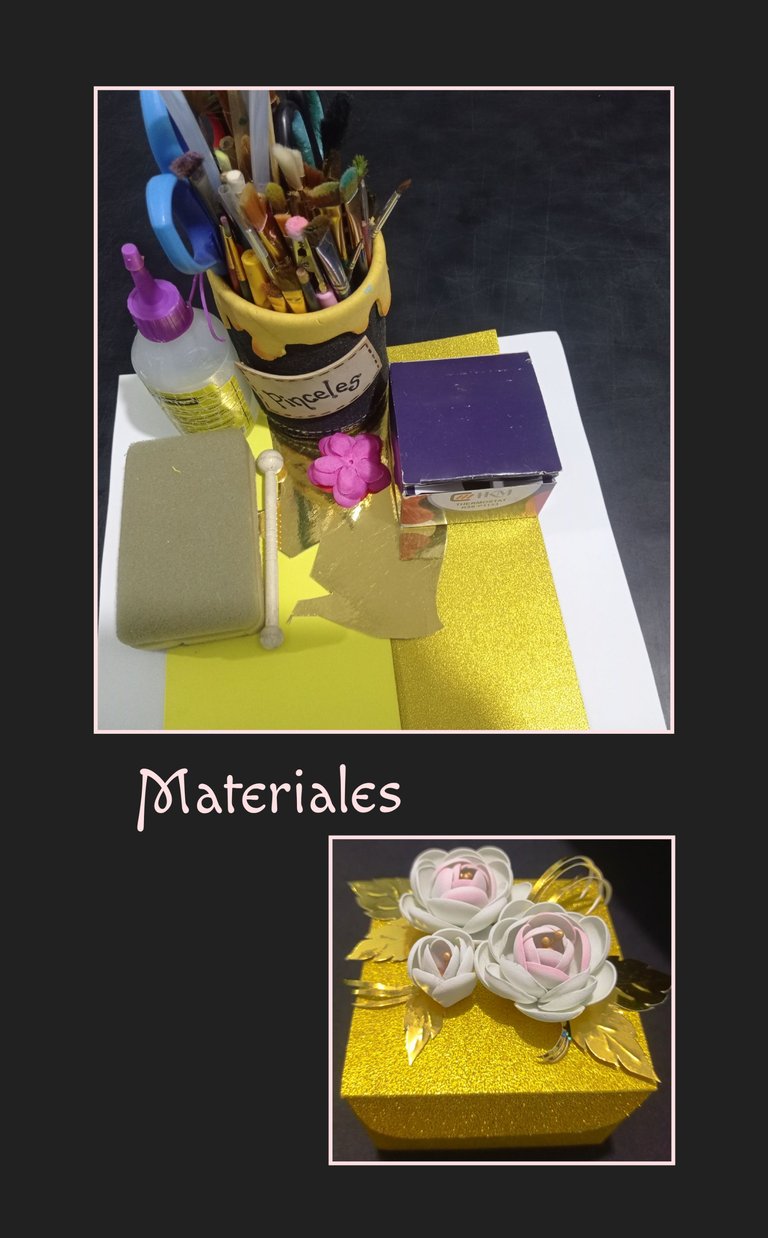
| Foami blanco | Cartulinas dorada escarchadas y metalizada |
|---|---|
| Caja de cartón | Tijera |
| Esponja y tiza | Silicón |
| Acocador | Pistilos |
| Molde de flores de tela | Plancha eléctrica |
Comencemos:
| Paso 1:
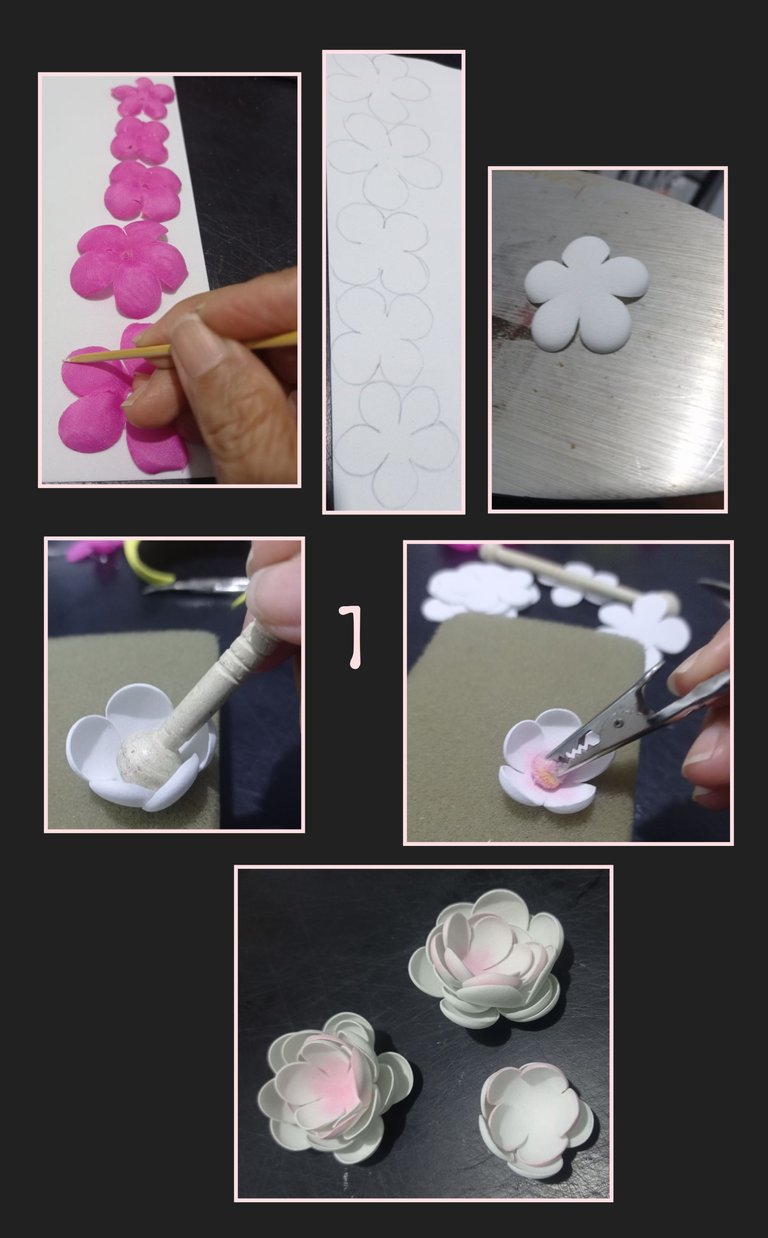
Marca con un palito de madera el borde de los pétalos cuando vayas a usar foami blanco, si usas lápiz a la hora de recortar hazlo un poquito más adentro (1mm) para evitar dejar marca del trazo para que tu trabajo quede pulcro, después recorta.
Calienta la plancha y coloca las flores, cuando comience a tomar volumen, coloca sobre la esponja y acoca, así harás con todas las piezas, luego da un poco de color con tiza en las flores más pequeñas.
Como ves es muy fácil, con solo termoformar y colocar una capa sobre otra ya queda casi armada!.
| Paso 2:
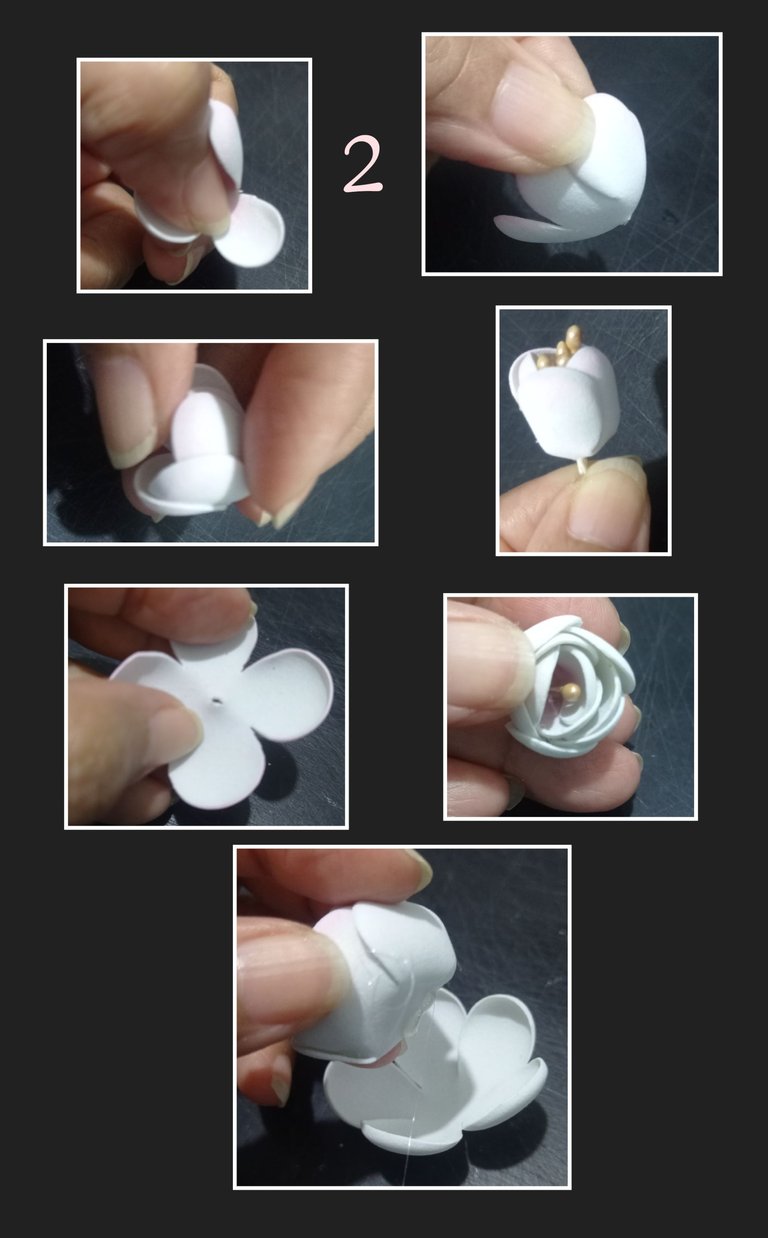
- Abre un orificio en el centro de las capas de pétalos más pequeños, aplica silicón en uno de los pétalos y pega sobre el segundo hasta completar los 5, luego inserta los pistilos y aplica silicón en la parte de abajo.
- Después aplica silicón en la segunda capa de pétalos e inserta
los pistilos y pega los pétalos repitiendo el proceso anterior, así harás hasta completar las 5 capas de pétalos.
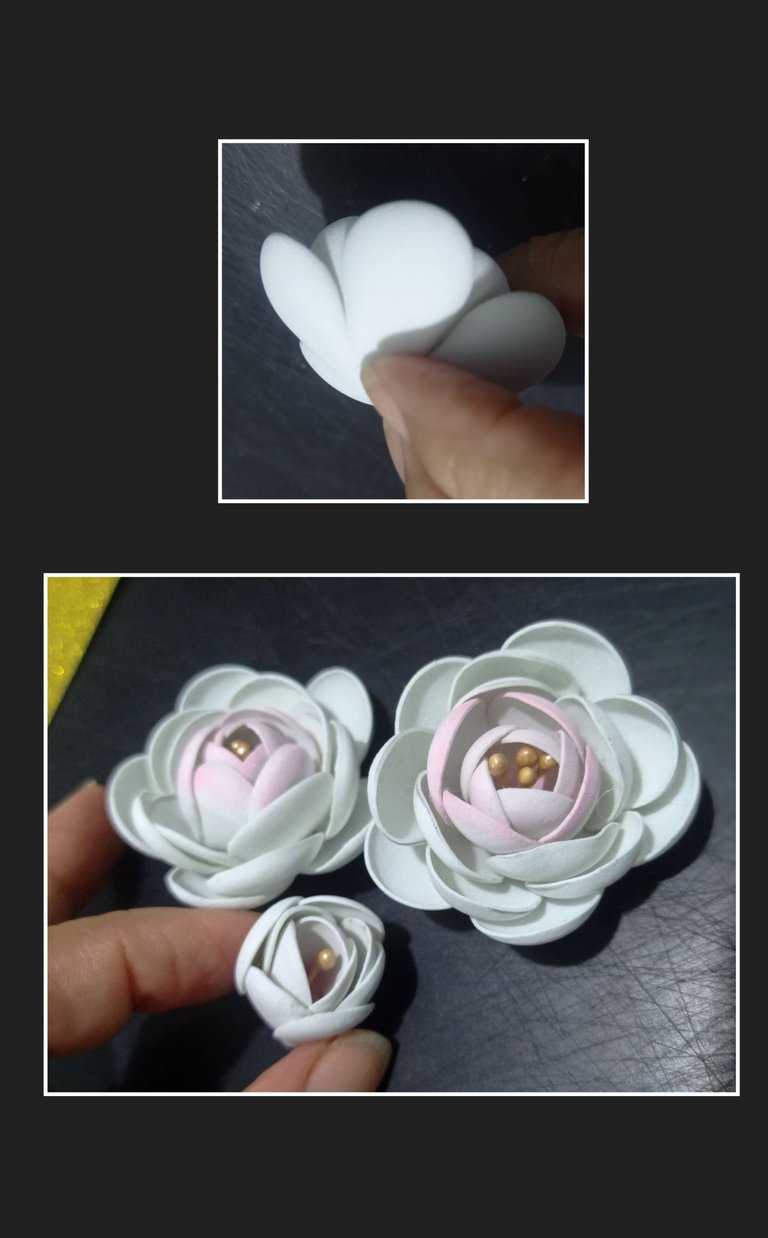
Así quedaron estas lindas flores!
| Paso 3:
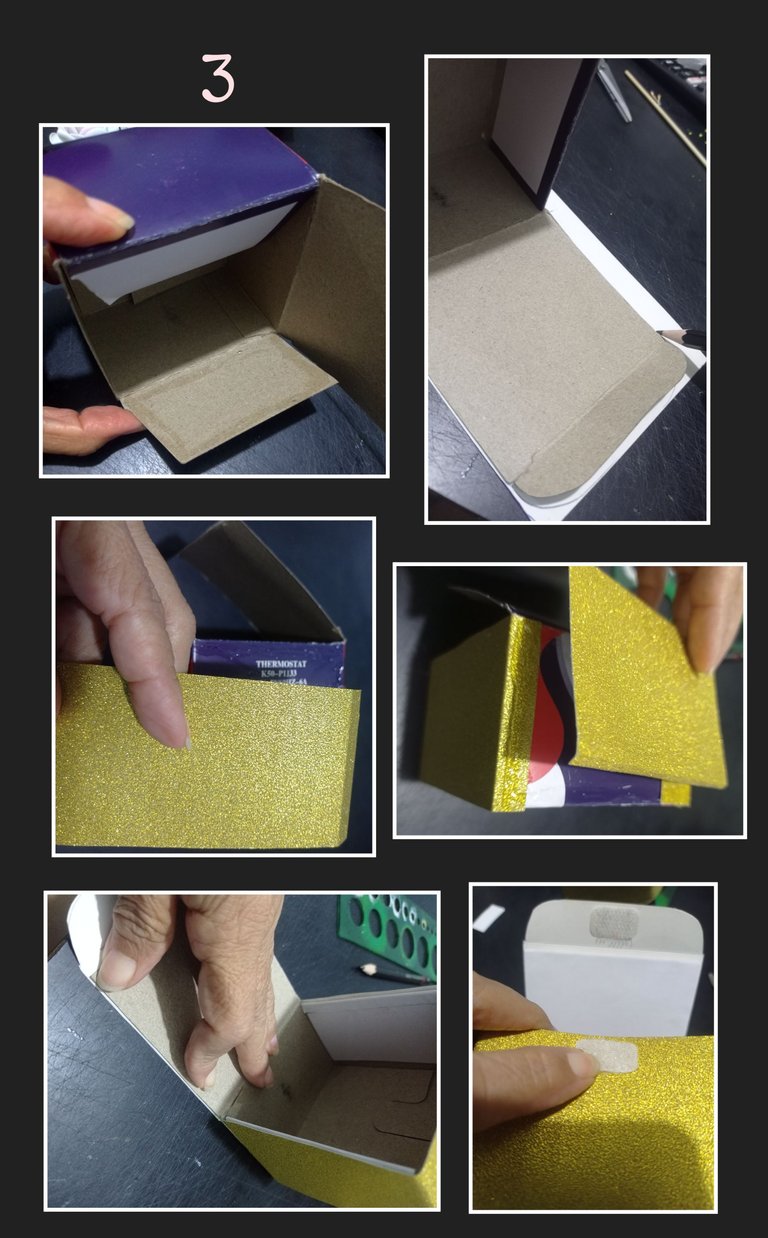
- Aplica silicón en las pestañas de la caja y pega hacia adentro para reforzar los lados.
- Luego coloca la caja sobre la cartulina escarchada y marca el contorno de la tapa y parte trasera (1 pieza).
- Luego mide el ancho y alto de la caja, marca sobre la cartulina y recorta.
- Aplica silicón a la caja y pega la tira alrededor y deja secar.
- Luego aplica silicón y pega la tapa y parte trasera, luego coloca sobre la mesa y haz presión por todas las orillas.
- Para dar mejor acabado, recorta en papel o cartulina blanca la forma de la tapa y el fondo y pega a la caja.
Si quieres puedes pegar cierre mágico a la tapa.
| Paso 4:
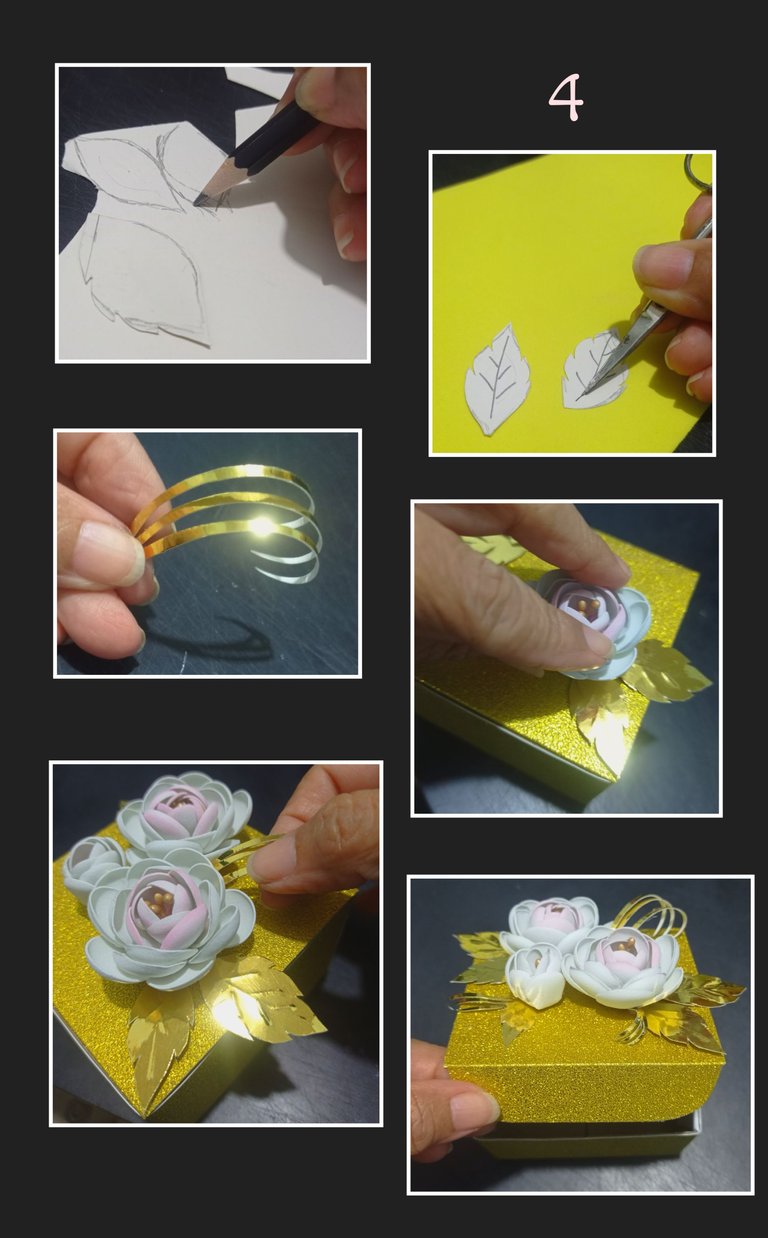
- Ahora dibuja sobre la cartulina metalizada unas hojas y recorta, coloca sobre un foami y con la punta de la tijera o un bolígrafo remarca las nervaduras por el lado blanco.
- También puedes marcar y recortar tiras y doblar con la tijera, después aplica silicón y pega las flores y hojas a tu gusto.
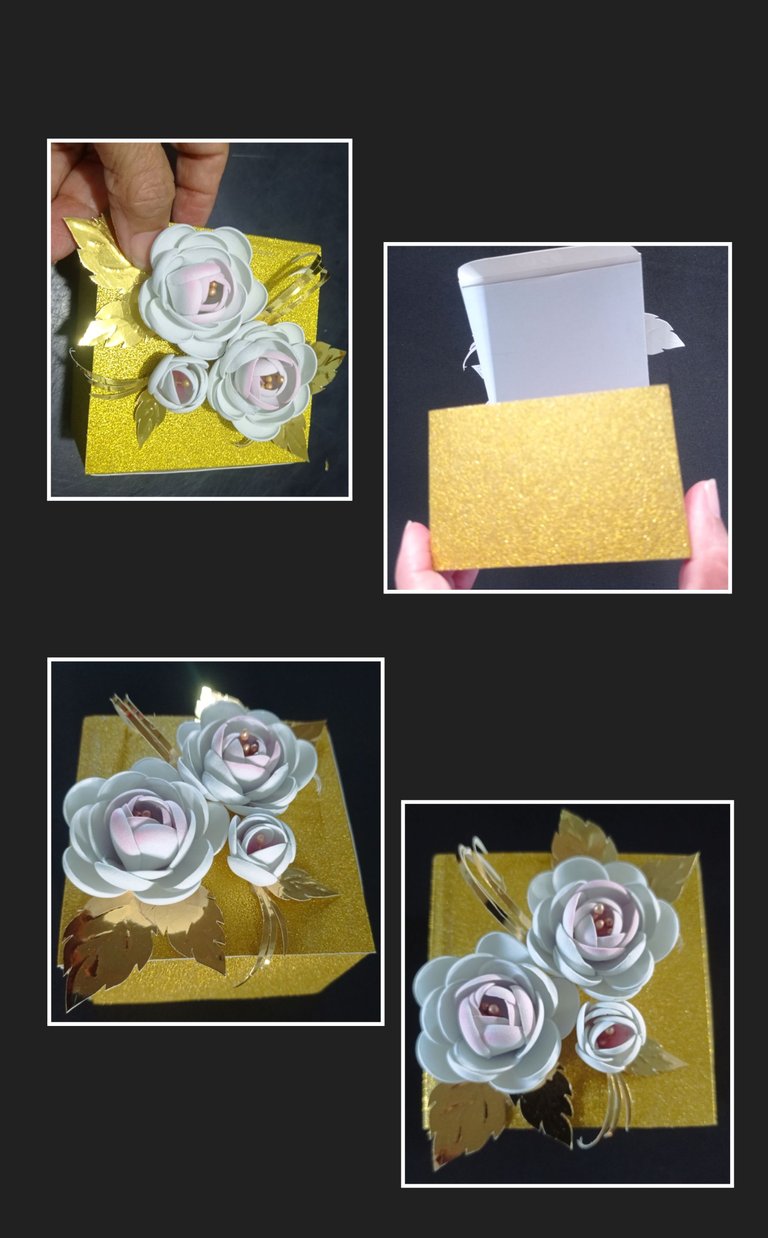
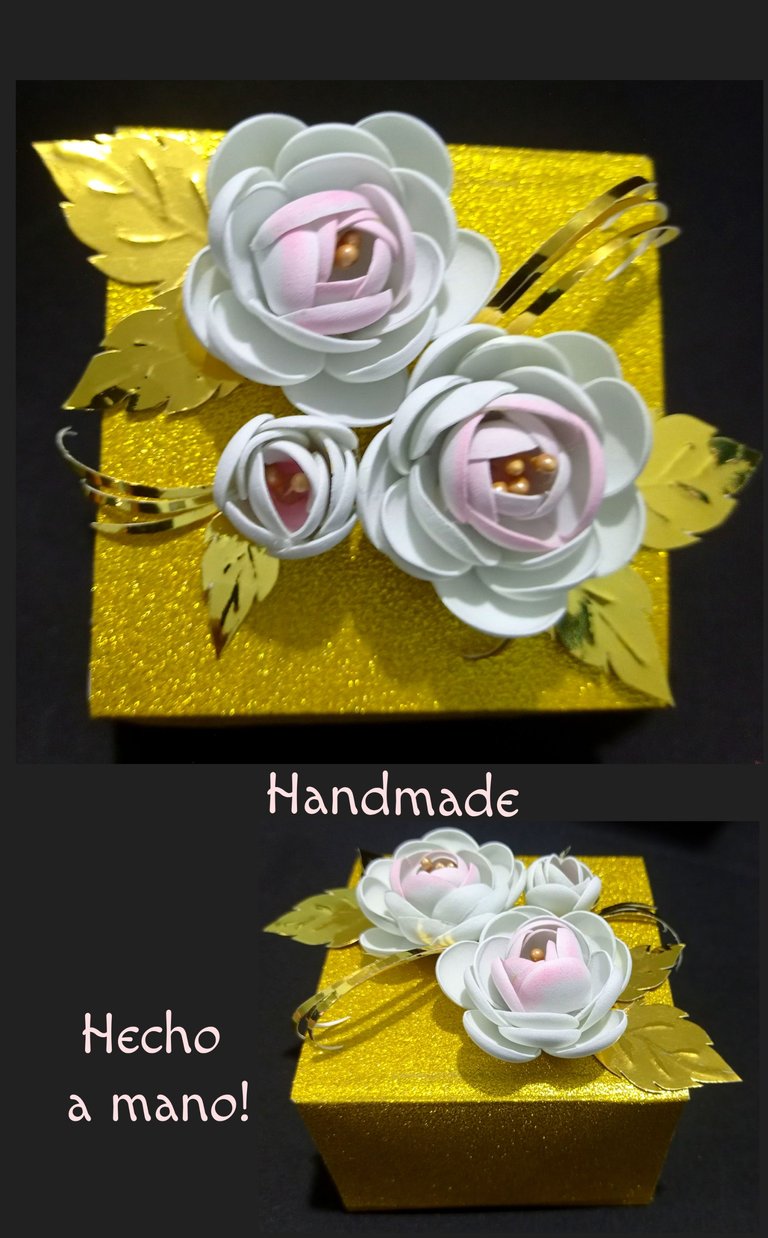
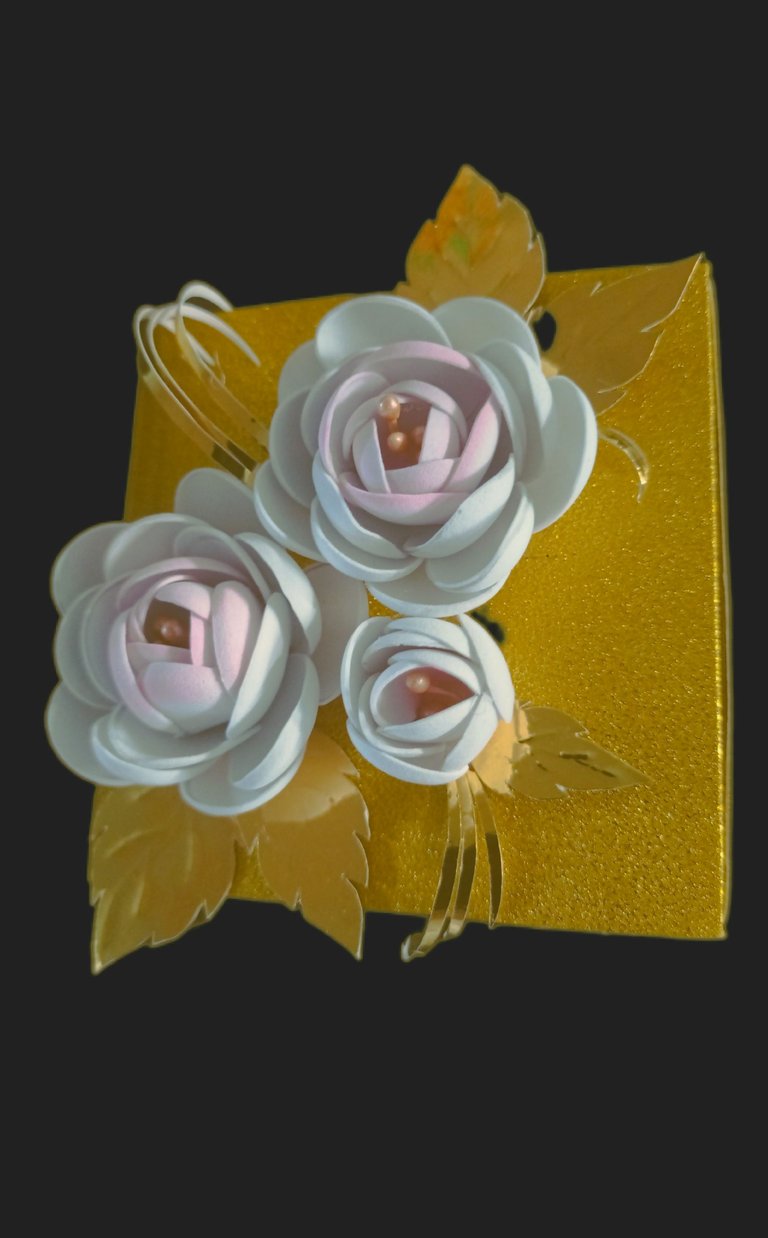
Este es el resultado de esta linda caja reutilizada y decorada con lindas flores, la cual podrás usar para obsequiar cualquier detalle, guardar prendas o darle el uso que quieras.
Editada con Etiquetas HTML
Fotos capturadas por mi Redmi Note 9
Editadas con GridArt.
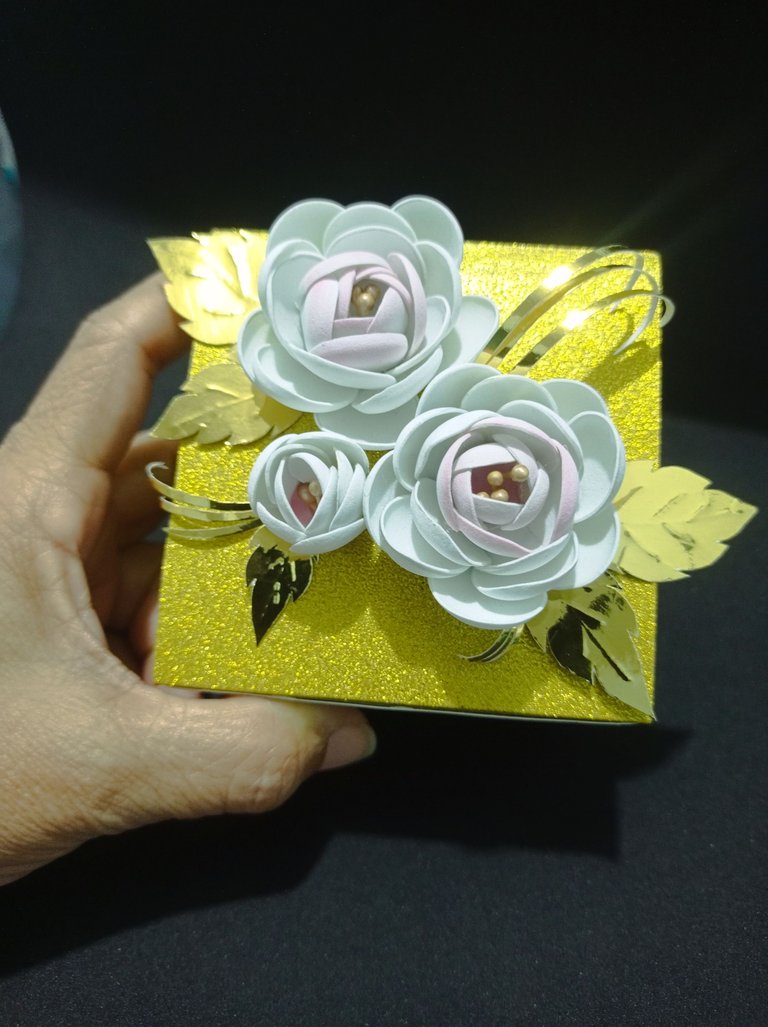
Ahora te muestro algunas fotos del resultado final de mi publicación.
Espero sea de tu agrado y como siempre mi paso a paso, te sirva de guía para que lo hagas a tu gusto y poniendo tu ingenio y creatividad.
Recuerda que podemos reutilizar y crear objetos útiles y muy bonitos.
Me despido hasta mi próximo tutorial, me encantará saber que estuviste por aquí!
Muchas gracias por tu apoyo.
Saludos y bendiciones.
Good evening and welcome to all my dear friends and artisans of this community.
Welcome to all of you.
You need:
| White Foami | Gold frosted and metallized cardstock |
|---|---|
| Cardboard box | Scissors |
| Sponge and chalk | Silicone |
| Hairdresser | Pistilos |
| Flower mold made of fabric | Electric iron |
Let's get started:
|Step 1:
Mark with a wooden stick the edge of the petals when you are going to use white foami, if you use a pencil at the time of cutting do it a little further inside (1mm) to avoid leaving a mark of the line so that your work is neat, then cut.
Heat the iron and place the flowers, when it begins to take volume, place it on the sponge and place it on the sponge, this way you will do with all the pieces, then give a little color with chalk on the smallest flowers.
**As you can see it is very easy, just by thermoforming and placing one layer on top of the other, it is almost ready to assemble!
| Step 2:
- Open a hole in the center of the smaller petal layers, apply silicone on one of the petals and glue over the second one until all 5 are complete, then insert the pistils and apply silicone on the bottom.
- Then apply silicone on the second layer of petals and insert the pistils and glue the
the pistils and glue the petals repeating the previous process, this way you will do until you complete the 5 layers of petals.
This is what these beautiful flowers look like!
|Step 3:
- Apply silicone to the tabs of the box and glue inward to reinforce the sides.
- Then place the box on the frosted cardboard and mark the outline of the lid and back (1 piece).
- Then measure the width and height of the box, mark on the cardboard and cut out.
- Apply silicone to the box and glue the strip around it and let it dry.
- Then apply silicone and glue the lid and back, then place on the table and press all around the edges.
- For a better finish, cut out the shape of the lid and the bottom from white paper or cardboard and glue to the box.
*If you want, you can glue a magic clasp to the lid.
| Step 4:
- Now draw some leaves on the metallic cardboard and cut them out, place them on a foami and with the tip of the scissors or a pen mark the ribs on the white side.
- You can also mark and cut out strips and fold with the scissors, then apply silicone and glue the flowers and leaves to your liking.
This is the result of this beautiful box reused and decorated with pretty flowers, which you can use to give as a gift, store clothes or use it as you like.
Edited with HTML Tags
Photos captured by my Redmi Note 9
Edited with GridArt.
Now I show you some photos of the final result of my publication.
I hope you like it and as always my step by step, will serve as a guide for you to do it to your liking and putting your ingenuity and creativity.
Remember that we can reuse and create useful and beautiful objects.
I'll say goodbye until my next tutorial, I'll be glad to know that you were here!
Thank you very much for your support.
Greetings and blessings.

 )
)