ESPAÑOL

Hola queridos amigos de Hive. Quiero brindarles el paso a paso para realizar el mantenimiento de una maquina de coser Singer Modelo 316-G.
El mantenimiento de nuestras maquinas de coser juega un papel importante en el cuidado de nuestras maquinas de coser. El Mantenimiento regular es la primera línea de defensa.
Muchos de los problemas y fallas en estos equipos se deben al poco mantenimiento o mal uso como: enhebrado incorrecto, uso de agujas dobladas, desafiladas o mal instaladas, mal uso de los prensatelas o que estas no sean compatibles, bobinas incorrectas o dañadas, o hilo de mala calidad.
El Mantenimiento en las maquinas de coser es necesario debido a que se reduce el desgaste de las piezas y las rasgaduras de las mismas. Asi mismo, el mantenimiento mejora la calidad de costura y asegura que las puntadas se realicen de manera uniforme y sin problemas, además de alargar la vida util de los equipos y economizar gastos.
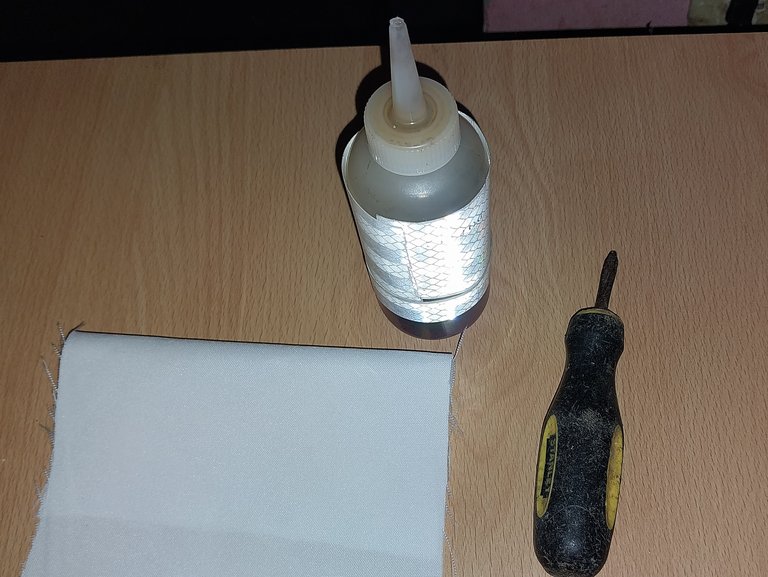
Para realizar el mantenimiento de la maquina de coser se necesitan los Siguientes Materiales
- Aceite de tipo "Paranifico" (Es importante utilizar el lubricante recomendado por el fabricante)
- Pañito
- Destornillador
Paso a Paso

1. Lubricación de la parte superior del cabezote de a máquina:

El mantenimiento que se va a realizar a la maquina es de tipo preventivo, y consiste en la revisión d ela maquina partiedro de la limpieza y la lubricación.
Se debe limpiar la zona con la ayuda de un pañito humedo y luego uno seco.
Seguidamente se debe aplicar el aceite. De esta forma este modelo de maquina de coser tiene algunos orficios en su carcaza que conduce a los elementos mecanicos internos de la maquina de coser.
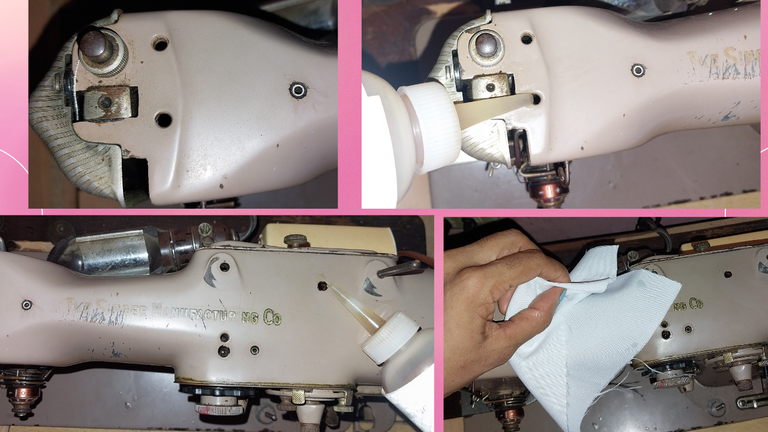
De esta manera se debe aplicar el aceite aplicando 3 gotas grandes de aceite en cada uno de los aguejeros de la carcaza de la maquina.
2. Lubricación de la palanca de Retroceso
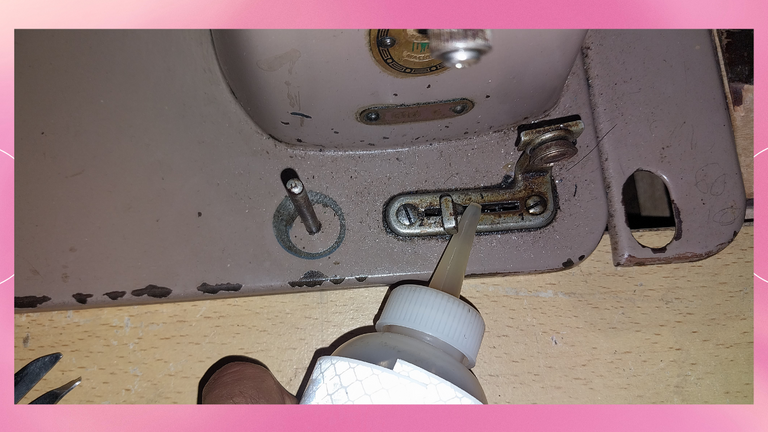
Seguidamente se debe lubricar la zona de la palanca de retroceso, es la que utiliza para rematar nuestras prendas, por ello requiere lubricación.
3. Lubricación del Regulador Puntada
Esta maquina posee un tornillo que permite regular la puntada de la maquina de coser, este sistema requiere lubricación.
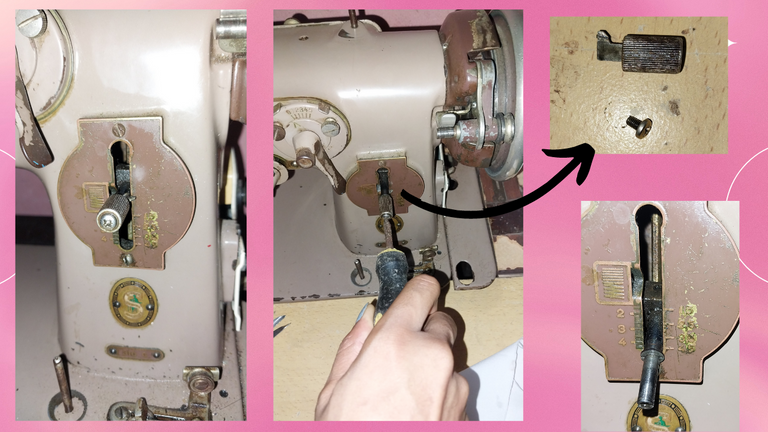
De esta manera se toma el destornillador y se saca el tornillo fijado en el centro de esta pieza. Se retira el tornillo y el cabezal guía.

Seguidamente se debe aplicar el lubricante en esta pieza, luego se debe insertar el cabezal y finalmente fijar el tornillo.
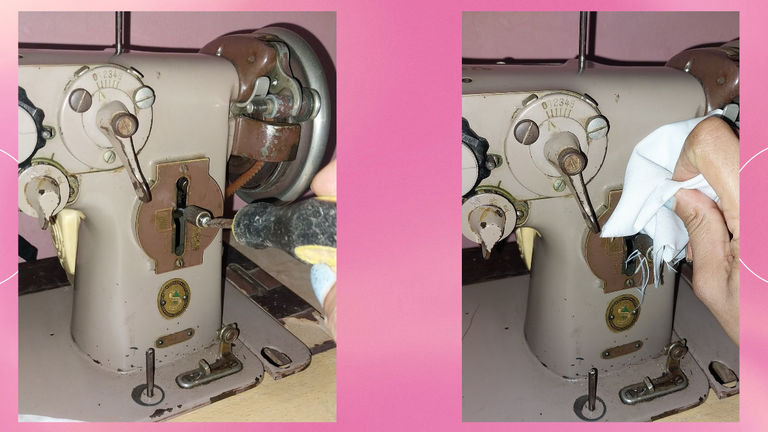
Luego se debe limpizar la zona de lubriocación.
4. Lubricación del carril de la lanzadera
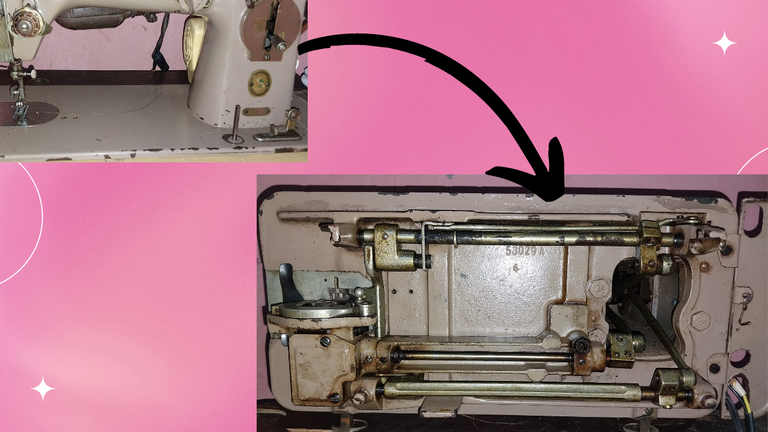
Se debe inclinar el cabezote de la máquina hacia atrás y se aplica una gota de aceite en cada uno de los lugares donde haya rozamiento de piezas. Es decir tornillos y piezas de union mecanica.


Seguidamente se debe mover el pedal de la maquina para accionar los elementos mecanicos y de esta forma hacer que el lubricante fluya en estos.
5. Lubricación de la cavidad de la Caja-Bovina
Dentro del cuerpo del mecanismo se encuentra el bobinado de hilo inferior que se encarga de proporcionar una buena estructura en todo lo que se quiere coser.
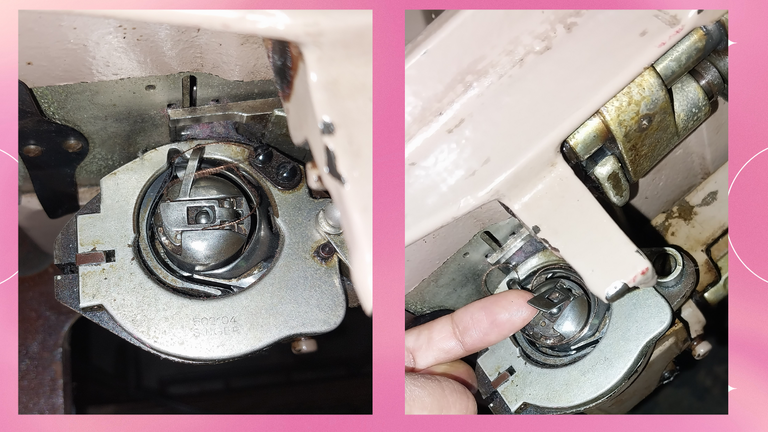
Se debe abrir la abrazadera para retirar la bovina, Se levanta el pestillo del porta-bobinas y se retira esta.
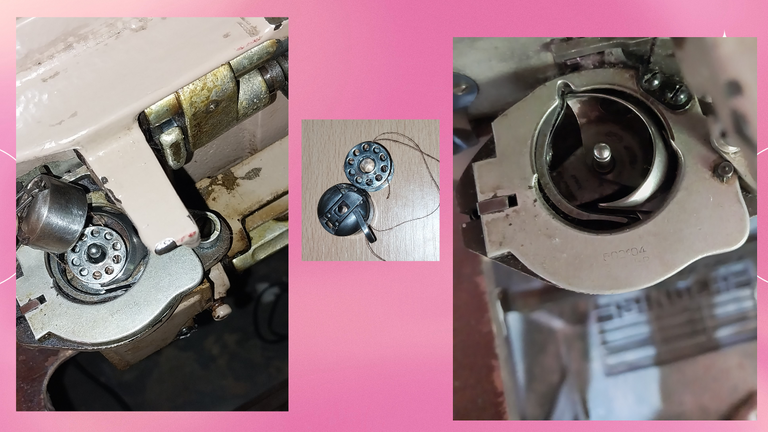

Luego se saca la lanzadera, que es el accesorio que gira alrededor de la caja-bobina.
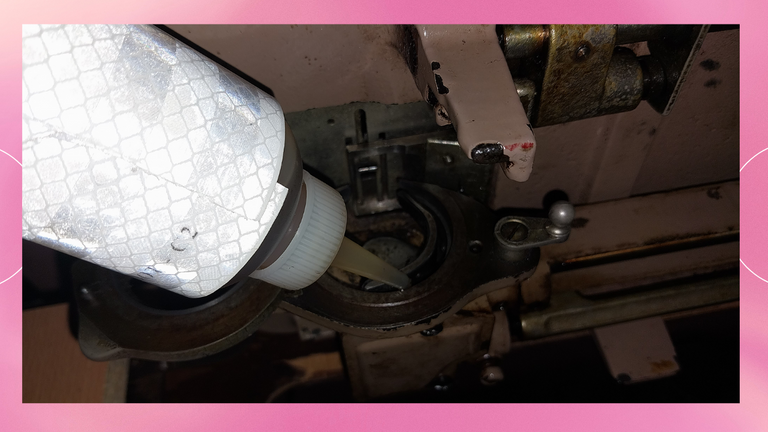
Seguidamente se debe lubricar esta cavidad.
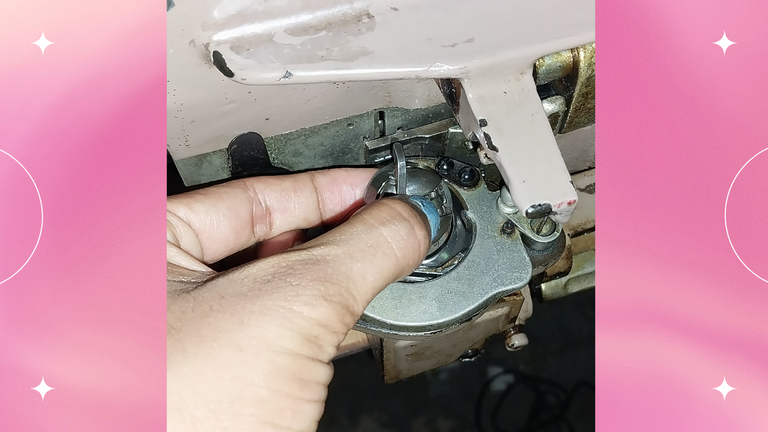
Luego se incorporan las piezas retiradas a la maquina, se introduce la lanzadara, se cierra la tapa de la lanzadera y se ajusta con la abrazadera. Seguidamente se introduce la bovina haciendola encajar en el perno.
6. Lubricación del brazo de la máquina:
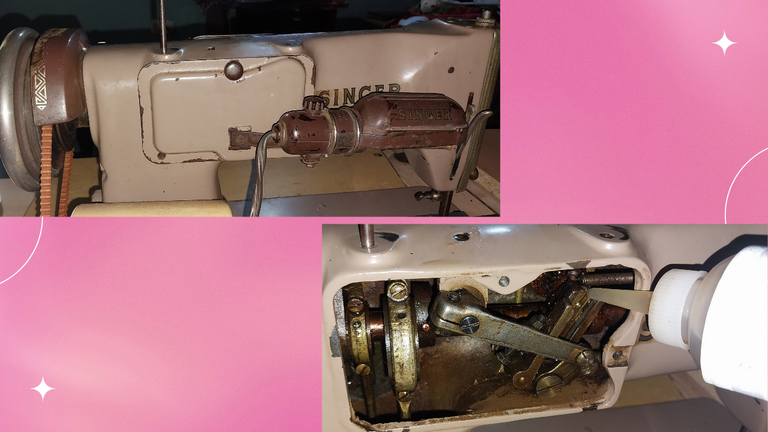
En la parte de atrás de la máquina hay una tapa sujeta con un tornillo, se debe Aflojar el tornillo y retirar esta. Luego se le da vuelta a la rueda volante hacia nosotros y hasta que la biela de conexión esté en el punto más alto.
Se debe aplicar 3 gotas de aceite a través del agujero en la parte superior del cabezote. Asi mismo, se debe lubricar también las otras piezas móviles del interior de la maquina.

Es necesario realizar el mantenimiento de la maquina de coser a las 100 horas de trabajo.
Saludos amigos! espero les resulte de mucha ayuda este tutorial.
Muchas gracias

Créditos
- Las imagenes me pertenecen
- Edición: fotos fueron realizadas en Canva
- Traductor: Deepl Traslator.
ENGLISH
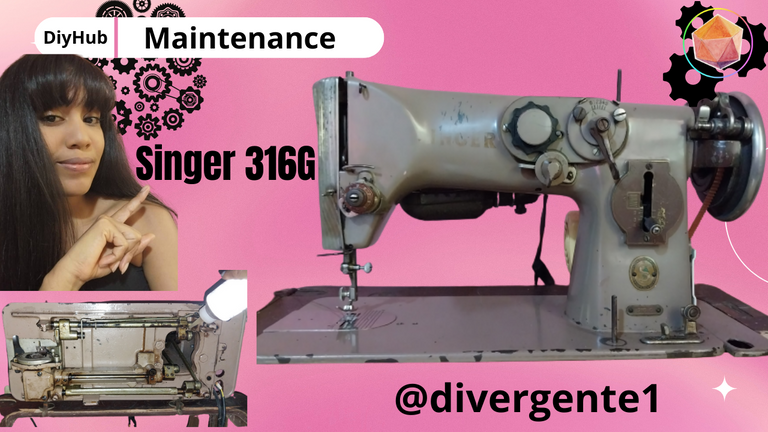
Hello dear friends of Hive. I want to give you the step by step to perform maintenance on a Singer Model 316-G sewing machine.
The maintenance of our sewing machines plays an important role in the care of our sewing machines. Regular maintenance is the first line of defense.
Many of the problems and failures on these machines are due to poor maintenance or misuse such as: incorrect threading, use of bent, dull, blunt or improperly installed needles, misused or mismatched presser feet, incorrect or damaged bobbins, or poor quality thread.
Maintenance on sewing machines is necessary because it reduces wear and tear on parts. Maintenance also improves the quality of sewing and ensures that the stitches are made evenly and smoothly, in addition to extending the life of the equipment and save costs.
The following materials are required for sewing machine maintenance.
- Paranifico" type oil (It is important to use the lubricant recommended by the manufacturer).
- Cloth
- Screwdriver
Step by Step
1. Lubrication of the upper part of the machine head:
The maintenance to be performed on the machine is of a preventive type, and consists of overhauling the machine starting with cleaning and lubrication.
The area should be cleaned with the help of a damp cloth and then a dry one.
Then the oil should be applied. In this way this model of sewing machine has some holes in its casing leading to the internal mechanical elements of the sewing machine.
In this way the oil should be applied by applying 3 large drops of oil in each of the holes of the machine casing.
2. Reverse lever lubrication.
Next you must lubricate the area of the reverse lever, it is the one used to finish off our garments, therefore it requires lubrication.
3. Stitch Regulator Lubrication
This machine has a screw that allows to regulate the stitch of the sewing machine, this system requires lubrication.
The screwdriver is taken and the screw fixed in the center of this part is removed. The screw and the guide head are removed.
Next, apply the lubricant to this part, then insert the head and finally fix the screw.
Then clean the lubrication area.
4. Lubrication of the shuttle rail.
The machine head should be tilted backwards and a drop of oil should be applied to each place where there is friction of parts. I.e. screws and mechanical joint parts.
Then move the foot pedal of the machine to actuate the mechanical elements and in this way make the lubricant flow into them.
5. Lubrication of the bovine-case cavity.
Inside the body of the mechanism is the lower thread winding which is responsible for providing a good structure on everything that is to be sewn.
The clamp must be opened to remove the bobbin, the bobbin holder latch is lifted and the bobbin is removed.
Then remove the shuttle, which is the accessory that rotates around the bobbin case.
This cavity must then be lubricated.
Then the removed parts are incorporated into the machine, the shuttle is inserted, then the cover of the shuttle is closed and tightened with the clamp. Then the bovinae is inserted, making it fit on the bolt.
6. Lubrication of the machine arm:
At the back of the machine there is a cover fastened with a screw, loosen the screw and remove it. Then turn the flywheel towards us until the connecting rod is at the highest point.
Apply 3 drops of oil through the hole in the top of the headstock. The other moving parts inside the machine should also be lubricated.
Greetings friends! I hope you find this tutorial very helpful.
Thank you very much.
Credits
- The images belong to me
- Editing: Photos edited in Canva
- Translator: Deepl Translator.

