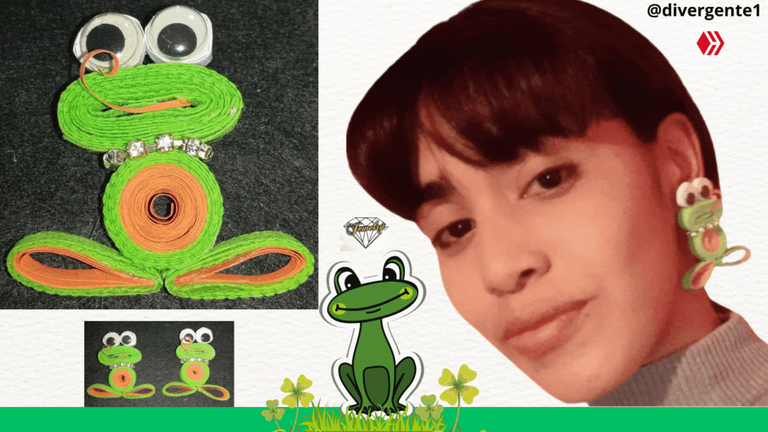
Hello friends of Hive! Being able to have fun when creating our designs undoubtedly makes us all happy. Taking advantage of the shapes and diversity that gives us our beloved nature, I want to show you the step by step in the development of earrings in the shape of a frog, using some techniques of filigree but also adding other materials in addition to the original material such as cardboard ribbons to create the figure.
I hope you like it and above all that you can have fun introducing the children to the activity, I am sure it will be a very fun process for everyone.
The following materials will be needed:
Materials
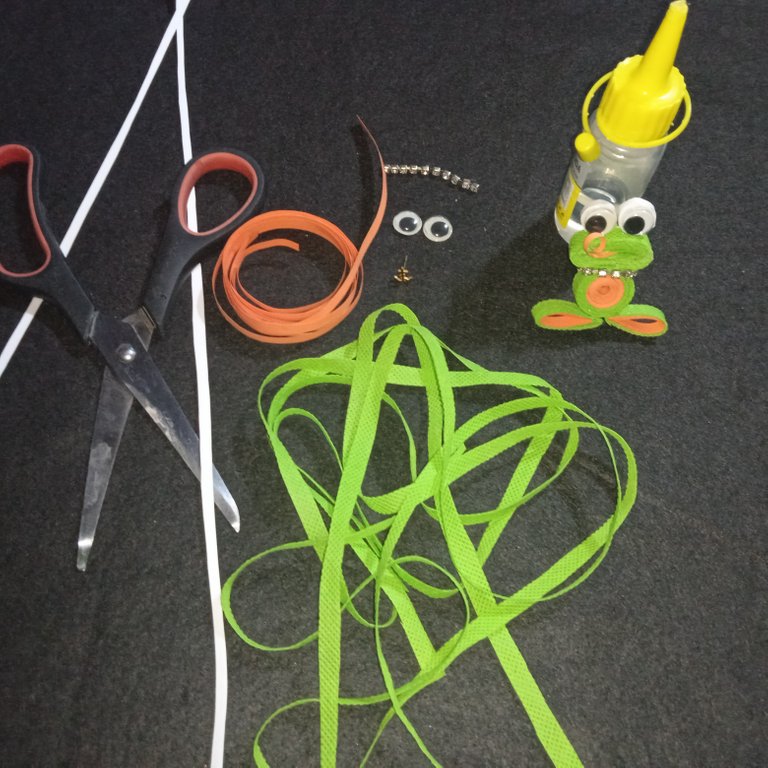
- Green PVC fabric ribbons
- Two little eyes
- Orange cardboard ribbons
- Hot Silicone
- White cardboard ribbons
- Crystal ribbons
- Fasteners
- Scissors
STEP BY STEP
First Piece (Frog's face).
1
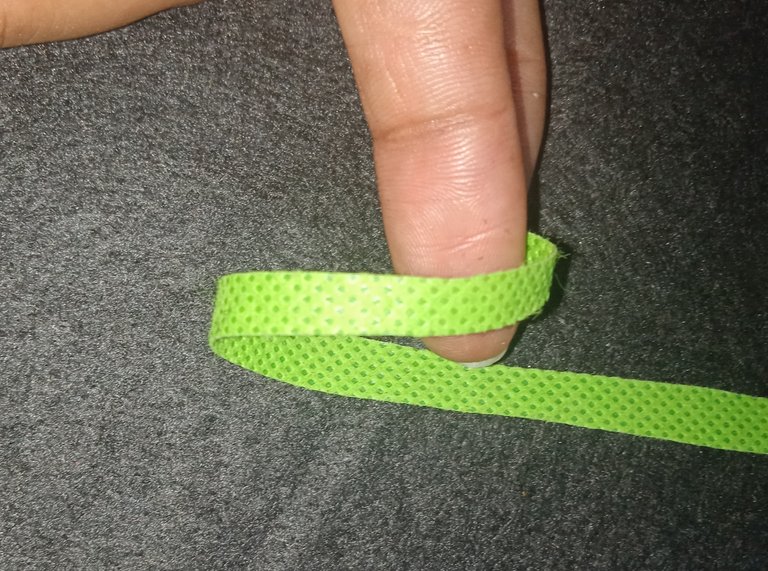
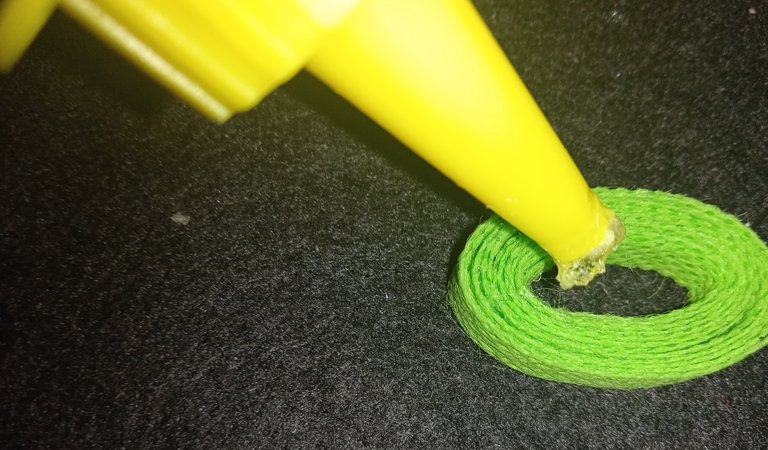
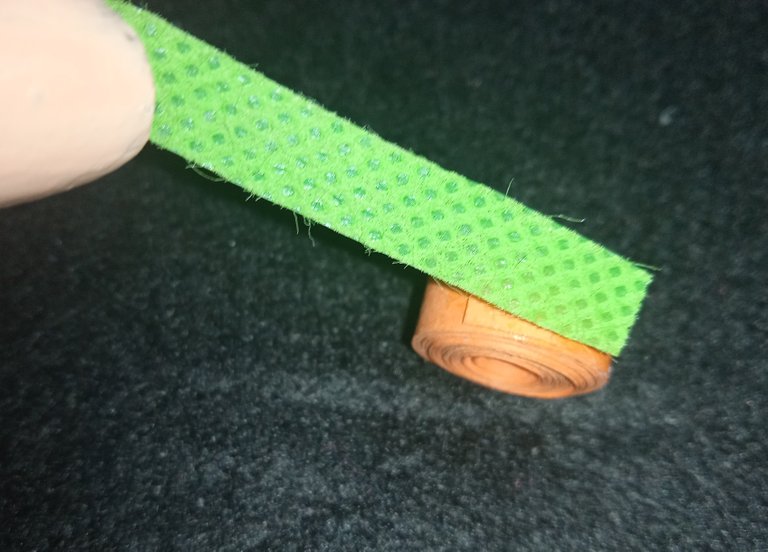
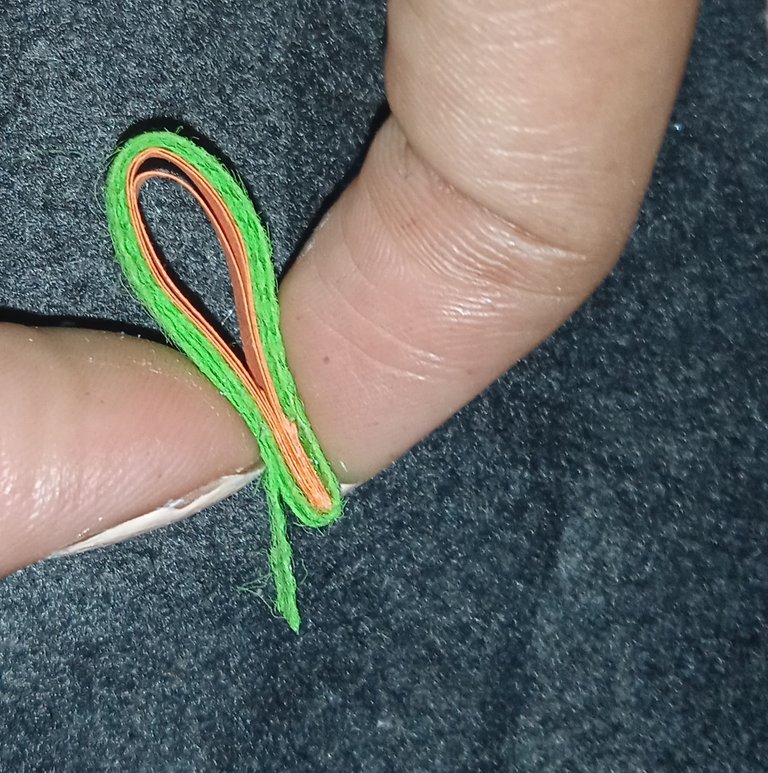
Take the green PVC fabric ribbons and wrap them around your index finger, make several turns.
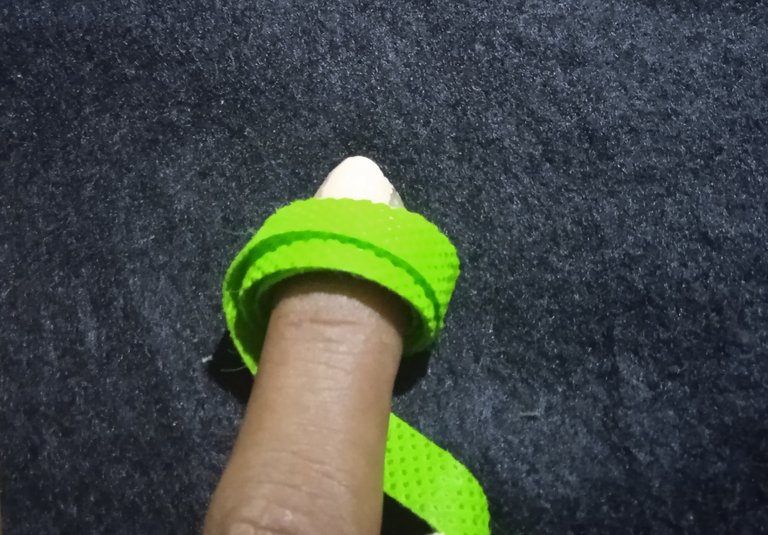
Approximately 12 turns are made around the index finger, always one on top of the other.
2
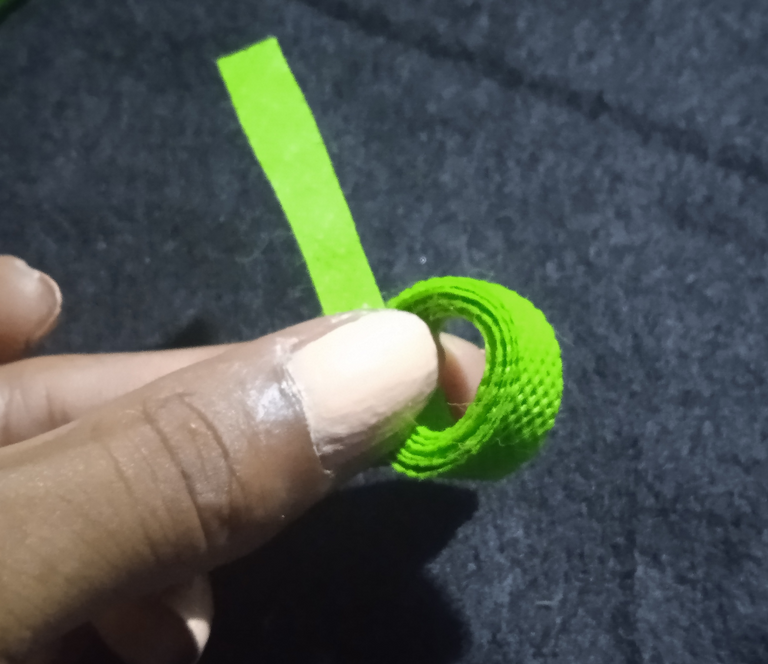
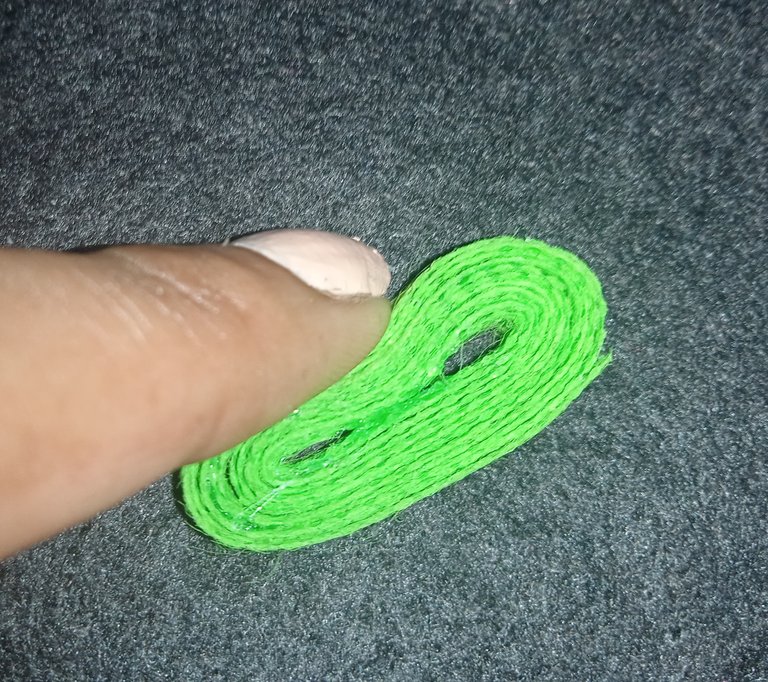
Then the formed figure is removed from the index finger, holding the end of the figure to prevent it from getting messy.
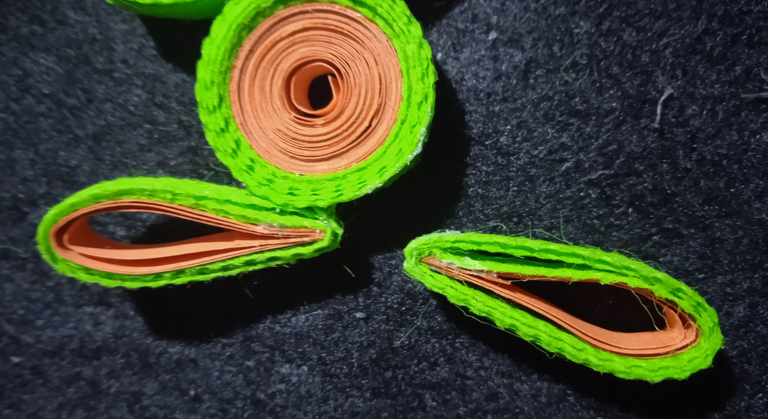
3
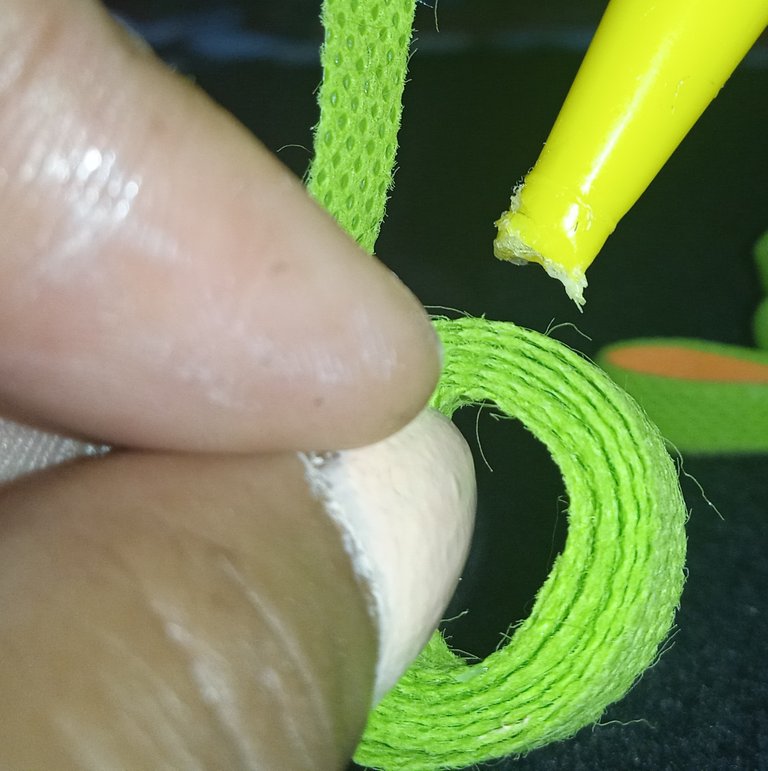
Then add a little bit of cold silicone and glue the excess end.
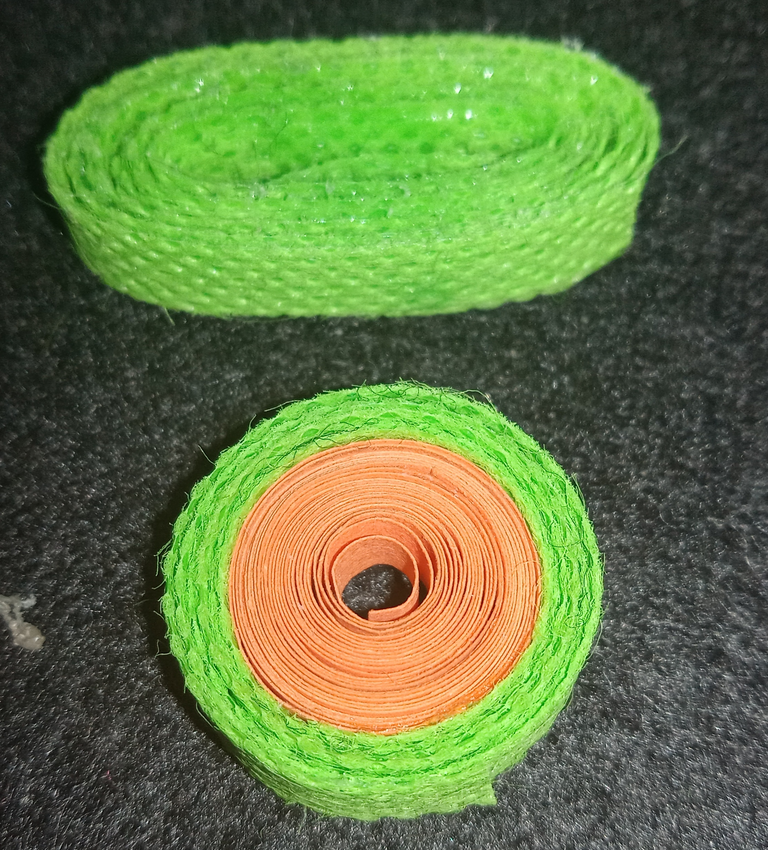
This is the final result of our oval figure.
4
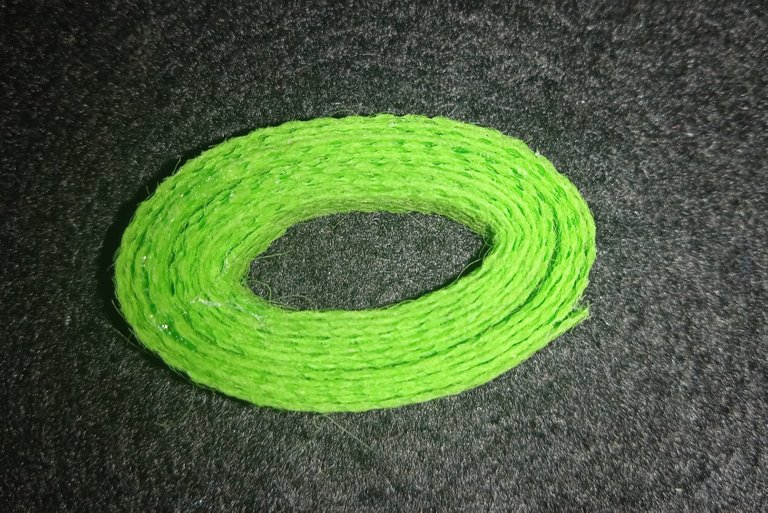
Then add some cold silicone in the central and inner area of the oval.
Then press both ends of the oval together.
5
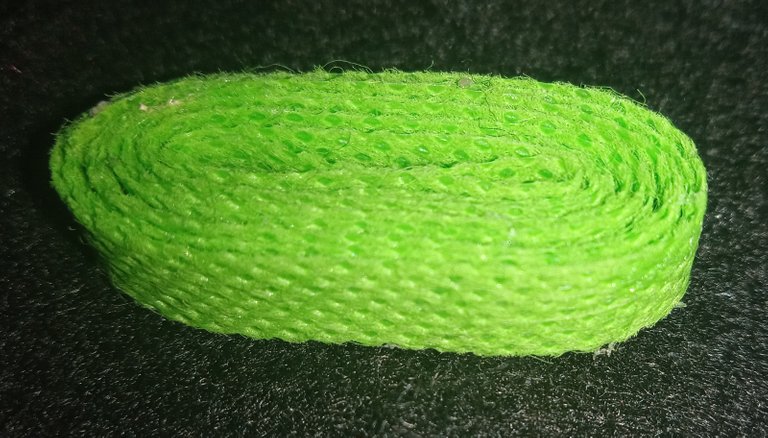
This would be the final result of our first figure.
Second Piece ( Frog body )
1
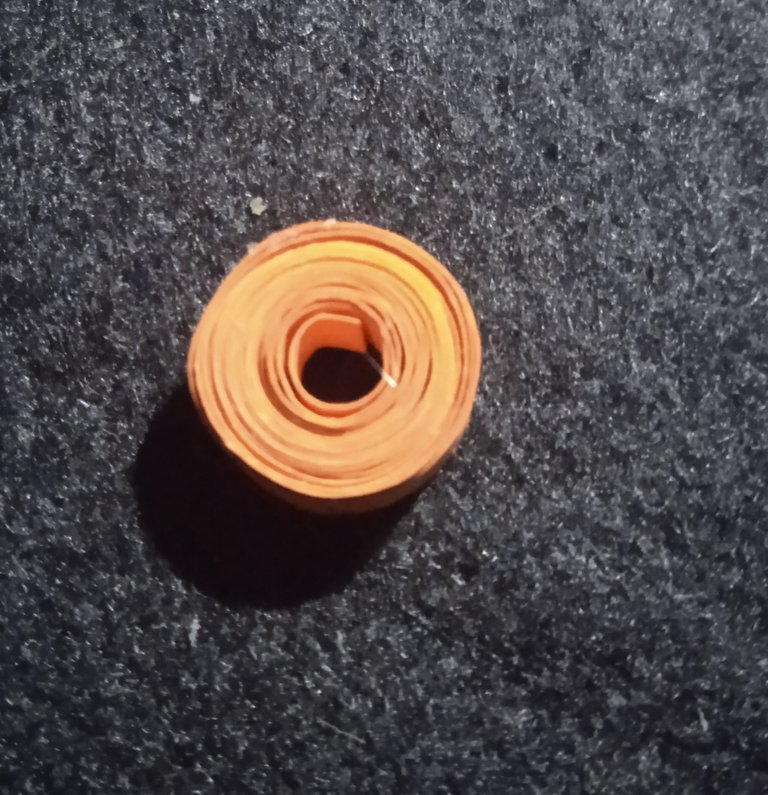
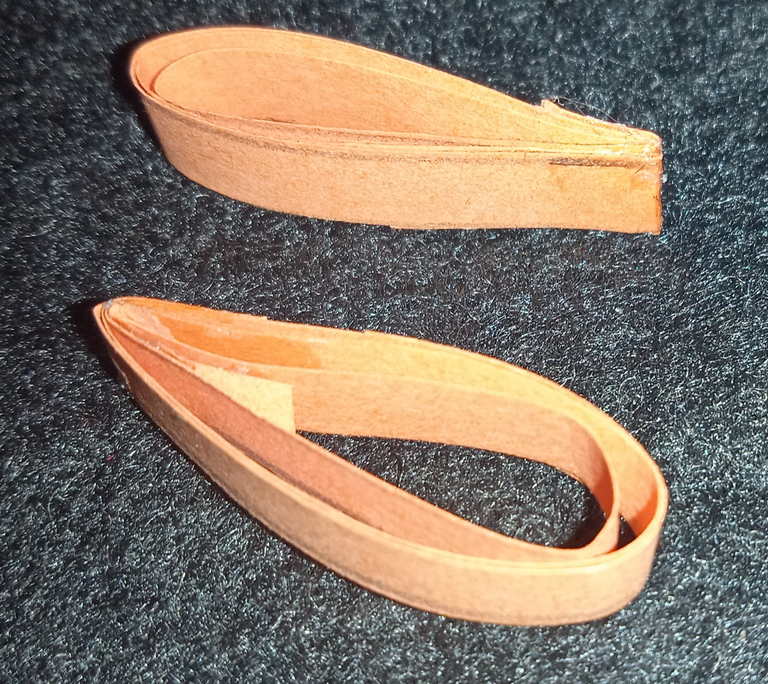
Then take the orange cardboard strips and make a circle and glue the end of it.
2
Then take the green fabric and wrap it around the orange circle. Make 6 turns around the main orange circle.
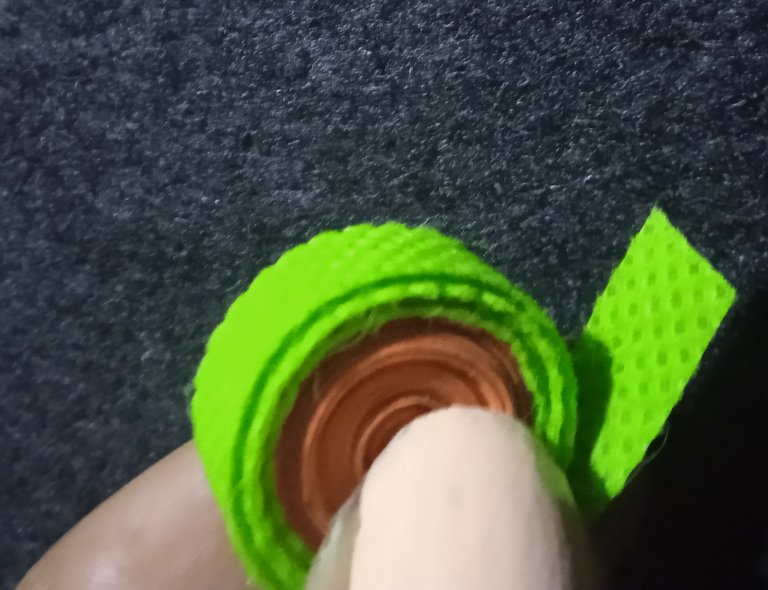
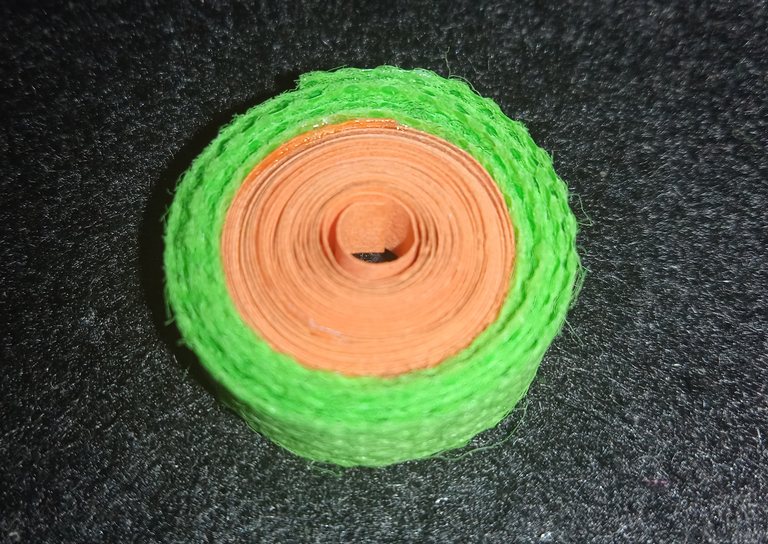
This would be the result of our second piece.
Joining the pieces together.
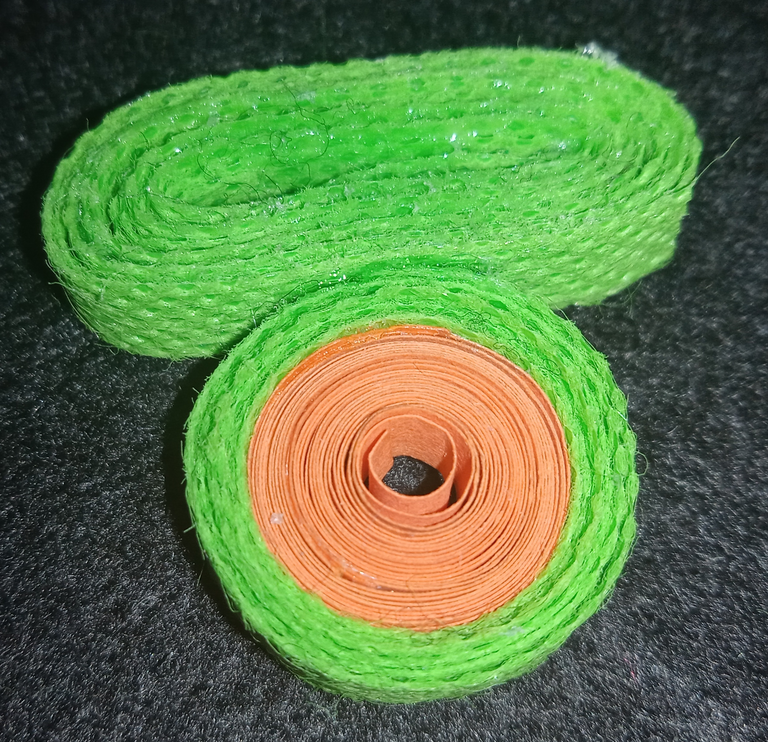
Glue piece 1 to the edge of piece 2.
Design and Decoration of the figure
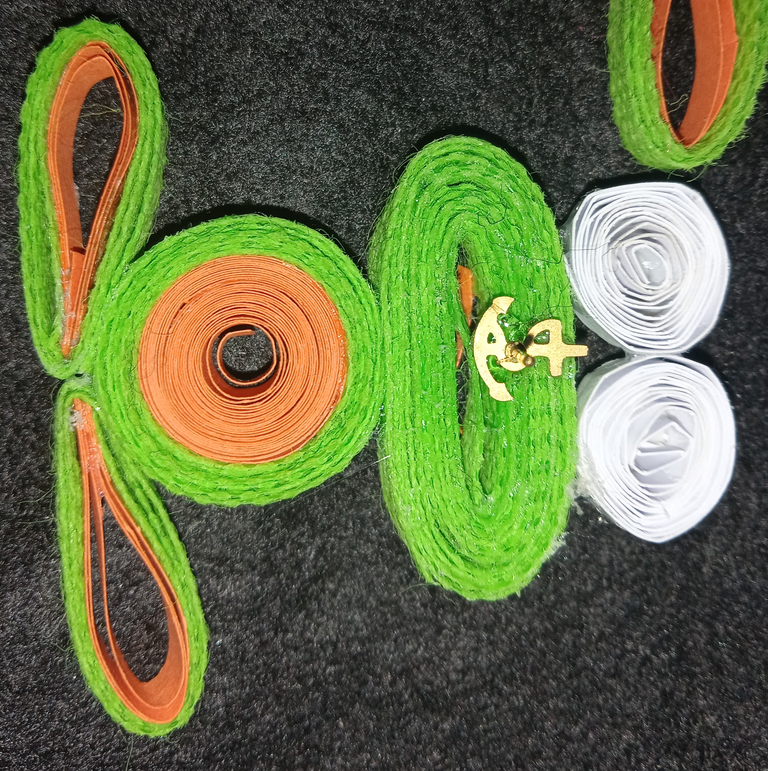
Eyes
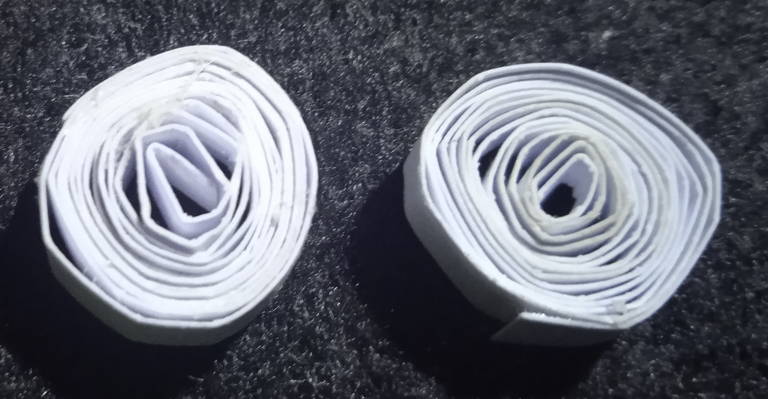
Take two strips of cardboard and make two circles with the strips.
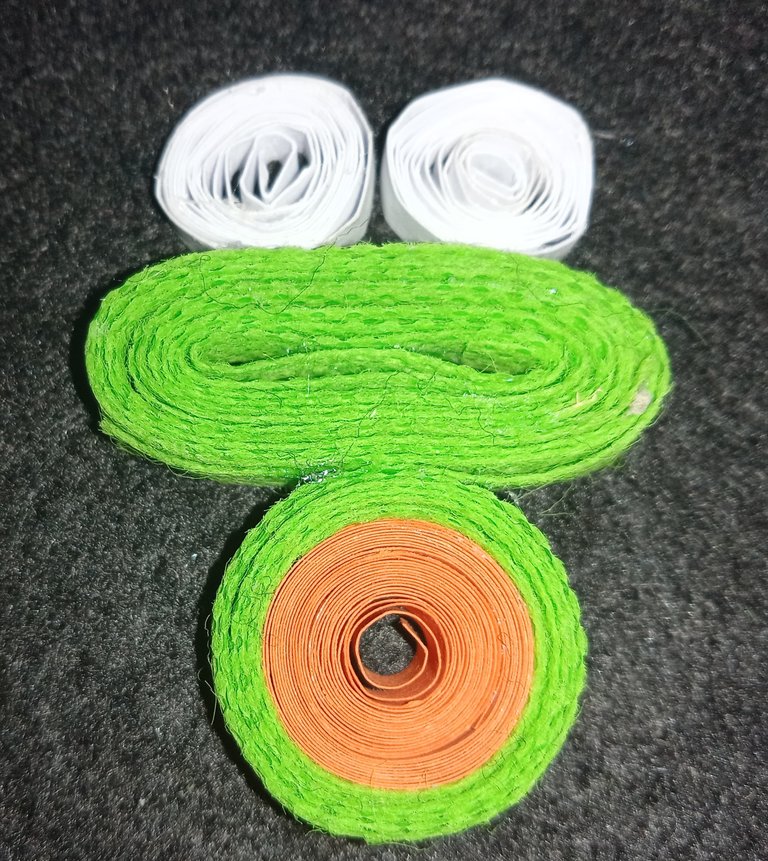
Glue both circles on the upper part of the piece that forms the frog's face.
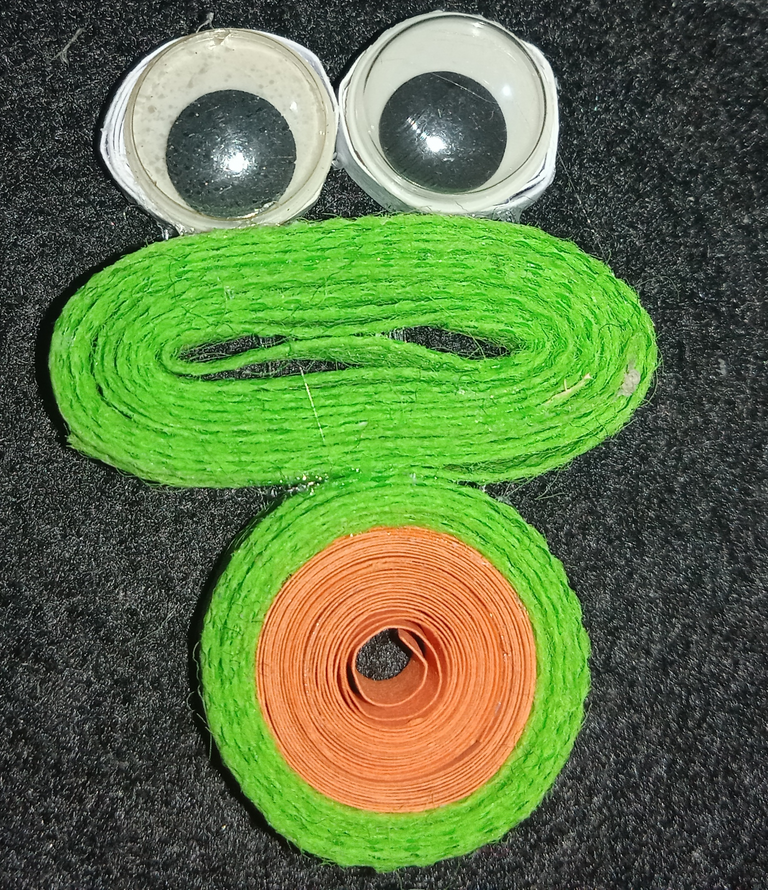
Then proceed to add the eyes on each of the cardboard circles.
The frog's legs

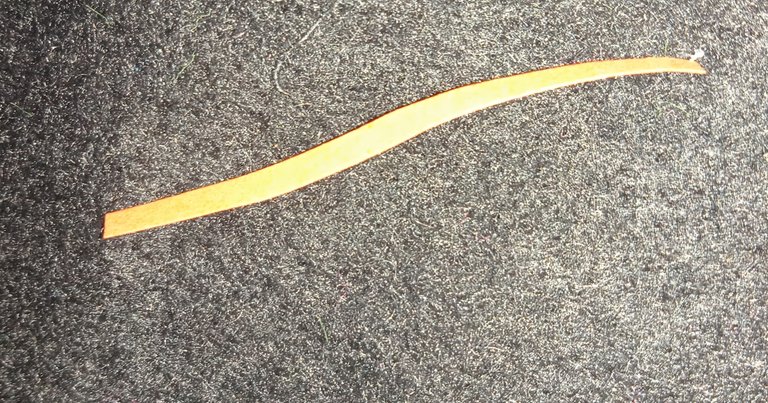
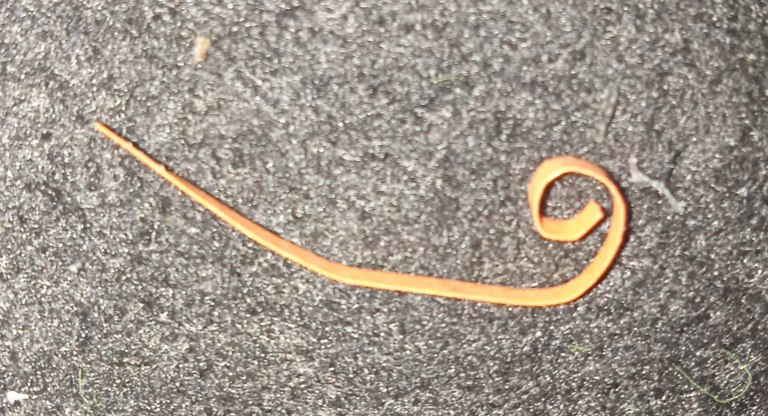
To make the legs of the frogs, take a strip of orange cardboard and join the ends of the tips together with your fingers. You must make 3 turns with the cardboard.
This is the result, in this case both legs are made.
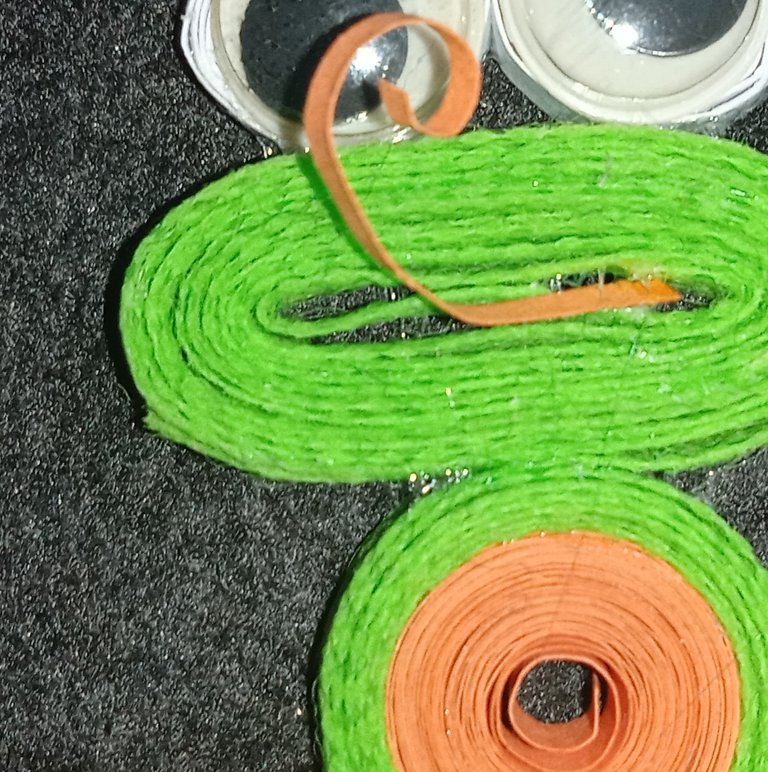
When each orange figure is ready, proceed to take green fabric ribbons and make 4 turns around the orange figure.
Then glue the end with cold silicone.

Finally glue the legs to the body of the figure.
Frog's tongue
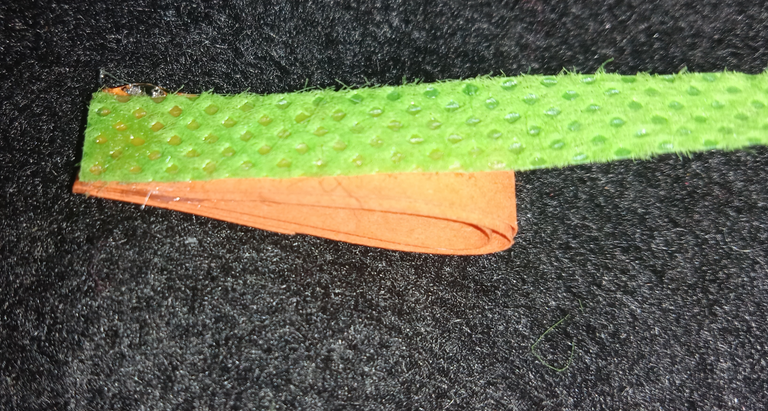
Then take an orange cardboard ribbon 4 cm long and proceed to roll the end of it a little bit.
The tongue sticks right at the opening of the mouth, the half that separates the figure from the frog's face.
The earring holder is also glued to the back of the frog.
Decoration

We also add a decorative element to finish the project, we glue a necklace of small crystals around the neck of our piece.
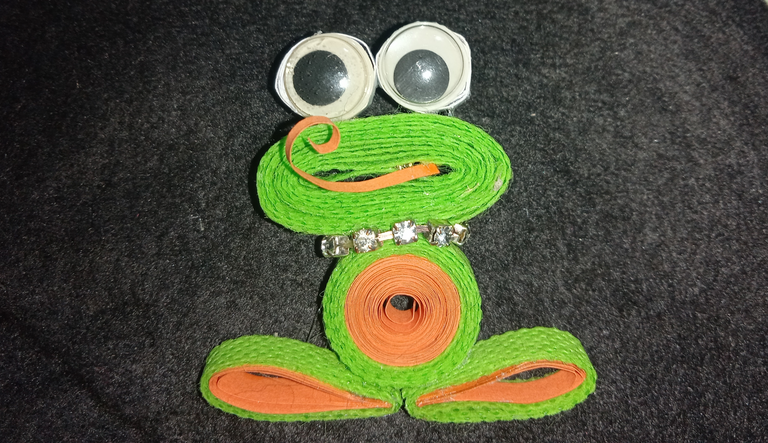
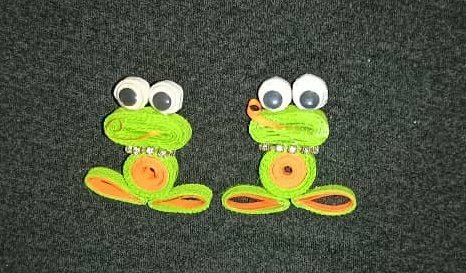
This is the final result of our cute little frog. I hope you like it!
Thank you very much for reading friends!
The images are my own and were taken with a ZTE BLADE phone.
Translator used: Deepl
I edited the pictures using canva.

Hola amigos de Hive! Poder divertirnos al momento de crear nuestros diseños sin duda alguna nos hace feliz a todos. Aprovechando las formas y la diversidad que nos brinda nuestra amada naturaleza, quiero mostrarles el paso a paso en la elaboración de unos aretes en forma de rana, utilizando algunas técnicas de filigrama pero tambien añadiendo otros materiales además del material original como lo son las cintas de cartulina para crear la figura.
Espero que les guste y sobre todo que se puedan divertirse introduciendo en la actividad a los niños, estoy segura que será un proceso muy divertido para todos.
Se necesitarán los siguientes materiales:
Materiales
- Cintas de Tela verde PVC
- Dos ojitos
- Cintas de cartulina naranja
- Silicón Caliente
- Cintas de cartulina blanca
- Lintos de cristales
- Sujetadores
- Tijera
PASO A PASO
Primera Pieza (Rostro de la rana)
1
Se deben tomar las cintas de tela verde de PVC y se enrollan en el dedo índice, se deben hacer varias vueltas.
Aproximadamente se hacen 12 vueltas al rededor del dedo índice, siempre una sobre otra.
2
Luego se saca la figura formada del dedo indice sujetando el extremo de esta para evitar que esta se desordene.
3
Luego se debe añadir un poco de silicon al frio y se pega el extremo sobrante.
Este es el resultado final de nuestra figura ovalada.
4
Luego se debe añadir un poco de silicón al frio en la zona central e interna del ovalo.
Luego se hace presión para unir ambos extremos del ovalo.
5
Este sería el resultado final de nuestra primera figura.
Segunda Pieza ( Cuerpo de la rana)
1
Luego se toma las tiras de cartulina naranja y se hace un circulo y se pega el extremo de esta.
2
Luego se toma la tela verde y se enrolla esta sobre el circulo naranja. Se deben realizar 6 vueltas al rededor de circulo principal naranja.
Este sería el resultado de nuestra segunda pieza.
Unión de las piezas.
Se debe pegar la pieza 1 en el borde de la pieza 2.
Diseño y decoración de la figura
Ojos
Se toman dos cintas de cartulina y se hacen dos circulos con las tiras.
Se pegan ambos círculos en la zona superior de la pieza que forma el rostro de la rana.
Luego se procede a añadir los ojitos sobre cada uno de los circulos de cartulina.
Patas de la rana
Para realizar las patas de las rana se procede a tomar una cinta de cartulina naranja y se procede a juntar los extremos de las puntas con la ayuda de los dedos. Se deben realizar 3 vueltas con la cartulina.
Este es el resultado, en este caso se realizan ambas patas.
Al tener lista cada figura naranja, se procede a tomar cintas de tela verde y se hacen 4 vueltas alrededor de la figura narranja.
Luego se pega con el silicón al frio el extremo.
Finalmente se pegan las patas al cuerpo de la figura.
Lengua de la Rana
Luego se toma una cinta de cartulina naranja de 4 cm de largo y se procede a enrollar un poco la punta de esta.
La lengua se pega justo en la abertura de la boca, la mitad que separa la figura del rostro de la rana.
Tambien se pega en la parte trasera el sujetador del arete.
Decoración
También añadimos un elemento decorativo para culminar el proyecto, se trata de pegar un collar de cristales pequeños al rededor del cuello de nuestra pieza.
Este es el resultado final de nuestra linda ranita. Espero les guste!
Muchas Gracias por leer amigos!
Las imagenes son de mi autoria y fueron Tomadas a traves de un Telefono ZTE BLADE.
Traductor utilizado: Deepl
La edicion de las fotos la realicé mediante canva.