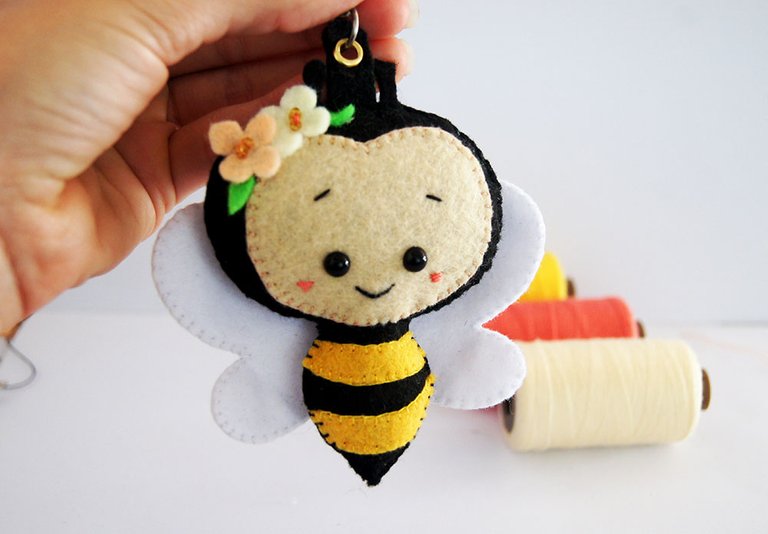
Hello, inspired by my entry to Hive and because I love bees, today I want to share with you the process to make this cute little felt bee.🐝
Hola, inspirada por mi entrada a Hive y porque me encantan las abejas, hoy les quiero compartir el proceso para hacer esta linda abejita de fieltro.🐝

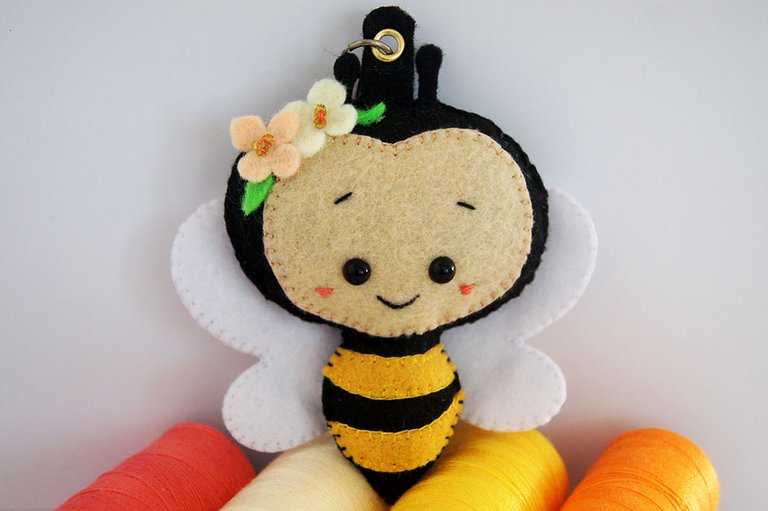

This is my first time in this community and I am very excited to share my creations here.
As I already told you I bring you this little bee which I made into a keychain but it can be used for different purposes, as a pendant, a backpacker or simply as a toy or ornament.
Without further ado, let's get started.
Es mi primera vez en esta comunidad y estoy muy entusiasmada por compartir mis creaciones por acá.
Como ya les dije, traigo esta abejita la cual convertí en un llavero pero se puede utilizar para diferentes usos, como un colgante, un mochilero o simplemente de juguete o adorno.
Sin más, comenzamos.


• Felt: black, yellow, white, fur, (green and salmon)-optional.
• Yarns: black, yellow, white, fur and pink.
• Two black half pearls
• Synthetic cotton.
• Pencil or pen
• Cardboard
• Scissors
• Silicone
• Needle
•Fieltro: negro, amarillo, blanco, piel, (verde y salmón)-opcional.
• Hilos: negro, amarillo, blanco, piel y rosado.
• Dos medias perlas negras
• Algodón sintético.
• Lápiz o bolígrafo
• Cartulina
• Tijeras
• Silicona
• Aguja


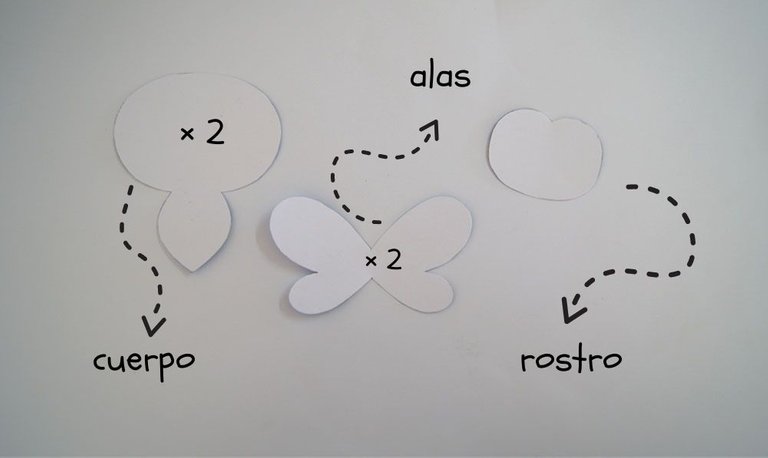
•The first thing I did was to draw my little bee on a piece of cardboard and cut it out to make the molds for the body, face and wings.
Here I leave the image of the patterns obtained, where I identify them by names and with a numbering that indicates the amount of pieces we need of this one.
•Lo primero que hice fue dibujar mi abejita en una cartulina y recortarla para sacar los moldes del cuerpo, el rostro y las alas.
Acá les dejo la imagen de los patrones obtenidos, donde los identifico por nombres y con una numeración que indica la cantidad de piezas que necesitamos de este.

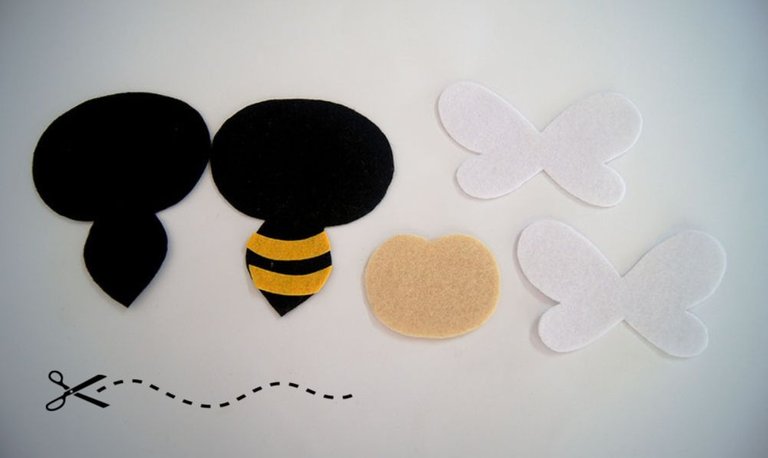
•Then I proceed to mark and cut out the molds on the felt in the following order:
-The body as I indicated in the previous image I mark it twice to get two pieces of this, the front and the back, this I do it in black color.
-The wings also need to be double and white.
-From the face pattern only one and skin color.
-I cut two yellow strips to imitate the color sequence of the bees.
•Seguido procedo a marcar y a recortar los moldes sobre el fieltro con el siguiente orden:
-El cuerpo como indiqué en la imagen anterior lo marco dos veces para obtener dos piezas de este, la del frente y la trasera, esto lo hago de color negro.
-Las alas también las necesitamos doble y de color blanco.
-Del patrón del rostro solo uno y de color piel.
-Recorté dos listones amarillos para imitar la secuencia de color de las abejas.

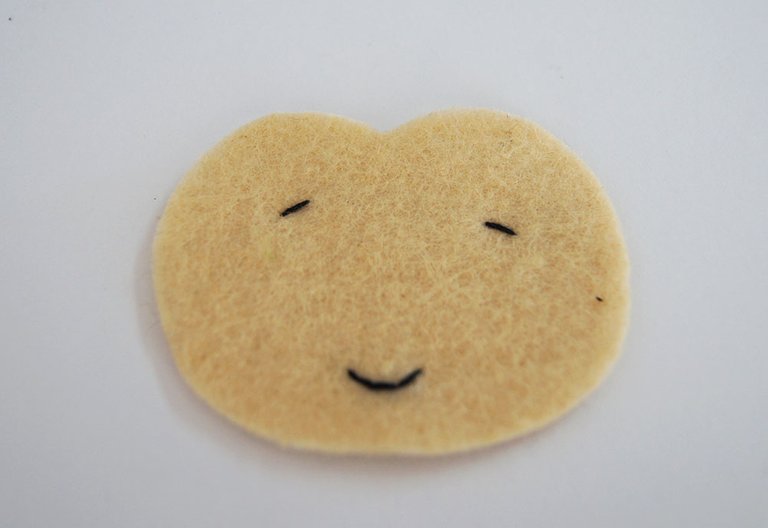
• The first details were added to the face by stitching to simulate the mouth and eyebrows.
• Los primeros detalles los hago en el rostro dándole unas puntadas para simular la boca y las cejas.

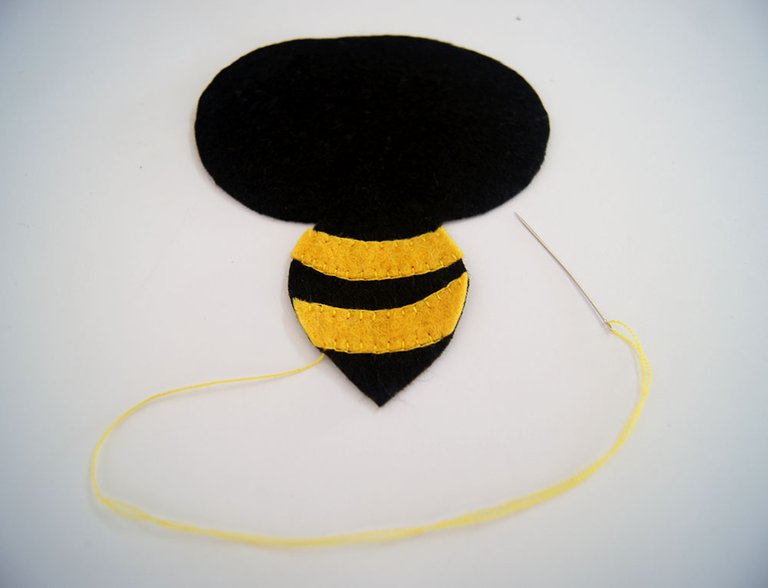
• I continue gluing to one of the bodies two yellow ribbons and the face with the colors of thread that corresponds to each one, giving a few stitches that adjust them to the bottom, thus making it our front part.
• Continuo pegando a uno de los cuerpos los dos listones amarillos y el rostro con los colores de hilo que le corresponde a cada cual, dando unas puntadas que los ajusten al fondo convirtiéndola así en nuestra parte frontal.
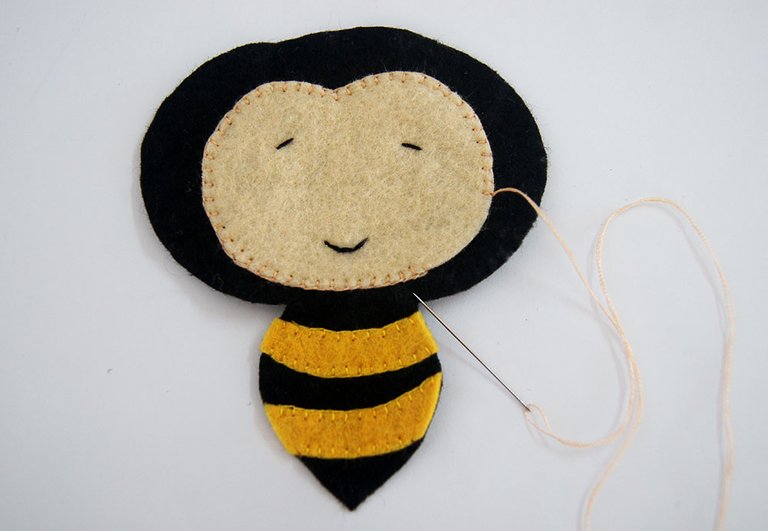

• Then I proceed to join the two patterns of the body making them match perfectly in shape and with stitches I close the edge leaving a space between the two layers of felt to fill with synthetic cotton and give more body and volume to our little bee. I do the same with the wings, but with much less stuffing to make them flatter, this is optional since you can do it as you like. If you want the wings completely flat I recommend cutting a single piece and glue it with silicone at the end.
• Acto seguido procedo a juntar los dos patrones del cuerpo haciéndolos coincidir en su forma perfectamente y con puntadas voy cerrando por el borde dejando entre las dos capas de fieltro un espacio para rellenar con algodón sintético y darle más cuerpo y volumen a nuestra abejita. Así mismo hago con las alas, pero con mucho menos relleno para que queden más planas, esto es opcional ya que lo pueden hacer a su gusto. Si quieren las alas completamente planas yo recomiendo cortar una sola pieza y pegarla con silicona al final.
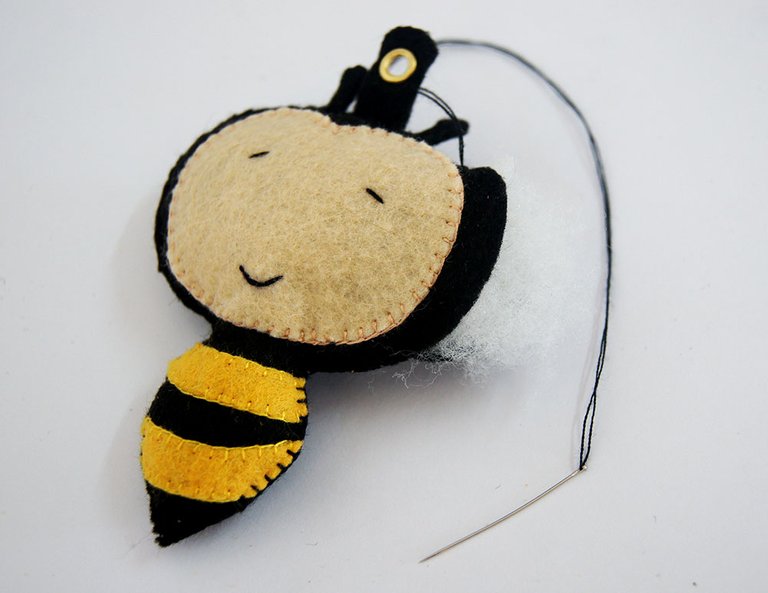

...And to finish I added a few details to my taste, but they can be modified to your preference with the materials you have at hand and so you can add your own unique and personal touch😉.
-With green felt I made two little leaves and with salmon I made flowers in two different shades that I later embedded on one side of the head.
-I also added some antennae and a support where the keychain hardware would hang.
-I glued the wings to the bee's back with silicone.
-With the two black half pearls I made the eyes, gluing them in the place of the face where I liked the most, because it gives a very tender expression.
...Y para terminar agregué unos cuantos detalles a mi gusto, pero pueden ser modificado a preferencia de cada cual con los materiales que tenga a mano y así le pone su toque único y personal😉
-Con fieltro verde hice dos hojitas y con salmón unas flores de dos tonos diferentes que posteriormente incrusté a un lado de la cabeza.
-También agregué unas antenas y un soporte donde iría colgado el herraje de llavero.
-Pegué con silicona las alas a la espalda de la abejita.
-Con las dos medias perlas negras hice los ojos pegándolas en el lugar del rostro donde mas me gustó, tambien le di unas puntadas con hilo rosa para simular los pomulos, pues le da una expresión muy tierna.😍
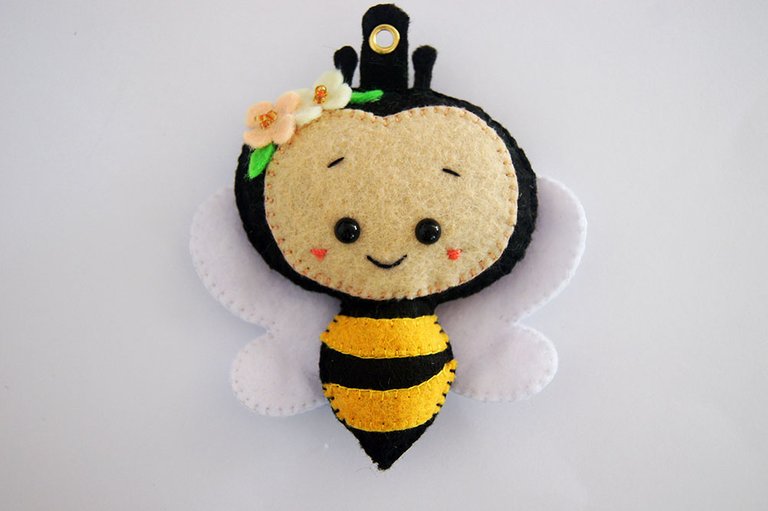

I really enjoyed the process and loved the result.
Tell me. What you thought?😃
Disfruté mucho el proceso y me encantó el resultado.
Cuéntame ¿Qué te pareció? 😃
