Muy buen día a todos comunidad de Hive, espero estén bien, el día de hoy vengo a mostrarles como modifiqué mi teclado mecánico (Un Drevo Calibur V2 TE
formato 65%), con materiales simples que me encontré en la casa.
La verdad tenía bastante tiempo queriendo modificar mi teclado para mejorar su sonido ya que últimamente me está gustando mucho este nicho del modding
de teclados y estuve investigando, y a pesar de que muchos mods son para teclados que son Hot-Swap o que los switches se pueden interncambiar sin
necesidad de desoldar, pensé que no podría, pero hay muchos mods que no requieren que quites los switches, así que quise intentarlo.
Para ello utilicé un trozo de goma espuma que estaba tirado por ahí en el almacén de la casa, un bandita/curita para heridas, cinta adhesiva normal, tijeras, un
cutter o exacto, destornilladores y paciencia jeje.
Very good morning to all Hive community, I hope you are well, today I come to show you how I modified my mechanical keyboard (A Drevo Calibur V2 TE
65% format), with simple materials that I found at home.
The truth is that I had quite some time wanting to modify my keyboard to improve its sound because lately I'm liking a lot this niche of modding
and I was investigating, and although many mods are for keyboards that are Hot-Swap or that the switches can be interchanged without the need to desolder, I thought that I would
I thought I couldn't, but there are many mods that don't require you to remove the switches, so I wanted to give it a try.
To do this I used a piece of foam rubber that was lying around in storage at home, a band-aid/wound band-aid, regular duct tape, scissors, a
cutter, screwdrivers and patience hehe.
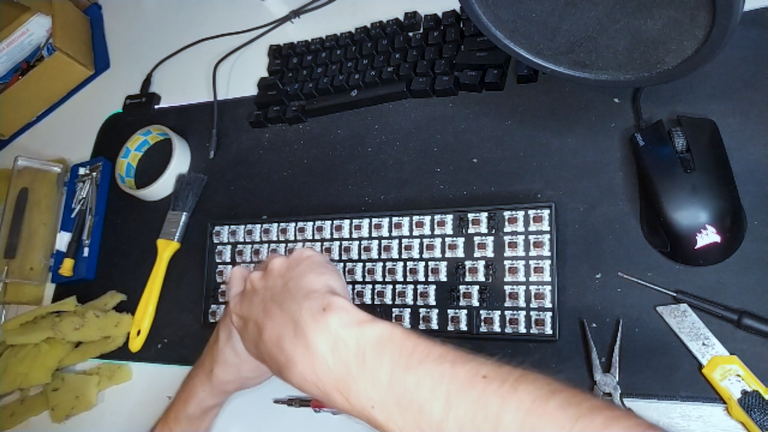
Lo primero que hice fue desconectar el teclado y quitar todas sus keycaps o teclas para poder limpiarlo mejor y poder acceder a sus tornillos, ya que estos se encuentran en la parte superior de la carcasa, una vez retirados, limpie el polvo acumulado con una brocha suave y procedí a quitar los 6 tornillos, para
poder quitar la placa y PCB con los switches del resto de la carcasa. Los cuales tambien procedí a limpiar con cuidado con una brocha suave.
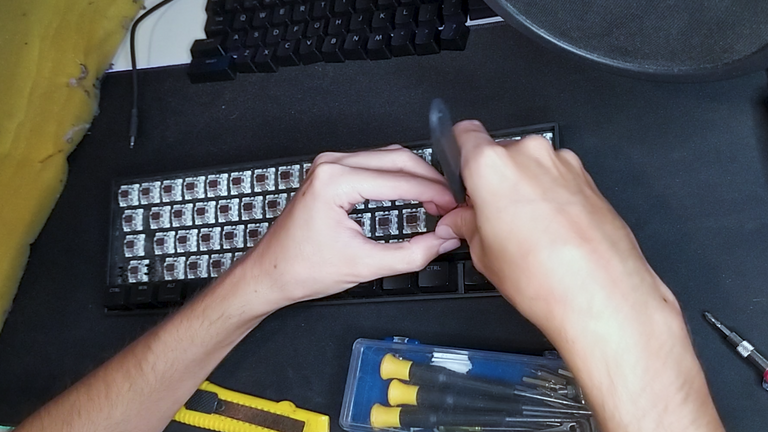
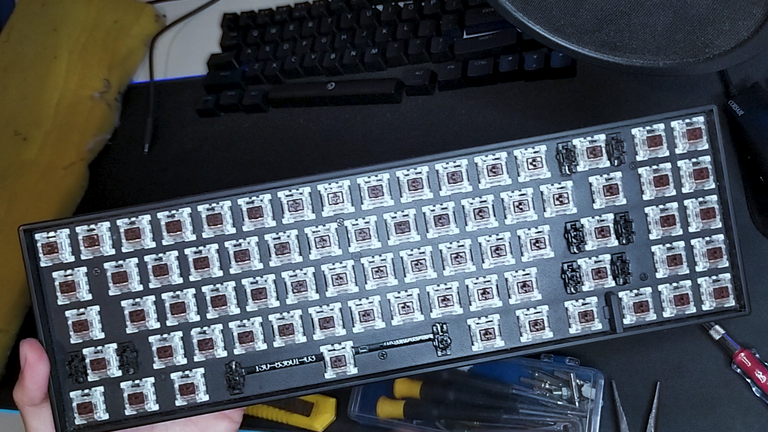
Teclado sin las keycaps / Keyboard without the keycaps
![]) )
)
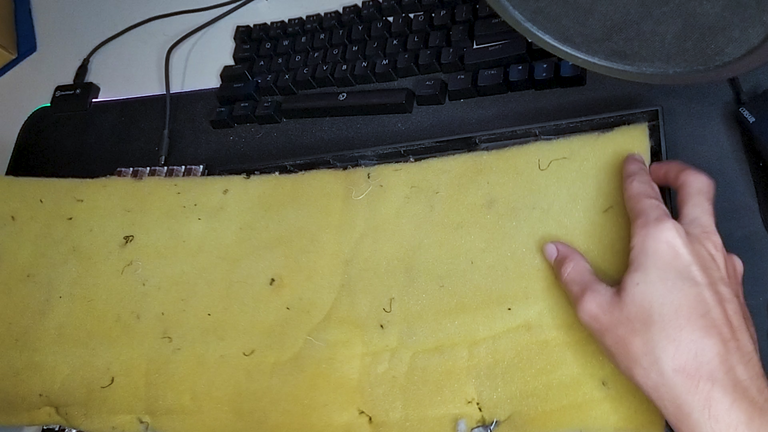
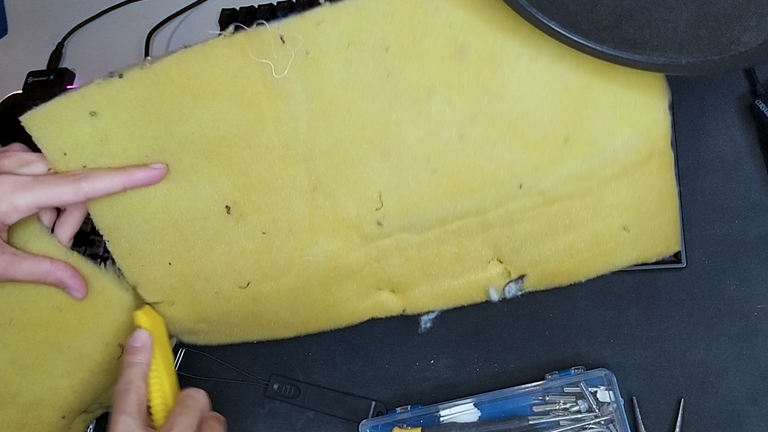
Una vez limpios, tomé la goma espuma y comencé a recortar un rectangulo del tamaño del interior de la carcasa, ya que este irá debajo del PCB y sobre la carcasa para amortiguar el sonido que rebota por dentro de la carcasa, al principio me costó cortar la goma espuma ya que era mas grande que la carcsa y
además era mas gruesa, por lo cual tuve que hacerla mas delgada para poder luego atornillar el PCB sin forzarlo mucho.
Una vez recortado el bloque de goma espuma, lo calcé dentro de la carcasa y luego procedí a atornillar el PCB preocurando de que esta no entrara muy a la fuerza ya que esto podría dañarla a largo plazo.

The first thing I did was to disconnect the keyboard and remove all its keycaps or keys to be able to clean it better and to be able to access its screws, since these are in the upper part of the casing, once removed, I cleaned the accumulated dust with a soft brush and proceeded to remove the 6 screws, to be able to remove the board and PCB with the switches from the rest of the casing.
I removed the board and PCB with the switches from the rest of the case. Which I also proceeded to clean carefully with a soft brush.
Once clean, I took the foam rubber and began to cut a rectangle the size of the inside of the case, as this will go under the PCB and on the case to muffle the sound that bounces inside the case, at first it cost me to cut the foam rubber as it was larger than the case and it was also thicker, so I had to cut it with a soft brush.
It was also thicker, so I had to make it thinner to be able to screw the PCB without forcing it too much.
Once the foam rubber block was cut, I fitted it inside the case and then proceeded to screw the PCB, being careful not to force it in too tightly as this could damage it in the long run.
Ya cuando estaba a punto de colocar las keycaps y terminar el mod, me dieron ganas de ir un poquito mas allá y quería probar el mod del banding o encintado, pero a medias, ya que se recomienda hacer otros pasos pero no quería ir tan lejos porque no tenía todos los materiales, pero igual quise intentarlo.
When I was about to place the keycaps and finish the mod, I wanted to go a little further and I wanted to try the banding mod, but only half way, since it is recommended to do other steps but I didn't want to go that far because I didn't have all the materials, but I still wanted to try it.
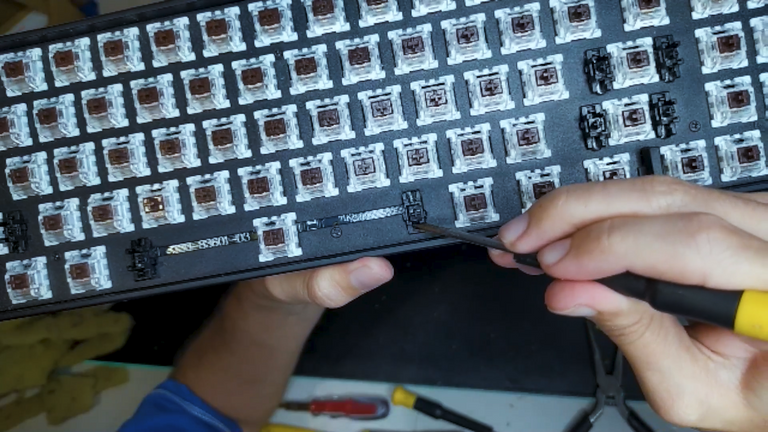
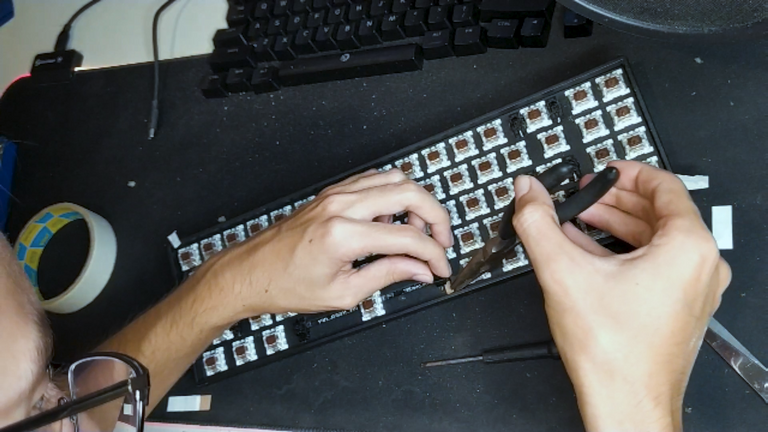
Para esto procedí a aflojar los estabilizadores de la placa para poder colcoar un trozo de cinta en el zócalo para que al entrar con mas presión la besa esta no quedara floja y redujera el ruido que produce, al principio no tenía una curita o bandita para heridas (material con el que se recomienda hacerlo o cinta quirurgica), así que lo iba a hacer con cinta común y corriente, pero luego encontré una bandita por lo cual use ambas opciones.
For this I proceeded to loosen the stabilizers of the plate to be able to place a piece of tape in the socket so that when entering with more pressure the besa this would not be loose and reduce the noise it produces, at first I did not have a band-aid or band-aid for wounds (material with which it is recommended to do it or surgical tape), so I was going to do it with ordinary tape, but then I found a band-aid so I used both options.
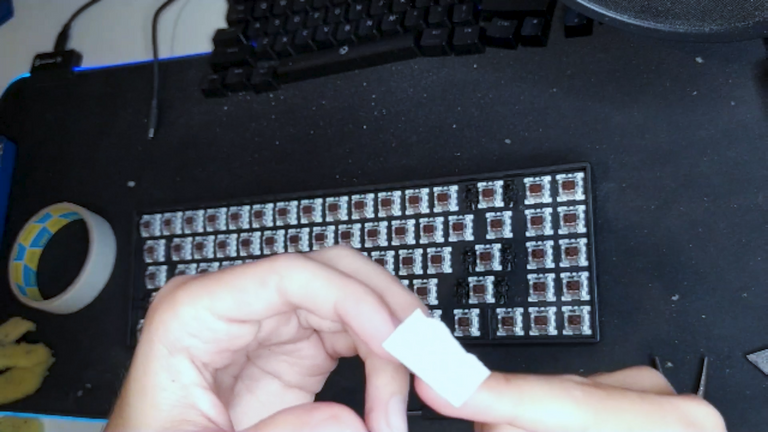
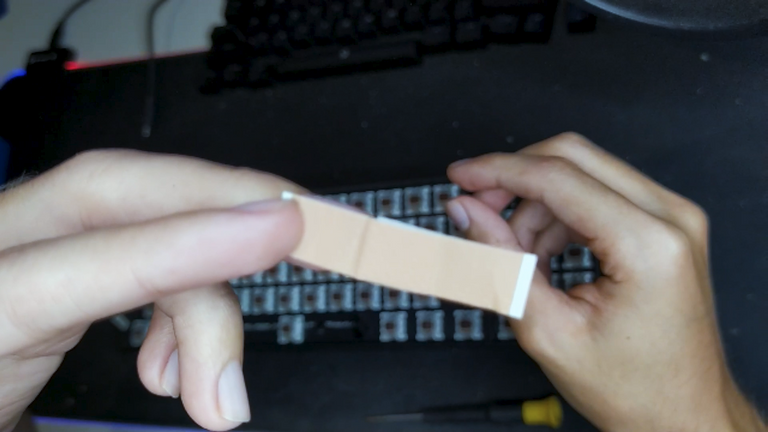
Corté pequeñas tiras que coloqué alrededor del zócalo del estabilizador para que entrara mas a presión y repetí este proceso con cada uno de los estbilizadores (barra espaciadora, teclas de Shift, Enter, Backspace, etc), use doble capa de cinta ya que con una sola no quedaba del todo quieto.
I cut small strips that I placed around the socket of the stabilizer so that it would fit more tightly and I repeated this process with each of the stabilizers (space bar, Shift, Enter, Backspace, etc), I used double layer of tape since with only one it was not completely still.
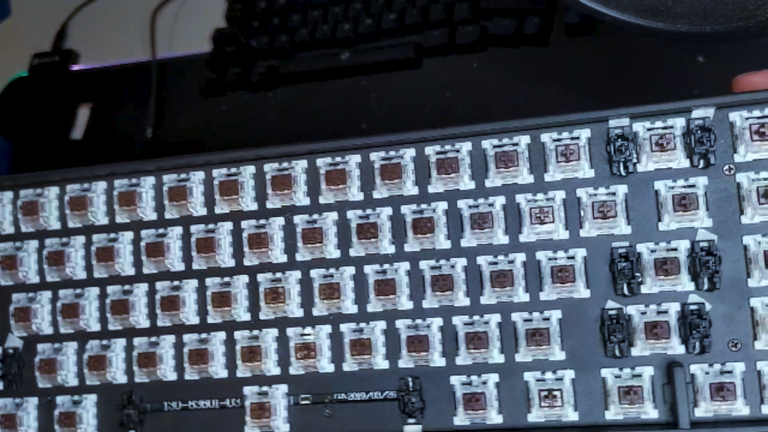
Estabilizadores con la cinta ya colcoada / Stabilizers with tape already in place
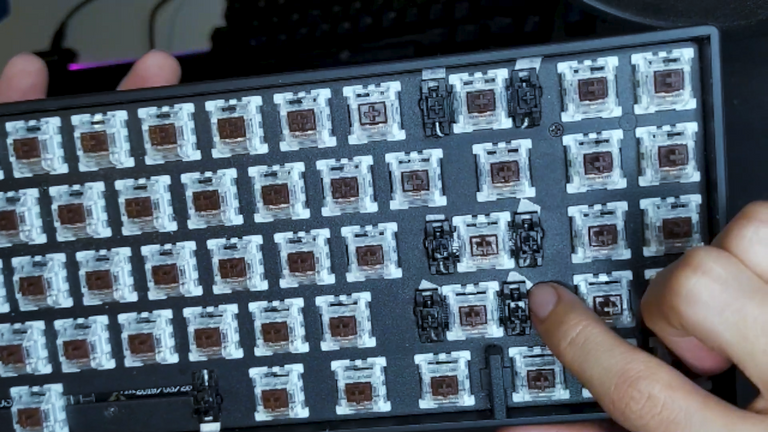
Una vez colocada la cinta, me aseguré que el seguro de los estabilizadores estuviera en su posición para que no se aflojara con el tiempo, y procedí a colocar todas las keycaps de nuevo, cabe recalcar que desde antes ya había probado que las teclas estaban funcionando antes de colocar las Keycaps para asegurarme que todo funcionaba bien y posteriormente hacer una prueba de sonido.
Once the tape was in place, I made sure that the stabilizer lock was in position so that it would not loosen over time, and proceeded to place all the keycaps again, it should be noted that I had already tested that the keys were working before placing the Keycaps to make sure that everything worked well and then do a sound test.
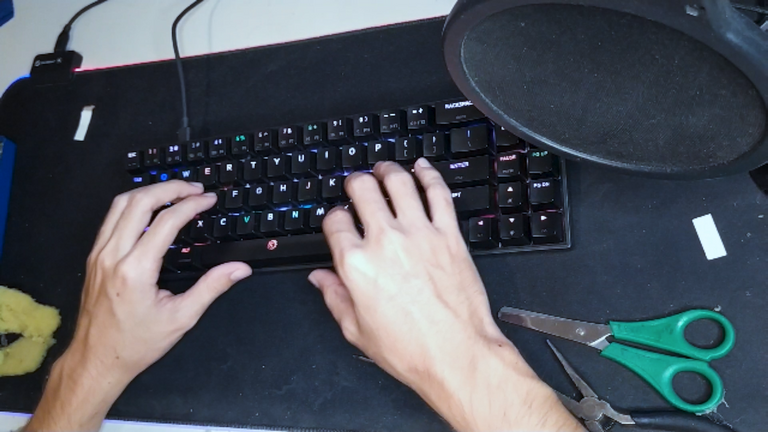
Y pues así fue como mejoré el sonido de mi teclado para que dejara de hacer ruido al presionar las barras, y tuviera un sonido mas acojinado/grave que el que tenía antes, espero puedan apreciar en el cambio de sonido en el vídeo que dejé del procedimiento y espero tambien algunos se aventuren a hacer este mod que no es tan complicado ni riesgoso y pueden mejorar algo el sonido de su teclado para no molestar a las personas con el sonido jajaja.
Espero les haya gustado el post, pronto mas vídeos como este y perdón por haber estado desaparecido todo este tiempo, el trabajo me ha tenido lejos de Hive jeje. Un abrazo y saludos a todos!
And so that's how I improved the sound of my keyboard to stop making noise when pressing the bars, and had a sound more cushioned / bass than it had before, I hope you can appreciate the sound change in the video I left the procedure and I hope also some venture to do this mod is not so complicated or risky and can improve the sound of your keyboard to not bother people with the sound hahaha.
I hope you liked the post, soon more videos like this and sorry for being missing all this time, work has kept me away from Hive hehe. A hug and greetings to all!
El vídeo fue grabado y hecho por mi.
Editado en: Adobe Premiere CC 2022
Grabado con un teléfono Xiaomi Redmi Note 8
Todos los derechos reservados.
Música utilizada para el vídeo/Music used for the video:
Ohayo by Smith The Mister
Smith The Mister
Free Download / Stream:
Music promoted by Audio Library
––––––––––––––––––––––––––––––
🎵 Track Info:
Title: Ohayo by Smith The Mister
Genre and Mood: Hip Hop & Rap + Calm
▶️ 3Speak


