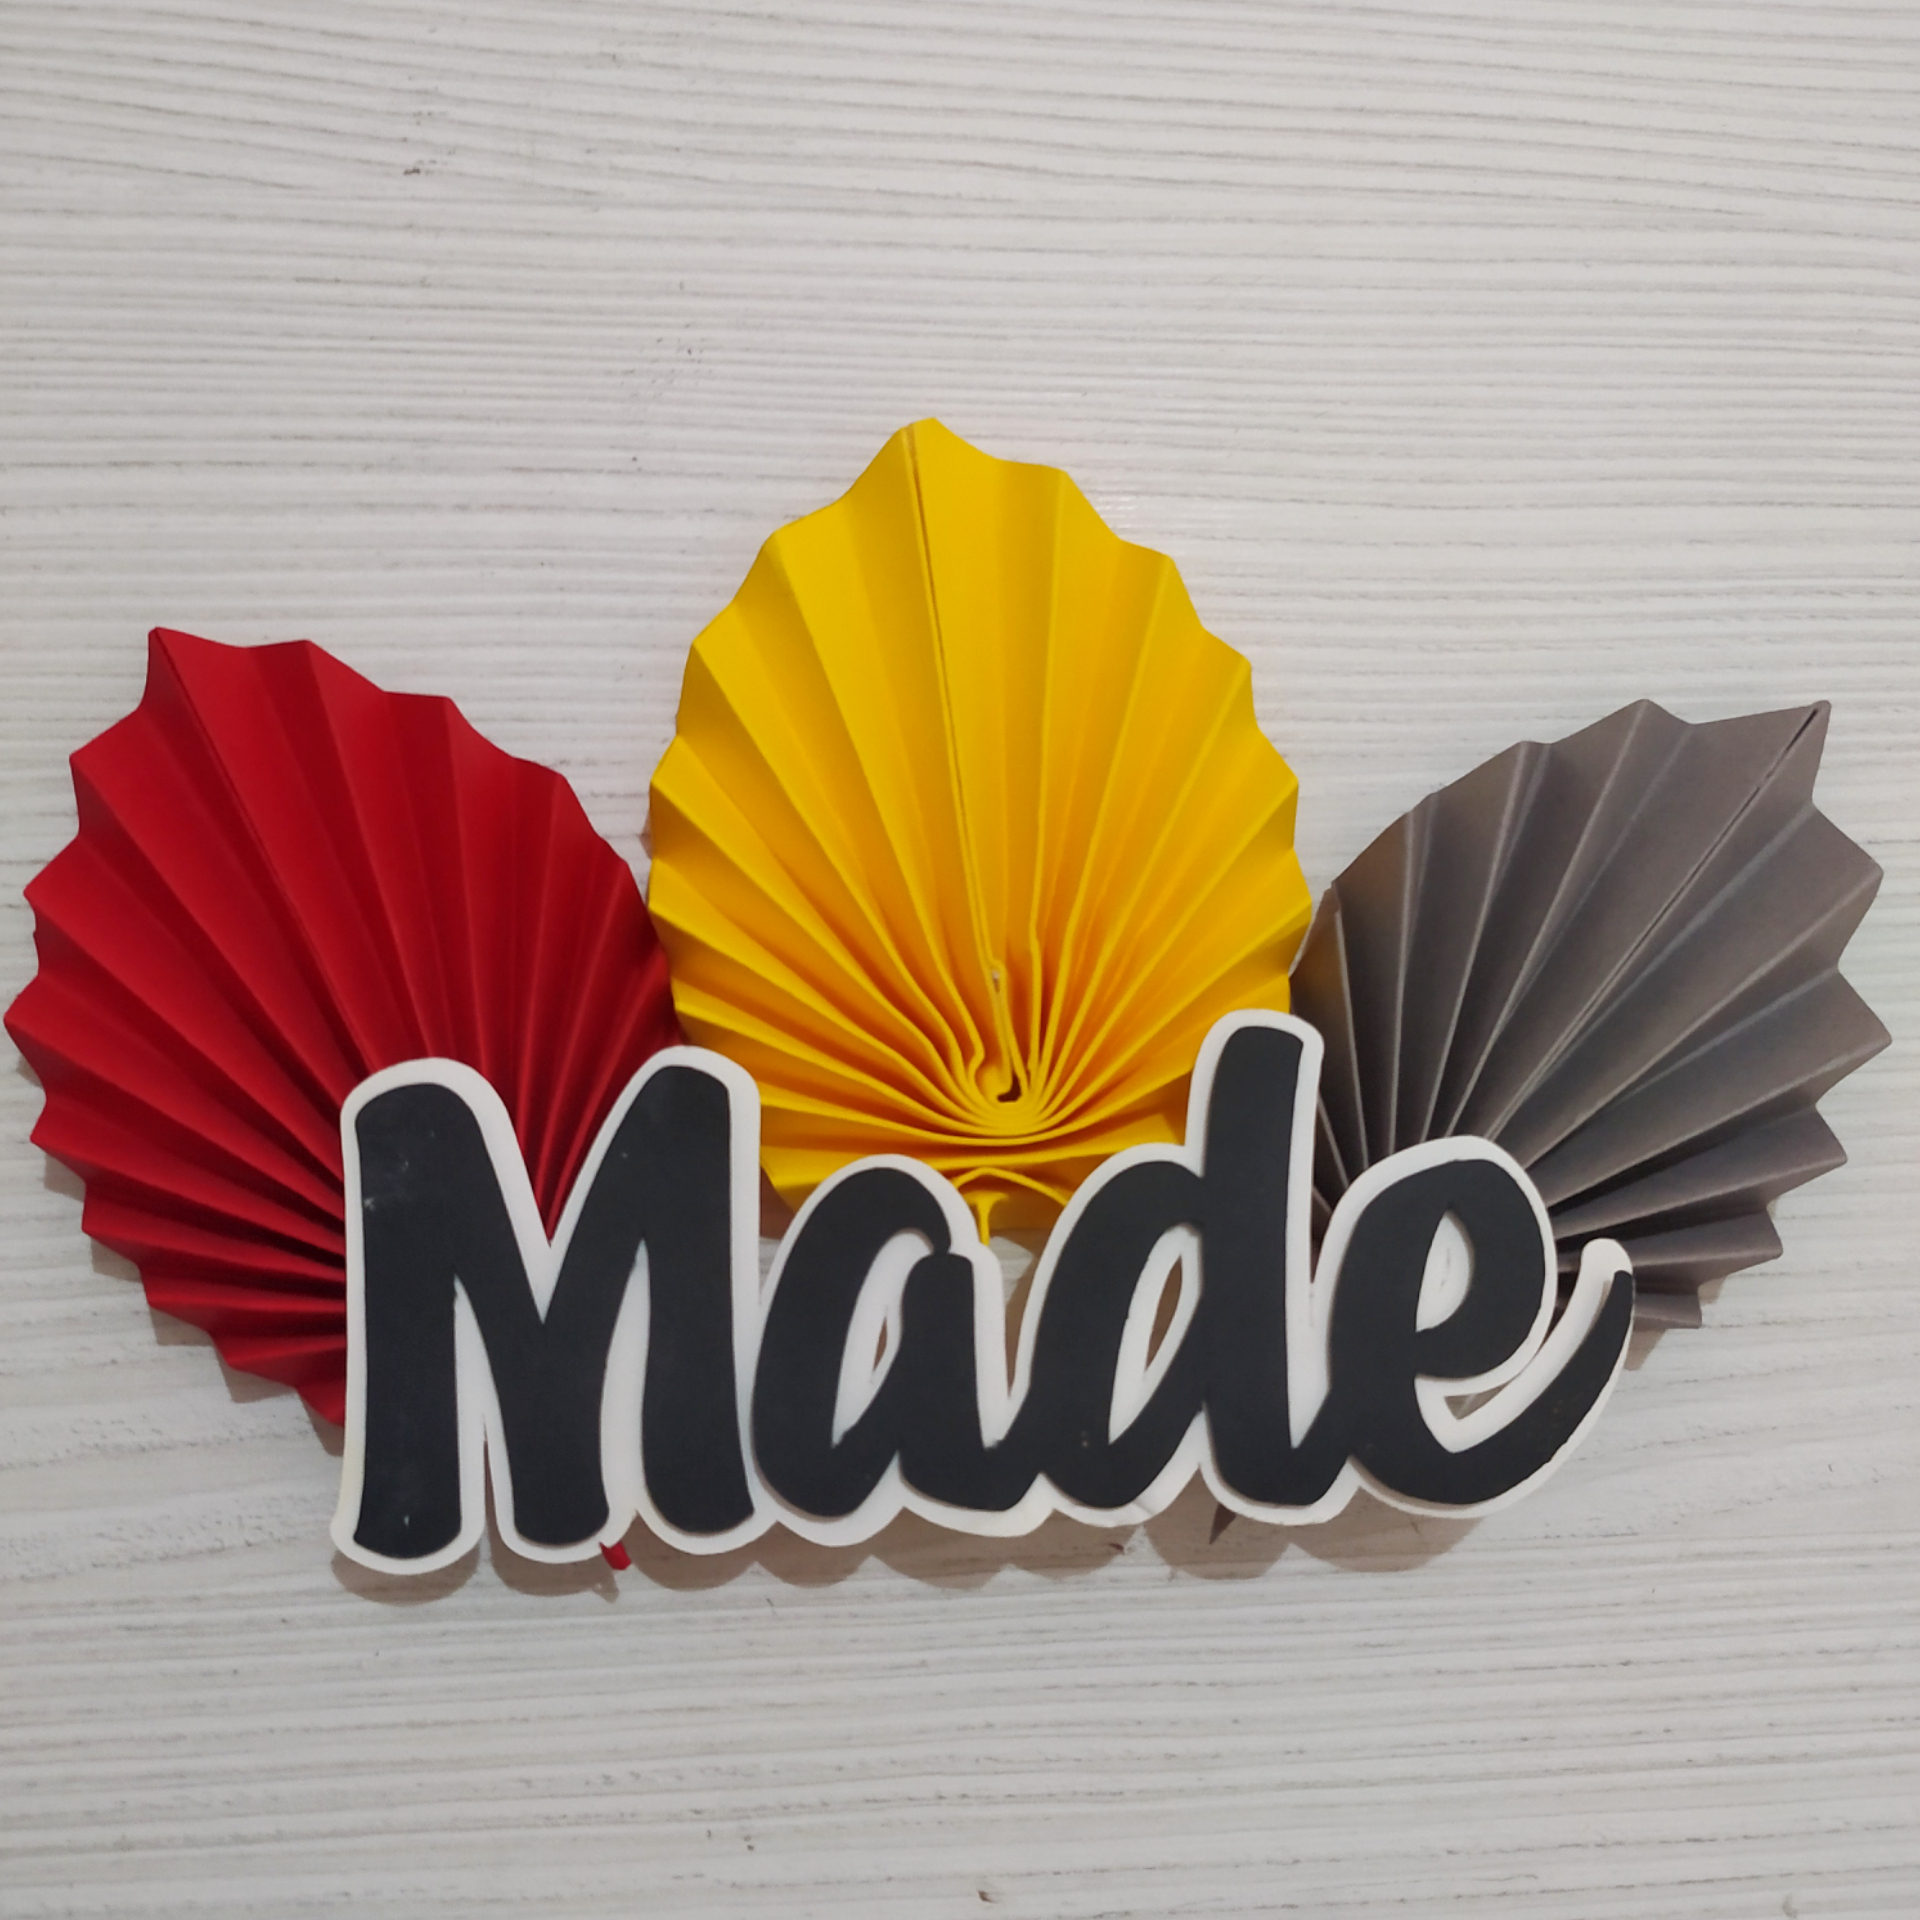
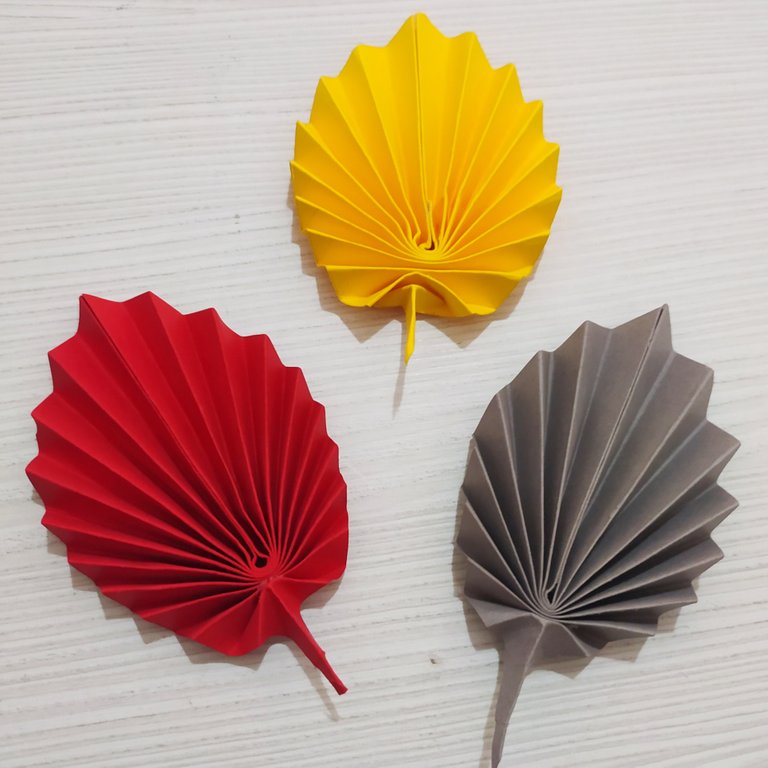
Hola amigos de Hive ¿Cómo están? Espero estén teniendo un hermoso día. Hoy quiero mostrarles como hacer palmas de papel, esta es una decoración sencilla que se encuentra entre las tendencias de decoraciones para tortas, aunque también se pueden usar para decorar otras cosas.
La mejor parte es que es muy sencillo y económico de hacer, y da un aspecto sobrio y elegante a las decoraciones.
Hi Hive friends, how are you? I hope you are having a beautiful day. Today I want to show you how to make paper palms, this is a simple decoration that is among the trends in cake decorations, although they can also be used to decorate other things.
The best part is that it is very simple and inexpensive to make, and it gives a sober and elegant look to the decorations.
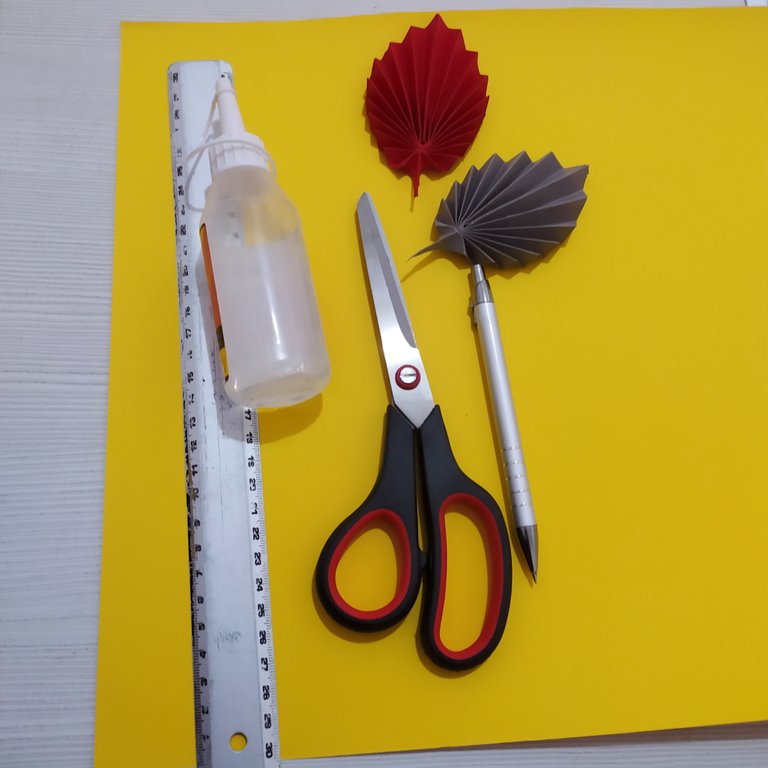
Materiales/Materials
- Cartulinas de colores
- Regla
- Tijera
- Silicón
- Colored paper
- Rule
- Scissor
- Silicone
Proceso/Process
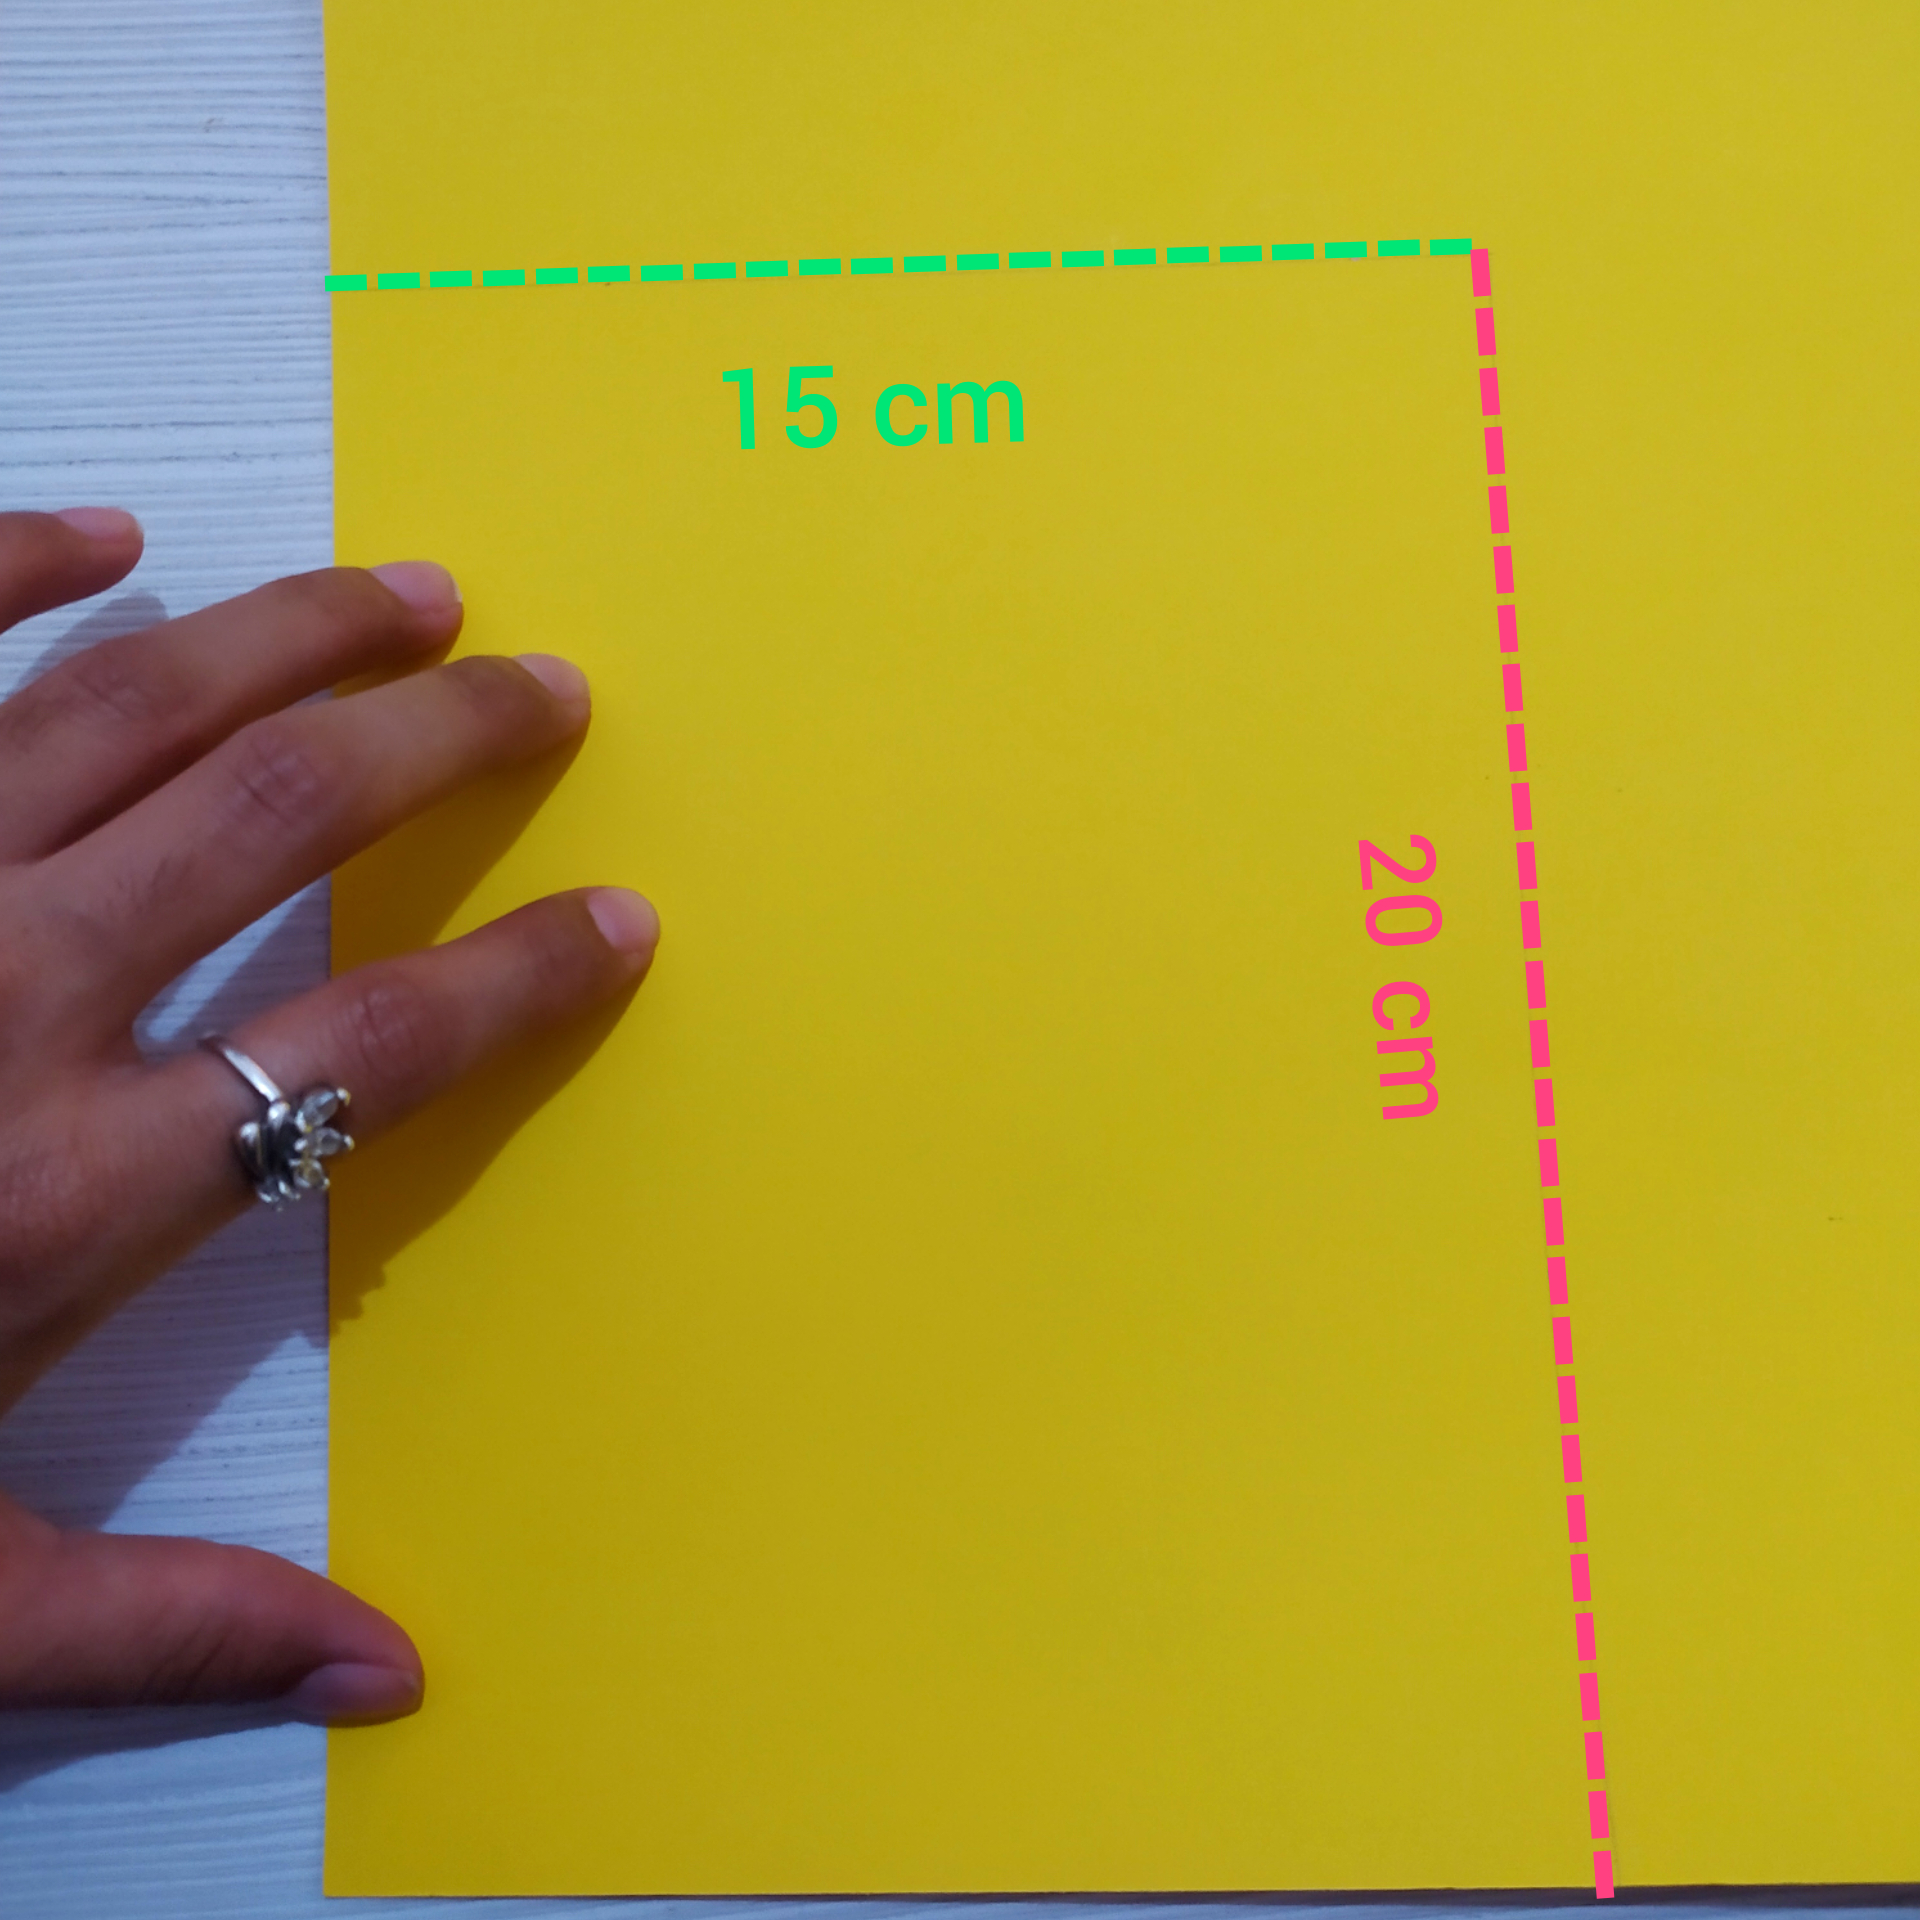
Comenzamos marcando en el papel un rectángulo de 20 x 15 cm (con estas medidas el tamaño final de las palmas es 8 aprox). Puede ajustar las medidas según cuán grande o pequeño lo desee.
We start by marking on the paper a rectangle of 20 x 15 cm (with these measurements the final size of the palms is 8 approx). You can adjust the measurements based on how big or small you want it.
Luego marcamos el centro de uno de los lados más pequeños del rectángulo (en este caso la mitad seria en 7.5 cm). Con ayuda de este punto trazamos desde las dos esquinas contrarias para así formar un triangulo.
Then we mark the center of one of the smaller sides of the rectangle (in this case the half would be 7.5 cm). With the help of this point we draw from the two opposite corners to form a triangle.
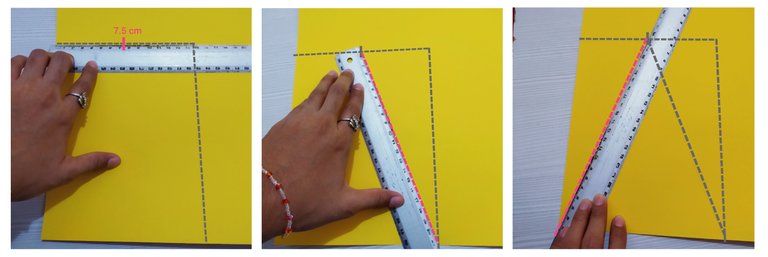
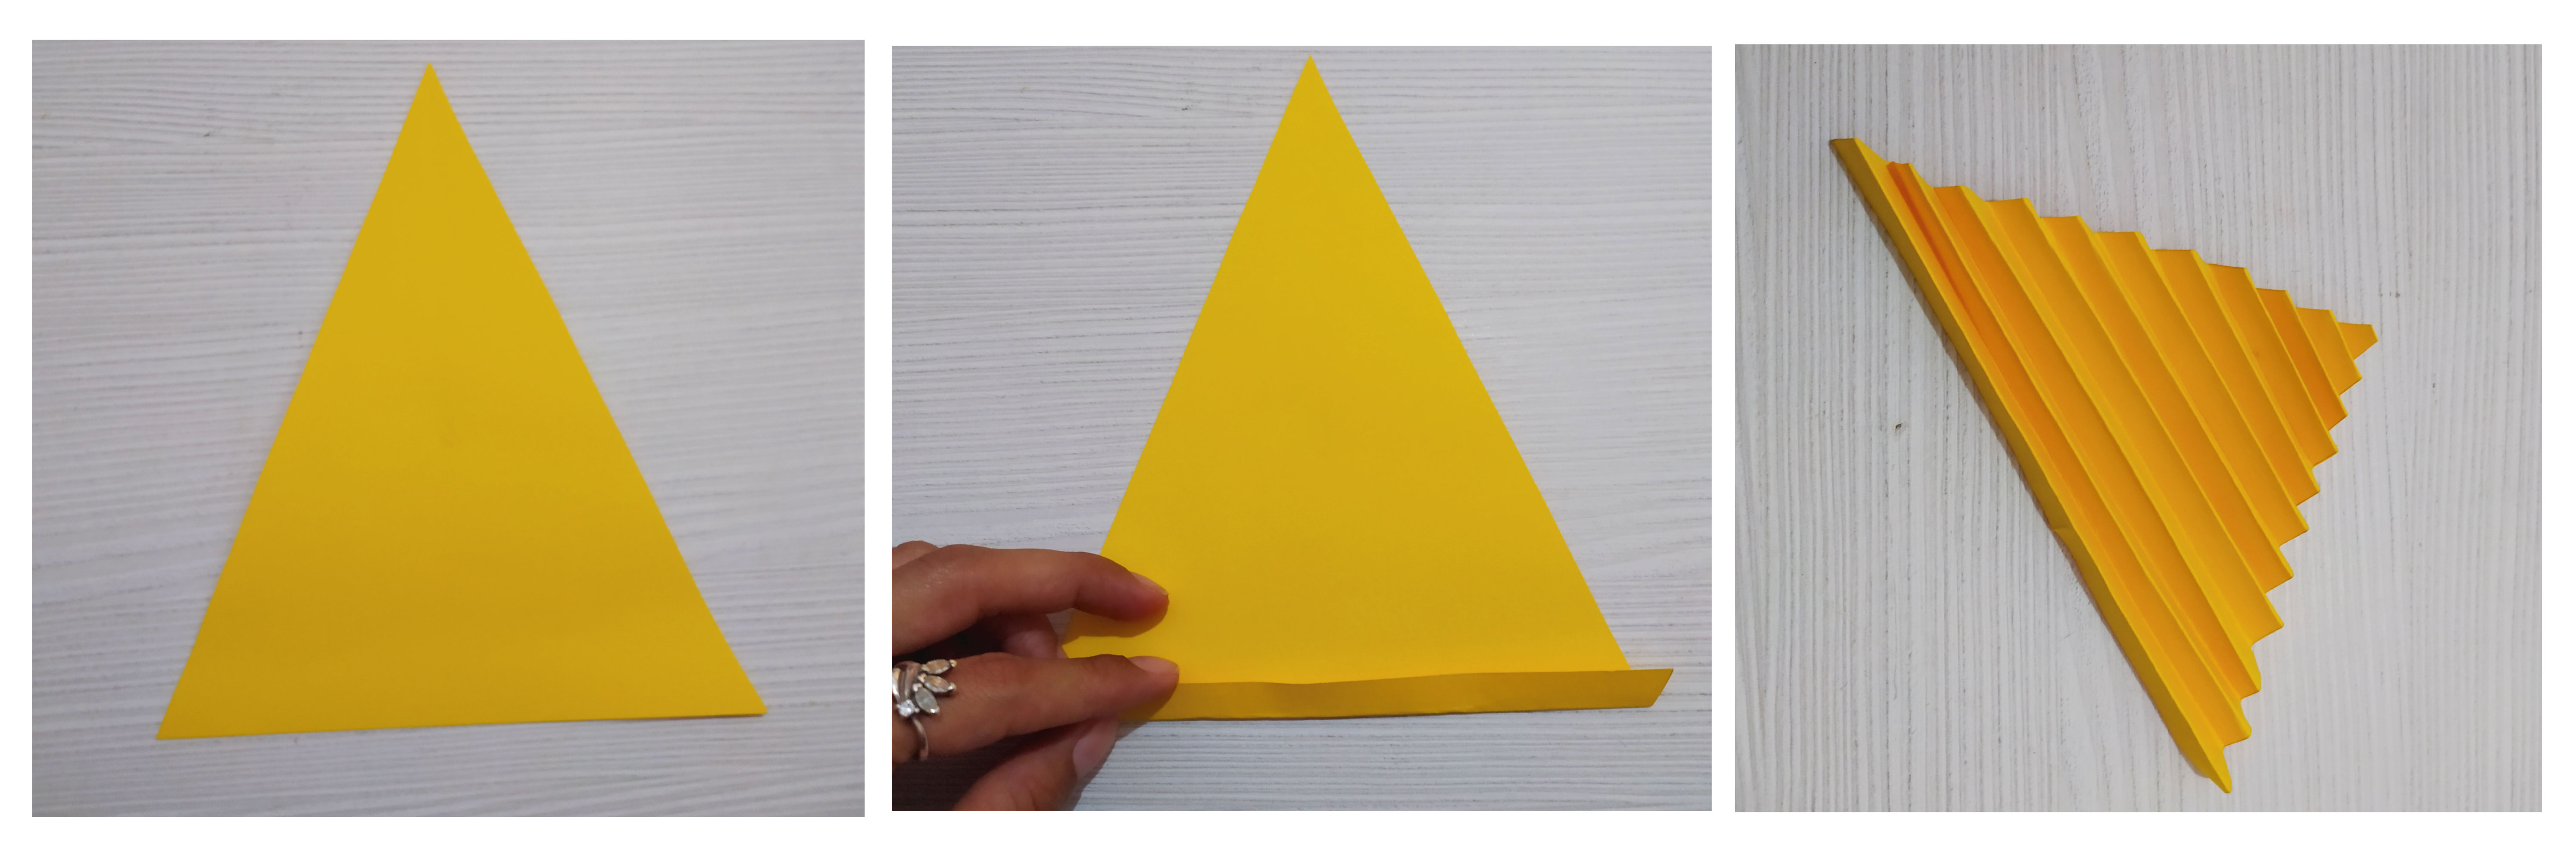
Procedemos a cortar el triangulo para luego comenzar a hacer pliegues de 1 cm de grosor aproximadamente, partiendo desde la parte más ancha del triangulo.
We proceed to cut the triangle and then begin to make folds approximately 1 cm thick, starting from the widest part of the triangle.
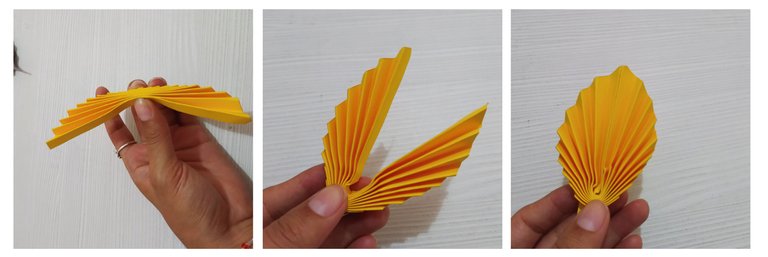
Una vez que terminados los pliegues, doblamos por la mitad de manera que las dos puntas de los extremos queden parejas entre sí para lograr la forma de palma, y pegamos ambas caras con silicón para fijar.
Once the folds are finished, we fold in half so that the two ends of the ends are even with each other to achieve the palm shape, and we glue both sides with silicone to fix.
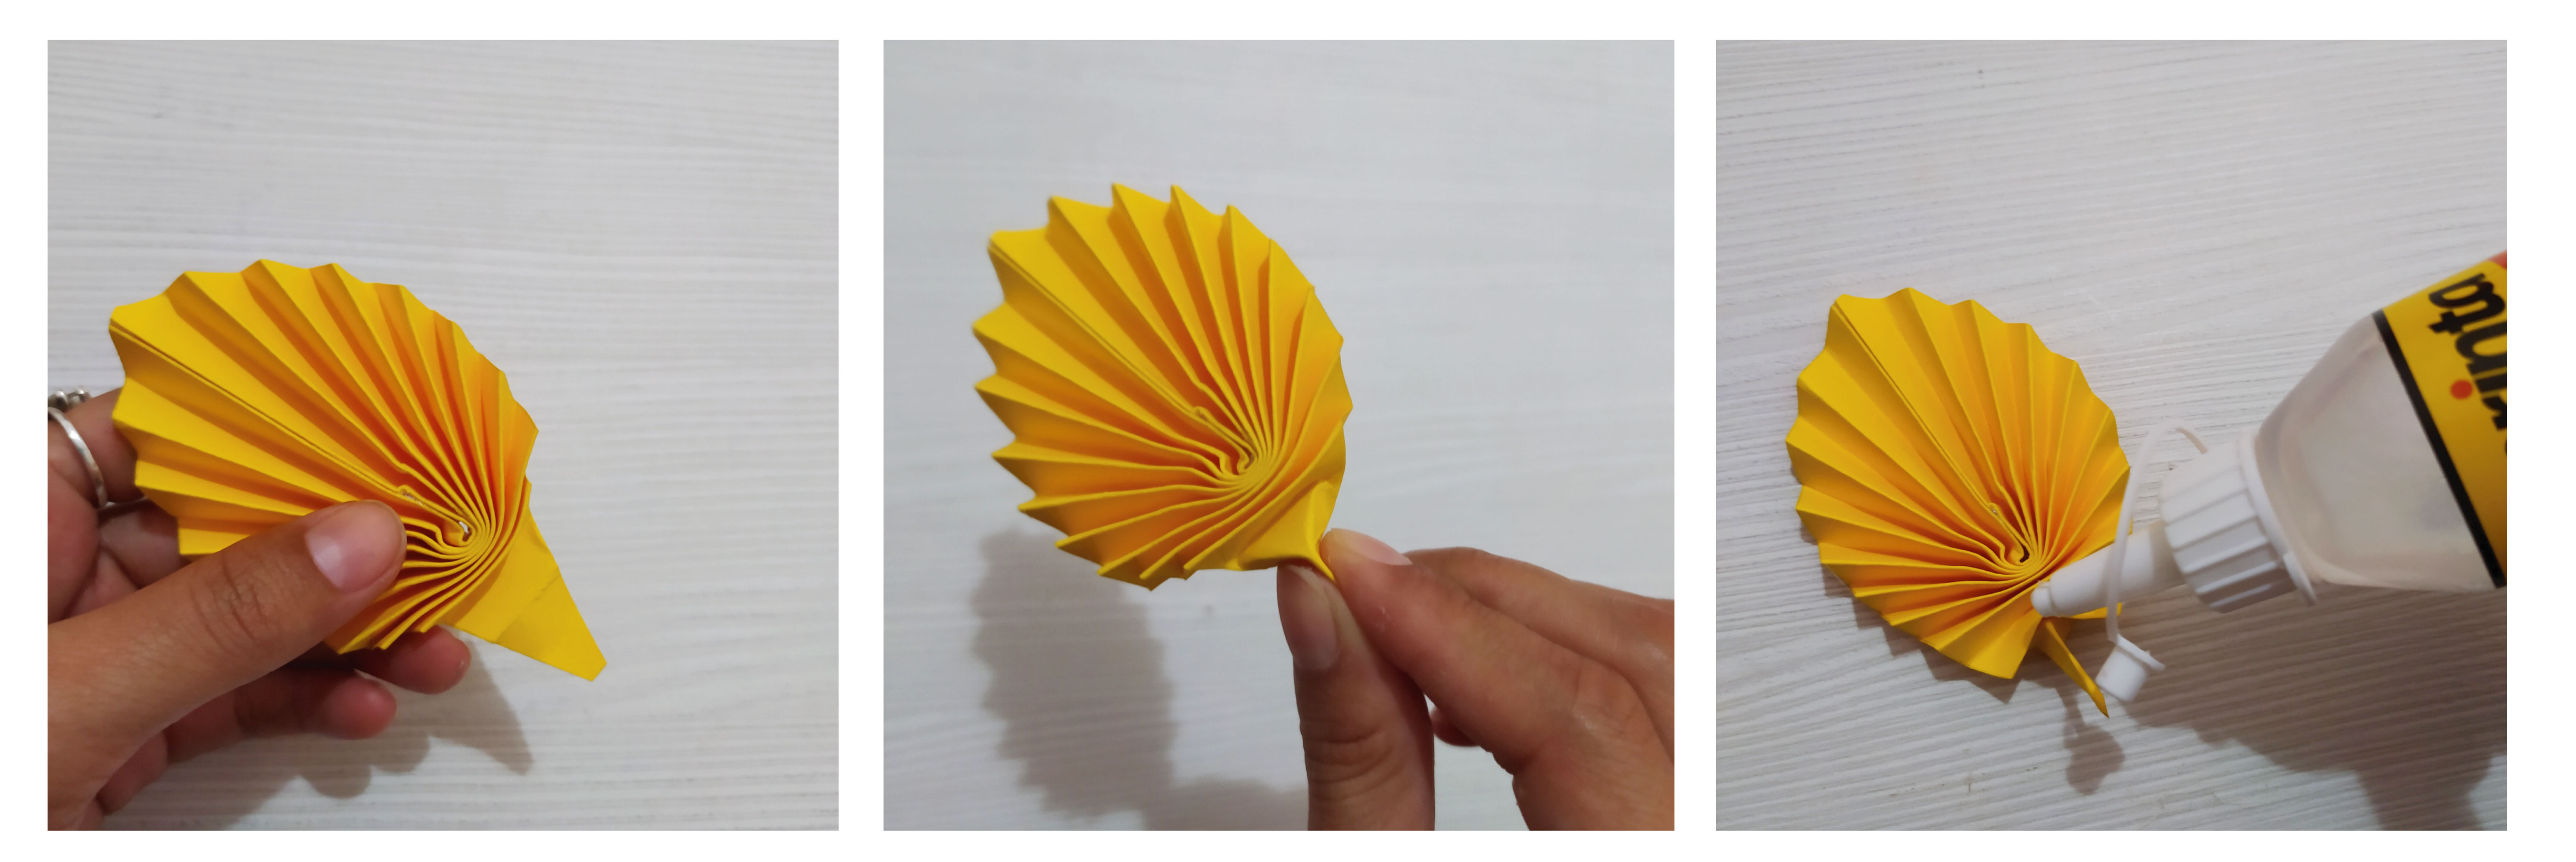
Para culminar en los últimos tres pliegos más pequeños hacemos un pellizco para que sea el principio del tallo y si lo prefiere puede pegar un palillo en la parte trasera de la palma, y listo estará lista para decorar tu pastel o lo que prefieras.
To culminate in the last three smaller sheets we make a pinch so that it is the beginning of the stem and if you prefer you can stick a toothpick in the back of the palm, and it will be ready to decorate your cake or whatever you prefer.
Espero que este tutorial les sea de utilidad y puedan crear cosas muy bellas. Hasta pronto. 💚
I hope this tutorial is useful for you and you can create very beautiful things. See you soon. 💚
SALUDOS / REGARDS 👋
Todas las fotos fueron tomadas con mi celular Xiaomi Note 8
Contenido original de @cutmadeart (fotos y texto) - Todos los derechos reservados Publicado en HIVE.
All Photos are my property. I use Xiaomi Note 8.
** Original content from @cutmadeart (photos and text) ** - All rights reserved Posted on HIVE.