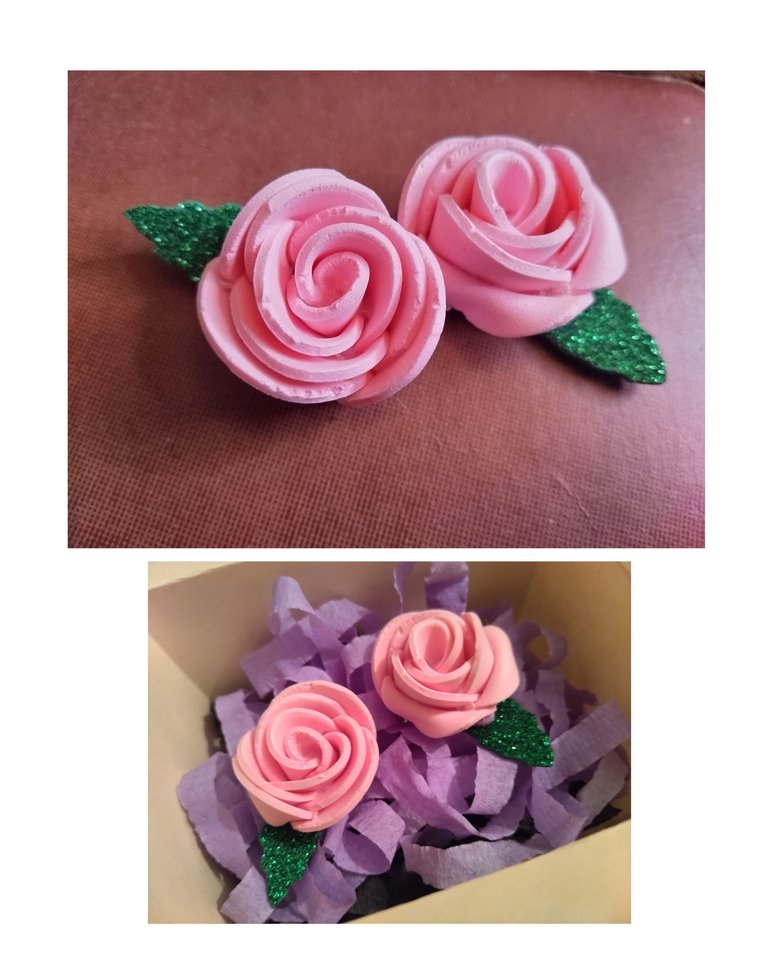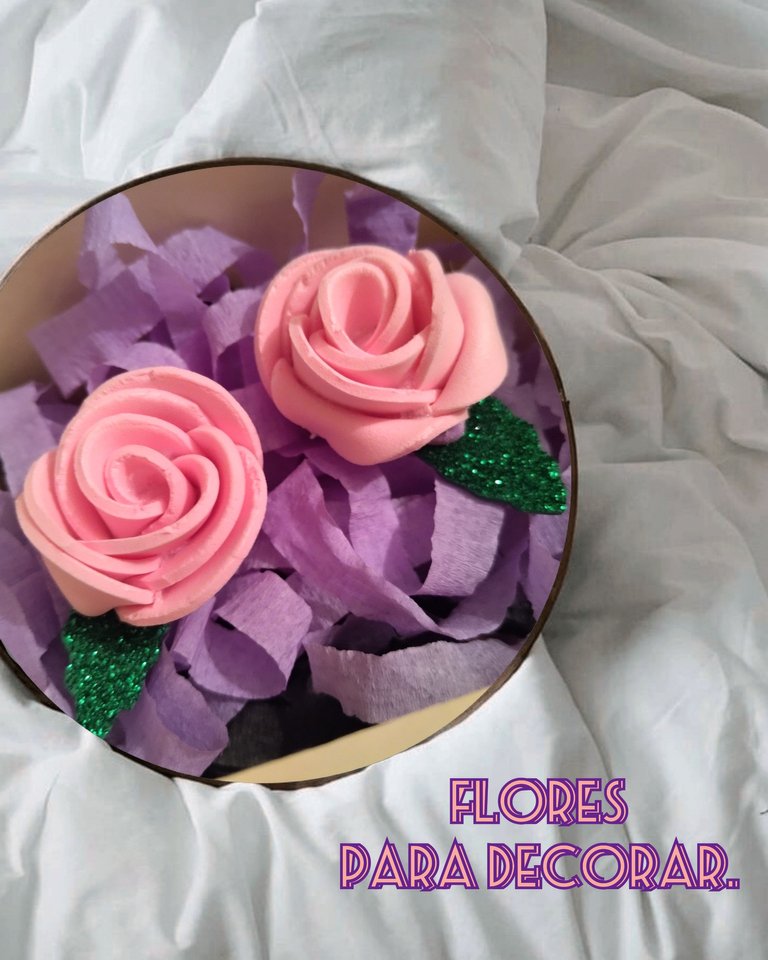
Hola mis amores 😘 ¿cómo están? espero que bien. Mi publicación de hoy está dedicada desde ya a todas las mujeres del mundo que de alguna manera u otra han desempeñado el rol de madre. Para ellas son estas lindas flores que hice hoy. Igualmente es un regalo para todas las manualistas y artesanas que deseen incorporar flores variadas en sus próximos arreglos para obsequiar a las madres en su día.
Hello my loves 😘 how are you? I hope you are doing well. My today's post is dedicated to all the women in the world who in one way or another have played the role of mother. For them are these pretty flowers that I made today. It is also a gift for all the craftswomen and artisans who wish to incorporate a variety of flowers in their next arrangements to give to mothers on their day.

Flores: modelo 1.
Flowers: model 1.
Lo que más me gusta de hacer este tipo de flores es que en una sola labor obtenemos dos florecitas. Además las podemos hacer del tamaño que necesitamos sin necesidad de variar el patrón. Otro aspecto que vale la pena resaltar es que podemos usar todos los retazos de foami que nos van quedando y hacer flores de diferentes tamaños. Es conveniente para nosotros tener una cajita llena de flores por si en un momento menos pensado tenemos que decorar un empaque o bolsa 🛍️. Sin más te cuento cómo se hacen.
What I like most about making this type of flowers is that in a single work we get two little flowers. Besides, we can make them in the size we need without having to change the pattern. Another aspect worth noting is that we can use all the scraps of foami that we have left and make flowers of different sizes. It is convenient for us to have a box full of flowers in case we need to decorate a package or bag 🛍️. Without further ado, I will tell you how to make them.
MATERIALES. MATERIALS.
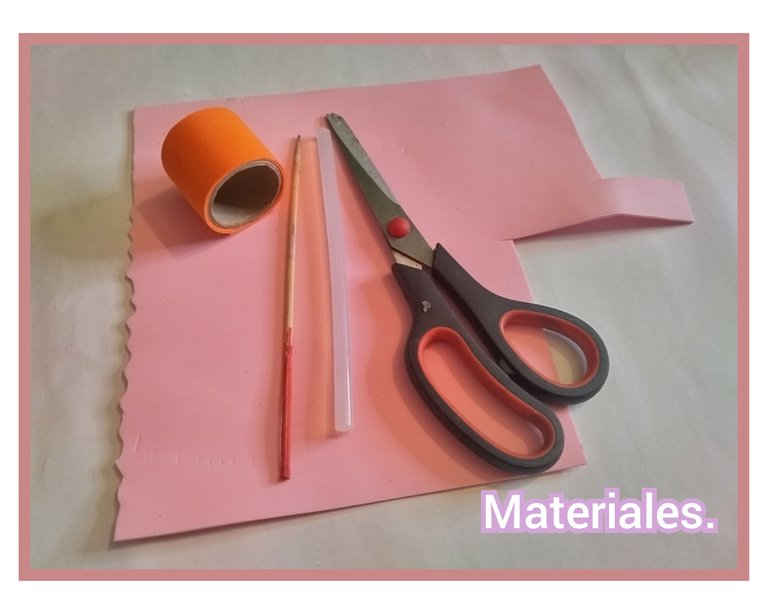
Los materiales que usé para realizar estas hermosas flores son:
- Foami liso y escarchado.
- Silicón en barra.
- Tijeras.
- Un círculo pequeño.
- Palito de altura.
The materials I used to make these beautiful flowers are:
- Smooth and frosted Foami.
- Silicone stick.
- Scissors.
- A small circle.
- A small circle.
PROCEDIMIENTO. PROCEDURE.
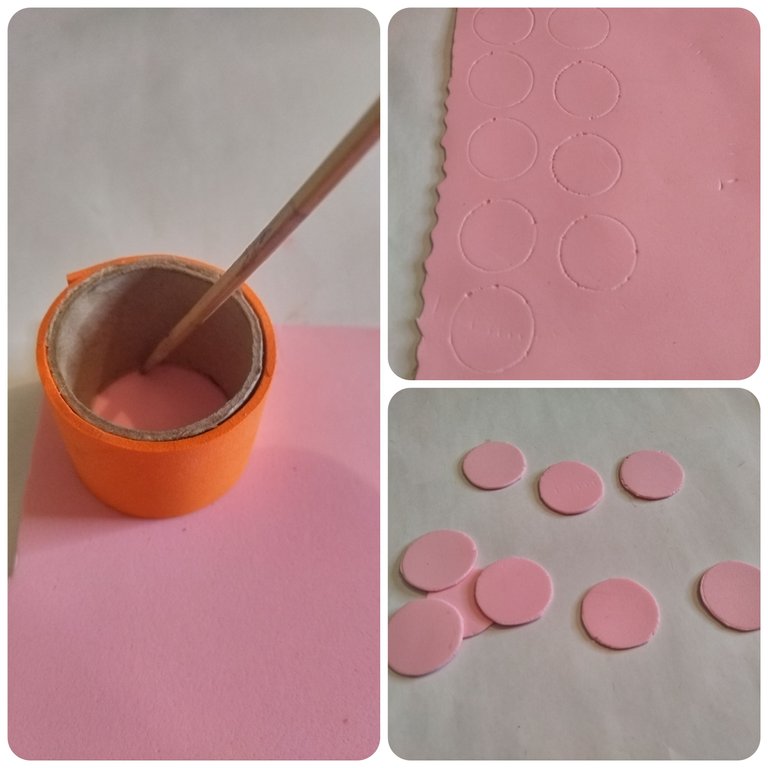
Para empezar vamos a tomar el círculo que elegimos, este lo vamos a montar sobre el foami rosado para marcar con el palito de altura y luego cortar. El tamaño del círculo dependerá del que necesites para hacer tus flores. Igualmente la cantidad de círculos, para mí flor yo realicé solo 9 círculos.
To start we will take the circle we chose, we will mount it on the pink foami to mark it with the height stick and then cut it. The size of the circle will depend on the size you need to make your flowers. Also the number of circles, for my flower I made only 9 circles.
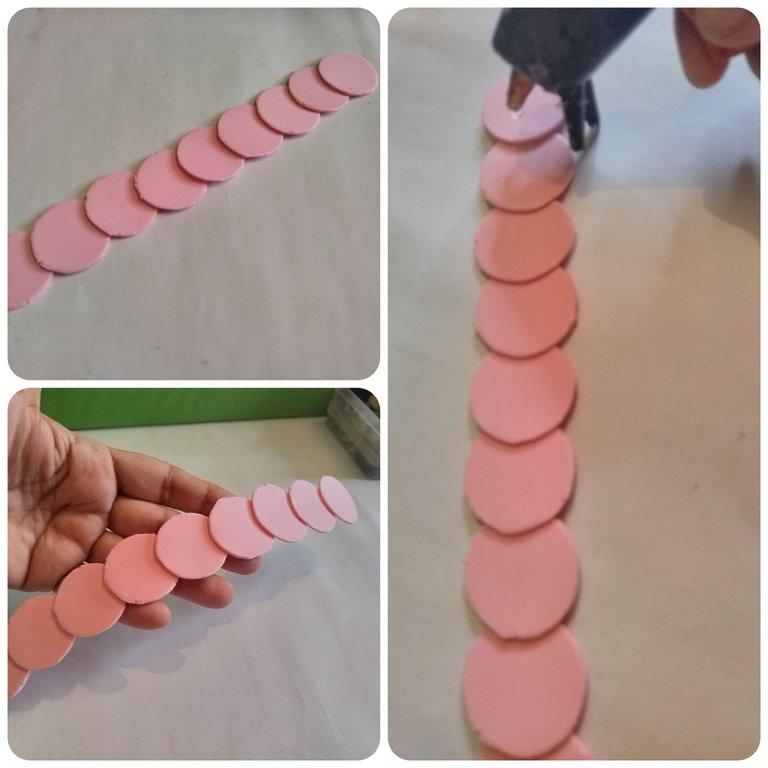
El siguiente paso es unir cada uno de los círculos para formar con ellos una larga tira. Como ves, solo vamos a colocar pegamento en una de las orillas del círculo para pegar el otro. Repetimos este paso hasta que hayamos pegado todos los círculos.
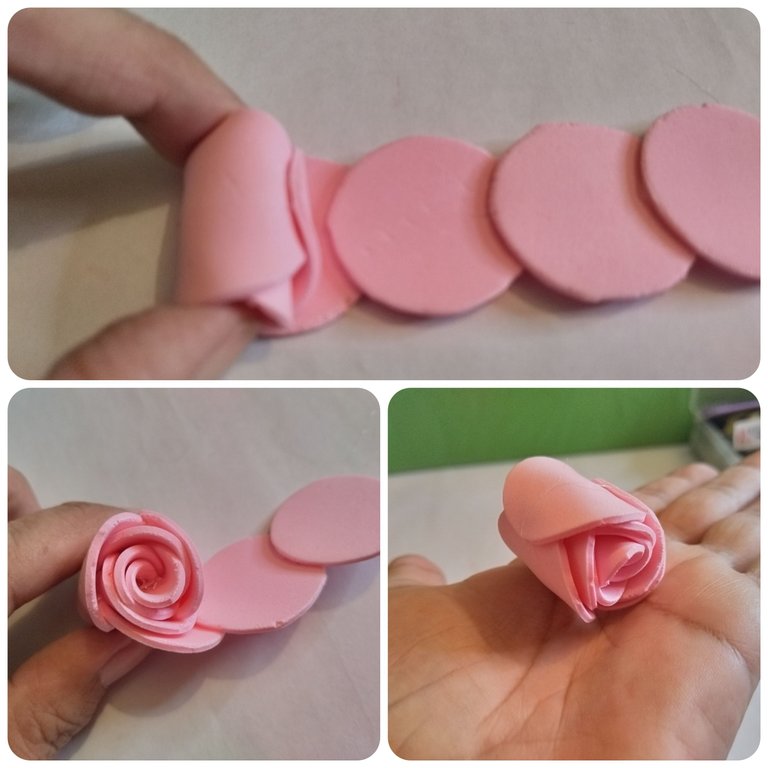
Inmediatamente colocamos pegamento desde uno de los extremos por todo el medio de la tira.
- The next step is to join each of the circles together to form a long strip. As you can see, we are only going to put glue on one of the edges of the circle to glue the other one. We repeat this step until we have glued all the circles together.
- Immediately place glue from one of the ends all the way down the middle of the strip.
- A medida que vamos poniendo el silicón iremos enrollando para formar las dos florecitas.
- As we put the silicone on, we will roll it up to form the two little flowers.
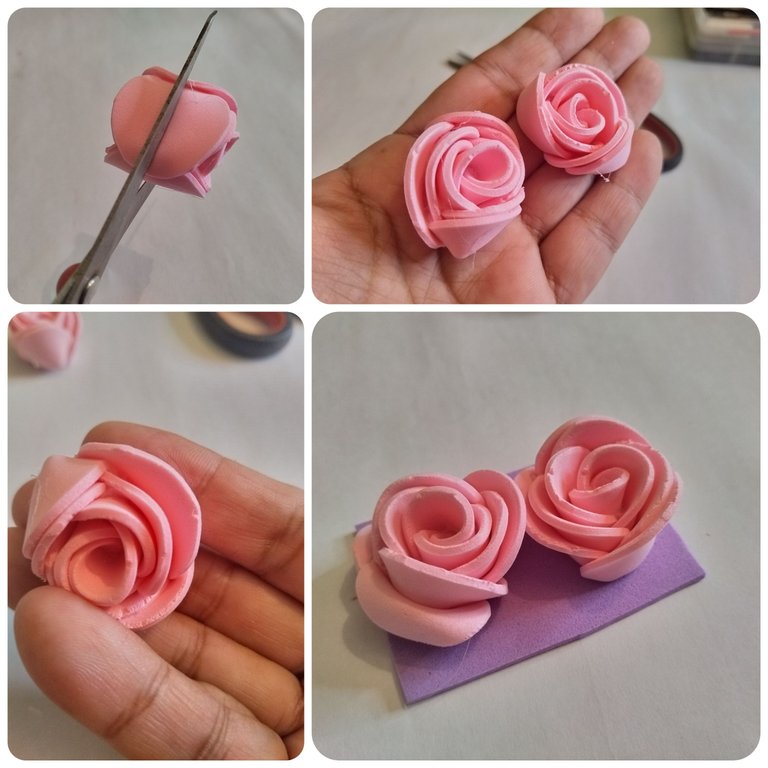
- Una vez enrollada la tira procedemos a cortar por todo el medio para obtener de este modo las dos flores. Con otro trocito de foami le hacemos una tapita o base a cada flor.
- Once the strip is rolled up, we proceed to cut all around the middle to obtain in this way the two flowers. With another small piece of foami we make a cap or base for each flower.
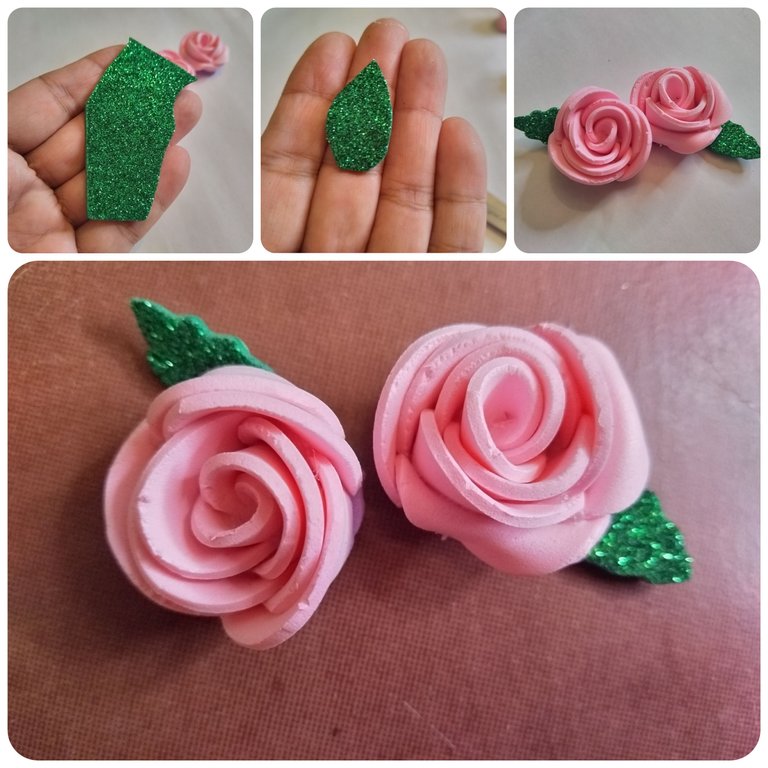
- Por último hacemos unas hojitas con el foami escarchado color verde y las pegamos debajo de la flor. Puedes colocar una o dos hojas. Y así deben verse.
- Finally we make some leaves with the green frosted foami and glue them under the flower. You can place one or two leaves. And this is how they should look.
Este es el primero de varios modelos de flores que estaré compartiendo en estos días. No tendrás excusas para no decorar o regalar flores a estas mujeres tan bellas y relevantes de nuestras vidas. También te servirán para decorar proyectos en cualquier otra ocasión especial. Si lo deseas también puedes utilizar otro material para hacerlas como el papel o la cartulina, todo depende de tu gusto y disponibilidad de materiales.
This is the first of several models of flowers that I will be sharing these days. You will have no excuses not to decorate or give flowers to these beautiful and relevant women in our lives. You can also use them to decorate projects for any other special occasion. If you want you can also use other materials to make them such as paper or cardboard, it all depends on your taste and availability of materials.
Espero que te sea útil este tutorial y te animes a hacerlas. Muchas gracias por tu apoyo. Todas las fotos son de mi propiedad. Edité con Polish. Usé el traductor de Deepl. Hasta la próxima. Bendiciones 🙏.
I hope you find this tutorial useful and I encourage you to make them. Thank you very much for your support. All photos are my property. I edited with Polish. I used Deepl translator. see you next time. Blessings 🙏.
