English
Greetings to all my fellow Hive members, I hope you are well. I know you haven't seen much of me these days and it's not because I'm on vacation, far from it. I wish I was going out these days even if it is to some town near where I live but I am not. Well I tell you that I've been doing this construction for days but as I had many pauses I didn't finish it quickly, today I could finish it and I show it to you down here.
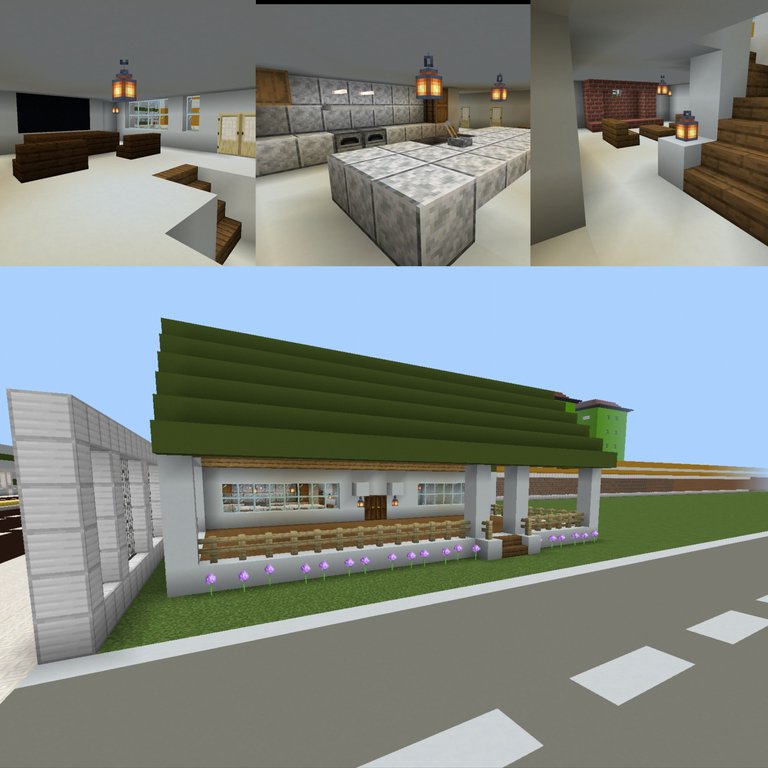
It is a new residential area, right next to "Conjunto Residencial Puntarenas", I show you the design of the houses since all of them will be the same as the one I brought you in the post.
Construction process
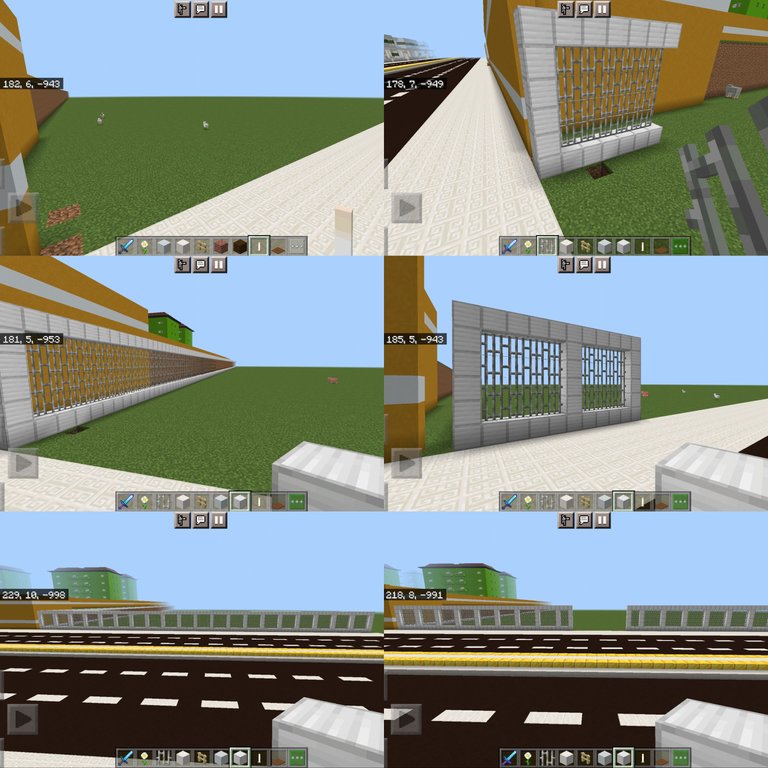
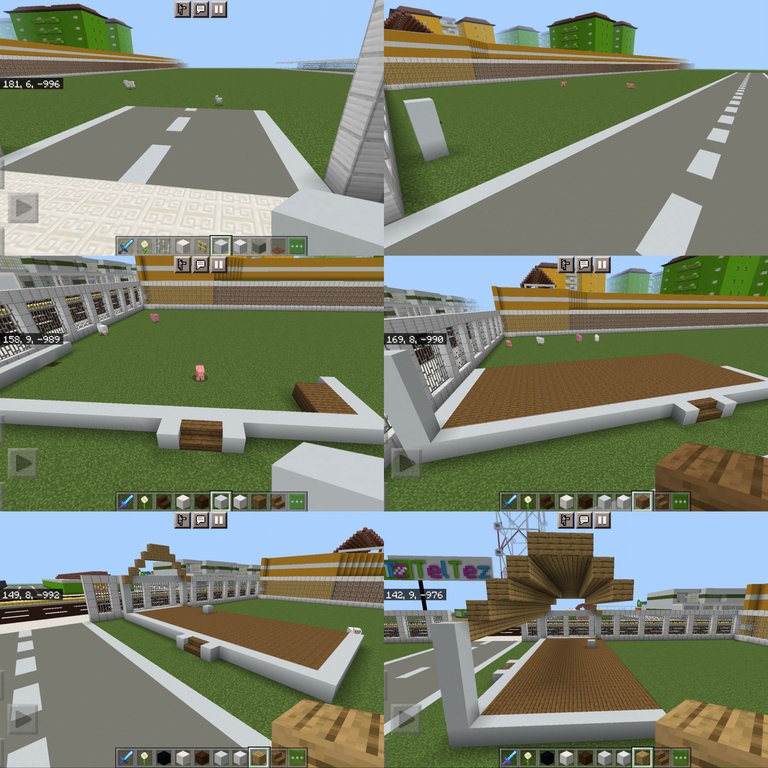
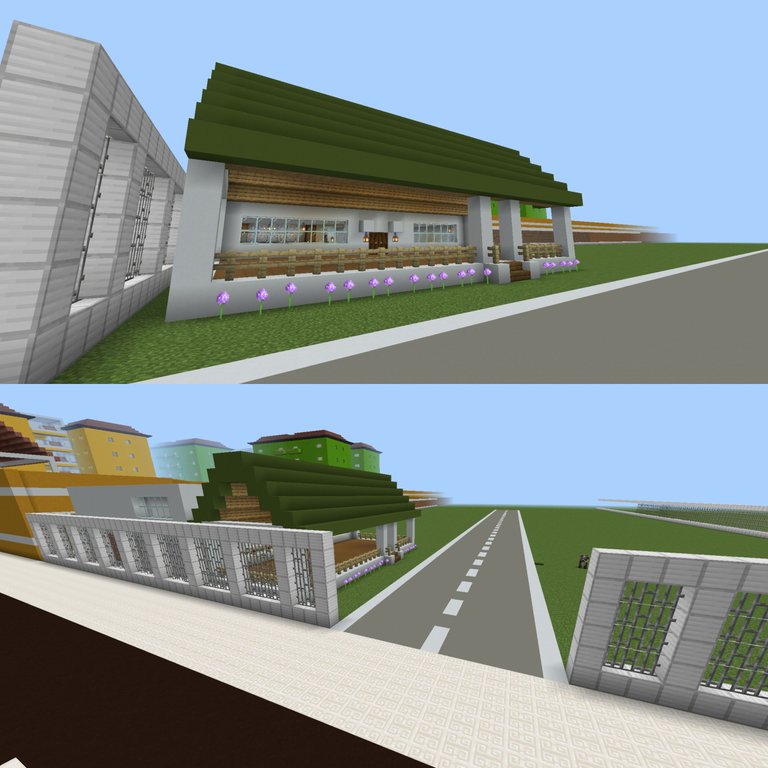
The first thing was to make the fence with iron (bars and block) in a rectangle, then in the center a concrete road, on the sides would go the houses.
A considerable space was left for a small front garden in each house and the construction process began.
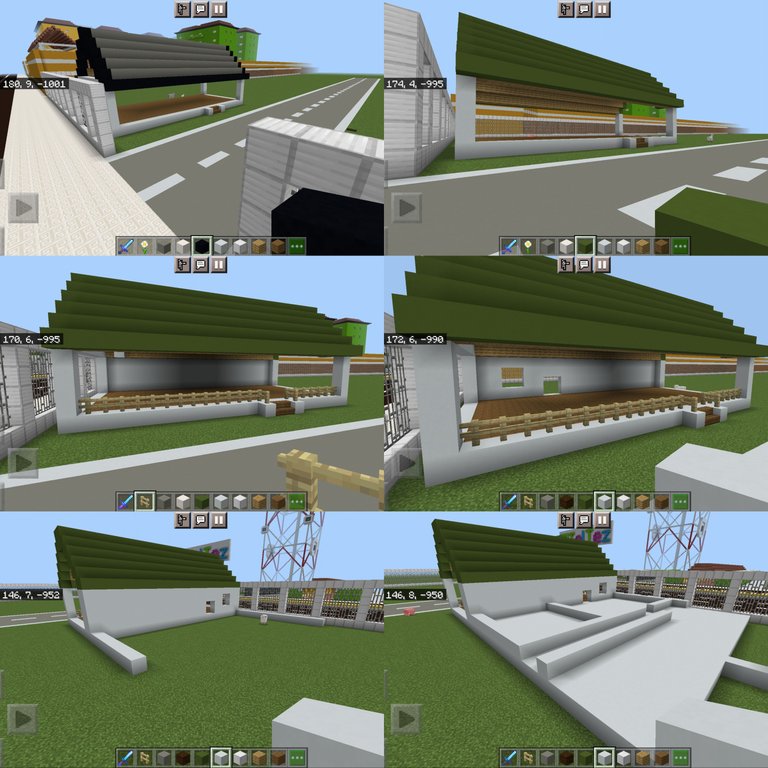
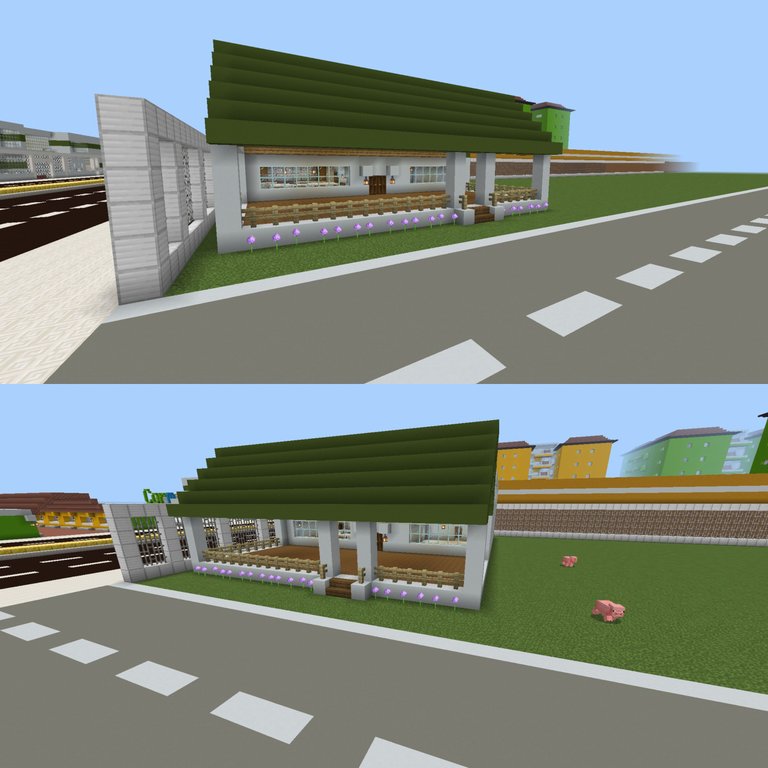
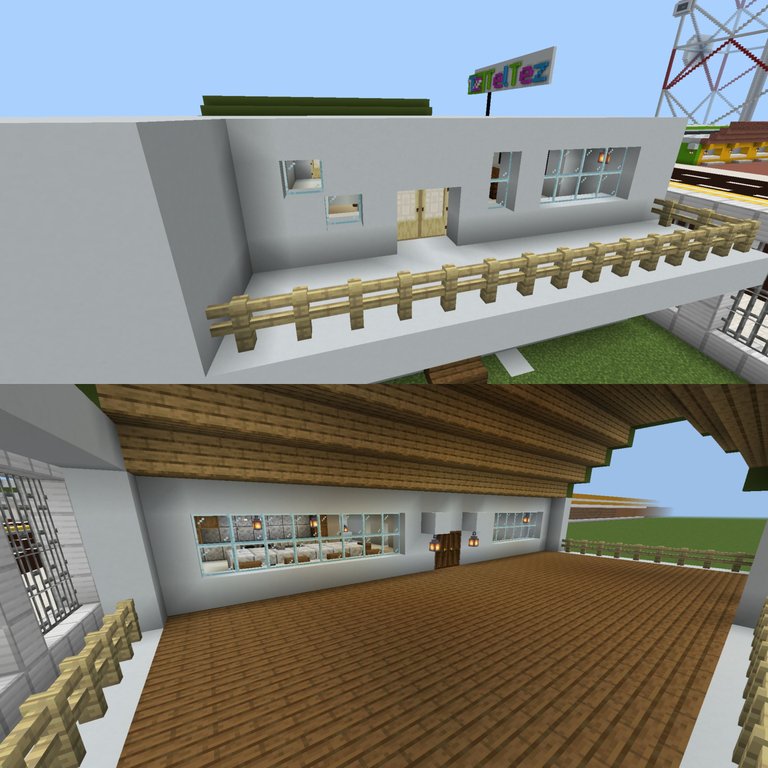
A pillar was placed and the front part of the house was marked, which would be a porch made with wood both on the floor and on the roof, the one on the floor a little darker than the one on the roof. When all the pillars were placed, in the outer part of the roof was placed gray concrete that then changed to green as it looked better in this color (this to simulate the mantle that is placed on top of the wood). Fences were placed around this porch and a wall that would divide the access to the house.
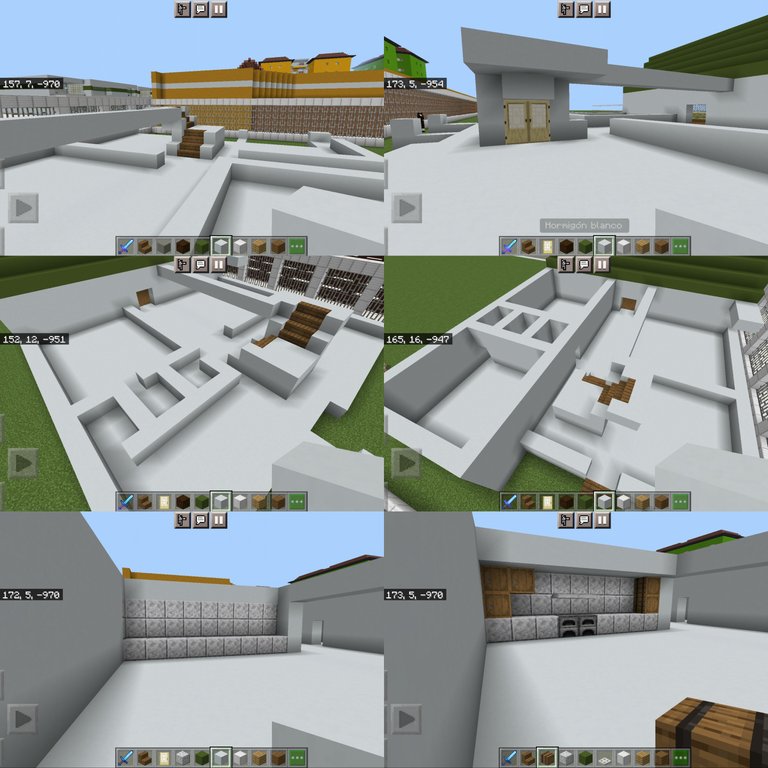
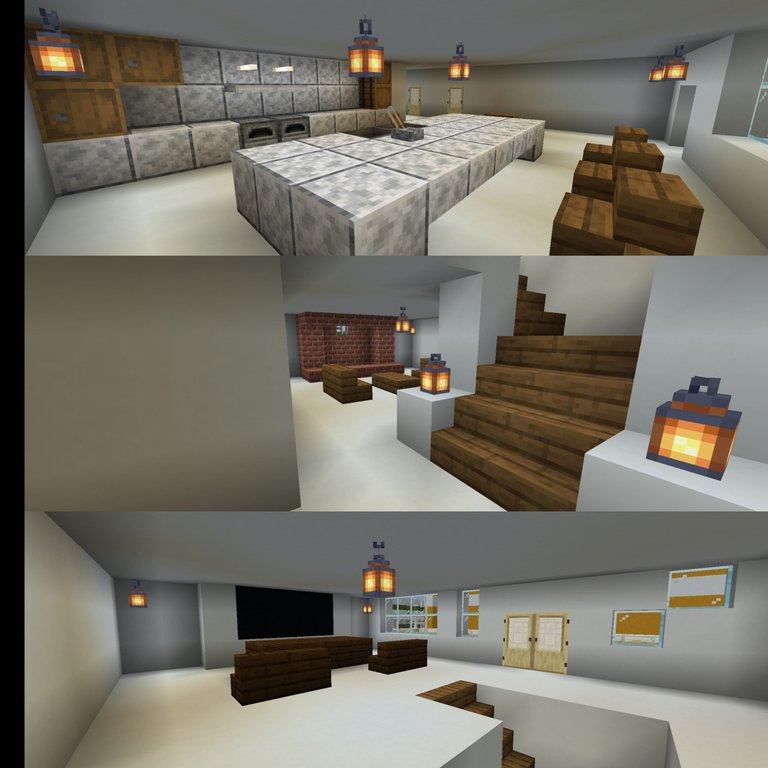
For the internal part of the house the floor was filled with white concrete, each section of the house was divided; when you enter the house you find the kitchen and the dining room, on the right hand side there is a room, in the front the stairs, next to this another room, bathrooms and a small living room.
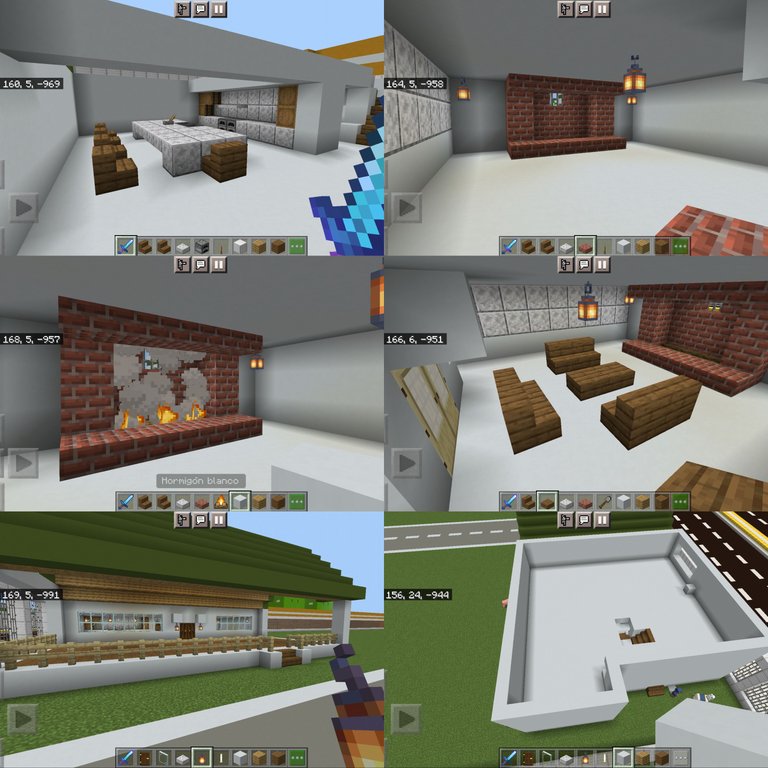
For the construction of the kitchen, diorite was used for the countertop as well as for the design of the kitchen, barrels, ovens, trap doors, a cauldron with a lever to simulate the sink and some seats around it. The room next to the stairs was built with a fireplace and some seats with a table.
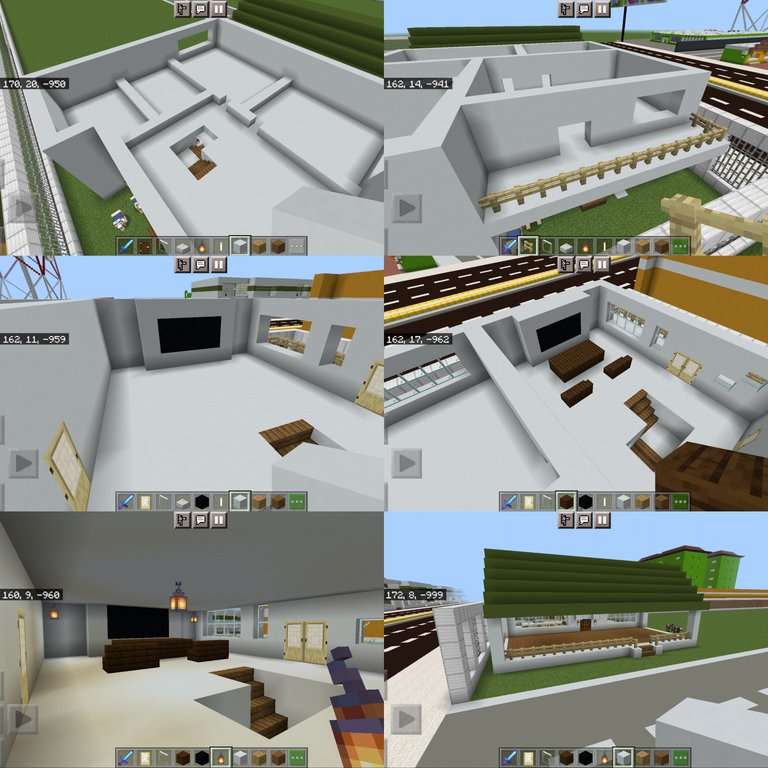
We do not go now to the second floor where more rooms were placed, a balcony, a living room with TV and seats, and some windows were placed around it.
The final touches of the house were flowers in the front part, placing all the lighting being lanterns and placing the rest of the windows. Here below you can see the final result, but be of your liking, see you in a next post I hope it will be soon. Greetings.
Español
Un saludo a todos mis compañeros de Hive, espero se encuentren bien. Se que no me han visto mucho estos días y no es porque esté de vacaciones ni mucho menos. Ojala fuera salido estos días aunque sea a algún pueblo cerca de donde vivo pero no. Bueno les comento que hace días que vengo haciendo está construcción pero como hacia muchas pausas no la terminé rápido, hoy pude terminarla y se las muestro acá abajo.
Se trata de una zona residencial nueva, justo al lado de "Conjunto Residencial Puntarenas", les muestro el diseño de las casas ya que todas seran iguales a esta que les traje en el post.
Proceso de construcción
Lo primero fue realizar el cercado con hierro (barrotes y bloque) en todo un rectángulo, luego en el centro una carretera de hormigón, a los lados irían las casas.
Se dejó un espacio considerable para un pequeño jardín frontal en cada casa y se inició el proceso de esta.
Se colocó un pilar y se fue marcando la parte frontal de la casa la cual sería un porche hecho con madera tanto en el suelo como en el techo, la del suelo un poco más oscura a la del techo. Cuándo se colocaron todos los pilares, en la parte exterior del techo se le colocó hormigón gris que luego cambio a verde ya que se veía mejor en este color (esto para simular el manto que se le colocan encima de la madera). Se colocaron vallas alrededor de este porche y una pared que dividiría el acceso a la casa.
Para la parte interna de la casa se relleno al suelo todo con hormigón blanco, se dividió cada sección de la casa; al entrar te topas con la cocina y el comedor, a mano derecha queda una habitación, en el frente las escaleras, a lado de esta otra habitación, baños y una pequeña sala.
Para la construcción de la cocina se utilizó diorita tanto en el mesón como para el diseño de esta, se colocaron barriles hornos, trampillas, un caldero con una palanca para simular el fregadero y algunos asientos al rededor. La sala que quedó al lado de las escaleras se le construyó una chimenea y algunos asientos con mesa.
No vamos ahora al primer piso dónde se ubicaron más habitaciones, un balcón, una sala con tv y asientos, se culminó colocando algunas ventanas alrededor.
Los últimos retoques de la casa fueron flores en la parte frontal, colocar toda la iluminación siendo esta linternas y colocar el resto de ventanas. Acá abajo podrán apreciar el resultado final pero sea de su agrado nos vemos en un próximo post espero que sea pronto. Saludos.

Screenshots of the building process/ Capturas del proceso de construcción
Final build/ Construcción final

Game: Minecraft Version 1.18.2.03
Traducido con DeepL
All screenshots were taken by me
English
Greetings to all my fellow Hive members, I hope you are well. I know you haven't seen much of me these days and it's not because I'm on vacation, far from it. I wish I was going out these days even if it is to some town near where I live but I am not. Well I tell you that I've been doing this construction for days but as I had many pauses I didn't finish it quickly, today I could finish it and I show it to you down here.
It is a new residential area, right next to "Conjunto Residencial Puntarenas", I show you the design of the houses since all of them will be the same as the one I brought you in the post.
Construction process
The first thing was to make the fence with iron (bars and block) in a rectangle, then in the center a concrete road, on the sides would go the houses.
A considerable space was left for a small front garden in each house and the construction process began.
A pillar was placed and the front part of the house was marked, which would be a porch made with wood both on the floor and on the roof, the one on the floor a little darker than the one on the roof. When all the pillars were placed, in the outer part of the roof was placed gray concrete that then changed to green as it looked better in this color (this to simulate the mantle that is placed on top of the wood). Fences were placed around this porch and a wall that would divide the access to the house.
For the internal part of the house the floor was filled with white concrete, each section of the house was divided; when you enter the house you find the kitchen and the dining room, on the right hand side there is a room, in the front the stairs, next to this another room, bathrooms and a small living room.
For the construction of the kitchen, diorite was used for the countertop as well as for the design of the kitchen, barrels, ovens, trap doors, a cauldron with a lever to simulate the sink and some seats around it. The room next to the stairs was built with a fireplace and some seats with a table.
We do not go now to the second floor where more rooms were placed, a balcony, a living room with TV and seats, and some windows were placed around it.
The final touches of the house were flowers in the front part, placing all the lighting being lanterns and placing the rest of the windows. Here below you can see the final result, but be of your liking, see you in a next post I hope it will be soon. Greetings.
Español
Un saludo a todos mis compañeros de Hive, espero se encuentren bien. Se que no me han visto mucho estos días y no es porque esté de vacaciones ni mucho menos. Ojala fuera salido estos días aunque sea a algún pueblo cerca de donde vivo pero no. Bueno les comento que hace días que vengo haciendo está construcción pero como hacia muchas pausas no la terminé rápido, hoy pude terminarla y se las muestro acá abajo.
Se trata de una zona residencial nueva, justo al lado de "Conjunto Residencial Puntarenas", les muestro el diseño de las casas ya que todas seran iguales a esta que les traje en el post.
Proceso de construcción
Lo primero fue realizar el cercado con hierro (barrotes y bloque) en todo un rectángulo, luego en el centro una carretera de hormigón, a los lados irían las casas.
Se dejó un espacio considerable para un pequeño jardín frontal en cada casa y se inició el proceso de esta.
Se colocó un pilar y se fue marcando la parte frontal de la casa la cual sería un porche hecho con madera tanto en el suelo como en el techo, la del suelo un poco más oscura a la del techo. Cuándo se colocaron todos los pilares, en la parte exterior del techo se le colocó hormigón gris que luego cambio a verde ya que se veía mejor en este color (esto para simular el manto que se le colocan encima de la madera). Se colocaron vallas alrededor de este porche y una pared que dividiría el acceso a la casa.
Para la parte interna de la casa se relleno al suelo todo con hormigón blanco, se dividió cada sección de la casa; al entrar te topas con la cocina y el comedor, a mano derecha queda una habitación, en el frente las escaleras, a lado de esta otra habitación, baños y una pequeña sala.
Para la construcción de la cocina se utilizó diorita tanto en el mesón como para el diseño de esta, se colocaron barriles hornos, trampillas, un caldero con una palanca para simular el fregadero y algunos asientos al rededor. La sala que quedó al lado de las escaleras se le construyó una chimenea y algunos asientos con mesa.
No vamos ahora al primer piso dónde se ubicaron más habitaciones, un balcón, una sala con tv y asientos, se culminó colocando algunas ventanas alrededor.
Los últimos retoques de la casa fueron flores en la parte frontal, colocar toda la iluminación siendo esta linternas y colocar el resto de ventanas. Acá abajo podrán apreciar el resultado final pero sea de su agrado nos vemos en un próximo post espero que sea pronto. Saludos.


