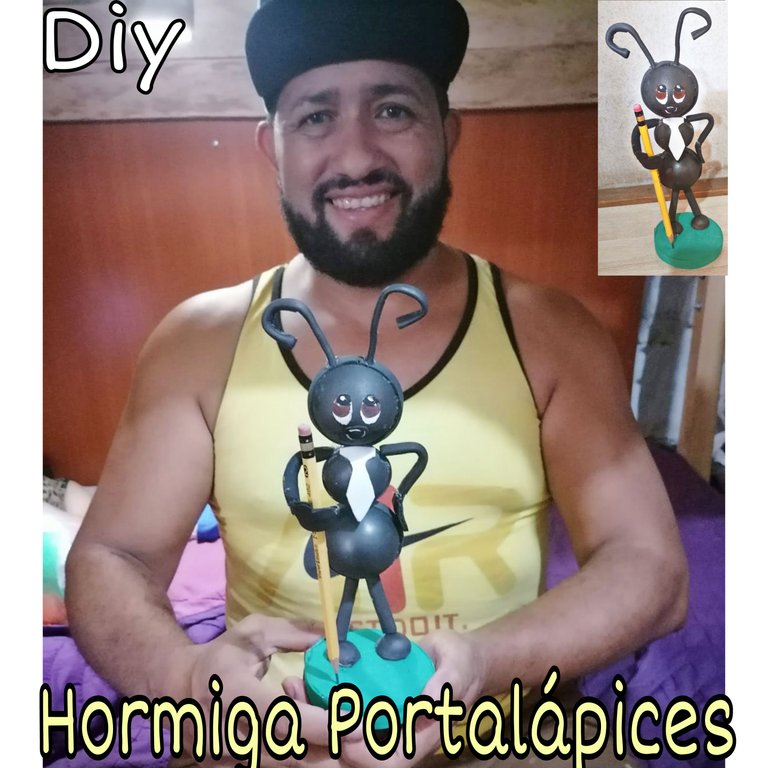
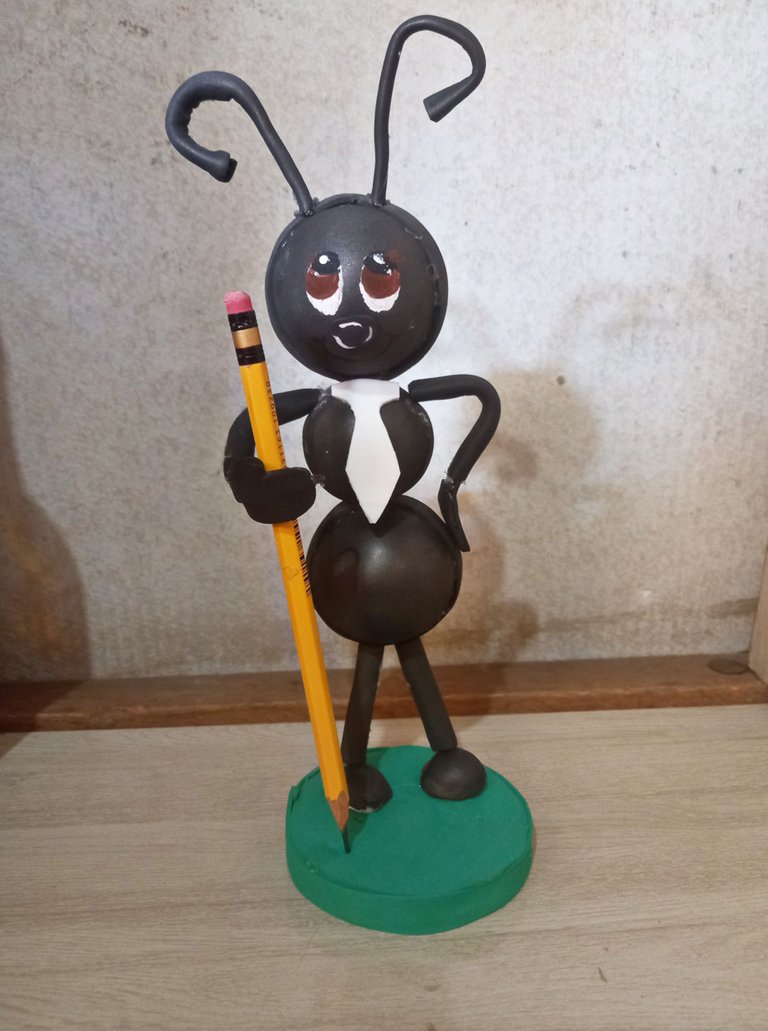
Saludos cordiales querida comunidad de #hive-diy, espero que estén pasando un bonito día, que se encuentren muy bien y con buena salud. Hoy quiero compartir con ustedes la creación de una Hermosa Hormiga Ejecutiva porta lápices o boligrafos de foami y anime, ideal para adornar cualquier espacio de trabajo o sala de estudio. Quédate hasta el final de éste tutorial.
Warm greetings dear #hive-diy community, I hope you are having a nice day, that you are very well and in good health. Today I want to share with you the creation of a beautiful Executive Ant pencil or pen holder made of foami and anime, ideal to decorate any workspace or study room. Stay until the end of this tutorial.
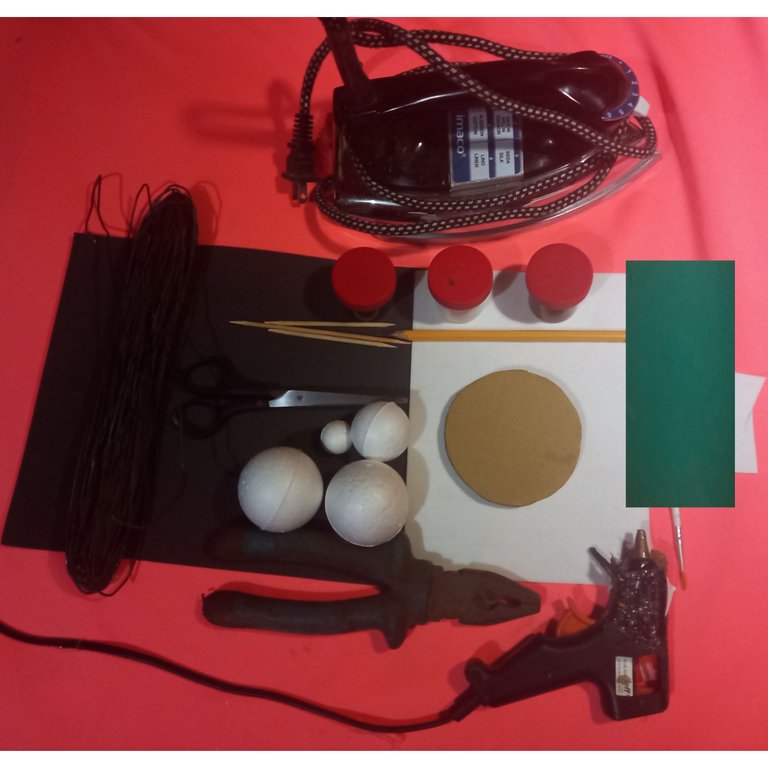
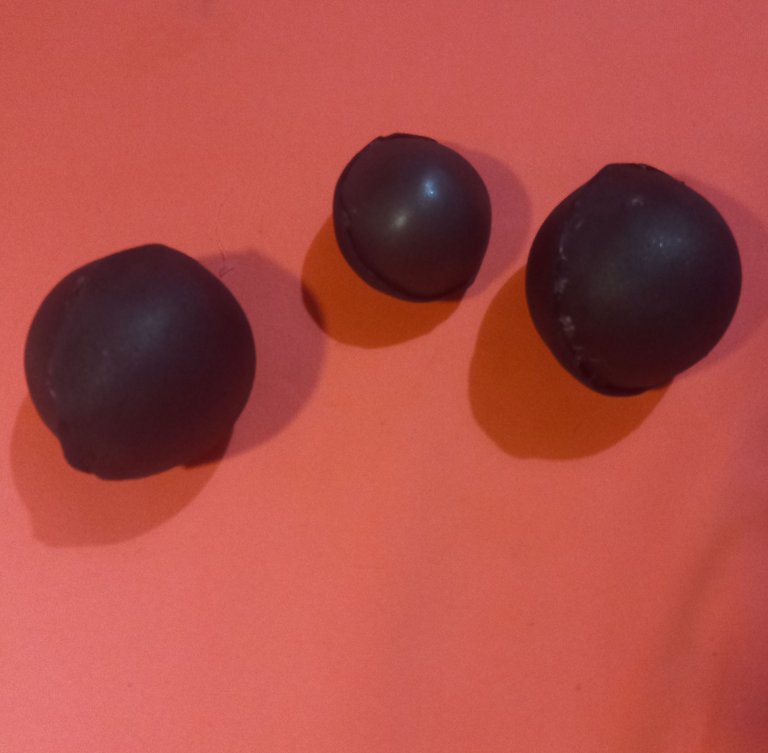
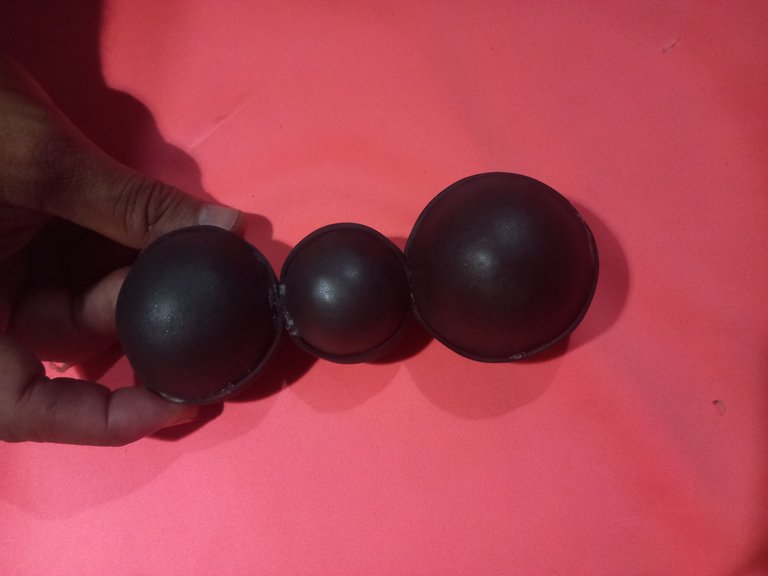
Esferas de anime o tecnopor dos número 2, una número 1, otra de 0.40 y 0.20.
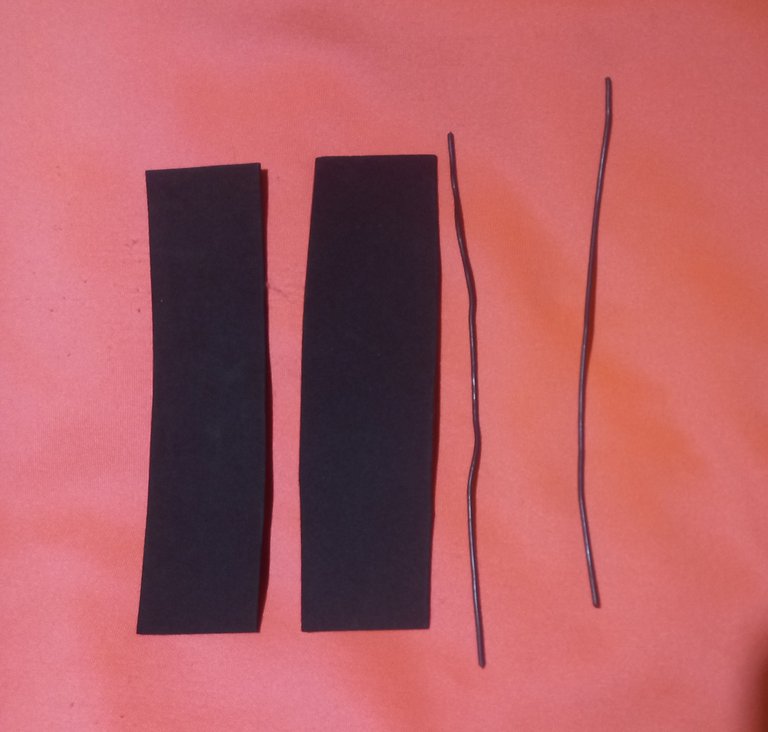
Foami negro, blanco y verde.
Alambre.
Tres palillos de altura, uno de 10 cm y dos de 7 cm, con doble punta.
Pintura blanca, marrón y roja.
Pincel.
Alicate.
Base redonda con tres capas de cartón.
Plancha para ropa.
Exacto.
Lápiz.
Tijeras.
Pistola de silicón caliente.
Anime or technopor spheres two number 2, one number 1, one number 0.40 and one number 0.20.
- Black, white and green Foami.
- Wire.
- Three sticks of height, one of 10 cm and two of 7 cm, with double tip.
- White, brown and red paint.
- Paintbrush.
- Pliers.
- Round base with three layers of cardboard.
- Clothes iron.
- Exactly.
- Pencil.
- Scissors.
- Hot silicone gun.
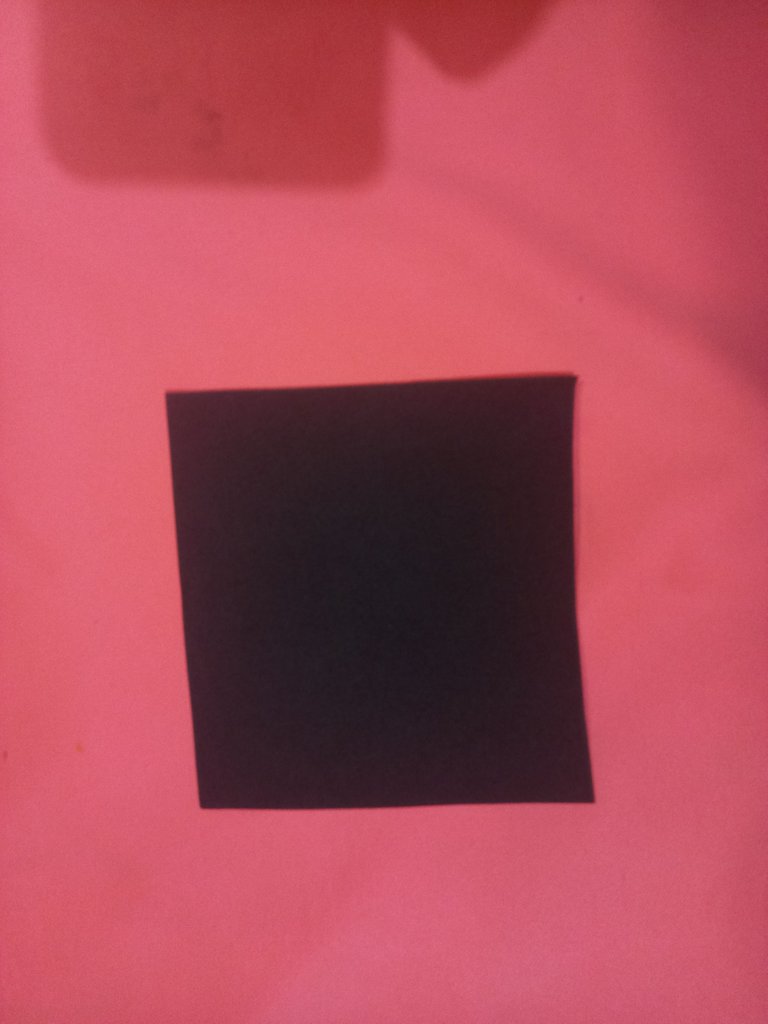
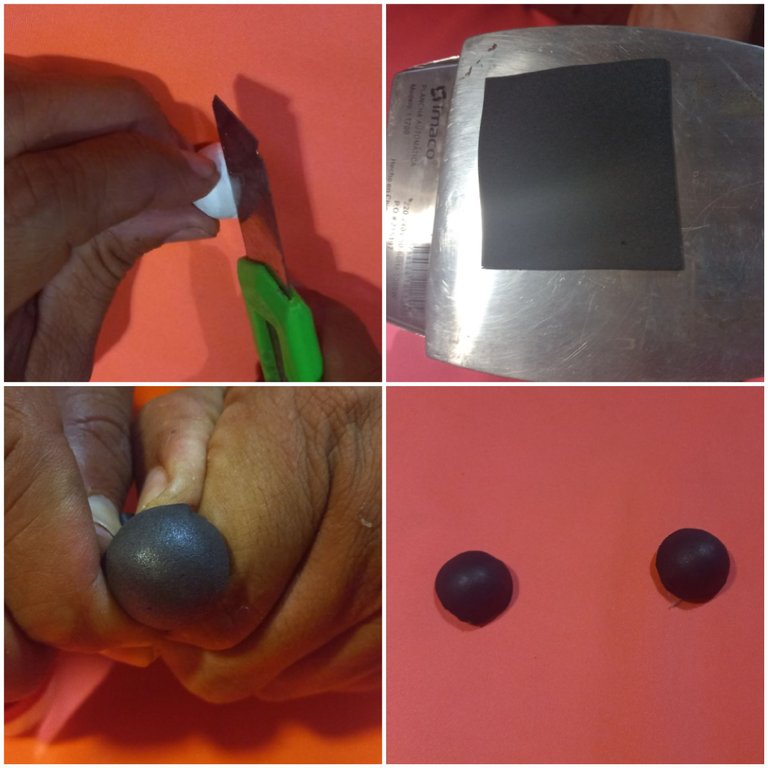
Comenzaremos cortando un cuadrado de foami negro de 10cm×10cm.
We will start by cutting a 10cm×10cm square of black foami.
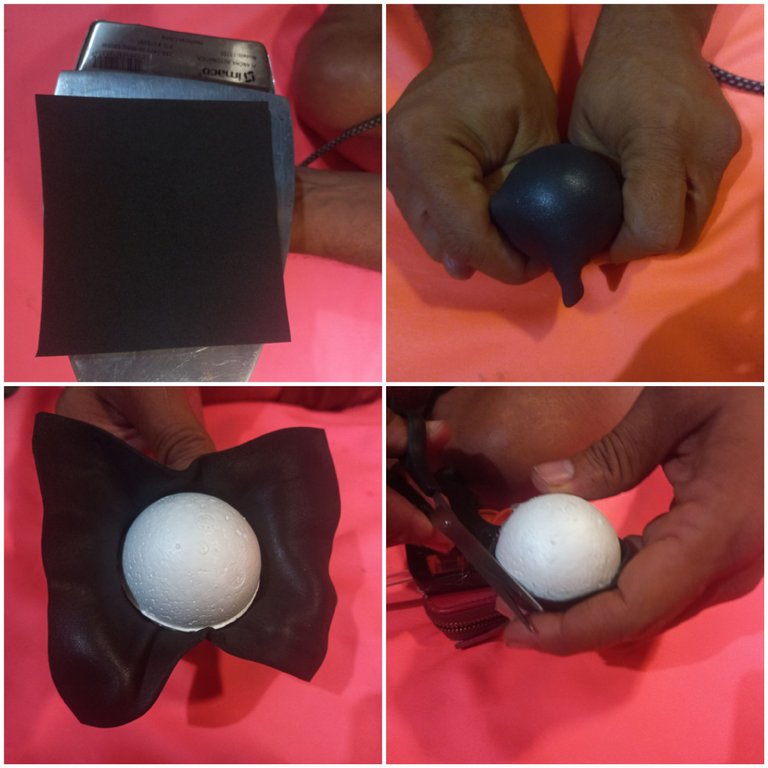
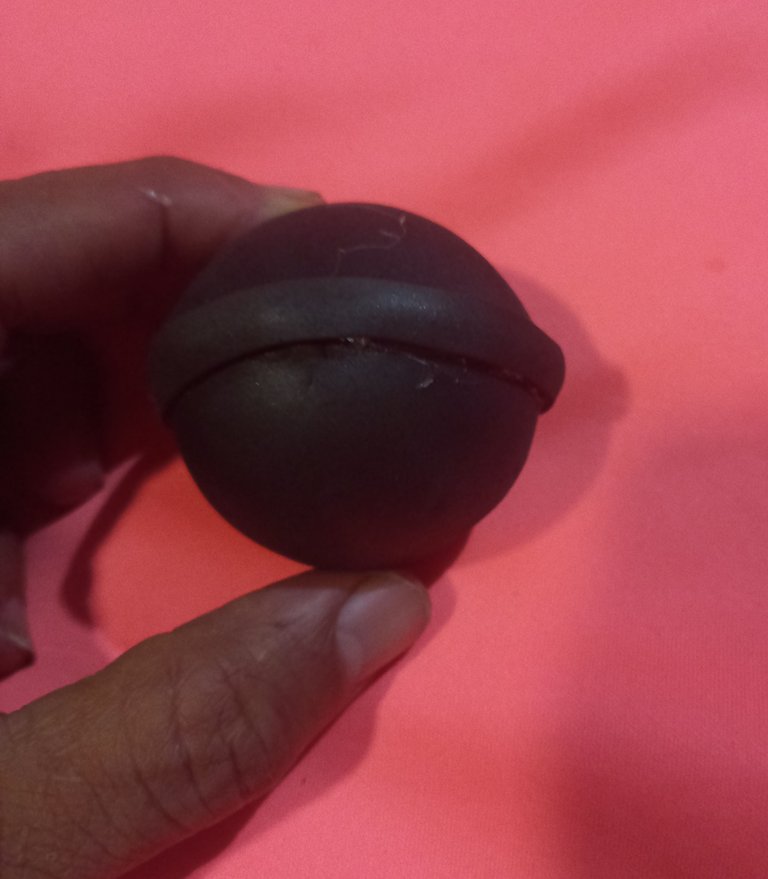
Lo colocamos sobre la plancha caliente, lo retiramos con cuidado y lo estiramos sobre la esfera de tecnopor número 2, pegamos el foami estirado por la línea de fábrica y cortamos el excedente. Éste mismo procedimiento lo haremos por ambos lados y con todas las demás esferas.
We place it on the hot plate, remove it carefully and stretch it over the number 2 technopor sphere, glue the stretched foami along the factory line and cut the excess. We will do the same procedure on both sides and with all the other spheres.
Luego de haber forrado las tres esferas, cortamos unas tiras de 1cm de ancho y las pegamos en las uniones para darle un mejor acabado a las esferas.
After having lined the three spheres, we cut 1 cm wide strips and glue them at the joints to give a better finish to the spheres.
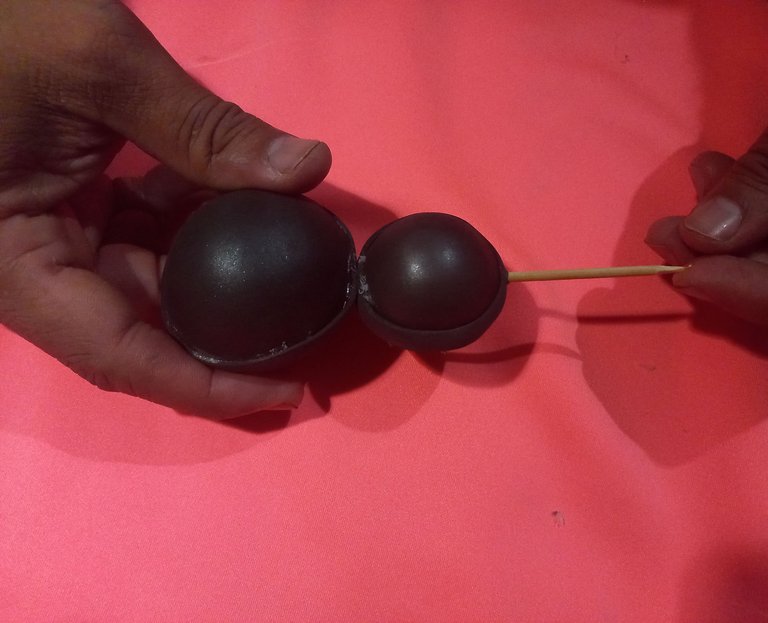
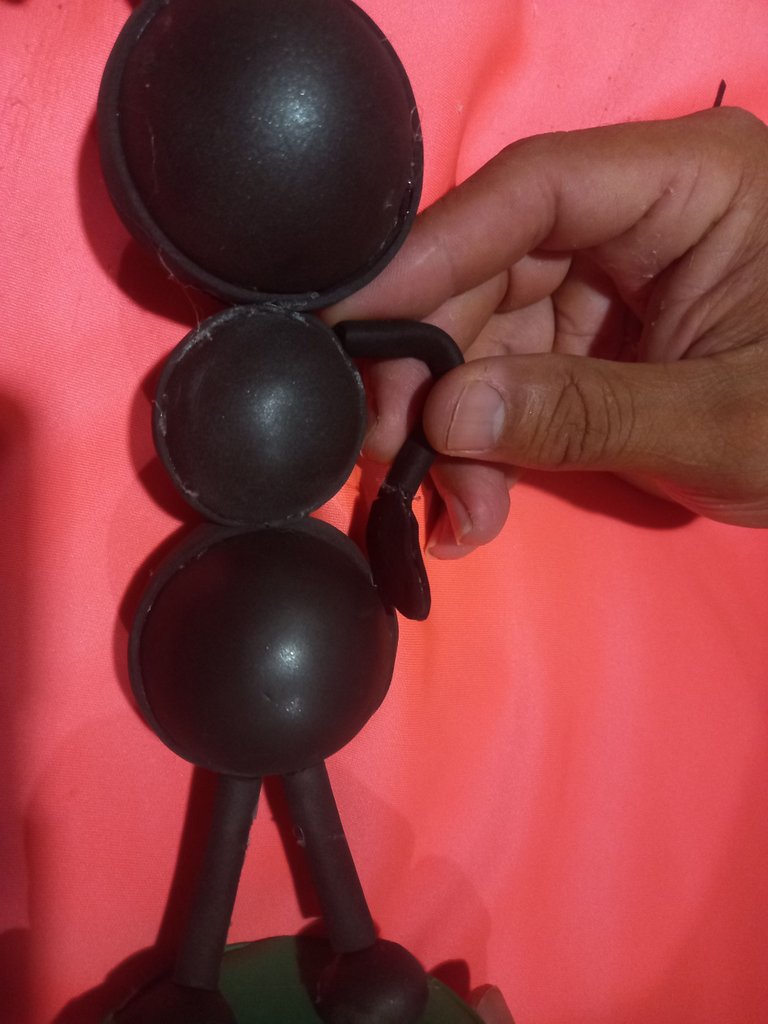
Con el palillo de altura de 10cm unimos las tres esferas una grande al principio, la pequeña en el medio y la otra grande al final, esto es para hacer el cuerpo de la Hormiga.
With the 10cm high stick we join the three spheres, a big one at the beginning, the small one in the middle and the other big one at the end, this is to make the body of the Ant.

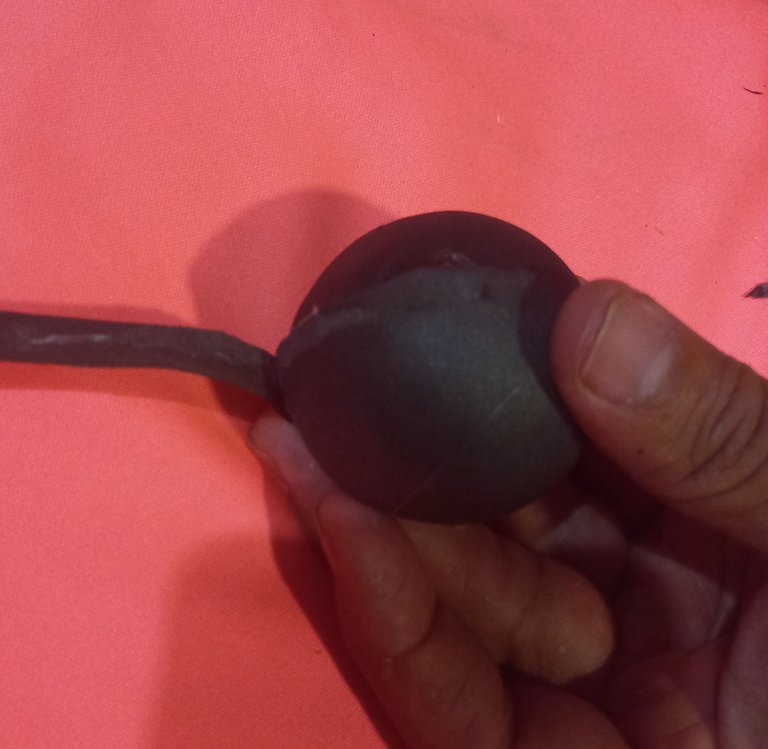
Para hacer las patitas utilizaremos la esfera # 0.20, la cortamos a la mitad y la forramos con foami negro.
To make the legs we will use the sphere # 0.20, cut it in half and line it with black foami.
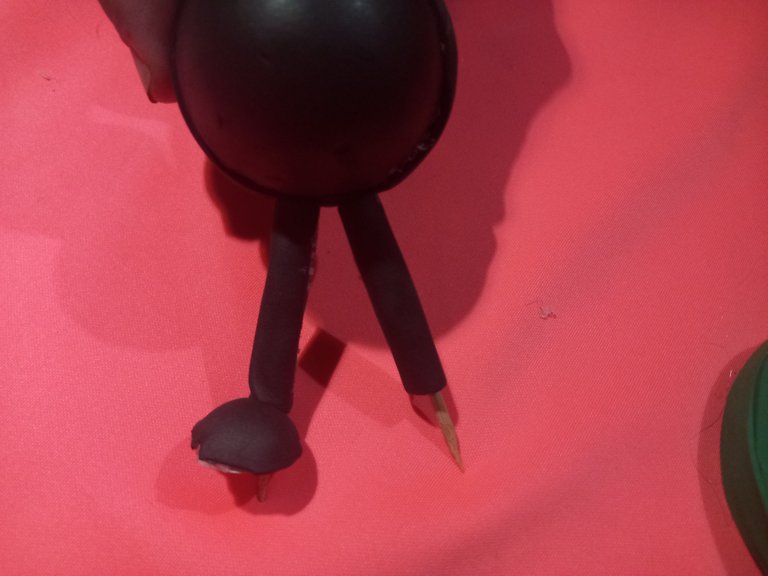
Después forramos los dos palillos de altura de 7cm con foami negro y los introducimos debajo de la esfera # 2 a cada lado.
Then we line the two 7cm tall sticks with black foami and insert them under the sphere #2 on each side.
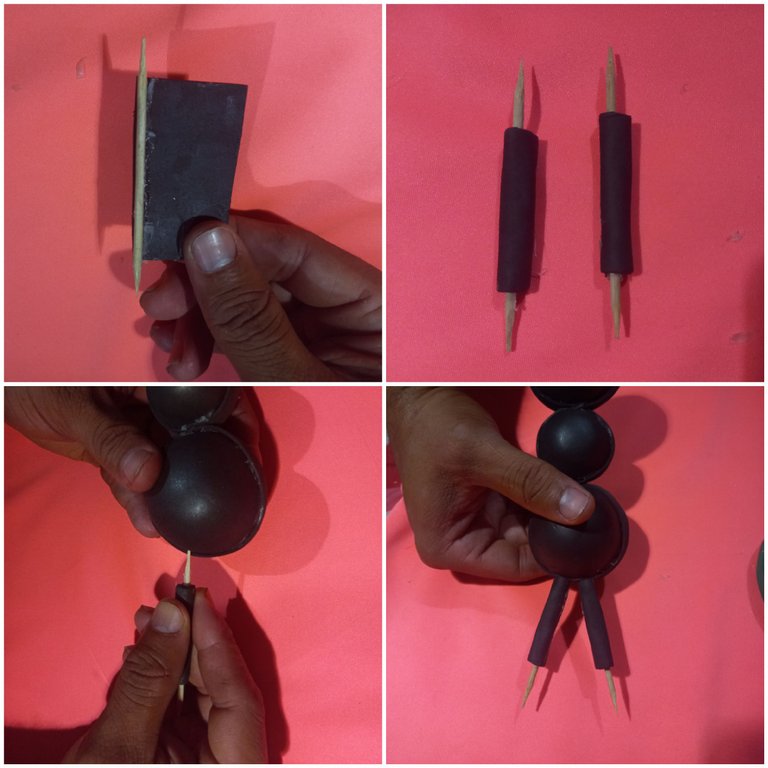
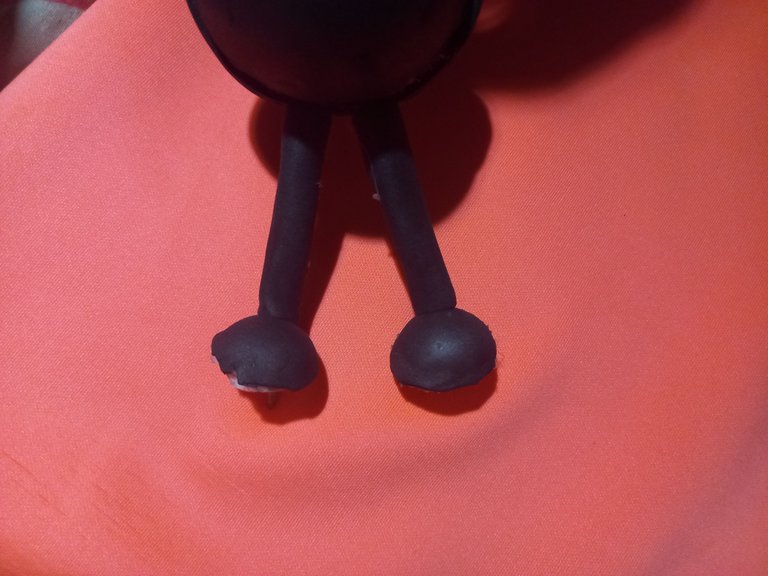
Luego unimos las Mitades de las esferas 0.20 con cada uno de los palillos de las patas. Dejando un espacio de punta para fijar por allí a la la hormiga de la base.
Then we join the halves of the 0.20 spheres with each of the sticks of the legs. Leaving a space of tip to fix there to the ant of the base.
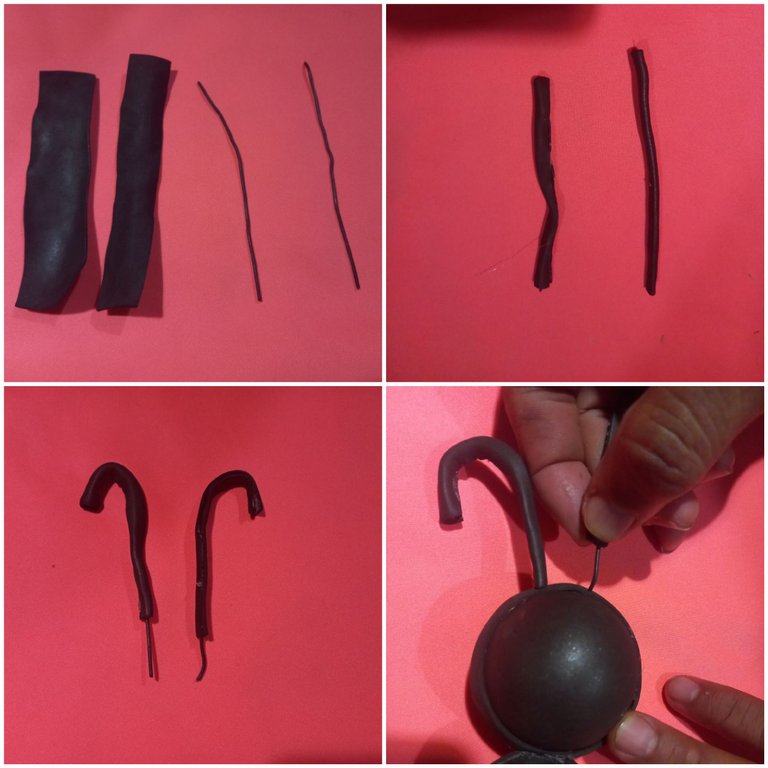
Para hacer las antenas de la hormiga forrados con foami negro dos Trozos de alambre y los introducimos uno al lado de otro sobre la cabeza.
To make the ant's antennae, we cover two pieces of wire with black foami and insert them side by side over the head.
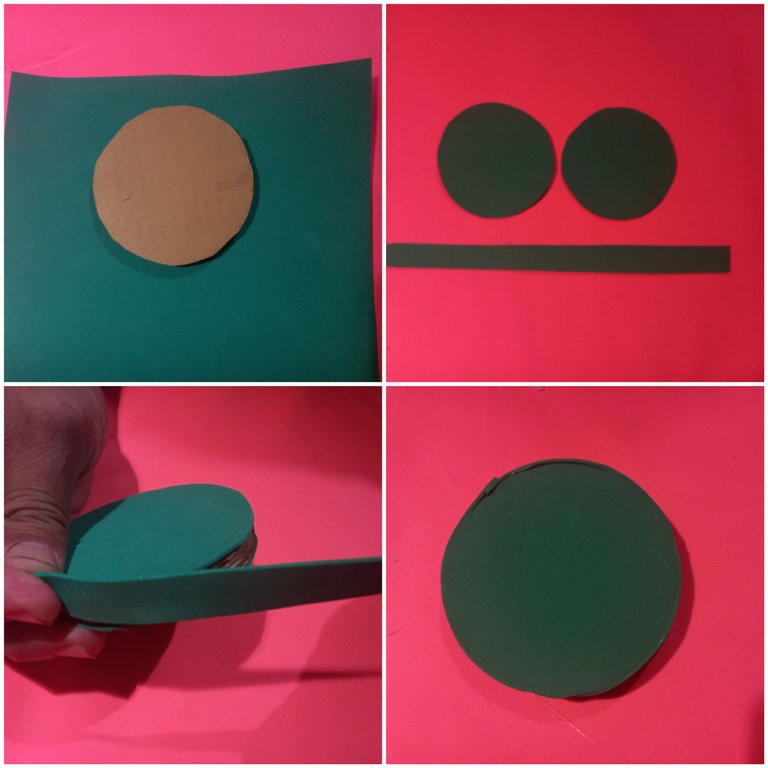
Posteriormente forramos la base circular de cartón con foami verde, para esto sacaremos dos círculos de foami del mismo tamaño de la base y una tira de aproximadamente 1cm de ancho para pegarla en el borde.
Next, we line the circular cardboard base with green foami, for this we will take out two circles of foami of the same size as the base and a strip of approximately 1 cm wide to glue it on the edge.
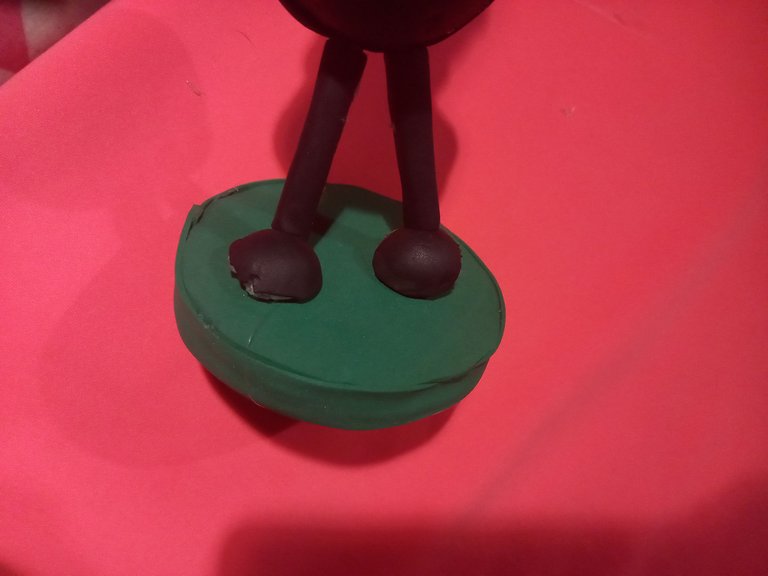
Fijamos con el espacio de punta que quedó de las patas, la base de la Hormiga.
We fix with the tip space left from the legs, the base of the Ant.
Cortamos dos pedazos de alambre de 7 cm de largo los forramos con foami negro dejando un espacio libre de alambre de un centímetro.
We cut two pieces of wire 7 cm long and cover them with black foami, leaving a one centimeter free space of wire.
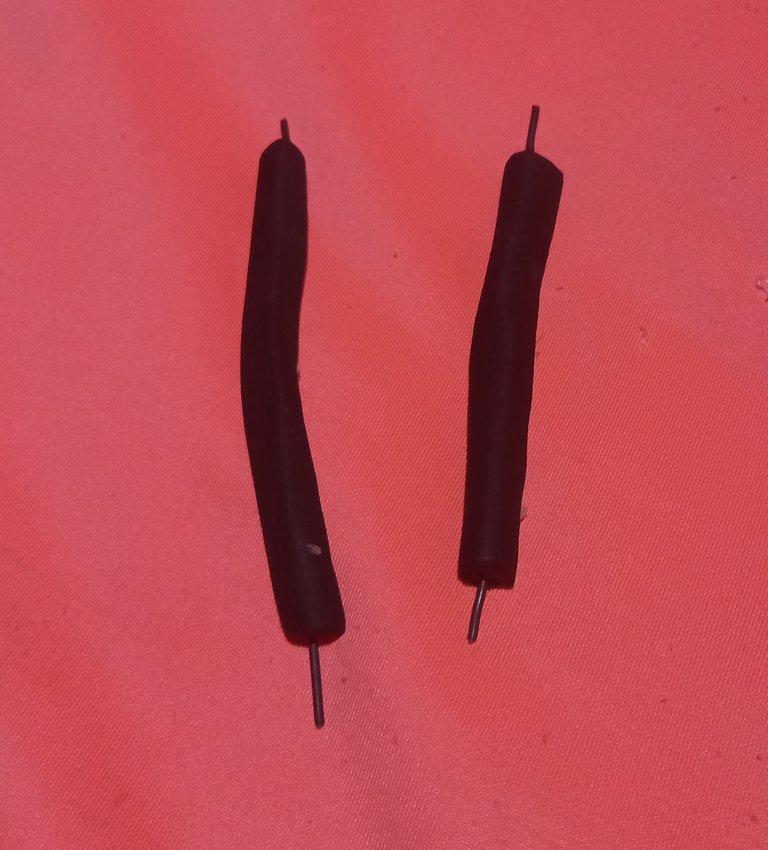
Luego Hacemos unas manitos y las pegamos doble en los espacios libres, en una de esas manitas vamos a hacerle una forma curva para introducir el lápiz por allí.
Then we make some little hands and we double glue them in the free spaces, in one of those little hands we will make a curved shape to introduce the pencil through there.

Ahora procedemos a pegar los brazos en la parte del borde superior de la esfera del medio dándole la forma que queremos.
Now we proceed to glue the arms on the upper edge of the middle sphere giving it the shape we want.

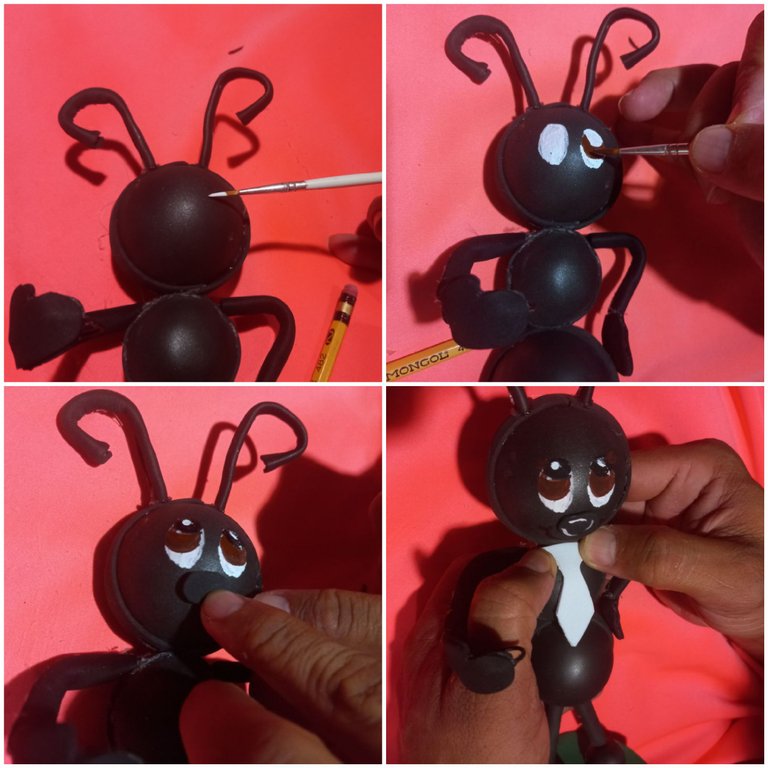
Finalmente terminamos haciendo los ojitos pegando la nariz, hacemos una corbata de foami y la pegamos en la hormiguita
Finally we finish making the eyes by gluing the nose, we make a foami tie and glue it on the ant.

Gracias estimado amigo lector por quedarte hasta 3l final de éste tutorial, espero te haya gustado. Hasta otra oportunidad. DIOS LOS BENDIGA.
Thank you dear reader friend for staying until the end of this tutorial, I hope you liked it. See you again. GOD BLESS YOU.


