Hola queridas manualistas de Hive.
Espero que estén bien y la creatividad se encuentre en su punto ideal para seguir adelante cada día mostrando nuestras piezas y diseños ante el mundo.
Qué bonito es estar en esta comunidad donde podemos encontrar personas de cada continente e intercambiar nuestros conocimientos, nuestra cultura. Admiro a la gente de Venezuela, Colombia, argentina, sur áfrica, Nigeria, Cuba, pero, Inglaterra, entre otros. Ustedes me han enseñado mucho y les agradezco también por su cariño y su apoyo durante estos hermosos años. Dentro de poco cumplo un año más de vida y creo que estoy un poco sentimental por ello, ya a esta edad uno comienza a valorar cada cosa que sucede, saca lo bueno de la vida y solo quiere entregar lo mejor de sí.
También estoy sensible ya que también estamos por compartir una semana más donde recordamos la pasión de nuestro señor Jesucristo y todo por este tiempo de cuaresma se trata del perdón, el recogimiento, y el amor por el prójimo. Ojala nos dejáramos envolver un poco más de esta energía que se mueve en el ambiente por este tiempo, de seguro la pasaríamos mejor.
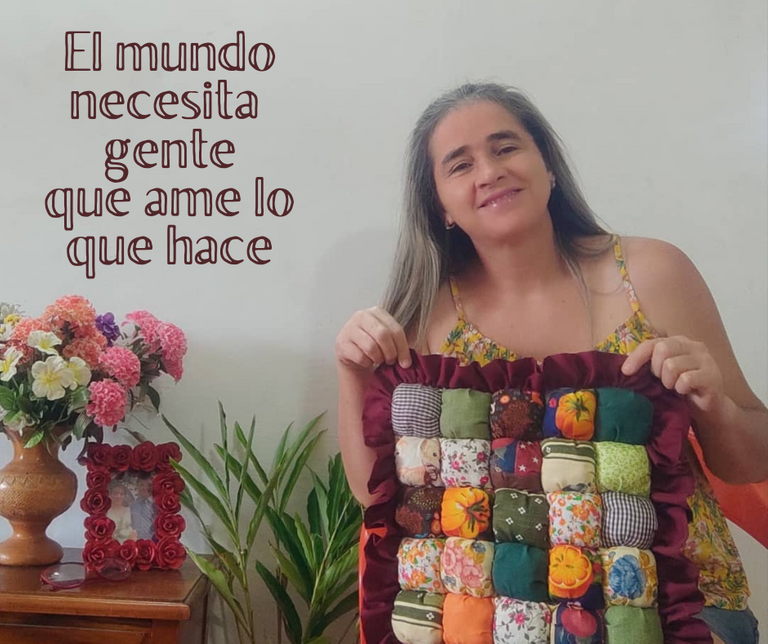
Hablando de AMOR, hoy he conseguido en instagram una frase de Steve Jobs que me atrapo y me puso a pensar mientras elaboraba el cojín que les presento.
“La única forma de hacer un gran trabajo, es amando lo que haces”
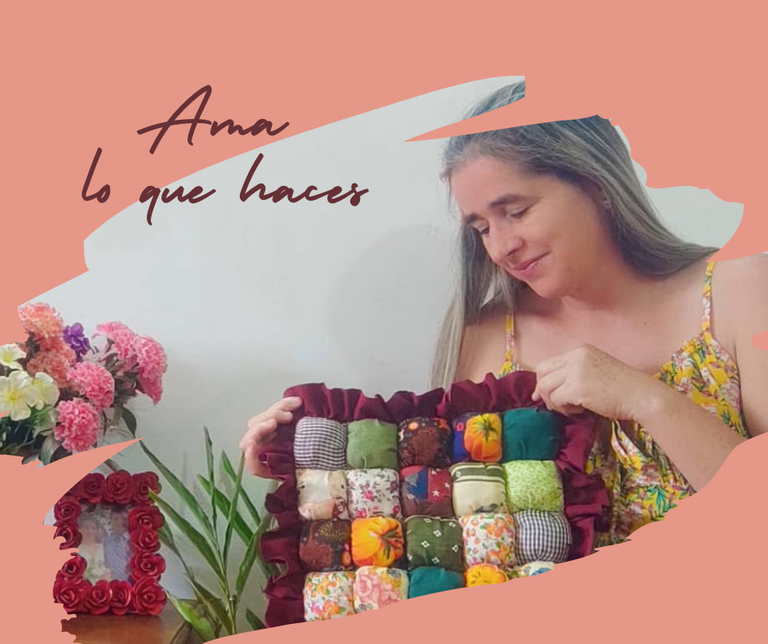
Esta frase me quedó rondando y mientras basteaba las telas pensaba que aunque esta frase muchos la hemos escuchado y la vemos en muchas partes somos pocos los que la ponemos realmente en práctica. Esto se puede notar en trabajos de oficina, en atención al público y hasta en nuestra propia casa cuando hacemos una comida o un oficio.
Luego me fui a la cocina y pensaba que no importa cuántas horas tarde haciendo una receta, porque cuando la haces con AMOR te llenas de paciencia y tu recompensa será ver a todos comiendo eso que hiciste con amor. Aunque más nadie se dé cuenta, tu corazón estará feliz de ver que hiciste eso para ellos.
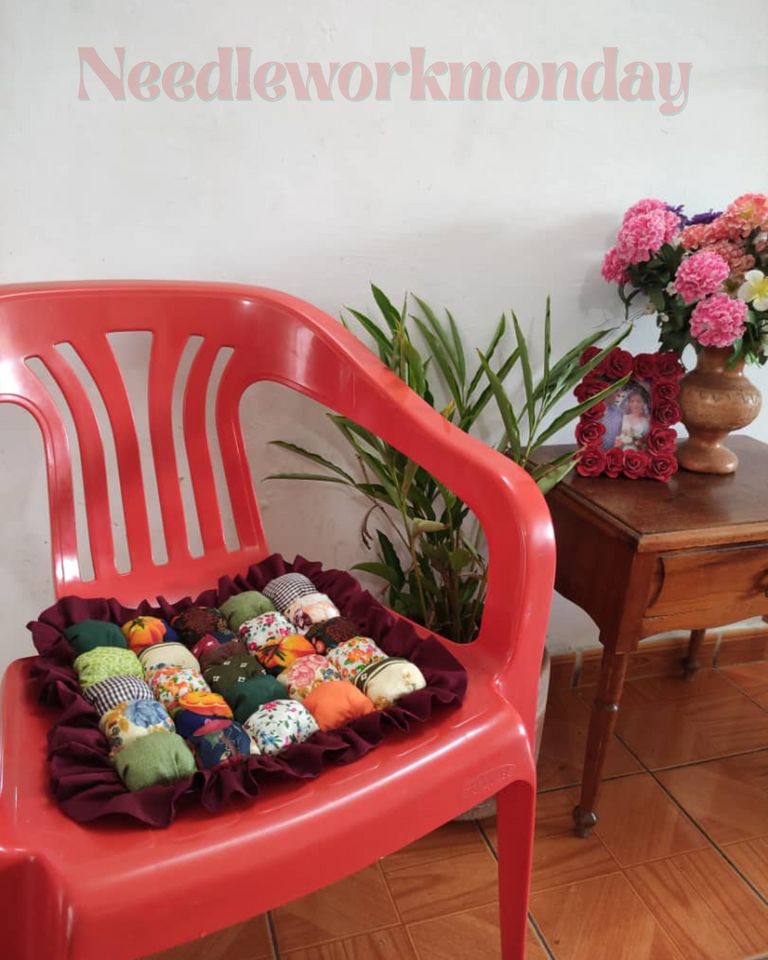
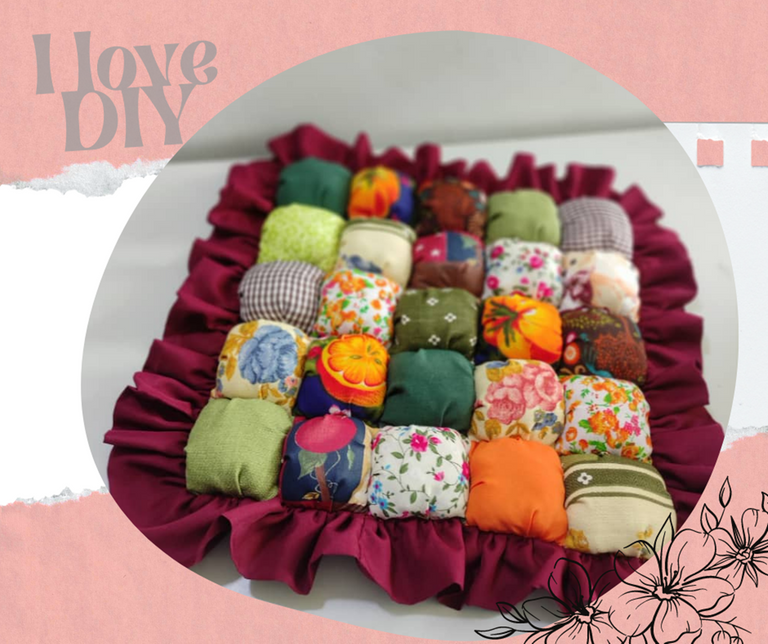
Esta manualidad que hoy les presento tiene mucho de esto, la única diferencia es que la hice para mí y el amor propio también es valedero. Tal vez suene gracioso lo que les voy a decir, pero es que mi pompis estaba sintiendo mucho frio en las mañanas cuando me siento a publicar o comentar sus publicaciones, así que desde hace días vengo diciéndome: _ voy hacerme un cojín. Ayer definitivamente el frio estaba fuerte y deje todo lo que estaba por hacer a un lado y me fui a mi taller de costura y me puse a diseñar un cojín que sirviera para abrigar mis nalgas, darles descanso y a su vez me sirviera como pieza decorativa para mi espacio.

Recordé entonces un cojín que hizo hace un mes nuestra amiga @Mariela-b cojín para mecedora Parte I en un comentario le dije que me gustaba mucho y que me daba miedo adentrarme en un proyecto tan grande, pero desde ese día no deje de pensar en ese cojín, porque en verdad le quedó muy bonito y se veía muy cómodo. Algo así quería para mí o mejor dicho para mi pompis.
Deje el miedo y la flojera a un lado y me dije: ¡Yo me merezco algo así!
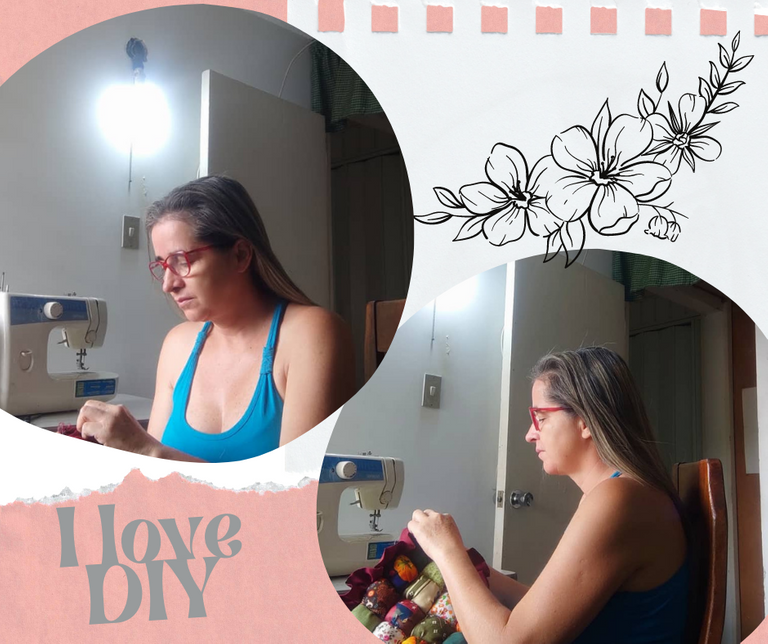
A mí me gusta mucho trabajar el Patchwork, me gusta trabajar con retazos, combinar colores y técnicas, por eso este proyectos se me hizo más agradable.
¿Qué es la técnica biscuit?
En alfarería un biscuit (galicismo que en español significa bizcocho) o un bizcocho, es el resultado de la primera cocción de la terracota o arcilla, pero más a menudo se llama biscuit a ese mismo resultado, siempre que la materia prima no sea arcilla sino caolín, cuarzo y feldespato. (internet)
Teniendo un poco más de conocimientos según algunos videos que vi en internet, puse manos a la obra, busqué retazos de tela que combinaran con mi espacio, yo soy más de colores tierra y gracias a Dios he guardado bastantes de esos recortes que quedan de otros proyectos.

Es verdad que es un proyecto grande, tarde dos días en hacerlo, pero ahora que veo el resultado estoy feliz de haber emprendido esta aventura. Estoy segura que quieres saber algunos detalles del proceso así que te invito a seguir leyendo un poco más. De todos modos siempre les invito a utilizar las herramientas que se consiguen en internet, allí puedes conseguir videos increíbles que explican muy bien el paso a paso.
Pasito a pasito.
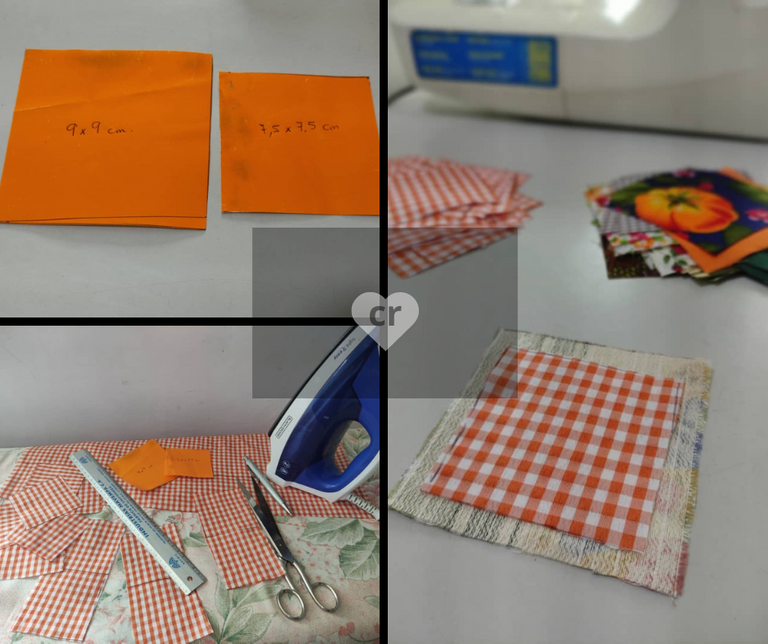
Lo primero que hice fue recortar los patrones de los cuadros, uno mide 7,5 cm de cada lado y el otro 9 cm. Aquí en este paso debo decirles que si proyecto es más grande puedes recortar cuadros de 11 cm como los hizo nuestra amiga Mariela-b. Apenas termines de cortar los cuadros según se a tu elección trata de colocarlos sobre una mesa y ubícalos a tu gusto, que combinen bien, tómale una foto para que luego recuerdes donde va cada quien.
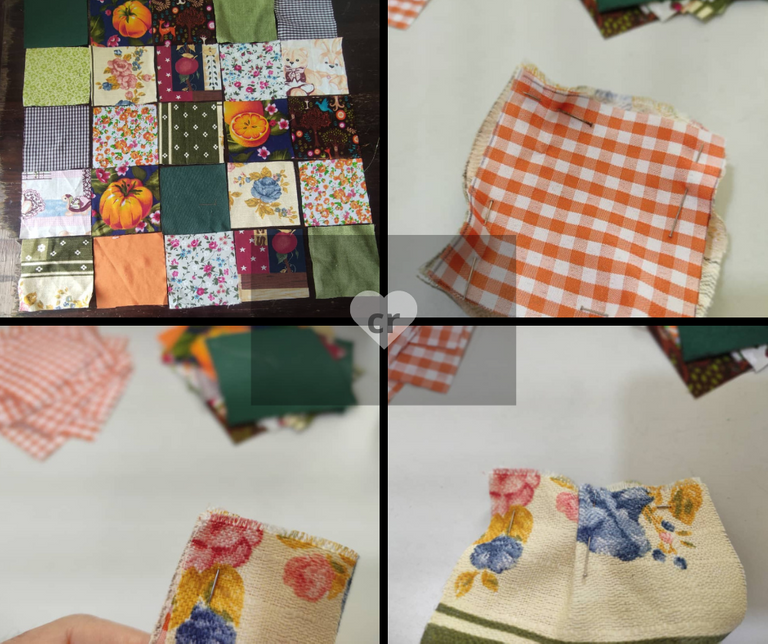
Luego unimos las esquinas con la ayuda de alfileres pequeños. Y basteamos por todo el contorno buscando la mitad para que quede abombado. No te preocupes si queda sellado a cada lado, luego hablaremos de ese punto.
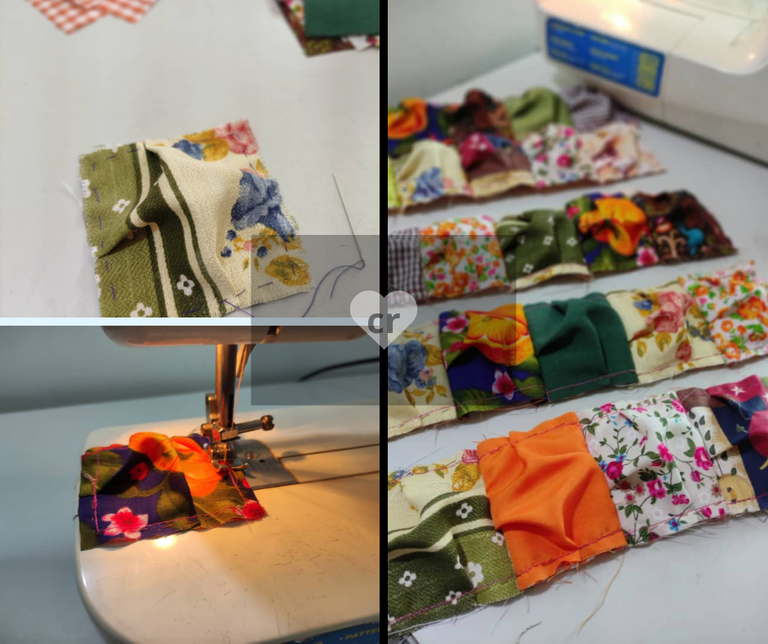
Cuando ya hemos basteado todos los cuadros nos vamos a la máquina de coser y pasamos costura recta.
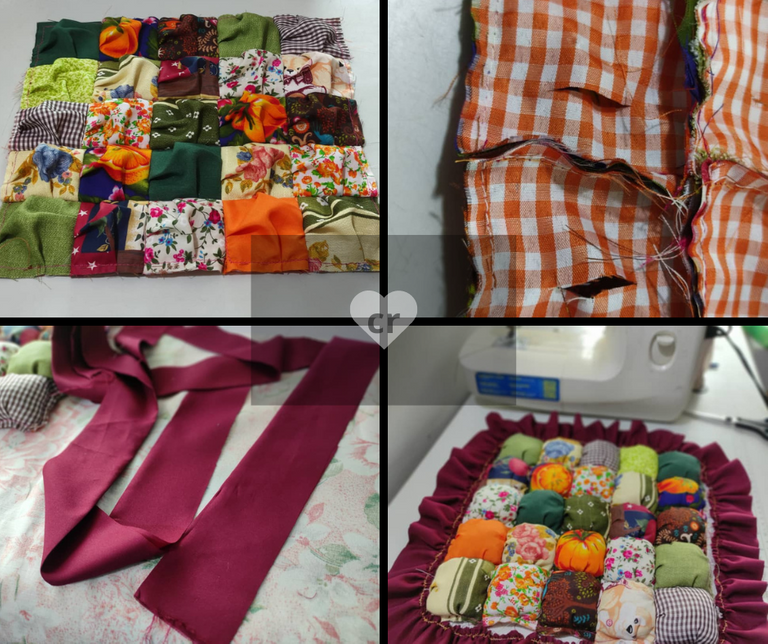
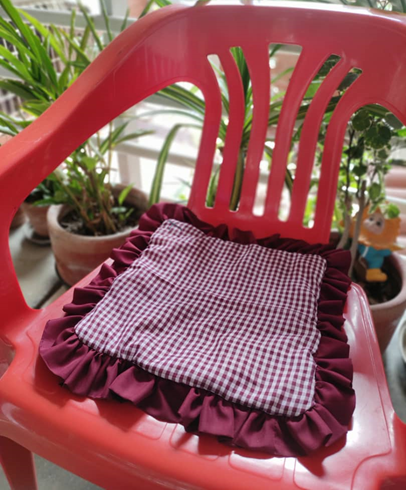
Luego unimos todas las piezas. Realizamos un corte por la parte posterior, rellenamos y cosemos. Hasta este paso ya podríamos estar listos, pero como yo le quería con más decoración le coloqué un volante de color vino tinto, este volante media 12 centímetros de ancho por 2,50 de largo. Por ultimo le colocas un forro.
Debo decirles que a cada paso es mejor bastear primero, así no tendrás tantas inconvenientes de que la tela se mueva.
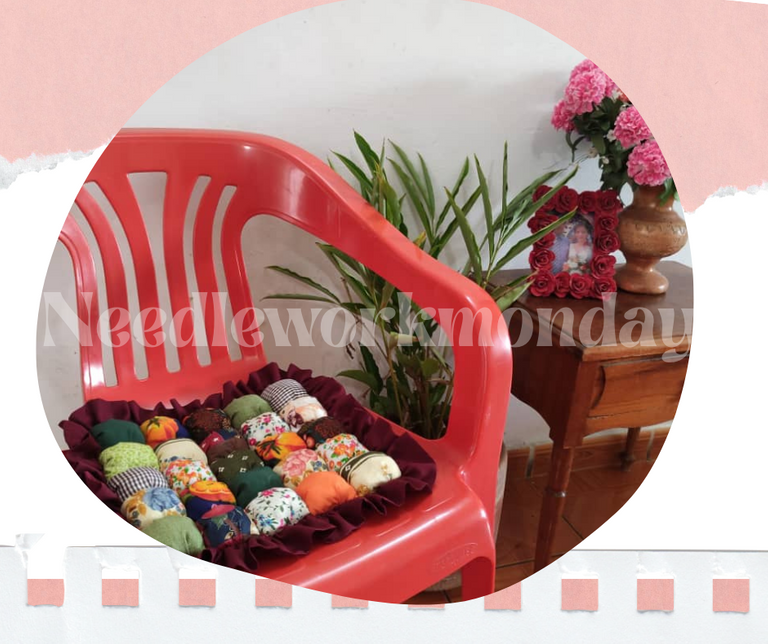
Estoy feliz, aquí mientras les escribo estoy sentada sobre mi cojín nuevo y estoy segura que durante unos días me sacara unas cuantas sonrisas cada vez que lo vea y mis nalgas ya no volverán a sentir frio nunca más.
Les digo hasta la próxima semana queridos amigos, cuídense mucho, pásenla bien y vayan al templo a orar un rato que eso es bueno, se los aseguro.


Hello dear Hive Crafters.
I hope you are well and creativity is at its ideal point to move forward every day showing our pieces and designs to the world.
How nice it is to be in this community where we can meet people from every continent and exchange our knowledge, our culture. I admire people from Venezuela, Colombia, Argentina, South Africa, Nigeria, Cuba, but, England, among others. You have taught me a lot and I thank you also for your love and support during these beautiful years. Soon I will be one more year of life and I think I am a little sentimental about it, at this age one begins to value everything that happens, takes the good out of life and only wants to give the best of himself.

I am also sensitive because we are also about to share one more week where we remember the passion of our Lord Jesus Christ and everything for this time of Lent is about forgiveness, recollection, and love for our neighbor. If only we would let ourselves be a little more involved in this energy that moves in the atmosphere during this time, we would surely have a better time.
Speaking of LOVE, today I got on instagram a quote from Steve Jobs that caught me and got me thinking while I was making the cushion I present to you.
"The only way to do great work, is to love what you do."

This phrase stayed with me and while I was basteing the fabrics I thought that although many of us have heard this phrase and we see it in many places, few of us really put it into practice. This can be noticed in office jobs, in customer service and even in our own home when we make a meal or a craft.
Then I went to the kitchen and thought that it doesn't matter how many hours it takes to make a recipe, because when you make it with LOVE you are filled with patience and your reward will be to see everyone eating what you made with love. Even if no one else notices, your heart will be happy to see that you made it for them.

This craft that I present to you today has a lot of this, the only difference is that I made it for me and self-love is also valid. It may sound funny what I'm about to tell you, but my pompis was feeling very cold in the mornings when I sit down to post or comment on your posts, so for days I've been saying to myself: _I'm going to make a cushion: _ I'm going to make myself a cushion. Yesterday the cold was definitely strong and I left everything I was about to do aside and went to my sewing workshop and started to design a cushion that would serve to warm my buttocks, give them a rest and at the same time serve as a decorative piece for my space.

Then I remembered a cushion that our friend @Mariela-b made a month ago Rocking Chair Cushion Part I, in a comment I told her that I really liked it and that I was afraid to go into such a big project, but since that day I never stopped thinking about that cushion, because it was really beautiful and looked very comfortable. I wanted something like that for me, or rather for my booty.
I put fear and laziness aside and said to myself: I deserve something like that!

I really like to work with patchwork, I like to work with scraps, combine colors and techniques, that's why this project was more enjoyable for me.
What is the biscuit technique?
In pottery a biscuit is the result of the first firing of the terracotta or clay, but more often it is called biscuit to that same result, provided that the raw material is not clay but kaolin, quartz and feldspar (internet).
Having a little more knowledge according to some videos I saw on the internet, I got down to work, I looked for fabric scraps that matched my space, I am more of earth colors and thank God I have saved enough of those scraps left over from other projects.

It's true that it's a big project, it took me two days to do it, but now that I see the result I'm happy to have undertaken this adventure. I'm sure you want to know some details of the process so I invite you to read a little more. Anyway I always invite you to use the tools that you can get on the internet, there you can get amazing videos that explain very well the step by step.
Step by step.

The first thing I did was to cut out the patterns of the squares, one measuring 7.5 cm on each side and the other 9 cm. Here in this step I must tell you that if your project is bigger you can cut out 11 cm squares as our friend Mariela-b did. As soon as you finish cutting the squares according to your choice, try to place them on a table and place them as you like, so that they match well, take a picture so that you can remember where each one goe

Then we join the corners with the help of small pins. And we baste all around the contour looking for the middle so that it is bulging. Don't worry if it is sealed on each side, we will talk about that later.
When we have basted all the squares we go to the sewing machine and pass straight seam.

When we have basted all the squares we go to the sewing machine and pass straight seam.

We join in lines according to the photo we took in the previous step. Then we join all the pieces together. We make a cut on the back, fill and sew. Up to this step we could be ready, but as I wanted it with more decoration I placed a red wine color ruffle, this ruffle is 12 centimeters wide by 2.50 long. Finally you put a lining.
I must tell you that at each step it is better to baste first, so you won't have so many problems with the fabric moving.

I am happy, here as I write I am sitting on my new cushion and I am sure that for a few days it will make me smile every time I see it and my buttocks will never feel cold again.
Until next week dear friends, take care of yourselves, have a good time and go to the temple to pray for a while, that is good, I assure you.

𝕋𝕠𝕕𝕠 𝕧𝕒𝕝𝕖 𝕝𝕒 𝕡𝕖𝕟𝕒 𝕤𝕚 𝕝𝕝𝕖𝕧𝕒, 𝕙𝕚𝕝𝕠𝕤, 𝕥𝕖𝕝𝕒𝕤 𝕪 𝕞𝕦𝕔𝕙𝕒𝕤 𝕡𝕦𝕟𝕥𝕒𝕕𝕒𝕤 𝕕𝕖 𝔸𝕄𝕆ℝ.

