On the internet there are multiple explanations of how to sew them but there are not so many of how to make the pattern.
The drawings are made to scale, so although they seem small for an adult size, the proportions are the same. I usually use tape measures at 1: 2, 1: 3 and 1: 4 scale to design the garments that I am going to sew later and make the diagrams of the patterns before making them to have a clear idea before cutting the pieces. So this is the method I'm going to use to teach you.
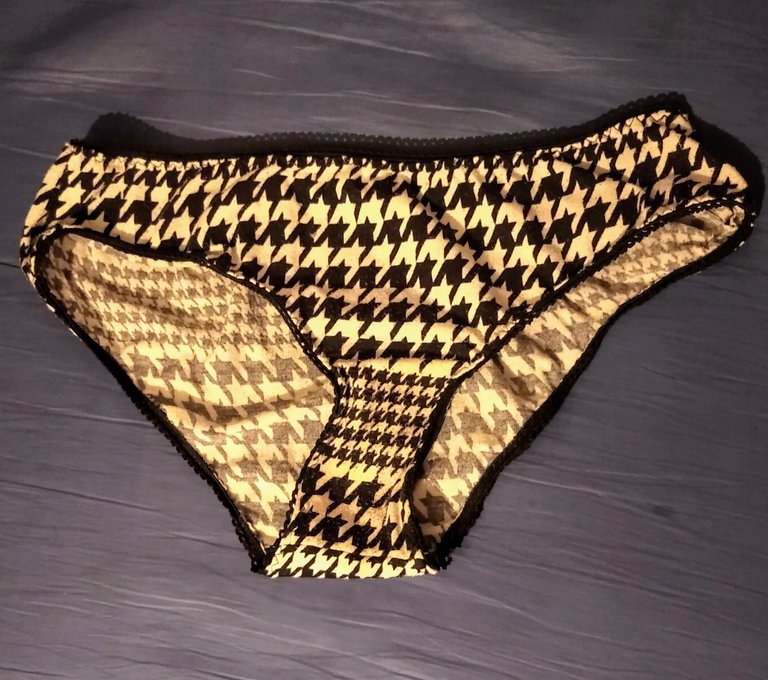
Hola Chicos!! Espero que tengan un lindo lunes! No he tenido chance de sentarme en mi máquina de coser y hacer algo pero una amiga me pidió que le explicará como hacer el patrón de una panty y se me ocurrió que tal vez a alguien por acá le ayudaría tener el esquema para hacer su propia ropa interior a medida. En internet hay múltiples explicaciones de como coserlas pero no hay tantas de como hacer el patrón. Los dibujos están hechos a escala, así que aunque parezcan pequeños para la talla de adultos, las proporciones son las mismas. Suelo usar cintas métricas a escala 1:2, 1:3 y 1:4 para diseñar las prendas que voy a coser luego y hacer los esquemas de los patrones antes de realizarlos para tener la idea clara antes de cortar las piezas. Así que este es el método que voy a usar para enseñarles.
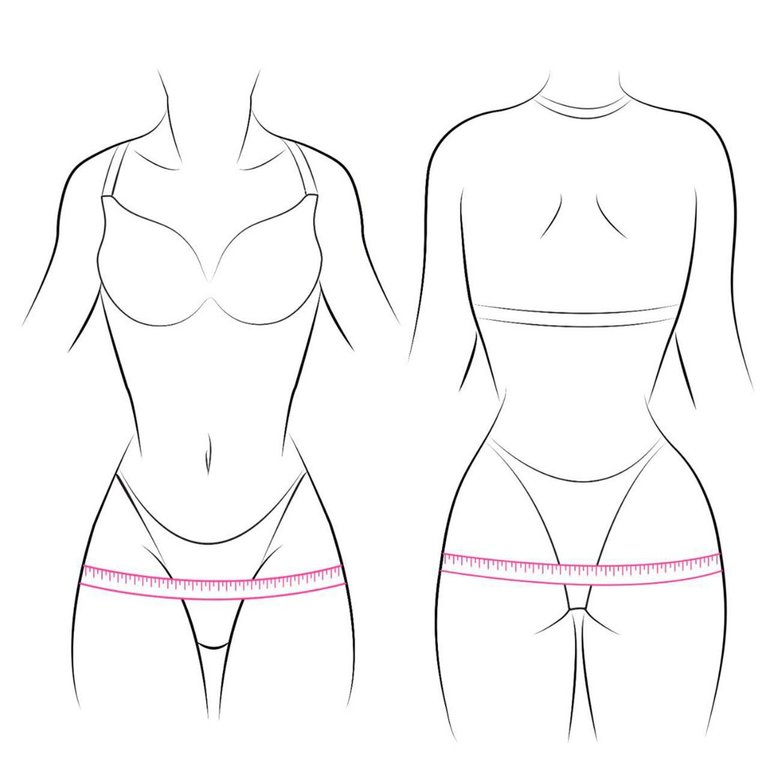
1. Take Measures
Tomar Medidas Lo primero que hay que hacer es medirte a ti o a la persona a la que le haras la panty el contorno de cadera. Tiene que ser alrededor de la parte más prominente del trasero. Luego hay que dividir esa medida entre 4. Por ejemplo, si tu contorno de cadera es de 90 cm, el resultado será de 22.5 cm
For the front
Para el delantero
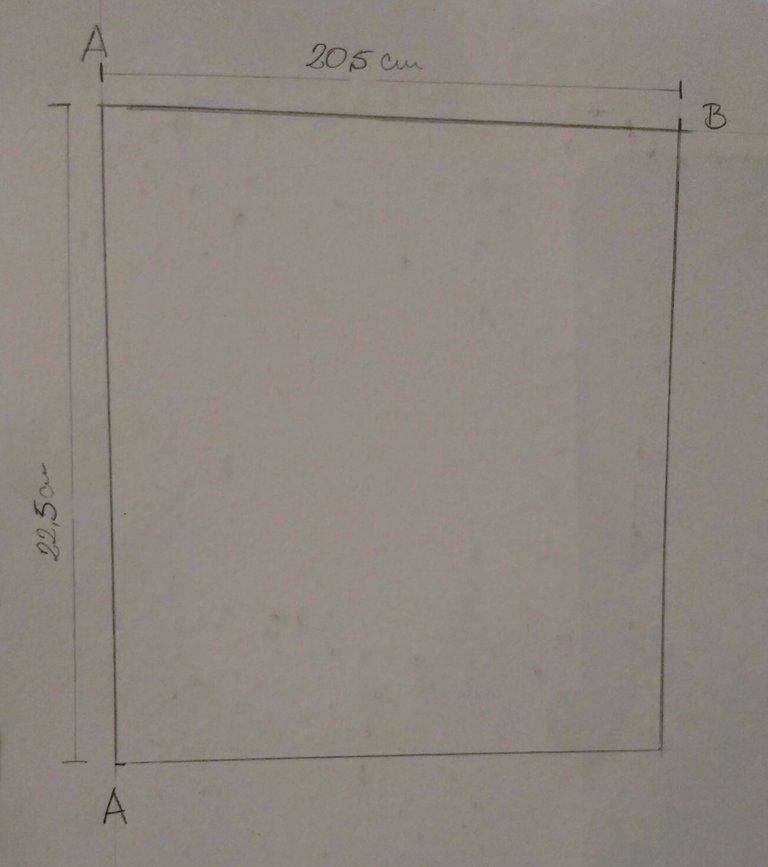
2 .Draw a square
Now on a sheet of paper you have to draw a square that is "1/4 of hip contour - 2 cm" wide and 1/4 of hip contour long. That is, the measurement we obtained before will be the length and the width will be that measurement minus 2 cm.
It is very important that you use a set square so that the angles of the pattern are correct.
We will call the vertical line on the left A, and the upper horizontal we will call B.
Trazar un cuadrado
Ahora en una hoja de papel hay que trazar un cuadrado que tenga el "1/4 de contorno de cadera - 2 cm" de ancho y de largo 1/4 de contorno de cadera. Es decir, que la medida que obtuvimos antes será el largo y el ancho será esa medida menos 2 cm.
Es muy importante que uses una escuadra para que los angulos del patrón sean los correctos.
A la línea vertical de la izquierda la llamaremos A, y a la horizontal superior la llamaremos B.
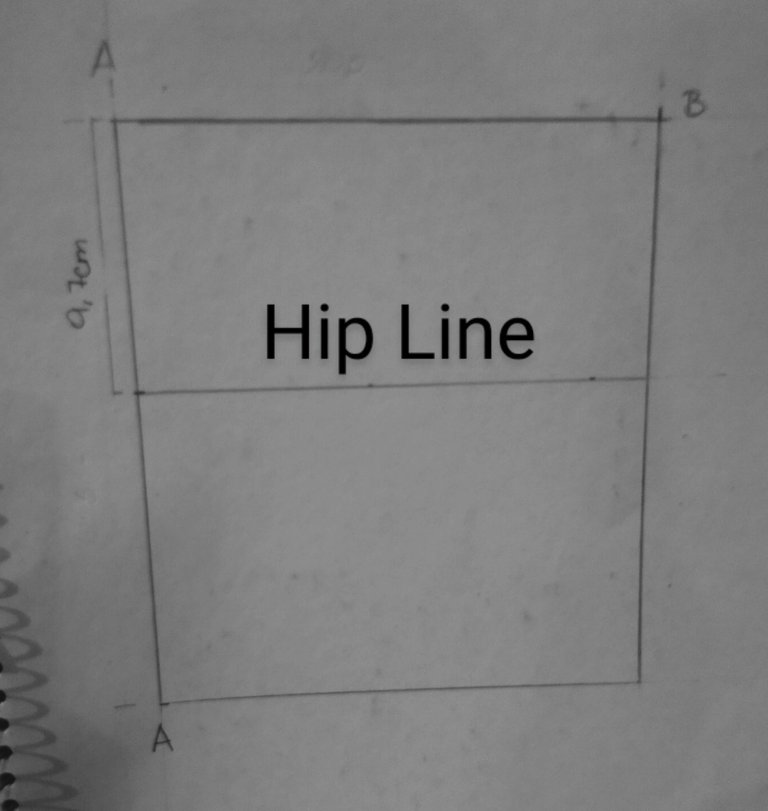
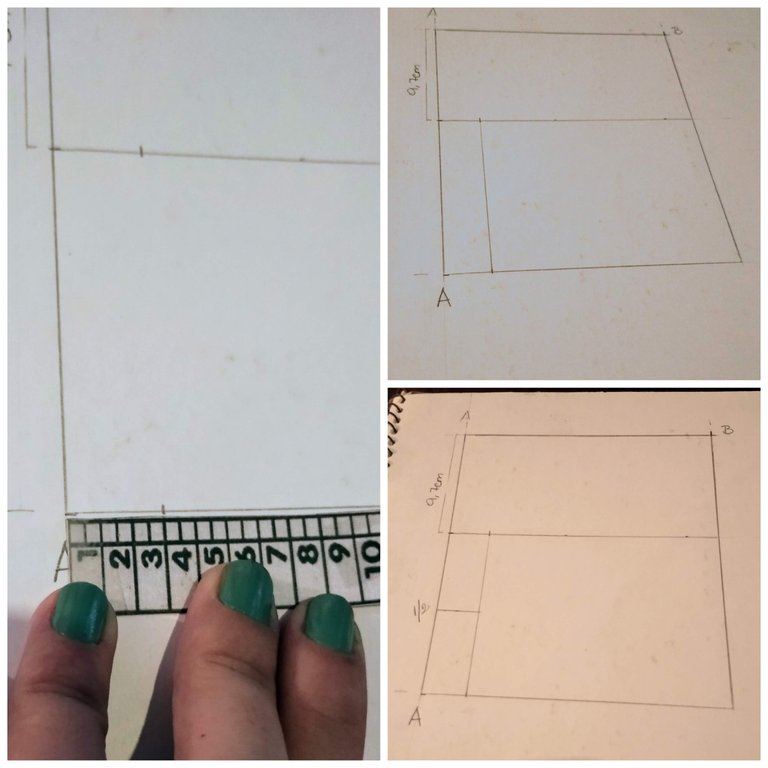
3 . Hip Line
On line A, which measures 1/4 of the hip (in the example 22.5 cm). You have to calculate half of this measurement, which would be 11.25 cm. and then you have to subtract 1.5 cm (9.7 cm) and measure this on line A from the top corner.
Línea de Cadera
En la línea A, la cual mide 1/4 del contorno de cadera (en el ejemplo 22,5 cm). Hay que calcular la mitad de esta medida, que seria 11,25 cm. y luego hay que restar 1,5 cm (9,7 cm) y medir esto en la línea A desde la esquina superior.
4 .Crotch
Measure 3 cm from left to right on both the hip line and the bottom line of the square. and draw a line joining these points. And in this little square, mark the middle.
Entrepierna
Tanto en la Línea de cadera como en la línea inferior del cuadrado hay que medir 3 cm de izquierda a derecha. y trazar una línea uniendo estos puntos. Y en este cuadradito, marcar la mitad.
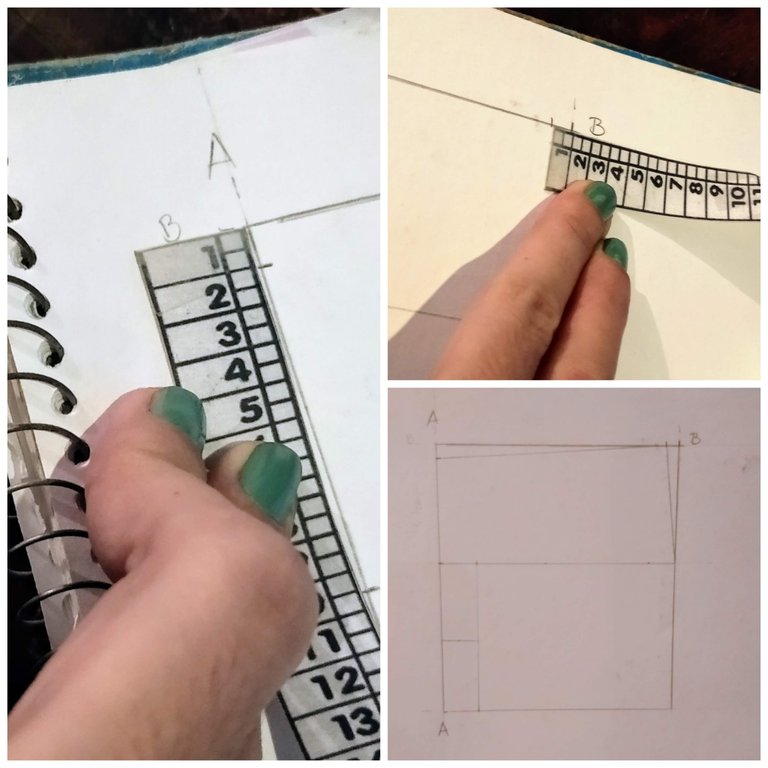
5 .Waist
On line A (upper left corner), go down 1 cm. And in line B (upper right corner), enter 1 cm. Join this last point with the hip line and the point on line A with the new point on line B.
Cintura
En la línea A (esquina superior izquierda), bajar 1 cm. Y en la línea B (esquina superior derecha), entrar 1 cm. Unir este último punto con la línea de la cadera y el punto de la línea A con el nuevo punto de la línea B.
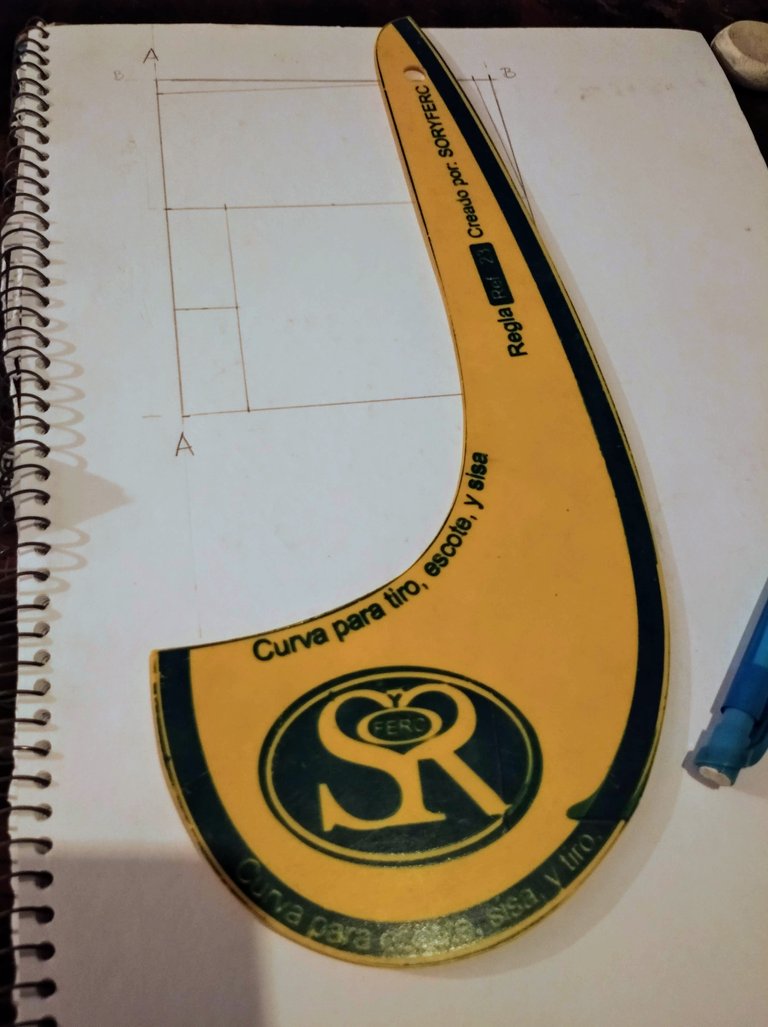
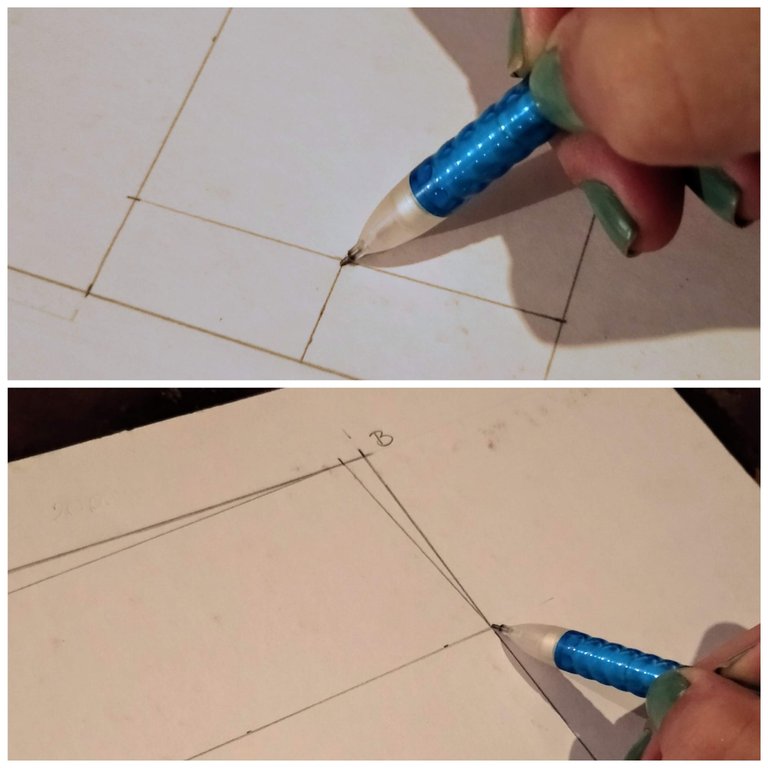
6 . Draw the legs
With the help of a curve ruler like the one in the picture, draw a curve between the points shown in the pictures.
Trazado de las piernas.
Con la ayuda de una regla curva de patronaje (como la que se muestra en la foto), trazar una curva desde los puntos que se muestran en la fotografía.
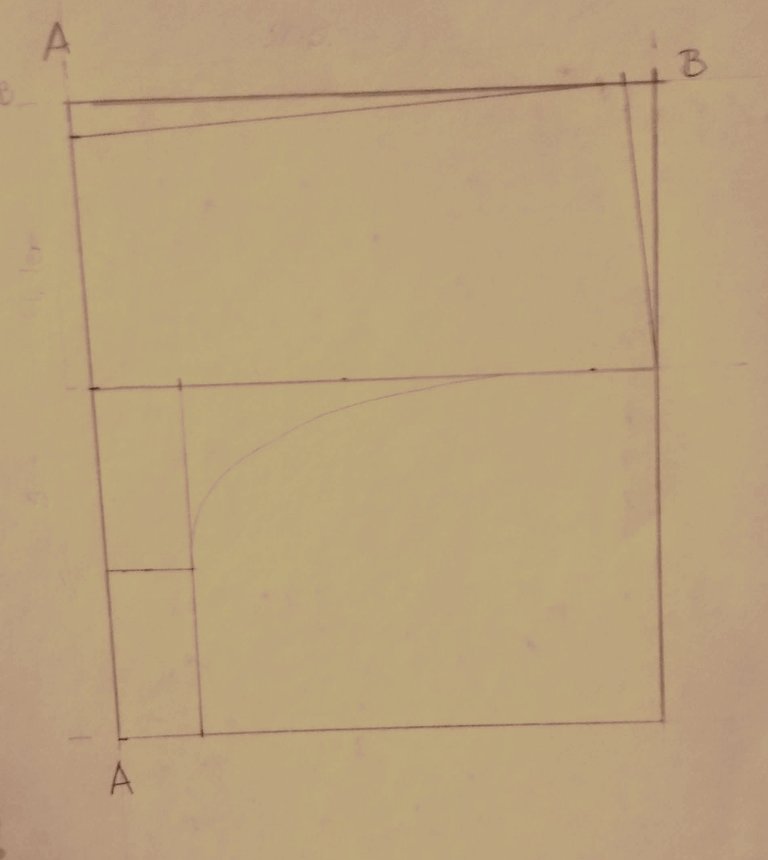
Back
Trasero.
7 . Waist
Do the same steps from number 2 to number 3.
In the upper right corner of line B, enter 1 cm
Then, on line A, go up 2 cm. And connect these dots.
Cintura
Hacer los mismos pasos del número 2 al numero 3.
En la esquina superior derecha de la línea B, entrar 1 cm
Luego, en la línea A, subir 2 cm. Y unir estos puntos.

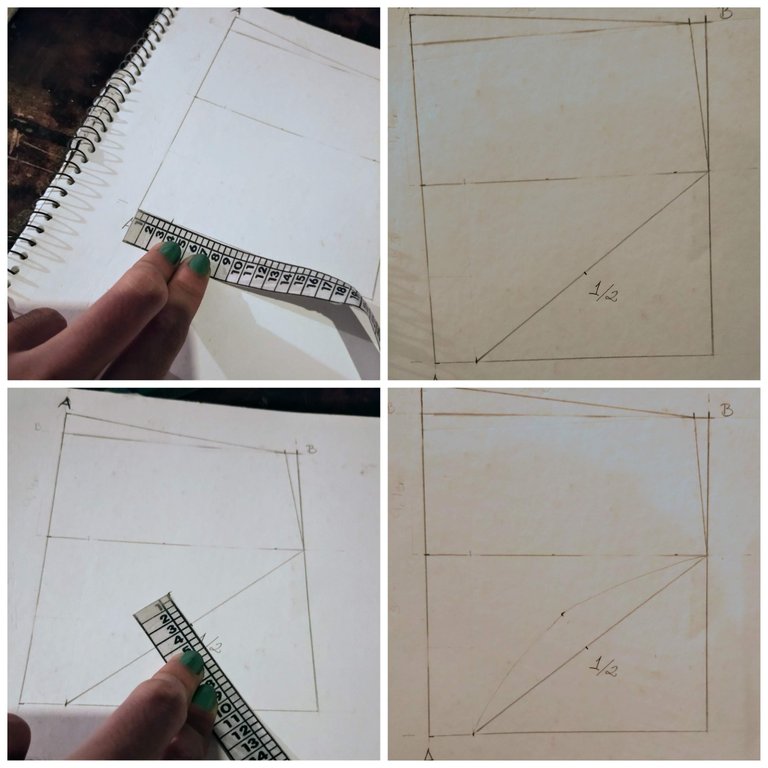
8 .Crotch and Legs
Entrepierna y Piernas
En la línea inferior del cuadrado, marcar 3 cm de izquierda a derecha. Y unir a la línea de cadera en línea recta. En esta línea, marcar la mitad y subir perpendicularmente 3 cm. Unir en línea curva este punto con el punto de la entrepierna y la línea de cadera.
Preparation for sewing
Line A would be the fold of the fabric, so you can cut it like this and fold the fabric when you go to cut it or fold the paper when you trace the pattern and cut it with the whole piece and not fold the fabric.
You also need to increase the seam allowance that you are going to use. I usually put 1 cm but it is totally to your liking. Just keep in mind the type of elastic you will use.
Regarding the type of fabric to use. I usually use cotton blends. But I know of many people who use stretchy synthetic fabrics like lycra and they look great.
Preparación para coser
La línea A seria el doblez de la tela, por lo que puedes cortarlo así y doblar la tela cuando vayas a cortarla o doblar el papel cuando trazes el patrón y cortarlo con la pieza entera y no doblar la tela.
También es necesario aumentar el margen de costura que vayas a usar. Yo le suelo poner 1 cm pero es totalmente a tu gusto. Solo ten en cuenta el tipo de elastico que utilizarás.
Con respecto al tipo de tela a usar. Yo suelo usar mezclas de algodón. Pero se de muchas personas que usan telas sinteticas elasticas como lycra y quedan geniales.


