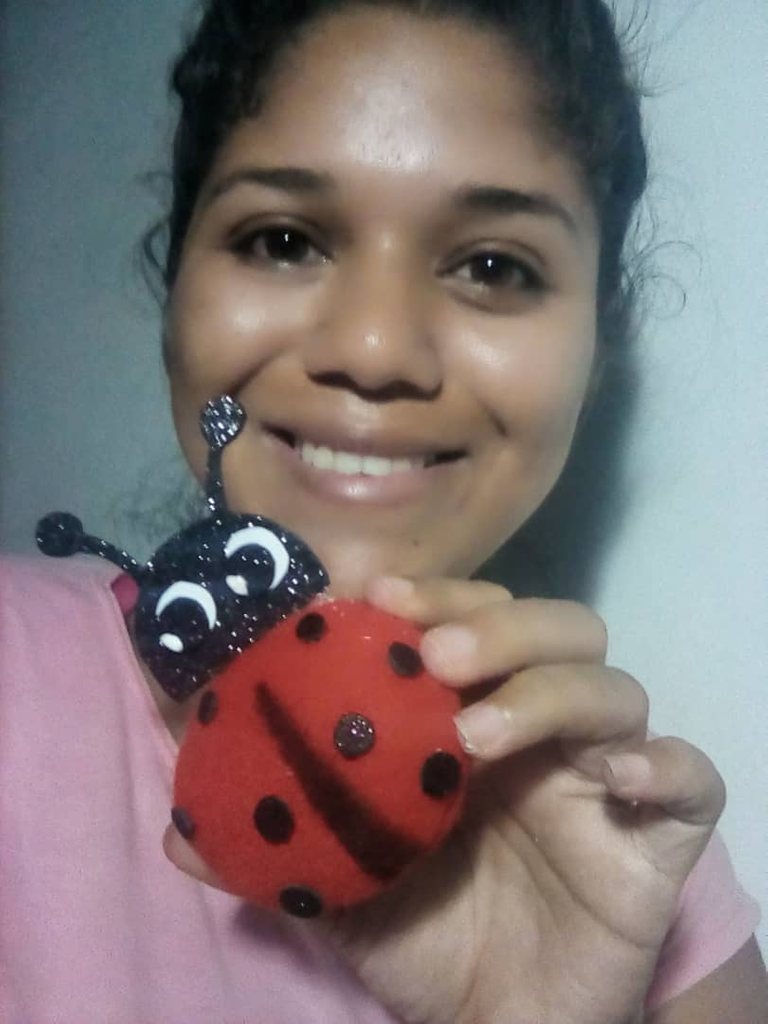
Hola Comunidad HiveDiy, hoy les traigo una Bella Mariquita de nombre Tintín, elaborada en Fieltro y Foami, y cumple doble función, como pieza decorativa ecologista y como porta agujas. Agradezco la positiva respuesta que han dado a mis aportes en esta distinguida Comunidad.
Hello HiveDiy Community, today I bring you a beautiful ladybug named Tintin, made in Felt and Foami, and serves dual function, as an eco-friendly decorative piece and as a needle holder. I appreciate the positive response you have given to my contributions in this distinguished Community.
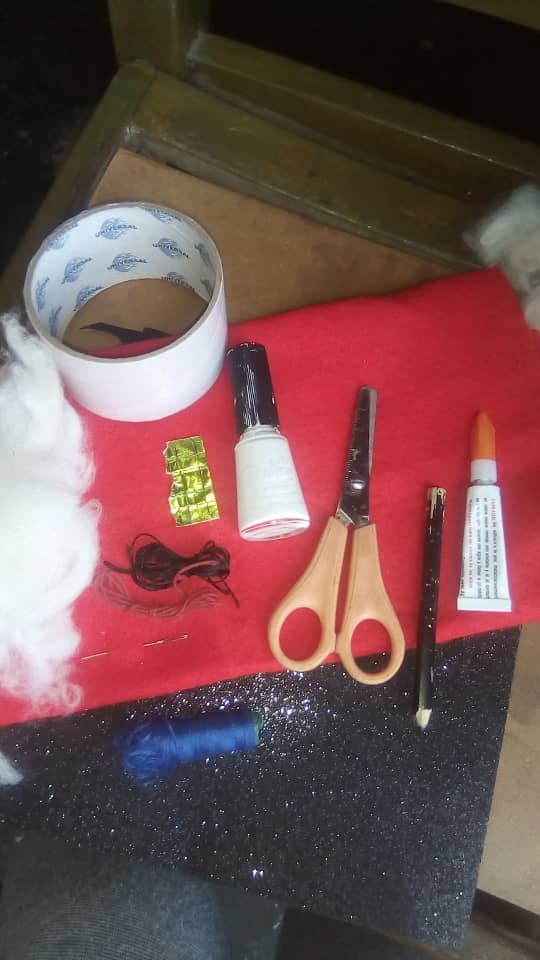
Bella Mariquita Tintín
Materiales:
Molde.
Tijera.
Hilo.
Aguja.
Lápiz crayón o marcador.
Pintura blanca.
Pega para tela.
Fieltro.
Relleno.
Foami negro escarchado.
Foami negro mate.
Beautiful Ladybug Tintin
Materials:
Mold.
Scissors.
Thread.
Needle.
Crayon pencil or marker.
White paint.
Fabric glue.
Felt.
Stuffing.
Frosted black foami.
Matte black foami.
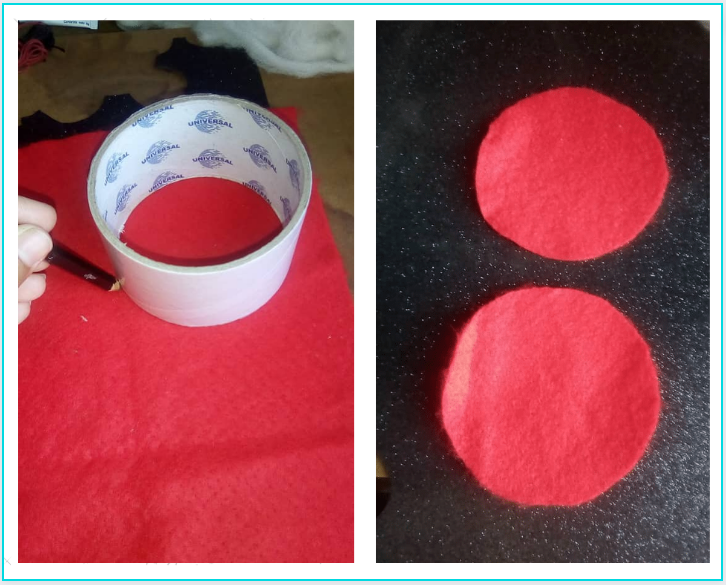
Comenzamos marcando en el fieltro dos círculos del mismo tamaño usando el molde de guía, cortamos con la tijera y procedemos a coser con hilo y aguja.
We start by marking two circles of the same size on the felt using the mold as a guide, cut with the scissors and proceed to sew with thread and needle.
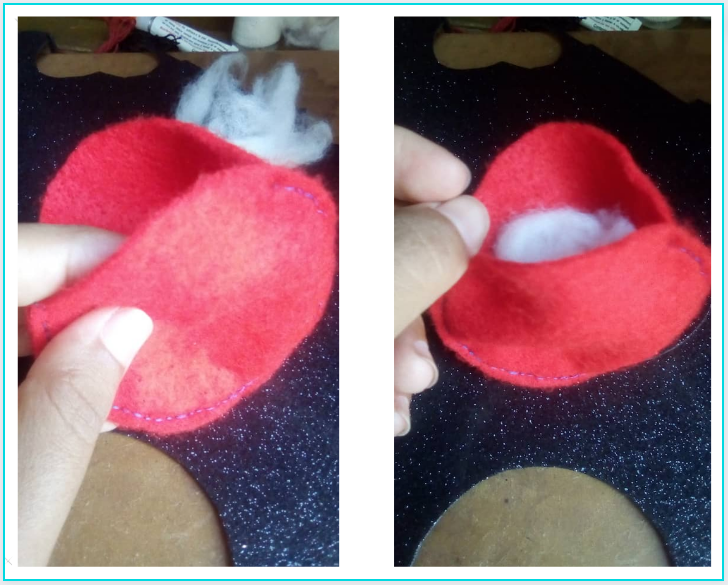
Cosemos hasta dejar una pequeña abertura, volteamos el círculo para que la costura quedé en el interior y procedemos a introducir el relleno,
We sew until we leave a small opening, turn the circle over so that the seam is on the inside and proceed to insert the filling,
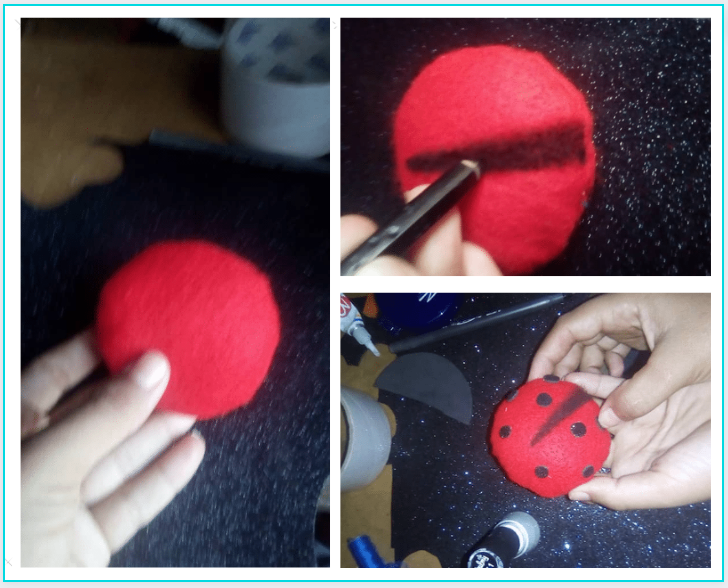
Ahora marcamos la carita y los puntos de la pequeña mariquita en el Foami escarchado y recortamos y reservamos, procedemos a pintar con el color o marcador una raya de la mitad del cuerpo hacia abajo para definir las alas de la mariquita.
Now we mark the face and the dots of the little ladybug on the frosted Foami and cut out and set aside, we proceed to paint with the color or marker a line from the middle of the body down to define the wings of the ladybug.
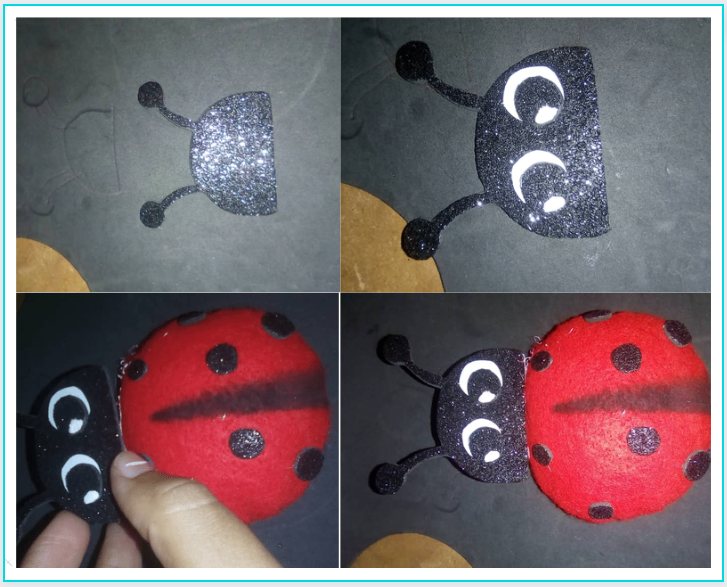
Proseguimos pegando los puntos y con el Foami negro mate marcamos y picamos dos círculos y dos círculos que serán los ojos de Tintín. Para culminar pintamos en la carita de la mariquita dos círculos blancos y le pegamos los ojos, le damos retoques con la pintura blanca en los ojos y la pegamos al cuerpo.
We continue gluing the dots and with the matte black Foami we mark and chop two circles and two circles that will be the eyes of Tintin. To finish we paint on the ladybug's face two white circles and glue the eyes, we touch up with the white paint on the eyes and glue it to the body.
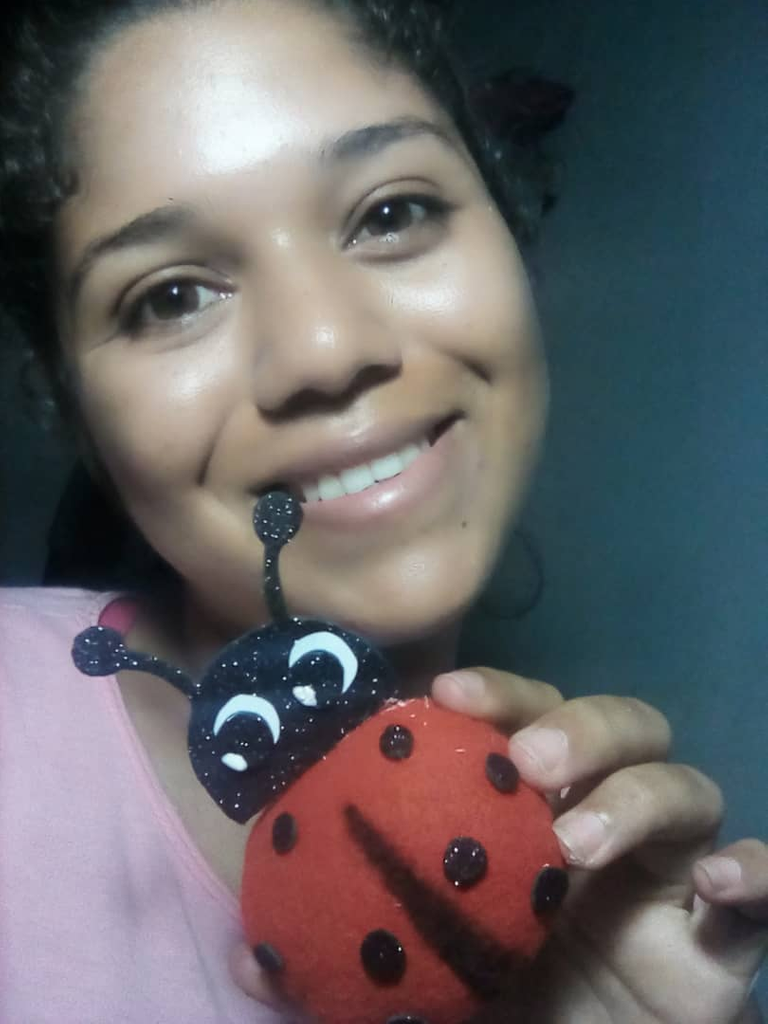
Muy bien amigos míos. Así nos queda nuestra Bella Mariquita Tintín, espero que les sea útil y excelente compañera, ha sido un placer poder aportarles un poco de mi experiencia y les agradezco observar mis contenidos, hasta pronto.
Very well my friends. So we have our beautiful Ladybug Tintin, I hope it will be useful and excellent companion, it has been a pleasure to bring you a little of my experience and I thank you for watching my content, see you soon.
                      Fotos de mi autoria editadas en Canva.
        Traducion realizada con DieepL Translate el mejor traductor del mundo.
                  Mil Gracias por ver y seguir mi contenido
