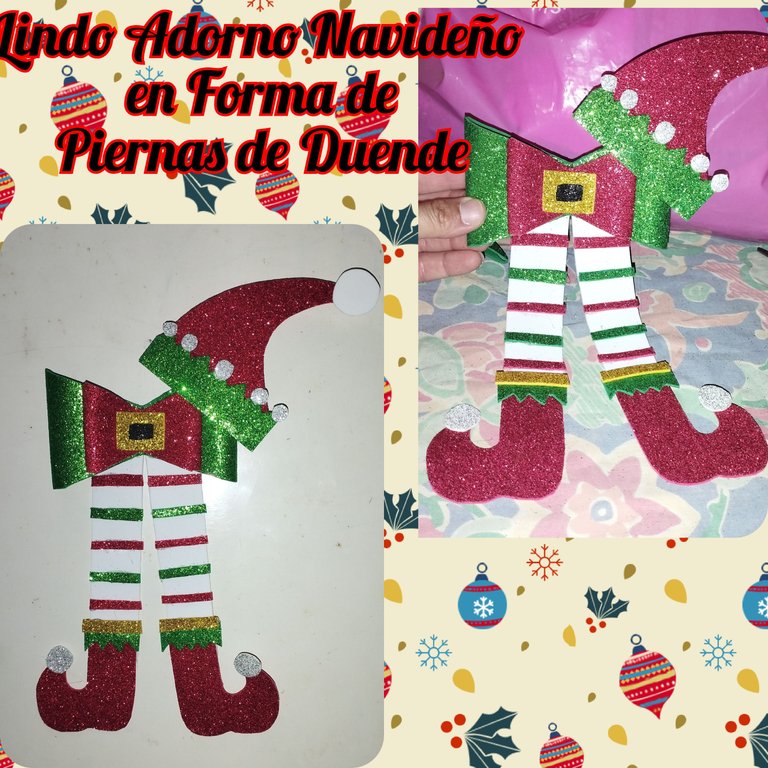
Feliz inicio de semana mis queridos amigos de @diyhub y todos los integrantes de la plataforma Hive.. en esta oportunidad quiero compartir con ustedes en esta bella comunidad de creativas manualidades, me encantan todas las que he visto de los diferente hivers, y son hermosos. Hoy quise compartir este hermoso Adorno navideño en forma de piernas de duende para nuestras neveras, árbol de navidad y hasta quizás para las puertas es muy ajustable a todas estas opciones eso solo depende de ustedes dónde lo quieran colocar y el uso que deseen darle. Yo le puse un pequeño imán detrás para usarlo en mi nevera se ve muy hermoso.
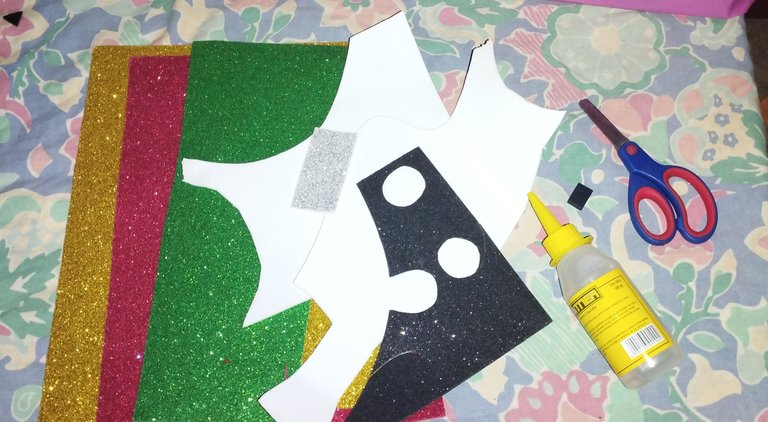
Le muestro a continuación los materiales que utilice en mi adorno Navideño.
MATERIALES:
- Foami: Verde, Rojo, Dorado, Blanco,Plateado y Negro.
- Silicón al frío y caliente.
- Tijera.
- Imán.
PASO A PASO:
PASO 1:
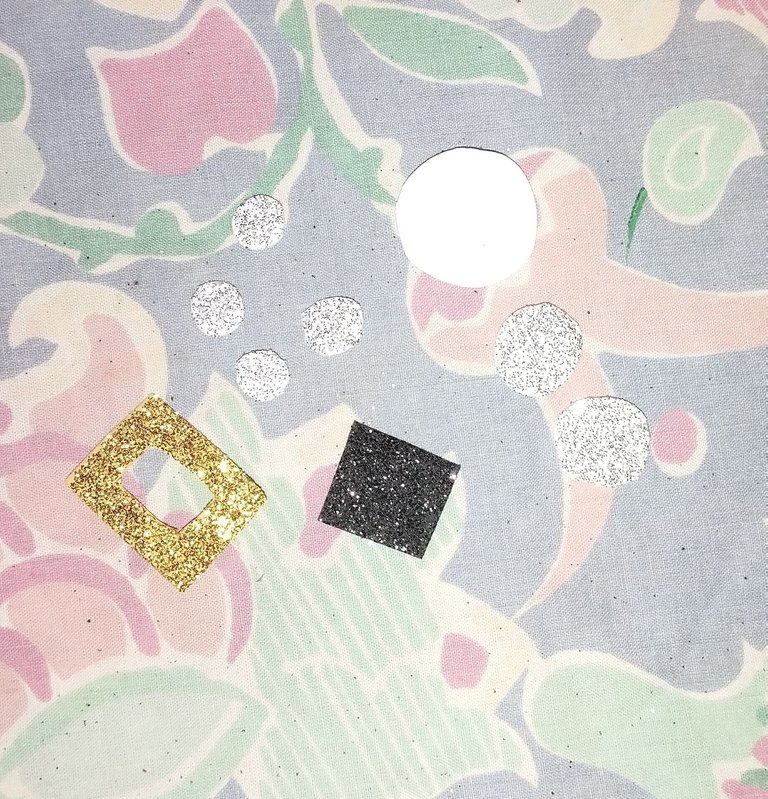
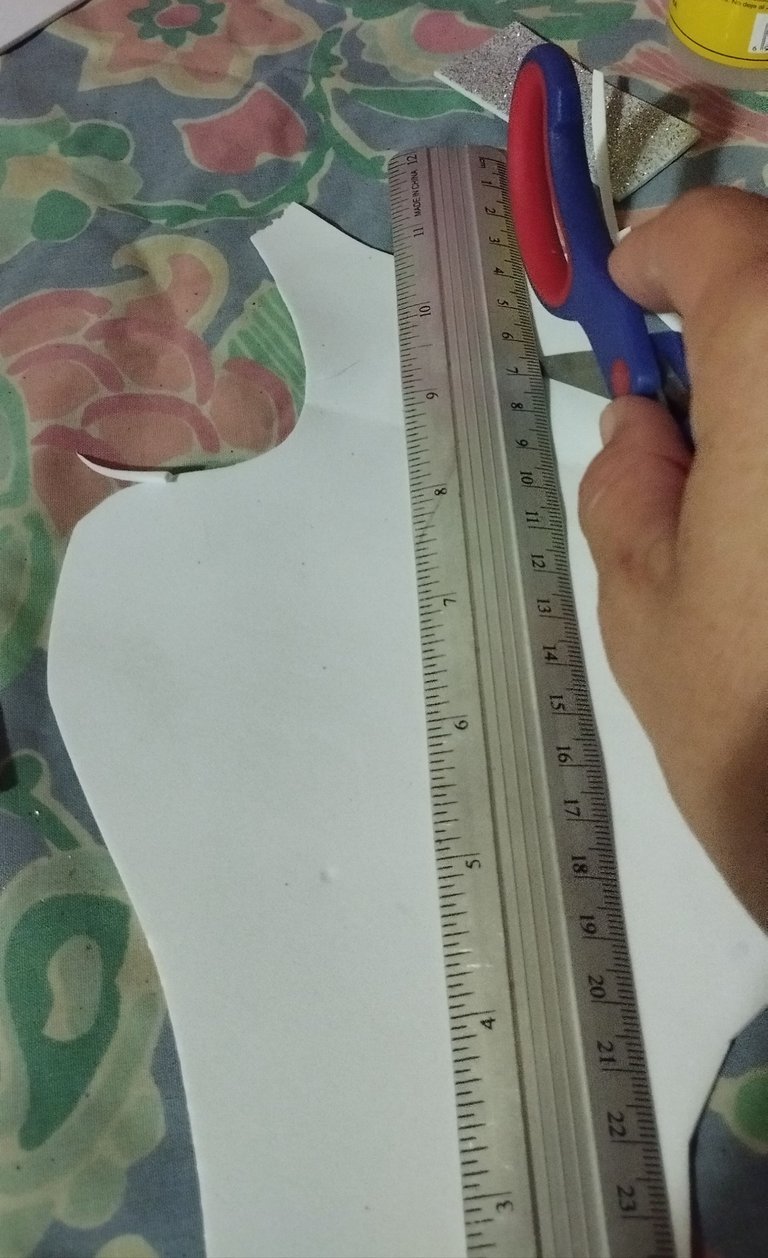
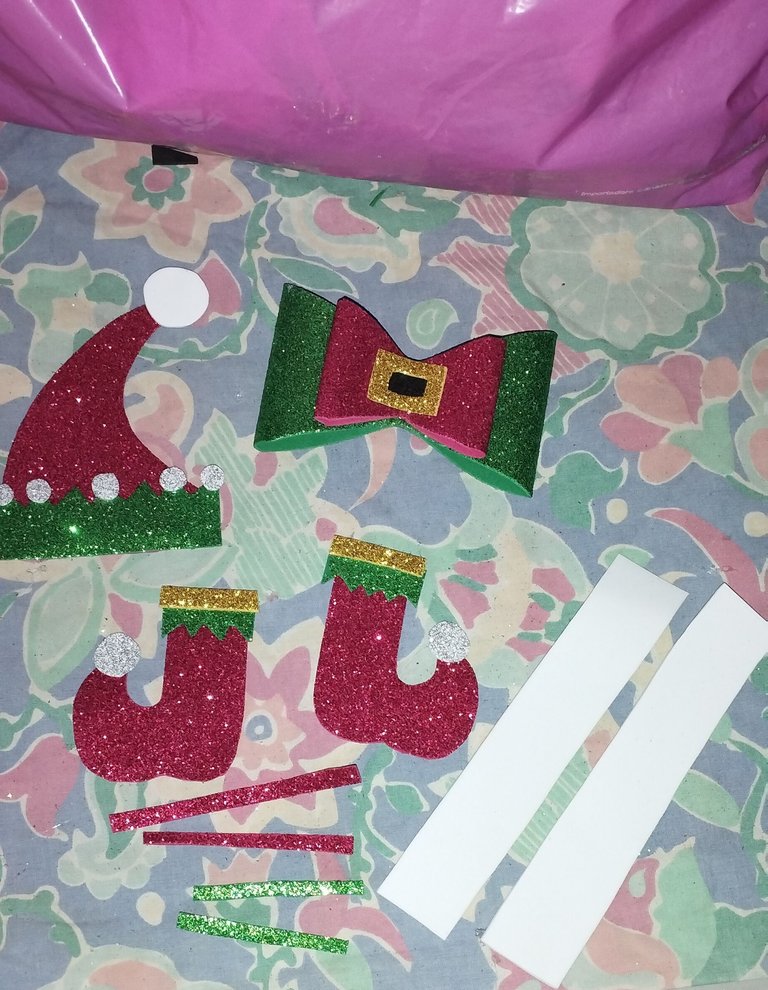
Recortamos todos las partes que se van a utilizar para el adorno. Yo recorte primero los pequeños detalles como los círculos que irán en la punta de las zapatillas, la hebilla de la correa y el del gorro estos los hice en el foami: blanco, plateado, Dorado y negro.
PASO 2:
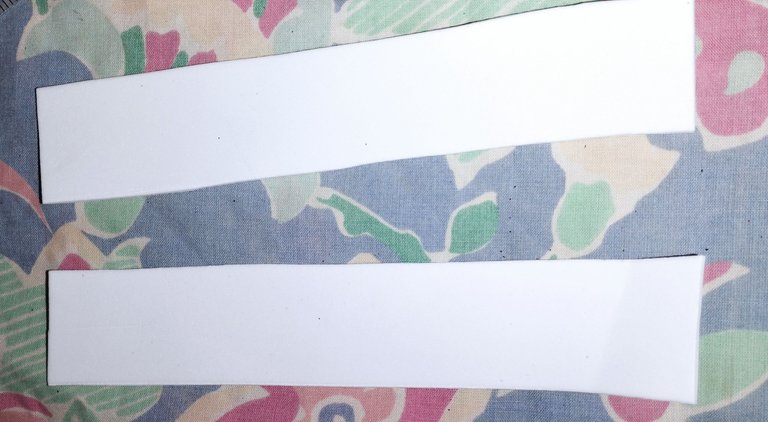
Ahora vamos a cortar las piernas que utilice 5 centímetros de ancho de foami blanco recorte dos que son las piernas.
PASO 3:
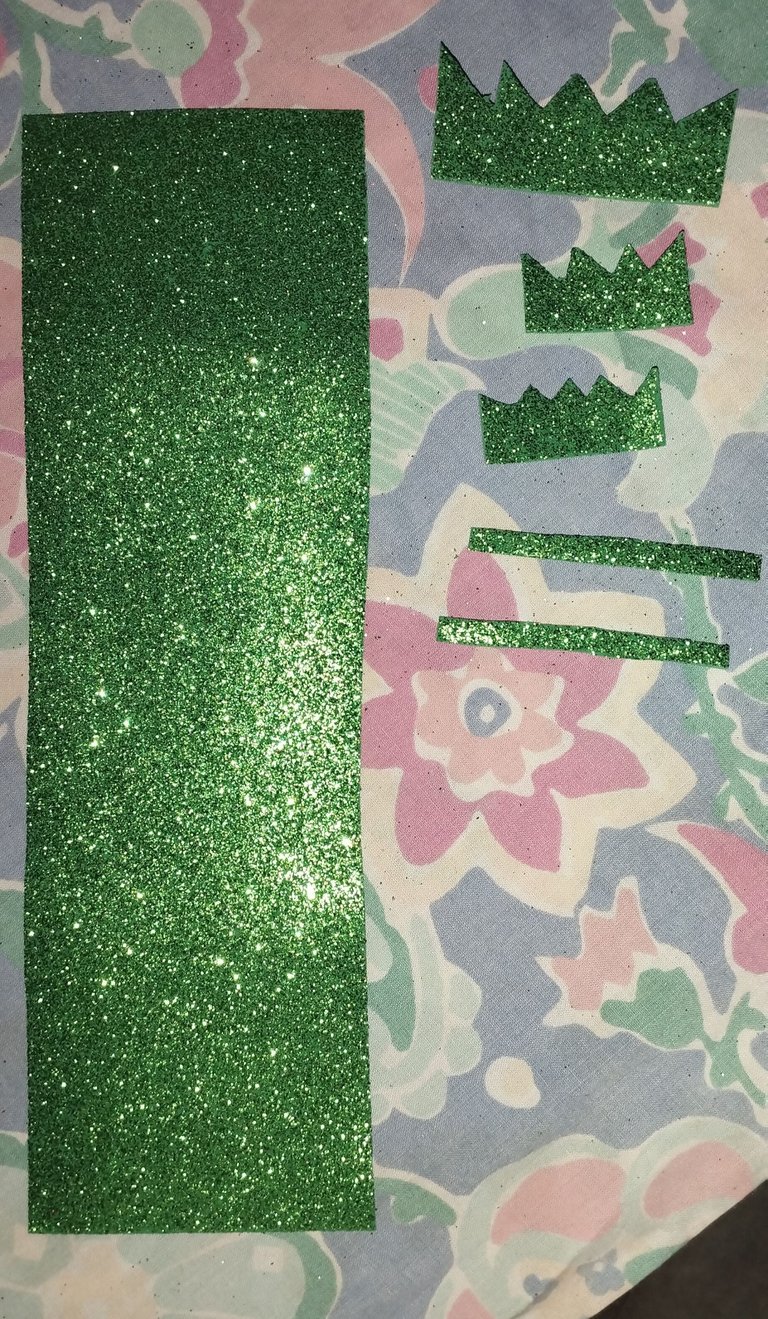
Recortamos en esta oportunidad lo que será en color verde de dónde sacaremos los accesorios de las botas y del gorro serán 3 en forma de corona y un rectángulo de dónde se elaborara un lazo.
PASO 4:
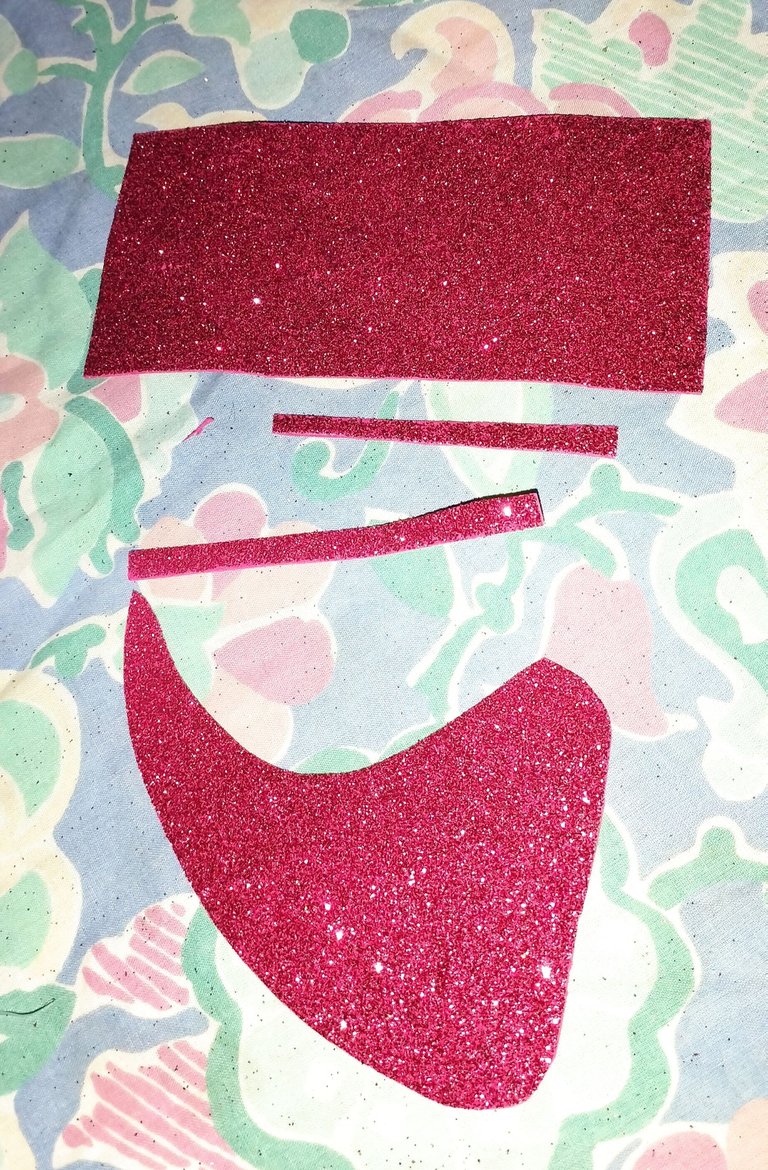
Del foami rojo sacaremos el gorro, un rectángulo y las botas que se le colocarán a las piernas del duende.
PASO 5:
Ya tenemos todo listo, para empezar a unir las piezas ya una vez que tengamos todo listo, yo lo hice así recortando las piezas primero y luego pegar para que se me hiciera más fácil en la manera de explicarme ya que aun no tengo tanta experiencia en la explicación del paso a paso.

PASO 6:
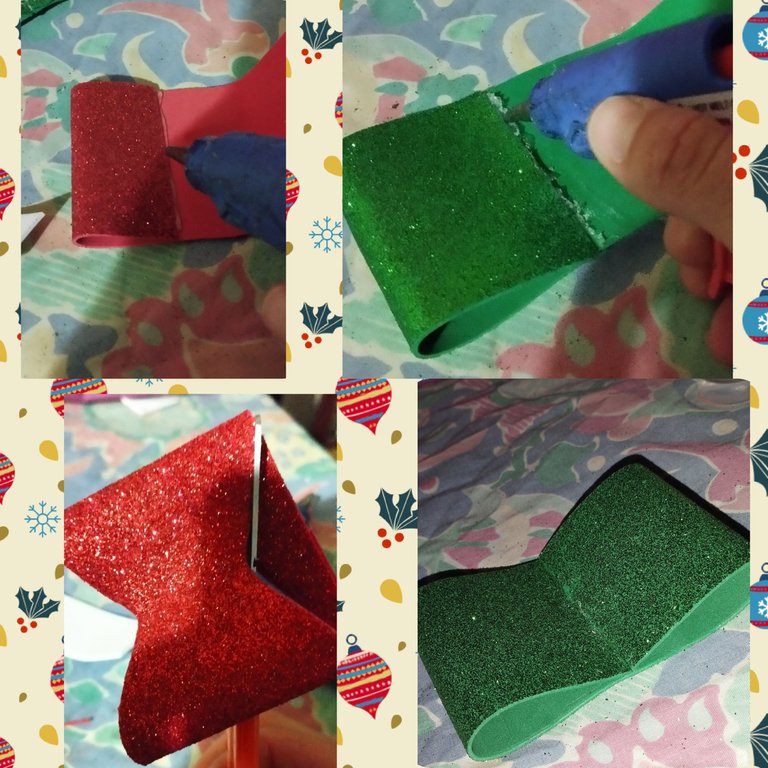
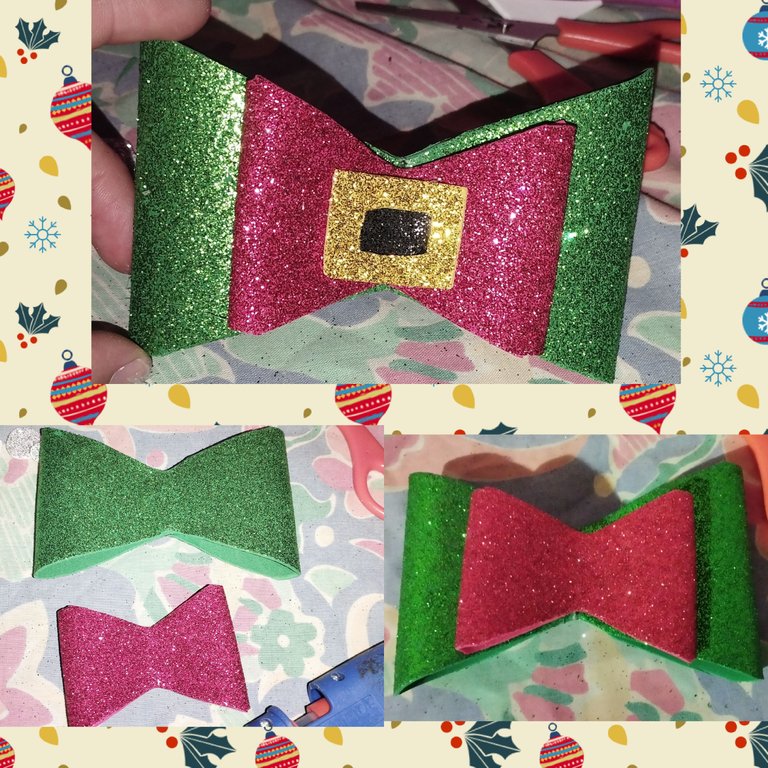
Con el rectángulo Rojo y Verde, vamos a pegarlos en el medio y luego vamos a recortar una forma de lazo en los dos el verde un poco más grande que el rojo pero haciéndole la misma forma de lazo. Luego en el centro se le coloca la hebilla que se hizo con dorado y negro.y así tenemos listo en lazo.
Paso 7:
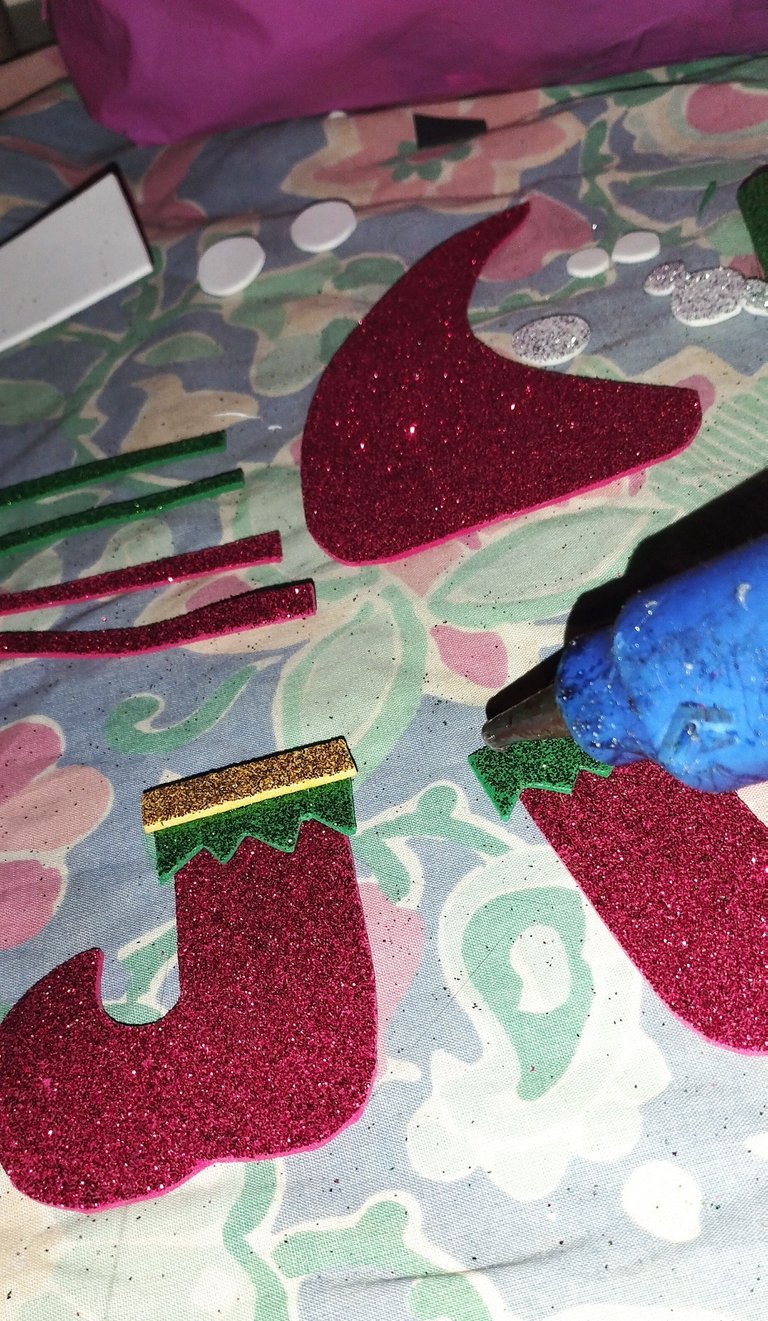
Unimos las piezas que son las botas y el sombrero. En el sombrero le ponemos la corona verde les recuerdo que la corona se debe haber del tamaño del gorro. Yo la hice de 15 centímetros de largo lo mismo que mide el gorro en la parte de abajo, en las botas le colocamos las otras formas de corona pero se la colocamos al revés para que se la impresión del borde de las medias y arriba le colocamos un borde dorado como un listón.
PASO 8:
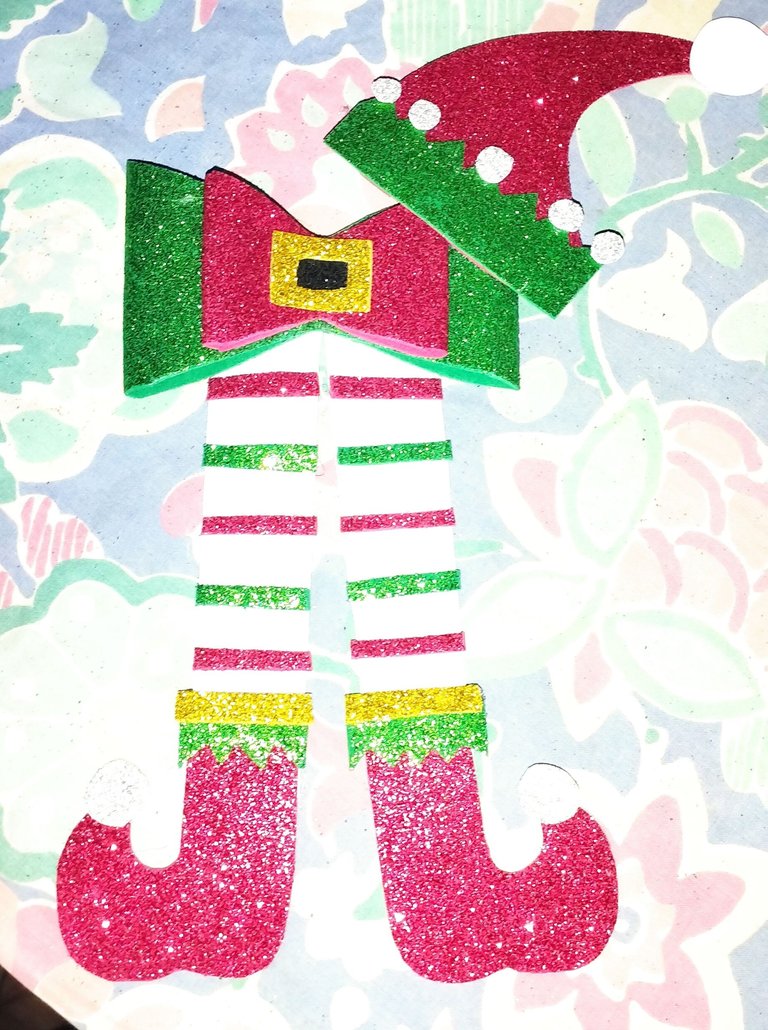
Ya una vez teniendo todo esto listo colocamos las piernas y vamos juntando las piezas grandes. Es decir el gorro , el lazo y las botas ya listas a las piernas se le van colocando listones rojos y verdes en secuencia. Ustedes pueden usar el color que deseen.

Y así de rápido y fácil tenemos una adornos de piernas de duende hermosas y prácticas para colocarlo dónde deseen.
Gracias por el apoyo, espero les gusten.
Saludos y abrazos.
Las imagenes me pertenecen, fueron tomadas de mi teléfono SamsungS23.
Las imágenes fueron editadas por programa de editor de fotos Polish.
traductor: Deepl Traslator.
Happy start of the week my dear friends of @diyhub and all the members of the Hive platform.. this time I want to share with you in this beautiful community of creative crafts, I love all the ones I have seen from the different hivers, and they are beautiful. Today I wanted to share this beautiful Christmas ornament in the form of elf legs for our refrigerators, Christmas tree and maybe even for the doors is very adjustable to all these options that just depends on you where you want to place it and the use you want to give it. I put a small magnet on the back to use it on my fridge, it looks beautiful.
Here are the materials I used in my Christmas ornament.
MATERIALS:
- Foami: Green, Red, Gold, White, Silver and Black.
- Hot and cold silicone.
- Scissors.
- Magnet.
STEP BY STEP:
STEP 1:
We cut out all the parts that are going to be used for the ornament. I first cut out the small details such as the circles that will go on the toe of the shoes, the buckle of the strap and the cap, these I did in foami: white, silver, gold and black.
STEP 2:
Now we are going to cut the legs we use 5 centimeters wide white foami cut out two which are the legs.
STEP 3:
We cut in this opportunity what will be in green color from where we will get the accessories of the boots and the hat will be 3 in the form of a crown and a rectangle from where we will make a bow.
STEP 4:
From the red foami we will take the hat, a rectangle and the boots that will be placed on the elf's legs.
STEP 5:
Now we have everything ready, to begin to join the pieces and once we have everything ready, I did it this way by cutting the pieces first and then glue to make it easier for me in the way to explain myself as I still do not have so much experience in explaining the step by step.
STEP 6:
With the Red and Green rectangle, we are going to glue them in the middle and then we are going to cut a loop shape in the two, the green one a little bigger than the red one but making the same loop shape. Then in the center we place the buckle that was made with gold and black and so we have the bow ready.
Step 7:
We join the pieces that are the boots and the hat. On the hat we put the green crown I remind you that the crown must be the size of the hat. I made it 15 centimeters long, the same length as the cap measures at the bottom, on the boots we put the other forms of crown but we put it upside down so that the impression of the edge of the stockings and above we put a golden edge as a ribbon.
STEP 8:
Once we have all this ready we place the legs and we put together the big pieces. That is the hat, the bow and the boots already ready to the legs are placed red and green ribbons in sequence. You can use any color you want.
And so quick and easy we have a beautiful and practical elf legs ornaments to place it where you want.
Thanks for your support, I hope you like them.
Greetings and hugs.
The images belong to me, they were taken from my SamsungS23 phone.
The images were edited by Polish photo editor program.
translator: Deepl Traslator.


