
¡Buenas noches mis queridos #Hivers. Hoy les quiero compartir otra edición de Manualidades Escolares, con la elaboración de sobres personalizados, pero esta vez los sobres los harán ustedes mismos guiándose por la estructura de los sobres de manila.

Los materiales que vamos a utilizar son:
- Una lámina de papel bond del color que deseen
- Tijeras
- Silicón frío
- Pistola de silicón
- Barra de silicón
- Colores
- Marcadores
- Un trocito de foami
- Un trocito de cinta elástica
- Un botón

El procedimiento es simple:
- Recortar un rectángulo del papel bond con las medidas de su gusto, en este caso puede ser de 50 cm de ancho x 30 cm de altura.
- Doblar la parte de 50 cm dejando hacia adelante una cara de 25 cm, y hacia atrás dos lados de 12 y 13 cm cada uno.
- Unir con pegamento los dos lados de 12 y 13 cm.
- Dejar una pestaña de 3 cm hacia arriba y una de 2 cm hacia abajo.
- La pestaña inferior se une con pegamento.
- A la pestaña superior se le coloca la cinta elástica y encima un círculo pequeño de foami.
- Por detrás del sobre se coloca un botón para ajustar la cinta elástica.
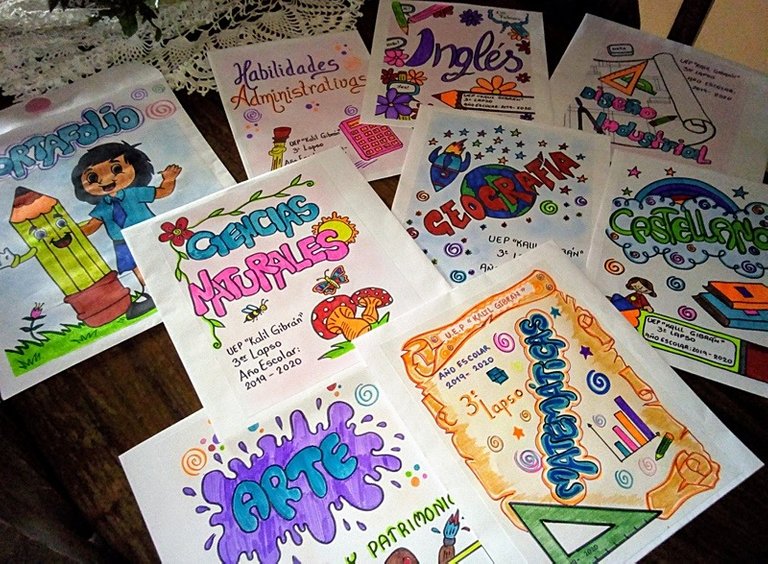
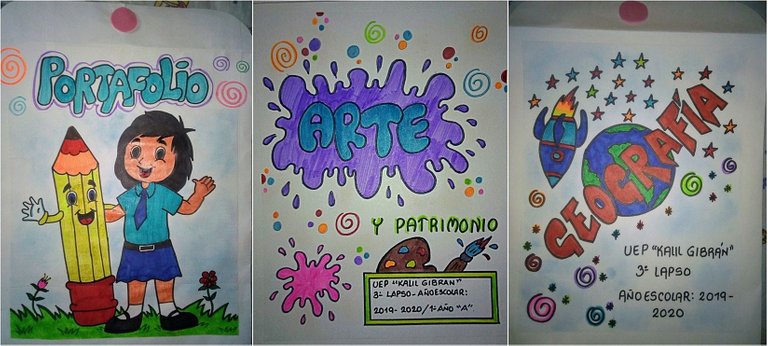
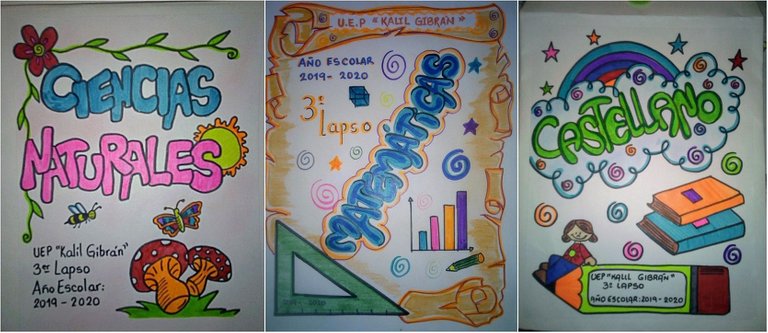
- Se decoran con dibujos relacionados a cada tema

Good evening my dear #Hivers. Today I want to share with you another edition of School Crafts, with the elaboration of personalized envelopes, but this time you will make the envelopes yourself, guided by the structure of the manila envelopes.
The materials that we are going to use are:
- A sheet of bond paper of the color you want
- Pair of scissors
- Cold sylicon
- Silicone gun
- Silicone bar
- Colors
- Markers
- A piece of foami
- A piece of elastic tape
- A button
The procedure is simple:
- Cut out a rectangle from the bond paper with the measurements of your liking, in this case it can be 50 cm wide x 30 cm high.
- Fold the 50 cm part leaving a 25 cm face forward, and two 12 and 13 cm sides backwards.
- Join with glue the two sides of 12 and 13 cm.
- Leave a 3 cm tab up and a 2 cm down.
- The bottom flange is attached with glue.
- The upper flange is placed with the elastic tape and on top of it a small circle of foam.
- A button is placed behind the envelope to adjust the elastic band.
- They are decorated with drawings related to each topic.
Espero que les haya gustado esta actividad, será hasta una próxima edición de Manualidades Escolares. ¡¡Feliz fin de semana!!
I hope you liked this activity, it will be until a next edition of School Crafts. Happy weekend!!
Todas las imágenes son de mi archivo personal y las actividades son realizadas por mis alumnos en mi Taller de Orientación Pedagógica.
All the images are from my personal archive and the activities are carried out by my students in my Pedagogical Guidance Workshop.