🇪🇸 ESPAÑOL
¡¡Feliz día para todos!!
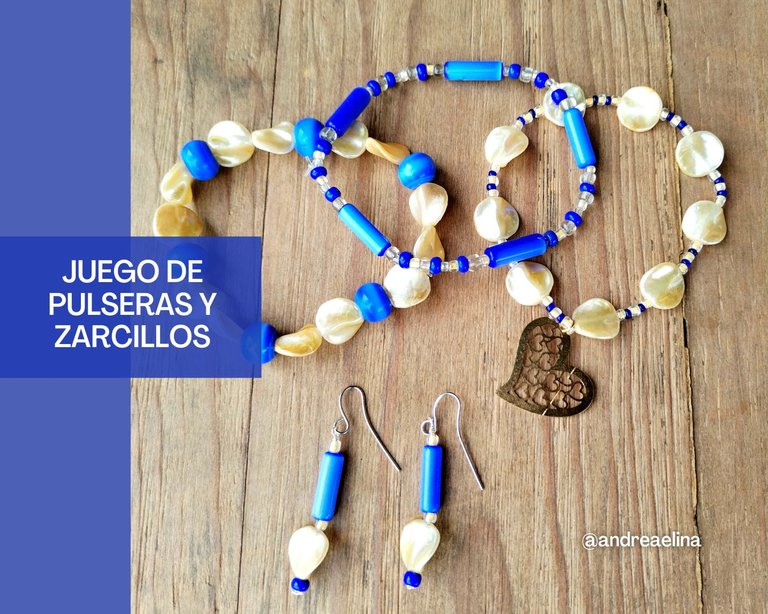
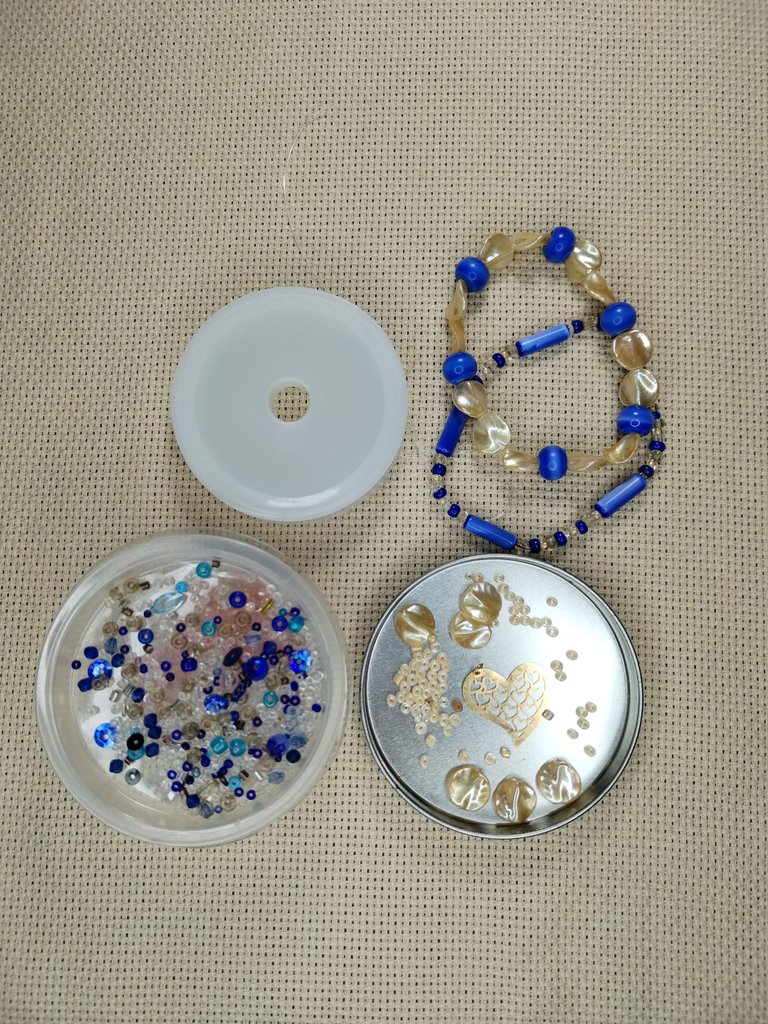
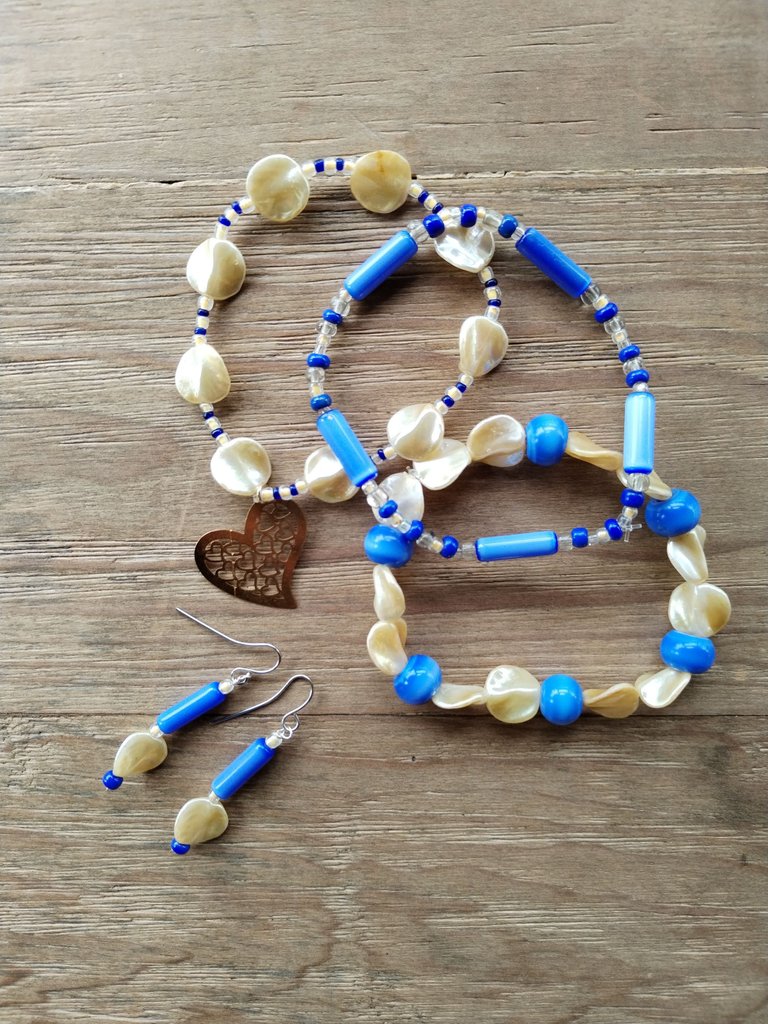
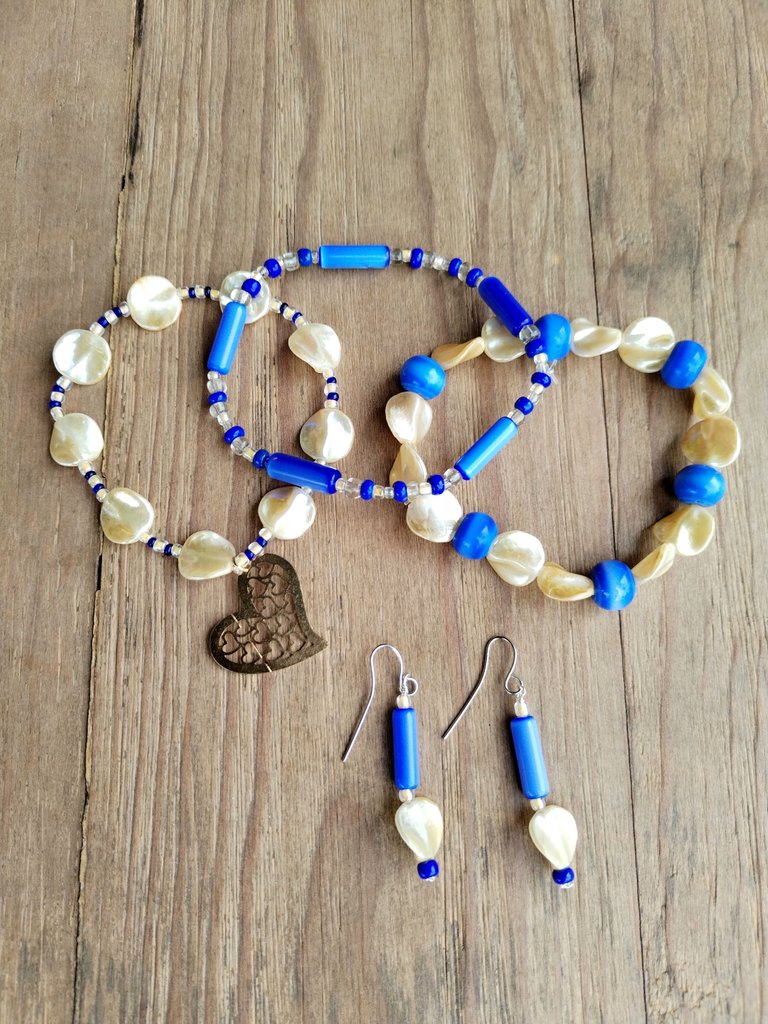
Hoy les mostraré la confección de unos zarcillos y una pulsera que hacen juego con otras dos pulseras que ya tenía armadas. Las había hecho con intención de regalarlas el día de las madres, pero al final solo me salieron esas dos porque me quedé sin nylon para hacer la cantidad de pulseritas que quería hacer en ese momento. Para esos meses aún no pertenecía a #Hive, razón por la cual no tengo documentado como las hice.
Sin embargo, se acerca el cumpleaños de una querida amiga y pensando en hacerle un detalle, recordé que ya tenía esas dos pulseras armadas, que hace unos días había comprado material nuevo y que todavía me quedaban piedritas de los mismos modelos y formas de esas que ya tenía hechas. Entonces pensé que podía completar el juego para que fuese más llamativo con una tercera pulsera y unos zarcillos que combinaran.
¡Así que me puse manos a la obra!
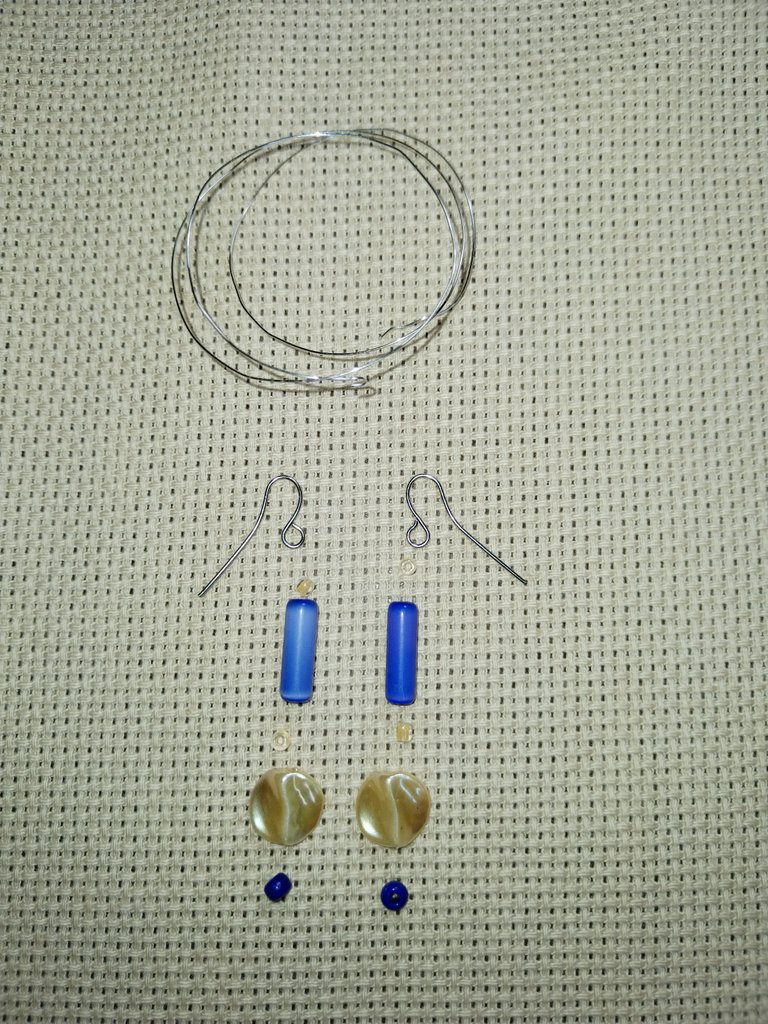
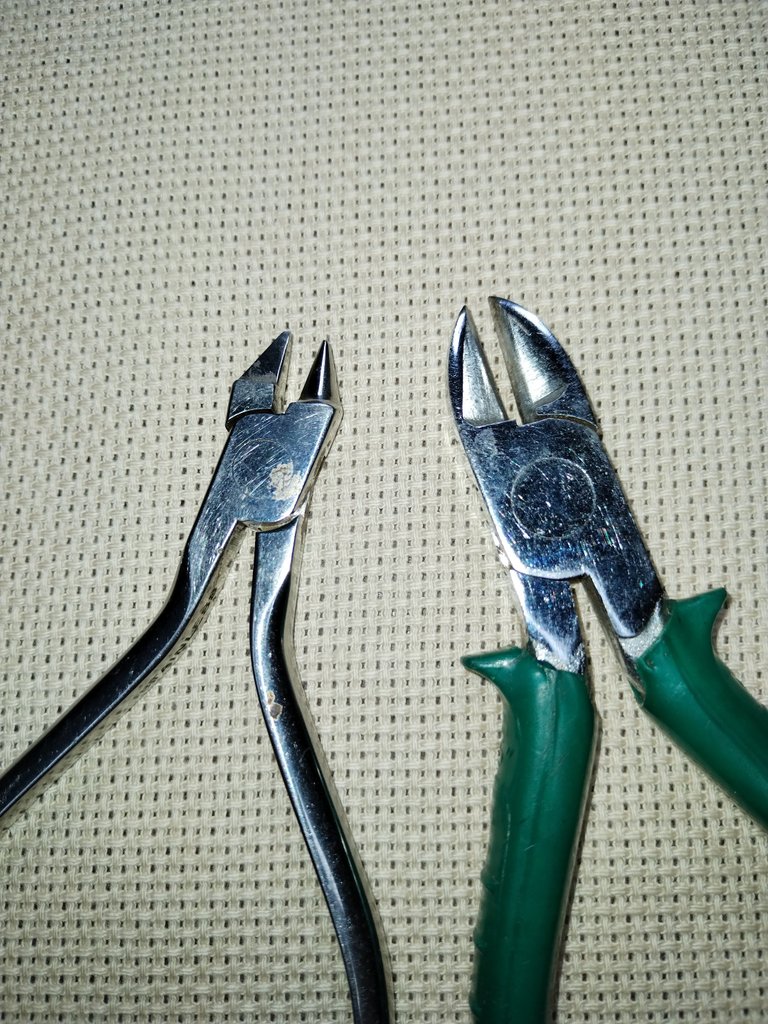
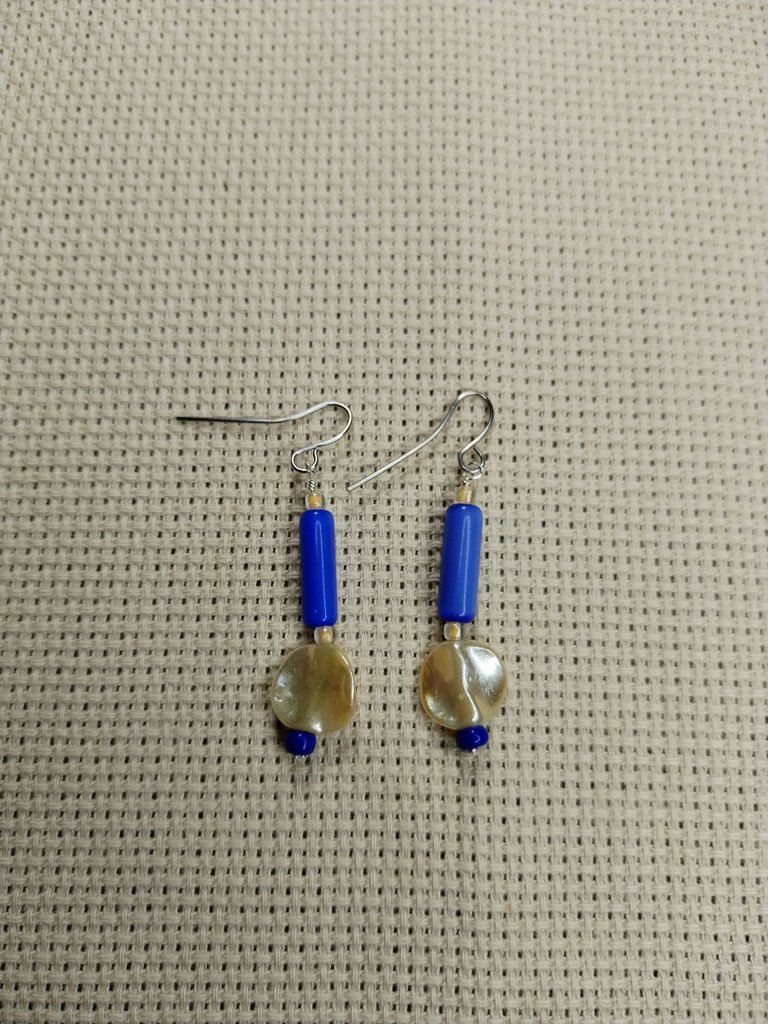
Pará la elaboración de los zarcillos se usó alambre de bisutería fino, las piedritas en tonos azules y beige que ya tenían las pulseras anteriores y unas bases para los Zarcillos, como instrumental necesité una pinza de corte y una pinza contorneadora.
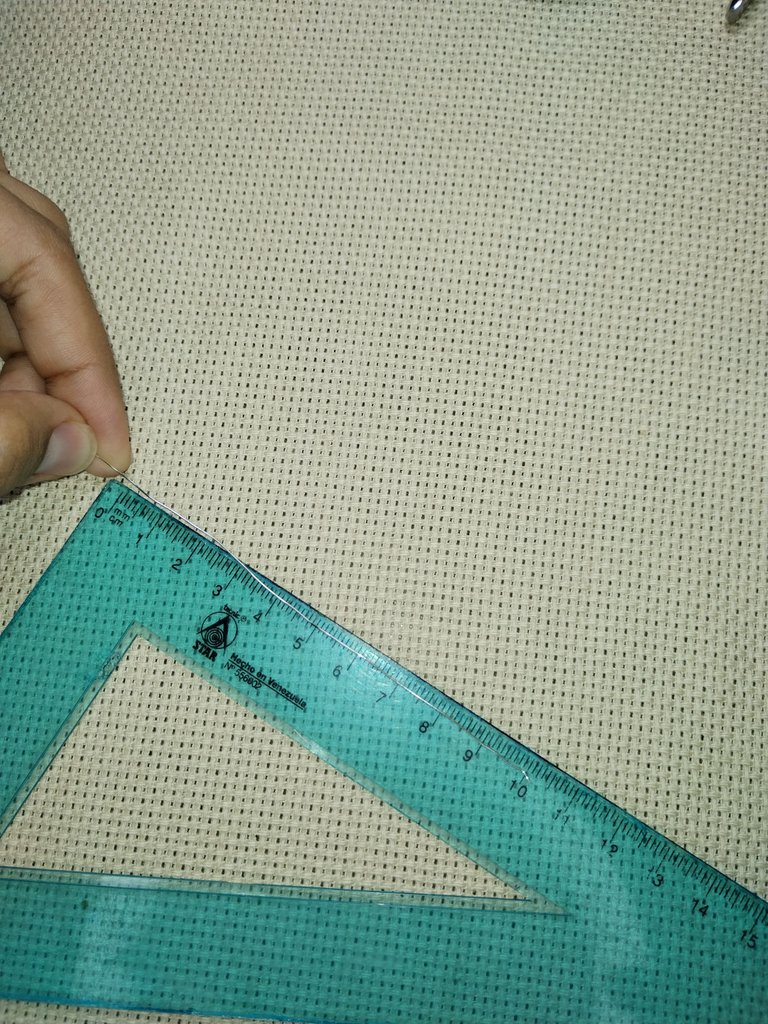
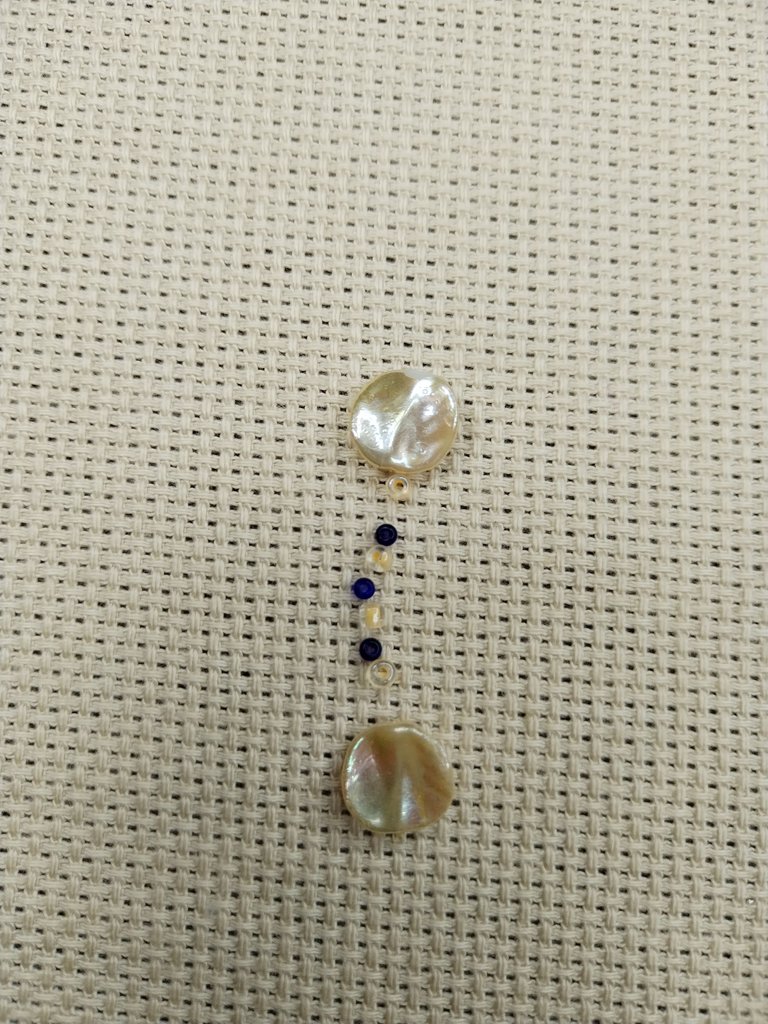
Como siempre, hice el boceto de como iban a estar dispuestas las piedritas para el diseño de los Zarcillos (es algo que me gusta hacer para poder visualizar mejor lo que estoy imaginándome y que luego el trabajo sea más cómodo de ejecutar).
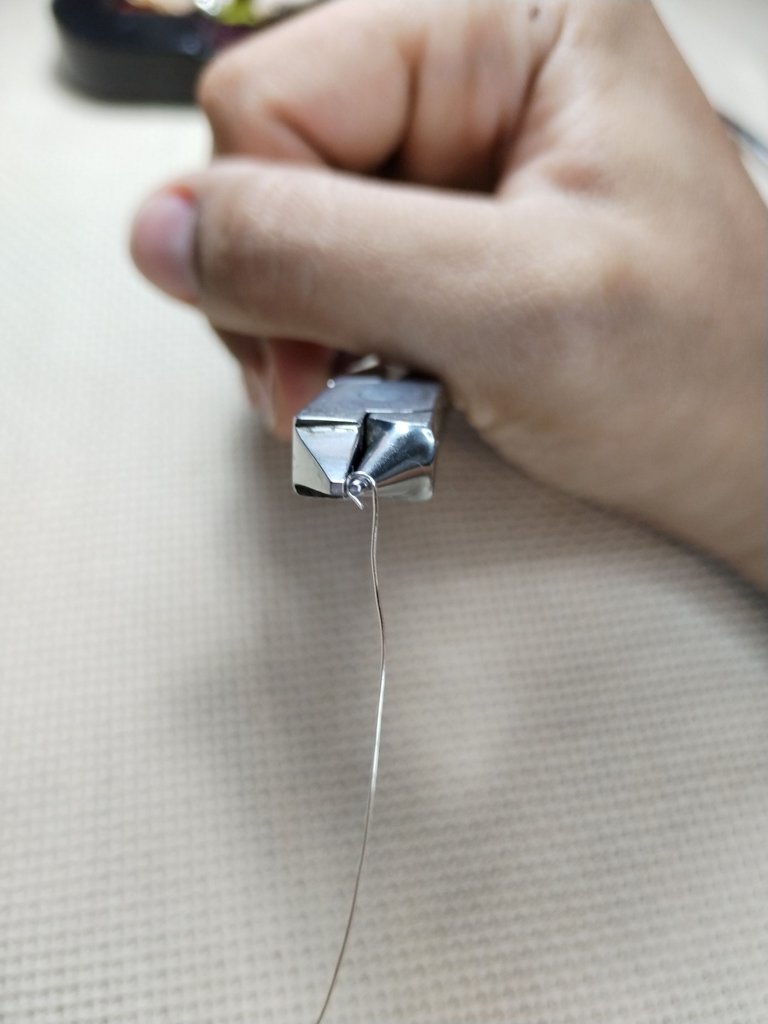
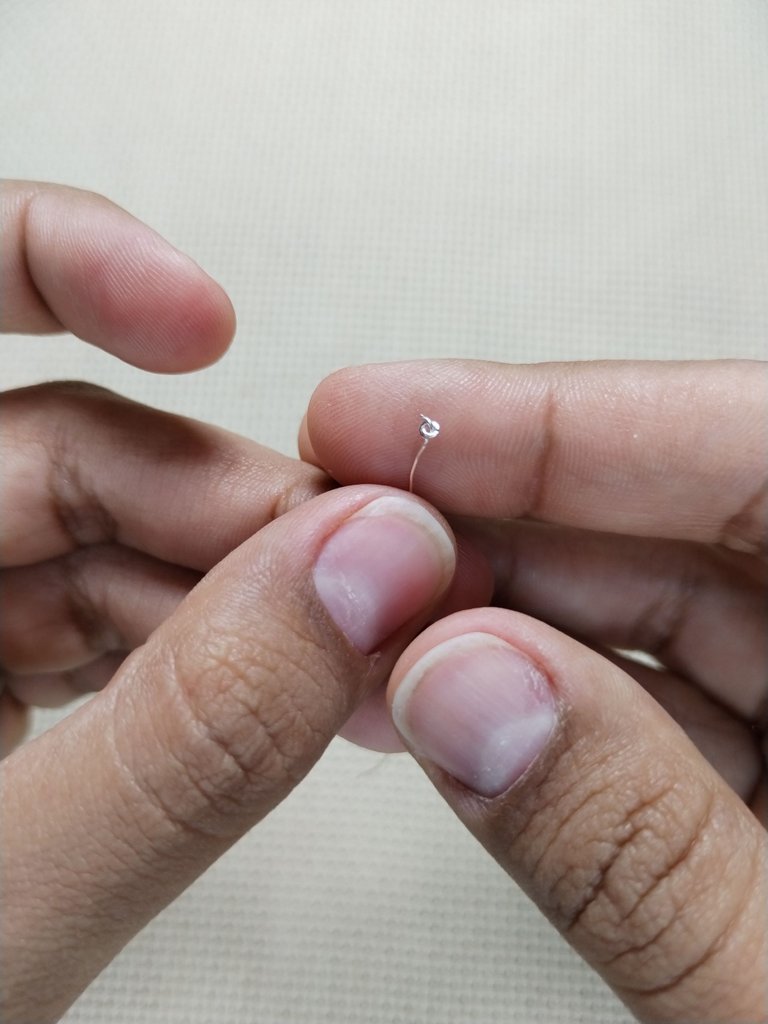
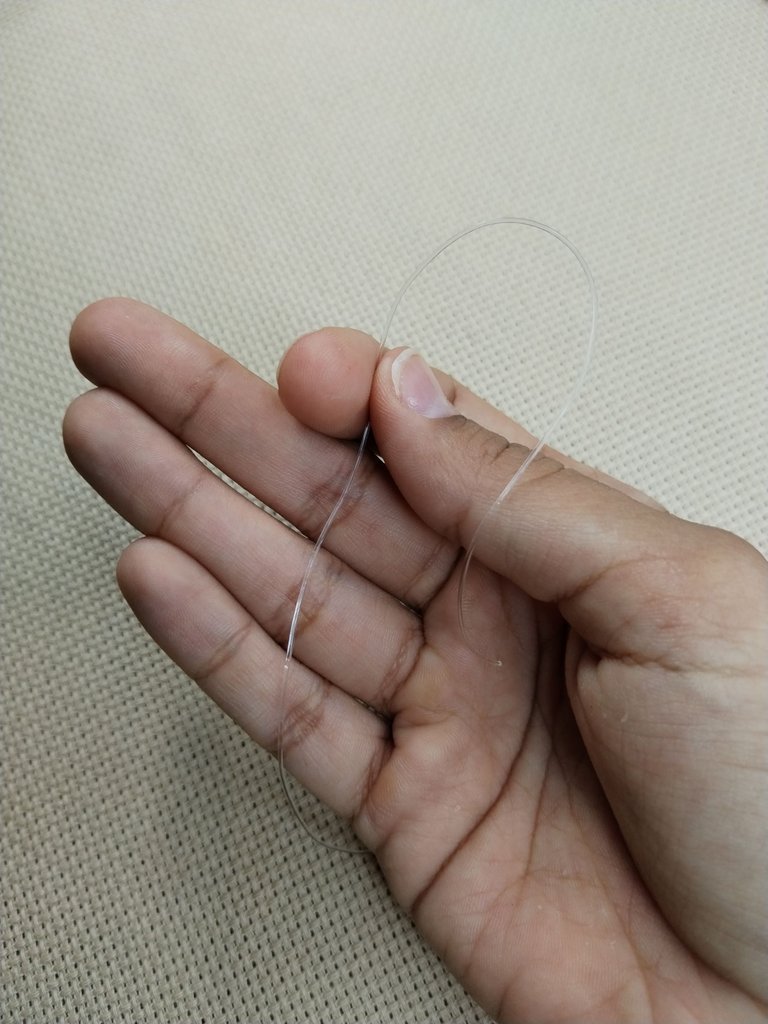
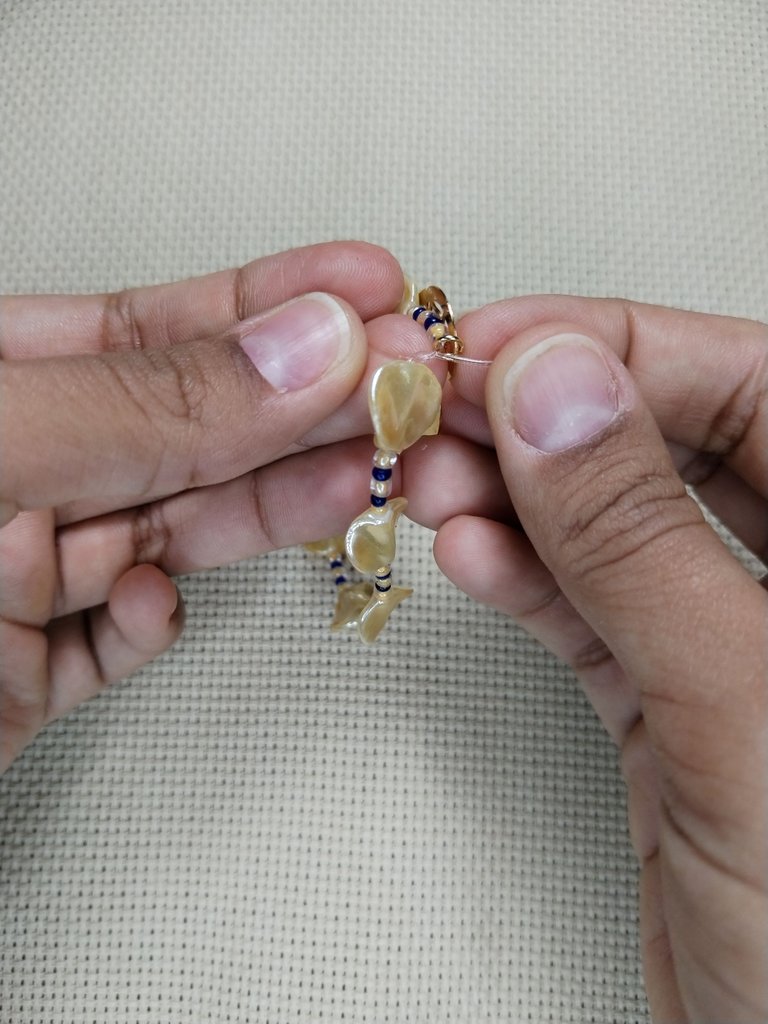
Corte una tira de alambre de unos 10 cm, luego con la ayuda de la pinza contorneadora y mis manos, hice un nudito en uno de los extremos del alambre para empezar a colocar nuestras piedritas y que no se salieran.
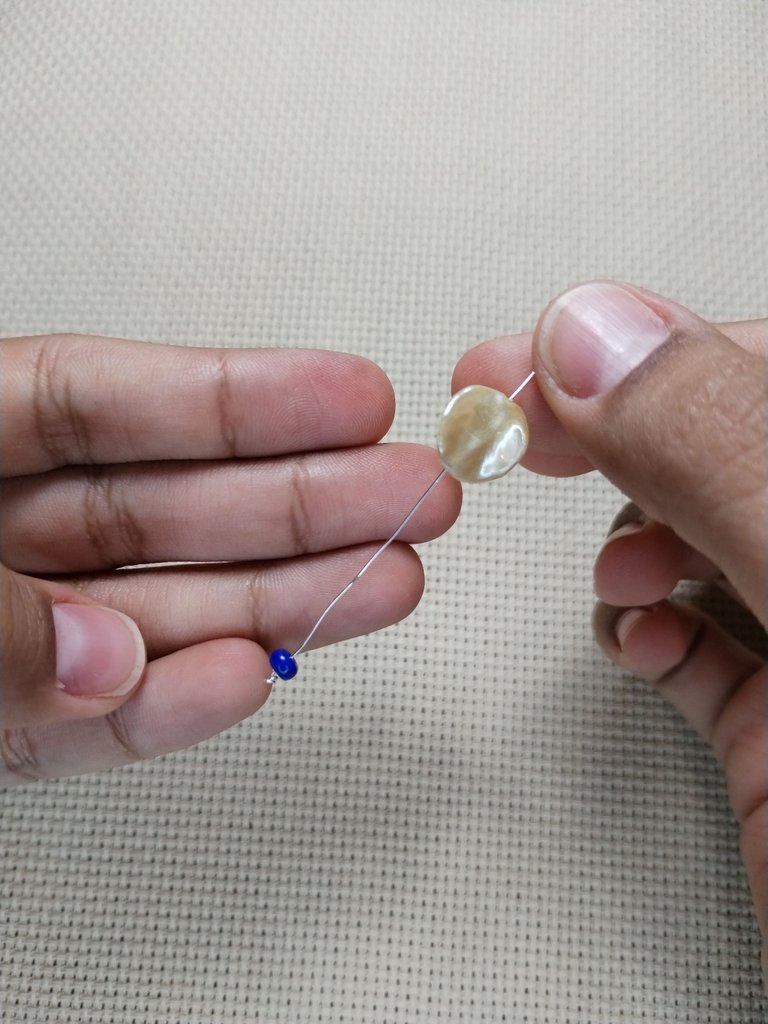
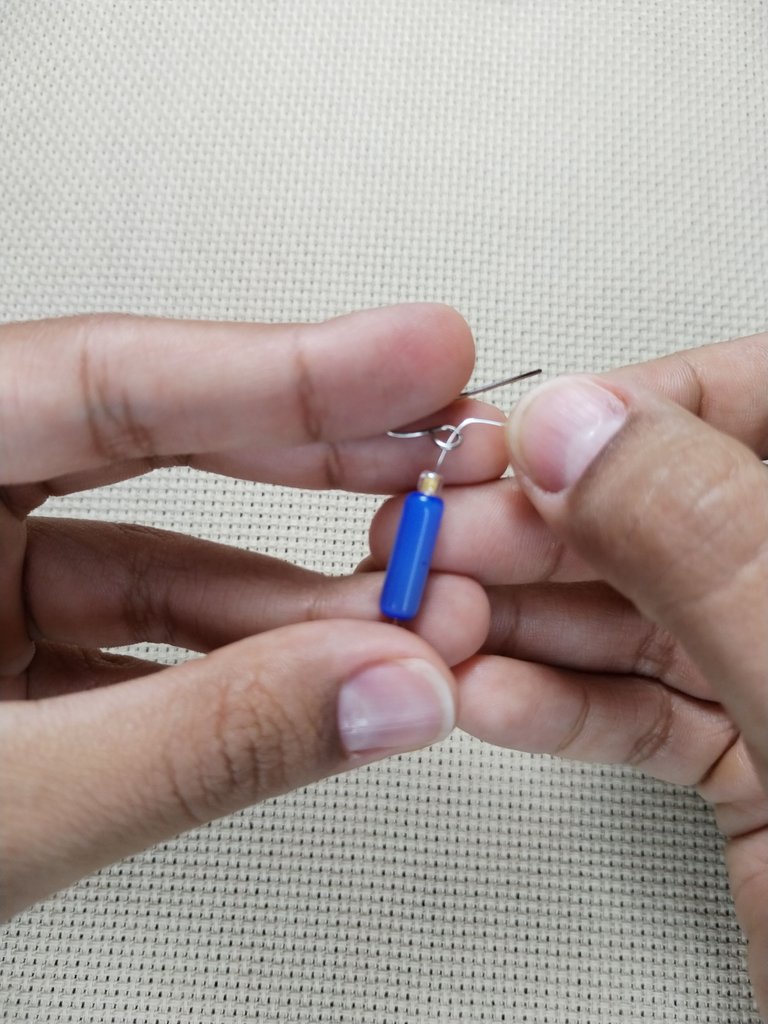
Colocamos una a una nuestras piedras según el diseño previamente establecido.
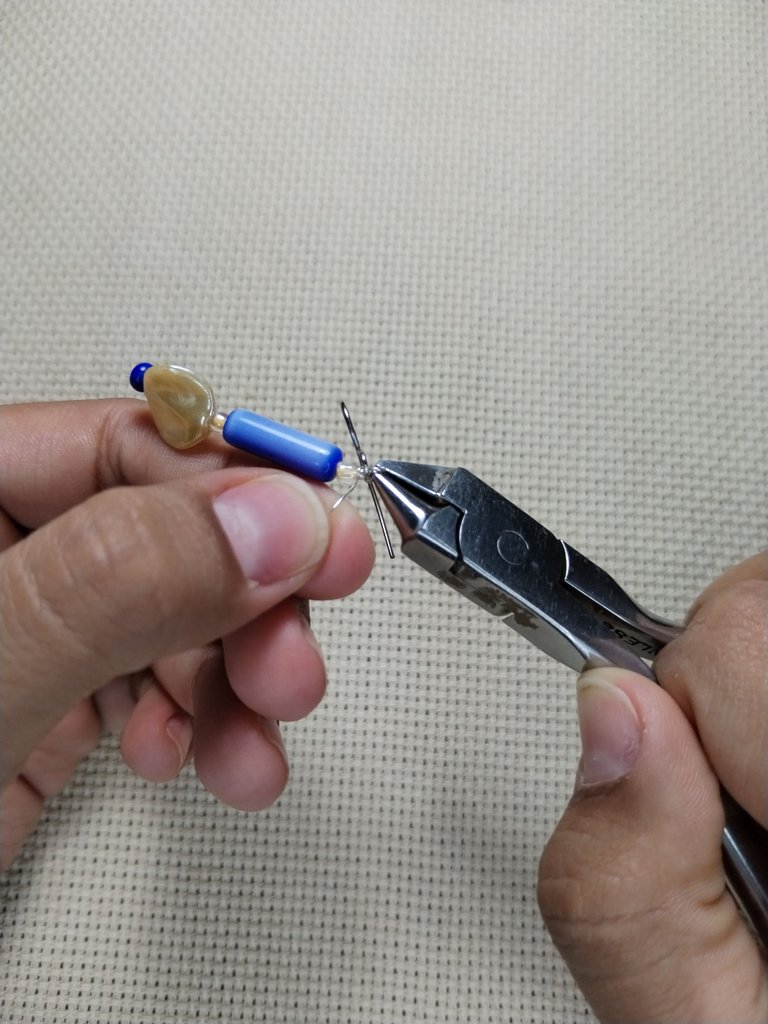
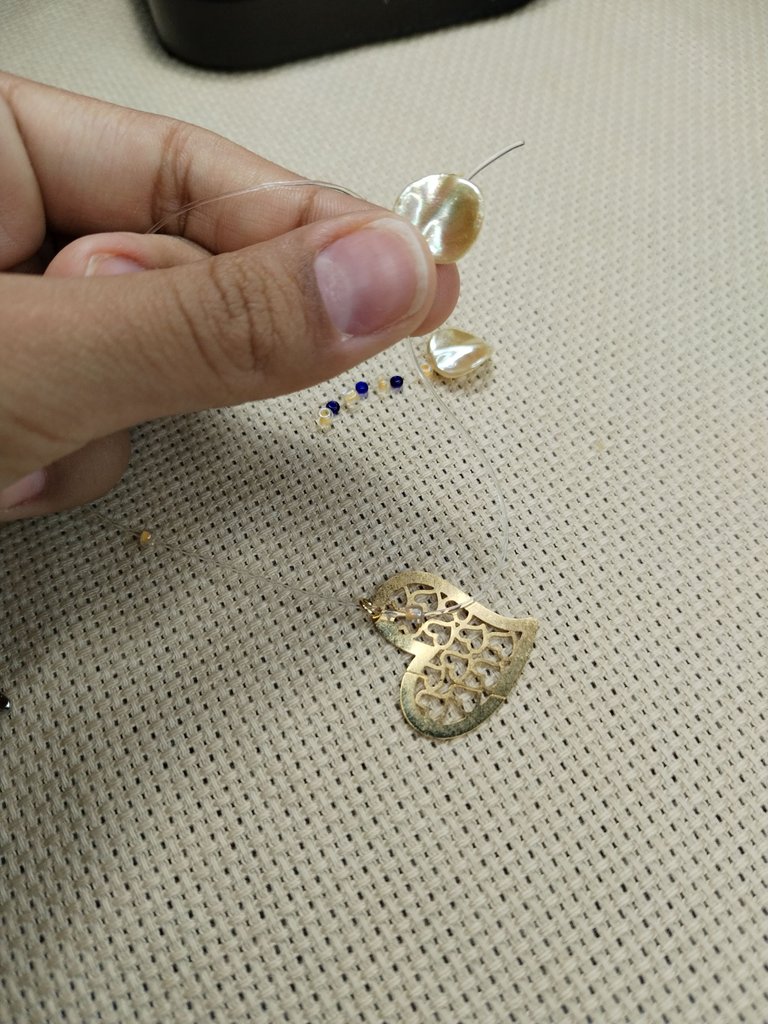
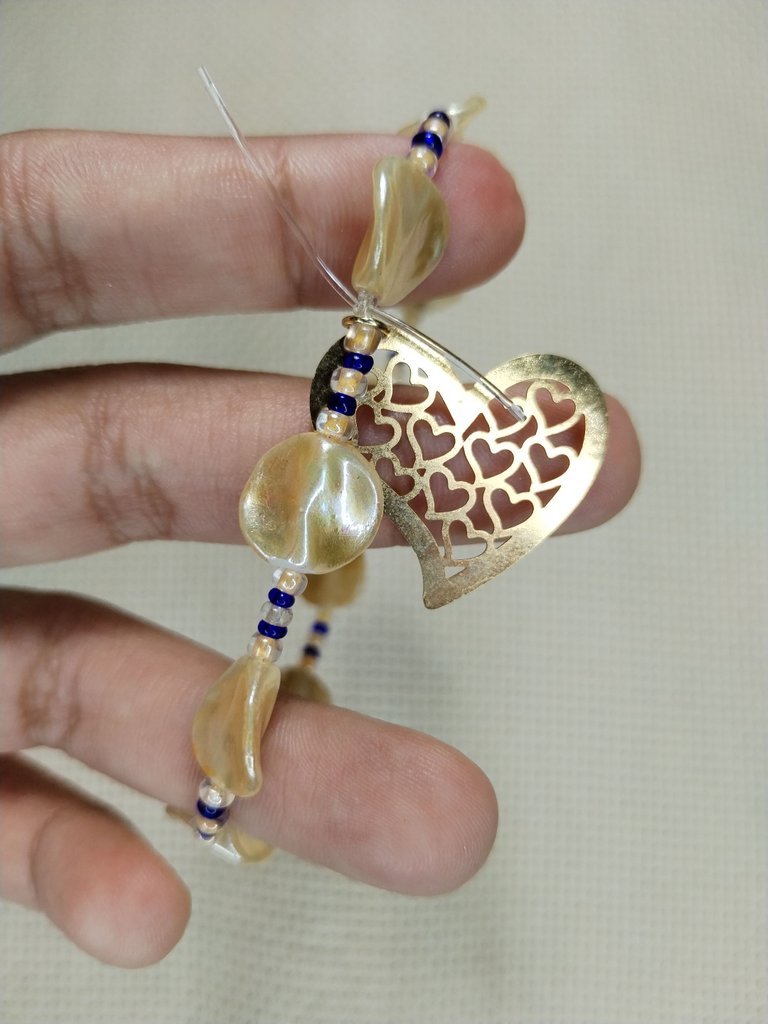
Y para finalizar, nuevamente con la pinza contorneadora y mis manos, introducimos el otro extremo del alambre dentro de la base de los Zarcillos y contorneamos el alambre para fijarlo a la base.
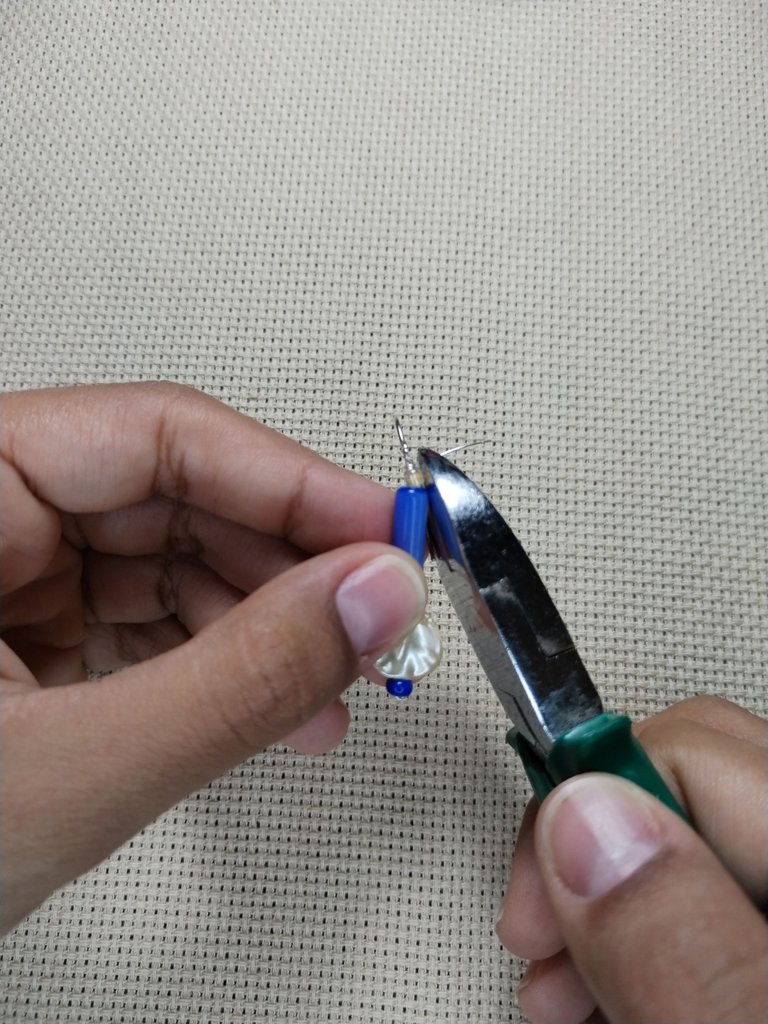
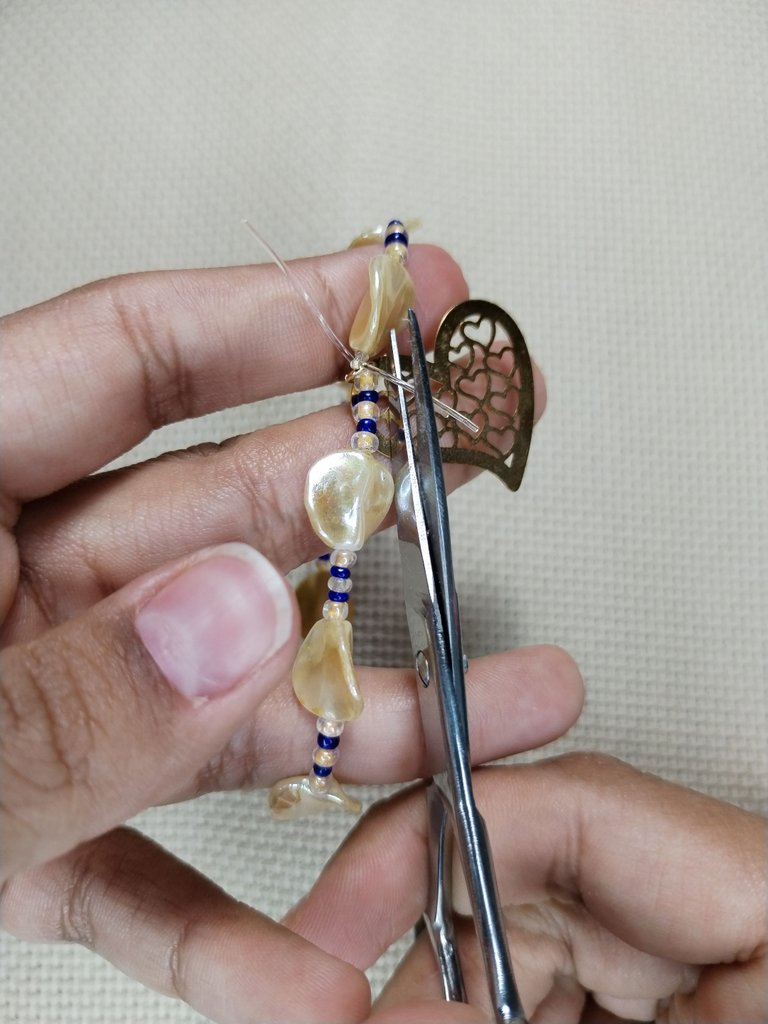
Cortamos el exceso de alambre, doblamos la punta del mismo para que no raspe y ya.
¡Están listos nuestros Zarcillos!
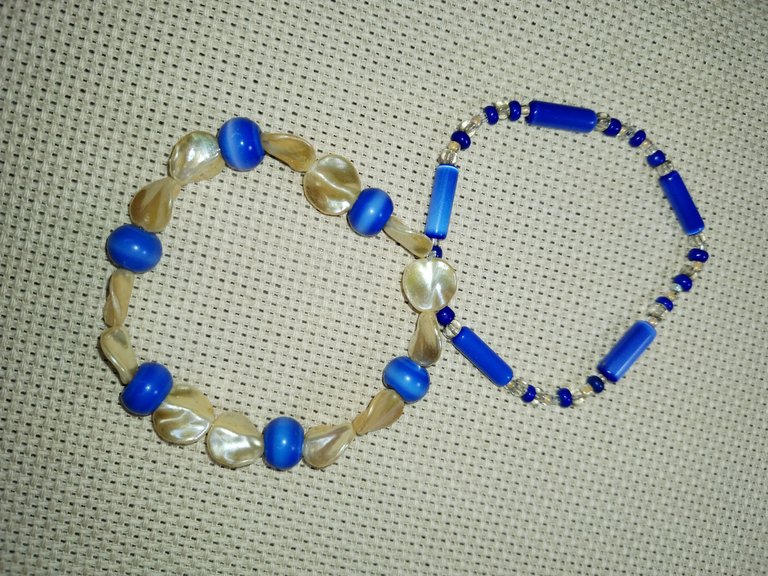
En segundo lugar, comencé a elaborar la pulsera que me faltaba, decidí agregar una tercera pulsera para que fuese un conjunto de bisutería más llamativo y que no se viera tan simple.
La confección de esta tercera pulsera fue bastante sencillo, ya que la hice a base de nilón elástico.
Primero hice una pequeña secuencia de como quería que se vieran las piedritas.
Luego corte la tira de nilón. Empecé a colocar piedrita por piedrita
Y para finalizar hice el nudo necesario al nylon para formar mi pulsera y corté con una tijera los excesos de nylon.
La verdad que con esta última pulsera y los zarcillos que hice, las dos anteriores agarraron más vida y ahora es un conjunto de bisutería superlindo.
Como pueden ver, son elaboraciones bastante sencillas que cualquiera puede hacer en casa para darle un detalle a alguien especial.
¡Espero que a mi amiga y a ustedes les guste tanto como me gusto a mí!
🇺🇸 ENGLISH
Happy day everyone!!
Today I will show you the making of some earrings and a bracelet that match two other bracelets that I already had. He had made them with the intention of giving them away on Mother's Day, but in the end I only got those two because I ran out of nylon to make the number of bracelets I wanted to make at that time. For those months I still didn't belong to #Hive, which is why I don't have documented how I did them.
However, the birthday of a dear friend is coming up and thinking of giving her a detail, I remembered that I already had those two bracelets assembled, that a few days ago I had bought new material and that I still had pebbles of the same models and shapes of those that I already had done. So I thought I could complete the set to make it more eye-catching with a third bracelet and matching earrings.
So I got to work!
For the elaboration of the tendrils, fine jewelry wire was used, the pebbles in blue and beige tones that the previous bracelets already had and some bases for the Tendrils, as instruments I needed a cutting pliers and a contouring pliers.
As always, I made the sketch of how the pebbles were going to be arranged for the design of the Tendrils (it's something I like to do to be able to better visualize what I'm imagining and then the work is more comfortable to execute).
I cut a strip of wire of about 10 cm, then with the help of the contouring pliers and my hands, I made a little knot in one of the ends of the wire to start placing our pebbles so that they would not come out.
We place our stones one by one according to the previously established design.
And to finish, again with the contouring pliers and my hands, we introduce the other end of the wire inside the base of the Tendrils and contour the wire to fix it to the base.
We cut the excess wire, bend the tip of it so it doesn't scratch and that's it.
Our tendrils are ready!
Secondly, I started to make the missing bracelet, I decided to add a third bracelet to make it a more striking jewelry set and not look so simple.
The making of this third bracelet was quite simple, since I made it out of elastic nylon.
First I made a little sequence of what I wanted the pebbles to look like.
Then cut the nylon strip. I began to place pebble by pebble
And to finish I made the necessary knot in the nylon to form my bracelet and cut the excess nylon with scissors.
The truth is that with this last bracelet and the Tendrils that I made, the other two previous ones took on more life and now it is a super cute jewelry set.
As you can see, they are quite simple preparations that anyone can make at home to give a detail to someone special.


