✨Hola Hivers✨
Saludos amigos de esta increíble comunidad.
He estado un poco perdida en estos últimos meses, es que tuve algunos inconvenientes con mi conexión a internet (cosa que lamentablemente se está volviendo normal en mi país 🇻🇪) pero ya volví 😁.
Durante este tiempo desconectada mi mente ha estado bastante activa con la creación de alguna manualidades (aunque en su mayoría siguen en mi mente porque aún no me he puesto manos a la otra 😋) y hoy les quiero mostrar una de las que si logré realizar 🙃.
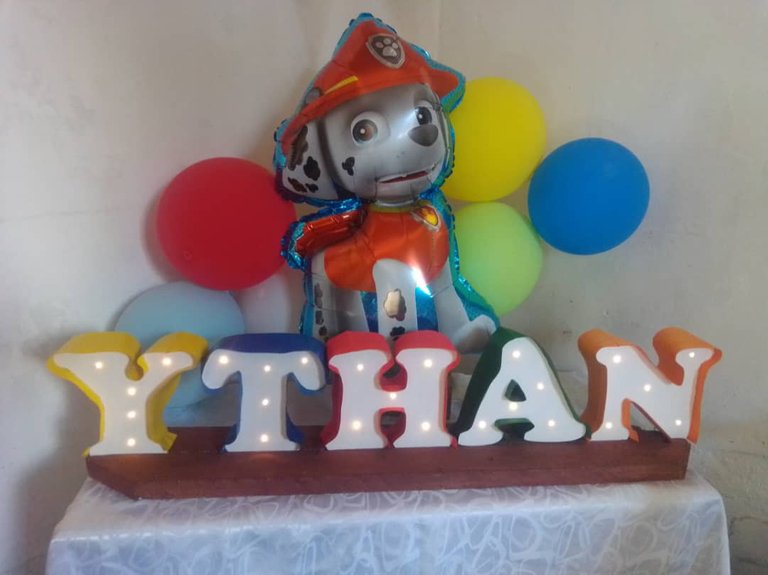
Se trata de las letras individuales con luces para decoracion. Se me ocurrió un día que salí de compras para el cumpleaños número 5 de mi hijo y vi unas letras muy lindas con bombillos muy pequeños que alumbraban dentro de la letra, muy lindas y muy costosas para el tamaño y la finalidad que realmente tienen. Así que se me ocurrió hacerlas con material reciclable en casa y este fue el resultado:
A continuación les dejo el paso a paso y los materiales que utilice para la elaboración de este pequeño proyecto.
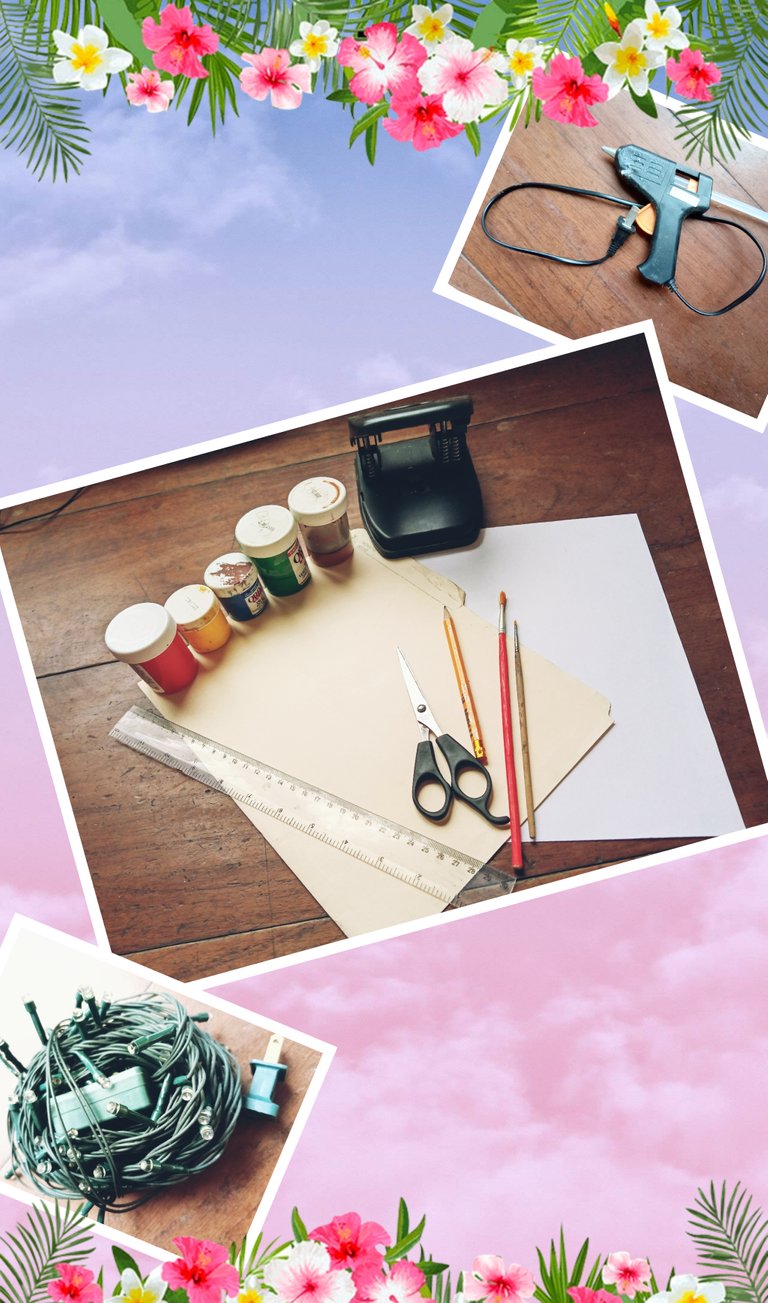
Materiales
- Tijera ✂️
- Lápiz ✏️
- Hoja blanca 📄
- Cartulina 🗂️
- Pincel 🖌️
- Pintura al frío (el color o colores de su preferencia) 🎨
- Regla 📏
- Pistola de silicon 🔫
- Luces de navidad (luz blanca)✨
- Sacabocado o abre huecos (como lo conozcan en su país) 🏷️
Paso a paso
1- Paso
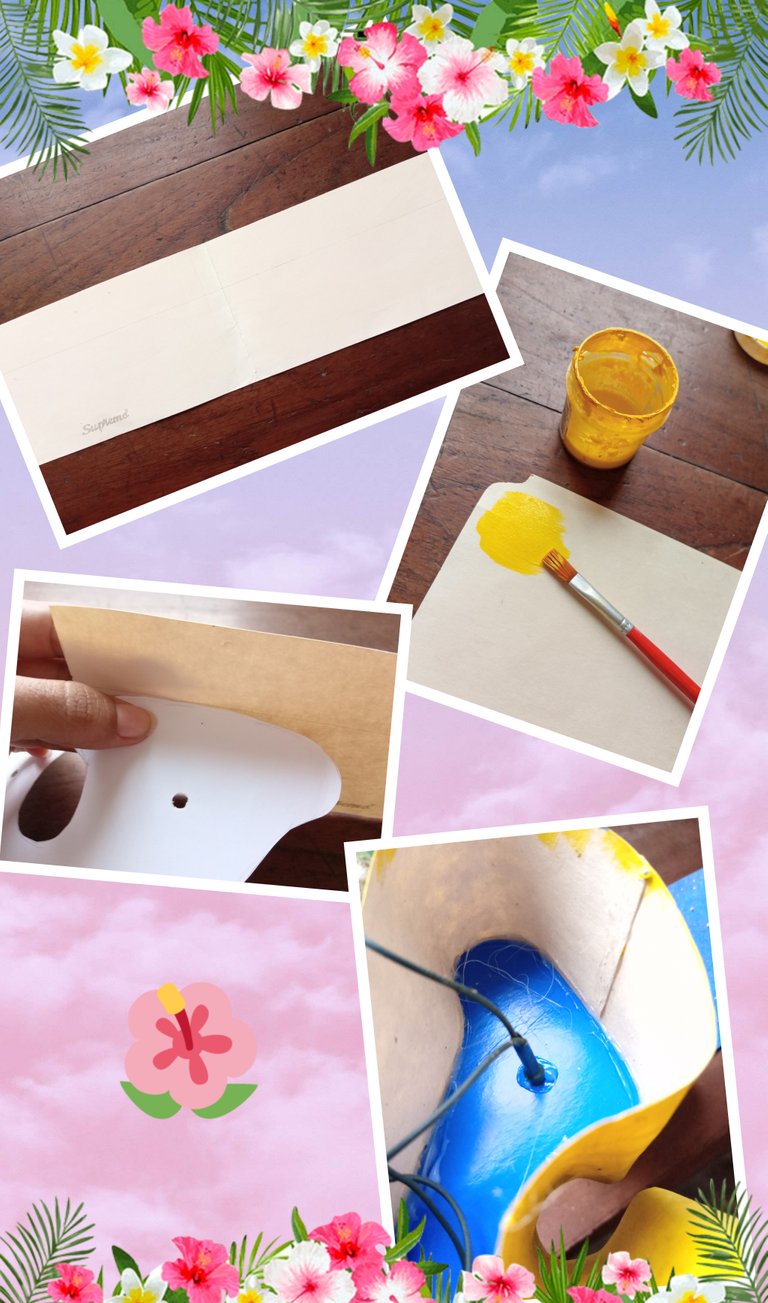
En la hoja blanca trazar el diseño de la letra que se desea hacer. En mi caso comencé con la letra "Y" ya que realizaría el nombre de mi hijo Ythan. También marque los puntos donde se abrirán los agujeros para colocar los bombillos de las luces de navidad. Recortar.
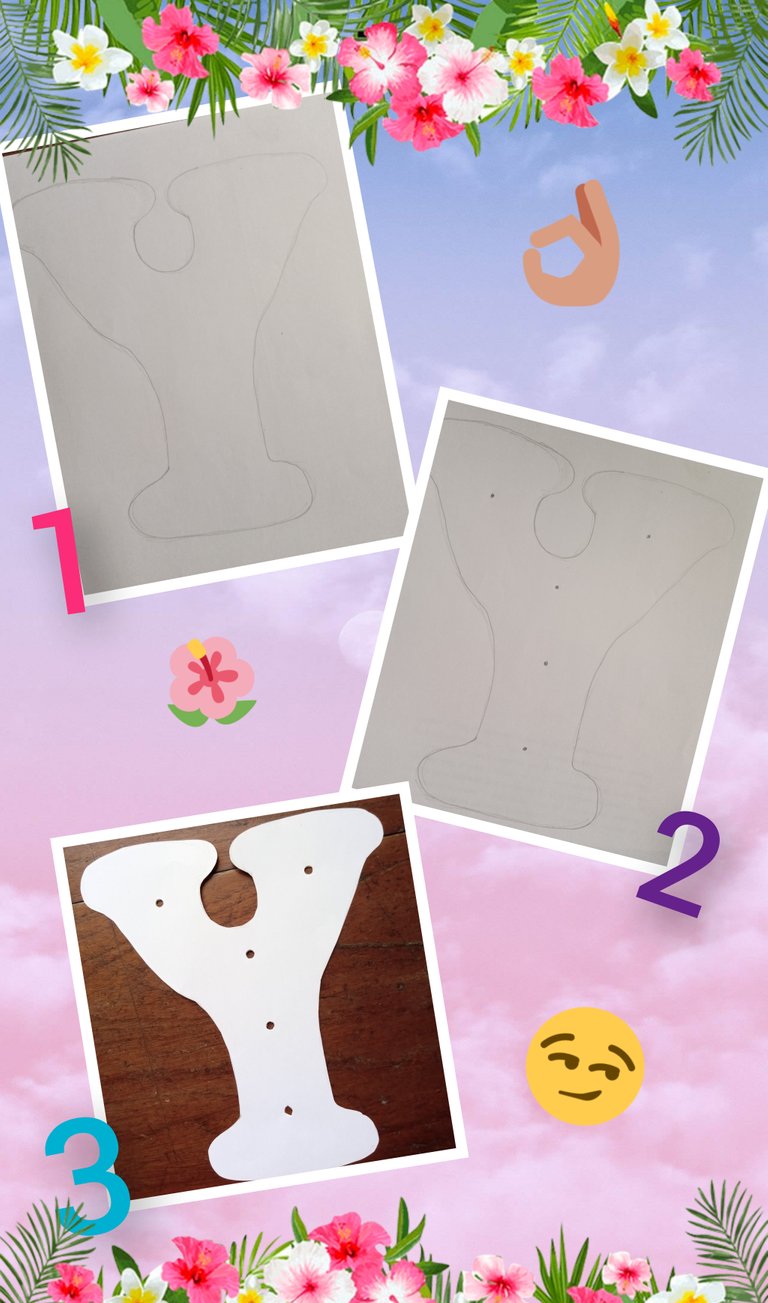
2- Paso
Luego de recortar la letra (en la hoja y luego en la cartulina) y abrir los agujeros con el saca bocado, procedemos a cortar una o varias tiras con la cartulina para pegarla en los bordes de la letra y hacer una especie de marco. Yo le coloque unos 10 cm de ancho para poder dejar la espacio suficiente y poder esconder los cables de las luces.
3- Paso
Con las tiras necesarias ya cortadas procedemos a pegarlas por todo el borde de nuestra letra para después poder pintarlas del color de nuestra preferencia. Yo esta letra la pinte con el borde amarillo y el centro blanco. (A cada letra le puse un color diferente el borde).
Por último procedemos a pegar las luces. Las que yo usé tenían 25 bombillos y me dio para colocar 5 bombillos por letra.

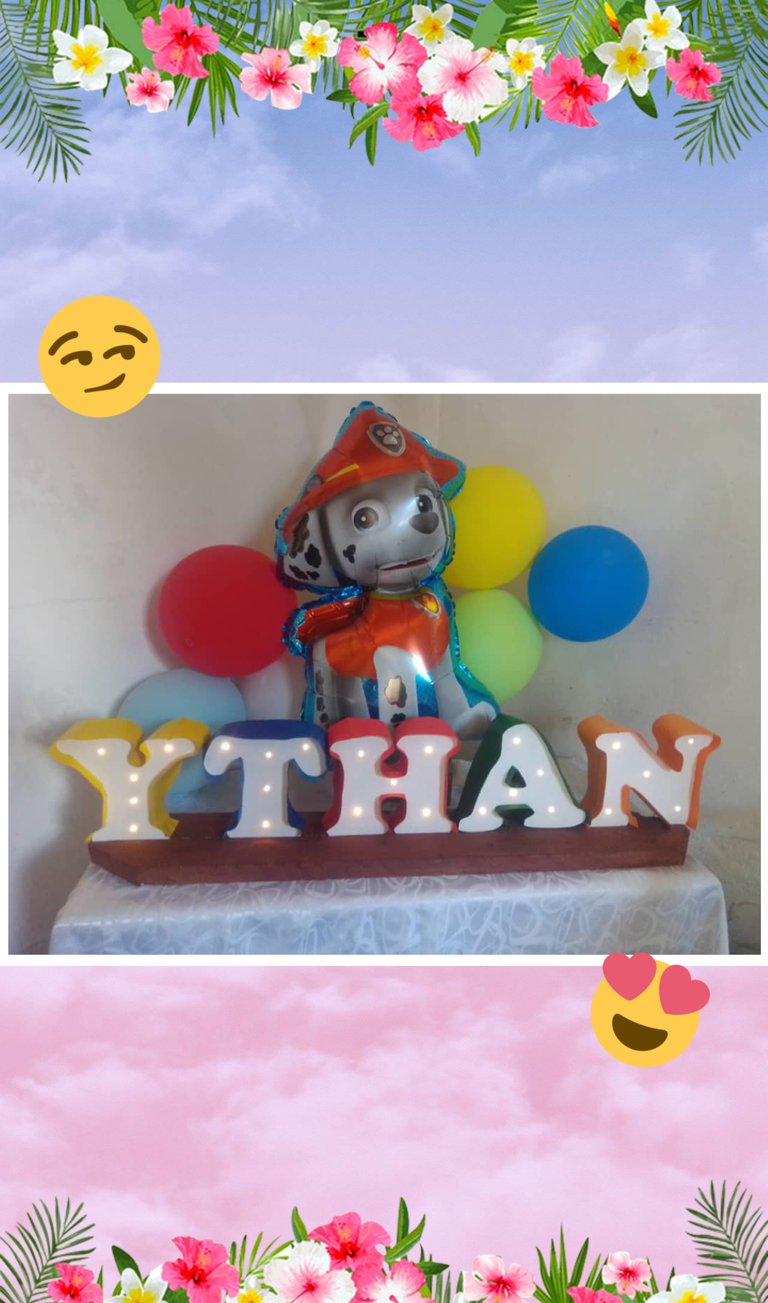
Y este fue el resultado de cómo quedó el nombre completo. La decoracion de los globos fue por motivo del cumpleaños de mi hijo de sus comics favoritos "Paw Patrol".
Espero que les gustara este pequeña manualidad y los inspire a realizar sus propios nombres o los de algún ser querido.
Nos vemos en el próximo post, me despido con cariño Alvac.art 💋

✨Hi Hivers✨
Greetings friends of this amazing community. I've been a bit lost in recent months, it's that I had some problems with my internet connection (which unfortunately is becoming normal in my country 🇻🇪) but I'm back 😁.
During this time disconnected my mind has been quite active with the creation of some crafts (although most of them are still in my mind because I haven't gotten to the other one yet 😋) and today I want to show you one of the ones that I did manage to do 🙃 .
It is the individual letters with lights for decoration. It occurred to me one day that I was out shopping for my son's 5th birthday and I saw some very pretty letters with very small light bulbs that lit up inside the letter, very pretty and very expensive for the size and purpose they really have. So it occurred to me to make them with recyclable material at home and this was the result:
Then I leave the step by step and the materials that I use for the elaboration of this small project.
Materials
- Scissors ✂️
- Pencil ✏️
- white sheet 📄
- Cardboard 🗂️
- Brush 🖌️
- Cold painting (the color or colors of your choice) 🎨
- Ruler 📏
- Silicone gun 🔫
- Christmas lights (white light) ✨
- Punch or open holes (as known in your country) 🏷️
Step by step
1- Step
On the white sheet, trace the design of the letter you want to make. In my case I started with the letter "Y" since it would make my son's name Ythan. Also mark the points where the holes will be opened to place the bulbs of the Christmas lights. Trim.
2- Step After cutting the letter (on the sheet and then on the cardboard) and opening the holes with the punch, we proceed to cut one or more strips with the cardboard to stick it on the edges of the letter and make a kind of frame. I placed about 10 cm wide to be able to leave enough space and to be able to hide the cables of the lights.
3- Step
With the necessary strips already cut, we proceed to glue them around the edge of our letter so that we can then paint them in the color of our choice. I painted this letter with a yellow border and a white center. (I put a different color on the border for each letter).
Finally we proceed to glue the lights.
The ones I used had 25 bulbs and I was able to place 5 bulbs per letter.
And this was the result of how the full name was left. The decoration of the balloons was for my son's birthday from his favorite comics "Paw Patrol".
I hope you liked this little craft and it inspires you to make your own names or those of a loved one.
See you in the next post, I say goodbye with love Alvac.art 💋