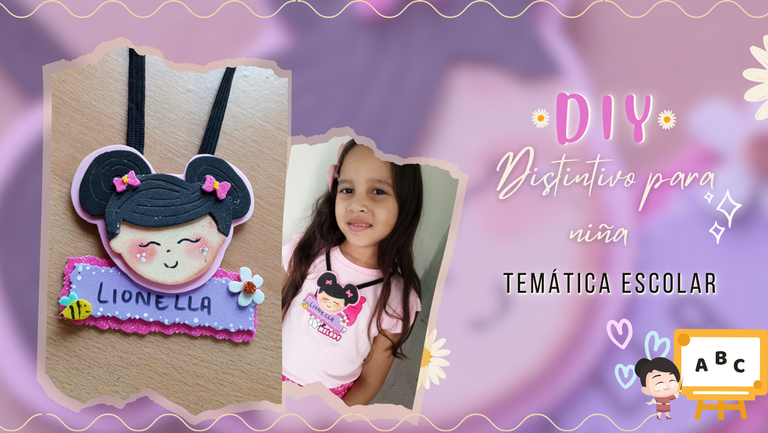
El regreso a clases esta a la vuelta y a nada más que un pestañazo, por lo que desde ya es bueno ir preparandonos con algunas cositas como distintivos para los nombres de nuestros pequeños y es que realmente siempre en el inicio a clases suelen escribir mal su nombre y quizá esto pasa muy a menudo con muchos niños, asi que por ello decidí compartir esta útil idea que sin duda alguna sera de gran ayuda tanto para que los reconozcan con más facilidad así como ayudar a su docente con la correcta escritura si es un nombre complejo.
Por aquí los dejo con el paso a paso🌷💗
Hello creative friends✨ I hope you are feeling great and that you have had a wonderful day, here we are very well thank God.
Back to school is just around the corner and nothing more than a blink of an eye, so from now on it is good to go preparing us with some little things like badges for the names of our little ones and is that really always at the beginning of classes often misspell their name and perhaps this happens very often with many children, so I decided to share this useful idea that certainly will be of great help both to recognize them more easily and help your teacher with the correct spelling if it is a complex name.
Here I leave you with the step by step🌷💗


Materiales:
- Foami liso de colores: piel, rosa, morado y negro
- Foami escarchado rosa
- Pintura al frío negra y blanca
- Silicón
- Cinta, estambre o algún cordón
Materials:
- Smooth Foami in colors: skin, pink, purple and black.
- Pink frosted Foami
- Black and white cold paint
- Silicone
- Ribbon, yarn or some string

Paso a Paso | Step by Step
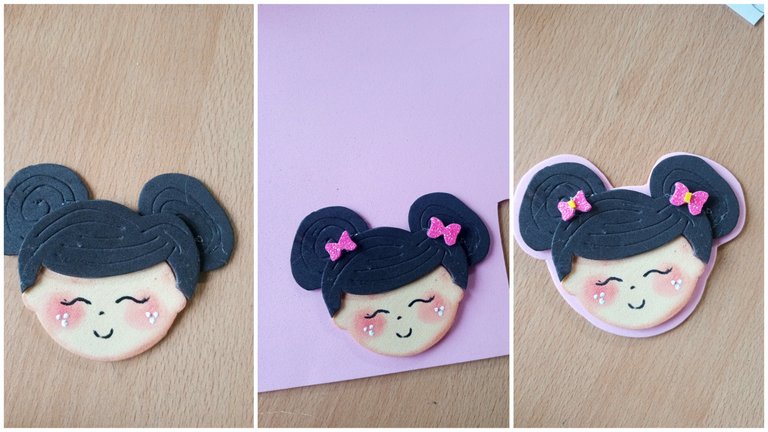
✨ Lo primero que hice fue realizar mas o menos un boceto de lo que queria y una vez lista, utilicé como patrón para marcar cada pieza de la niña en el foami correspondiente, siendo más la parte del rostro en foami color piel y el cabello en foami negro, luego arme (para el cabello queria dos moñitos) a los cuales le hice detalle con el puntero, difumine el rostro con una pintura marrón además de realizar las mejillas con un poco de rubor.
✨ The first thing I did was to make more or less a sketch of what I wanted and once ready, I used as a pattern to mark each piece of the girl in the corresponding foami, being more the part of the face in skin color foami and hair in black foami, then armed (for the hair I wanted two buns) to which I made detail with the pointer, blur the face with a brown paint in addition to making the cheeks with a little blush.

✨ Con pintura al frío negra le realice los ojos, nariz y boca. Una vez seco pegué el rostro sobre foami rosado para luego recortar dejando un pequeño borde, para darle un toqué extra a la niña en foami escarchado rosa recorte unos mini lazos y pegue en cada moño de cabello.
✨ With black frosting paint I made the eyes, nose and mouth. Once dry I glued the face on pink foami and then cut out leaving a small border, to give an extra touch to the girl I cut out some mini bows and glued them on each hair bow.

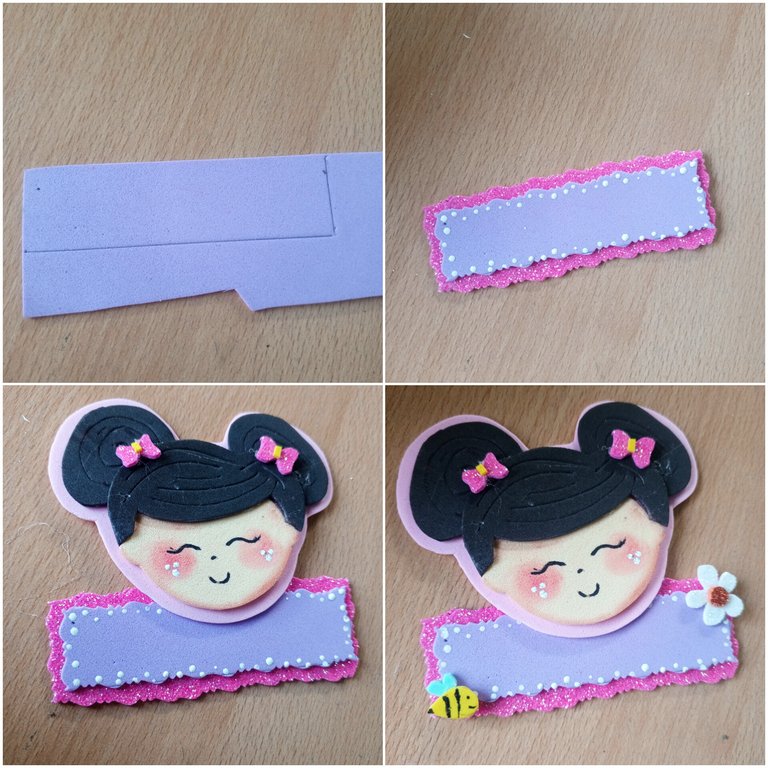
✨ En foami liso morado marque un rectángulo de 8cm×2,5cm y recorté con una tijera de forma, para luego pegar sobre foami escarchado rosa y tambien recortar con la tijera de formas dejando un borde mínimo. Seguidamente con pintura al frio realice algunos puntos en el interior del cuadro, para luego justo en la mitad pegar la niña y como extra realicé una mini flor y mini abeja y pegué donde creí que lucian mejor.
✨ In purple plain foami mark a rectangle of 8cm×2,5cm and cut with a shape scissors, then paste on pink frosted foami and also cut with the shape scissors leaving a minimal edge. Then with cold paint I made some dots on the inside of the picture, and then right in the middle I glued the girl and as an extra I made a mini flower and mini bee and glued them where I thought they looked better.

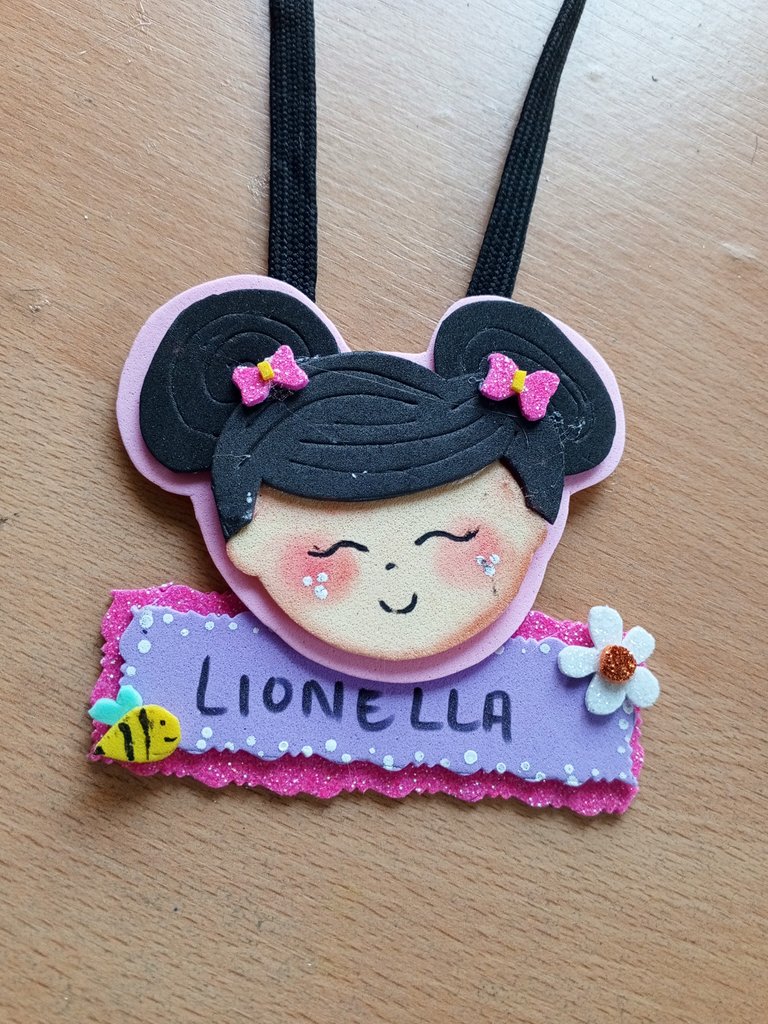
✨ Por último y para sujetar el distinto por la parte trasera pegué un cordón (puedes usar estambre o cinta) y ya está listo para usar. Está más que claro que este paso lo piedes obviar usando solo un ganchito prendedor, pero al ser para niños pequeños recomendaría más la opción de pegar el colgante..
✨ Finally, I glued a cord (you can use yarn or ribbon) to hold the different part of the pendant on the back and it is ready to use. It is more than clear that this step can be avoided by using just a little pin, but since it is for small children I would recommend the option of gluing the pendant...


Resultado | Result
Cómo mencioné al inicio está es solo una idea que puedes ajustar a tu creatividad e imaginación, y que ademas te ayudará a no tener problemas en cuanto al nombre de nuestros pequeños. Sin más amigos, espero les haya gustado ¡HASTA UNA PRÓXIMA OPORTUNIDAD Y NUEVA CREACIÓN 👩🏻🎨🎨
As I mentioned at the beginning this is just an idea that you can adjust to your creativity and imagination, and that will also help you not to have problems regarding the name of our little ones. Without further ado friends, I hope you liked it! SEE YOU NEXT TIME AND NEW CREATION 👩🏻🎨🎨


📷Ediciones | Editing in Canva and Picstar
✨Traducciones | Translations in Deepl

