Cuando nuestros hijos inician las clases, inician con ellas la tareas, los trabajos reciclables, manualidades y mas...
When our children start school, they start with them homework, recycling, crafts and more...
No me llevo mucho con hacer manualidades, me gusta mas la idea de dibujar y pintar, pero como soy mama pues me toca ser una todo terrenos y arriesgarme un poco, para ayudar a mi niña hacer sus trabajos.
I don't get along much with doing crafts, I like the idea of drawing and painting, but as I'm a mom, I have to be an all-rounder and take a little risk, to help my little girl do her work.
Esta semana tiene que hacer entrega de un reloj hecho con materiales reciclables, sus clases de esta semana se han tratado, de el tiempo, las horas, los minutos, los segundos, los dias, semanas y meses y que mejor manera de referencia al tiempo, tenemos al "Reloj".
This week you have to deliver a clock made from recyclable materials, your classes this week have been about time, hours, minutes, seconds, days, weeks and months and what better way to reference time, we have the "Clock".
Los materiales que use en esta actividad fueron bastantes sencillos y pocos, asi que aqui les dejo el paso.
The materials I used in this activity were quite simple and few, so here are the steps.

Portada realizada en Canva
MATERIALES / MATERIALS
- Block de papel de construcción
- Pega de barrita o blanca
- Tijeras
- Marcador
- Lápiz
- Tornillo pequeño
- Plato de cartón o plástico (Los que usamos para las fiestas).
- Construction paper block
- Stick or white glue
- Scissors
- Marker
- Pencil
- Small screw
- Cardboard or plastic plate (the ones we use for parties).


Lo primero que hice fue forrar las esquinas de mi plato plásticos, con el color favorito de mi hija, ya que no queríamos que fuera un simple reloj blanco con números y flechas, así que nos pusimos algo creativas por ese lado.
The first thing I did was to line the corners of my plastic plate with my daughter's favorite color, since we didn't want it to be a simple white clock with numbers and arrows, so we got a little creative on that side.


Como pueden ver, aquí ya le había hecho su hoyito en el medio, es en donde colocaremos nuestro horario y minutero. Lo hice con ayuda de mi pequeño tornillo.
As you can see, here I had already made its little hole in the middle, where we will place our hour and minute hand. I did it with the help of my little screw.


Con el papel de construcción de color negro haremos nuestras flechas, una grande y una pequeña (Aquí falto la flecha mas pequeña que seria el segundero). Pero como era muy pequeña no pude colocarla porque se rompía, así que decidimos dejarlo así.
With the black construction paper we will make our arrows, one big and one small (here the smallest arrow is missing, which would be the second hand). But as it was too small I could not place it because it would break, so we decided to leave it like this.

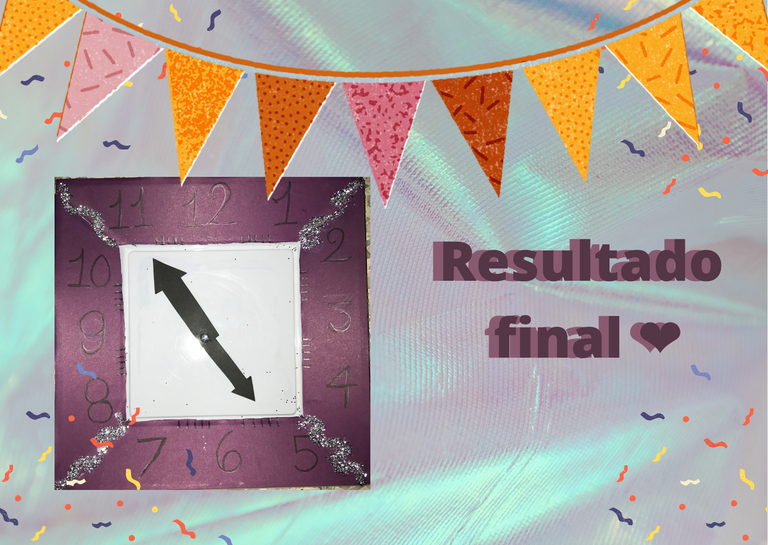
Este es nuestro resultado final, ustedes pueden hacerle las decoraciones que mas les guste, ser algo mas creativos (algo que a mi en estos casos no se me da mucho, pero hago el intento) a mi hija le encanto muchísimo y como a ella le encanta mucho echarle escarcha a todo, pues no nos podía faltar en su reloj.
This is our final result, you can make the decorations that you like, be a little more creative (something that I am not very good at in these cases, but I try) my daughter loved it very much and as she loves to put frosting on everything, we could not miss it on her watch.

Gracias por leerme, espero les ayude mucho y les haya gustado.
Thank you for reading, I hope it helps you a lot and you liked it.


