En esta ocasión me aventure a diseñar y confeccionar mi propio librero (primera vez que lo hago). Para serles sincera, fue más complicado de lo que imagine ya que requiere de mucho trabajo manual y sobre todo paciencia, pero, el aprendizaje hará que la próxima vez sea más fácil (eso espero).
El Concepto
La inspiración de este diseño surge luego de ver la película Alicia en el País de las Maravillas (versión de 1951). Quería que el diseño reflejara esa distorsión, asimetría y caos que vemos en las formas y objetos al momento que Alicia cae por la madriguera, también incorporar el uso de colores psicodélicos y brillantes pero, al final termine descartando esta idea como verán más adelante.
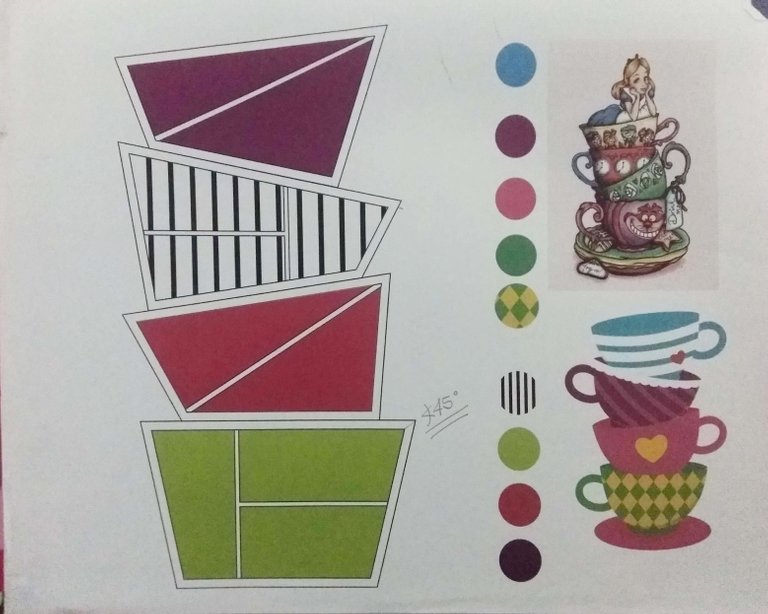
Diseño elaborado en Ilustrador impreso en papel. Imágenes de referencia de Google
El Modelado
Pasando el diseño a una vista 3D usando Sketchup
 Imagen exportada de Sketchup en vista 3D.
Haciendo pruebas de color
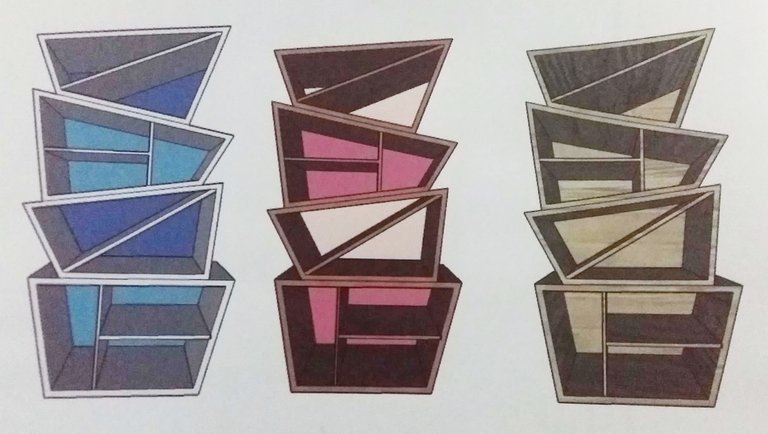 Imagen impresa en papel de modelado 3D elaborado en Sketchup.
Corte y lista de Materiales
Para esta parte les recomiendo llevar el plano técnico del mueble con sus medidas a un sitio que ofrezca servicio de corte y canteo de madera, así como hice yo.
Ya que ellos te asesoran en el tipo de material, la cantidad que necesitas y te hacen cortes limpios.
También es posible que debas hacer modificaciones en tu diseño para que este pueda ser funcional.
En mi caso ocupe:
- 2 láminas de 4'x8' pies de Plywood de 2cm de grosor (puede ser de 1cm)
- Clavos de 1" sin cabeza
- Martillo
- Goma para madera
- Sellador de madera
- Lijas
- Pintura
Proceso de Armado
Unir todas las piezas con clavos para formar los cajones.
Pegar las partes internas (divisiones) del cajón con goma.
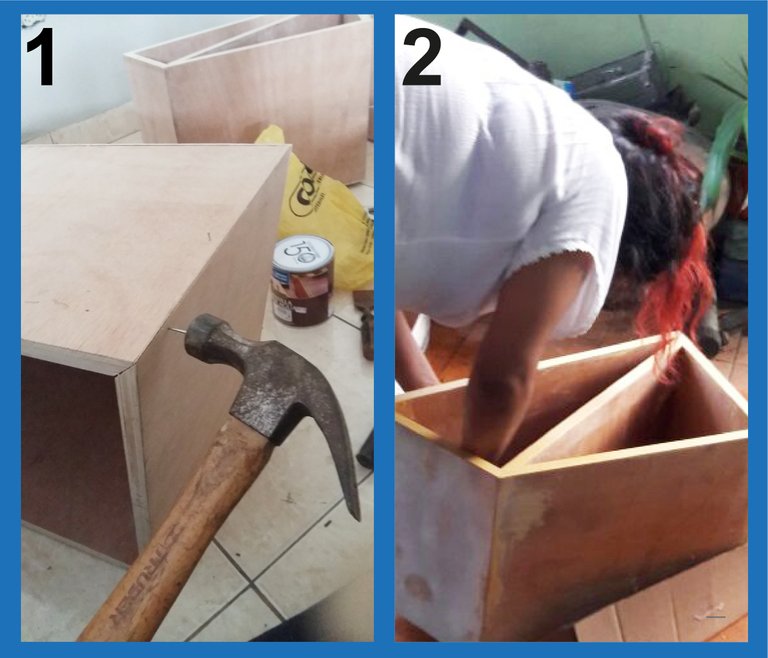 Fotos pertenecientes a @albabos
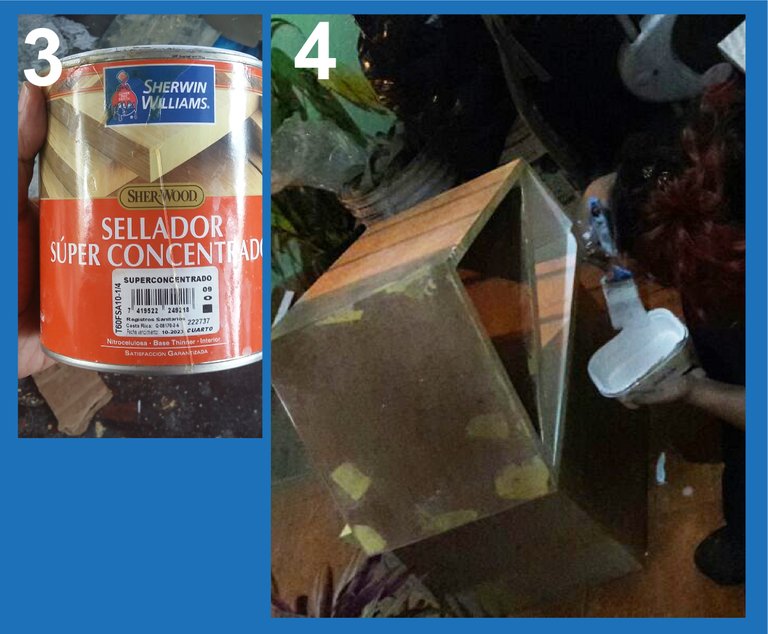
 Lijar y aplicar sellador para eliminar la porosidad y cubrir las imperfecciones de la madera.
Aplicar pintura para madera
 Fotos pertenecientes a @albabos
 Dejar secar por lo menos un día antes de colocar los cajones uno sobre otro.
Resultado final, recomiendo ponerle rueditas en la parte inferior para moverlo más fácilmente.
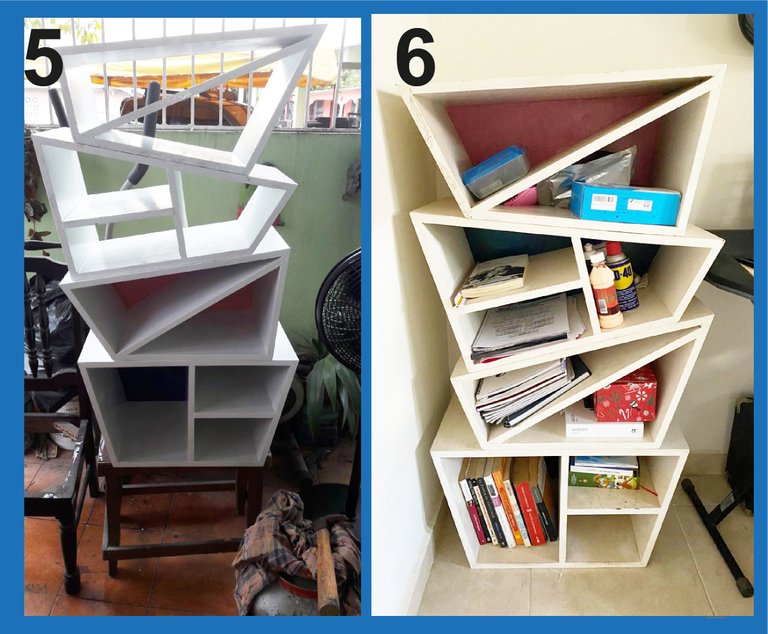 Fotos pertenecientes a @albabos
La experiencia de llevar un diseño de la computadora a la realidad, fue toda una aventura. Pasando de una idea vaga, a un boceto en papel y finalmente el diseño final.
Como les mencione anteriormente, uno debe hacer modificaciones en la marcha ya que hay cosas que físicamente son imposibles de hacer y sostenerse, como los ángulos de 45, 30 y 60 grados con los que diseñe los cajones inicialmente.
También, existen otro tipo de materiales como melamina o aglomerado que si bien son un poco más costosos, nos brindan la ventaja de un mejor acabado y nos evitamos gastar en pintura.
Y finalmente, recomiendo tener mucha paciencia e ir de poco a poco para no sentirse abrumado. Vale mucho la pena.

Bookcase Design
I find furniture design fascinating, especially when the piece of furniture you are looking for doesn't exist and the closest thing you can find to solve it is Ikea.
This time I ventured to design and make my own bookcase (first time I do it). To be honest, it was more complicated than I imagined since it requires a lot of manual work and above all patience, but, learning will make it easier next time (I hope so).
Concept
The inspiration for this design came after watching the movie Alice in Wonderland (1951 version). I wanted the design to reflect that distortion, asymmetry and chaos that we see in the shapes and objects when Alice falls down the rabbit hole, also incorporating the use of psychedelic and bright colors but, in the end I ended up discarding this idea as you will see below.
Design elaborated in Illustrator printed on paper. Reference images from Google
Modeling Design
Transferring the design to a 3D view using Sketchup
Image exported from Sketchup in 3D view.Making color proof
Image printed on 3D modeling paper made in Sketchup.Cutting and Materials List
For this part I recommend you to take the technical plan of the furniture with your measurements to a place that offers wood cutting and edging services, as I did.
They will advise you on the type of material, the amount you need and make clean cuts.
You may also need to make modifications to your design to make it functional.
In my case, I have used:
- 2 sheets of 4'x8' feet of 2cm thick Plywood (can be 1cm thick)
- 1" headless nails
- Hammer
- Wood glue
- Wood sealer
- Sandpaper
- Paints
Assembly Process
Join all the pieces together with nails to form the drawers.
Glue the internal parts (divisions) of the drawer with glue.
Source @albabos Sand and apply sealer to remove porosity and cover imperfections in the wood.
Apply wood paint
Source @albabos Allow to dry for at least one day before placing the drawers one on top of the other.
Final result, I recommend putting casters on the bottom to move it more easily.
Source @albabos
The experience of taking a design from the computer to reality was quite an adventure. Going from a vague idea, to a sketch on paper and finally the final design.
As I mentioned before, one must make modifications on the fly as there are things that are physically impossible to do and hold, such as the 45, 30 and 60 degree angles with which I initially designed the drawers.
Also, there are other types of materials such as melamine or chipboard that although they are a little more expensive, give us the advantage of a better finish and we avoid spending on paint.
And finally, I recommend having a lot of patience and go little by little so as not to feel overwhelmed. It is well worth it.