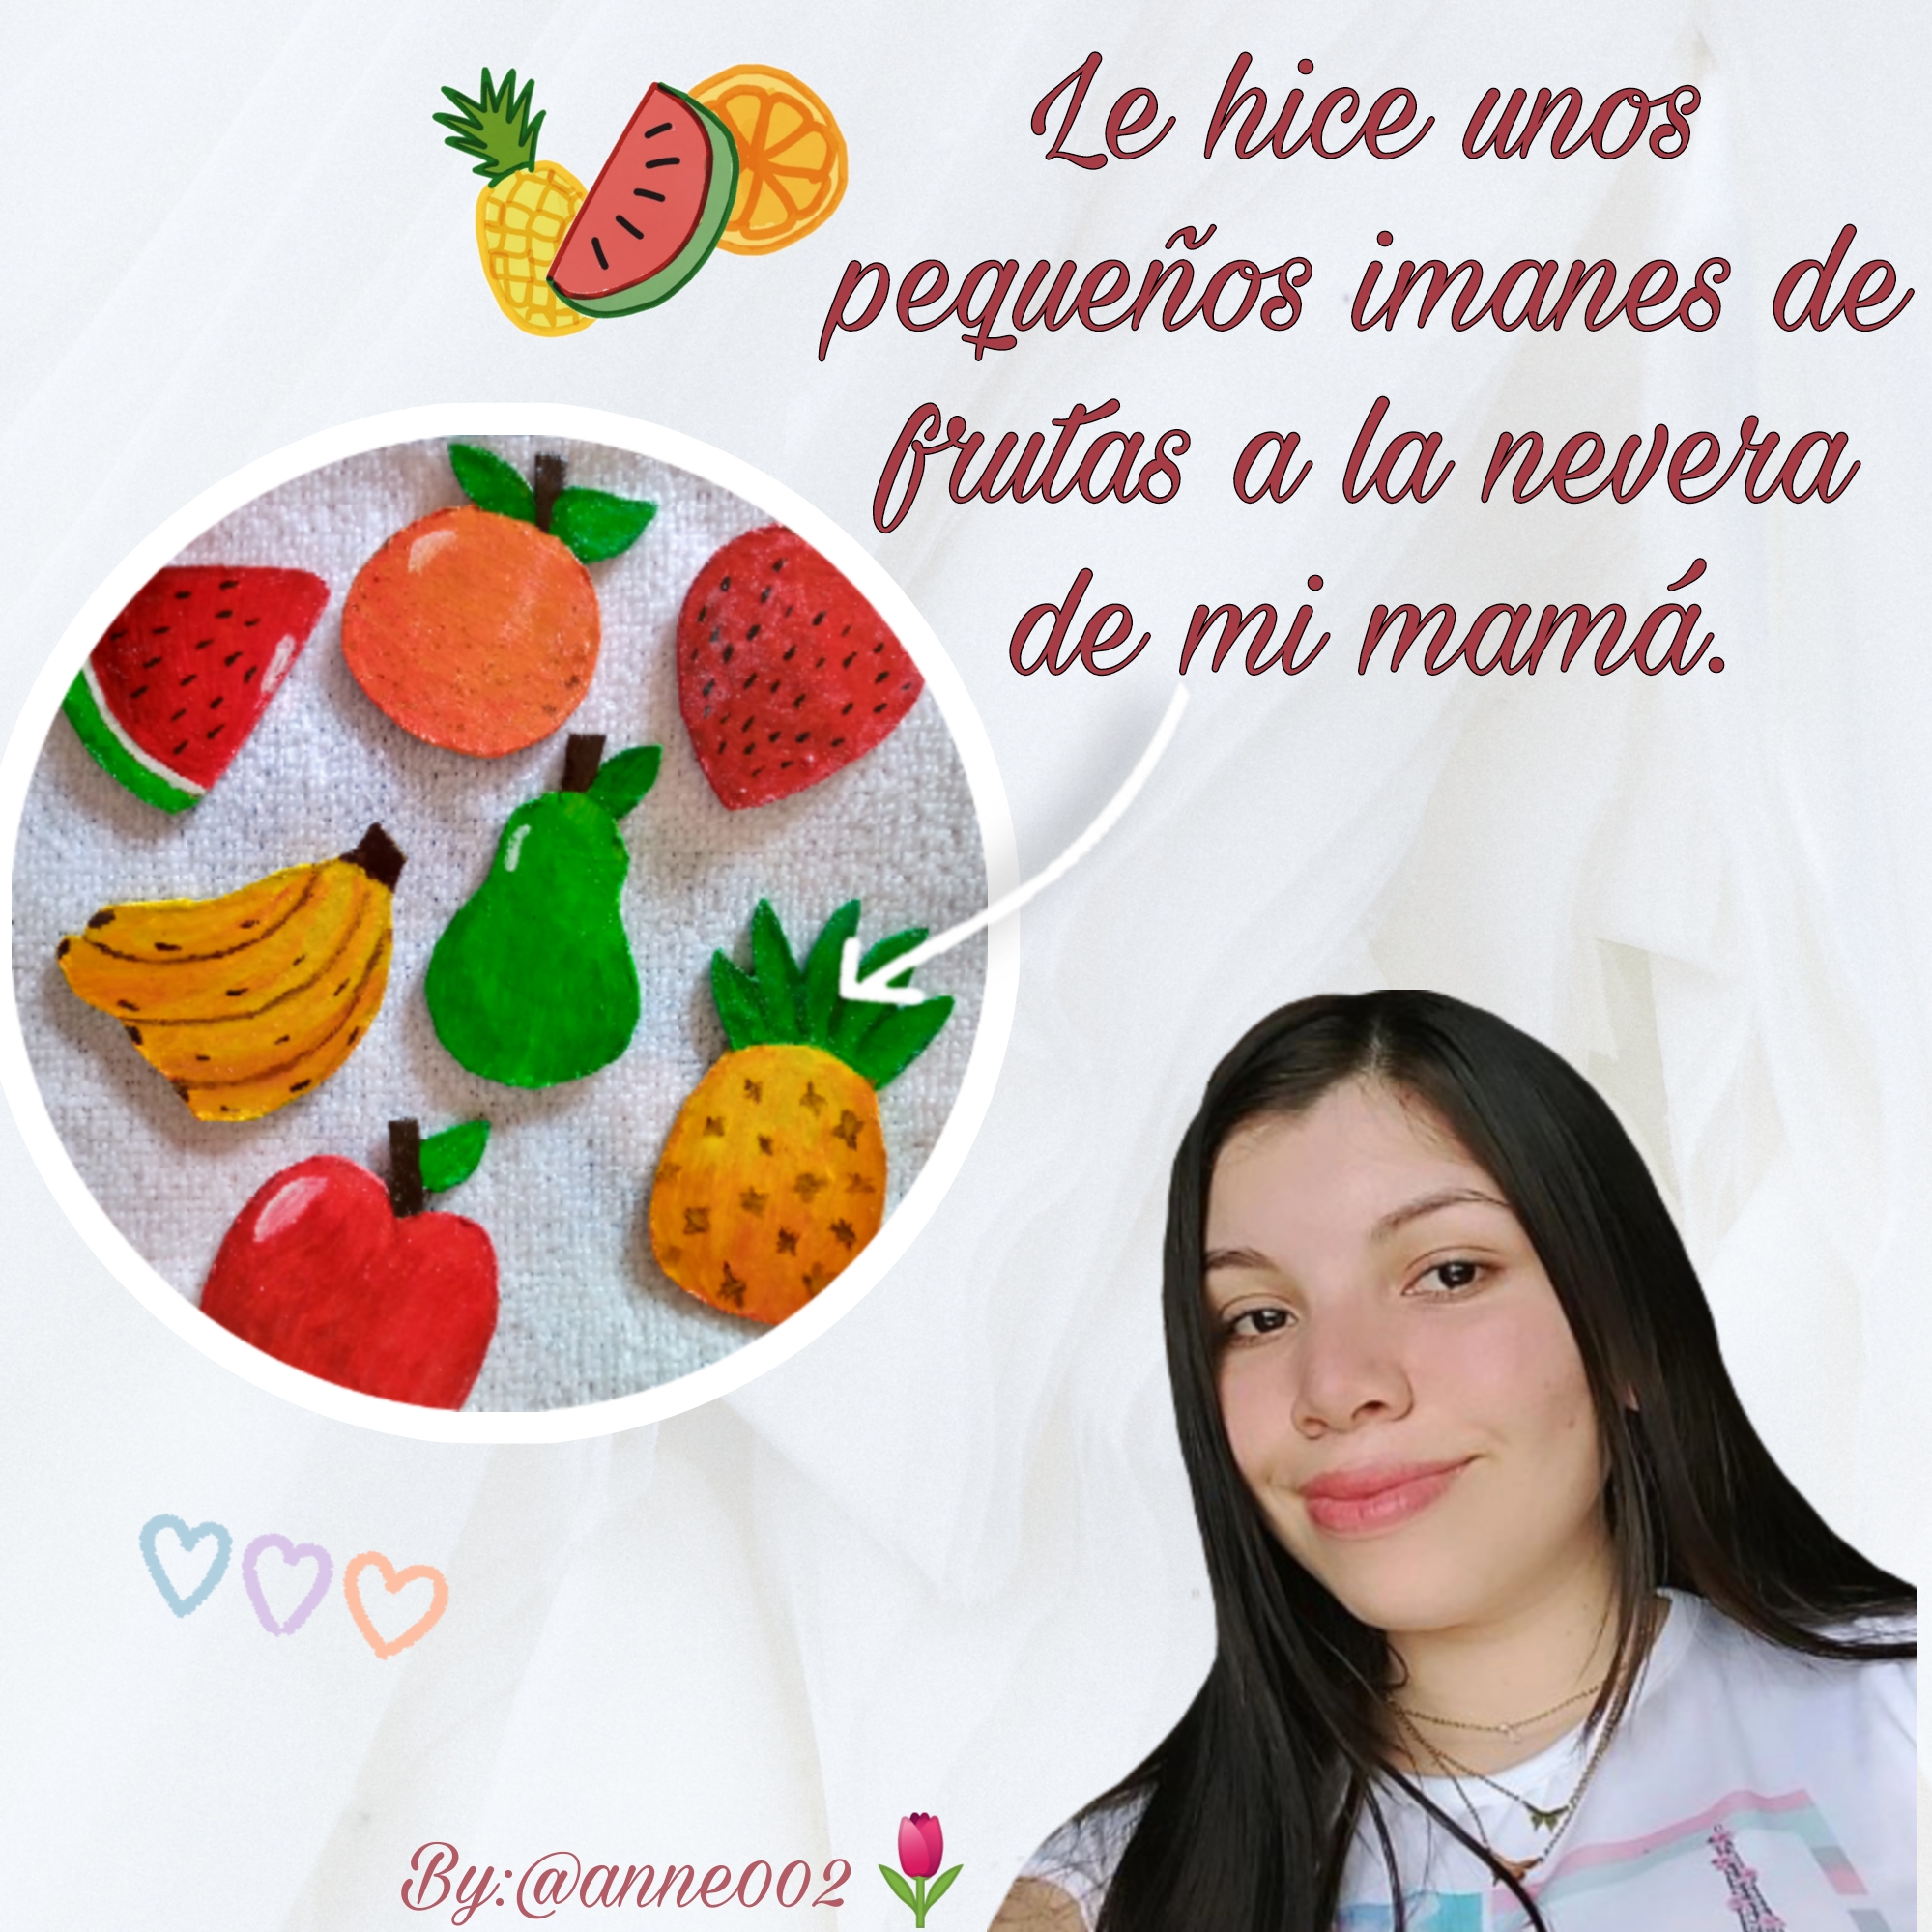
Hello friends! The table is now set to begin the banquet 😊, today I bring you a very particular idea that I know you will love very much, I made some magnets for my mom's refrigerator since the ones they had were old 🤭 so I know that sometimes we can't find the perfect magnets to decorate the kitchen and today I come to show you how you can make them with recyclable materials that you have at home, stay with me so that you can learn how I made them and how beautiful they turned out. 😊
Materiales que usé:
Materials i used :
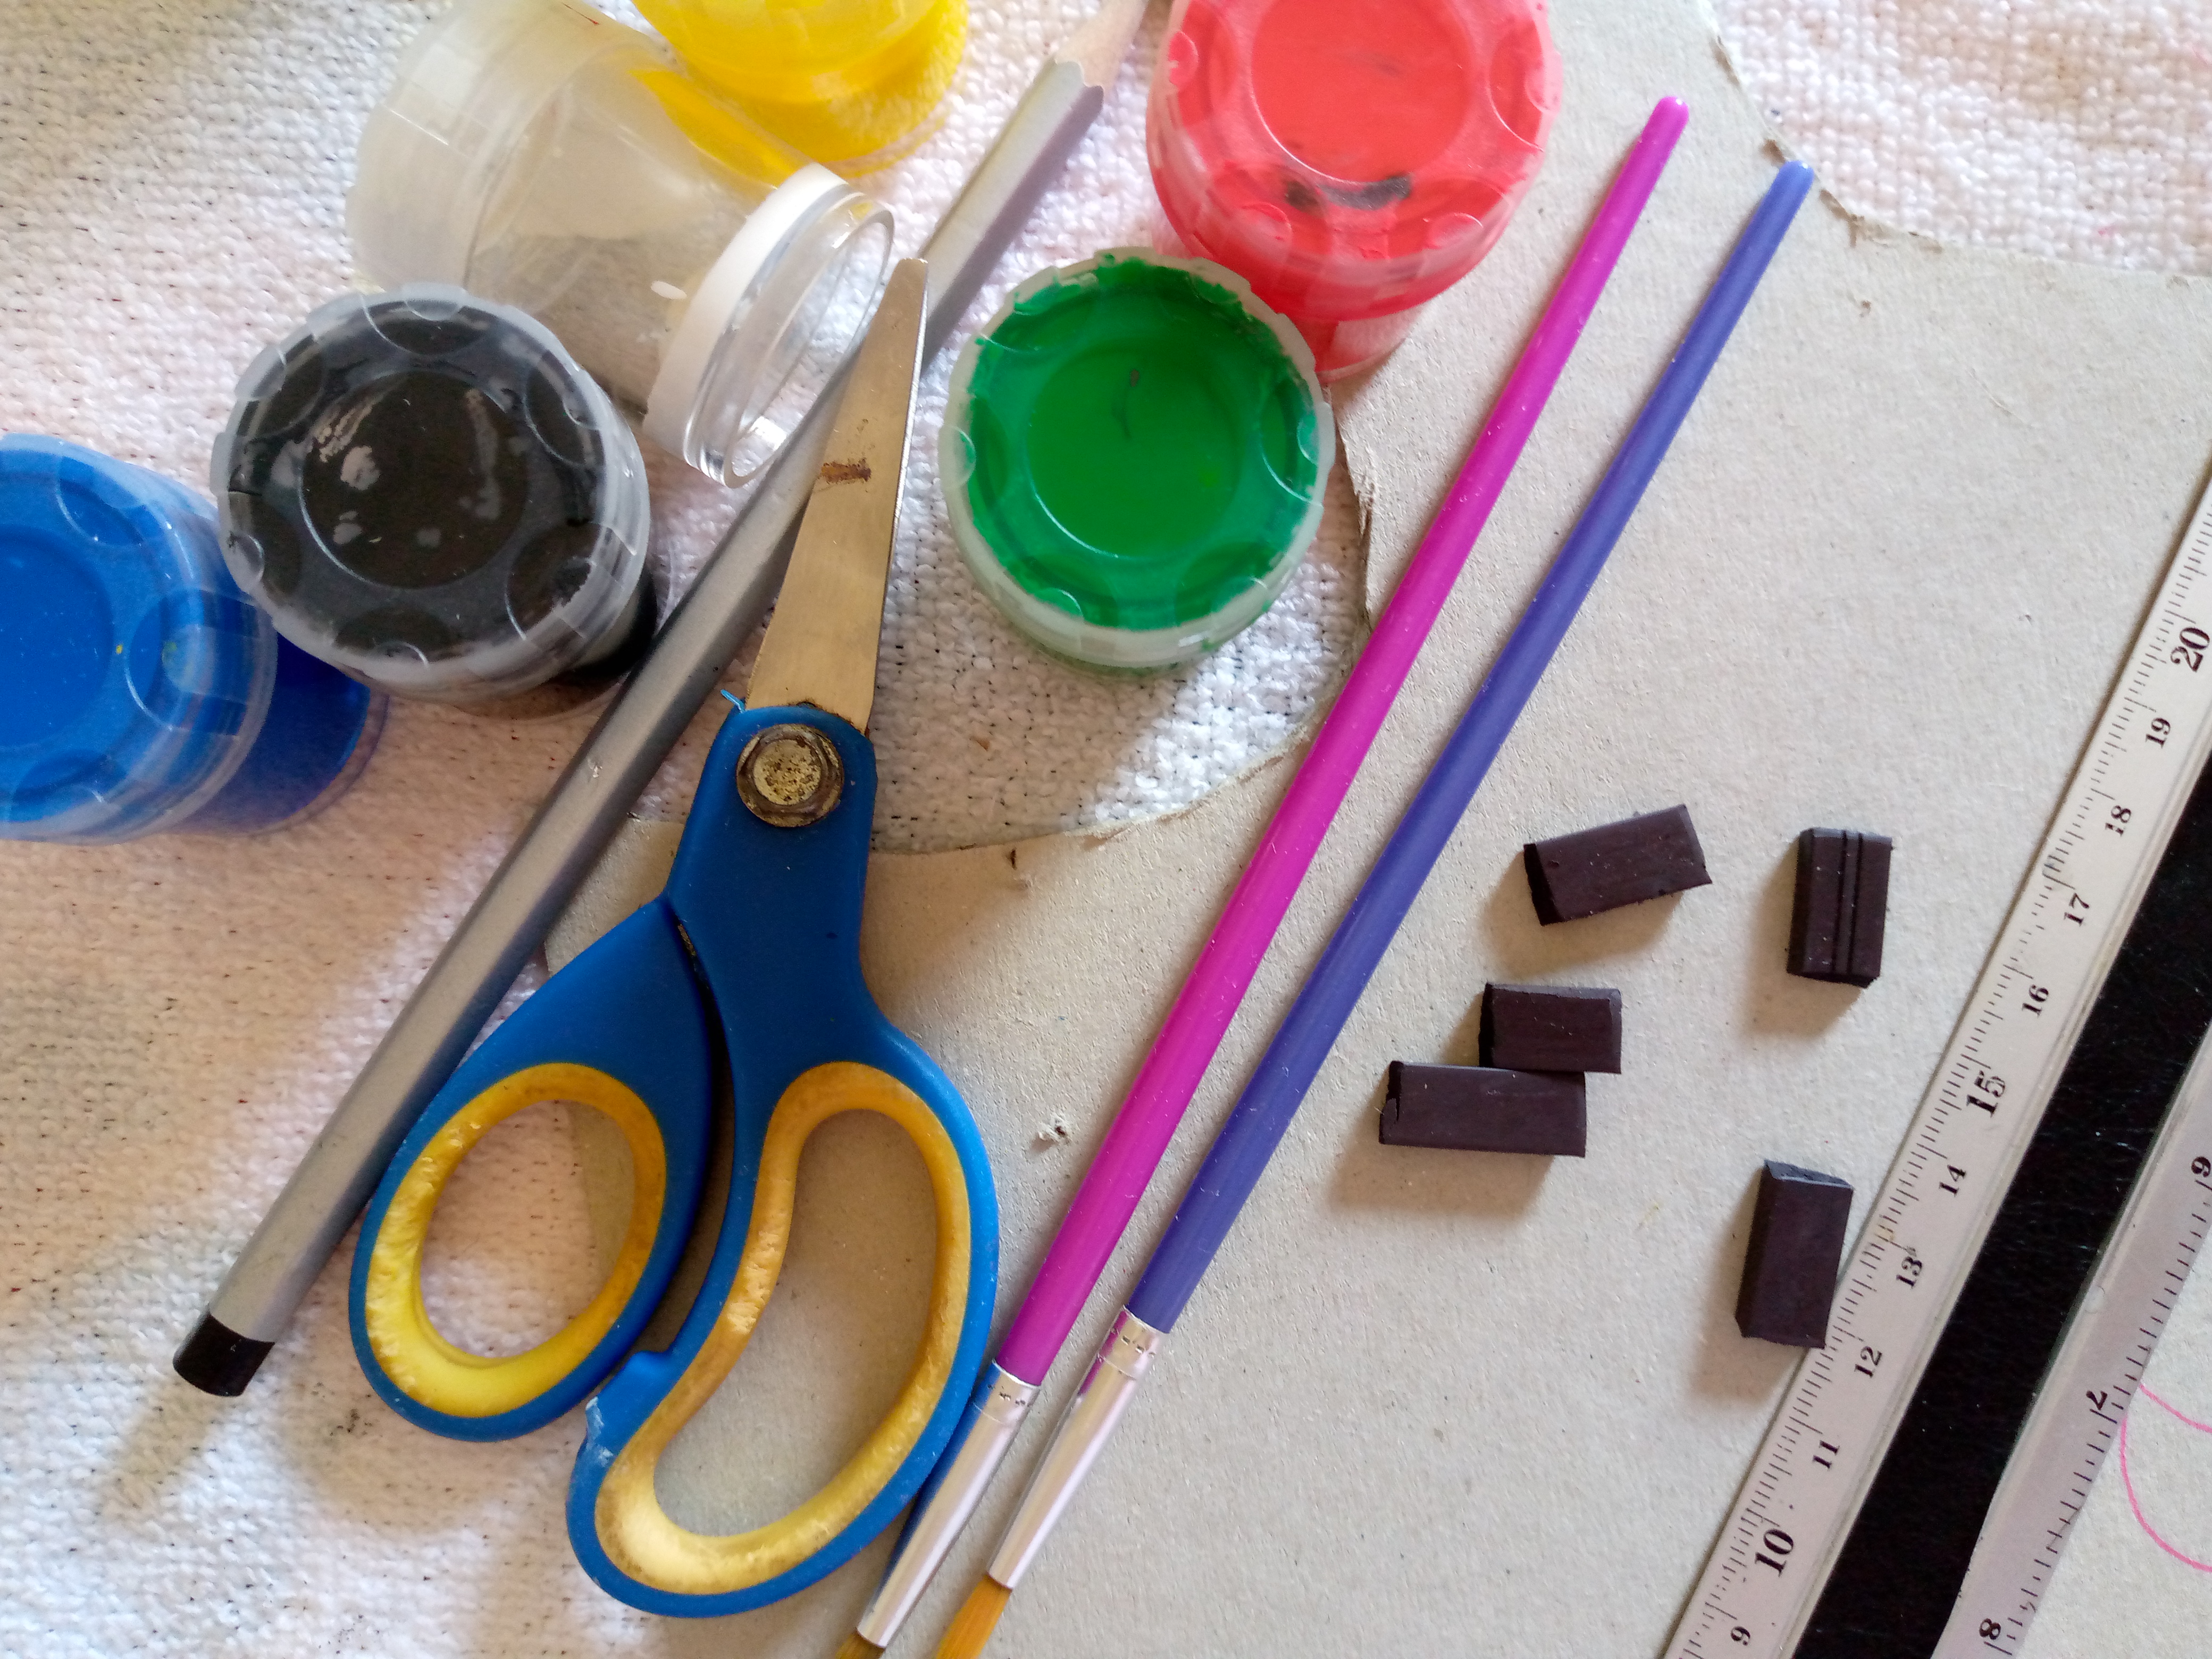
- Regla
- Trozo de cartón plano
- Tijeras
- Pinturas del color de las frutas
- Lápiz
- Esmalte de uñas transparente
- Trozos pequeños de imanes
- Silicón
- Pinceles
- Lima de uñas
- Ruler
- Flat piece of cardboard
- Scissors
- Fruit-colored paints
- Pencil
- Clear nail polish
- Small pieces of magnets
- Silicone
- Paintbrushes
- Nail file
Pasos a seguir:
Steps to follow:
Paso 01
Step 01
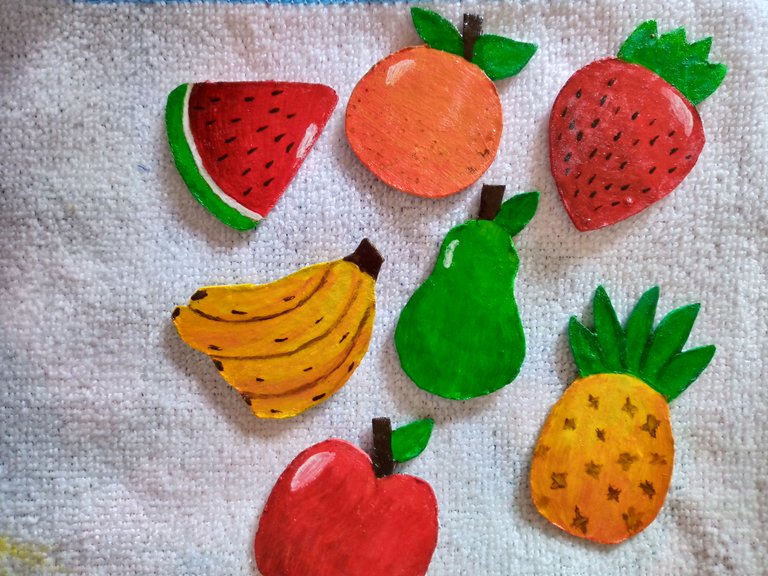
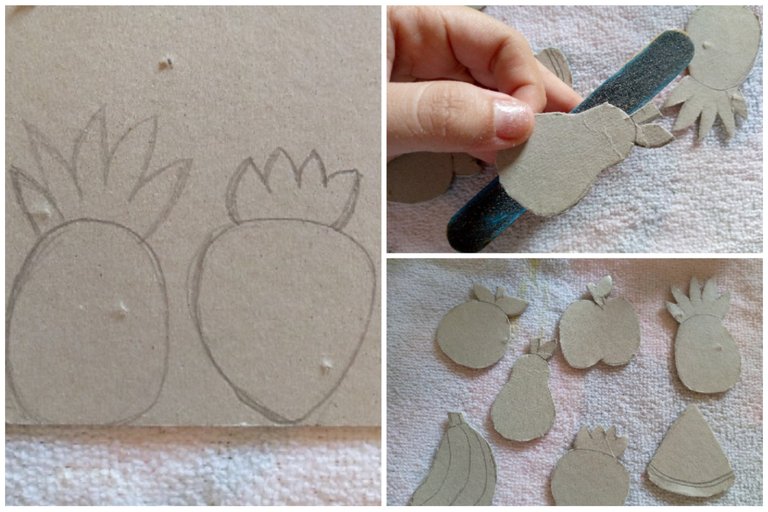
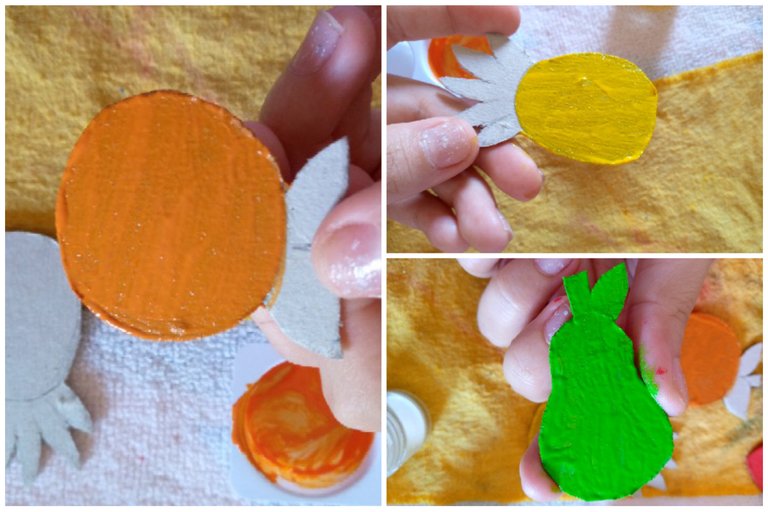
The first thing we will do is grab our cardboard and start drawing fruit figures here. I started by making a pineapple, a strawberry, and so on with the following ones. Not only can you make fruit, but also vegetables like corn, asparagus, pumpkins, avocado, and more. You can play with your imagination and make them whatever design you prefer. Once they are made on the cardboard, we will cut them out and with the help of the file I will remove the excess cardboard that I have left when I cut the figure.
Paso 02
Step 02
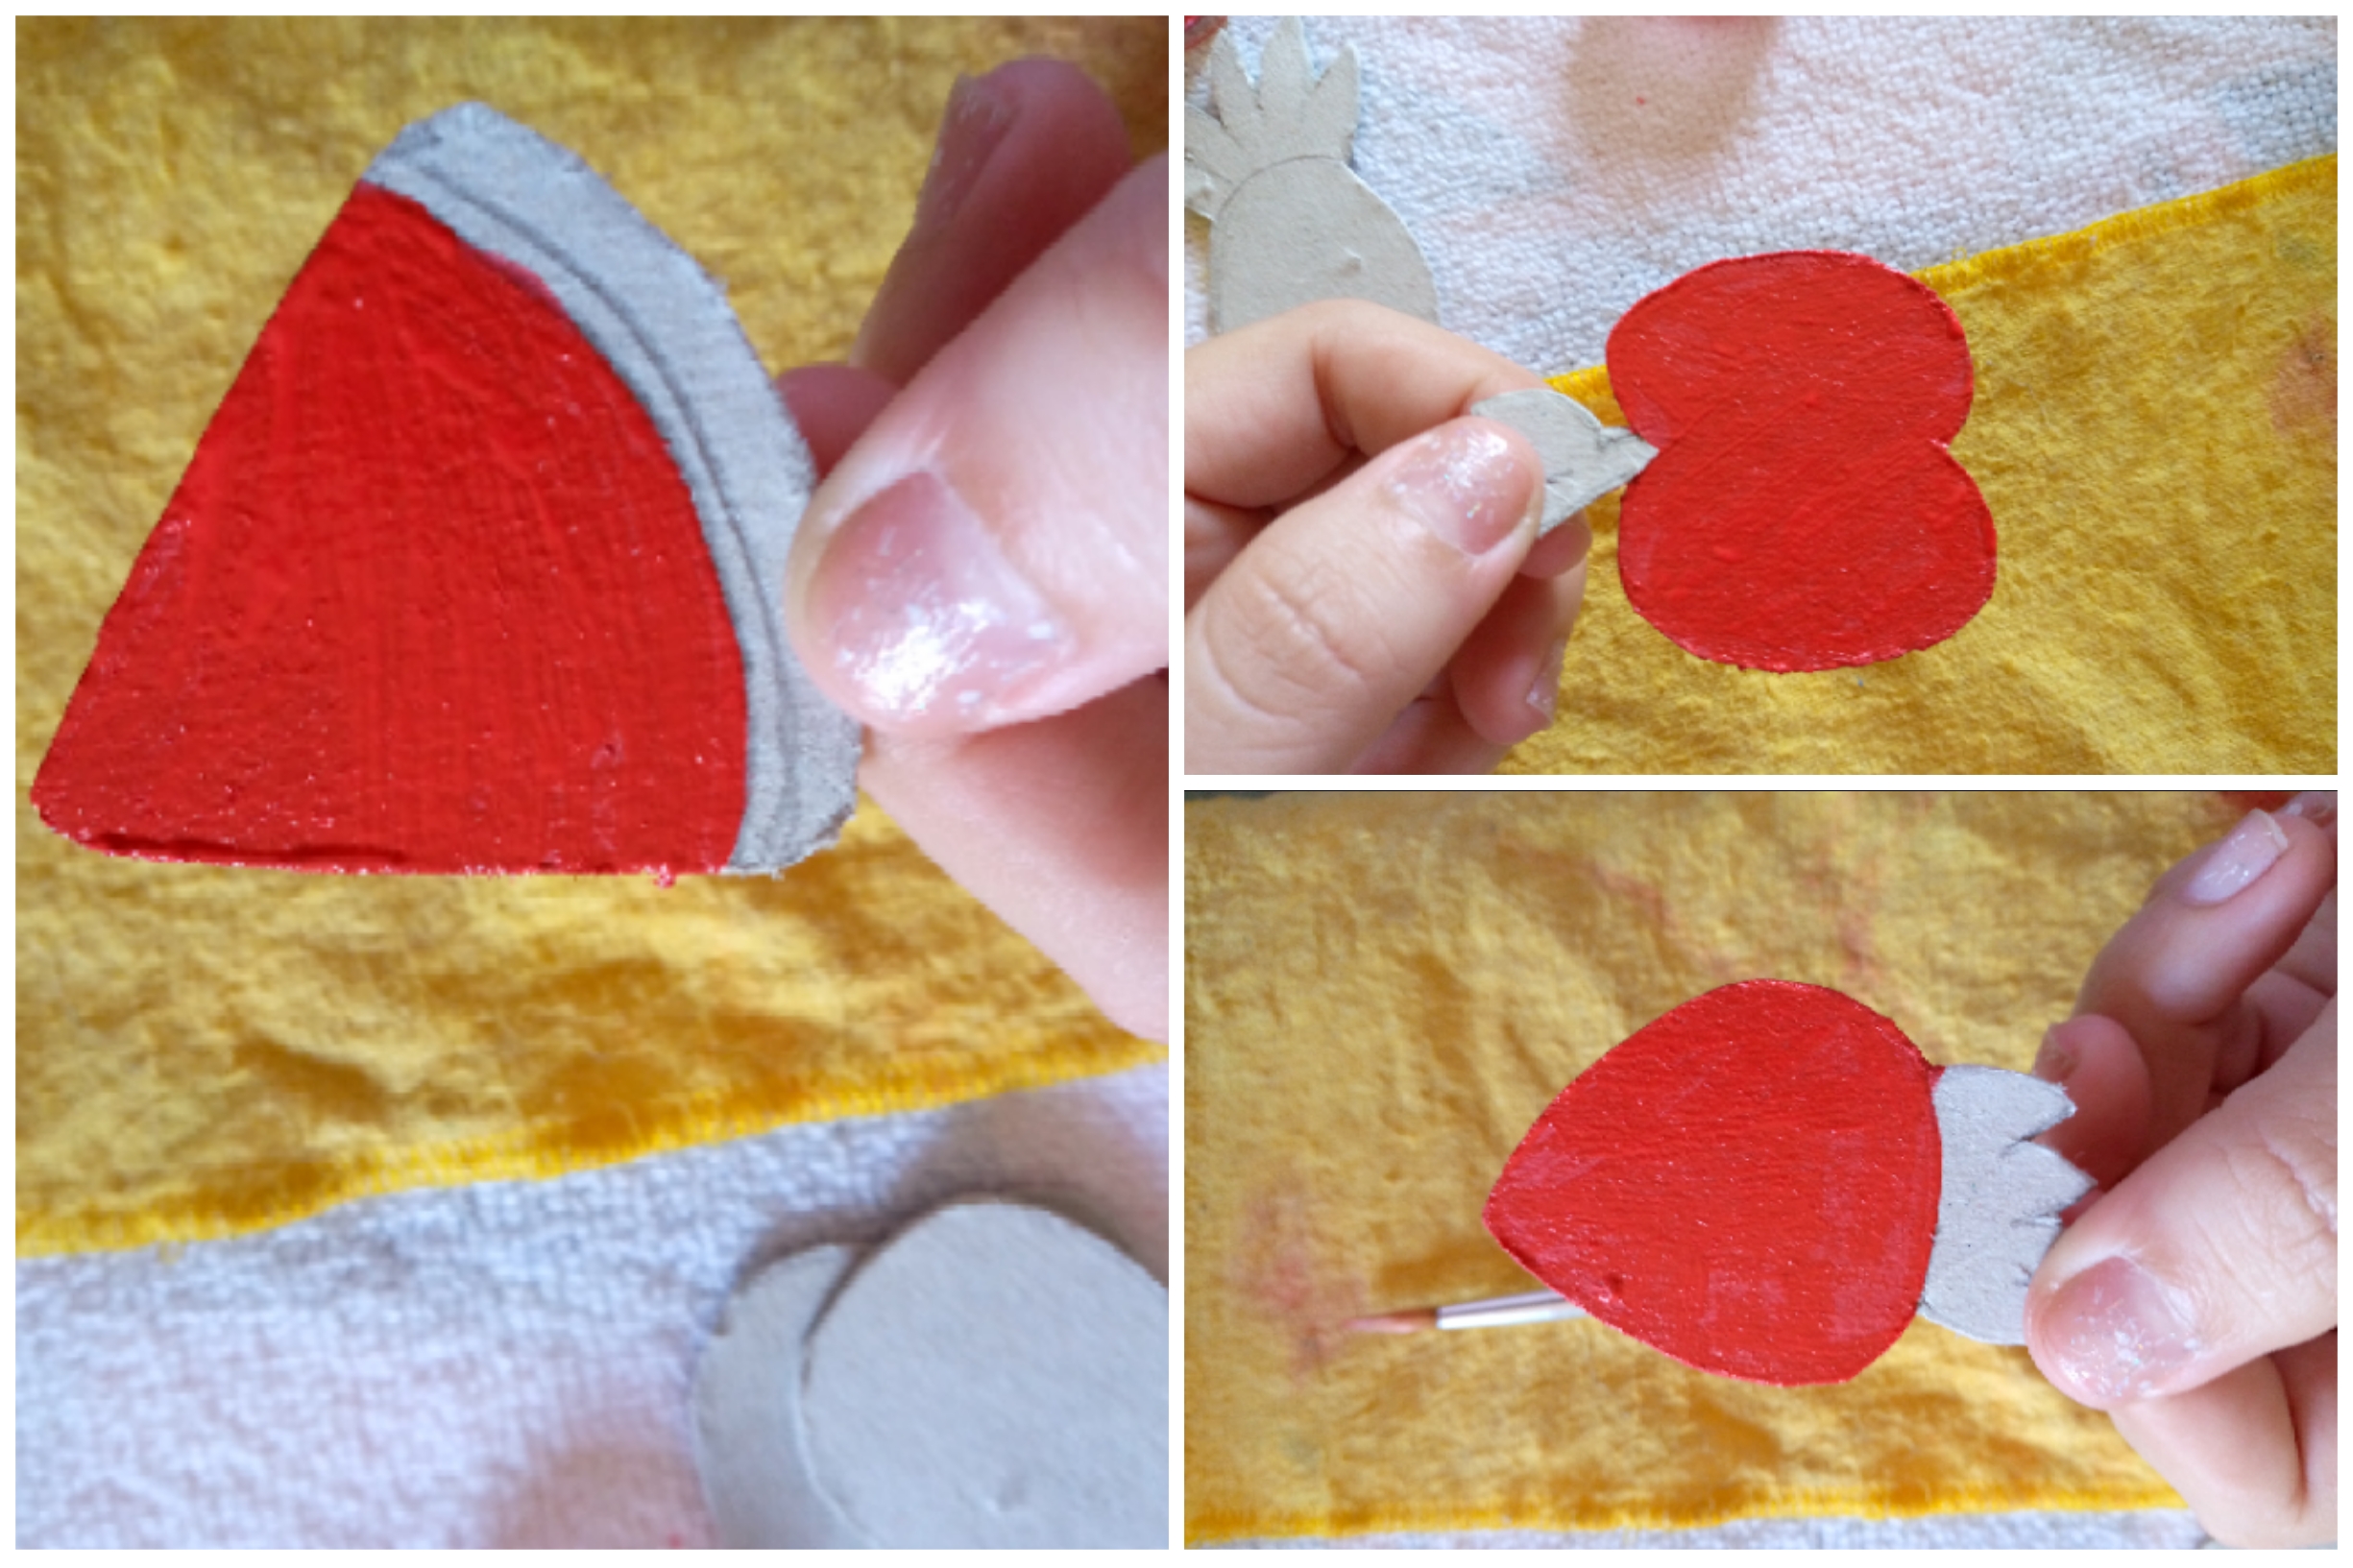
We move on to painting the fruits that are red with the paint. I take advantage of doing it this way so that they can dry completely and it will be easier for me to paint the other colors.
Paso 03
Step 03
We continue painting the other fruits like the orange, the pineapple and the pear. They look so pretty already painted. I love how the super bright colors of these fruits look 😍.
Paso 04
Step 04
I proceed to paint the details of the fruits such as the stripe of the watermelon in white, the seeds, and I also wanted to paint and blur each one with its shadows and the details of the fruits, as I did not have brown paint colors to paint the sticks of some and so well I painted them all.

Paso 05
Step 05
With the pieces of my magnet I am going to glue them on the bottom part then with the transparent enamel what we will do is cover the top part of the magnets with a layer of it, this is to give a more durable and shiny effect to the fruit magnets, this way we finish.
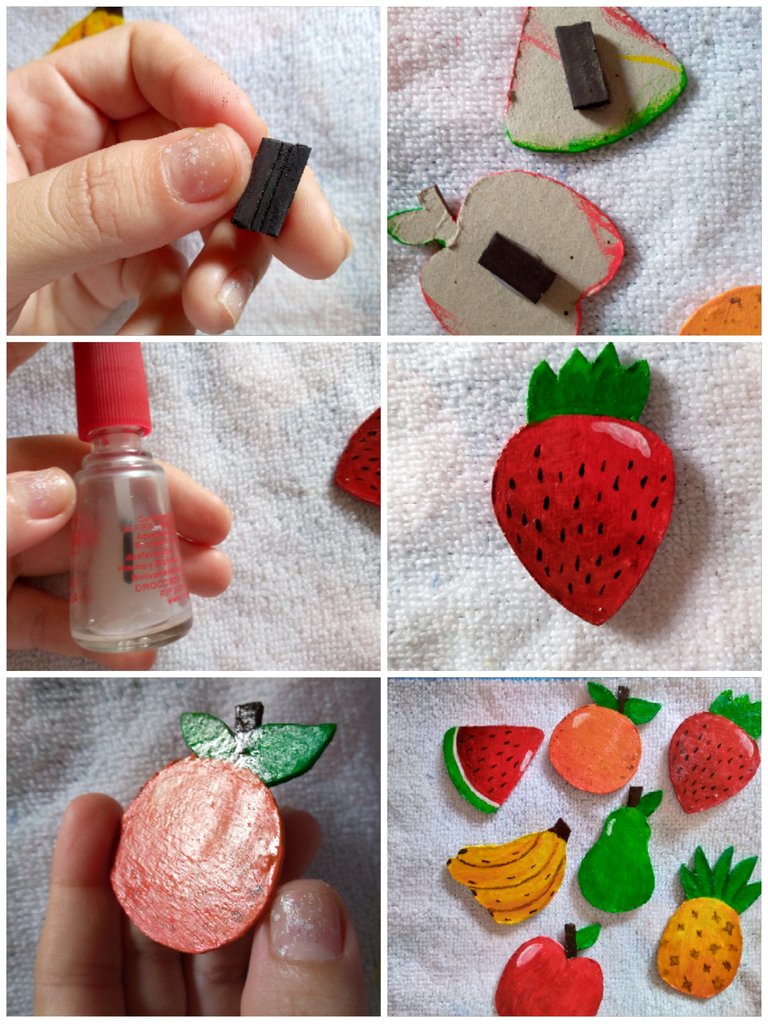
Resultado:
Result:
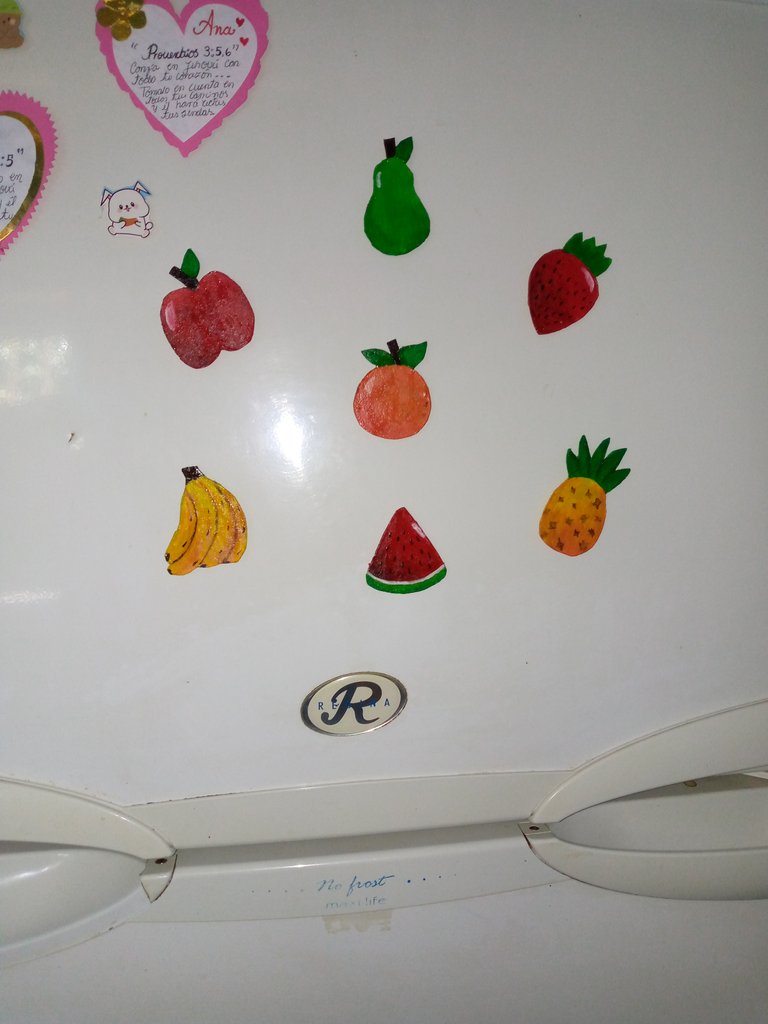
I would be happy to know that you really liked this creative idea 😊 My mom loved it a lot 🥺 I didn't expect it, to be honest, but she loved it a lot and I'm happy about that 🤭 If you liked it, comment on what you thought and I hope to read each other in another upcoming tutorial 😉 I will be making new things, I love you very much friends, take care of yourselves, blessings to you and have a beautiful and happy afternoon ❤️.
.jpg)