🤗Hola mi querida comunidad de Hive ❤
🤗Hello my dear Hive community❤

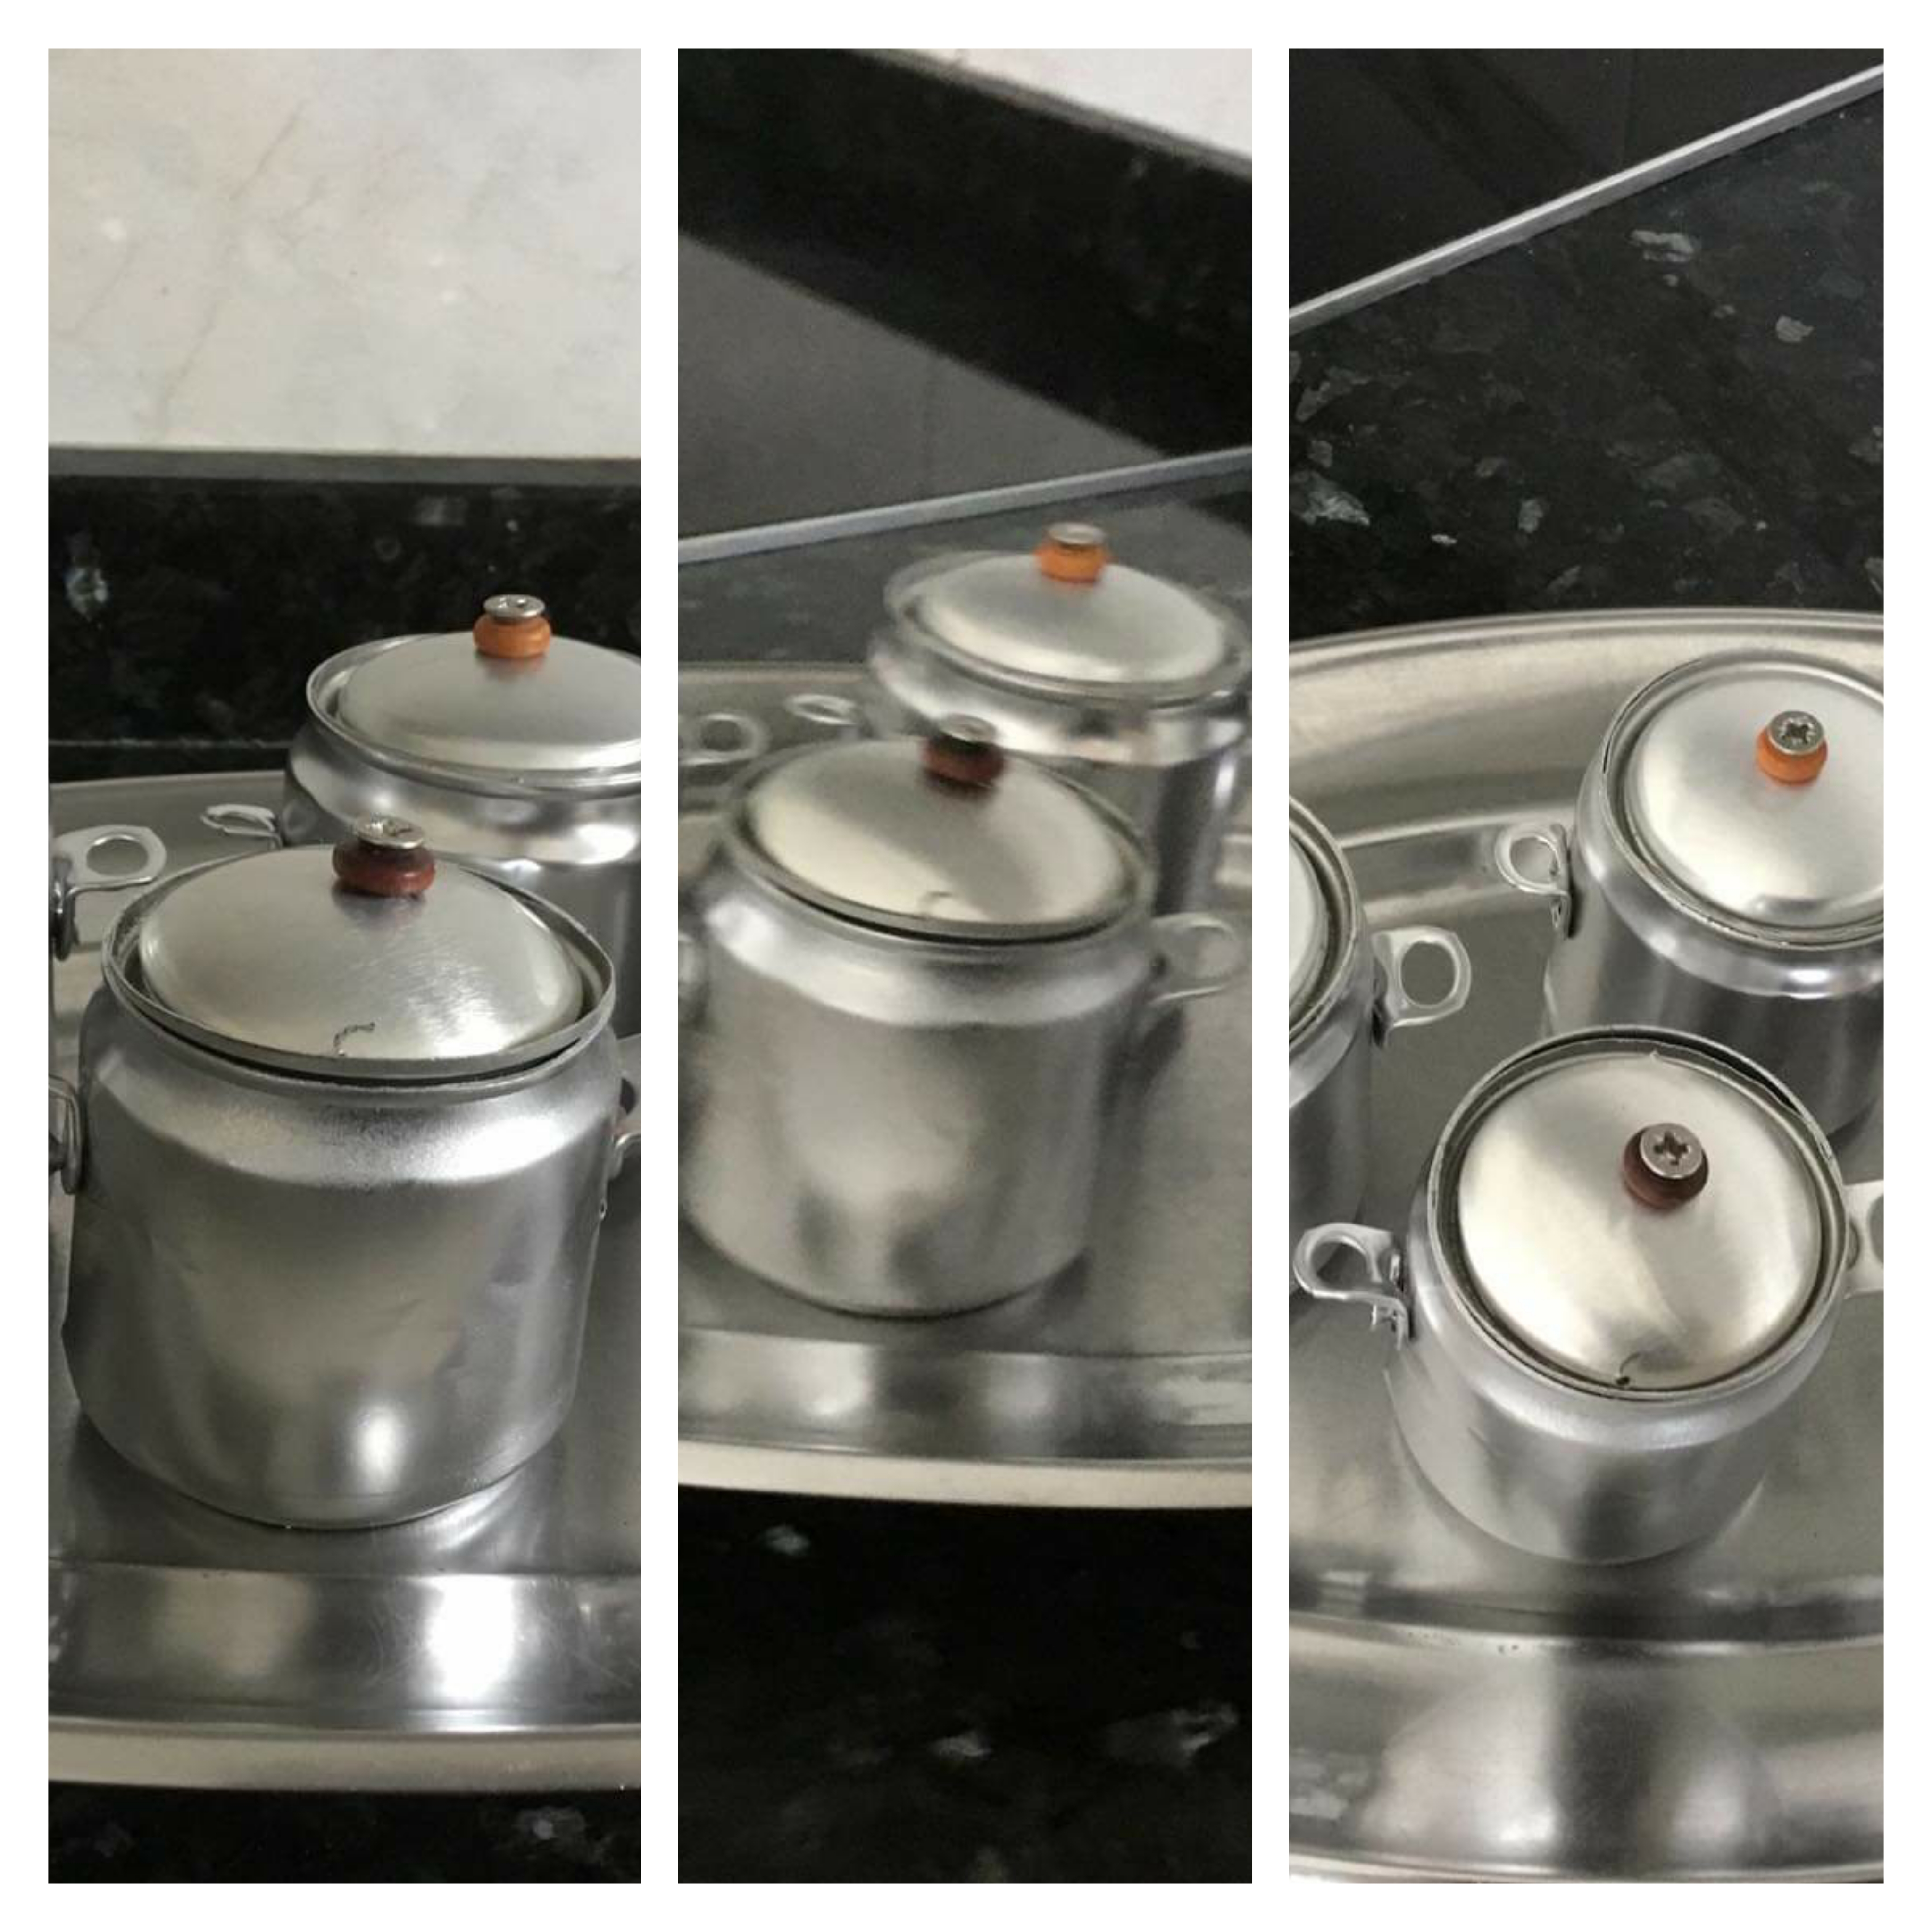
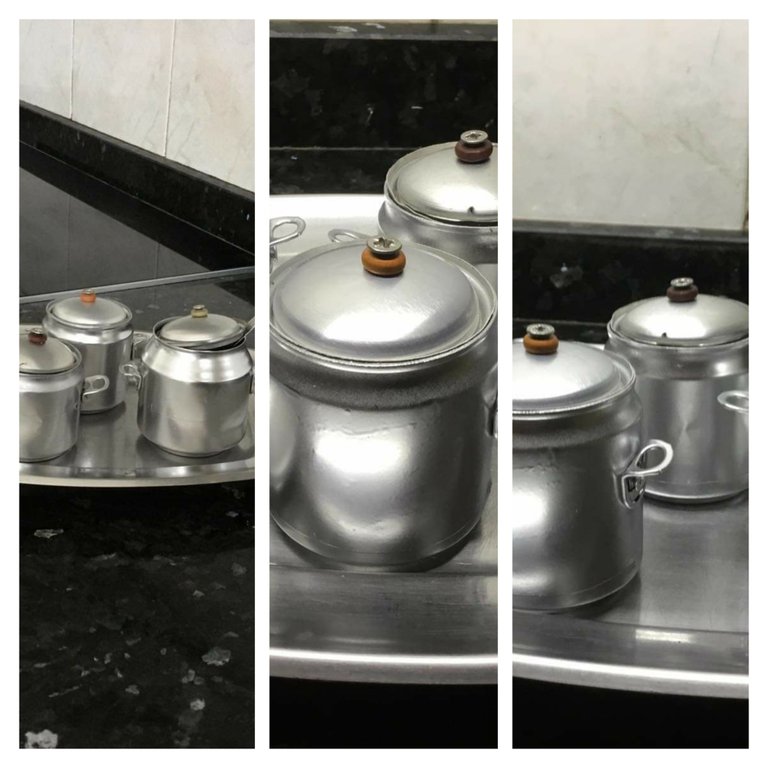
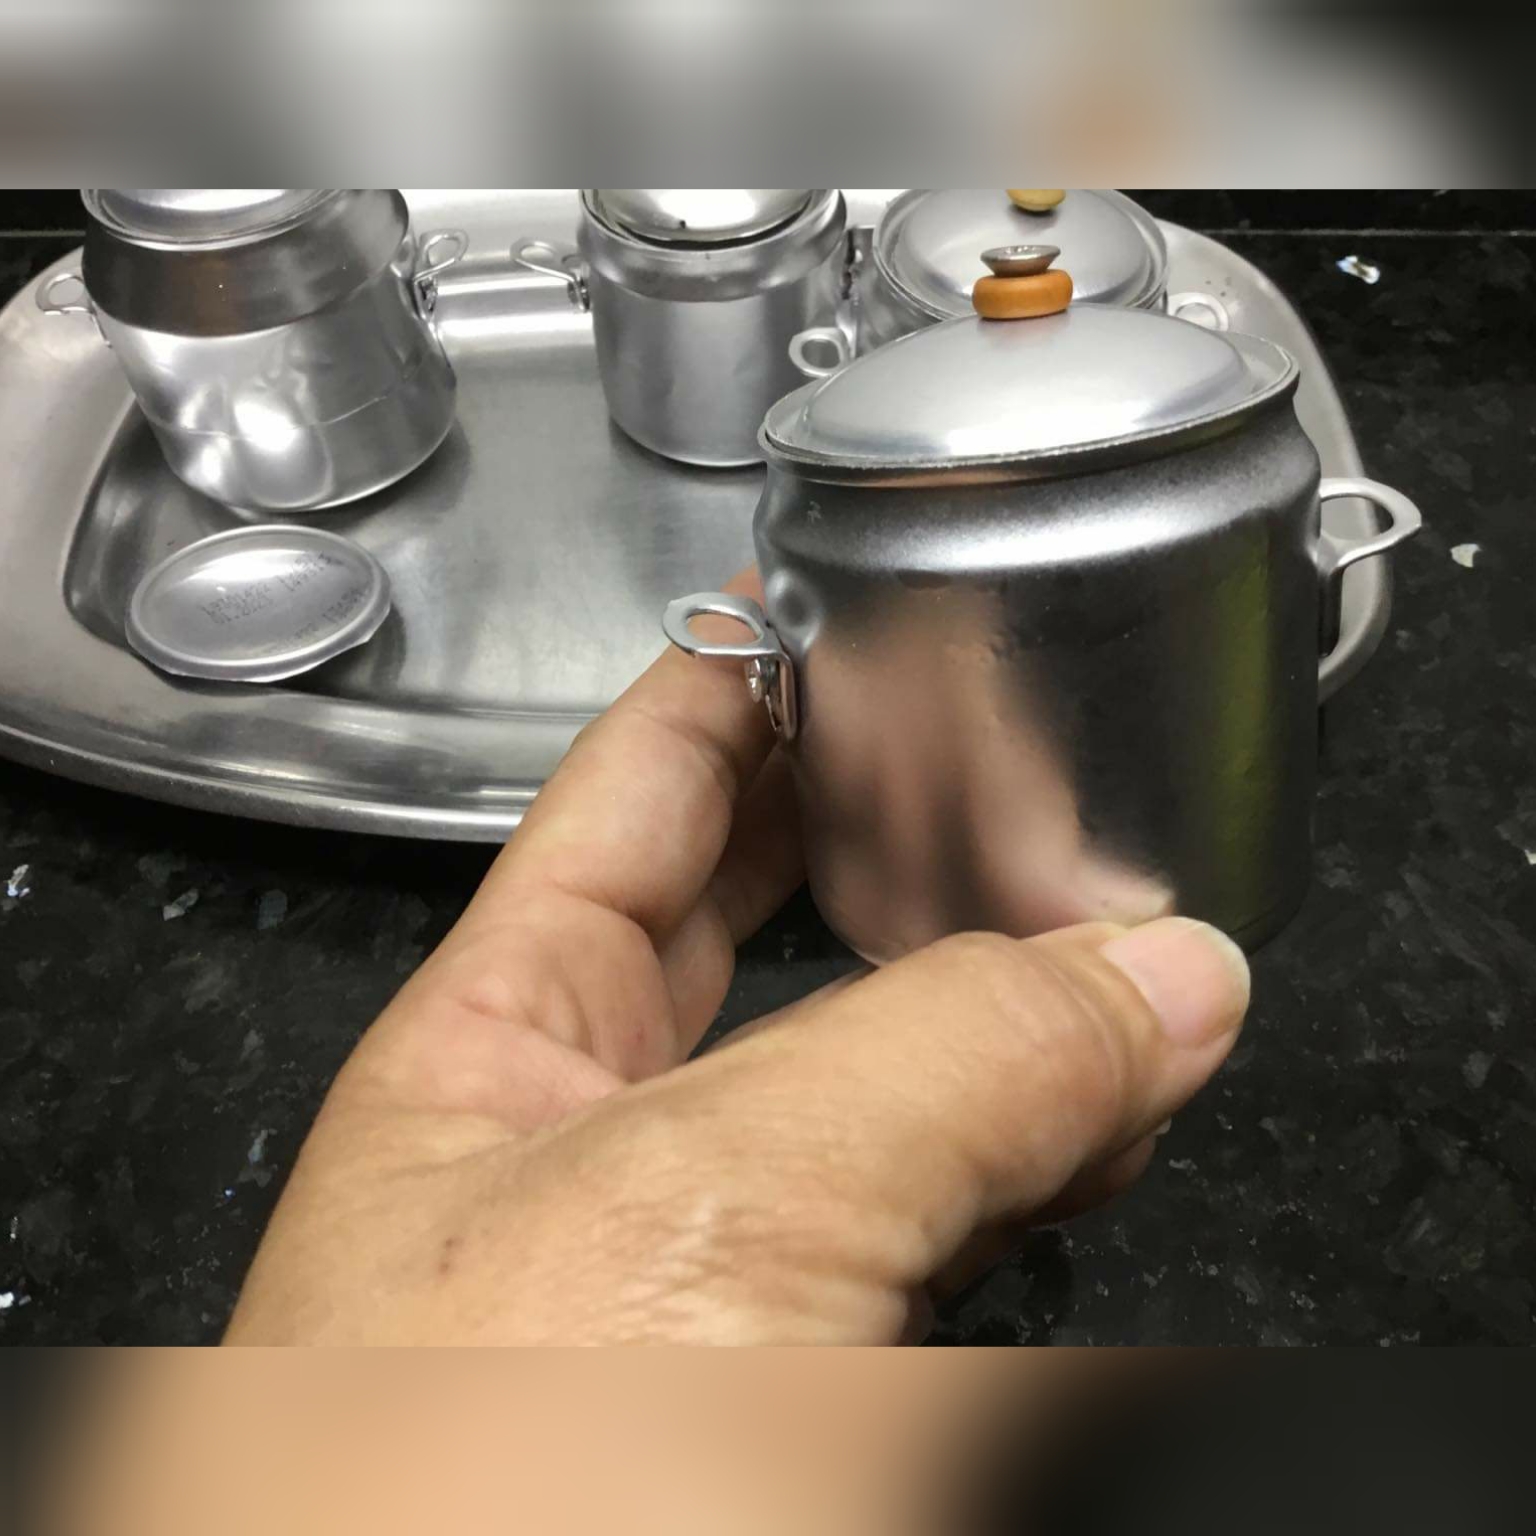
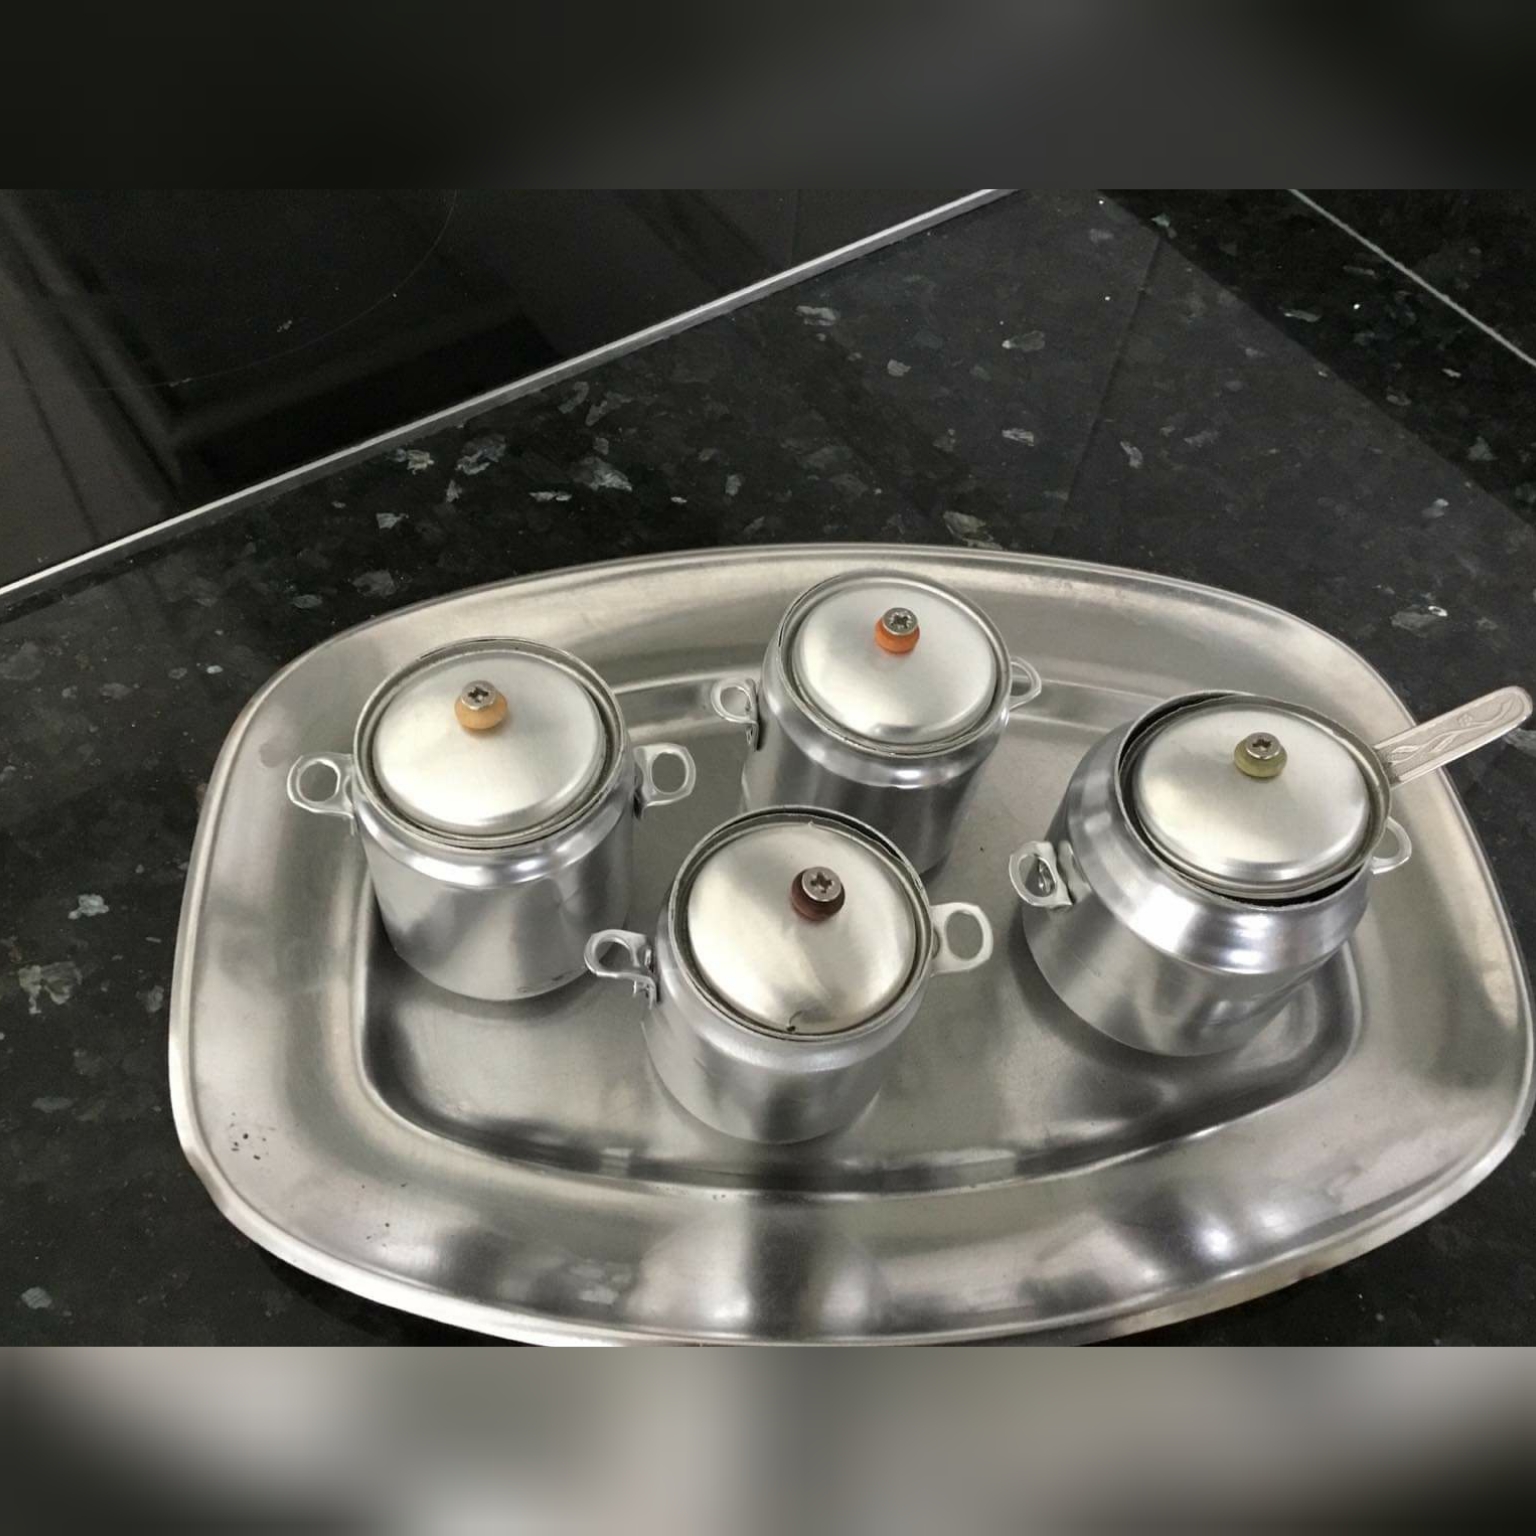
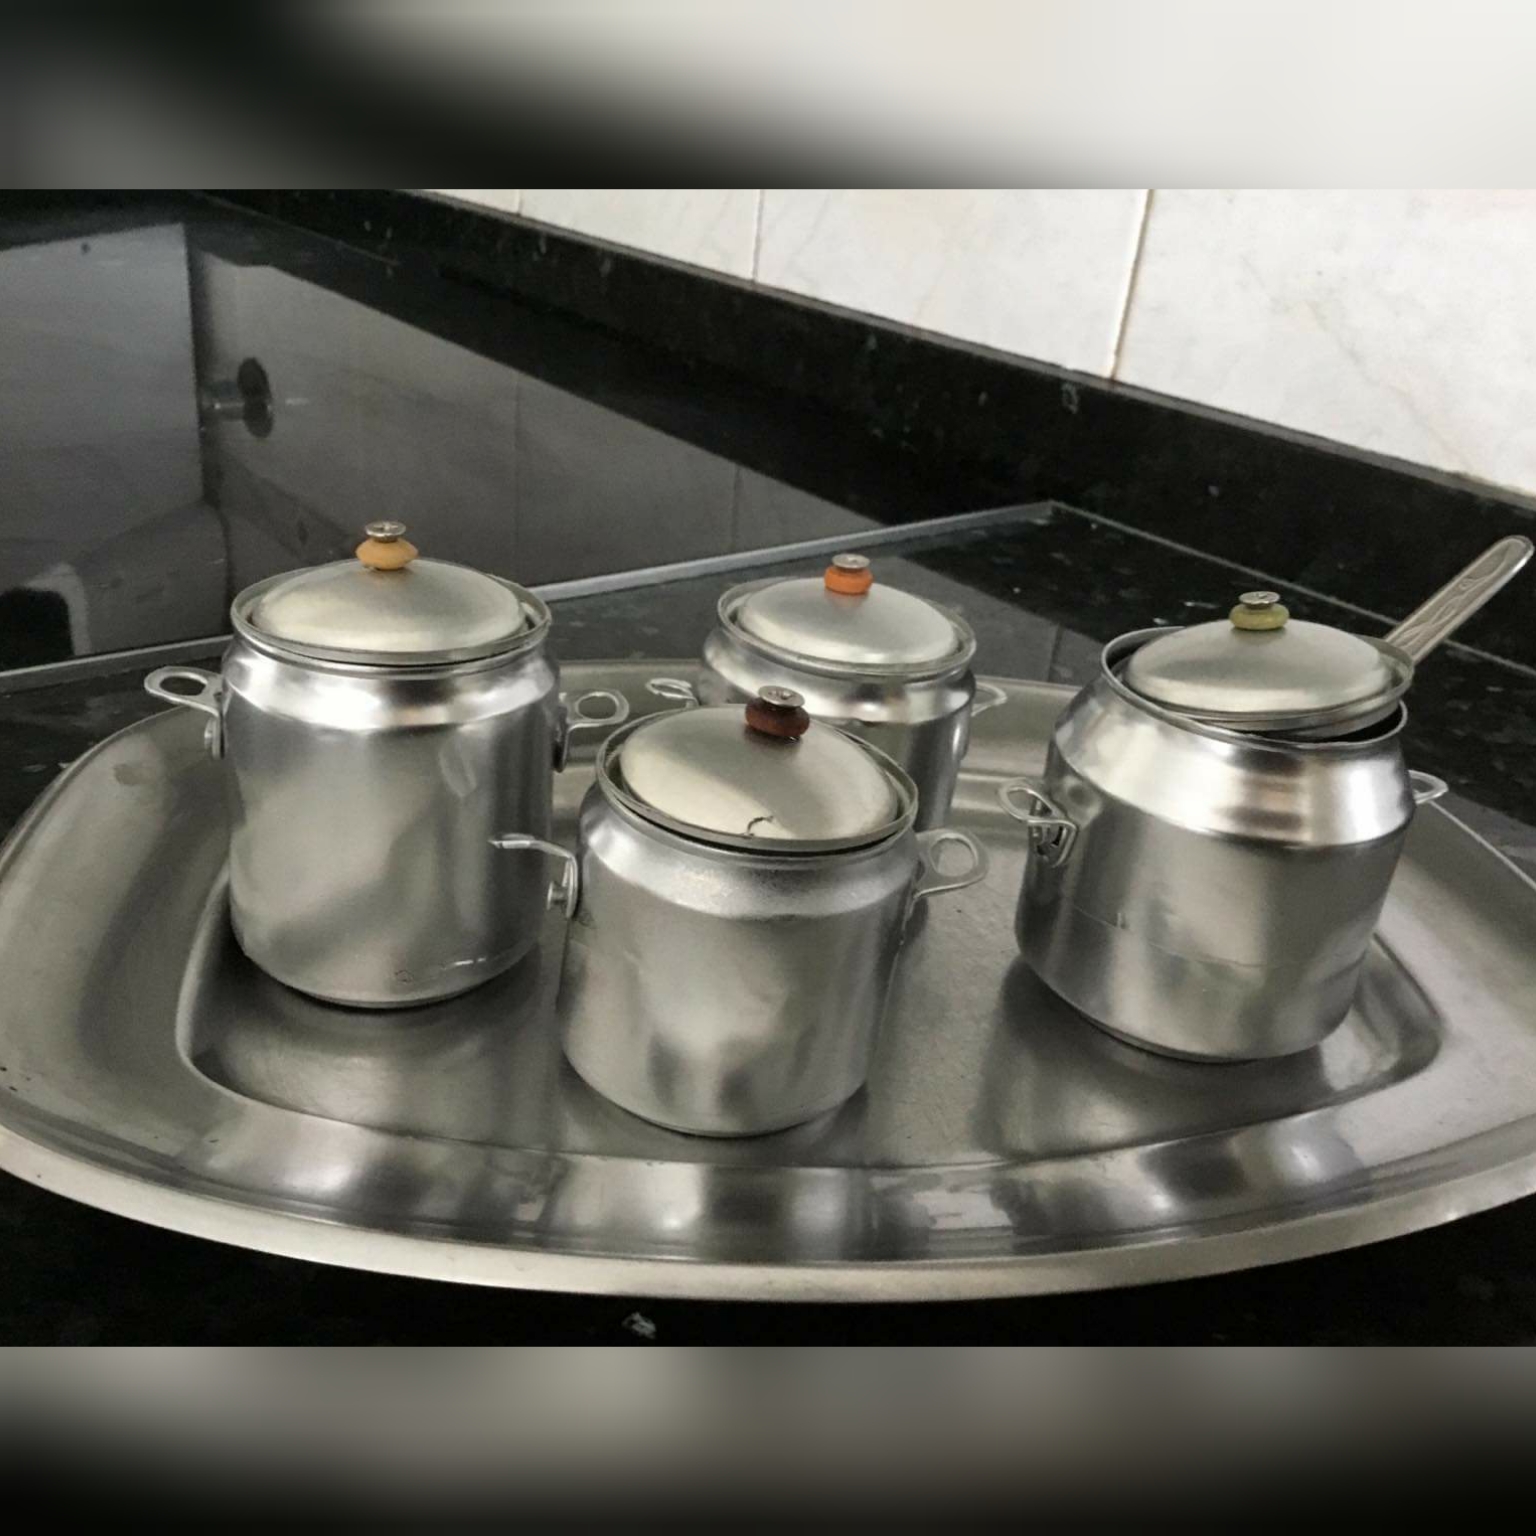
Un gran saludo a todas estas bellas comunidades que hacen familias en Hive; me siento muy emocionada en pertenecer a esta gran colmena🐝, ser parte de ésta comunidad me ha dado la oportunidad de compartir mis trabajos manuales, artesanales y mis experiencias ❤🤗. Hoy les traigo una cuchitura 😊 un juego de mini ollas; hermosas para decorar el área de la cocina o de parrilla, también sirve para obsequiarlas como un presente y para jugar nuestras princesas👧 de la casa.
A big shout out to all these beautiful communities that make families in Hive; I feel very excited to belong to this great hive🐝, being part of this community has given me the opportunity to share my manual work, crafts and my experiences ❤🤗. Today I bring you a cutlery 😊 a set of mini pots; beautiful to decorate the kitchen or grill area, it also serves to give it as a present and even serve to play our little 👧 of the house.
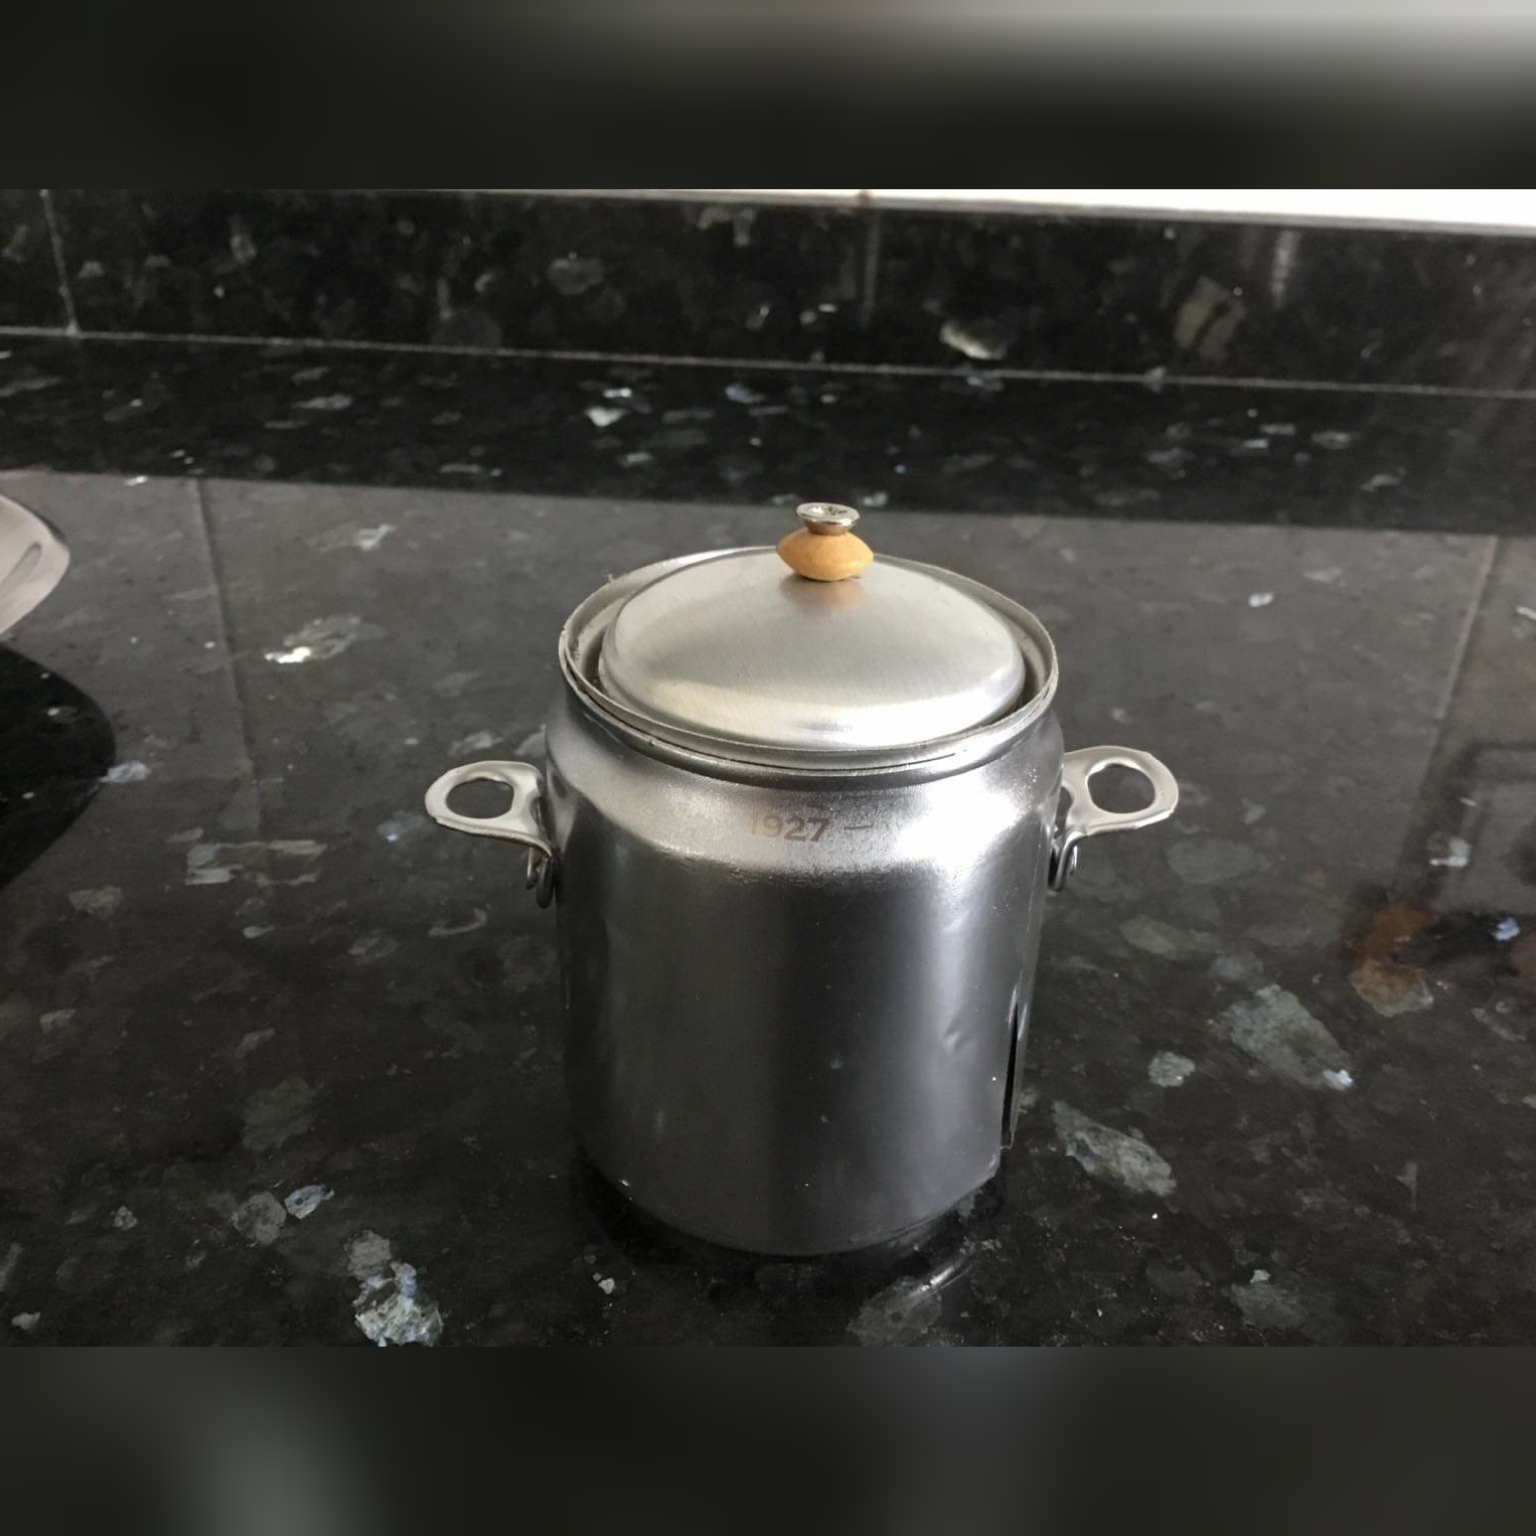
Para este juego de ollas vamos a utilizar muy pocos materiales y son muy fácil de hacer; el material principal de hoy es las latas de gaseosaso cervezas🍻🤩. Este juego de ollas lo realice para decorar un área en la cual estoy arreglando más adelante le mostraré esa área😍😚.Este juego de ollas me recuerdan a las que usaba mi abuela que eran de material de aluminio y se veían brillantes; pero cuando la ponía en la lecha quedaba negra 🤪🤭 y después para limpiarlas usaba arena húmeda y una esponja de brillo y volvían a quedar como nuevas☺👍son los lindos recuerdos y aprendizaje de nuestro pasado😊👏 .Vamos mano a la obra .Acompañenme para que hagamos este lindo juego de ollas.
For this set of pots we are going to use very few materials and they are very easy to make; Today's main material is soda or beer cans🍻🤩. I made this set of pots to decorate an area in which I am fixing it later I will show you that area 😍😚. This set of pots reminds me of the ones my grandmother used that were made of aluminum material and looked shiny; but when I put it in the milk it turned black 🤪🤭 and then to clean them I used wet sand and a glitter sponge and they came back like new ☺👍 they are the beautiful memories and learning from our past 😊👏. Let's go to work. Join me for us to make this cute set of pots.

Materiales a utilizar-The materials to use

1. Latas de gaseosas o cervezas, acá se usarán 8 latas para realizar 4 ollas
2. Ocho(8) tornillos de menos de un centímetro y finos.
3. 4 perlas que agujero queden en los tornillos
4. 4 tornillos de un centímetro y finos
5. Tijera
6. Cuchillo
7. Lima de hierro o lijas para hierro
8. Una pinza o tenaza
9. Destornillador de estria o paleta esto va a depender de los tornillos que vaya usar.
10. Una regla o cinta métrica
11. Un marcador
12. Paño de cocina
13. Pintura en spray color plateado
1.Cans of soft drinks or beer, here 8 cans will be used to make 4 pots
2. Eight (8) screws less than one centimeter and thin.
3. 4 pearls that hole is left in the screws
4. 4 centimeter thin screws
5. Scissor
6. Knife
7. Iron file or sandpaper for iron
8. A clamp or pliers
9. Slotted or blade screwdriver This will depend on the screws you are going to use.
10. A ruler or tape measure
11. A bookmark
12. Tea towel
13. Silver spray paint

Pasos a seguir-Steps to follow

1.👣 lavar las latas con agua y secar con un trapo lo siguiente es medir con una regla o una cinta métrica y con el marcador marcar con un punto las medidas de 4 cm arriba y 3 1/2 de abajo. Este punto nos va servir como guia para hacer una línea alrededor de la lata. Sugerencia con un objeto que esté casi a la altura del punto coloque el marcador y vaya dándole vuelta a la lata👍.
1.👣 wash the cans with water and dry with a cloth. The next thing is to measure with a ruler or a tape measure and with the marker mark with a dot the measurements of 4 cm above and 3 1/2 below. This point will serve as a guide to make a line around the can. Suggestion with an object that is almost at the height of the point, place the marker and turn the can over👍.
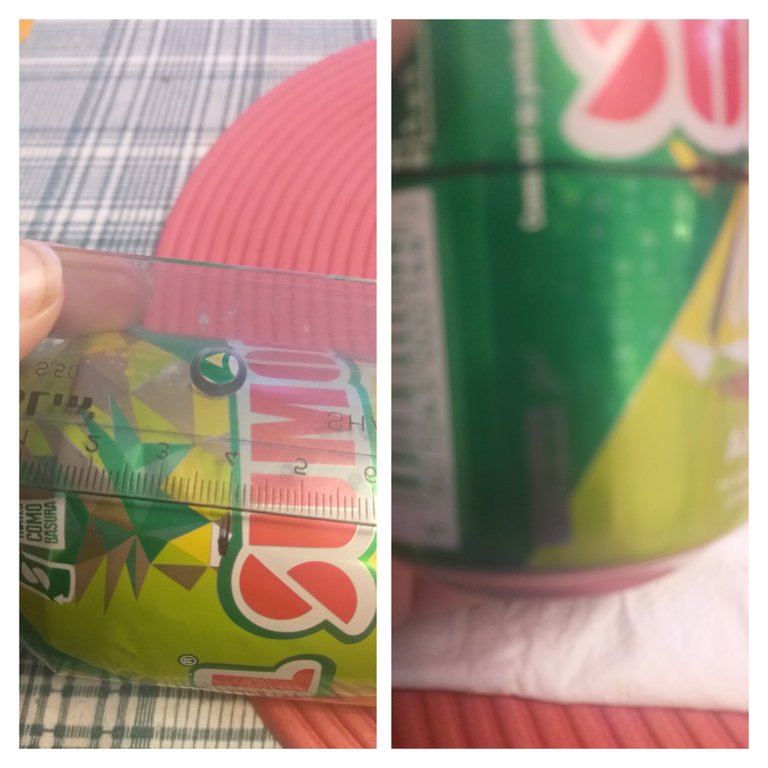
2👣. Con la lima o lija de hierro y para los que no tienen ninguna de la dos opciones pueden hacerlo con un piso rústico frotando la parte de encima la cual se caerá al desprenderse de la lata, yo utilicé la lima de hierro y es más rápido, pero igual le sirve la lija o el piso de concreto rústico. Después con la misma lima deberán limar todas esas imperfecciones alrededor de la lata esto es para que no se lastimen y queda más prolijo😍.
2👣. With the iron file or sandpaper and for those who do not have either of the two options you can do it with a rustic floor rubbing the top part which will fall when it comes off the can, I used the iron file and it is faster, but the sandpaper or the rustic concrete floor will still work. Then with the same file they should file all those imperfections around the can, this is so they don't get hurt and it's more neat😍.
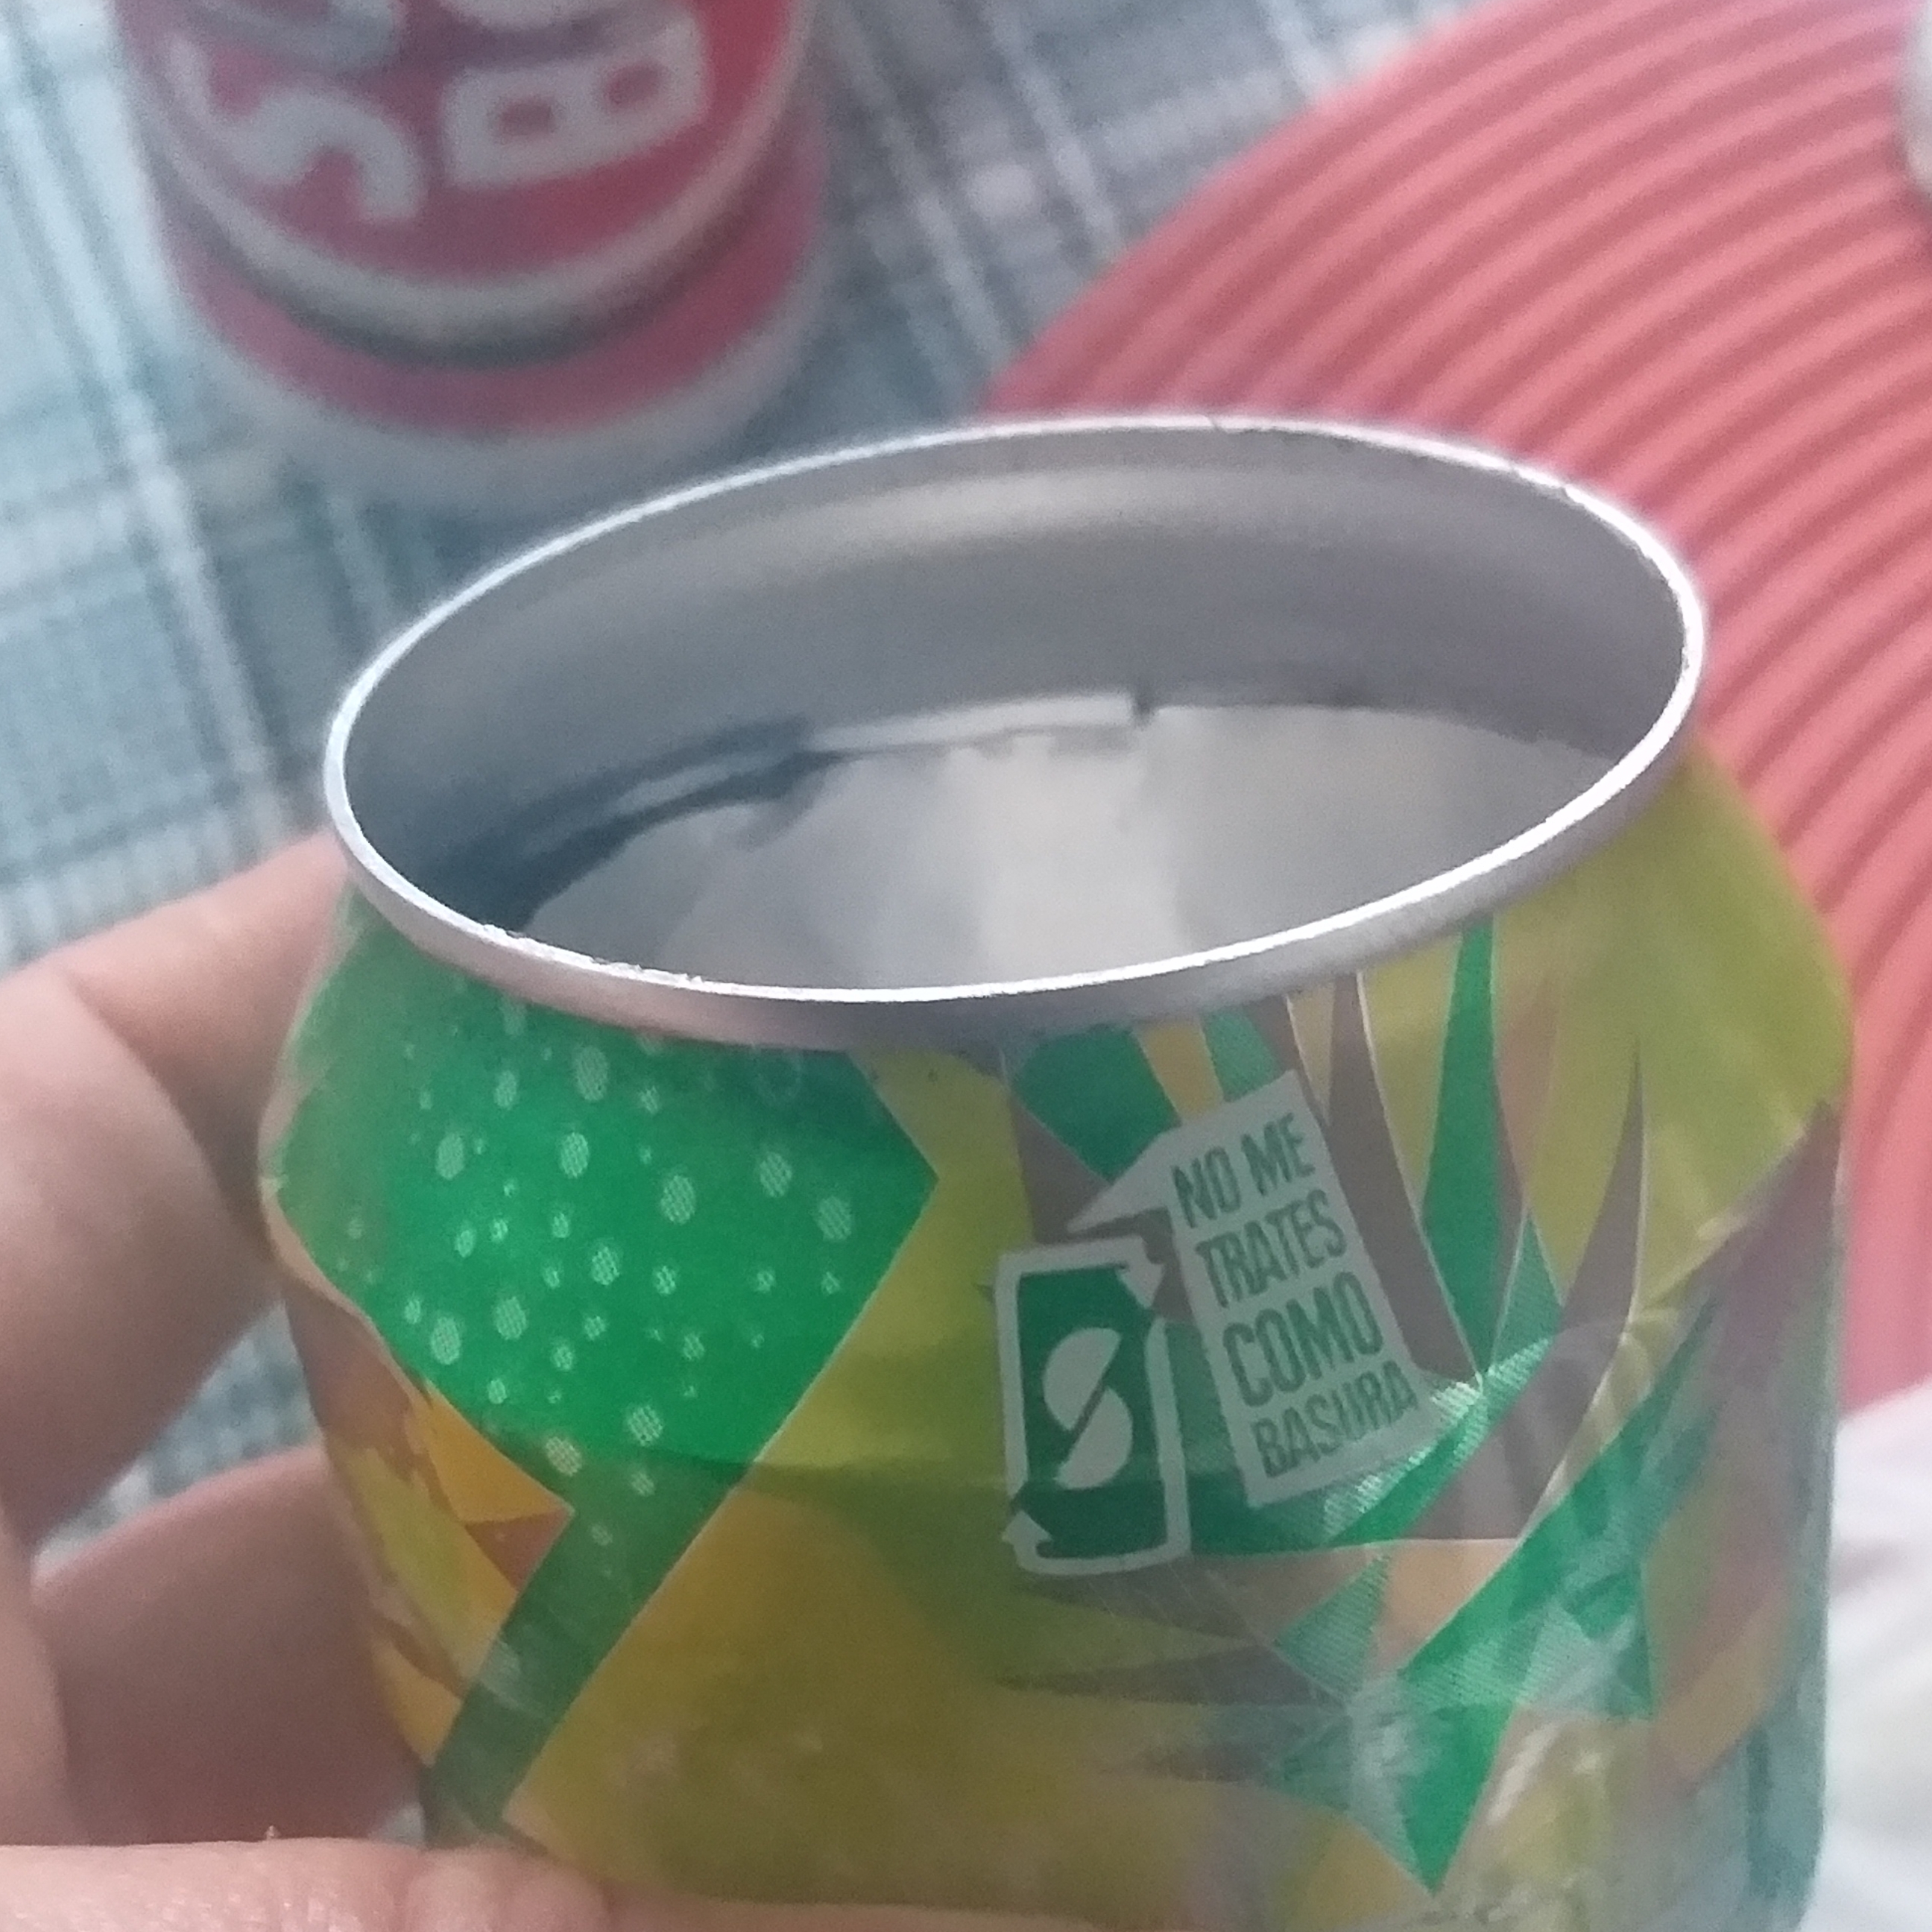
3👣. Ahora vamos a utilizar el cuchillo y introducir la punta del cuchillo por el medio de las dos rayas y que marcamos y luego cortar; esto es para poder recortar mejor con la tijera por donde estaba marcado. Observar en la imagen.
3👣. Now we are going to use the knife and introduce the tip of the knife through the middle of the two lines and that we mark and then cut; this is to be able to cut better with the scissors where it was marked. observe in the image.

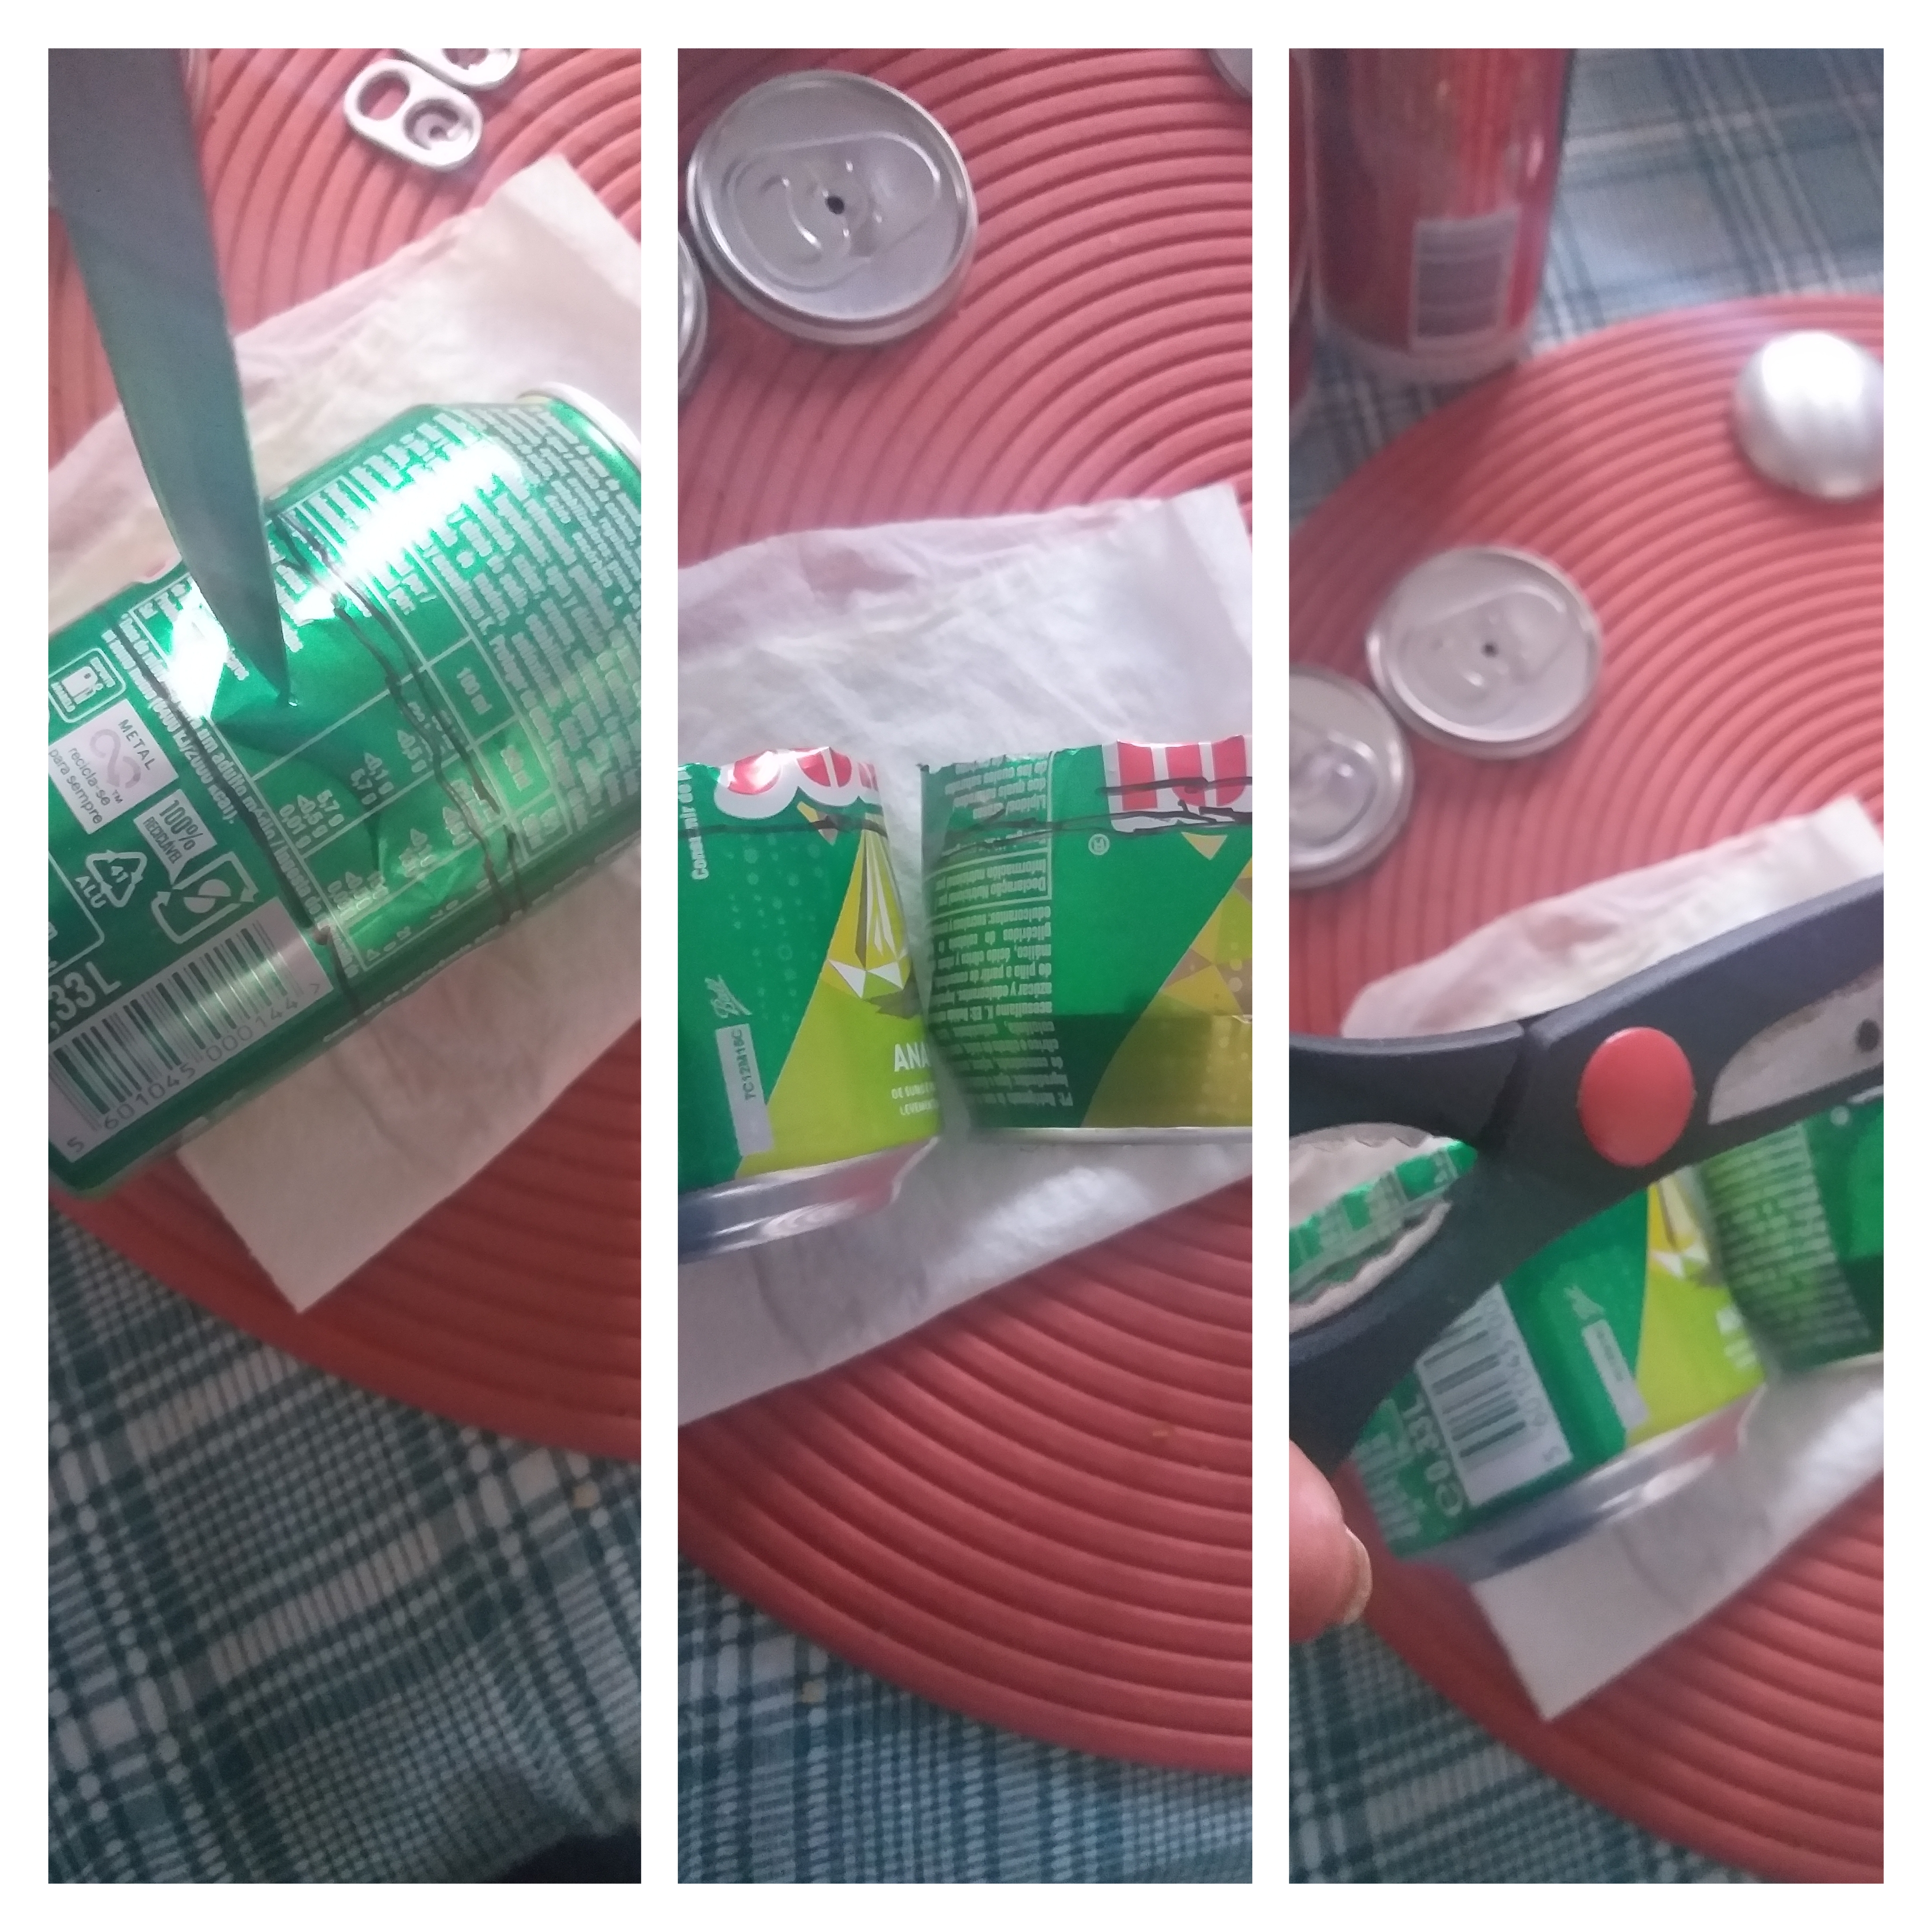
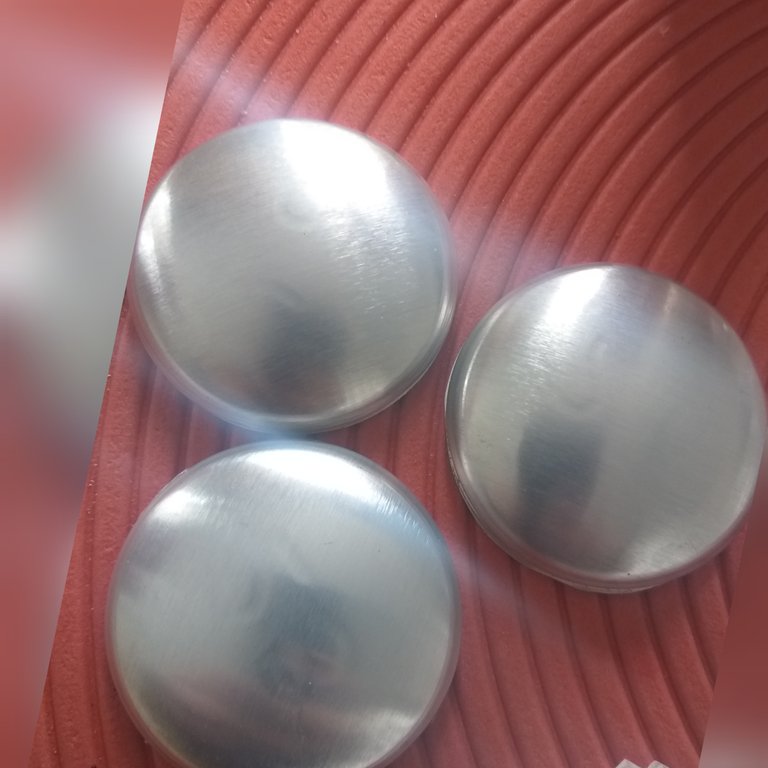
4👣. El siguiente paso es cortar con la tijera la parte de abajo de 4 latas que serán parte de las tapas de las ollas, luego debemos limar o lijar por todo alrededor de la tapa.
4👣. The next step is to cut with scissors the lower part of 4 cans that will be part of the lids of the pots, then we must file or sand everything around the lid.
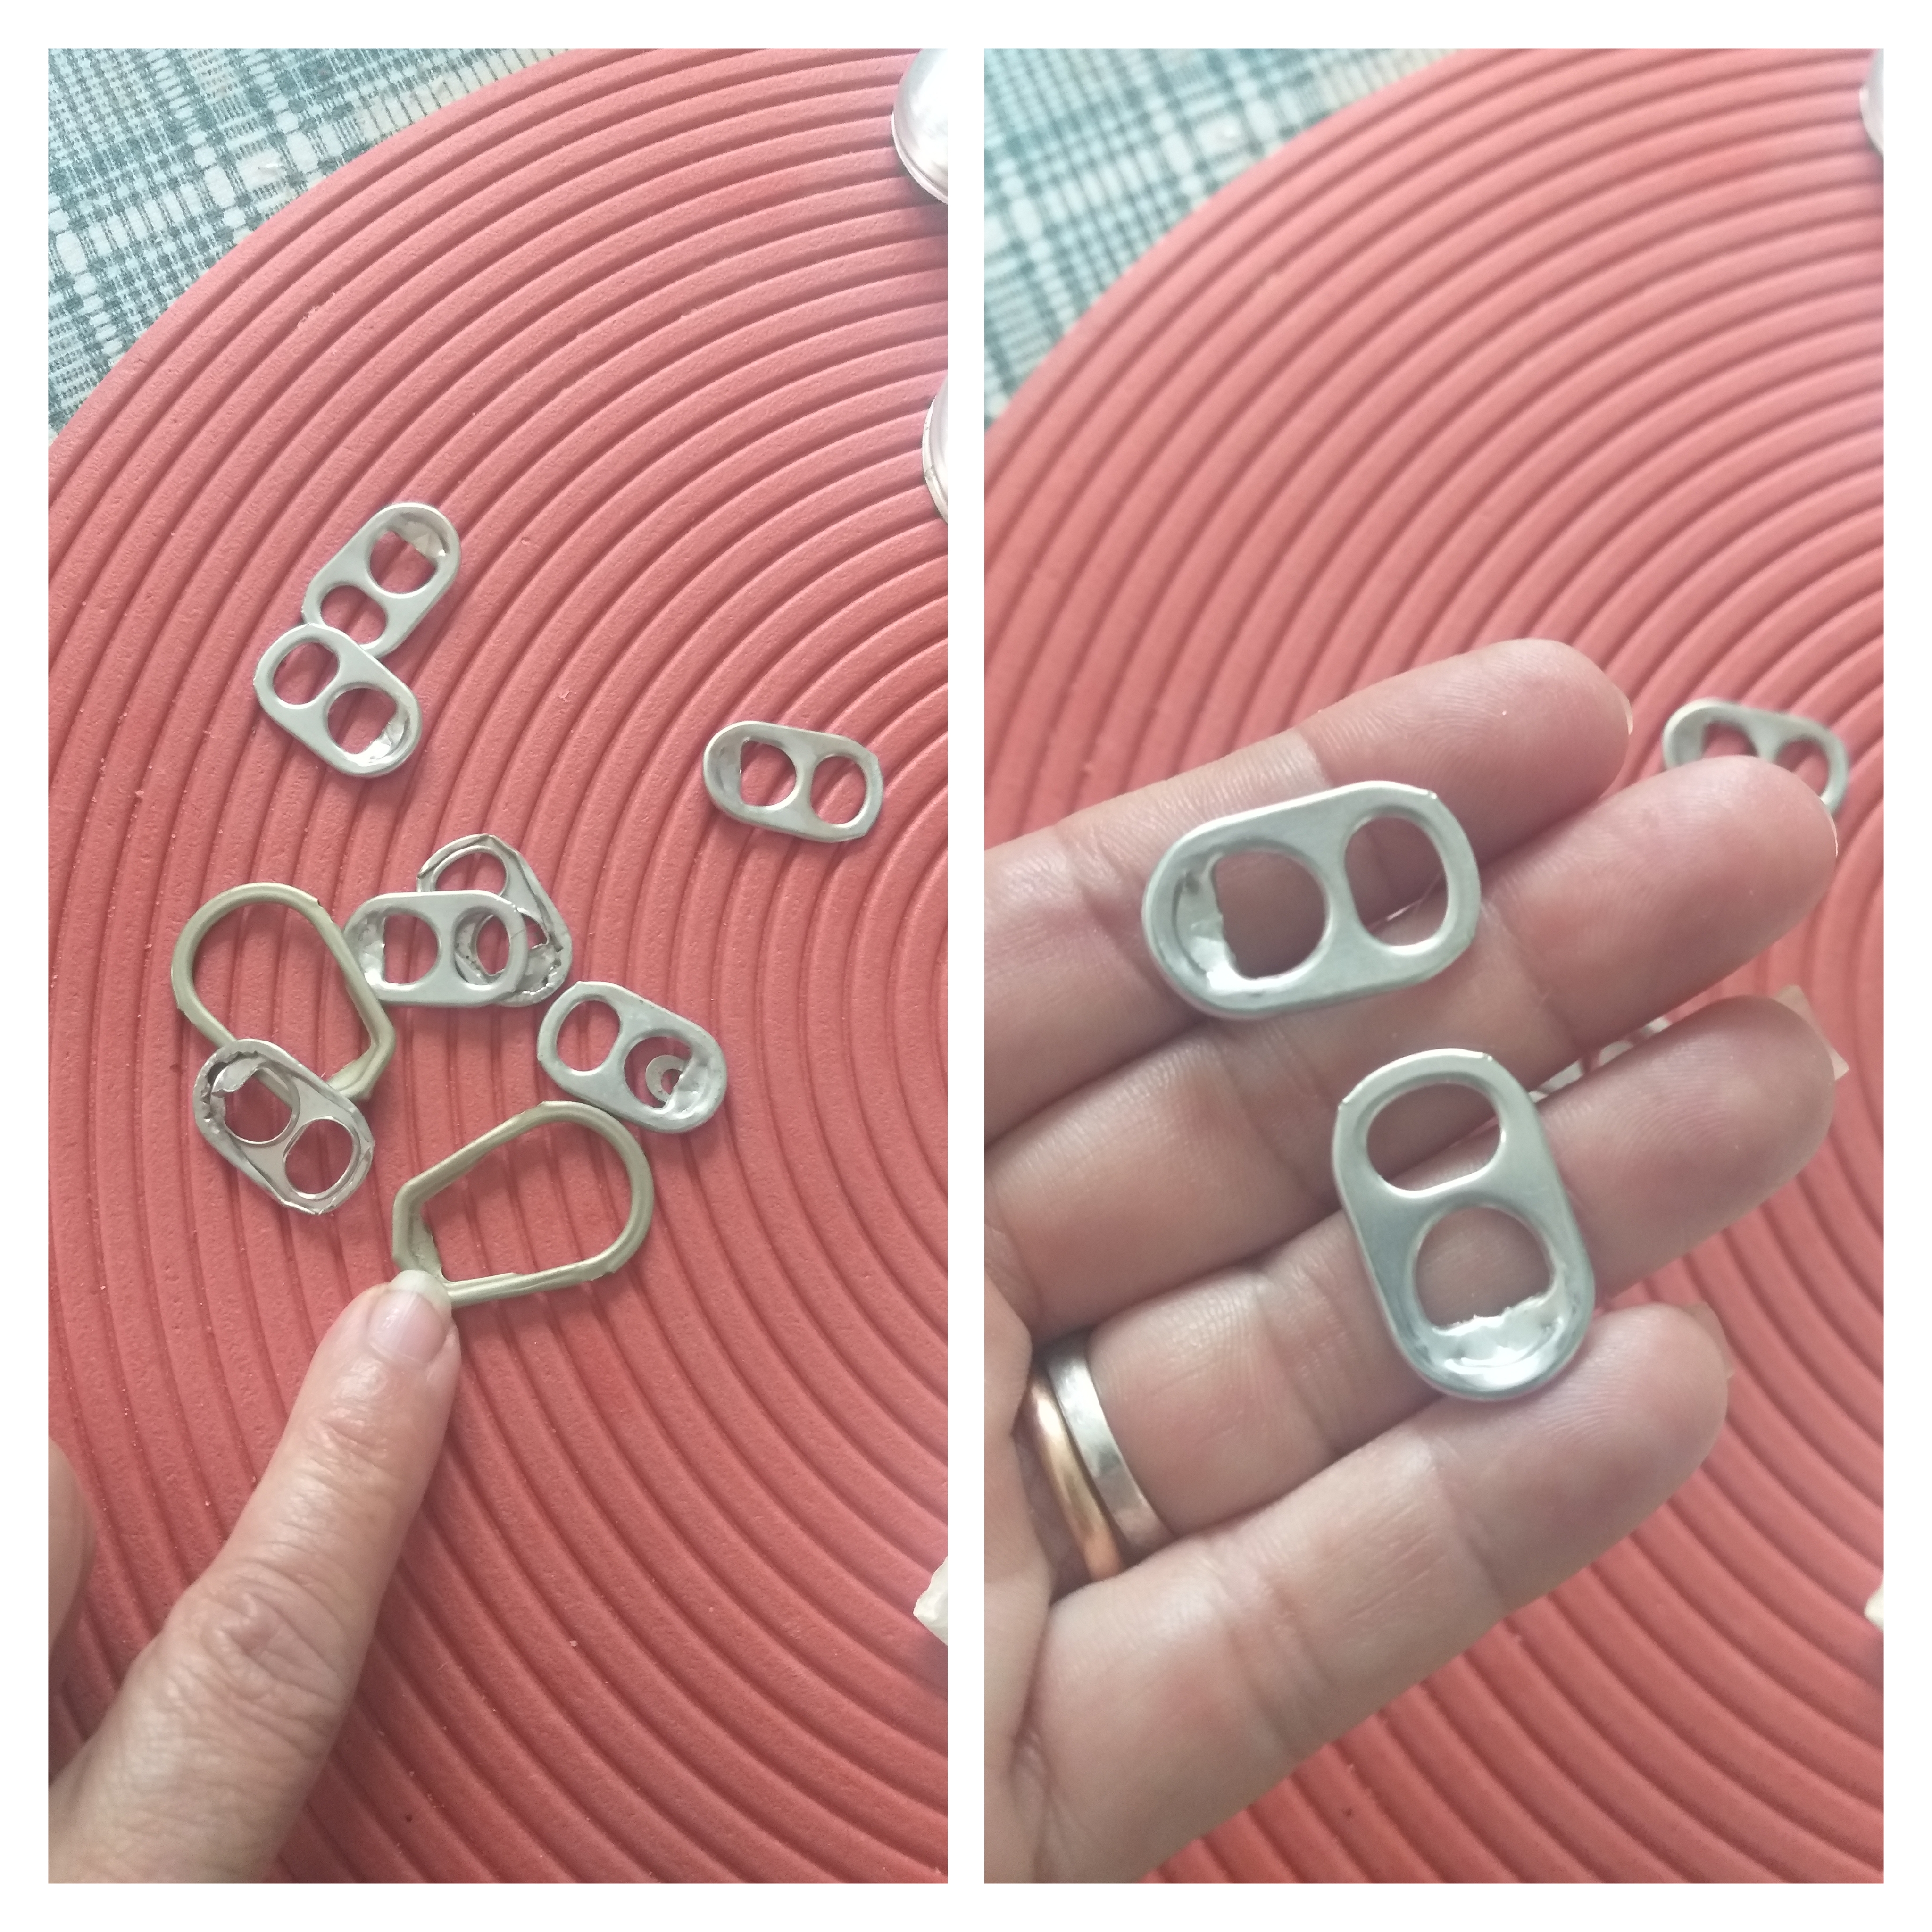
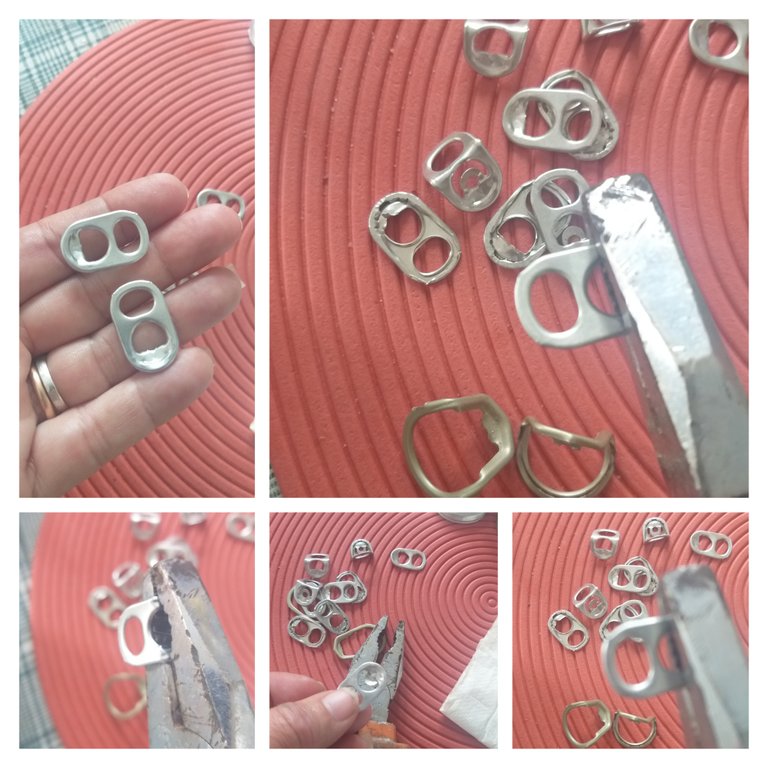
5👣. En este paso vamos a quitar o desprender las anillas de 8 latas que nos van a servir como las manoplas o mango o asas como algunas personas le dicen 👀 procuren a quitarla completa que él orificio que le queda servirá para colocar. Pueden observar en la imagen.
5👣. In this step we are going to remove or detach the rings from 8 cans that are going to serve us as mittens or handles or handles as some people say 👀 try to remove it completely because the remaining hole will serve to place it. You can see in the image.
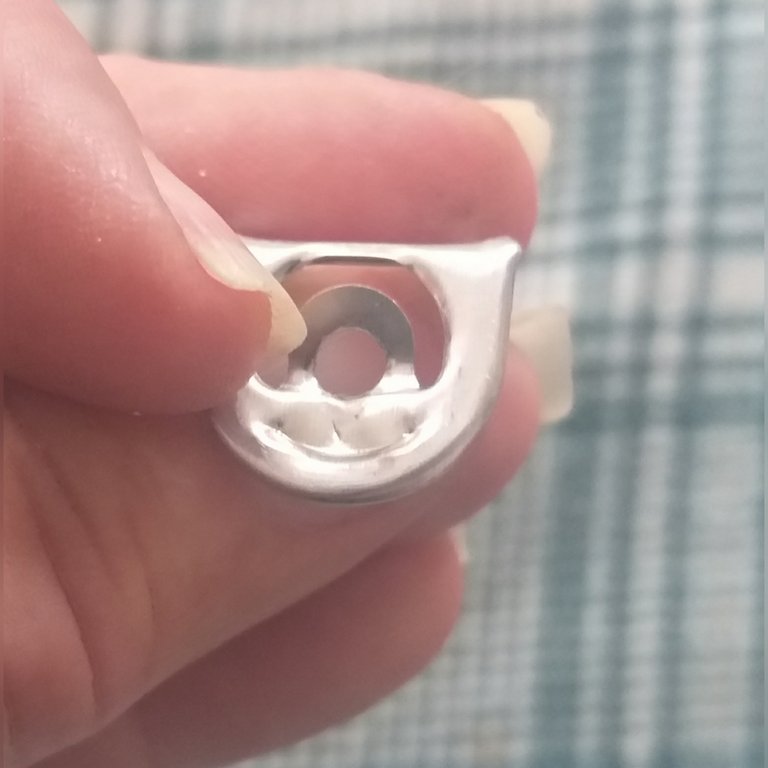
* Nota: Si el pedacito del aluminio donde está el orificio queda en la tapa no se preocupen pueden hacer el orificio en el aluminio que quedó en la anilla👍
* Note: If the piece of aluminum where the hole is remains in the lid, don't worry, you can make the hole in the aluminum that was left in the ring👍

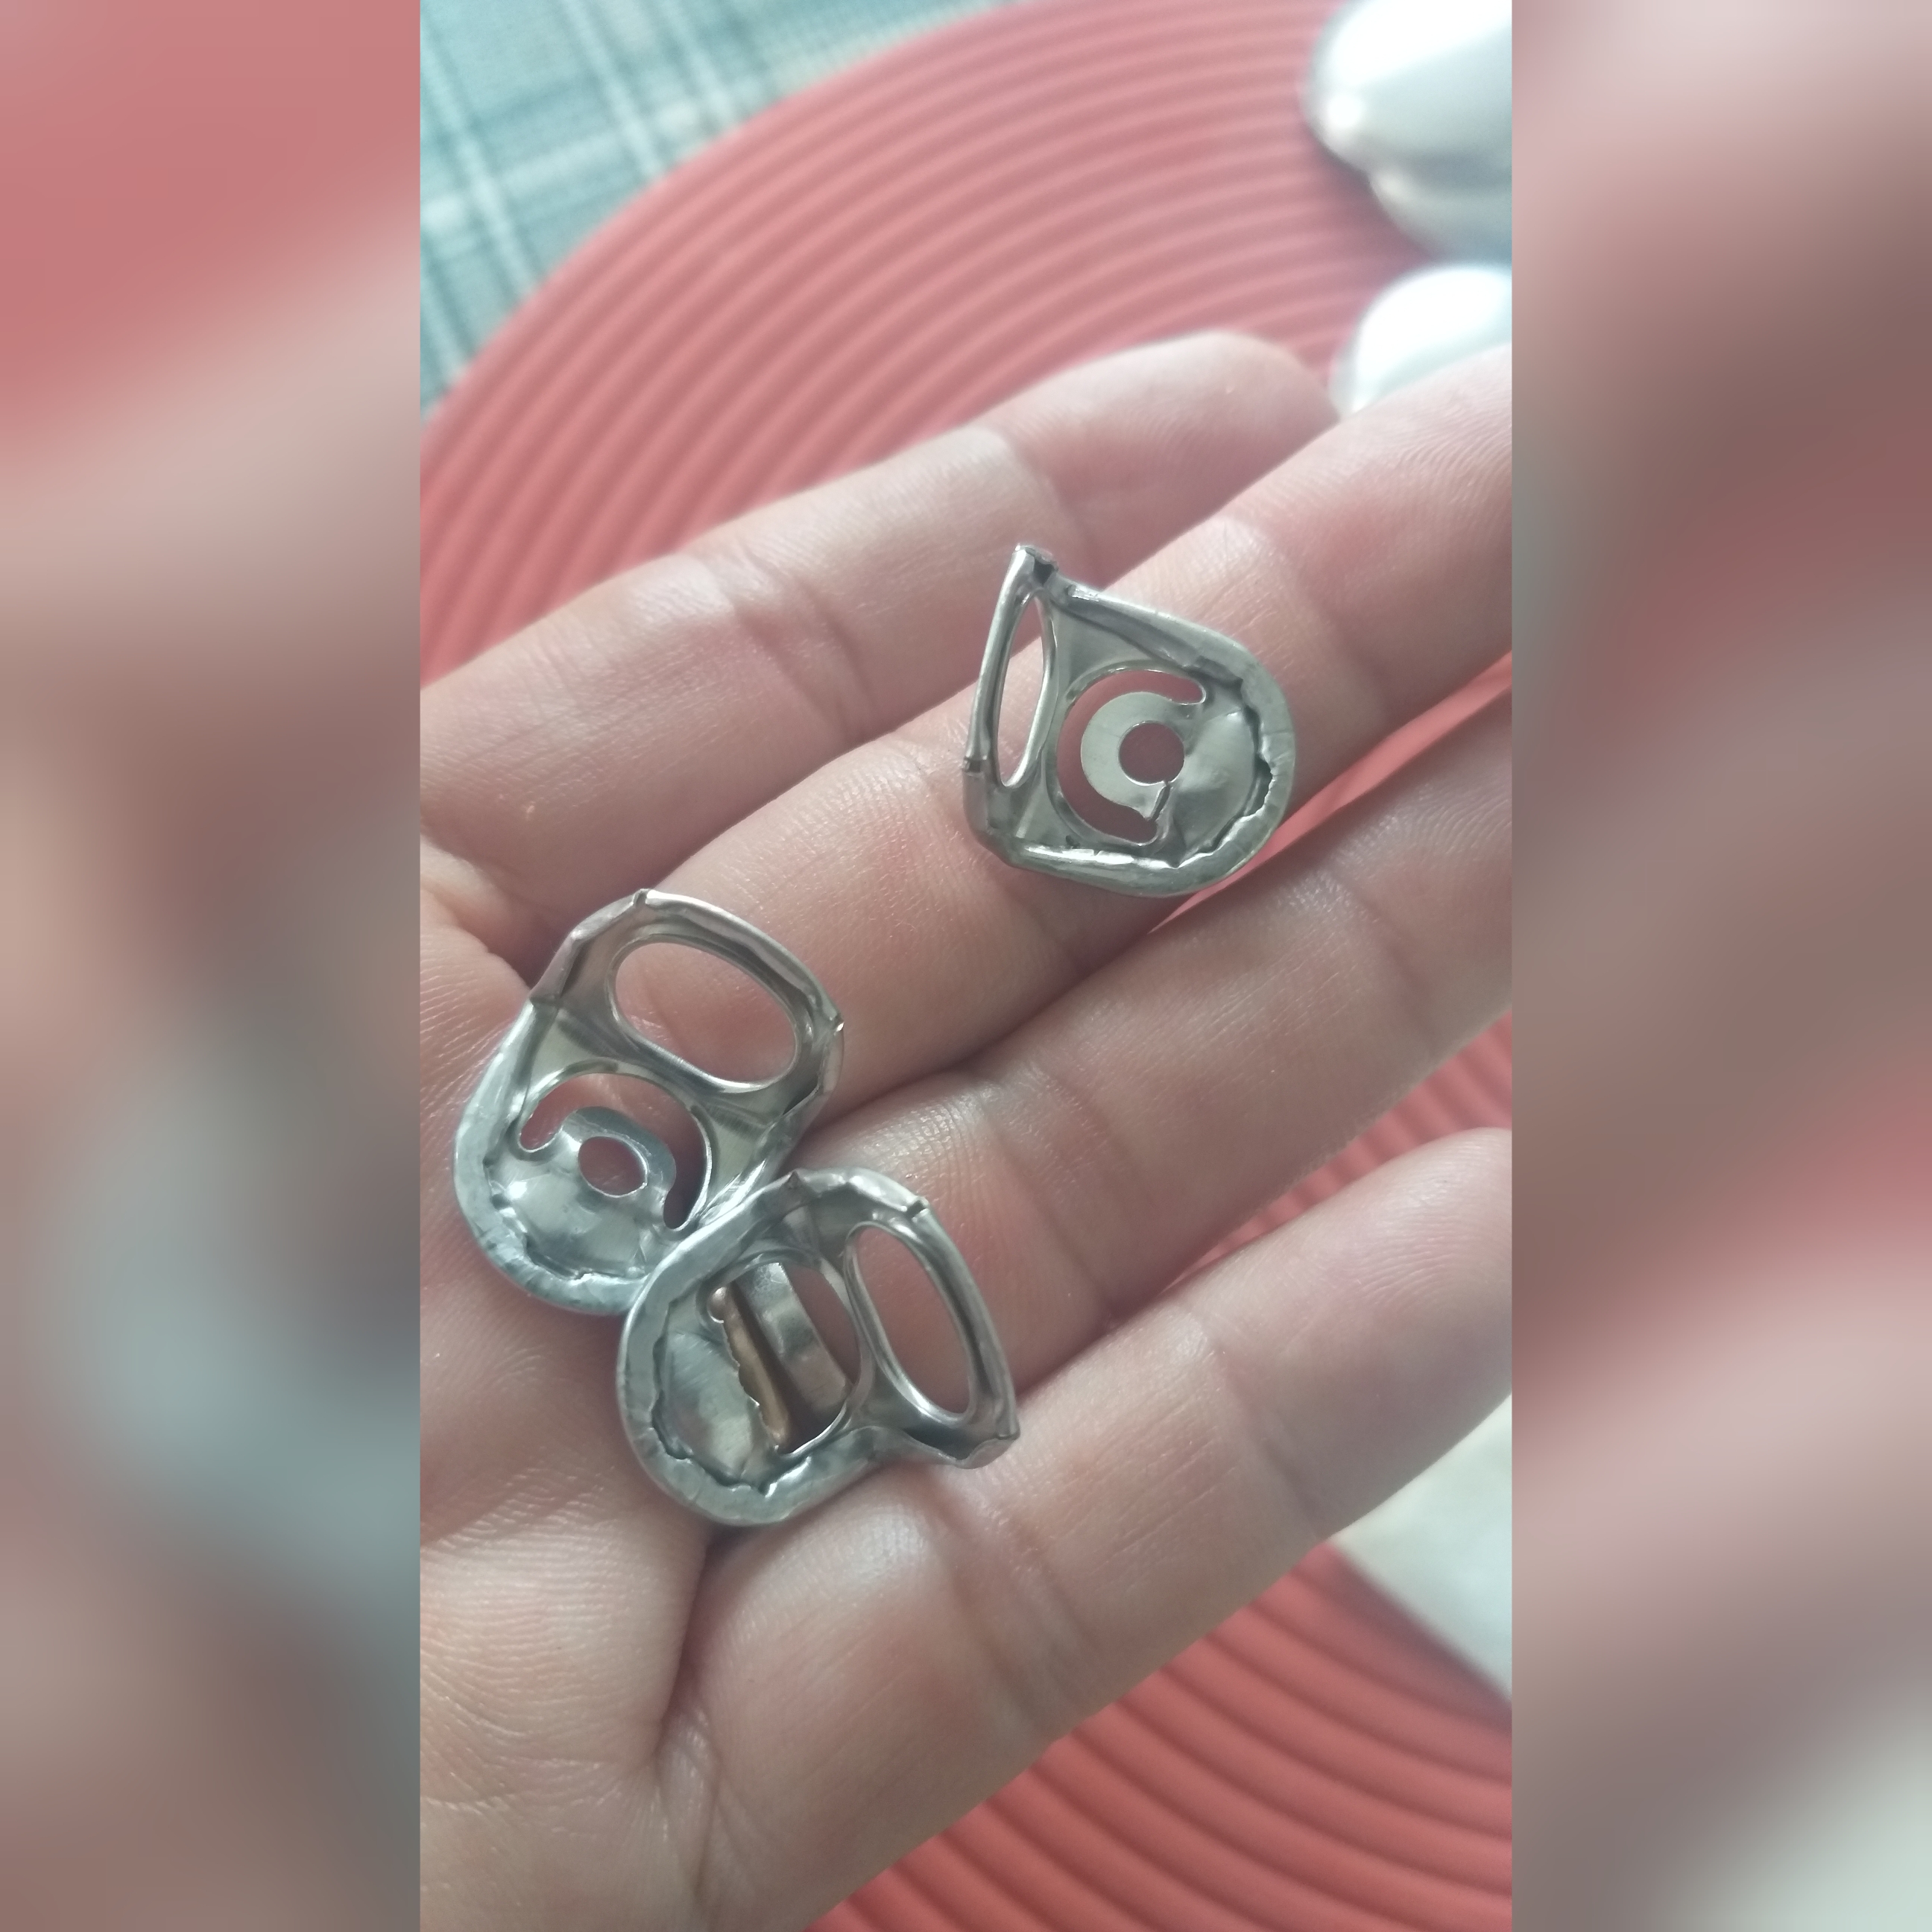
6👣. Con la tenaza o pinza doblar la anilla quedando la parte de donde está el orificio para abajo y si no tiene orificio, puede hacerlo con el cuchillo con cuidado. Pueden observar las imágened para guiarte.
6👣. With the pliers or tweezers bend the ring leaving the part where the hole is down and if it does not have a hole, you can do it carefully with the knife. You can look at the images to guide you.
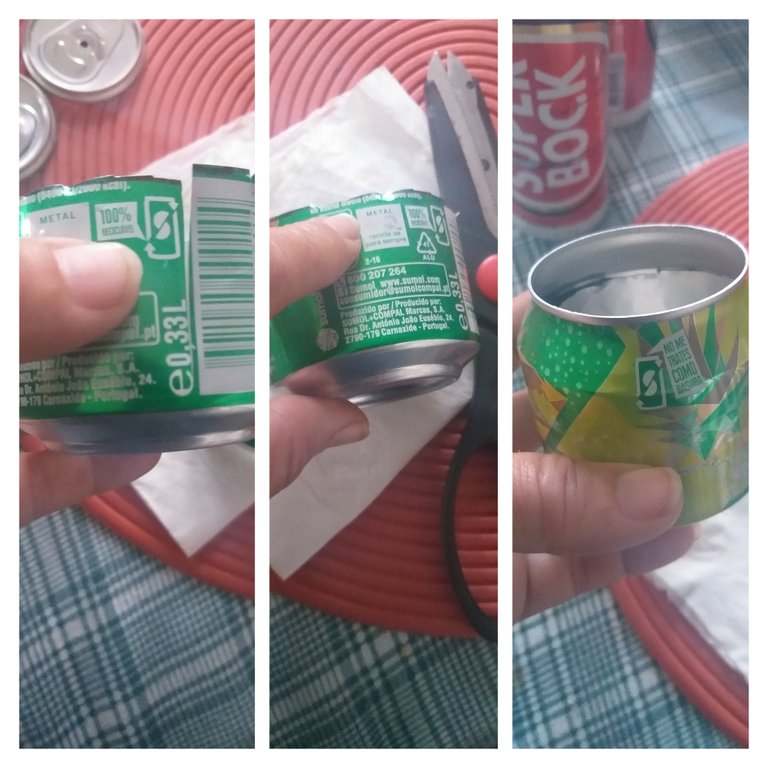
7👣. En este paso vamos a unir las dos partes de la lata, lo haremos cortando con la tijera un lado de la lata ( la parte de abajo)esto es para que la parte de encima se introduzca mejor. En la imagen pueden ver el resultado de una lata de gaseosa y una de cerveza.
7👣. In this step we are going to join the two parts of the can, we will do it by cutting one side of the can with scissors (the bottom part) this is so that the upper part fits better. In the image you can see the result of a can of soda and a can of beer.

8👣. Ya tenemos las anillas dobladas y las dos parte de las latas juntas; ahora vamos al siguiente paso que sería colocar una anilla en cada lado de la lata, la cual servirán como el agarrador de la ollas; es decir las manoplas, con los tornillos más pequeños vamos a colocarlospor el orificio de la anilla y con el destornillador fijarlo a la lata. En la imagen de digo como hacerlo.
8👣. We already have the rings folded and the two parts of the cans together; Now we go to the next step, which would be to place a ring on each side of the can, which will serve as the pot holder; that is, the mittens, with the smallest screws we are going to place them through the hole of the ring and with the screwdriver fix it to the can. In the image I say how to do it.
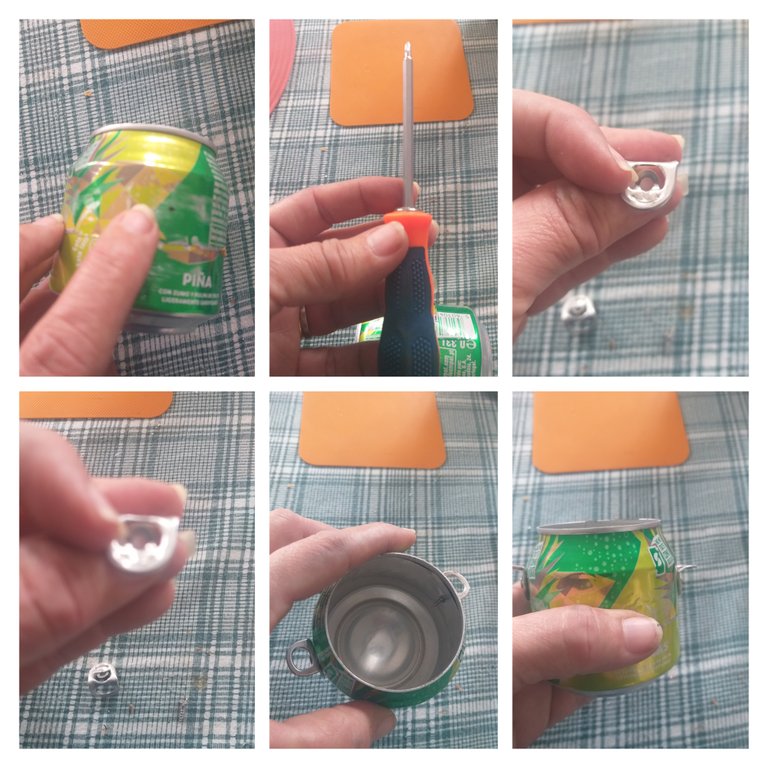
* Nota si desean pueden colocar una tuerca al sobrante del tornillo por la parte de adentro de la lata o colocarle pegamento de aluminio. Esto es una sugerencia de lo que pueden hacer. Yo lo dejé así porque quedaron firmes y son para decorar.
* Note if you wish you can place a nut on the leftover of the screw on the inside of the can or put aluminum glue on it. This is a suggestion of what they can do. I left it that way because they were firm and are for decoration.
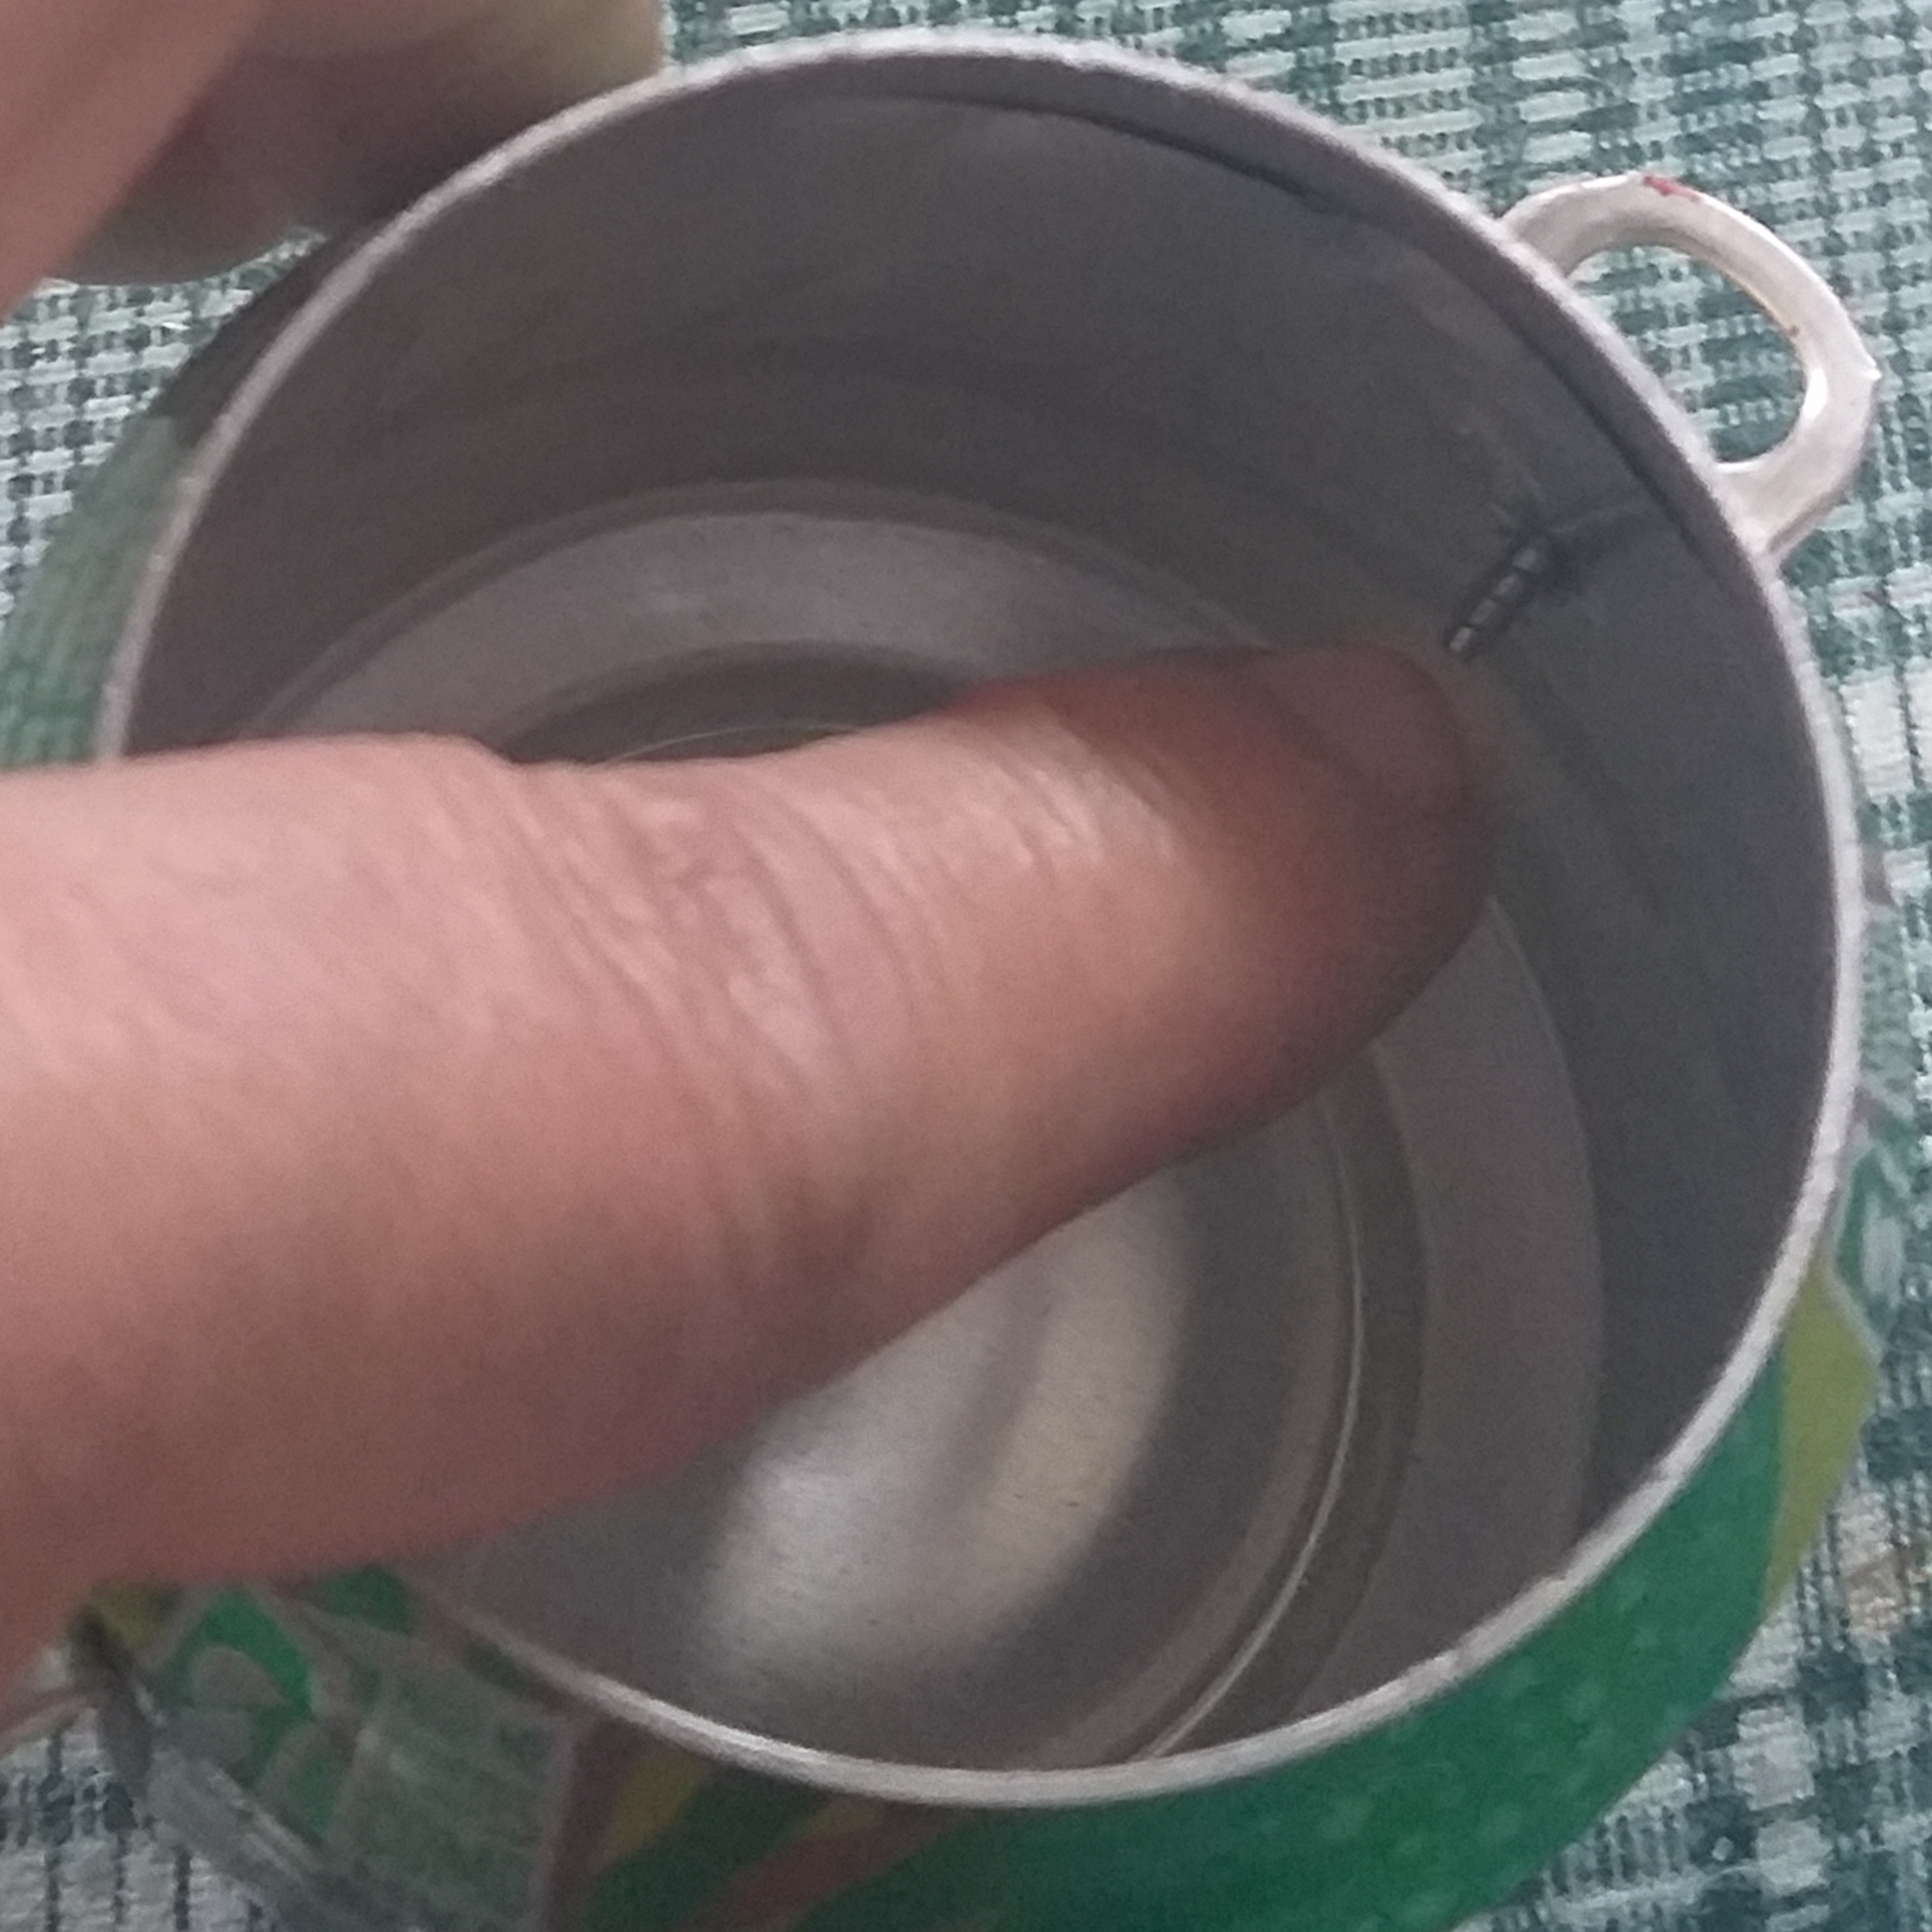
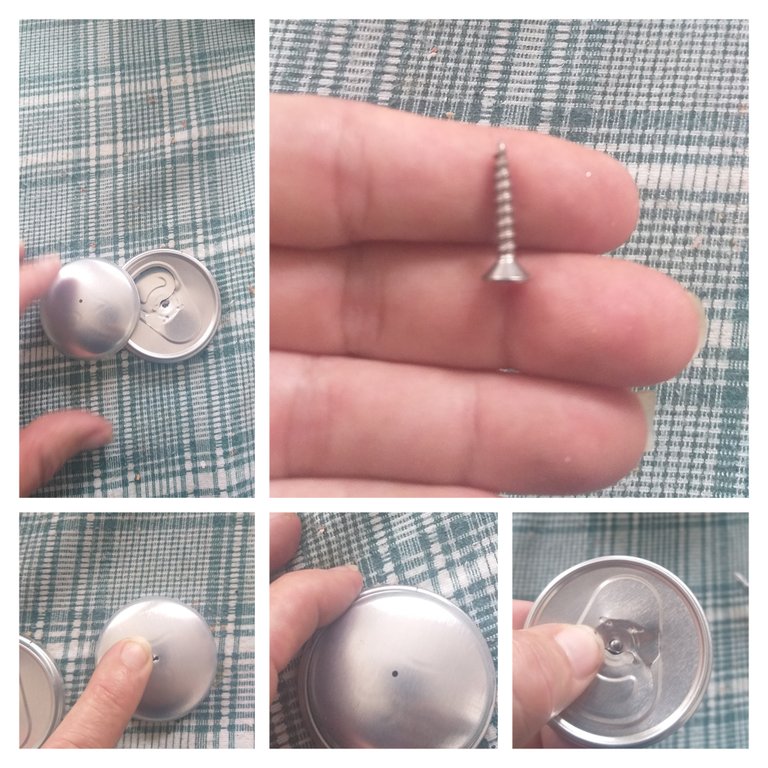
9👣. Armar las tapas de las ollas con la parte de abajo que le quitamos a las 4 latas y las de arriba; con el cuchillo vamos hacer un agujero o orificio en el medio de cada tapa de abajo y a cada tornillo que quedaron que son los más largos,le colocaremos la pepita o perla de bisutería que tengan un orificio donde pueda pasar el tornillo y atornillar las dos tapas. Observen las imágenes.
9👣. Assemble the lids of the pots with the lower part that we removed from the 4 cans and the upper part; with the knife we are going to make a hole or hole in the middle of each cover below and to each screw that remained, which are the longest, we will place the nugget or jewelery pearl that has a hole where the screw can pass and screw the two covers . Look at the images.
El resultado - The result

Pueden dejar las ollas así o pueden pintarlas con pintura de spray color plateado o negro o rojas eso es al gusto de cada quién yo sólo les doy ideas. En éste caso las pinté de color plateado. Una sugerencia cuando vayan a pintar con pintura en spray hágalo en espacios abierto y utilizar un cartón o plástico debajo para no manchar con pintura la mesa o donde esté trabajando.
You can leave the pots like this or you can paint them with silver or black or red spray paint, that is to your liking, I just give you ideas. In this case I painted them silver. A suggestion when you are going to paint with spray paint, do it in open spaces and use cardboard or plastic underneath so as not to stain the table or where you are working with paint.

El resultado - The result
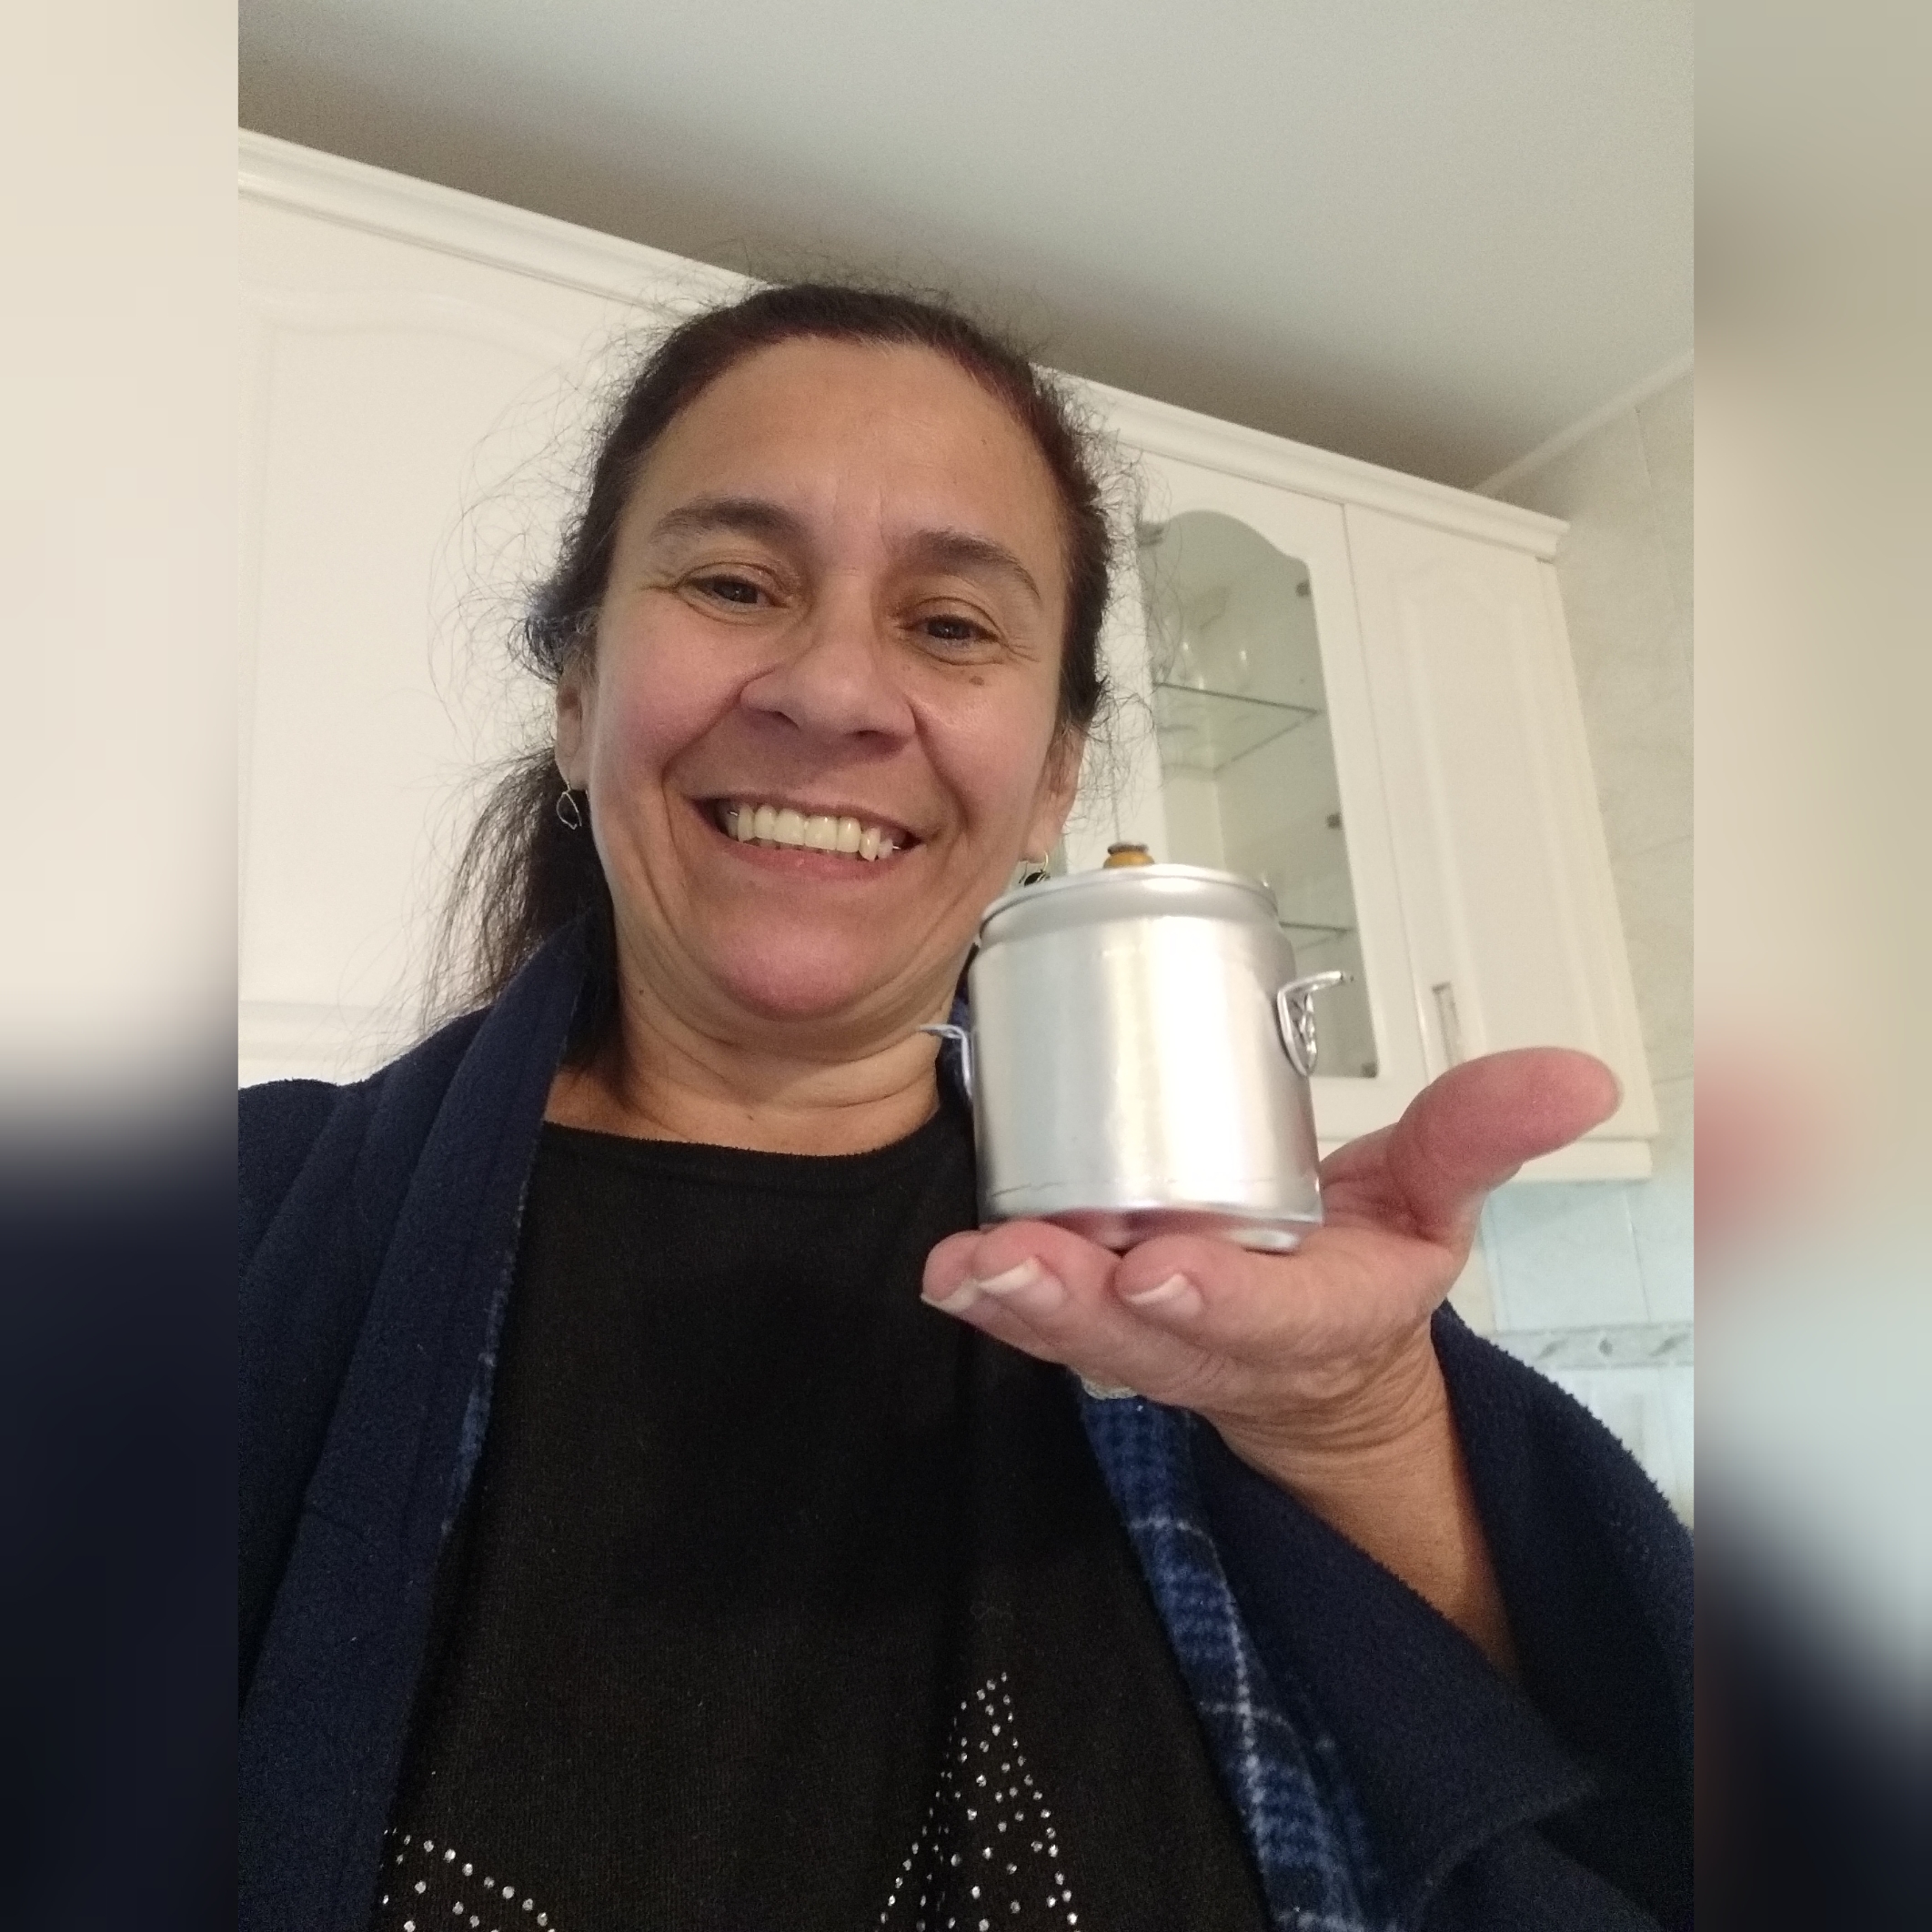
No me van a decir que son una cuchituras 🤩😍🤗. Espero que a ustedes que siguieron el paso a paso le haya gustado y se animen a realizar éstas hermosas mini ollas💕. Como siempre les doy un inmenso agradecimiento a todas esas personas que leen mis publicaciones y dejan hermoso comentarios, igualmente a las comunidades de esta linda colmena Hive que le ha abierto las puertas a millones de personas para poder expresar sus cualidades y dones y a la vez que se lo gratifiquen. Mil Bendiciones a todos.
They're not going to tell me they're a cutlery 🤩😍🤗. I hope that you who followed the step by step have liked it and are encouraged to make these beautiful mini pots💕. As always, I am immensely grateful to all those people who read my publications and leave beautiful comments, as well as the communities of this beautiful Hive hive that has opened the doors to millions of people to be able to express their qualities and gifts and at the same time they gratify it. A thousand blessings to all.

Las fotos son de mi propiedad tomadas con mi teléfono móvil Samsung Galaxy A6 y fueron organizadas por la aplicación GridArt.
The photos are my property taken with my Samsung Galaxy A6 mobile phone and were organized by the GridArt application.
