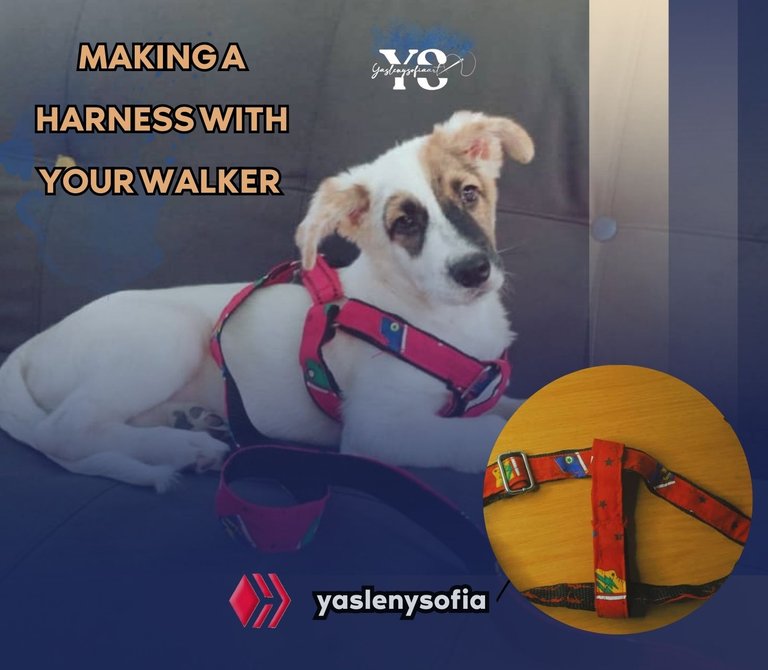
So I got down to work and looked for tutorials on YouTube to see what I needed, among them, what I was missing was the backpack clasp, so I bought it, unfortunately not the size I needed which was 20mm, because there was nowhere, they only had the one that followed, the 25 mm so, there was no other choice.
Previously I had tried to make a small harness with a ribbon, to give me an idea of how was the assembly and all that and so I could make photographic process with the right size for Oddie, it is really simple to develop, the complicated thing is to know the right measures of the dog. According to the video, the measures given are for a dog size M and only add or subtract 7cm to each of those, depending on the size of the animal.
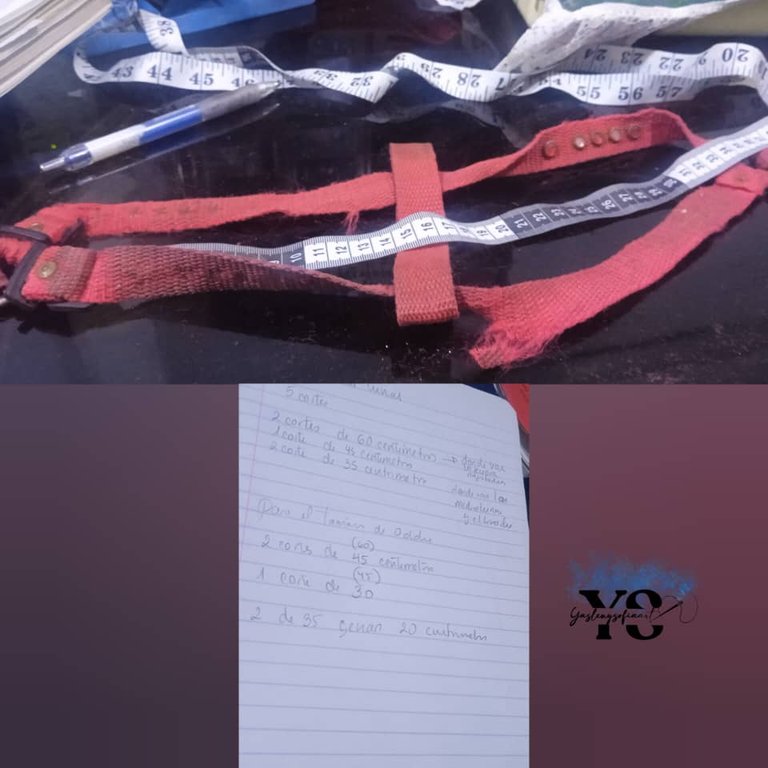
I took my tape measure, measured a breastplate that fits Oddie well but was already ugly and falling apart, so I could more or less get an idea of how much it would take, so I'll leave you with my dog's measurements, which would be XS, more or less.
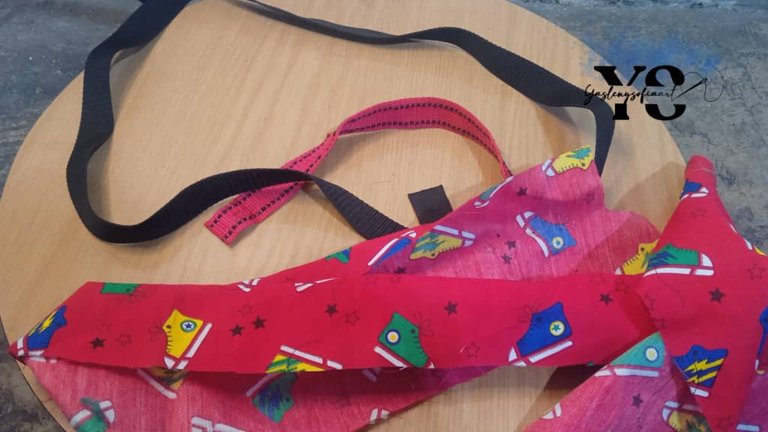
Note: since I had a piece of red cord, I decided to combine the colors and, so that it wouldn't look any more black, I wanted to sew a red fabric that I had on hand, you can skip this step if the cord is the color of your choice.
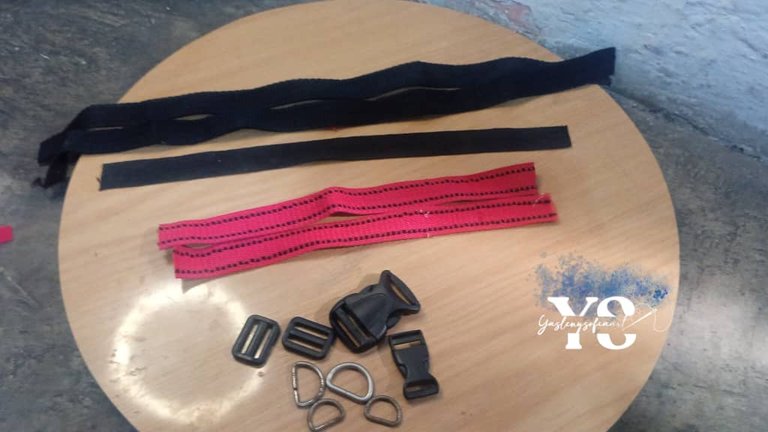
Cut the rope to the measurements I will give you below.
-2 cuts of 60 cm each (Size M), in my case there were two cuts of 50 cm each.
-1 Cut of reata of 45 cm (Size M), in my case it was 1 cut of 35 cm.
-2 cuts of 35 cm each (Size M), in my case there were two cuts of 25 cm each.
STEP 2
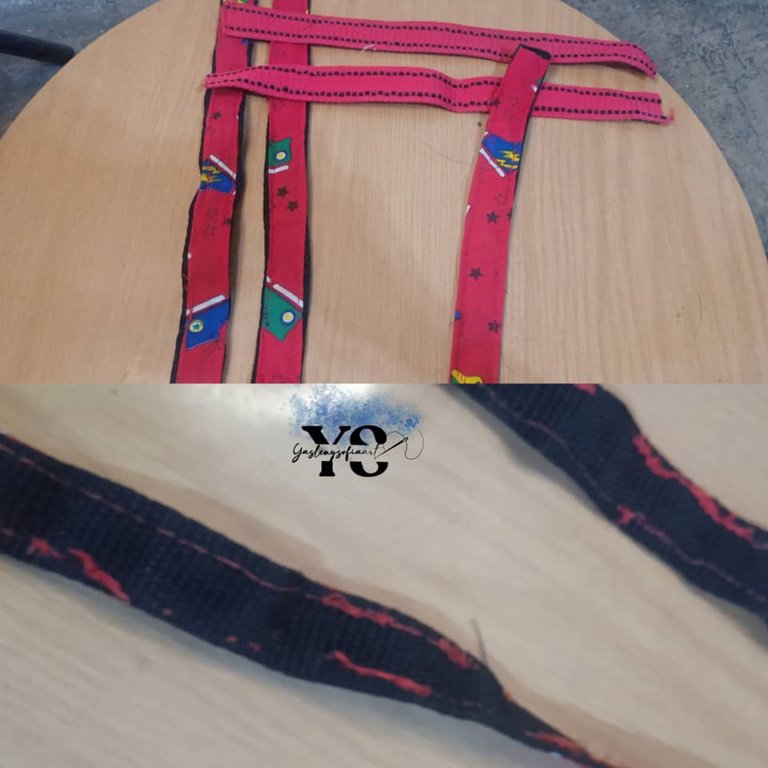
I sewed the fabric to the fabric, previously cut to the measurements of each one. Here I struggled, because first my machine is not suitable for that thickness and secondly the thread was not the right one, the best for this material is nylon, the one used for bags or shoes. Therefore, it got tangled and cut, in the end the back side of the pieces was ugly, but, after struggling for 2 days, I left it like that.
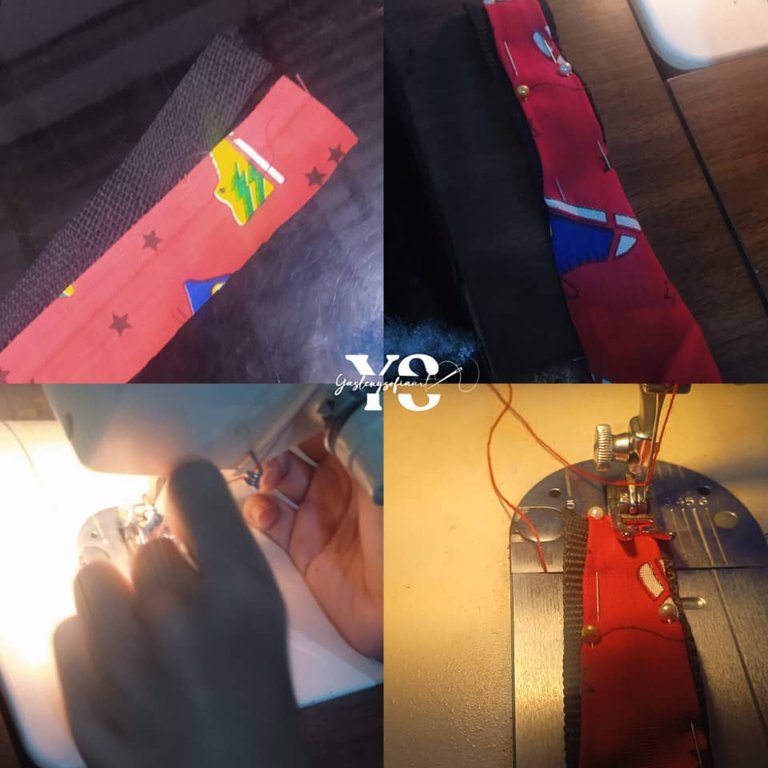
My sister helped me put the thread on the machine needle because she couldn't😅
STEP 3
The sewing ...
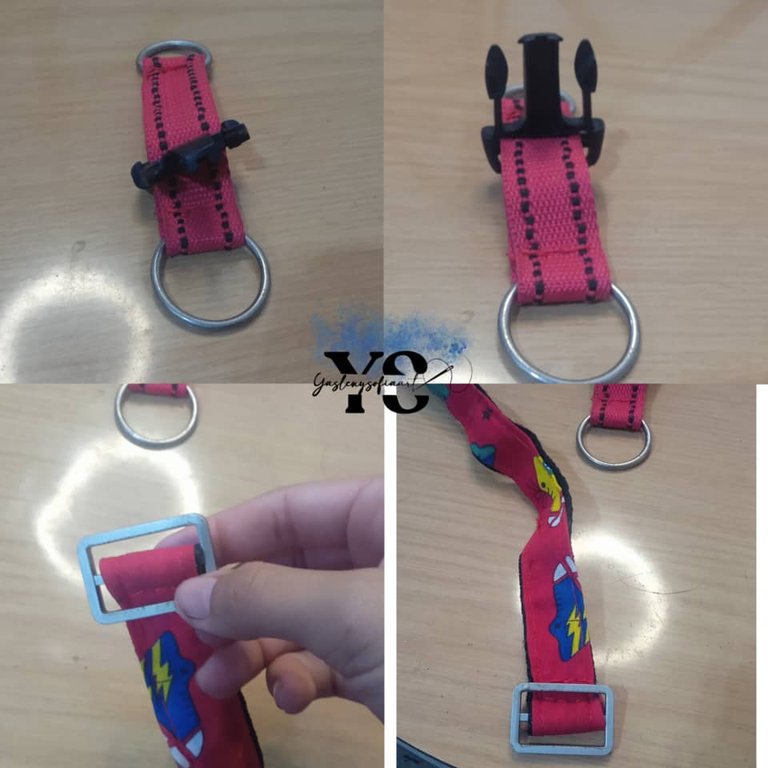
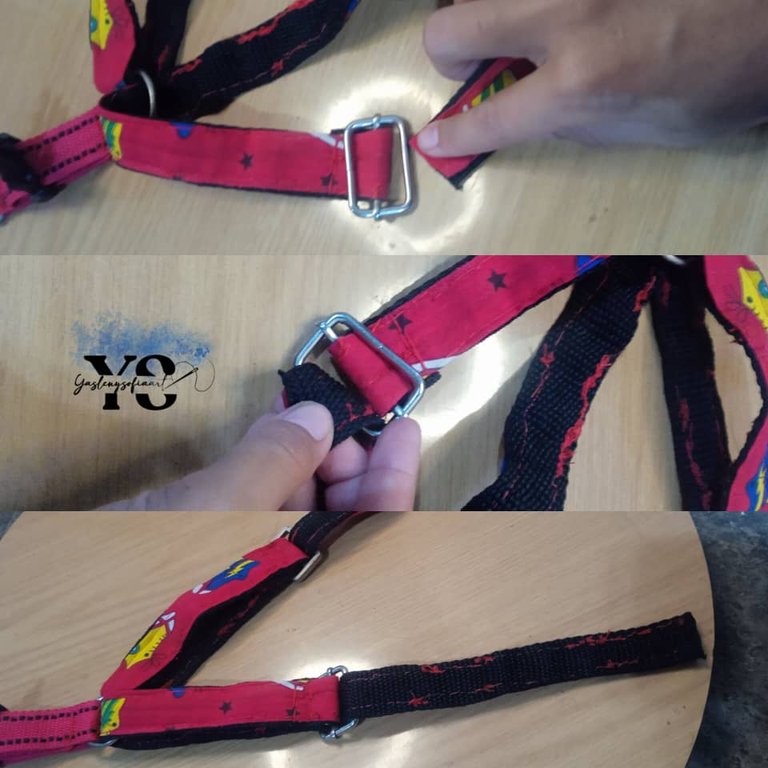
We take the two 50 cm strips and put the two tensors, one for each of the strips and for the part of the ends. We reserve (Image 1)
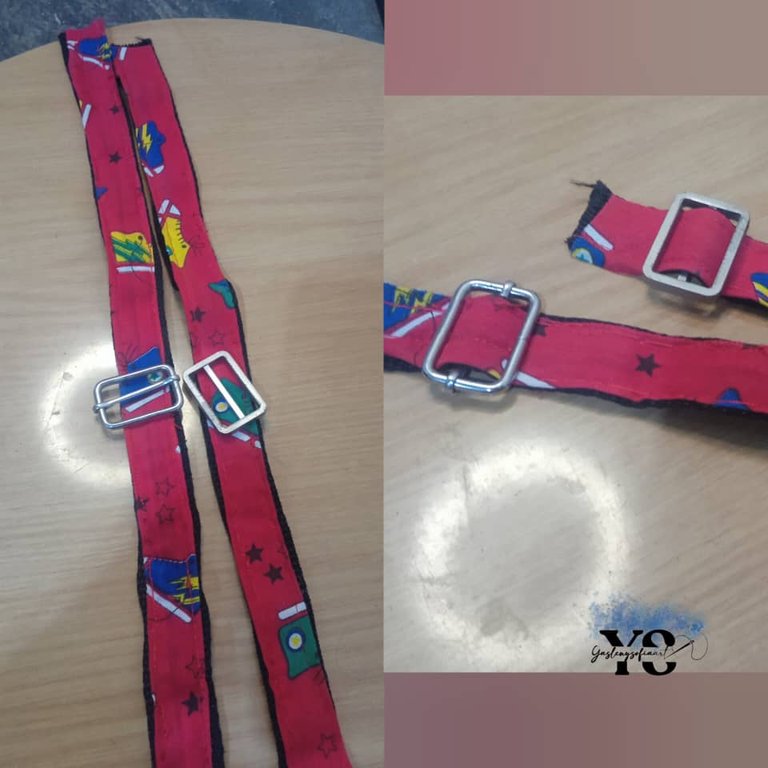
Image 1
Now, with the two 25 cm strips, put 2 crescent rings on each one; then bend the extreme ends of the strips, each crescent would be at the bent ends, as shown in the image (Image 2). At the end of the open end we put one of the parts of the brooch, the female, inserting it with the reverse side facing the front. In the same way we do with the other strip, already folded and with the half moons, but here would go the other part of the brooch (Image 3 and 4).
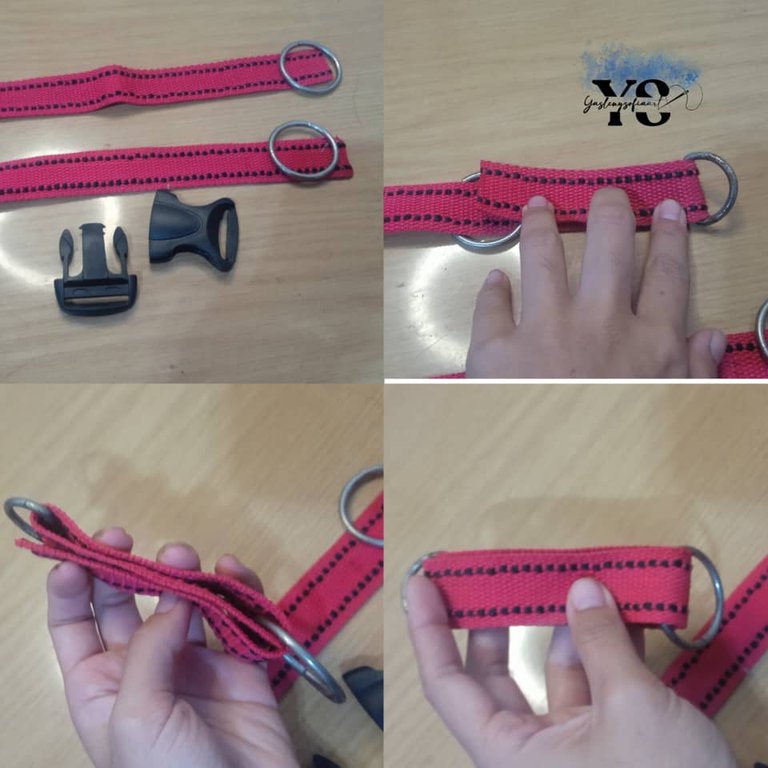
Image 2
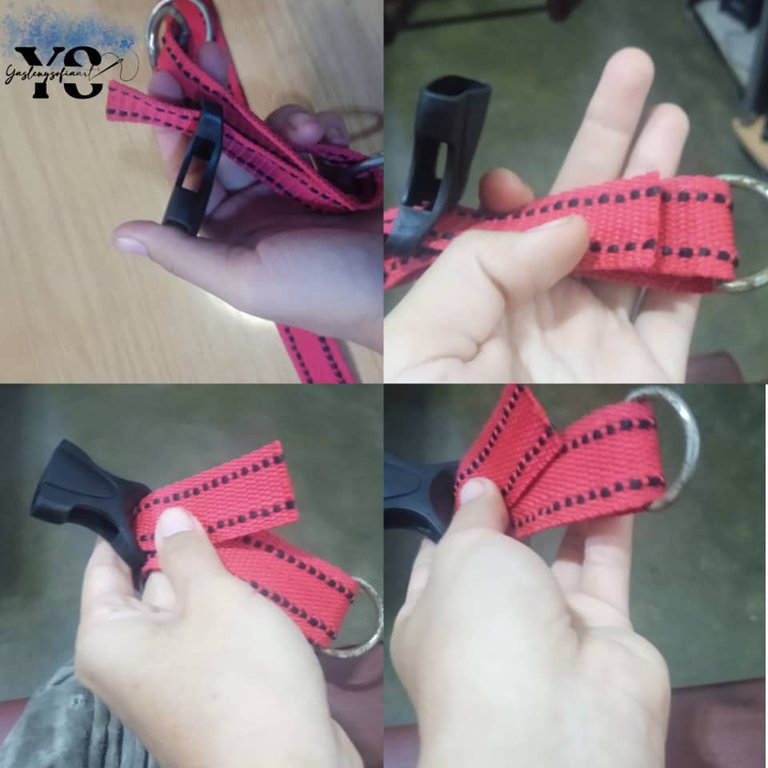
Image 3
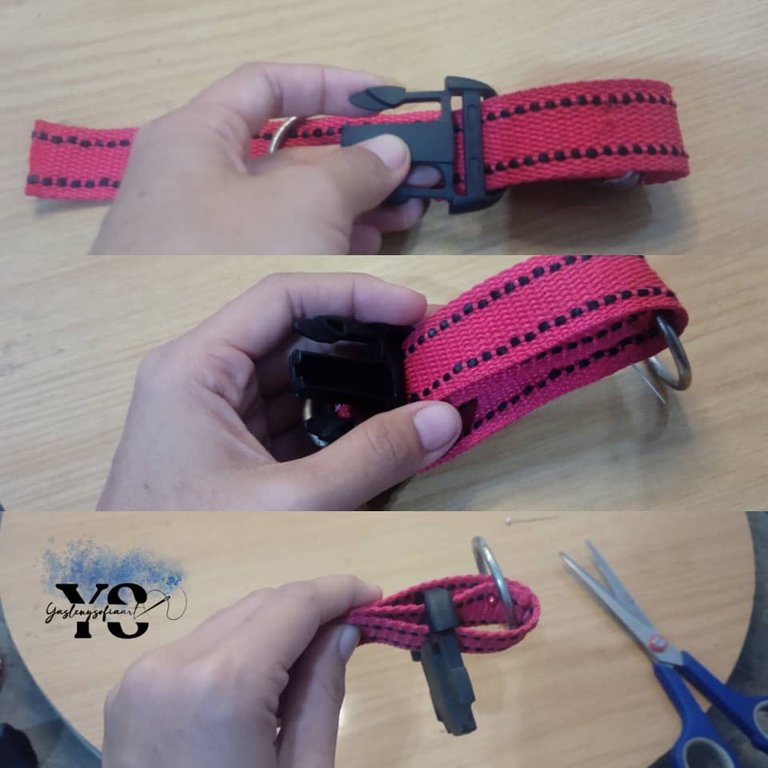
Image 4
Both 25 cm pieces, folded, should be of the same size. Once everything is well sized and both parts of the brooch match, the ends are sewn or riveted (Image 5).
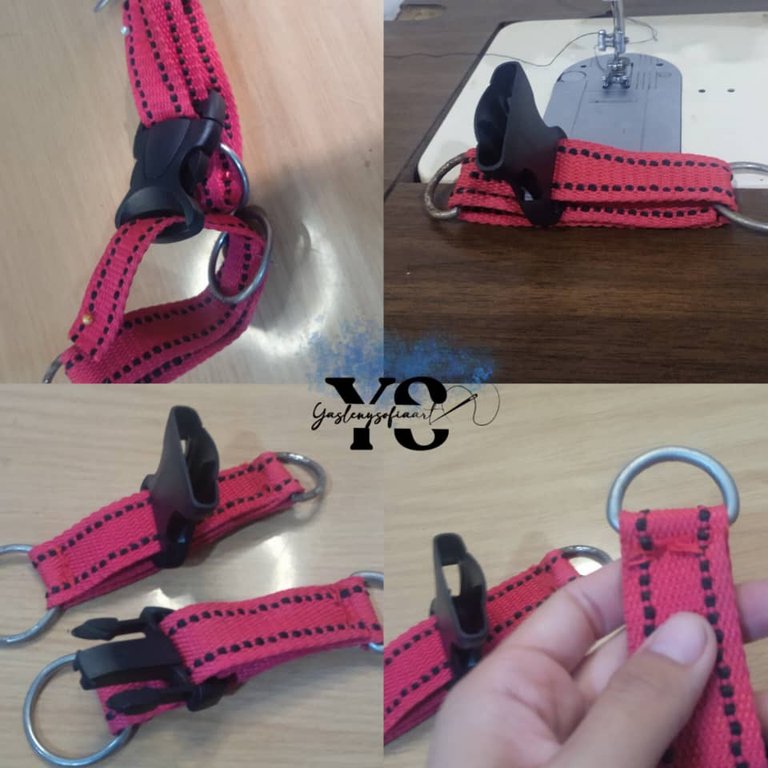
Image 5
The strips that have the tensioners or adjusters are sewn at the joint to fix it (Image 6).
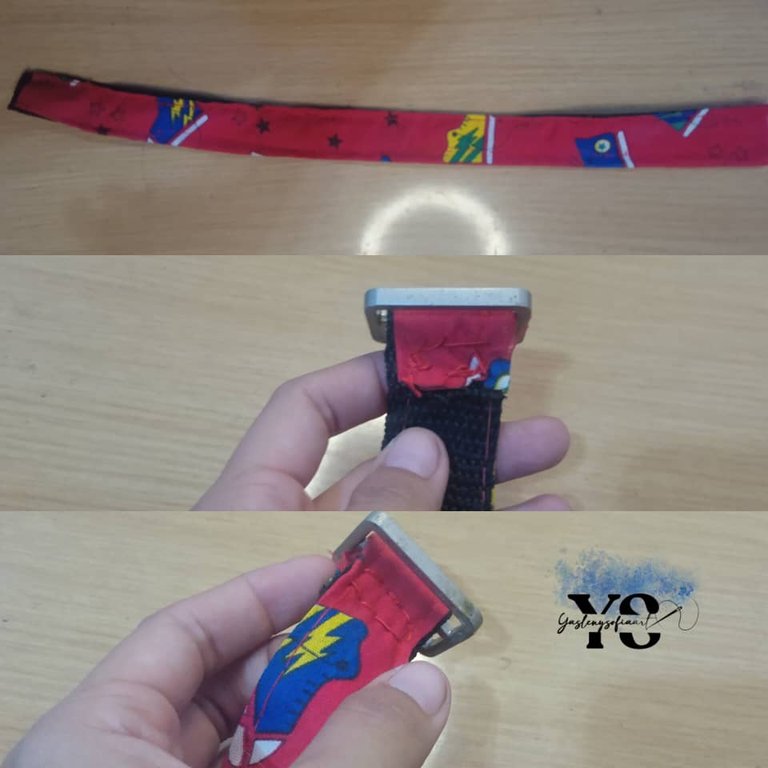
Image 6
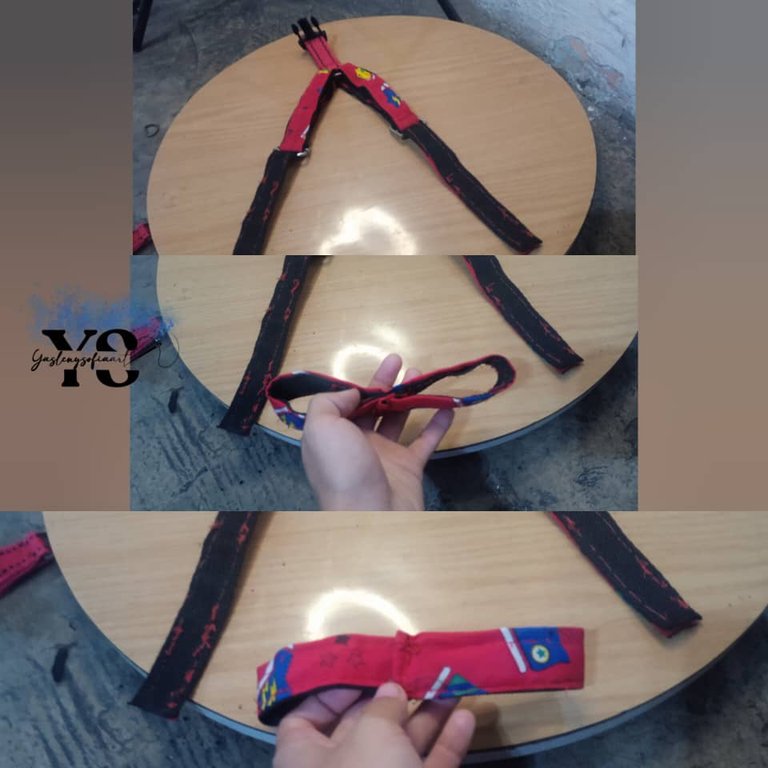
With the 35 cm piece, a sort of bow will be made, intertwining both ends, and the top one is folded so that the ends do not rub against the animal's skin and the union is sewn (Image 7).
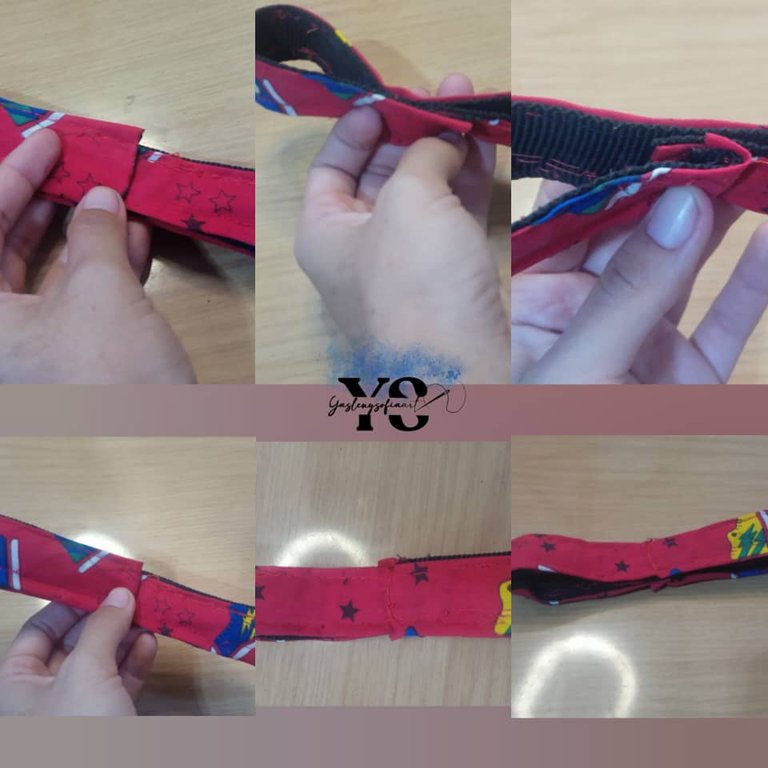
Image 7
STEP 4
As for the assembly...
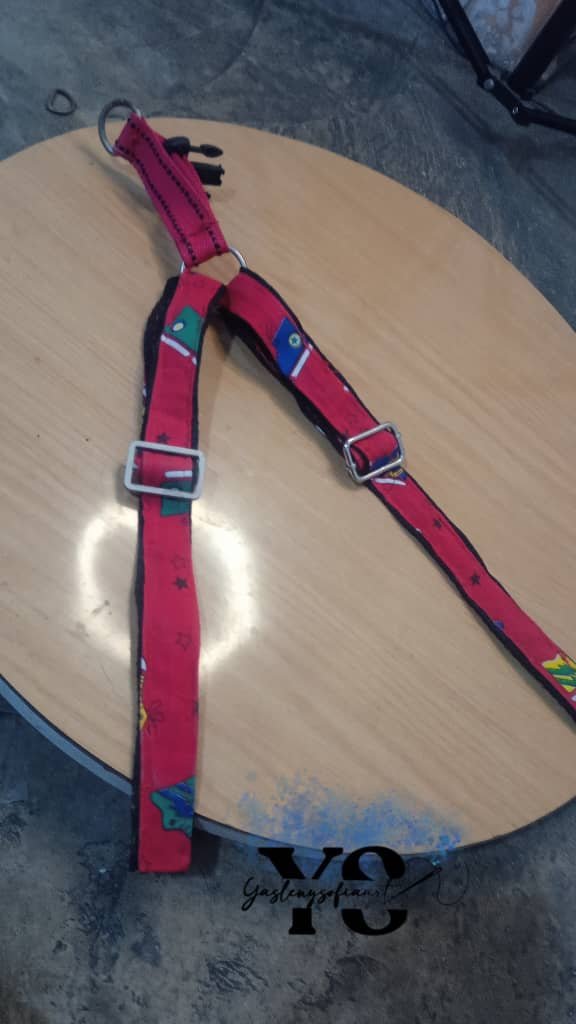
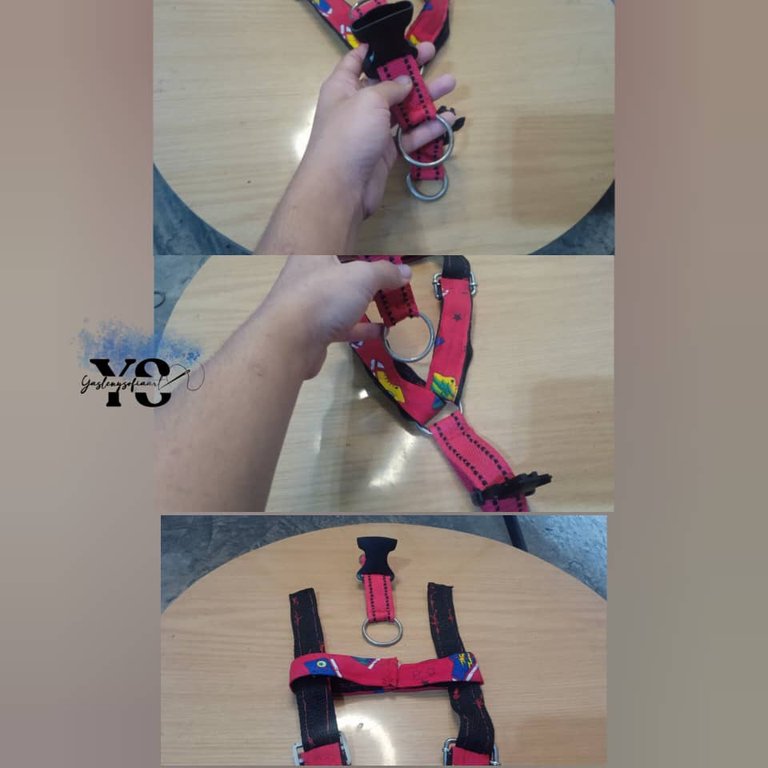
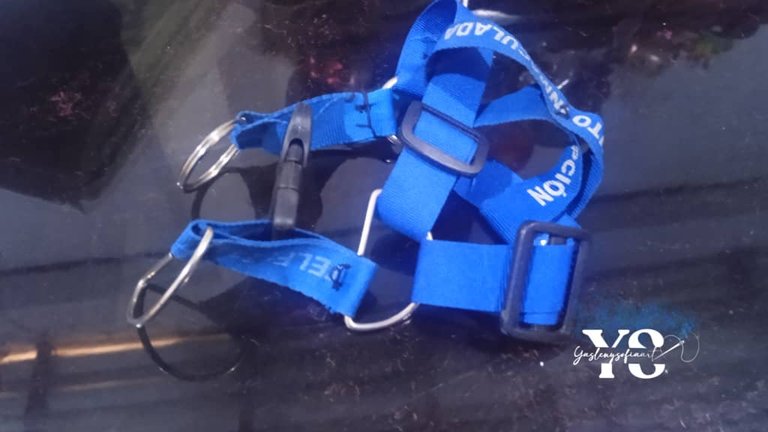
Once all the pieces are sewn, we proceed to assemble the harness, we take one of the small pieces, the one that has one of the parts of the brooch (the one that has the shape of a fork). We put this piece upwards and that the back of this brooch faces you; we take one of the strips that has the tensioners, where the part of the union is, the one that is shorter, we put it face down, we take the other end (where the tensioner is not), we insert it in the half moon that faces us, we pass it, and we stretch it, until it is more or less like 4 fingers before it reaches the half moon.
Then, this tip is passed through the tensioner, on both sides.
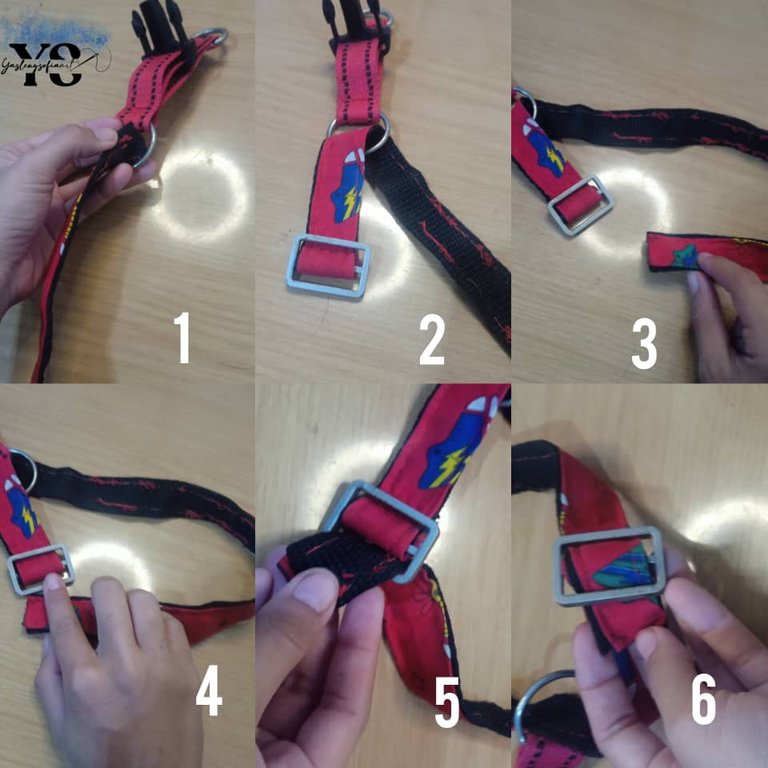
We do the same with the other strip that has the tensor, we identify the part that is the back of the strip, turn it over, take the other end and pass it through the ring that was passed the other. We do the same, we pass the end of this strip in its tensor, below and above.
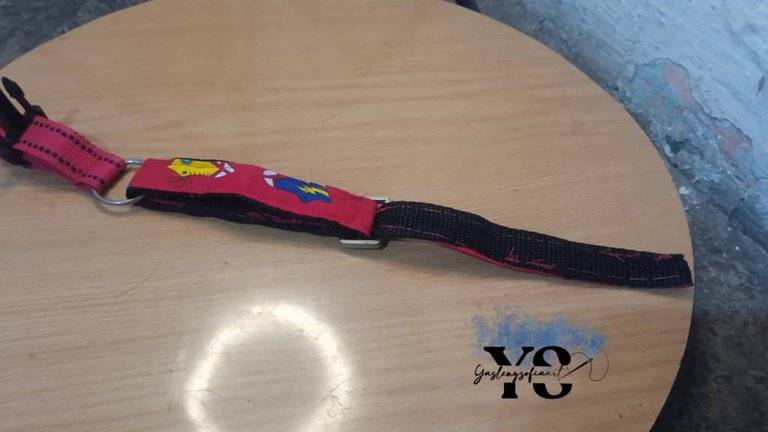
This is how it should look. The tensors should be facing upwards, which is the part that will be seen.
--
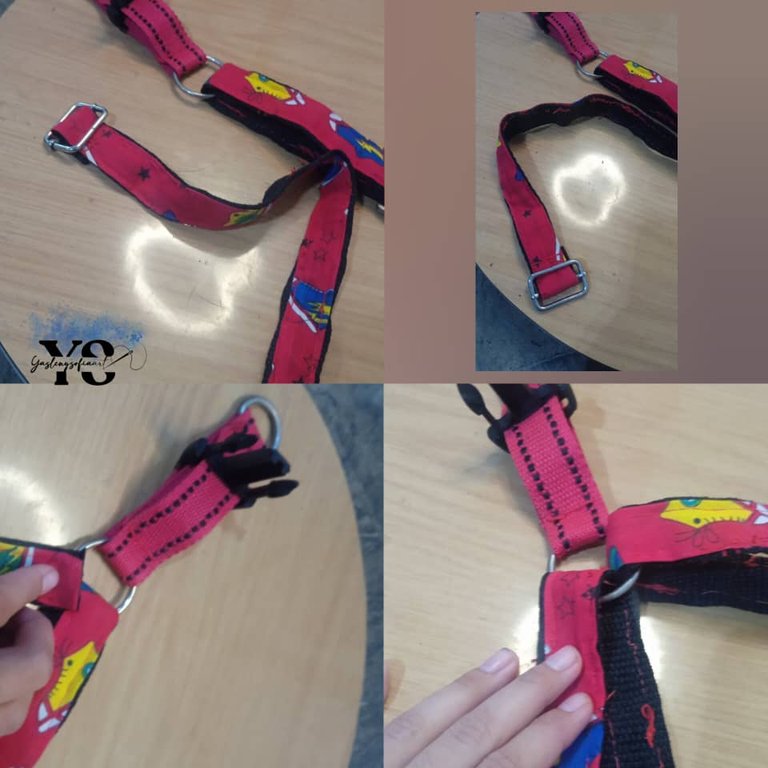
After that, the piece that is like a bow is grabbed with the seam facing upwards and we pass it through each of the ends of the ropes, with the part of the tensors facing downwards, as shown in the image.
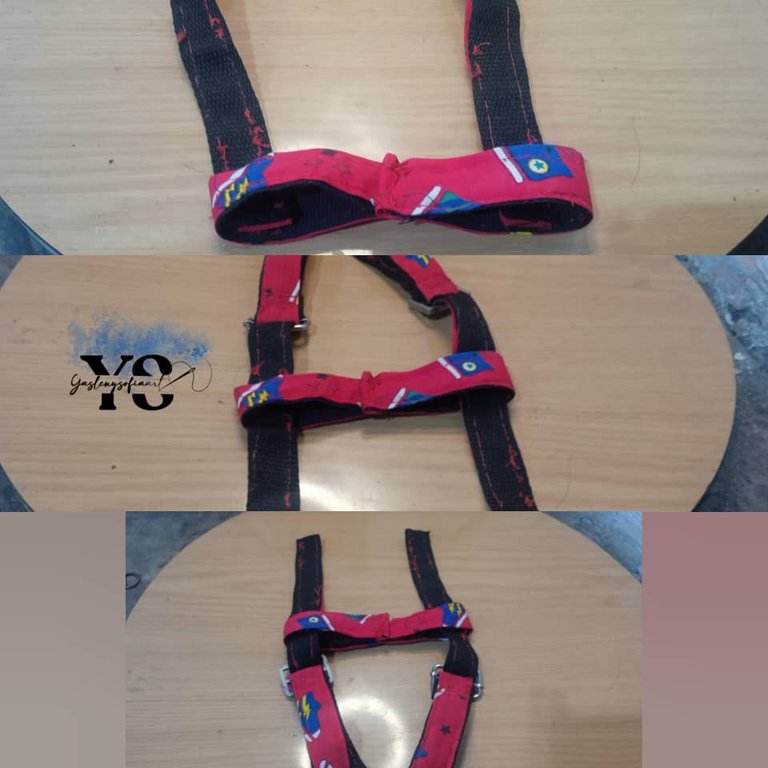
After that, we turn the whole harness over, we occupy the other piece that has the female clasp, we see that it fits perfectly with the other part of the clasp and we put it facing upwards, so that the part that fits faces you. We pass the two ends that are loose, through the ring, from the bottom to the top, as if it embraces the half moon.
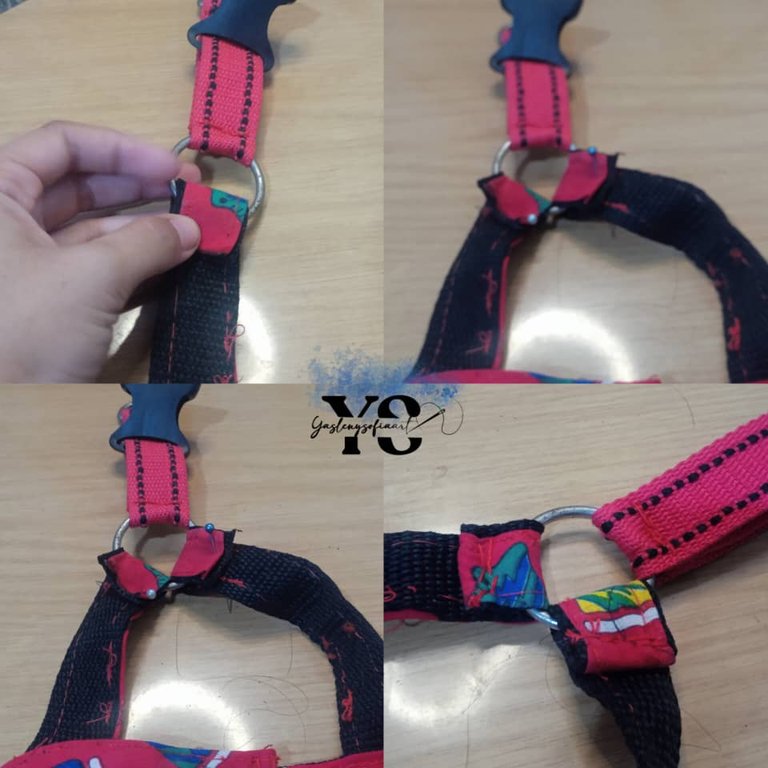
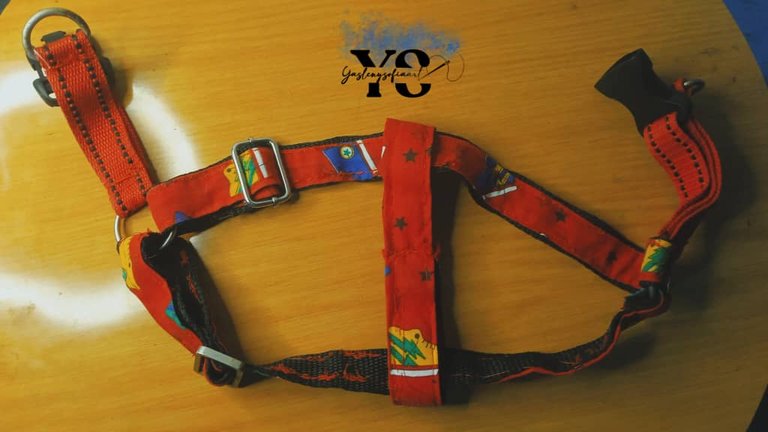
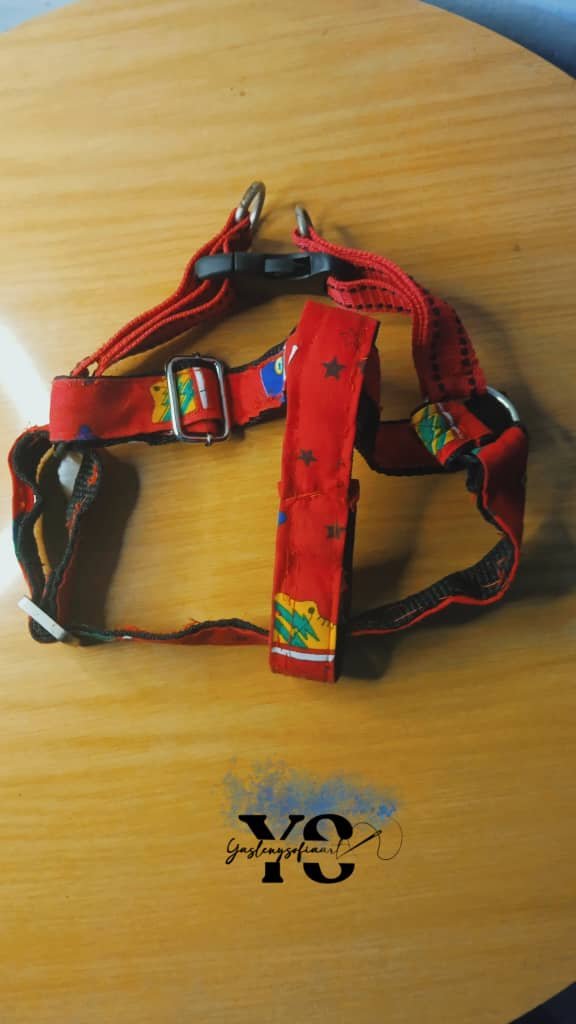
And we pass sewing, folding those ends out so that they do not rub against the animal's skin. Here the harness is already assembled.
STEP 5
The walker….
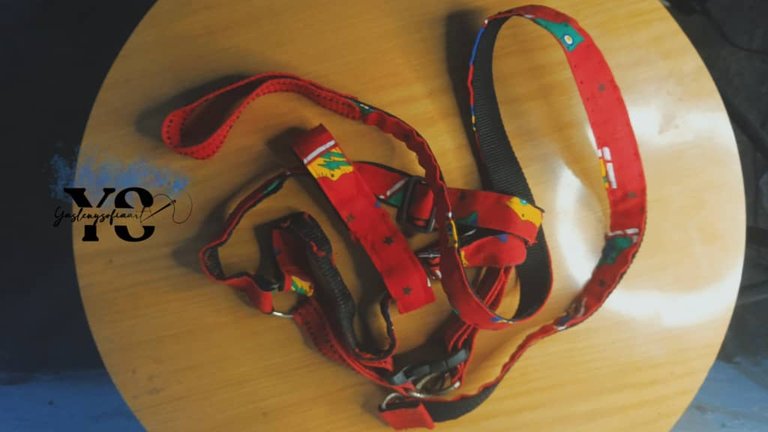
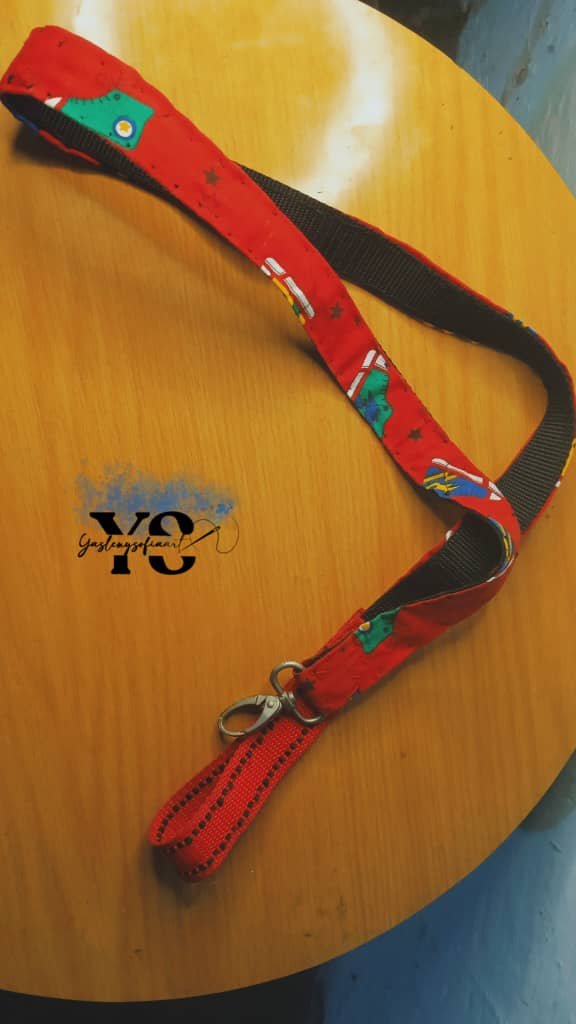
I took 1 mt of black and 20 cm of red fabric, so the measure for the walker would be about 1.20 mt approximately, the length is up to you to decide. Here, like the harness, I sewed the same red fabric, but this time by hand, I didn't want to make my machine suffer and I didn't have the thread.
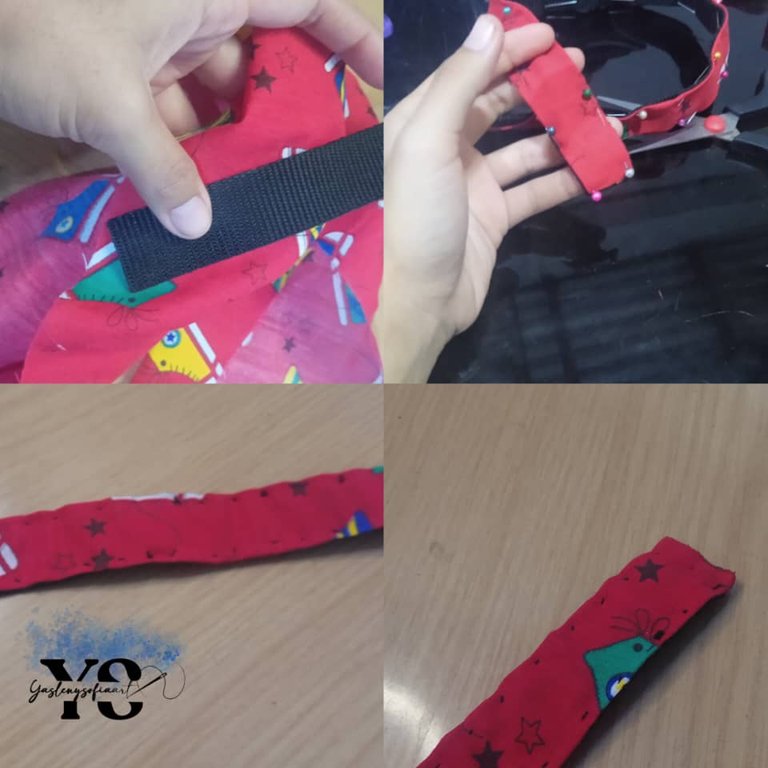
After sewing the fabric to the rope, I proceeded to sew the 20 cm of the red rope at one end, but folded in half, as shown in the picture (here my hands suffered, it was very thick). At the other end I sewed the carabiner, passing the rope from top to bottom, sewing it very well.
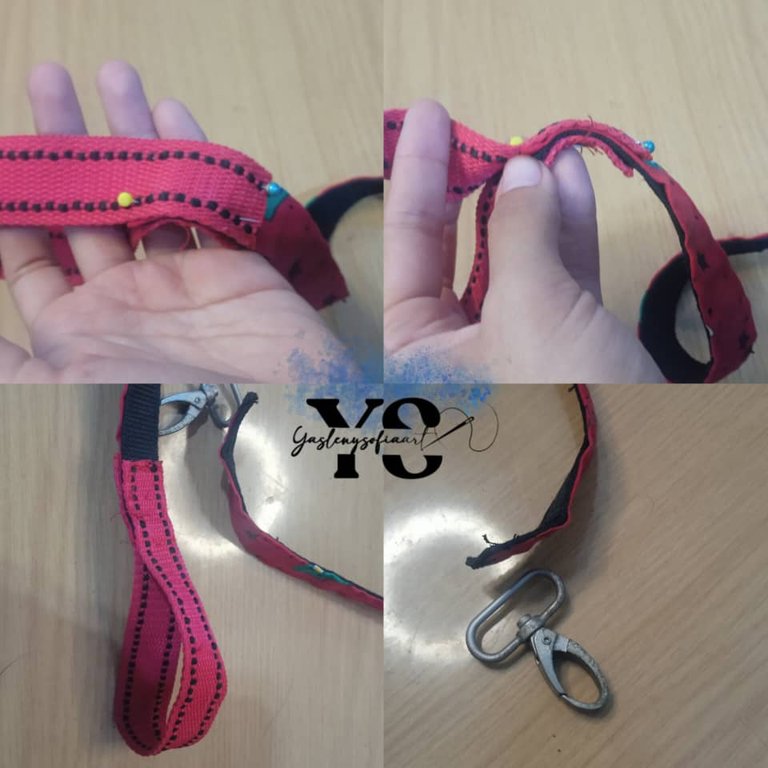
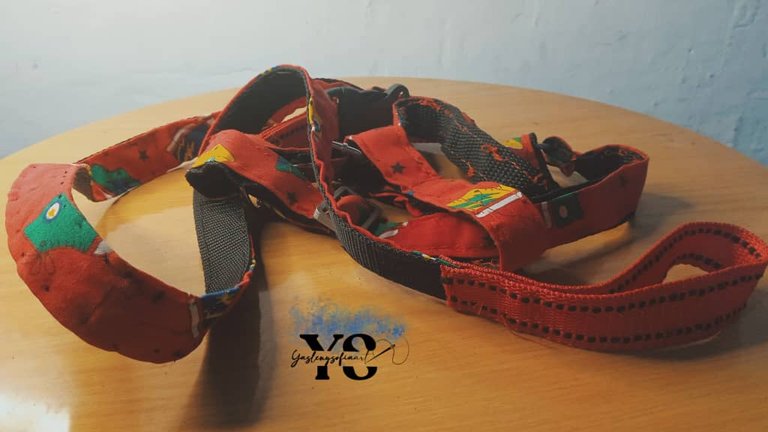
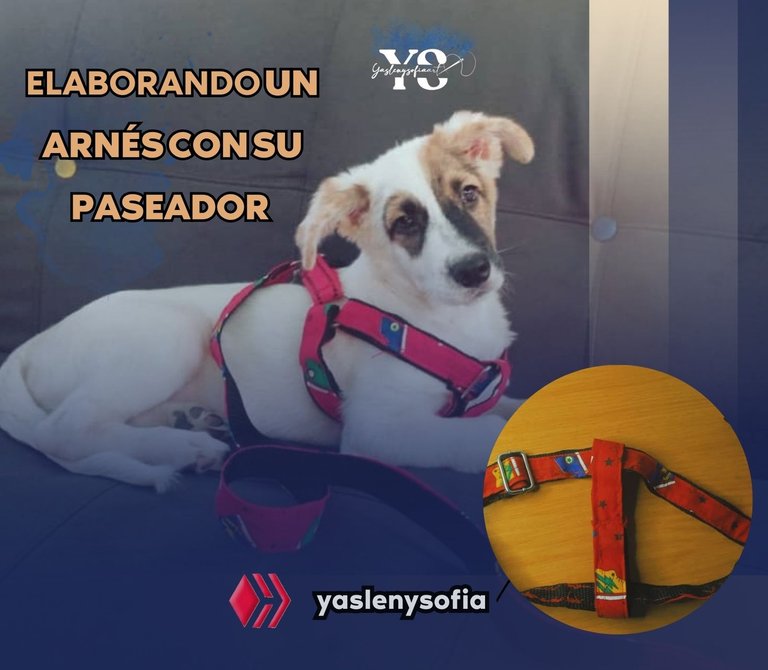
And this is the result, although the stitching is not good at all, I feel proud to have tried and that it looks nice to my doggy, I hope it lasts a few months because he is still a puppy. I leave you with the model posing his cute harness, which he is not used to, that's why his scared face.
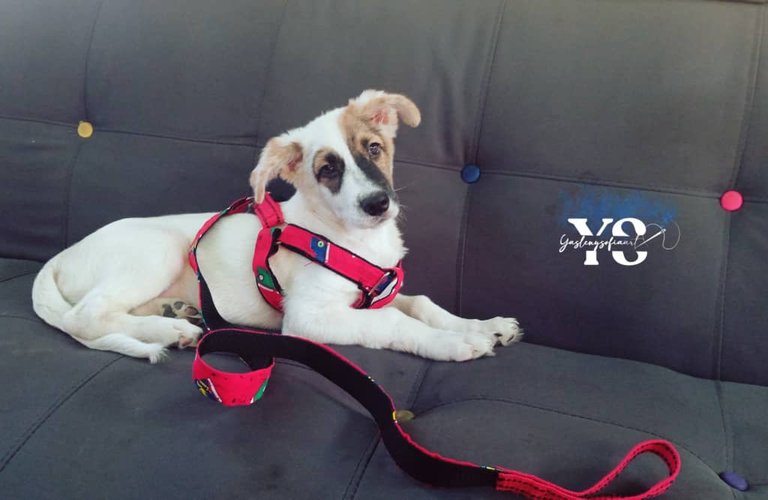
The model
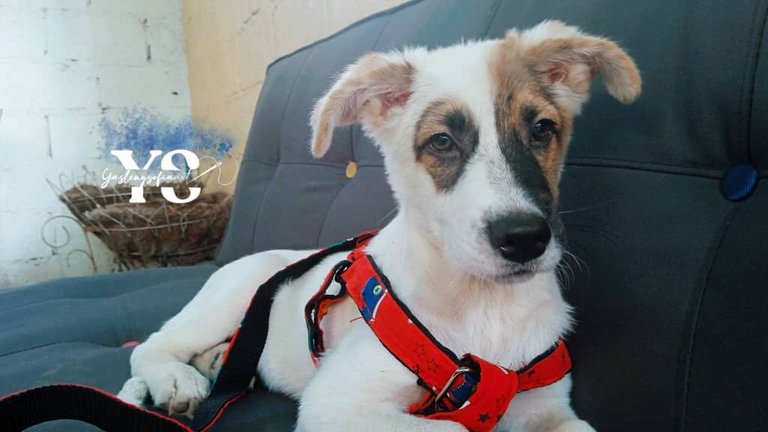
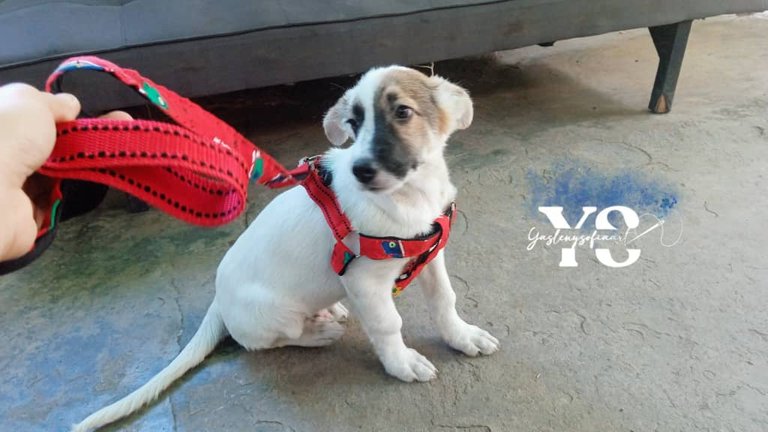
The images are from my personal archive, taken with my Redmi 9A cell phone. Cover designed in CANVA. Text translated with DeepL

Thank you for reading my post. I hope you liked it. I will be attentive to answer your comments. You can visit my blog, follow my content and social networks.
FACEBOOK / INSTAGRAM / TWITTER

ESPAÑOL
Saludos comunidad creativa de
@hivediy, el día de hoy les vengo a compartir el cómo elaboré mi primera vez un arnés para perro, no fue fácil, pero algo se logró. Deseaba tener una pechera para el nuevo integrante de la familia, Oddie, pero me dije ¿Por qué no intentó elaborar más bien una con mis manos? Con intentarlo no perdía y varios de los materiales lo tenía aquí en casa.
Así que puse manos a la obra y buscar tutoriales en YouTube para ver que necesitaba, entre los mismos, lo que me faltaba era el broche de mochila, por lo que lo compré, lamentablemente no del tamaño que necesitaba que era de 20mm, porque en ninguna parte había, solo tenían el que le seguía, el de 25 mm así que, no quedo de otra.
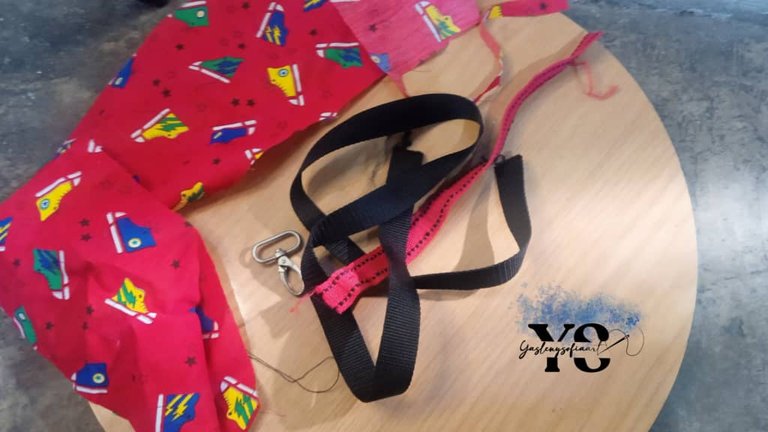

-3,05 mts de reata, de color negro o el de su preferencia.
-2mts de tela con motivos, el color y las figuras de su preferencia.
-2 tensores o regulador paseador doble mochila.
-4argollas de medialuna.
-1 chapa o broche de mochila.
-hilos de costura del color de la reata o de la tela.
-Tijera.
-Cinta métrica.
-Opcional, si no desean usar costura para unir las piezas pueden usar remaches.
Anteriormente había probado hacer un arnés pequeño con una cinta, para darme una idea de cómo era el armado y todo eso y así poder hacer proceso fotográfico con el tamaño adecuado para Oddie, es realmente sencillo de elaborar, lo complicado es saber las medidas adecuadas del perro. Según en el video, las medidas que dan son para un perro tamaño M y que solo se le sumen o reste 7cm a cada una de esas, dependiendo del tamaño del animal.
Tomé mi cinta métrica, medí una pechera que le queda a Oddie bien pero ya estaba fea y desasiéndose, para así más o menos tener una idea de cuanto se llevaría, por lo tanto, les dejare las medidas de mi perro, que vendría siendo XS, más o menos.
Nota: como tenía un trozo de reata roja, decidí combinar los colores y, para que no se viese nada más negro, quise coserle una tela roja que tenía a la mano, este paso lo pueden obviar si la reata es del color de su preferencia.

PASO 1
Cortar la reata a las medidas que les daré a continuación
MEDIDAS
5 Cortes de:
-2 Cortes de reata de 60 cm cada uno (Talla M), en mi caso fueron dos cortes de 50 cm cada una.
-1 Corte de reata de 45 cm (Talla M), en mi caso fue 1 corte de 35 cm.
-2 Cortes de reata de 35 cm cada uno (Talla M), en mi caso fueron dos cortes de 25 cm cada una.


PASO 2
Coser la tela a la reata, previamente cortadas a las medidas de cada una. Aquí si batalle, porque primero mi máquina no da para ese grosor y segundo el hilo no era el adecuado, el mejor para este material es el nylon, el que se usa para los bolsos o calzados. Por lo tanto, se me enredaba y cortaba, al final quedó feo la parte reversa de las piezas, pero, luego de batallar 2 días, lo deje así.

Mi hermana me ayudó a ponerle el hilo a la aguja de la máquina porque no podía😅

PASO 3
La costura …
Tomamos las dos tiras de 50 cm se le ponen los dos tensores, uno por cada de las tiras y por la parte de las puntas. Reservamos. (Imagen 1)

Imagen 1
Ahora, con las dos tiras de 25 cm, se le pone 2 aros de medialuna a cada una; para luego doblar las puntas extremas de las tiras, cada media luna quedaría en los extremos doblados, como se muestran en la imagen (Imagen 2). En el extremo que quede la punta abierta se le pone una de las partes del broche, la hembra, introduciéndola con el reverso de esta mirando al frente. De igual forma hacemos con la otra tira, ya doblada y con las medias lunas, pero aquí iría la otra parte del broche (Imagen 3 y 4).

Imagen 2

Imagen 3

Imagen 4
Ambas piezas de 25 cm, dobladas, deben quedar de la misma medida. Ya cuando todo este bien en tamaño y que ambas parten del brochen coincidan, se les pasa costura a esos extremos o se le pone remache (Imagen 5).

Imagen 5
A las tiras que tienen los tensores o ajustadores, se les cose en la unión para fijarlo (Imagen 6).

Imagen 6
Con la pieza de 35 cm se realizará una especia de moño, entrecruzándose ambos extremos y, el que quede arriba, se dobla para que las puntas salidas no rocen con la piel del animal y se cose dicha unión (Imagen 7).

Imagen 7
PASO 4
En cuanto al armado…
Ya con todas las piezas cosidas, se procede armar el arnés, tomamos una de las piezas pequeñas, la que tiene una de las partes del broche (la que tiene como la forma de tenedor). Ponemos dicha pieza hacia arriba y que el revés de este broche de hacia ti; tomamos una de las tiras que tiene los tensores, donde está la parte de la unión, la que queda más corta, la ponemos boca abajo, agarramos el otro extremo (donde no está el tensor), lo insertamos en la media luna que da hacia nosotros, la pasamos, y los estiras, hasta que quede más o menos como 4 dedos antes de que llegue a la media luna.
Luego, esa punta la pasamos por el tensor, por sus ambos lados.


Se hace lo mismo con la otra tira que tiene el tensor, identificamos la parte que es el revés de la tira, se voltea, se toma el otro extremo y se pasa por medio de la argolla que se pasó el otro. Hacemos lo mismo, pasamos la punta de esta tira en su tensor, por debajo y arriba.


Así debe quedar. Los tensores deben quedar mirando hacia arriba, que sería la parte que se verá.
--

Posterior a ello, la pieza que es como un moño se agarra con la costura mirando hacia arriba y la pasamos por cada uno de los extremos de las reatas, aclaro, con la parte de los tensores boca abajo, como se muestra en la imagen.


Siguiente a eso, volteamos todo el arnés, ocupamos la otra pieza que tiene el broche hembra, vemos que calce perfectamente con la otra parte del broche y lo ponemos mirando hacia arriba, que la parte que calza mire hacia ti. Pasamos los dos extremos que quedan sueltos, por medio de la argolla, desde abajo hacia arriba, como si abraza la media luna.


Y pasamos costura, doblando esas puntas salidas para que las mismas no rocen con la piel del animal. Aquí ya está armado el arnés.
PASO 5
El paseador….
Tomé 1 mt de reata color negro y 20 cm de reata roja, así la medida para el paseador seria como de 1,20 mt aproximadamente, el largo lo decide uno. Aquí, al igual que el arnés, le cosí la misma tela de color rojo, pero esta vez a mano, ya no quería hacer sufrir a mi máquina y que no tenía el hilo.

Luego de ya cosida la tela a la reata, procedí a coserle los 20 cm de la reata roja en una de los extremos, pero doblada por la mitad, como se muestra en la imagen. (aquí mis manos sufrieron, era muy grueso). En el otro extremo se cose el mosquetón, pasando la reata de arriba hacia abajo, cosiéndolo muy bien.

Y este es el resultado, aunque la costura no está nada bien, me siento orgullosa de haberlo intentado y que se le vea bonito a mi perrito, espero que le dure unos cuantos meses porque todavía está cachorro. Les dejo al modelo posando su lindo arnés, al cual no está acostumbrado, por eso su cara de susto.


El modelo


Las imágenes son de mi archivo personal, tomadas con mi celular Redmi 9A. Portada diseñada en CANVA. Texto traducido con DeepL

Gracias por leer mi post. Espero que les haya gustado. Estaré atenta a responder sus comentarios. Pueden visitar mi blog, seguir mis contenidos y redes sociales

FACEBOOK / INSTAGRAM / TWITTER

