Lo primero que hice fue comprar una cinta nylon, el broche y el tensor para hacer el collar, tome un color rojo para que haga resalte en su pelaje. El aro donde se sujetará el gancho de la correa ya lo tenía en casa, así que no fue necesario comprarlo. Posterior a eso y ver que no podría bordar bien el nombre en el material de nylon, procedí a tomar una tela con un color que se le acercara; esta tela seleccionada no fue algodón, pero era la que tenía a la mano y la que más se asemejaba en tono.
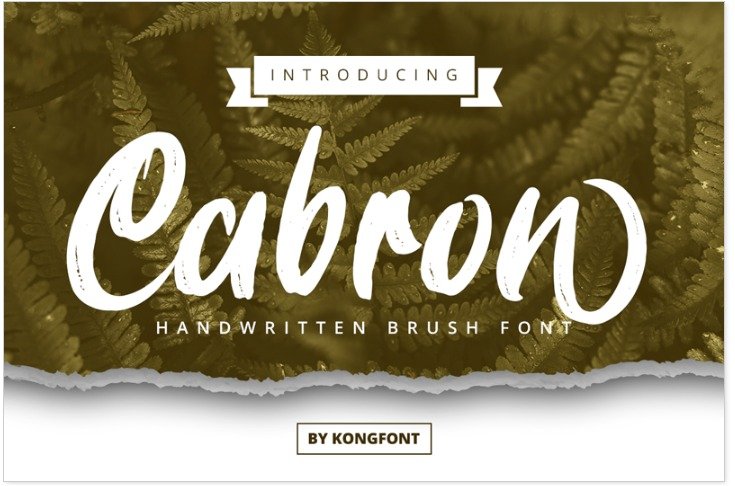
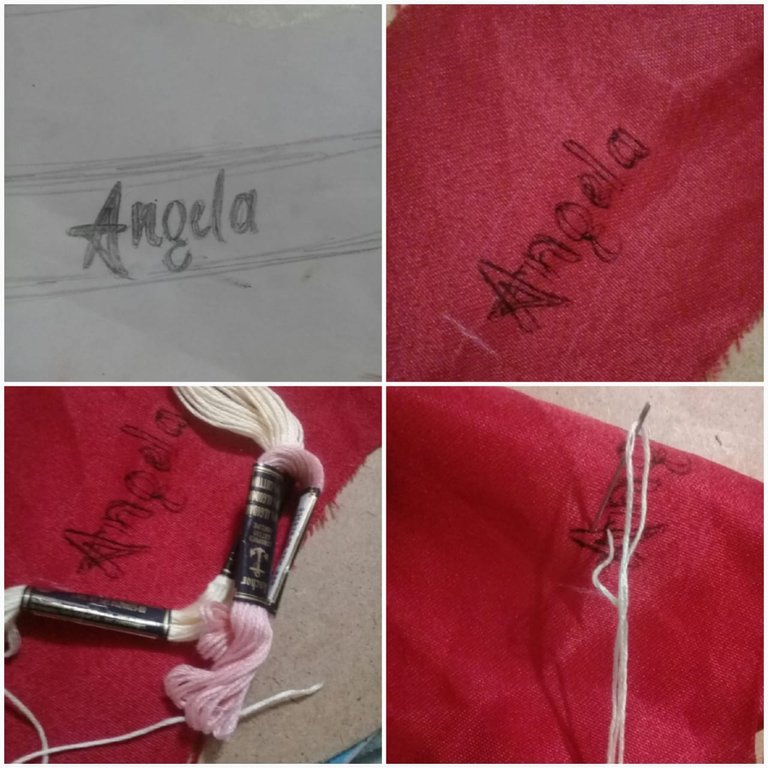
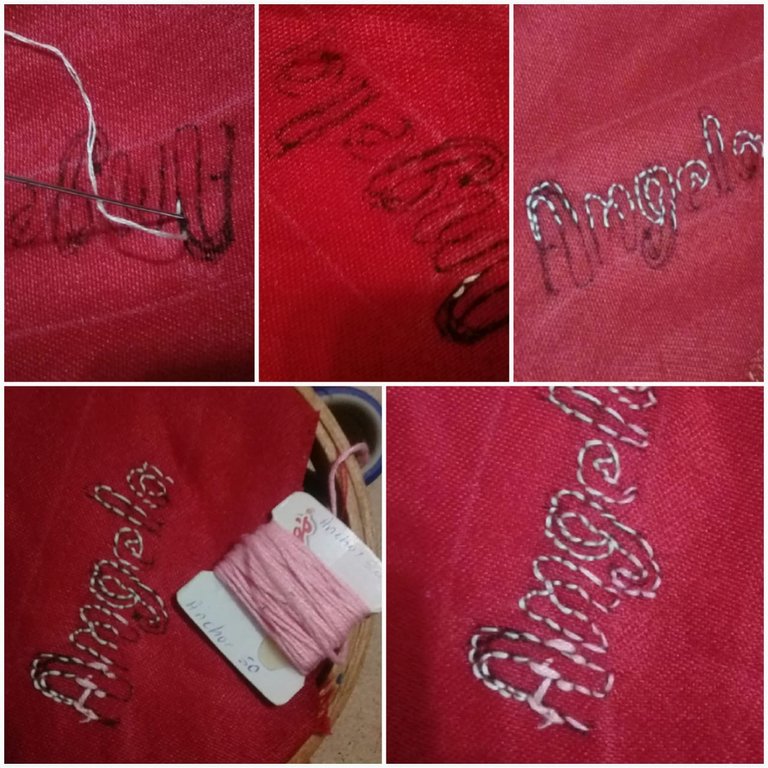
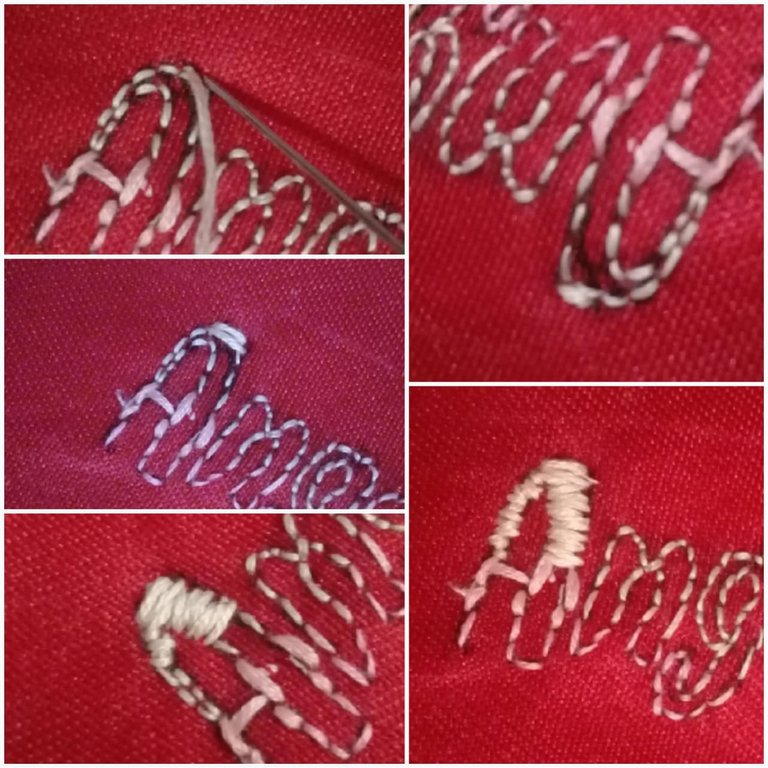
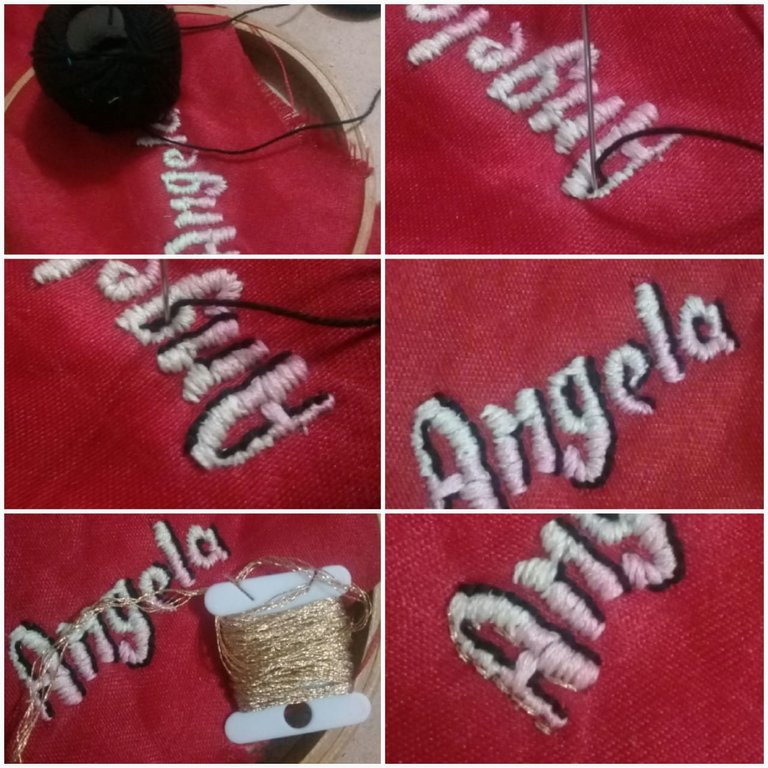
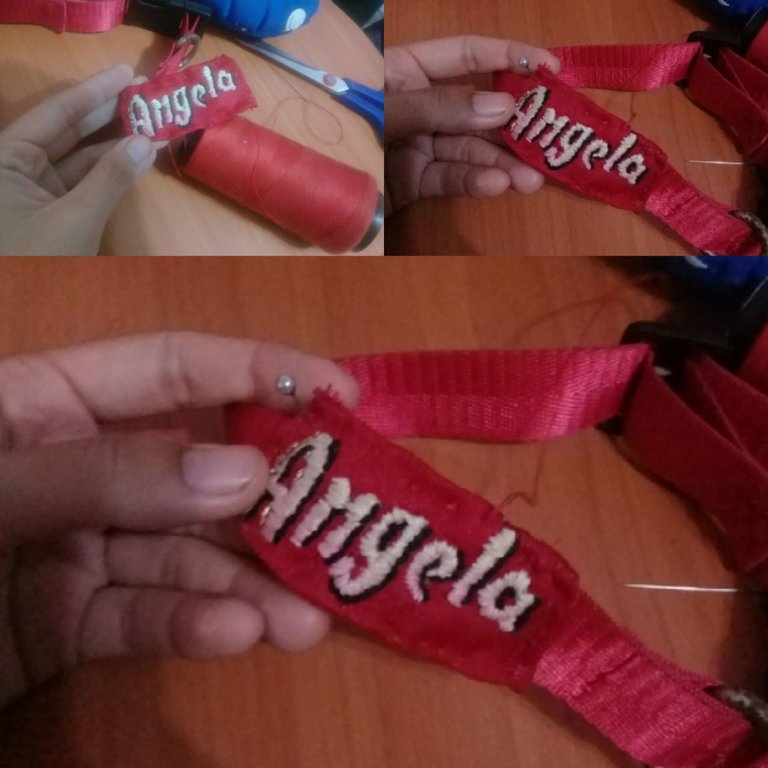
Posterior a esto y tomar la medida del recuadro a bordar con el tamaño del grosor del collar, busque una tipografía en internet, terminando por escoger la de Cabron Font, letra que la dibujé primero en una hoja y luego la traspase a la tela. Ya con esto procedí a bordarlo, con la técnica de paso atrás bordé las orillas de la parte de arriba de cada letra con un color crema y con la técnica de relleno terminé de cubrir todo el grosor de las mismas, quería hacer como un degradado, pero no contaba con todos los colores de hilo, así que la zona de abajo de las letras hice el mismo, pero con un rosado clarito.
Fuente
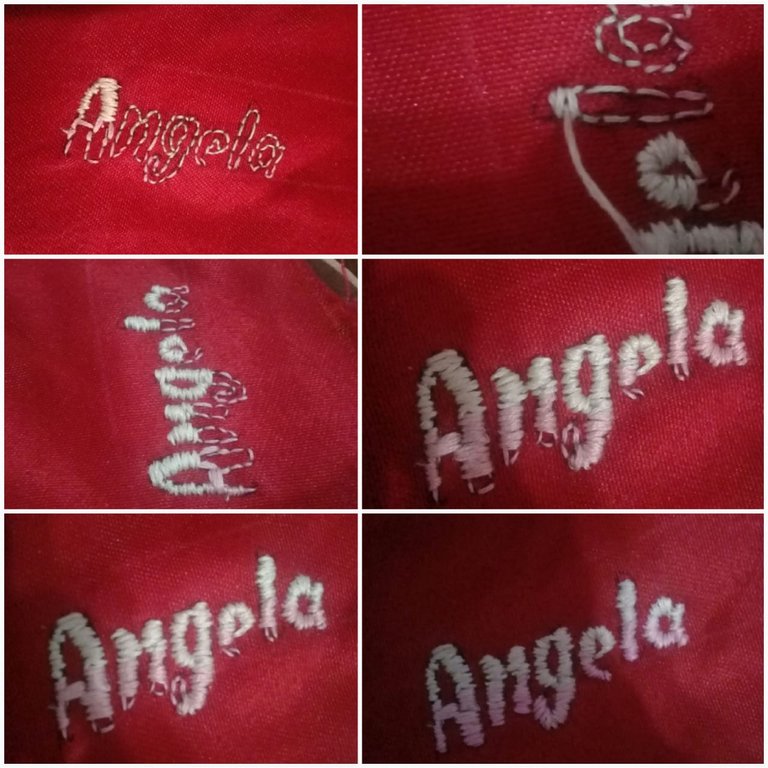
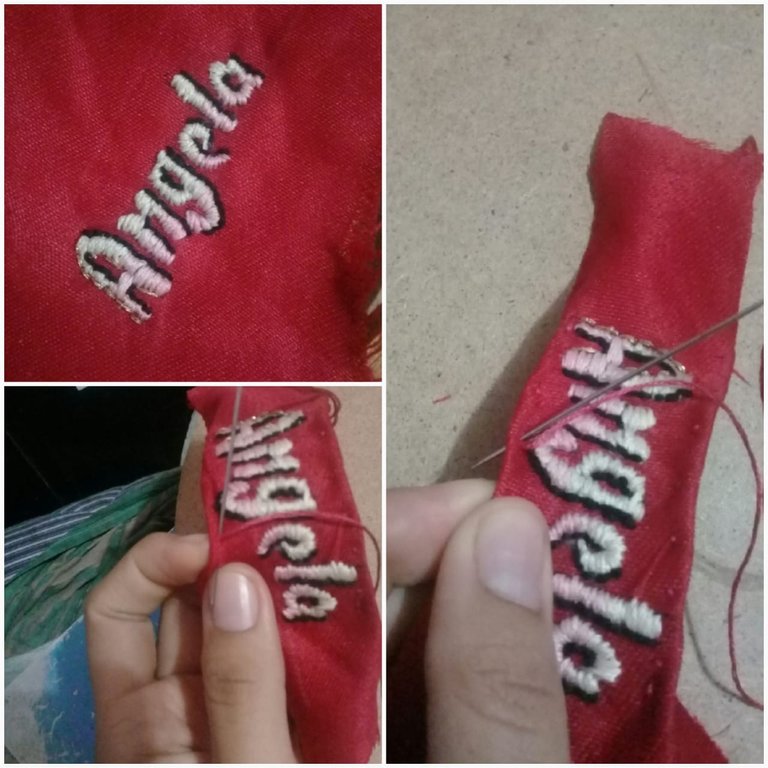
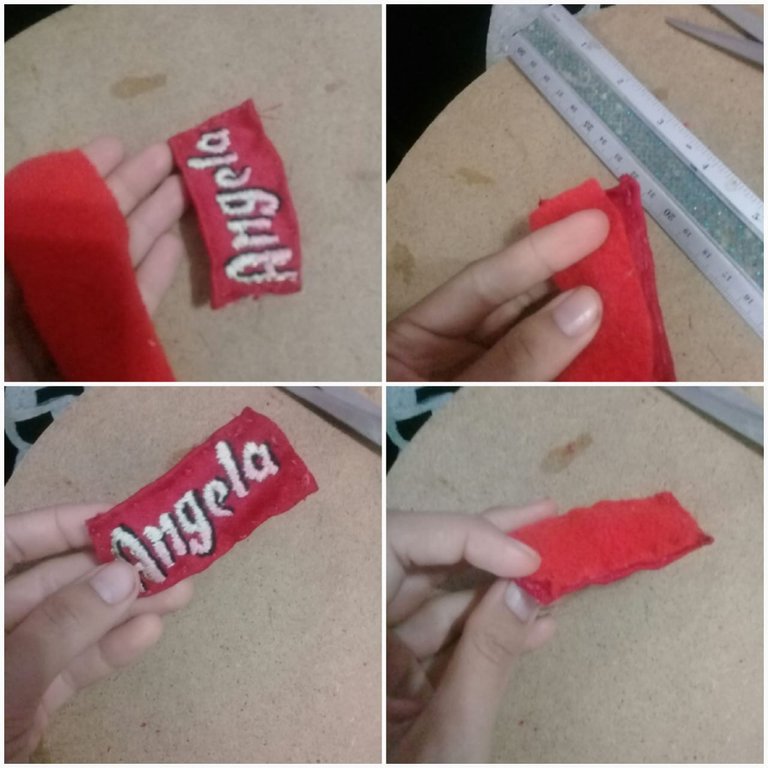
Al ver que no resaltaba tanto el nombre, le borde como una sombra con la técnica de paso atrás y con el hilo ovillo negro en los laterales, ya que este es más grueso. También le bordé con hilo dorado, pero solo en la letra A, para hacerlo un poco más llamativa. Seguidamente cosí las orillas, le puse un pedazo de tela de algodón en la parte de atrás, para que quedara más firme y se visualizara mejor.
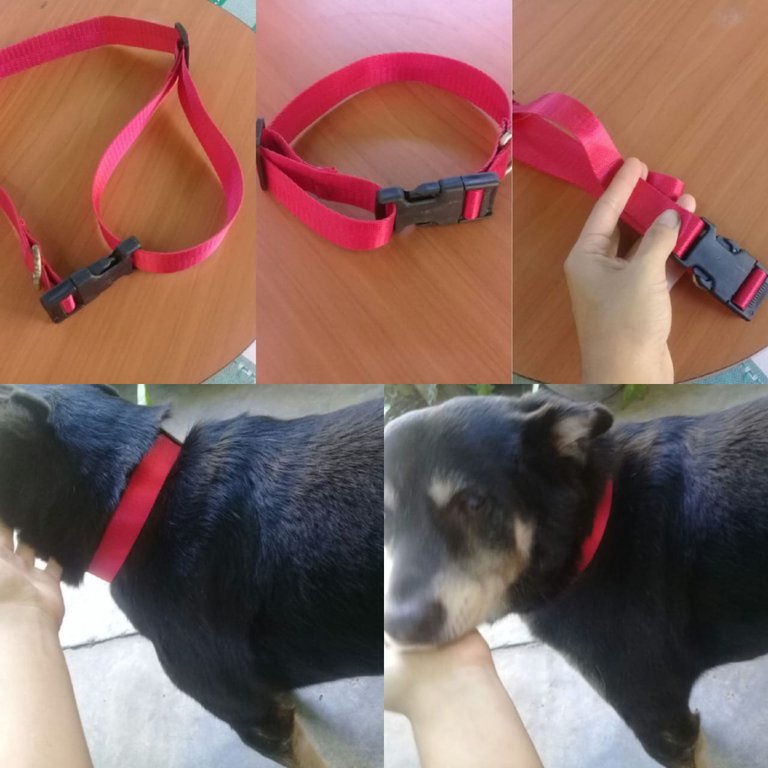
Con esto, seguidamente realice el collar y para eso tome la medida del cuello de mi perra, las medidas estándar para cada talla las puede ubicar en internet, pero quise hacerlo según el cuello de Angela, el cual era 44; acoto que la medida no puede quedar ni muy suelto ni muy apretado, debe haber un dedo de separación entre el cuello y la cinta métrica. Para hacer el collar busque tutoriales de YouTube, en uno me decía que la medida del tamaño del nylon debía ser el cuello del animal más 1.5 de longitud, no sé qué significa eso, pero doble la medida de 44 cm a 88 cm y con esto fue el tamaño del nylon que emplee.
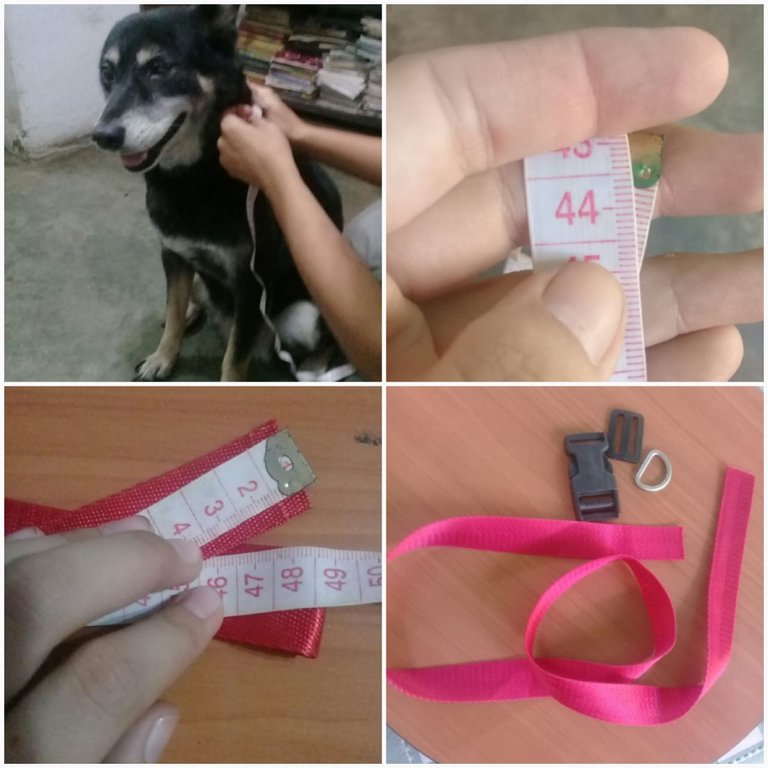
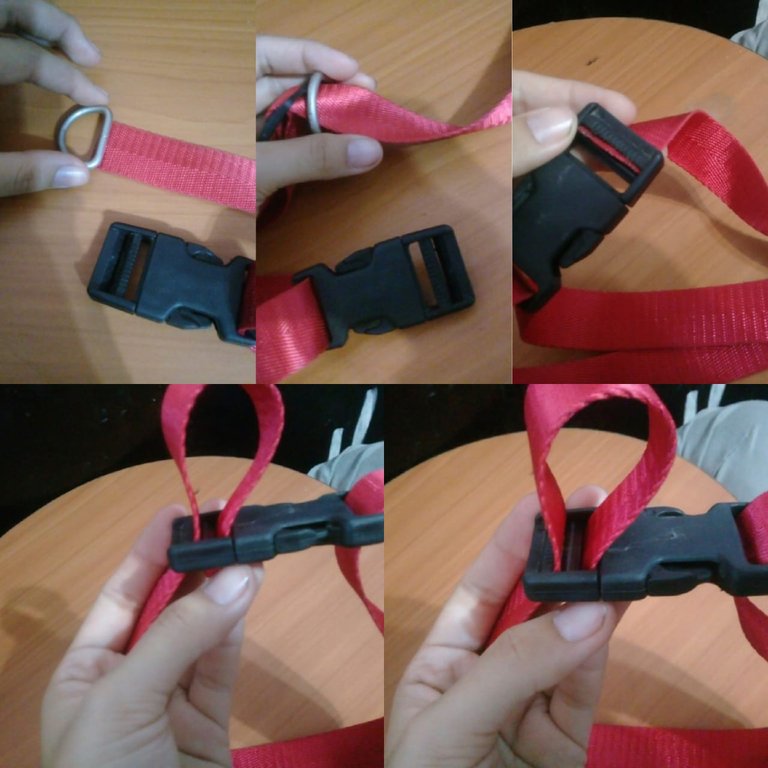
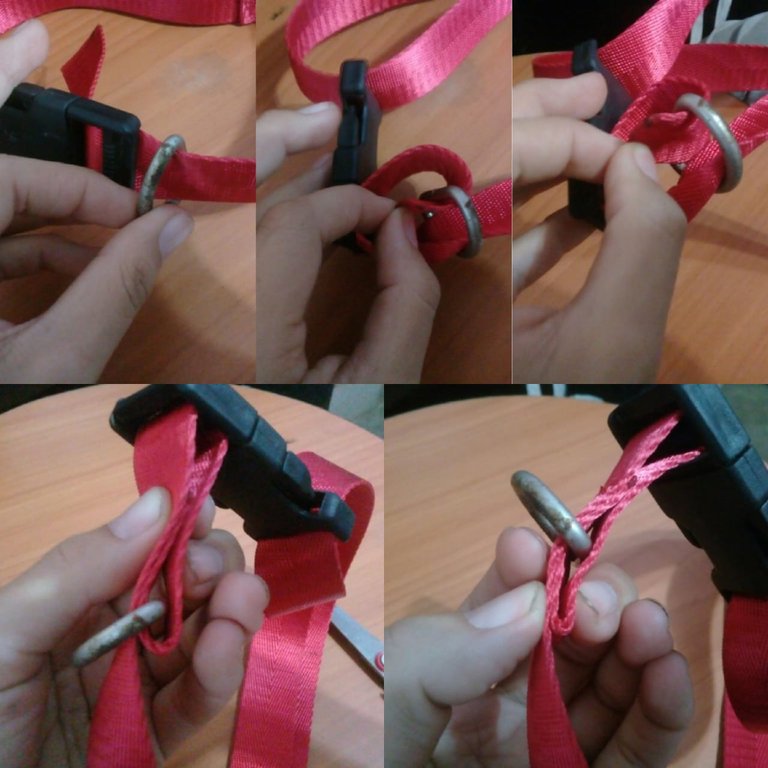
El proceso del collar consiste en tomar el broche y no separar las partes que lo conforma, se introduce el nylon por donde no tiene los dientes y se junta los extremos del nylon. Se toma el tensor y paso ambos extremos del nylon por ambos orificios, se deja una mitad del nylon del broche al tensor y otra mitad del tensor hacia las puntas del nylon. Se voltea, quedando el tensor boca abajo y se toma uno de los extremos del nylon preferiblemente el queda también boca abajo, y se acorta su medida, quedando solo un pedazo de este nylon, se dobla un centímetro o un poco más y se cose esos dobles al que queda al nylon que queda del otro lado del tensor. Ya cosida, por el extremo que quedó más largo se le introduce la media luna, y ese mismo extremo del nylon se introduce por el otro lado del broche, el que tiene los dientes.
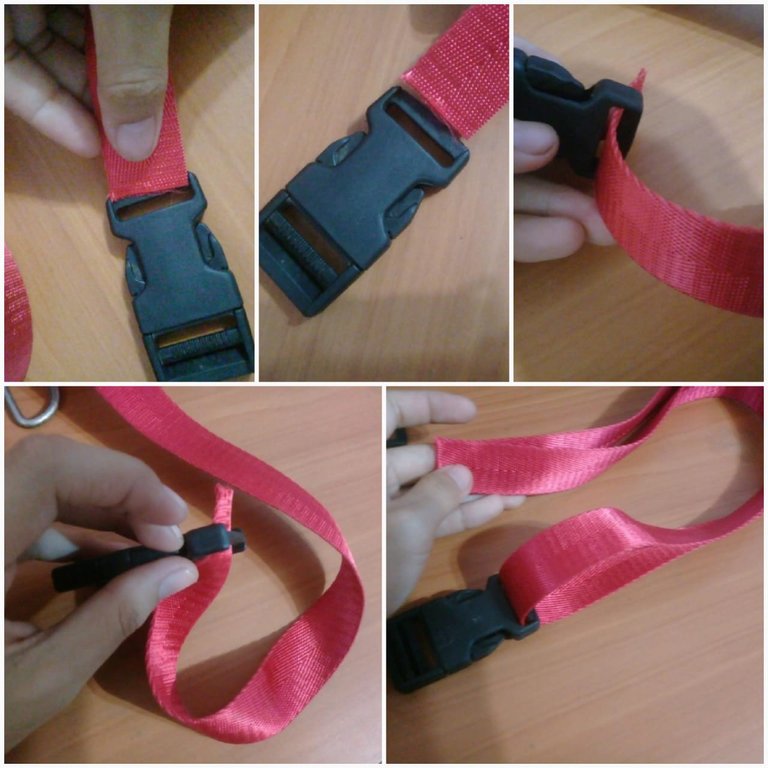
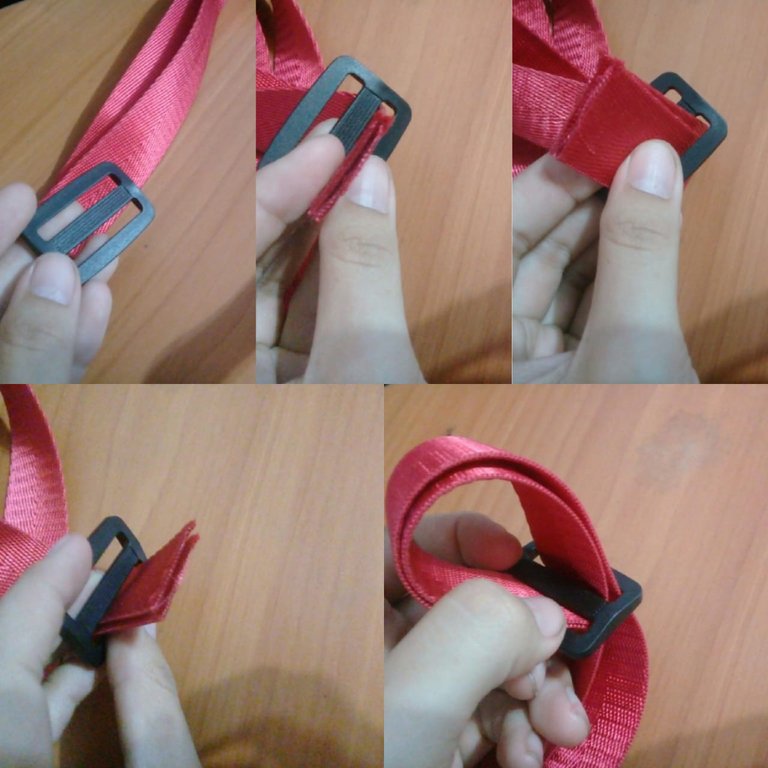
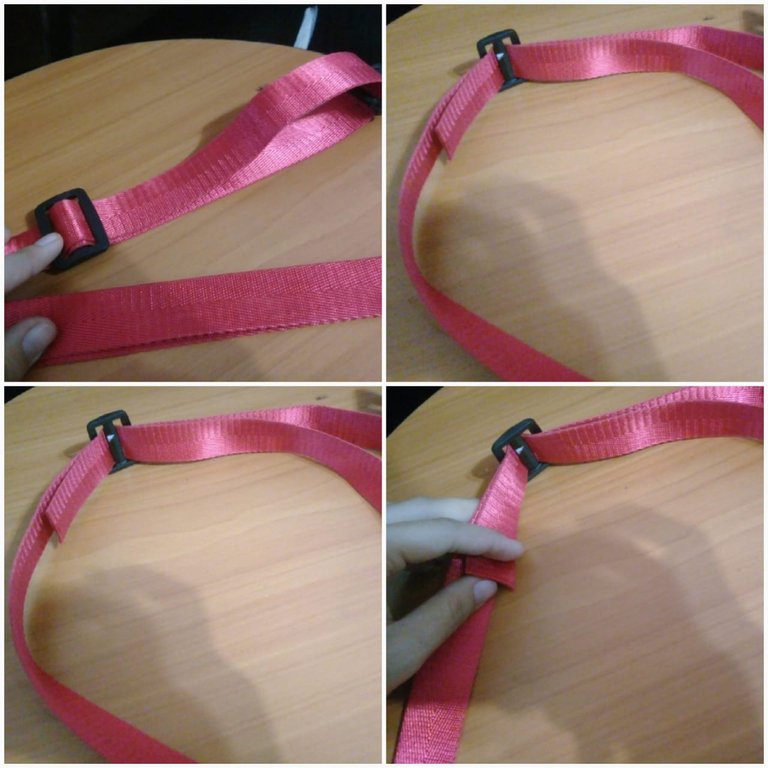
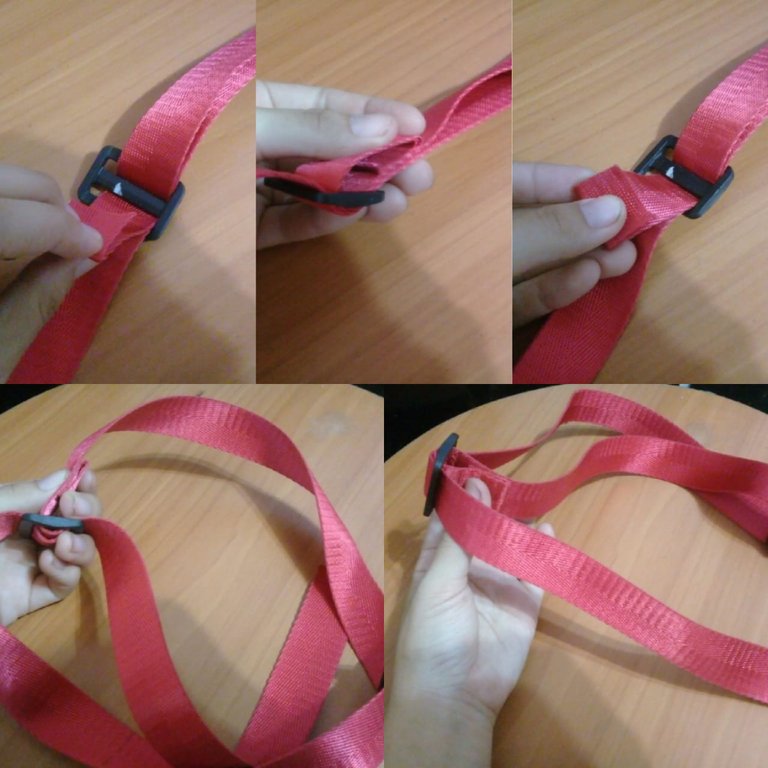
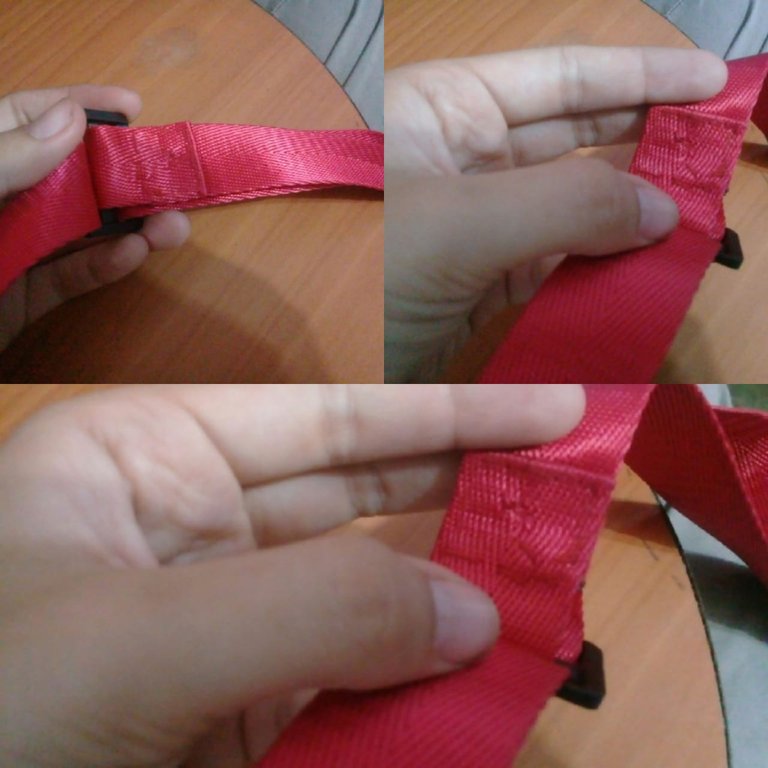
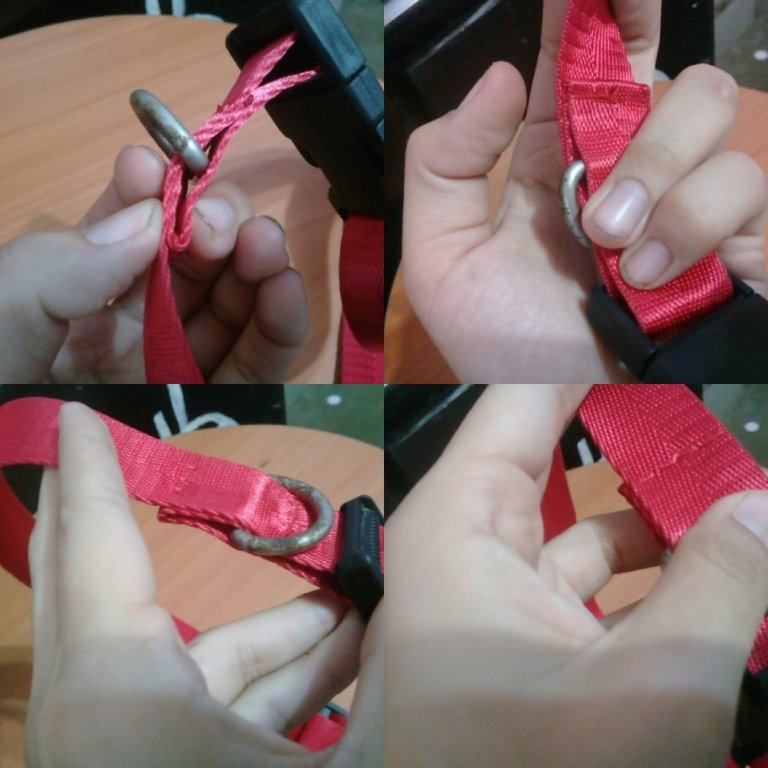
La media luna se acerca un poco al broche y se le traspasa el nylon por debajo y se cose de forma tal que la media luna quede fija y no ocurra accidentes con el collar luego de pasear al canino u otra mascota. Pues el collar quedó muy grande, las medidas no eran las que suponía, así que lo desarme con cuidado, para no perder nylon y en vez 88 cm, vendrían siendo como entre 15 a 20 cm más de la medida del cuello del animal, pues le termine quitando a esos 88 cm como 30 cm, así que el tamaño de nylon que al final use fue entre 58 a 60 cm. Igual si saben que significa el 1.5 de longitud de la medida, pues ahí sacarían la cuenta.
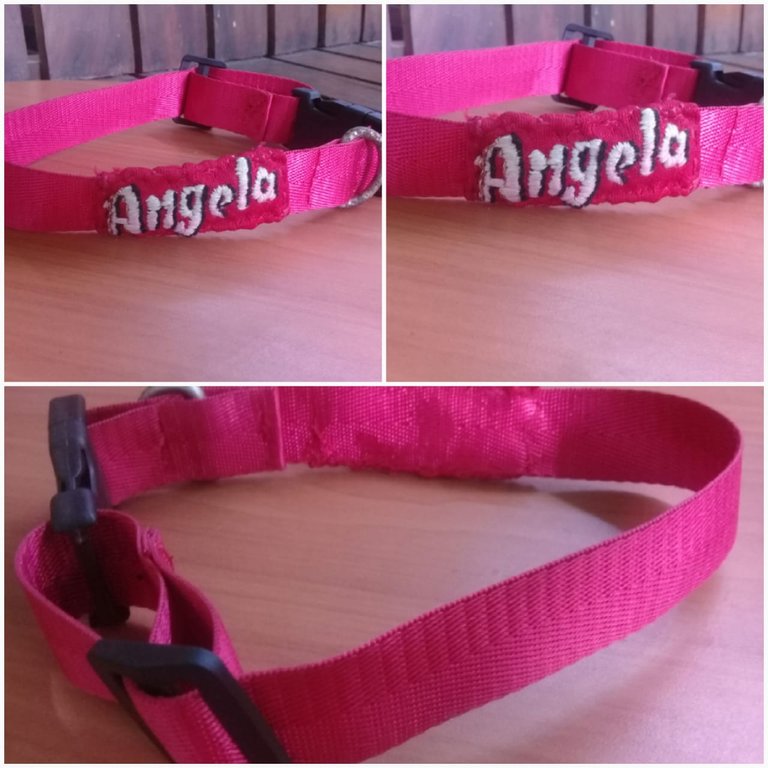
Ya con el collar bien armado y ajustado a la medida del cuello de mi perra, procedí a coserle el nombre bordado cerca de donde está la media luna; no les niego que el nombre me quedo un poco más grande del grosor del nylon, pero pude ajustarlo y unirlo al collar. Como a mi negrita no le puedo poner lazos porque es complicado con su pelo, agregando que no le gusta, decidí hacerle uno para ponérselo en el collar.
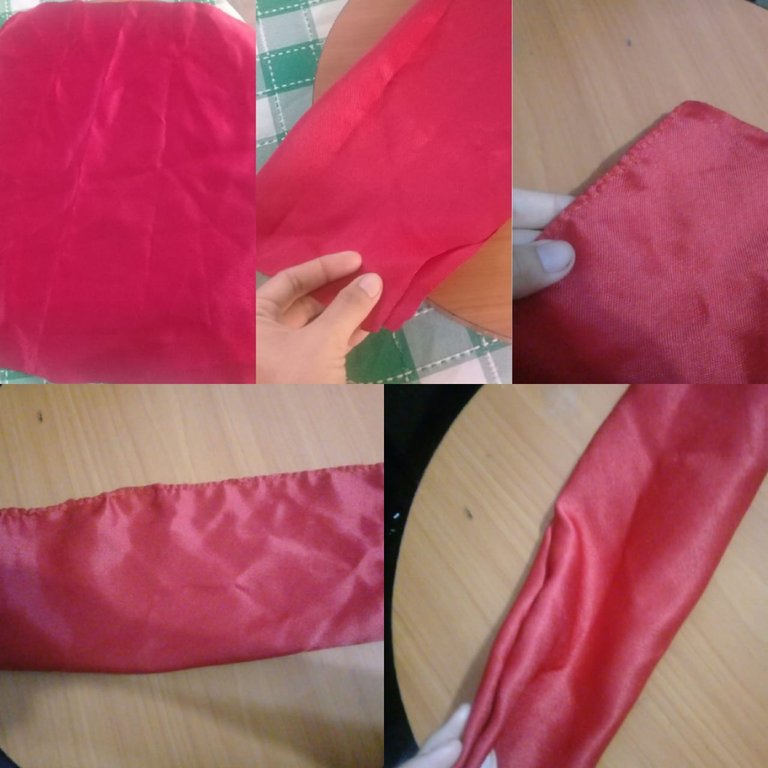
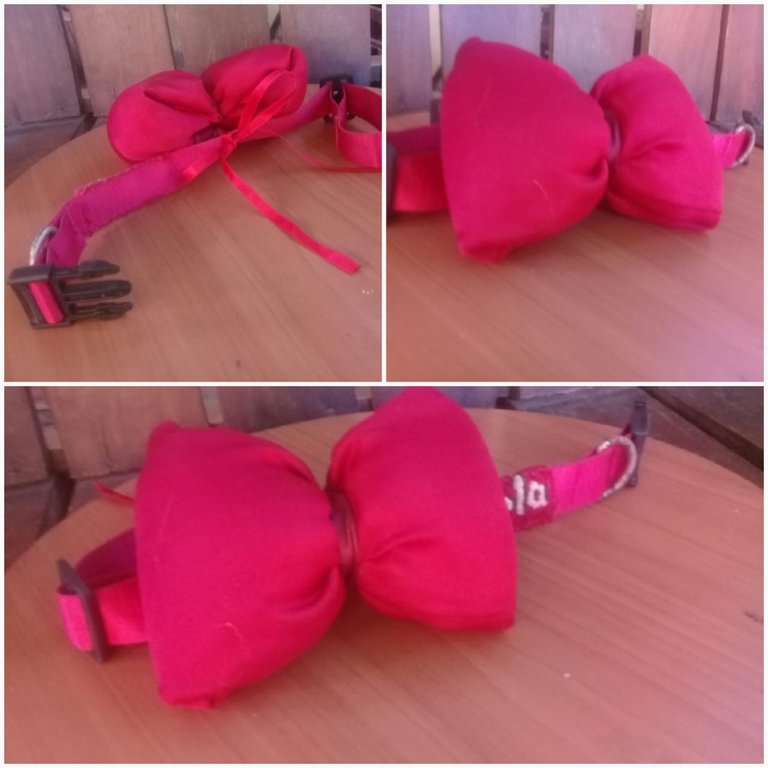
Este lazo lo hice de la siguiente manera: tome la misma tela donde borde el nombre y la corte en un rectángulo de 70 cm de largo y 20 cm de ancho, pues esta se dobla a la mita y se cose en la parte de adentro lo que sería la abertura larga de la misma. Quedando una tela rectangular, pero con abertura en sus extremos y ahí se le introduciría una esponja de 33 cm de largo y 10 cm de ancho, acoto que la esponja puede ser de 1 cm de ancho yo la hice doble para que quedara más abultada, e igualmente la medida del lazo puede ser del de preferencia, pues depende del tamaño deseado. Con la esponja introducida en la tela, doble ambos extremos hasta llegar más de la mitad de la misma, y que los extremos de este lazo formado queden más redondeados. Para fijarla use un hilo pabilo, por su grosos, pero lo recomendable es un hilo con el mismo color y de un grosor que te permita ajustarla bien.
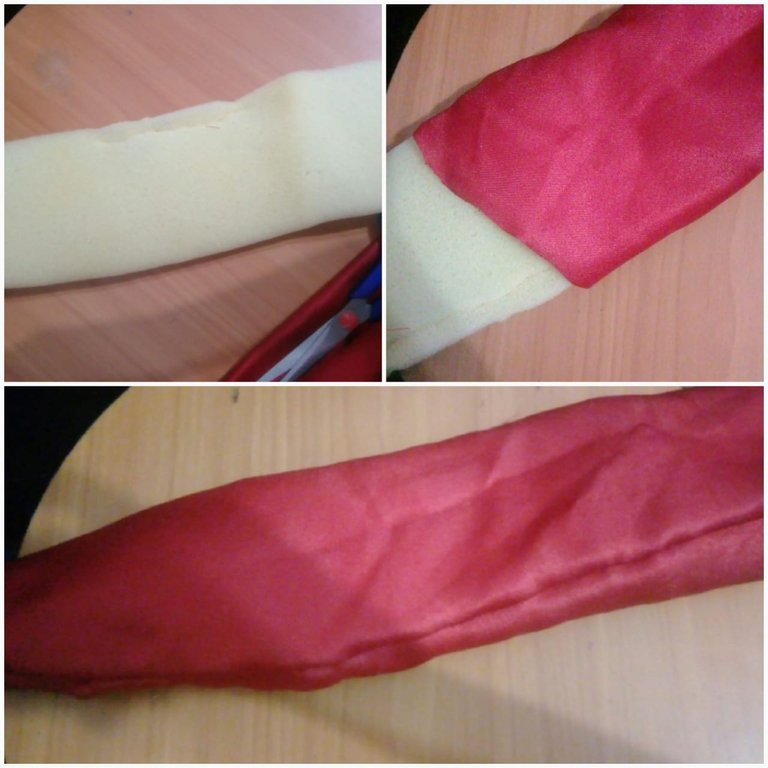
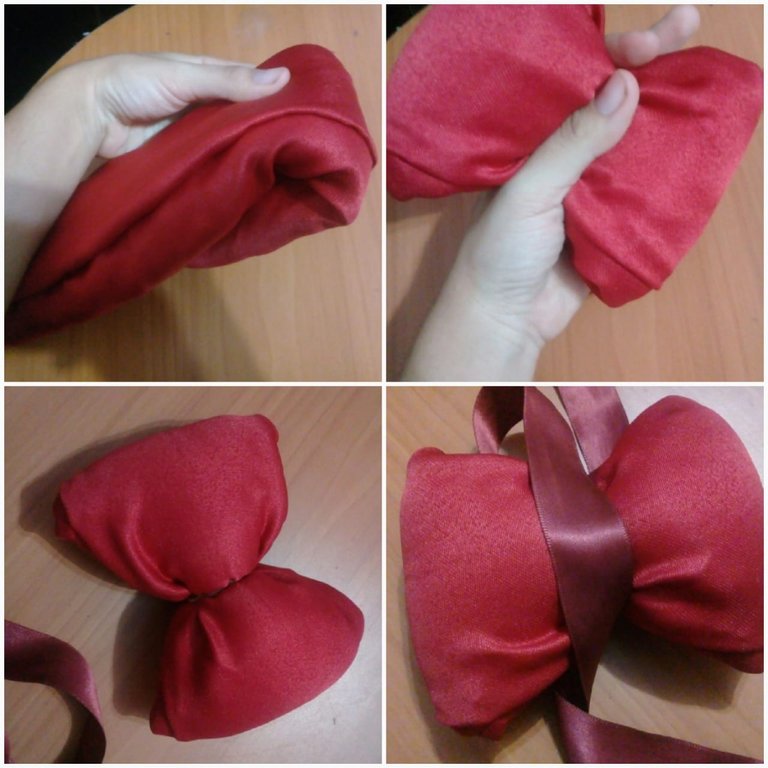
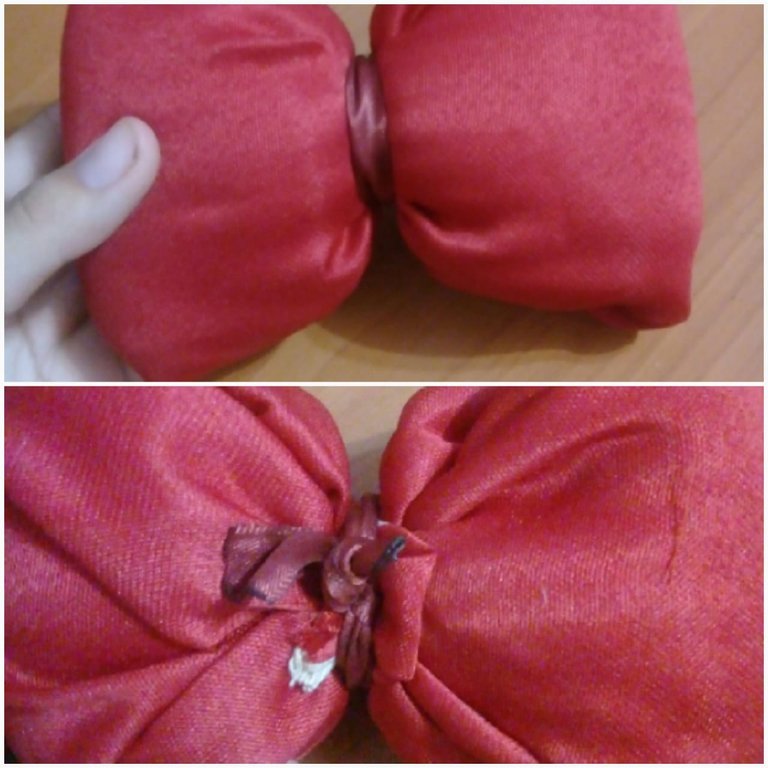
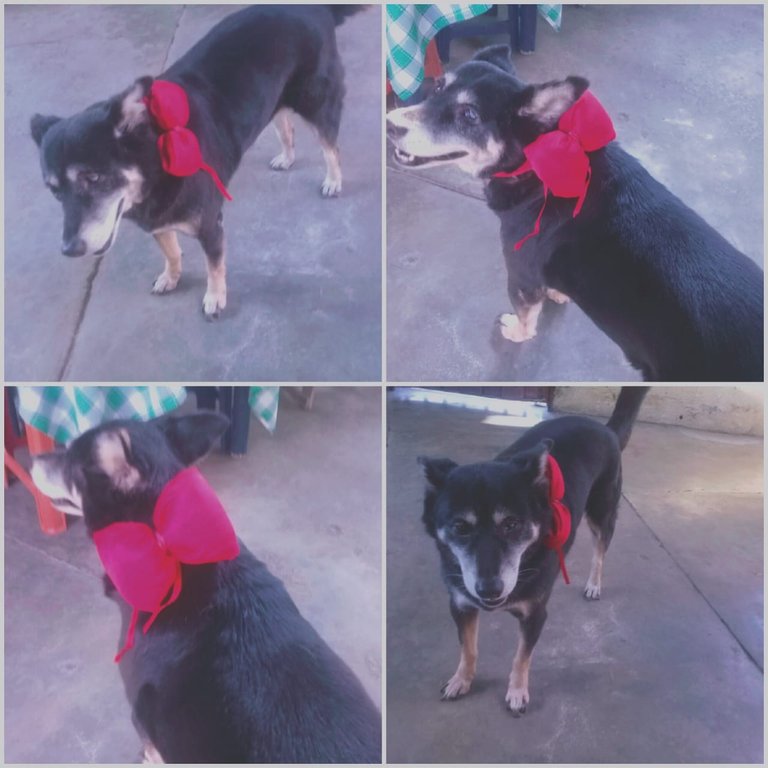
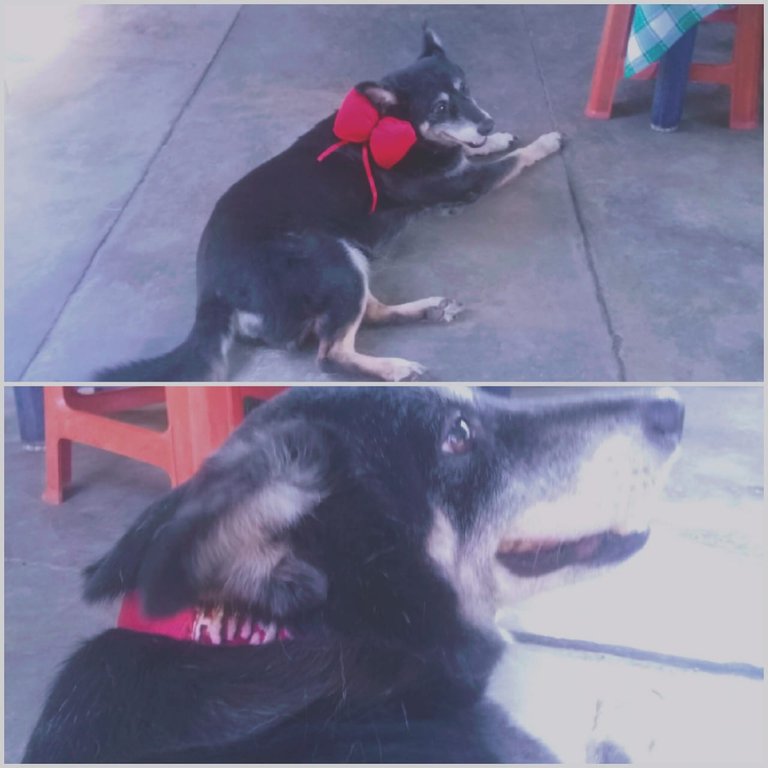
Luego, para que no se viera el hilo pabilo, le puse una cinta roja, fijándola con hilo y aguja, además de una cinta más pequeña, que es la que se amarraría a la correa. Y este fue el resultado, mi Angela estuvo modelando su correa por toda la casa, sabía que se lo había hecho especialmente para ella y eso me puso muy contenta. Espero les guste.
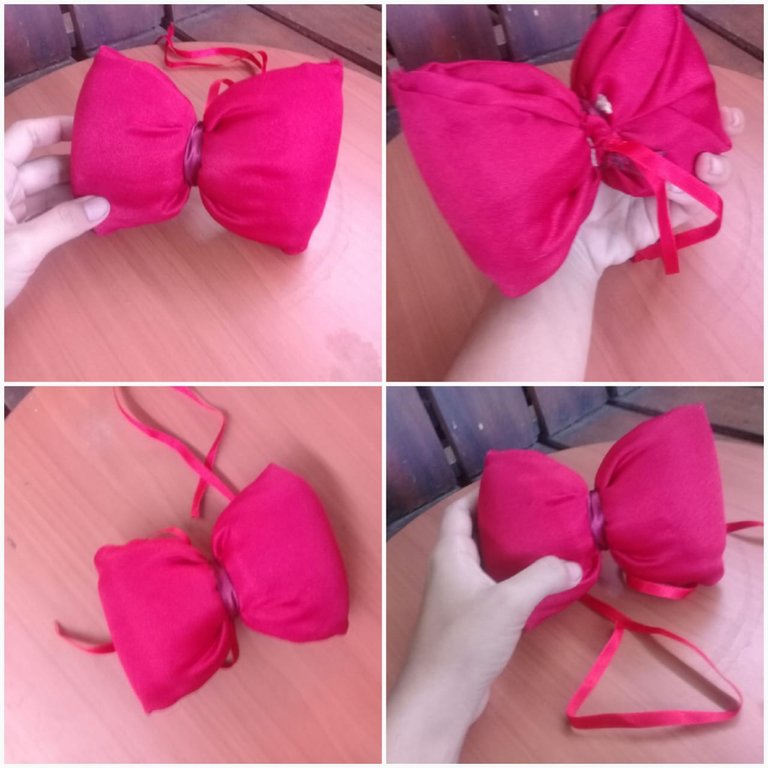
Las imágenes son de mi archivo personal tomadas con mi Samsung J2 Prime. Los collages también fueron hechos desde mi celular. La portada y los separadores fueron diseñados en CANVA.
Gracias por leer mi post. Espero que les haya gustado. Estaré atenta a responder sus comentarios. Pueden visitar mi blog, seguir mis contenidos y redes sociales
ENGLISH
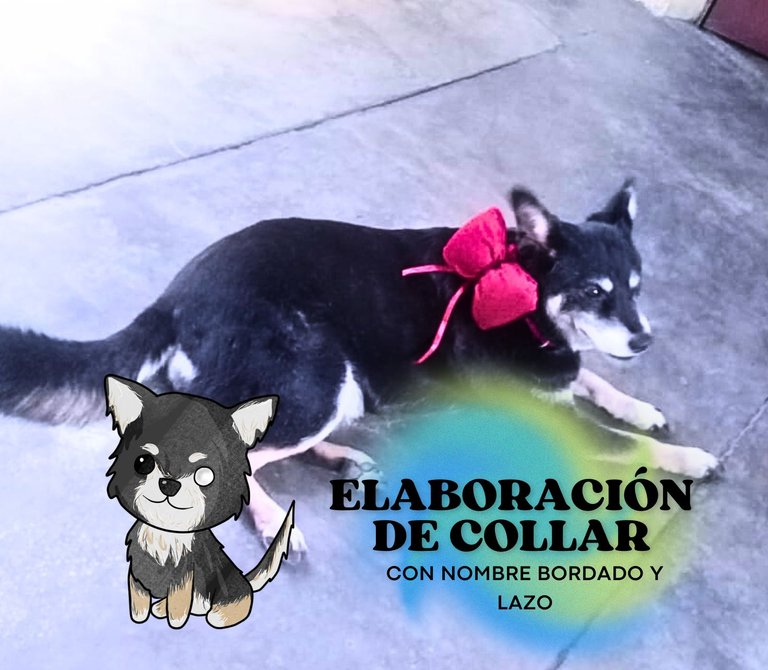
Greetings @Needleworkmonday community, I wanted to join this nice contest Needle Work Your PET dedicated to our beloved pets. In this case I want to show you a collar I made for my dog Angela, embroidered with her name and a ribbon that can be put on or removed; as I needed a collar for her, since the one she already has is too tight, what better opportunity than to make one to show it in this contest, although it is the first time I do something like this, I need to perfect it and make it more like my style, I love the result and my dog looks divine.
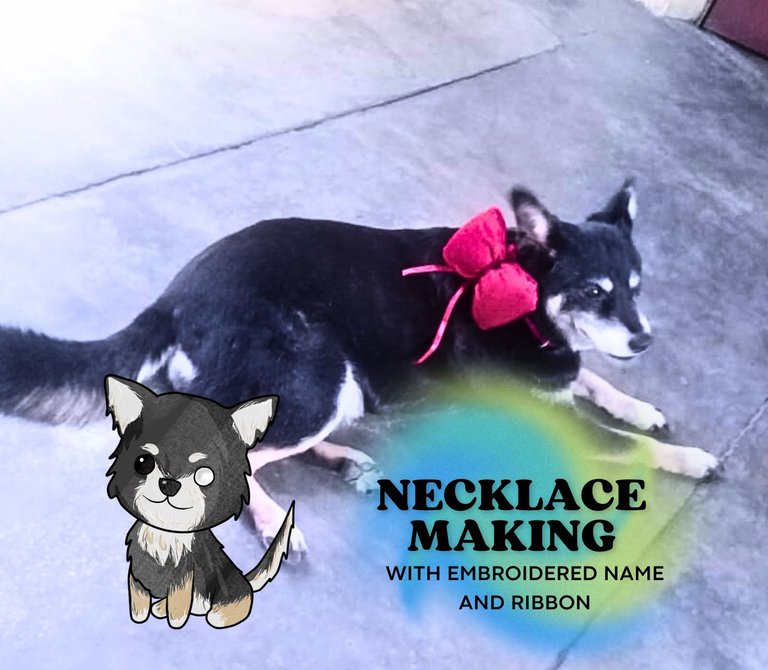
First of all, I want to tell you who Angela is, this beautiful dog came into our lives 7 years ago, shortly after our first dog died, she arrived like her name, like an angel, she stayed near the house, we gave her food and we loved her, my mom didn't want another dog, because one had died and we had the Golden for that moment. As fate would have it, a neighbor who wanted to sterilize her asked us to be a temporary home for her, while she was undergoing her post-surgery. My mom ended up agreeing and so it happened, we did her post-surgery and well, a few days later my mom wanted to let her go, because if she didn't get attached to her.
And yes, she got loose, however, she followed us everywhere, and from one moment to the next she would come into the house by herself, even at night to sleep. We ended up getting so used to her, that she was adopted and she was the beginning of several adopted pets, regardless of age. My mom fell in love with her, even though she didn't want her in the house and now with the passing of 2 of my dogs this year, she has become our light being together with our other rescued and adopted dog, super toñecos. Anyway, here I leave you the process of elaboration for this necklace with the embroidered name.
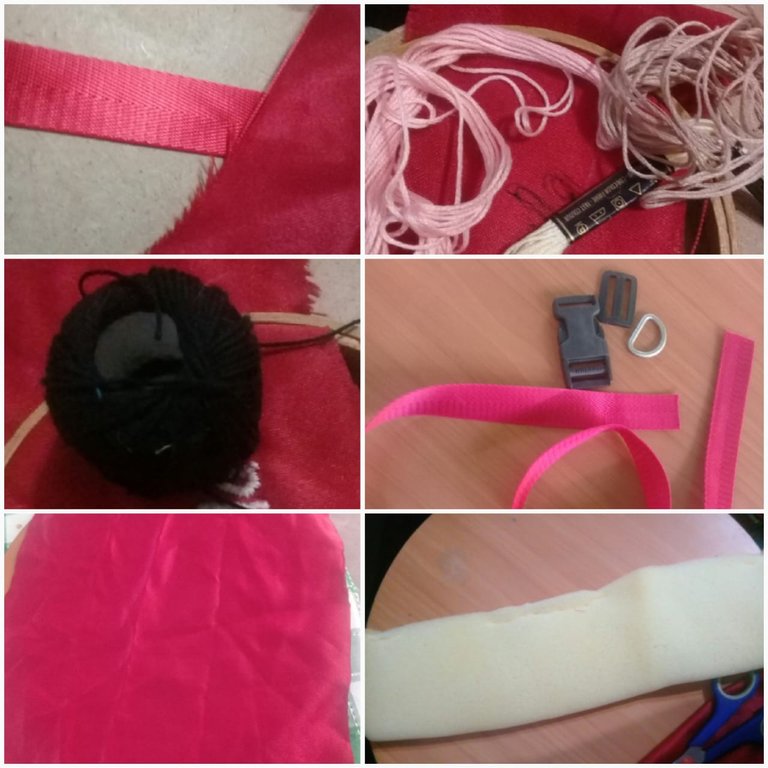
- Nylon ribbon, color of choice
- Sewing thread
- Embroidery thread
- Black yarn ball
- Gold thread
- Needle
- Scissors
- Half-moon or D-loop
- Snap or brooch
- Tensioner or slider or fixed center buckle
- Fabric preferably cotton or fabric suitable for embroidery. Preferred color
- Ribbon
- Sponge
The first thing I did was to buy a nylon ribbon, the clasp and the tensioner to make the collar, I took a red color to make it stand out in her coat. The ring where the hook of the leash will be attached I already had at home, so it was not necessary to buy it. After that and seeing that I could not embroider the name well on the nylon material, I proceeded to take a fabric with a color that was close to it; this selected fabric was not cotton, but it was the one I had at hand and the one that most resembled it in tone.
After this and taking the measure of the embroidery box with the size of the thickness of the necklace, I looked for a font on the internet, ending up choosing the Cabron Font, letter that I drew first on a sheet and then transferred it to the fabric. With this I proceeded to embroider it, with the step back technique I embroidered the edges of the top of each letter with a cream color and with the filling technique I finished covering the entire thickness of the letters, I wanted to make a gradient, but I did not have all the colors of thread, so the bottom area of the letters I did the same, but with a light pink.

Source


Seeing that the name did not stand out so much, I embroidered it as a shadow with the step back technique and with the black yarn on the sides, since it is thicker. I also embroidered with gold thread, but only on the letter A, to make it a little more striking. Then I sewed the edges, I put a piece of cotton fabric on the back, to make it firmer and better visualized.


With this, then I made the collar and for that I took the measurement of the neck of my dog, the standard measures for each size can be found on the internet, but I wanted to do it according to Angela's neck, which was 44; I note that the measure can not be too loose or too tight, there must be a finger of separation between the neck and the tape measure. To make the collar I looked for YouTube tutorials, in one of them it told me that the size of the nylon should be the animal's neck plus 1.5 of length, I don't know what that means, but I doubled the measurement from 44 cm to 88 cm and with this was the size of the nylon I used.

The process of the necklace consists of taking the brooch and not separating the parts that conforms it, the nylon is introduced where it does not have the teeth and the ends of the nylon are joined. Take the tensioner and pass both ends of the nylon through both holes, leaving one half of the nylon from the clasp to the tensioner and the other half of the tensioner towards the ends of the nylon. It is turned over, leaving the tensioner face down and take one of the ends of the nylon, preferably the one that is also face down, and shorten its size, leaving only a piece of this nylon, it is folded a centimeter or a little more and sew those doubles to the nylon that is left on the other side of the tensioner. Once sewn, the half moon is introduced through the longer end, and that same end of the nylon is introduced through the other side of the clasp, the one with the teeth.


The half moon is brought a little bit closer to the clasp and the nylon is sewn underneath and sewed in such a way that the half moon is fixed and no accidents happen with the collar after walking the canine or other pet. Well, the collar was too big, the measures were not what I supposed, so I disassembled it carefully, so as not to lose nylon and instead of 88 cm, would be about 15 to 20 cm more than the size of the animal's neck, so I ended up removing about 30 cm from those 88 cm, so the size of nylon that I finally used was between 58 to 60 cm. Anyway, if you know what the 1.5 cm of length means, you can do the math there.


Once the collar was well assembled and adjusted to the size of my dog's neck, I proceeded to sew the embroidered name near where the half moon is; I do not deny that the name was a little bigger than the thickness of the nylon, but I was able to adjust it and attach it to the collar. Since I can't put bows on my little black girl because it's complicated with her hair, adding that she doesn't like it, I decided to make her one to put on the necklace.


I made this bow as follows: take the same fabric where the name border and cut it into a rectangle of 70 cm long and 20 cm wide, then this is folded in half and sew inside what would be the long opening of the same. This leaves a rectangular fabric, but with an opening at its ends and there you would introduce a sponge 33 cm long and 10 cm wide, I note that the sponge can be 1 cm wide, I made it double so that it would be more bulky, and also the size of the loop can be of preference, because it depends on the desired size. With the sponge inserted in the fabric, fold both ends until you reach more than half of it, and that the ends of this loop formed are more rounded. To fix it, use a wick thread, because of its thickness, but it is advisable to use a thread with the same color and of a thickness that allows you to adjust it well.


Then, so that the wick thread would not show, I put a red ribbon, fixing it with thread and needle, plus a smaller ribbon, which is the one that would be tied to the strap. And this was the result, my Angela was modeling her leash all over the house, she knew that I had made it especially for her and that made me very happy. I hope you like it.


The images are from my personal archive taken with my Samsung J2 Prime. The collages were also made from my cell phone. The cover and dividers were designed in CANVA.
Translated using DeepL
Thank you for reading my post. I hope you liked it. I will be attentive to answer your comments. You can visit my blog, follow my content and social networks.

