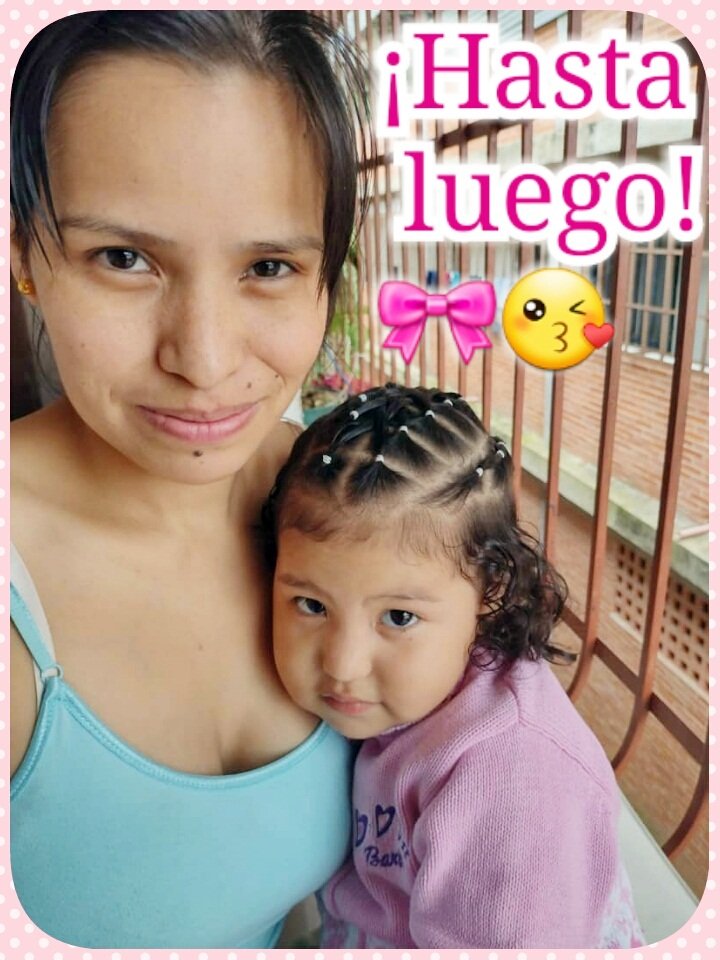

¡Hola! ¡Hola ! Buenas y bendecida tarde mis estimados lectores, por acá nuevamente compartiendo contenido hecho en casa, como siempre es un placer poder publicar por esta maravillosa plataforma.
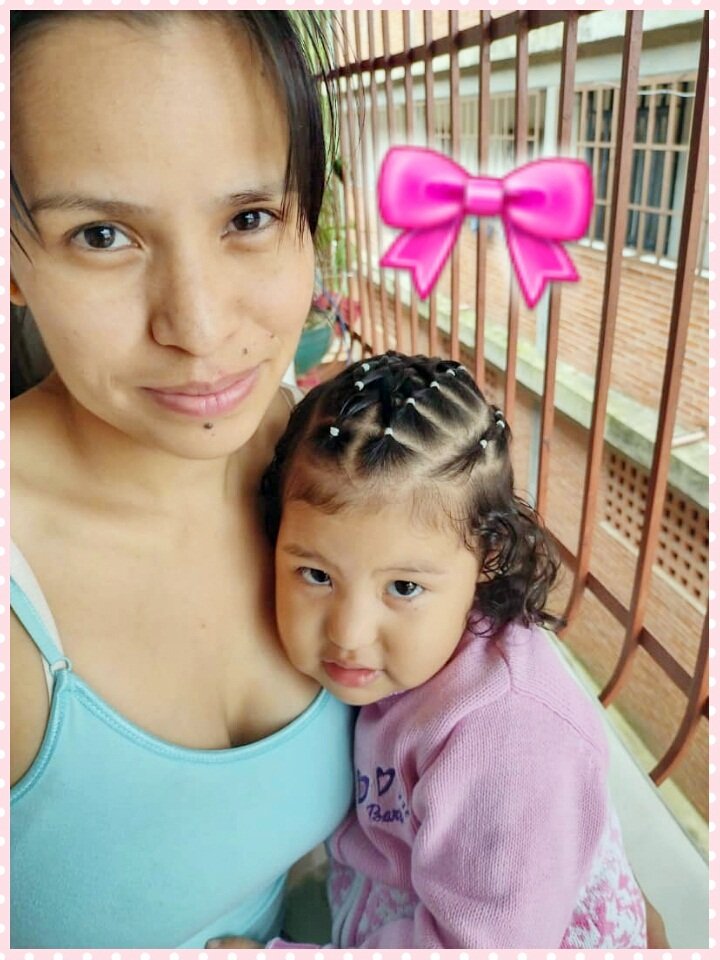
Como madre me gusta variar los peinados que les realizo a mis niñas. En esta ocasión les mostraré como le hice a mi hija Arianna un peinado, dando forma de malla, se ve muy bien.
No esperemos más y vayamos al paso a paso.
Hello! Hello! Hello! Good and blessed afternoon my dear readers, here again sharing homemade content, as always it is a pleasure to publish on this wonderful platform.
As a mother I like to vary the hairstyles I make for my girls. This time I will show you how I did my daughter Arianna's hairstyle, giving her a mesh shape, it looks great.
Let's not wait any longer and let's go to the step by step.
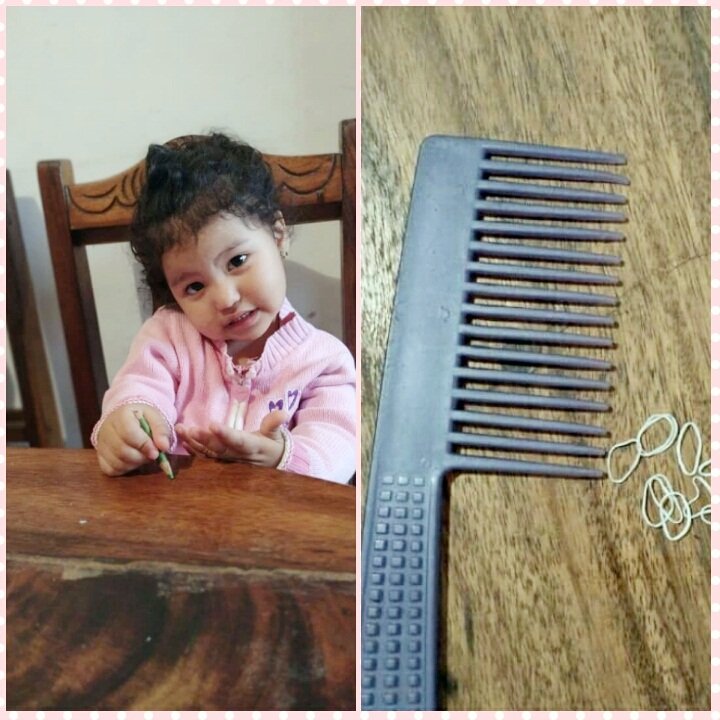
Materiales:
●Peine.
●Ligas .
●Modelo mi hija Arianna.
Materials:.
●Peine.
●Belts .
●Model my daughter Arianna.
Lo primero fué tomar una gran cantidad de cabello de la parte central de la cabeza de Arianna , con el peine hice un rectángulo en esta misma zona, até con una moñera. En el lateral derecho separé el cabello formando una franja delgada, en esta franja comencé a formar cuadros atándolos con ligas. Esto lo hice hasta donde culmina la línea.
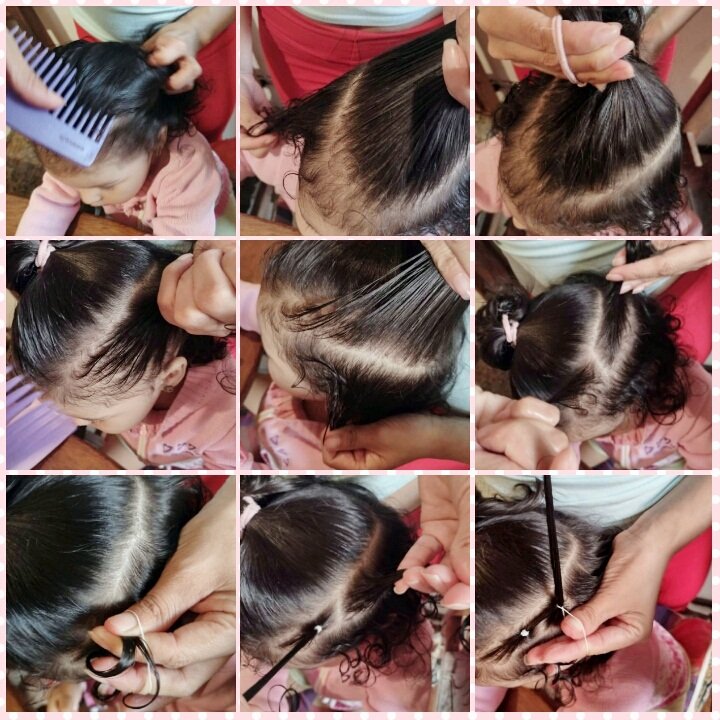
Luego del cabello atado con la moñera lo diviví de forma vertical justo a la mitad. Comencé por el lado derecho a formar cuadros sujetándolos con ligas, esto fue hasta el final de ese lado.
After the hair was tied with the bun, I divided it vertically right in the middle. I started on the right side to make a frame holding it with rubber bands, this was until the end of that side.
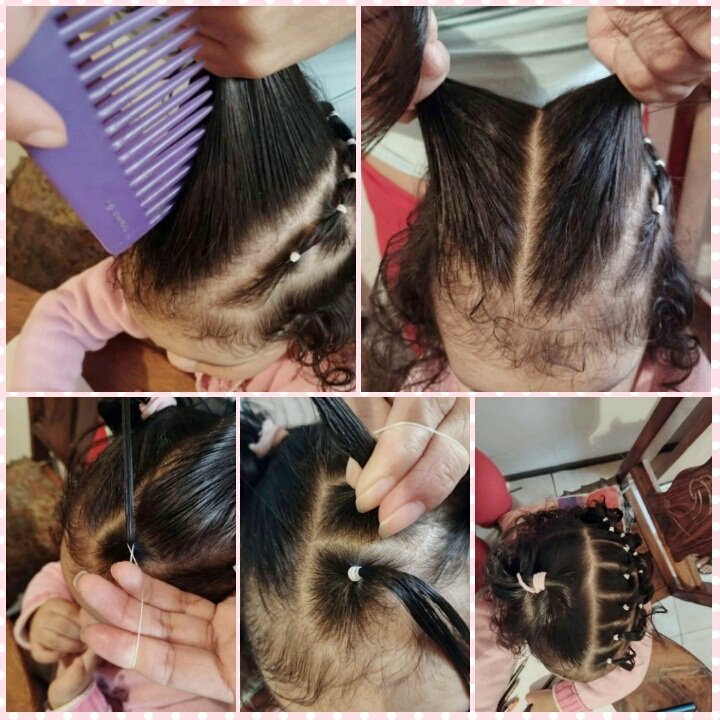
Lo mismo hice del lazo izquiero, quedando varios moños.
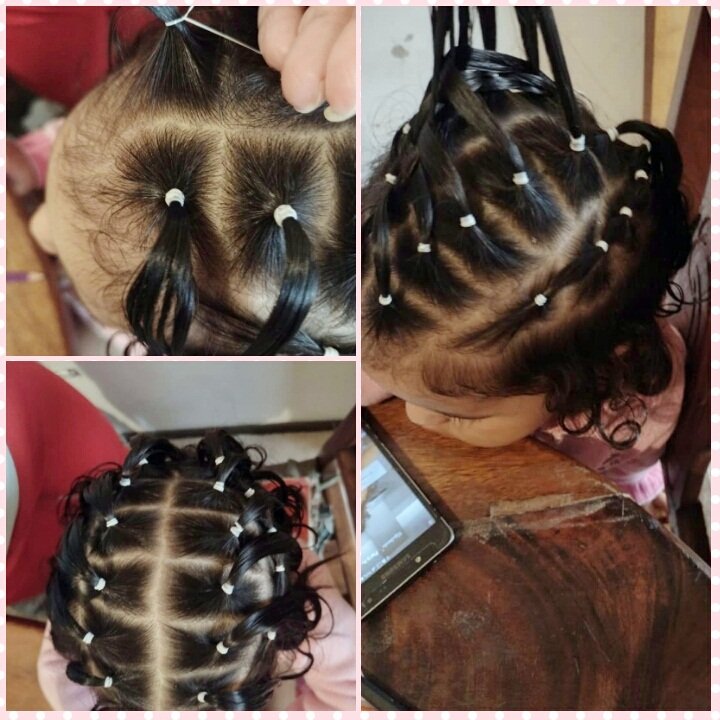
Para hacer la malla cogí los dos primeros moños y los crucé en forma de X, luego tomé el moño derecho y lo crucé por encima del segundo moño del lado izquierdo, despues lo introduje por la parte de abajo del tercer moño, así seguí hasta el ultimo moño del lado izquierdo, siendo siempre uno arriba y el otro abajo.
To make the mesh I took the first two bows and crossed them in the shape of an X, then I took the right bow and crossed it over the second bow on the left side, then I inserted it at the bottom of the third bow, so I continued until the last bow on the left side, always one on top and the other on the bottom.
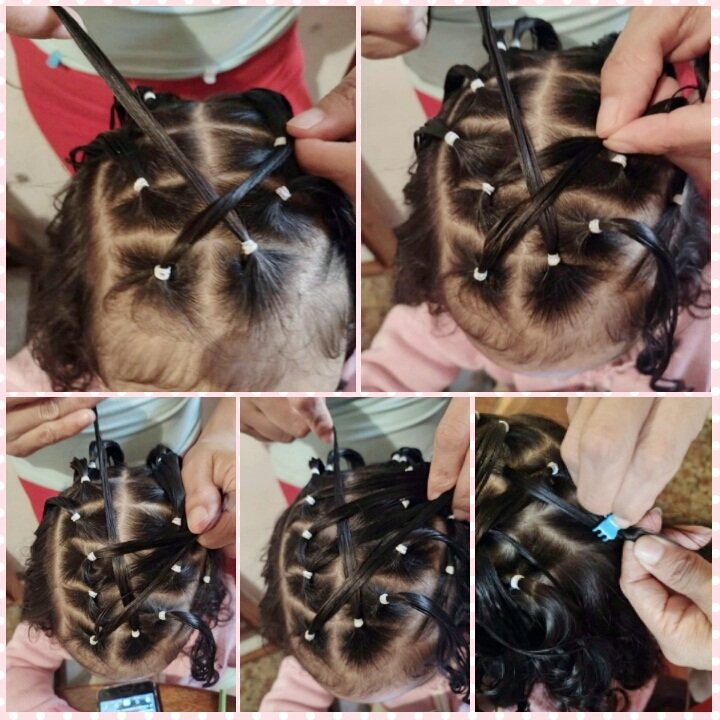
Este cruce lo hice con todos los moñitos del lado derecho al izquierdo, para poder formar la malla.
I made this crossing with all the little bows from the right side to the left, to be able to form the mesh.
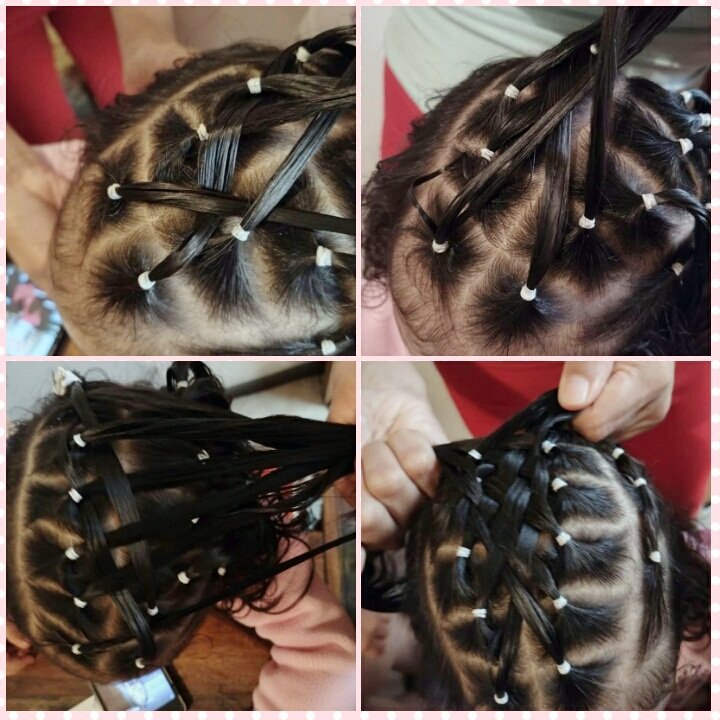
Los separé al final por cada lado correspondiente, y los amarré con ligas.
I separated them at the end for each corresponding side, and tied them with garters.
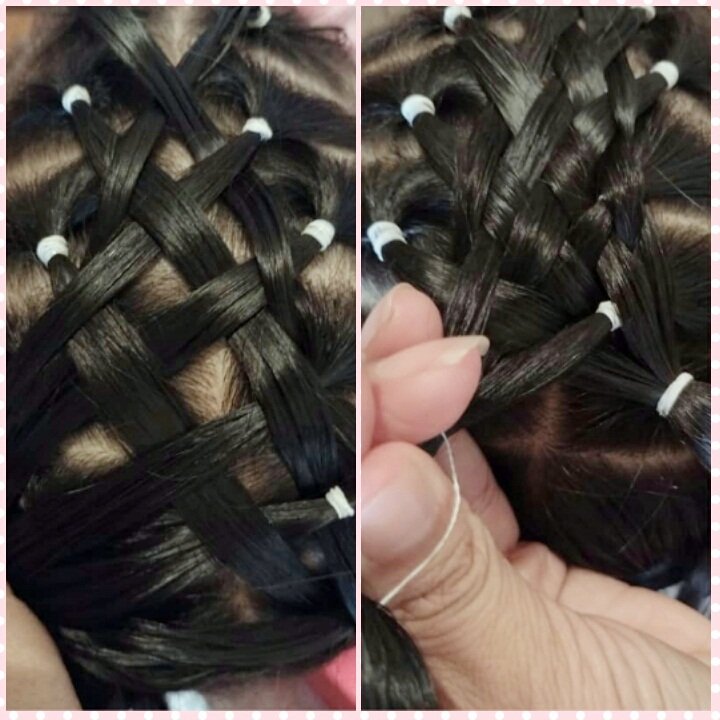
Y listo, un tejido muy lindo y facil de hacer.
And voila, a very nice and easy fabric to make.
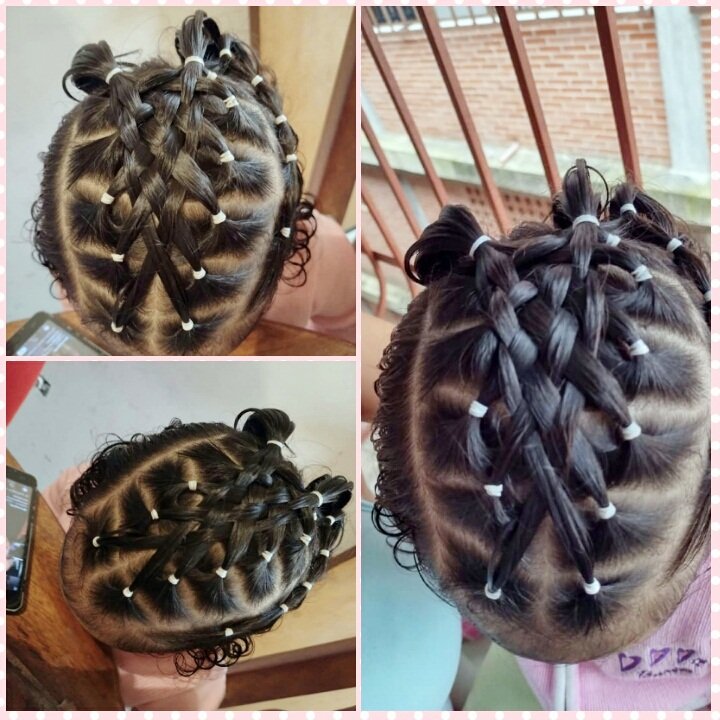

Todas las fotos son personales.
Disculpen si poseo errores de traducción, mi unico lenguaje es el castellano.
Gracias por visitar mi blog, gracias por leer mi contenido, espero sea de su agrado y utilidad, 🙏 Hasta luego. 😊
All photos are personal.
Sorry if I have translation errors, my only language is Spanish.
Thank you for visiting my blog, thank you for reading my content, I hope it is to your liking and usefulness, 🙏 See you later. 😊
