Hello my dear creative family of Hive Diy! We are already in the first day of July, we start this month at the beginning of a new week with the best attitude and desire to make every day better. I wish you in this new month many blessings and good things, I hope you don't lack happiness, love, creativity and productivity in this month, my best wishes.♡
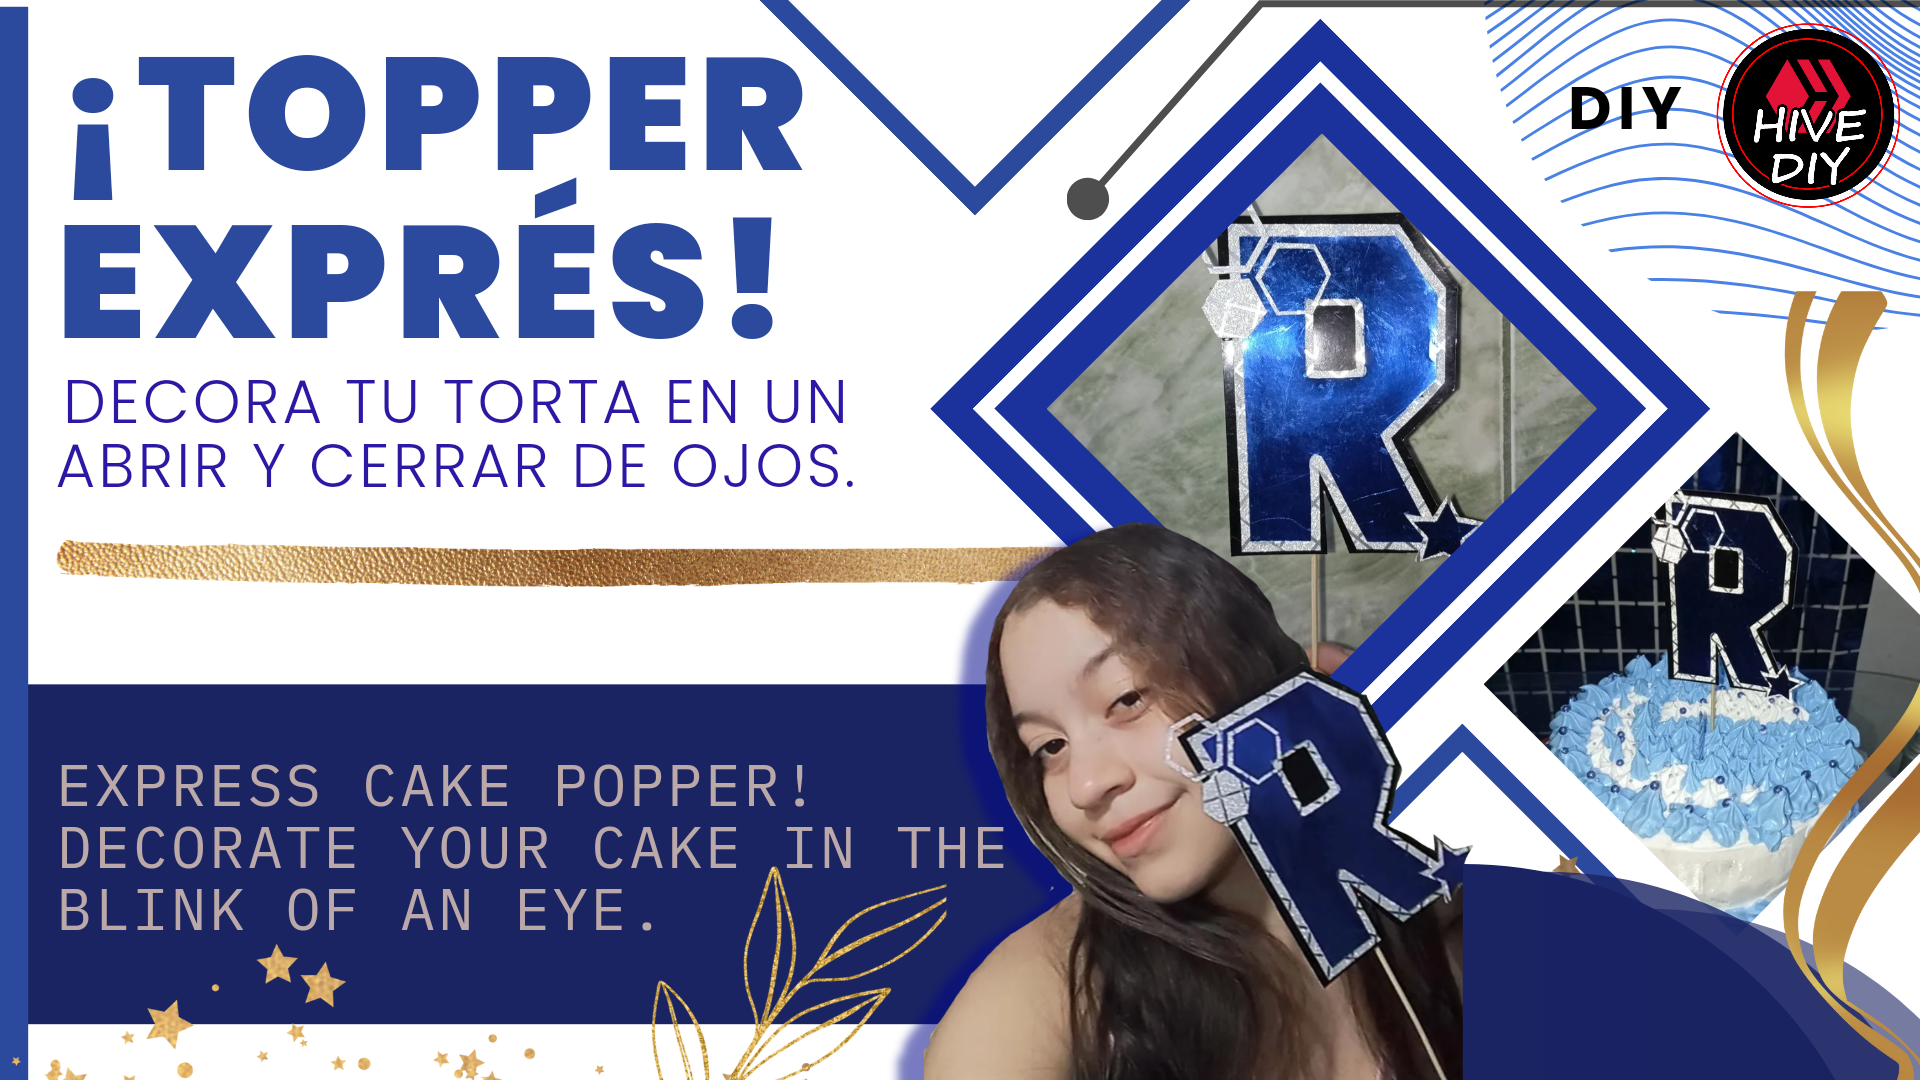
¡Felíz y bendecida primera tarde de Julio! ¿Preparados para un nuevo día en el mundo creativo? Hoy les traigo una manualidad súper fácil y encantadora que pueden hacer en casa de forma rápida. Si siempre has querido aprender a hacer tus Cake Toppers para decorar tus pasteles de cumpleaños ¡Este es el post ideal para ti! Te enseñaré paso a paso cómo crear un hermoso Cake Topper sencillo, que te sacará de apuros.
Happy and blessed first afternoon of July! Ready for a new day in the creative world? Today I bring you a super easy and lovely craft that you can make at home quickly. If you've always wanted to learn how to make your Cake Toppers to decorate your birthday cakes This is the perfect post for you! I will show you step by step how to create a beautiful simple Cake Topper that will get you out of trouble.
Expresa tu creatividad y personalízalo completamente a tu gusto, no tomará mucho tiempo realizarlo y es fácil. Este fue un *Cake topper sencillo, que realice en menos de 1 hora, el mismo día del cumpleaños de mi novio, la torta había quedado hermosa, pero sentía que le faltaba algo y que mejor que complementar la decoración con un Cake topper hecho a mano por nosotros mismos, así les traigo este hermoso resultado de un Cake topper de una inicial, lo que es mucho más rápido que hacer uno con el nombre completo, aún así ambos son muy lindos.
Express your creativity and customize it completely to your liking, it won't take long to make and it's easy. This was a simple *Cake topper, that I made in less than 1 hour, the same day of my boyfriend's birthday, the cake had been beautiful, but I felt that it was missing something and what better than to complement the decoration with a handmade Cake topper by ourselves, so I bring you this beautiful result of a Cake topper of an initial, which is much faster than making one with the full name, still both are very nice.
Ahora bien, aprende a crear a mano este hermoso Cake topper único y especial con estas instrucciones paso a paso, a continuación.
Now, learn how to create this beautiful, unique and special Cake topper by hand with these step-by-step instructions, below.
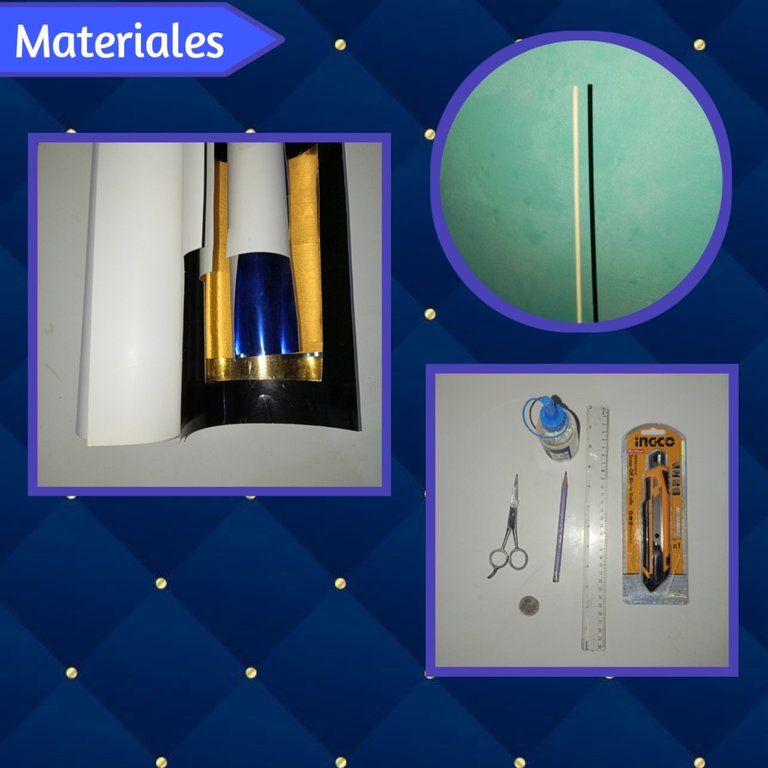
♡💙☄️Materials☄️💙♡
- Cartulinas: Metalizadas, unicolor, decoradas, etc 📎
- Silicón ✨
- Regla📏
- Lápiz ✏️
- Cutter/Exacto ✨
- Tijeras ✂️
- Palito de altura✨
- Cardboard: metallic, unicolor, decorated, etc 📎
- Silicone ✨
- Ruler📏
- Pencil ✏️
- Cutter/Exacto ✨
- Scissors ✂️
- Height stick✨
♡💙✨Step by Step✨💙♡
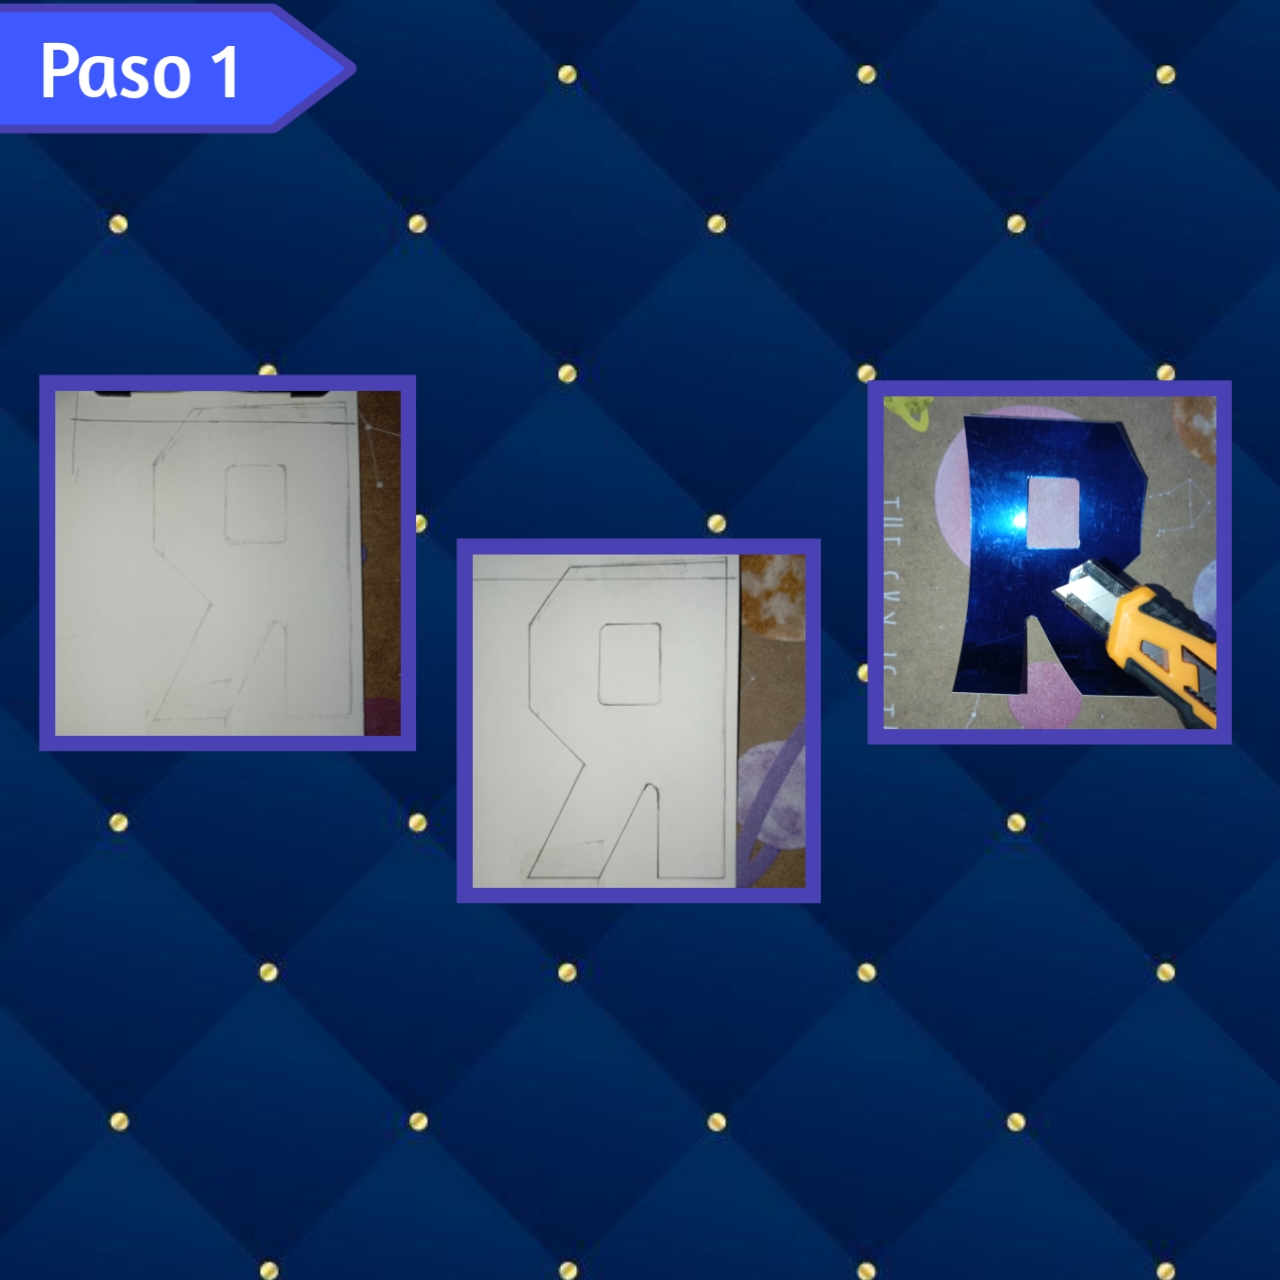
Paso 1:
Step 1:
Vamos a comenzar sacando una plantilla, ya sea impresa o incluso a mano, de nuestra inicial, en la tipografía que más nos guste, puede ser cursiva o simple, yo elegí una simple, algo más masculino y minimalista. Así, con la plantilla ya lista remarcada en nuestra hoja, le daremos la vuelta y la colocaremos también al otro lado de la cartulina e iremos pasando una moneda por el trazo hasta marcar toda la figura, luego remarcamos con el lápiz y recortamos con el cutter o tijera la figura.
Let's start by drawing a template, either printed or even by hand, of our initial, in the typography that we like the most, it can be cursive or simple, I chose a simple one, something more masculine and minimalist. So, with the template already marked on our sheet, we will turn it over and place it also on the other side of the cardboard and we will pass a coin along the line until we mark the whole figure, then we mark it with the pencil and cut the figure with the cutter or scissors.
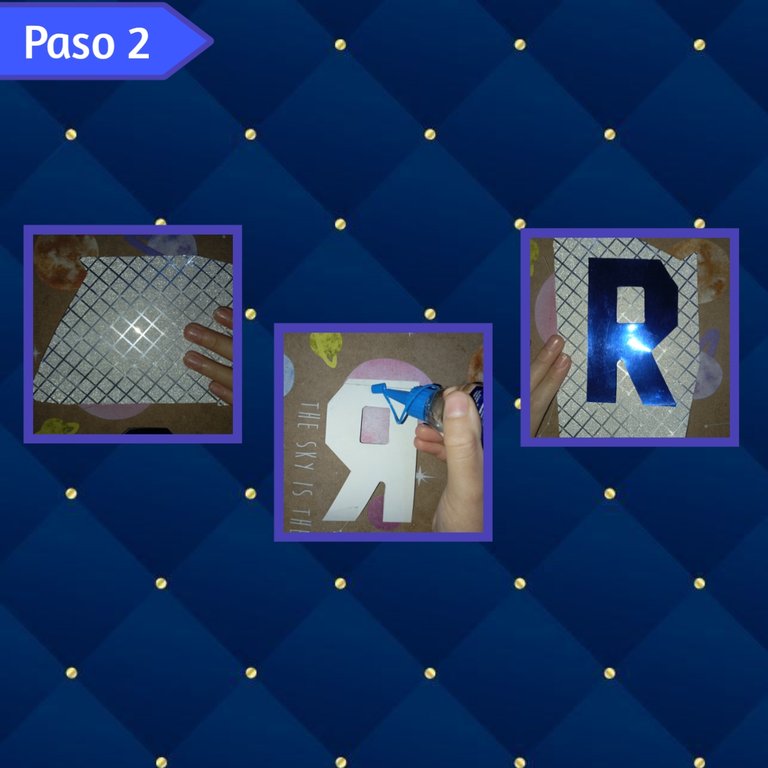
Paso 2:
Step 2:
Ahora tomaremos una cartulina decorada de nuestra preferencia, yo use una con patrones en color plateado muy hermosa. Después tomaremos la letra recortada anteriormente en la cartulina metalizada y le agregaremos silicón en la parte de atrás, puede ser caliente o al frío, el de su preferencia, bueno, continuamos pegando sobre la cartulina decorada y presionamos unos cuantos segundos hasta que pegue muy bien.
Now we will take a decorated cardboard of our preference, I used one with patterns in silver color very beautiful. Then we will take the letter previously cut out in the metallic cardboard and we will add silicone on the back, it can be hot or cold, the one of your preference, well, we continue gluing on the decorated cardboard and press a few seconds until it sticks very well.
Paso 3:
Step 3:
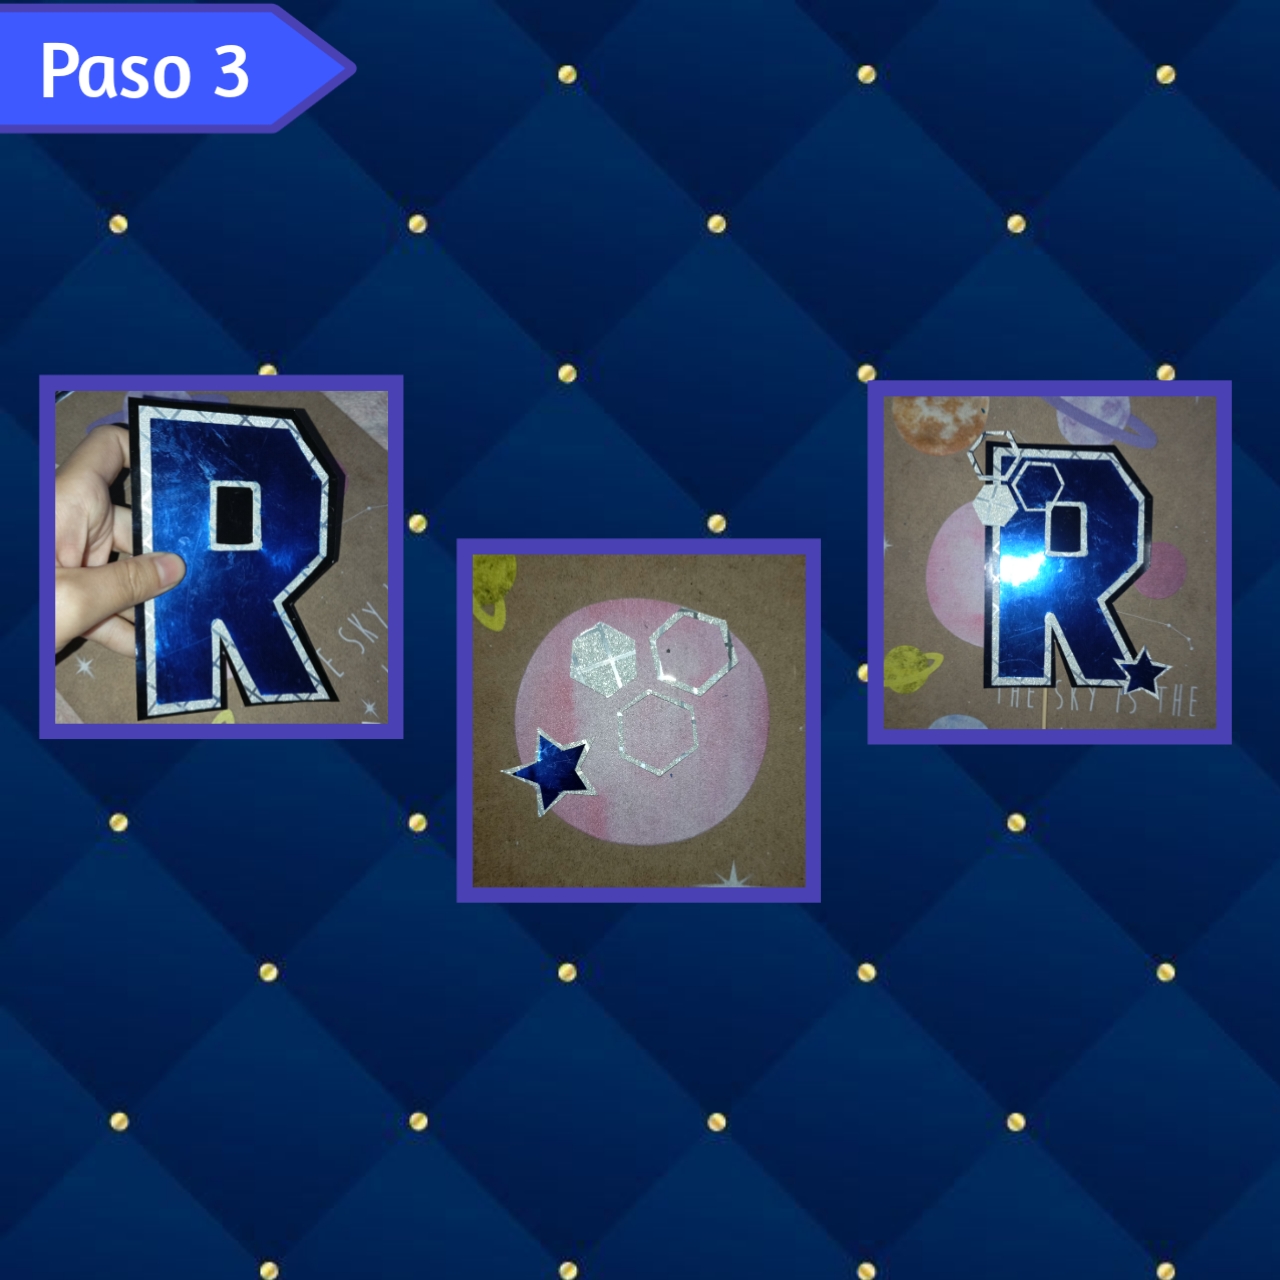
Continuando con el paso anterior, vamos a recortar por todo el contorno con ayuda del exacto y una regla, dejando a cada uno de los lados aproximadamente 1cm de distancia, para que se observe el borde, igualmente haremos en la parte interna (en el hoyo de la letra). Seguidamente repetimos exactamente el mismo proceso, pero con otro color de cartulina, yo use unicolor negra y por cierto en está no se recorta el centro de la letra, además agregamos una línea de silicón en la parte de atrás y pegamos un palito de altura, por último recorté unos detalles (Hexágonos y una estrella) y se los pegue en las esquinas y ya está listo.
Continuing with the previous step, we are going to cut all around the contour with the help of the exacto and a ruler, leaving approximately 1cm of distance on each side, so that the edge can be seen, we will do the same on the inside (in the hole of the letter). Then we repeat exactly the same process, but with another color of cardboard, I used black unicolor and by the way this is not cut the center of the letter, also add a line of silicone on the back and paste a stick of height, finally I cut some details (hexagons and a star) and stick them in the corners and it's ready.
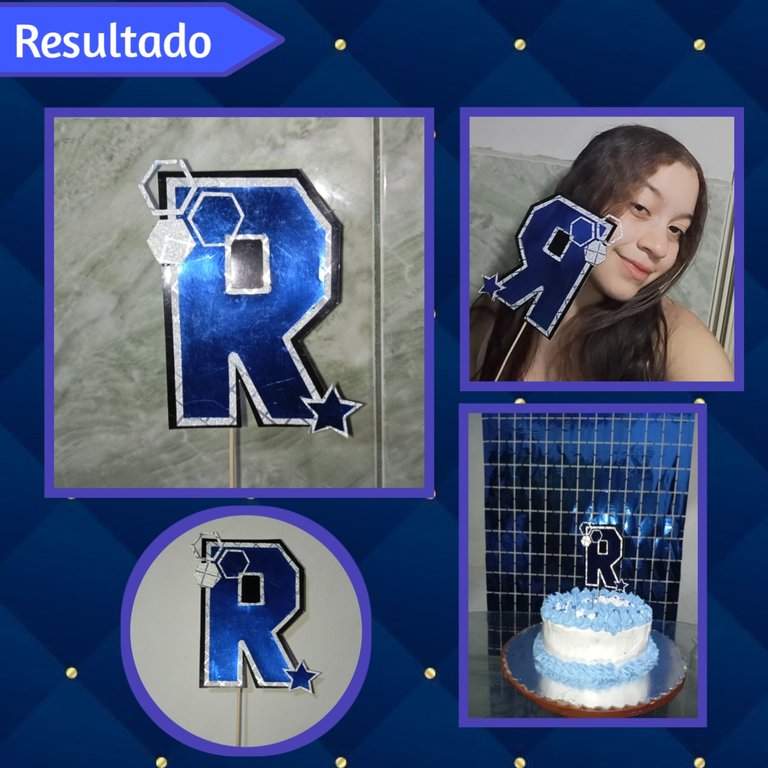
De está forma, podemos hacer en casa, de una forma rápida, que nos logrará sacar de apuros, un hermoso Cake topper, especial para decorar tortas de cumpleaños o alguna otra celebración. Este tipo de Toppers son muy versátiles a la hora de personalizar, ideas hay muchas, solo hay que tener creatividad y podremos crear estás hermosas decoraciones hechas a mano con mucho amor de una forma fácil.
This way, we can make at home, in a quick way, that will get us out of trouble, a beautiful Cake topper, especially to decorate birthday cakes or any other celebration. This type of Toppers are very versatile when it comes to customize, there are many ideas, you just have to be creative and we can create these beautiful decorations handmade with love in an easy way.
Aprovechando el momento, les dejó otra idea que he realizado anteriormente para decorar, está con decoración de chica y una letra tipo cursiva. Espero este post les guste y los inspiré a hacer creaciones muy lindas, con mucho amor les agradezco el llegar hasta el final, les pido que compartan y apoyen, un abrazo grande familia ¡Felíz mes de Julio!💙✨
Taking advantage of the moment, I leave you another idea that I have done before to decorate, it is with girl decoration and a cursive type letter. I hope you like this post and I inspired you to make very nice creations, with much love I thank you for reaching the end, I ask you to share and support, a big hug family Happy month of July!💙✨
☄️✨¡Gracias por leer! Hasta pronto queridos✨☄️
☄️✨Thanks for reading! See you soon dear ones✨☄️
Photos of my authorship taken from my Xiaomi Redmi 13C phone, edited in the free version of PixeLab


