Good afternoon dearest #HiveDiy community!!! I hope you are all very well, for my part I am a little absent since I am on my annual break and as every year I take the opportunity to do paperwork, deep cleaning in my house and everything you can imagine that I cannot do during the working year . But I don't forget this wonderful community so I took some time to make this Pokémon character called Bulbasaur.
Buenas tardes queridísima comunidad #HiveDiy!!! Espero se encuentren todos muy bien, por mi parte ando un poco desaparecida ya que estoy en mi descanso anual y como cada año aprovecho para hacer trámites, limpieza profunda en mi casa y todo lo que se puedan imaginar que no puedo hacer durante el año laboral. Pero no me olvido de esta maravillosa comunidad así que me hice un tiempito para hacer este personaje de Pokémon llamado Bulbasaur.
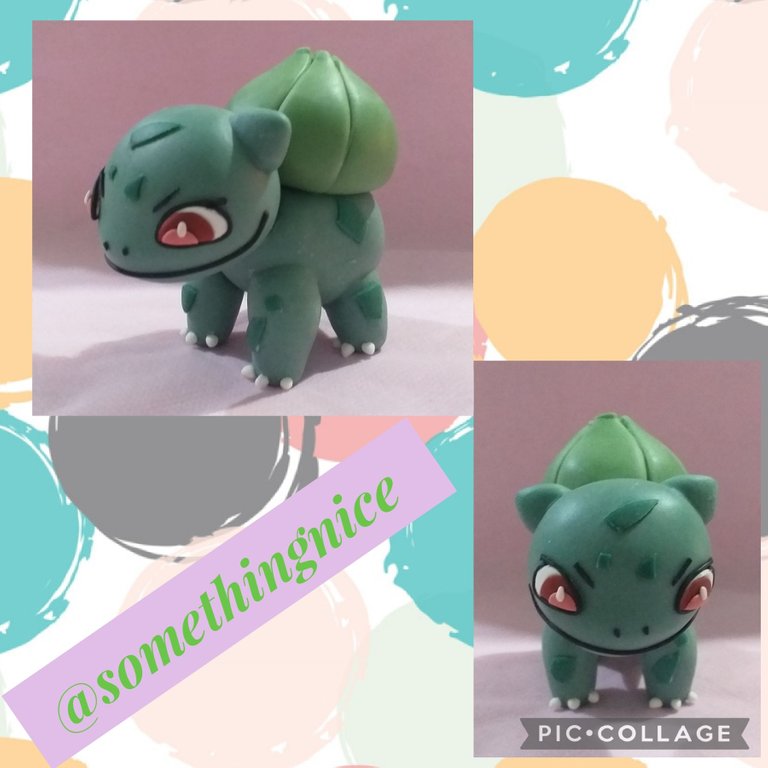
I made this character following the step by step of a Squash Clay tutorial from his YouTube channel. It's wonderful because it has a lot of Pokémon characters so it's probably not going to be the only one doing it.
It also shows which colors to mix to get the desired color.
Este personaje lo hice siguiendo el paso a paso de un tutorial de Squash Clay de su canal de YouTube. Es maravilloso porque tiene muchos personajes de Pokémon así que seguramente no va a ser el único que haga. Además muestra que colores mezclar para conseguir el color deseado.
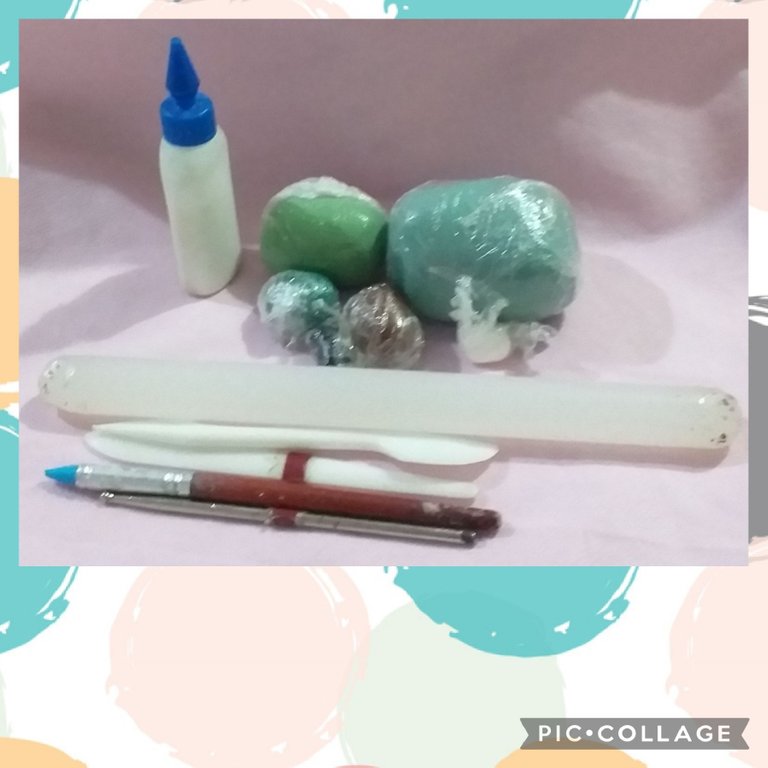
Materials
⚡ cold porcelain
⚡ vinyl glue
⚡ stakes
⚡ rolling pin
Materiales
⚡porcelana fría
⚡cola vinilica
⚡estecas
⚡palo de amasar
On this occasion the character is made only of dough but for a larger size it is advisable to carve Styrofoam because otherwise we run the risk of the work falling apart and more so if we have wet days.
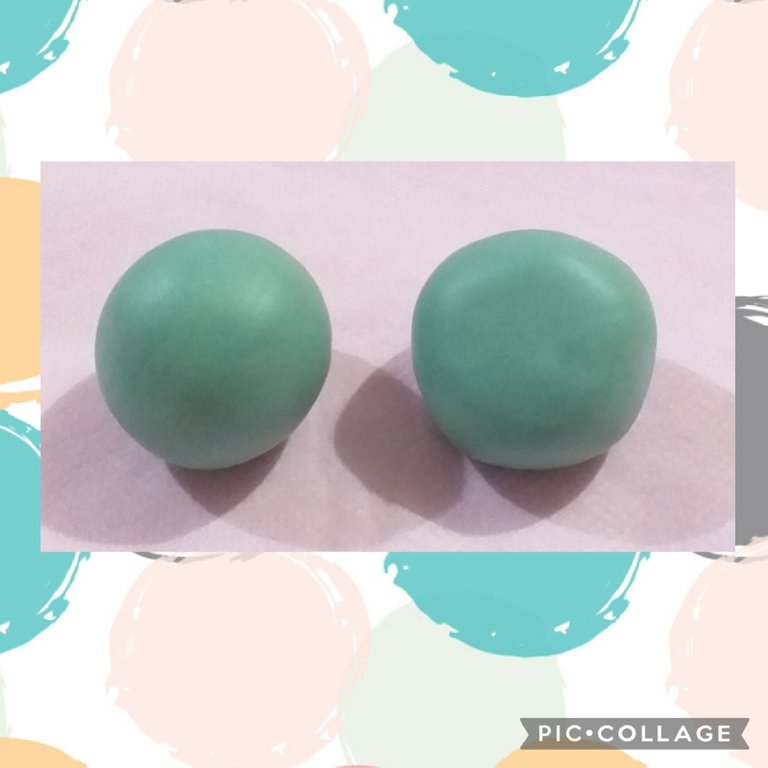
Make a ball for the head, flatten a little on the palm of your hand and give it a slightly oval shape.
En esta ocasión el personaje está hecho solo de masa pero para un tamaño más grande es recomendable tallar telgopor porque sino corremos el riesgo de que se desmorone el trabajo y más si nos toca días de humedad.
Para la cabeza hacer una bolita, sobre la palma de la mano aplanar un poco y dar forma un poco ovalada.
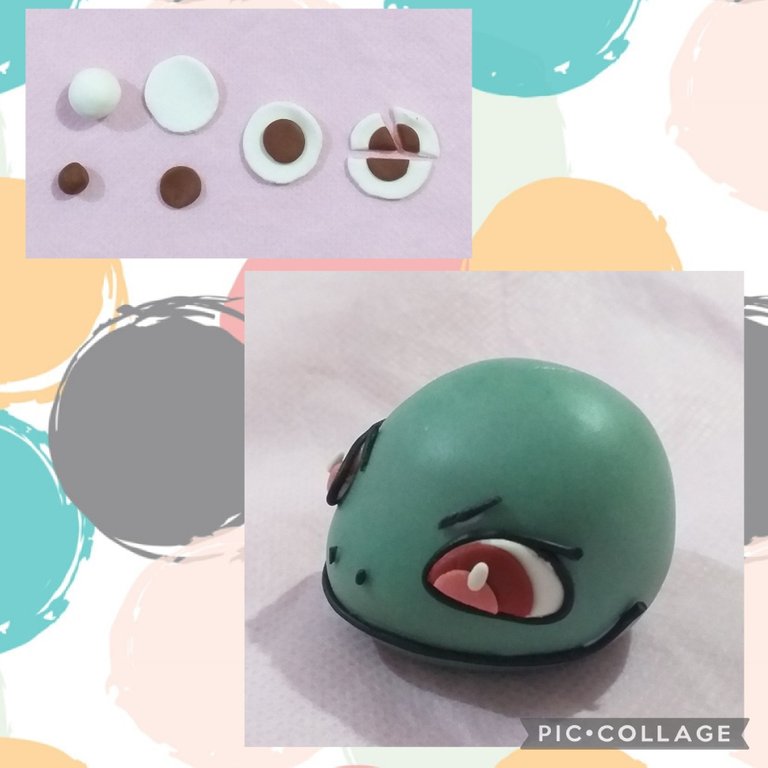
For the eyes, make two equal white balls and flatten, repeat the step with a smaller brown ball, overlap and cut more or less using a quarter for each eye.
Paste to the face, add a half circle of lighter brown (add white mass to the brown we already had) and a dot of white to light up the look.
Roll out the black dough very thin and paste it around each eye, add the eyebrows, the nostrils and the mouth all with the same strip.
Para los ojos hacer dos bolitas iguales de color blanco y aplanar, repetir el paso con una bolita más pequeña de color marrón, superponer y cortar más o menos utilizando un cuarto para cada ojo.
Pegar a la cara, agregar medio círculo de color marrón más claro (agregar masa blanca al marrón que ya teníamos) y un punto blanco para darle luz a la mirada.
Estirar masa de color negro bien fino y pegar en el contorno de cada ojo,agregar las cejas, los orificios de la nariz y la boca todo con la misma tira.
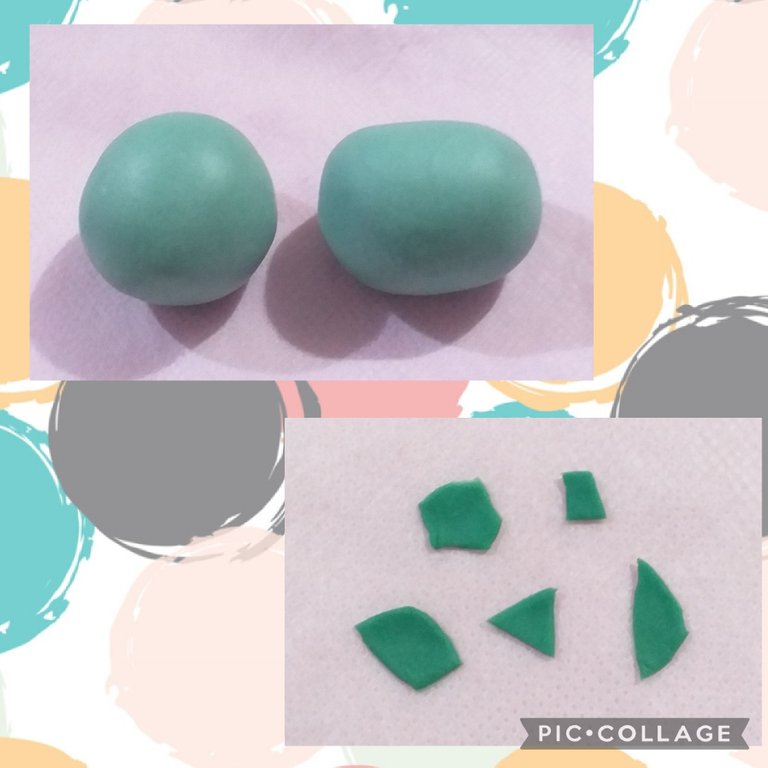
For the body, make a ball and shape it into a cylinder.
Stretch cold porcelain so that it is very fine in another shade of green and cut the different spots on the body, head and legs.
Para el cuerpo hacer una bolita y dar forma de cilindro.
Estirar porcelana fría de manera que quede bien fina en otro tono de verde y cortar las diferentes manchas que tiene en el cuerpo,cabeza y patas.
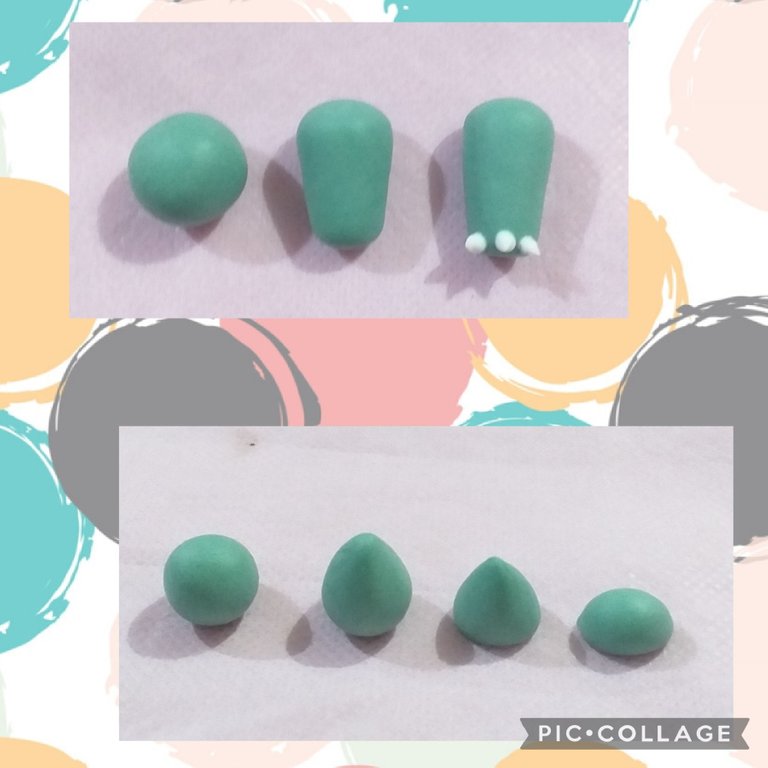
For the legs, make four equal balls, stretch leaving a thinner end and there we glue three hooves on each one, for which you only have to make very small white balls and shape them into drops.
For the ears, make two equal balls, form a drop, flatten and remove a portion at the bottom.
Para las patas hacer cuatro bolitas iguales, estirar dejando un extremo más fino y allí pegamos tres pezuñas en cada uno para lo cual solo hay que hacer bolitas muy pequeñas de color blanco y dar forma de gota.
Para las orejas hacer dos bolitas iguales, dar forma de gota, aplanar y quitar una porción en la parte inferior.
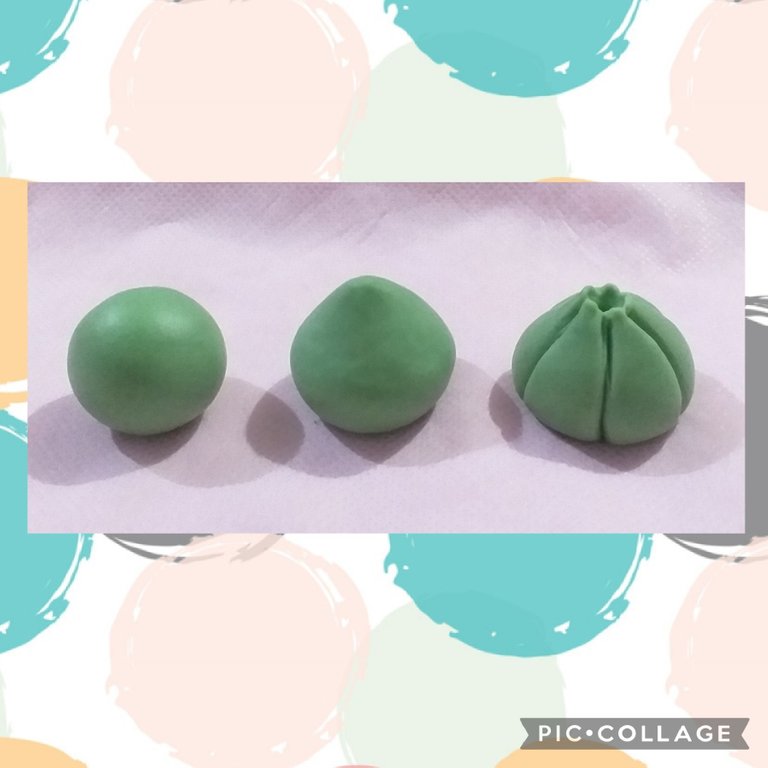
For the flower bulb, make a ball, give a little base, at the top take a small point, mark the segments and hollow out.
Para el bulbo de flor hacer una bolita, dar un poco de base, en la parte superior sacar una pequeña punta, marcar los gajos y ahuecar.
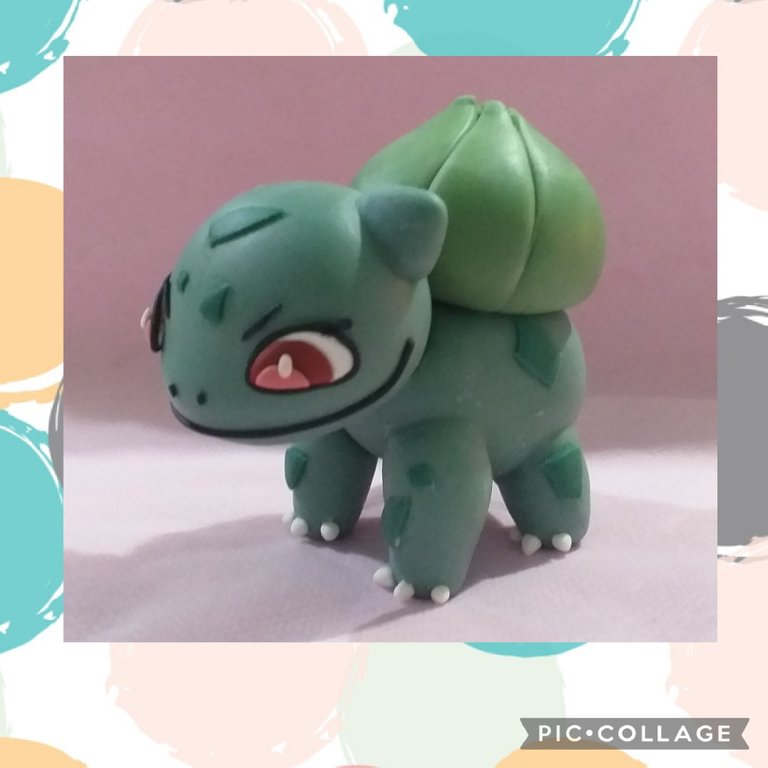
Join everything with vinyl glue. I made this character in parts, first the head, then the body, then the legs and finally the flower bulb. Each thing a different day because as it is only dough I was afraid that it would not be firm.
For this post I took photos with my Samsung Galaxy j4 cell phone and used the PicCollage app and Google Translate.
I hope you enjoyed my first foray into Pokémon characters and be encouraged to do it since it is quite easy and takes few materials and we can also do it as a gift to a fan of this animated series. Greetings. Andrea❤❤❤
Unir todo con cola vinilica. Este personaje lo hice por partes, primero la cabeza, luego el cuerpo, después las patas y por último el bulbo de flor. Cada cosa un día diferente porque como es solo masa tenía miedo que no quede firme.
Para este post tomé fotos con mi teléfono celular Samsung Galaxy j4 y utilicé la aplicación PicCollage y el traductor de Google.
Espero que hayan disfrutado mi primera incursión en personajes de Pokémon y se animen a hacerlo ya que es bastante fácil y lleva pocos materiales además que lo podemos hacer para regalar a algún fanático de esta serie animada. Saludos. Andrea❤❤❤
