It's easier said than done!

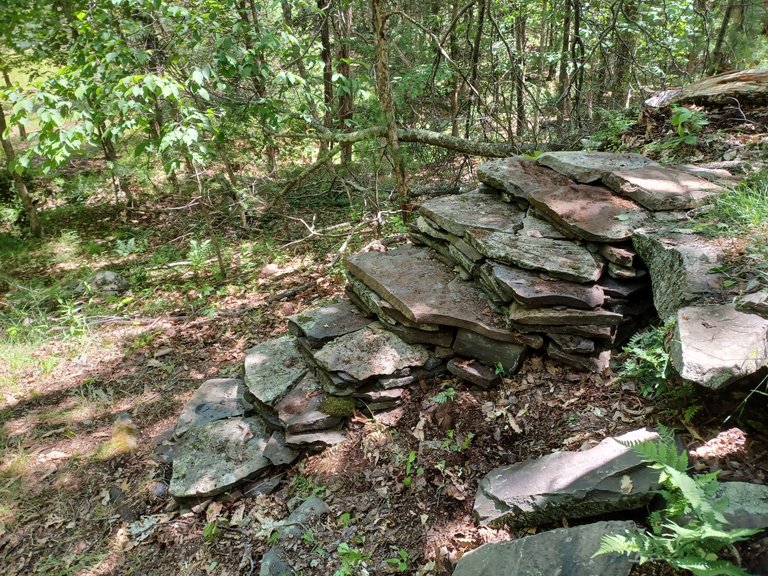
So i live in a part of the world where blue stone is pretty abundant, even after the amount of it that's been pulled to build sidewalks with all over the country!!!
Our little human goes to a private school which has a financial aid program where we can work a set amount of hours in exchange for a pretty large discount. I've always thought it was pretty exciting to trade my skills for something, and here I am doing work I enjoy doing so that my child can get a self-led education. It's the lind of school that won't break his growing imagination.
I typically work on making/upkeeping rope courses, and whatever else needs done in the mostly kid-designed playground. I like it because it's not your squeaky clean play set with all rounded edges sitting on top of soft sand, this thing is huge, biilt with upcycled construction material, in the forest with rocks and roots ready to catch any one by surprise witha quick trip to the ground!!! This place keeps you wide awake.
Anyhow this year, I was asked to build a giant net to stretch between a few trees, like a safety net to catch acrobats at a circus, for the kids to play on and chill if theu can. It had to be tough enough to withstand the abuse of a bunch of free-range kids. That's yet to come, I didn't quite figure that one out, but I stead I built stairs to make a path that leads into a new area of the forest that's being developed to play on.
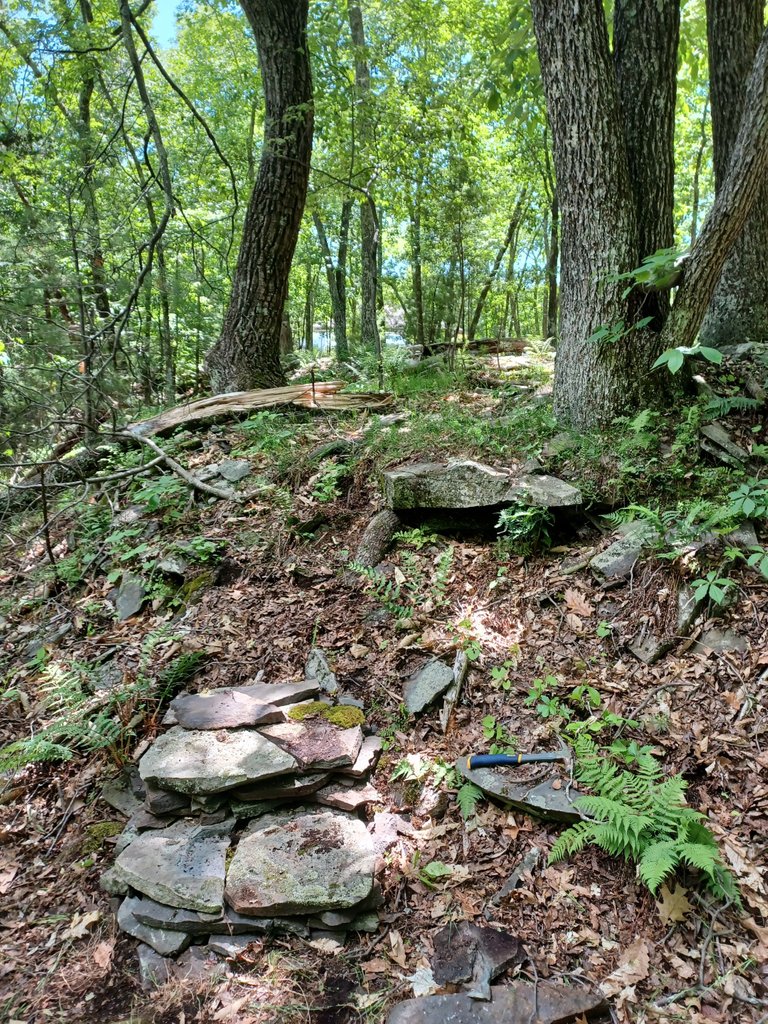
The place is so full of blue stone everywhere it was a fun project to take on! I had only dry-stacked stones once before before, to make an herb spiral for my wife, which I'm very proud of. Once I had the mechanics of stairs figured out, I got to work. The key is to start from the bottom so that the weight of each steps supports the step beneath it.

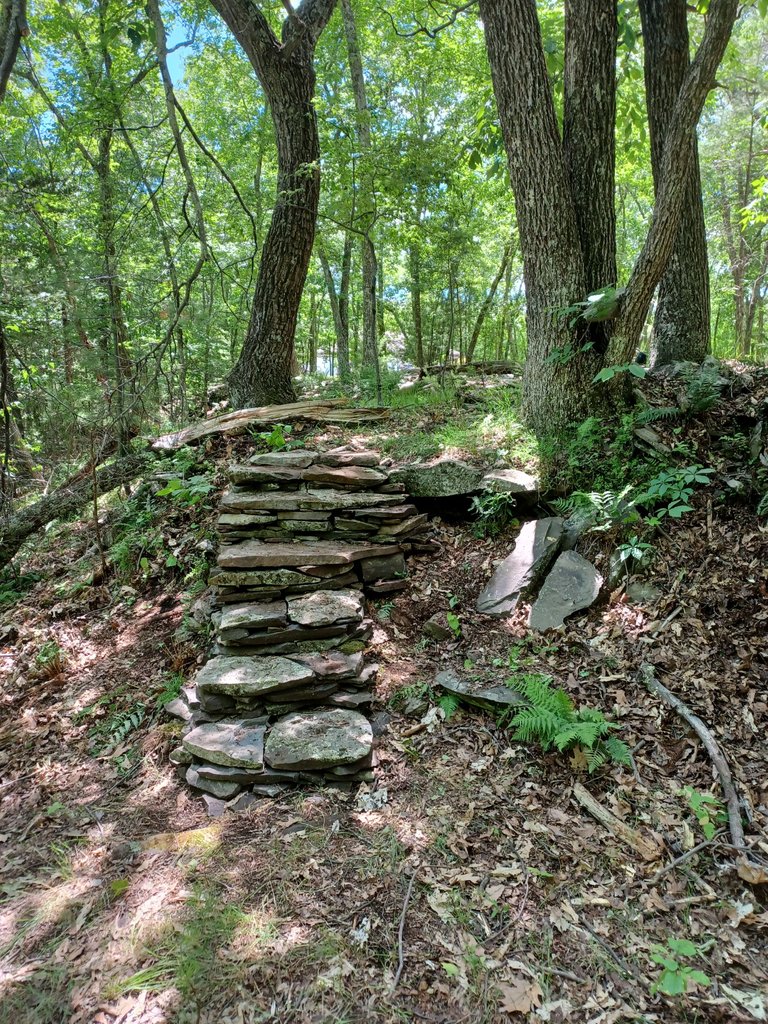
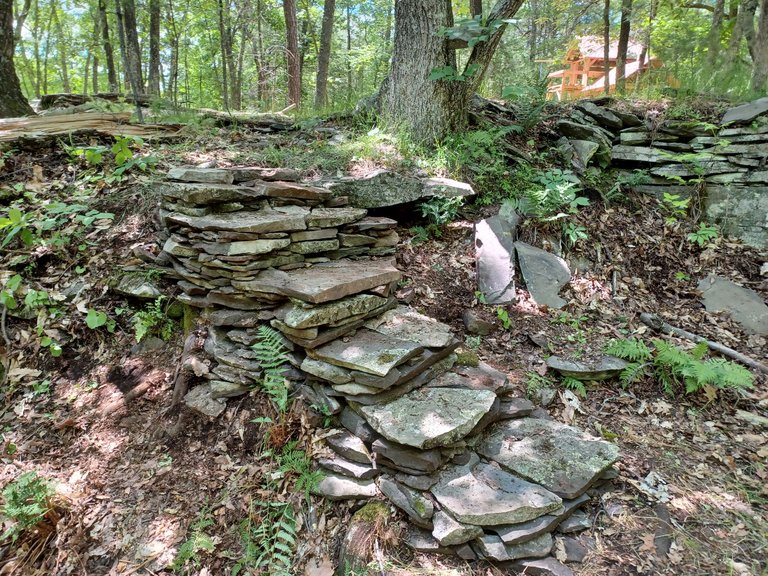
Each step is sort of made in the same fashion. I built them one layer at a time, as flat as I could, and each layer supports the previous one. In this picture I finished the second step. Every once in a while, to change work a bit, I concentrate on wedging smaller stones wherever there's some space, and I test each step by jumping on it, and kicking it a little. Once the first step is completely without movement, I start working on the third, to weigh down the second step, and repeat the process.
Keep in mind, dry-stacking means there is no mortar used in the build. This is a technique used throughout the world. When it's done right, it'll withstand the test of time.

I was in the zone, so I didn't really take many photos, what you see here is what I've got! It took me about six hours to build in two days. Once I was done, I noticed a massive widow maker hanging there right above the stairs I had just built... All I could think about were the kids really, walking back and forth under this tree whith its top half threatening to fall after the next wind storm, No Good!!!
Luckily another parent was there trimming trees, and he fell that tree without touching the stairs. Apparently he's a bit of a legend I the "tree service" world around here. He is crazy precise! It was impressive.
The last thing I want to do is to mortar the top steps, as it doesn't have any support weighing it down in place like the rest of the stairs.
I am very proud of this newly acquired skill-set. I enjoyed building it very much, and it's definitely something I would do again. Perhaps I could eventually get paid to do this, I hear it's quite costly to have someone build with stones!
I will give you an update after a couple months of school being back in full swing, I'm curious to see how durable these stairs are... they better last a long time!!!

| Hive | Presearch | Odysee | Minds | Hipcamp |
Find me on Social Media:
LBRY: https://lbry.tv/$/invite/@MugwortExpress:5
Odysee: https://odysee.com/$/invite/@MugwortExpress:5
Minds: https://www.minds.com/register?referrer=NoMansLand


