Esp
Buenos días comunidad Hive DIY, espero estén muy bien hoy mi querida familia! hoy quiero mostrarles como podemos reciclar esas viejas cajas de teléfonos y recortes de cartón que nos estén sobrando de otra manualidad, como muchos saben en pleno siglo XXI (21) los venezolanos hemos aprendido a darle uso a las cosas que por lo general desechábamos, encontrándole de esta manera un nuevo objetivo o utilidad en nuestras casas o vida cotidiana, es por ello que con todos estos recortes realice este hermoso organizador de prendas con recortes que me sobraron de otras manualidades. Aquí en donde el refrán de ¨para lo que uno es basura , para otro es oro¨ después de 19 años pude entenderlo, bueno sin mas que agregar acá les muestro como lo realice.
Eng
Good morning Hive DIY community, I hope you are very well today my dear family! today I want to show you how we can recycle those old telephone boxes and cardboard cutouts that are left over from another craft, as many know in the 21st century, we Venezuelans have learned to put to use things that we usually discarded, finding in this way a new objective or utility in our homes or daily life, that is why with all these cutouts I made this beautiful garment organizer with cutouts that I had left over from other crafts. Here where the saying "for what one is trash, for another is gold" after 19 years I could understand it, well without further ado here I show you how I did it.!

Esp
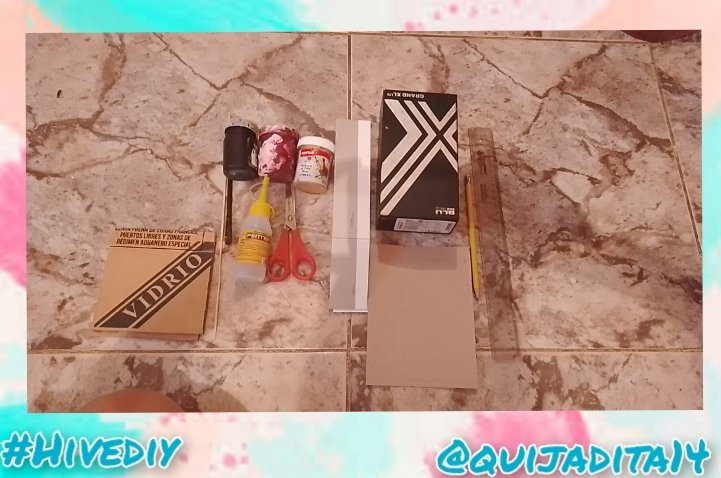
Los materiales que utilice los encontré en casa, son fáciles y practico, aunque a lo mejor se tengan que dirigir a la tienda por temperas o pega. Los que utilice fueron:
💁♀️Aguja, tijera, lápiz y regla
💁♀️ 2 Cuadros de cartón de 12 centímetros X 12 centímetros.
💁♀️Temperas dorada, Vinotinto y negra
💁♀️Pincel.
💁♀️Tira de cartón de 44 centímetros de largo X 2 centímetros de ancho.
💁♀️cartón piedra fino de 17 centímetros de largo X 10 centímetros de ancho.
💁♀️Una caja de teléfono
💁♀️Pega o silicona fría
💁♀️Un palillo de altura
Eng
I found the materials I used at home, they are easy and practical, although you may have to go to the store for temperas or glue. The ones I used were:
💁♀️Needle, scissors, pencil and ruler
💁♀️ 2 cardboard squares of 12 centimeters X 12 centimeters.
💁♀️Golden, red wine and black tempera
💁♀️Brush.
💁 ♀️ Cardboard strip 44 centimeters long X 2 centimeters wide.
💁♀️ fine stone cardboard 17 centimeters long X 10 centimeters wide.
💁♀️A phone case
💁♀️Glue or cold silicone
💁♀️A tall toothpick

Esp
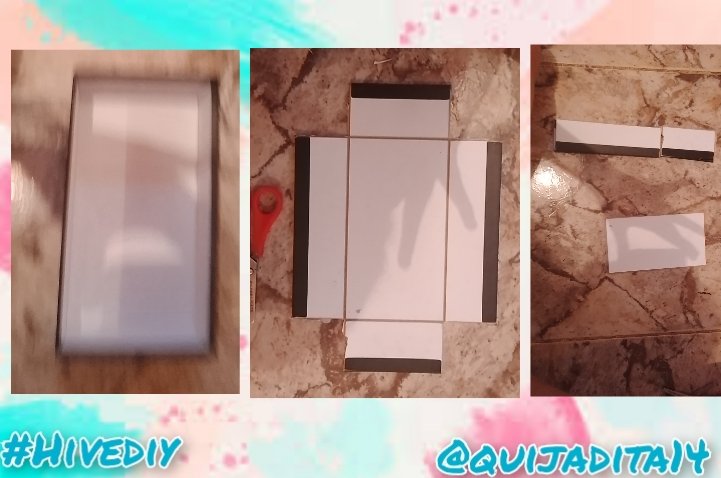
Bueno familia acá vamos, para comenzar tomamos la caja de teléfono y le vamos a quitar la tapa y con eso trabajamos, la vamos a desarmar y recortarle los laterales que le sobran al rectángulo que se encuentra en el medio, esto lo hacemos con la ayuda de las tijeras y apartaremos las piezas recortadas del rectángulo principal, esto lo utilizaremos para hacer los peldaños que sujetaran nuestros pendientes.
Eng
Well family here we go, to start we take the telephone box and we are going to remove the cover and with that we work, we are going to disassemble it and cut the sides that are left over from the rectangle that is in the middle, we do this with the help of the scissors and we will separate the cut pieces from the main rectangle, we will use this to make the steps that will hold our earrings.

Esp
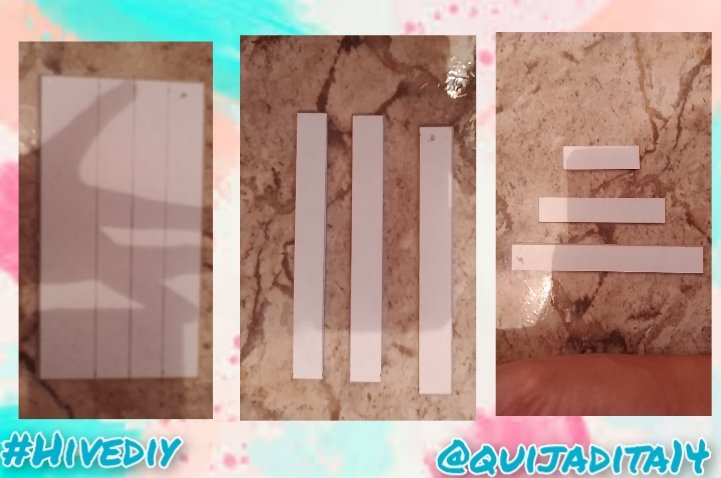
Luego tomamos el rectángulo que recortamos y con la regla y el lápiz vamos a medir tres líneas de 2 centímetros de ancho X los centímetros que tenga el rectángulo, ahora bien luego de haberlas recortado con las tijeras vamos a medir en una 15 centímetros de largo, en la segunda mediremos 10 centímetros y recortaremos y en la ultima marcaremos 5 centímetro y recortaremos, quedando una pirámide con estas tiras de la manera que se muestra en las imágenes y las apartamos a un lado.
Eng
Then we take the rectangle that we cut out and with the ruler and the pencil we are going to measure three lines of 2 centimeters wide X the centimeters that the rectangle has, now after having cut them with the scissors we are going to measure 15 centimeters long, in the second we will measure 10 centimeters and we will cut and in the last we will mark 5 centimeters and we will cut, leaving a pyramid with these strips in the way shown in the images and we set them aside.

Esp
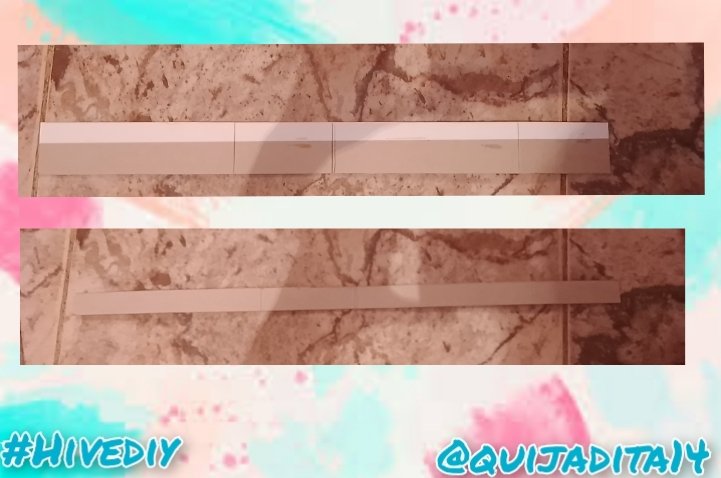
Para hacer la base que llevara las tiras de cartón que anterior mente cortamos, vamos a tomaremos la tira de cartón de 44 centímetros de largo X 2 centímetros de ancho, como pueden ver en la imagen yo tuve que recortarla ya que la mía tenia 5 de ancho, luego de esto la vamos a dividir en 17 centímetros de largo, luego 5 centímetros, otra vez 17 centímetros de largo y por ultimo 5 centímetros, haciendo un pequeño dobles donde hicimos las marcas.
Eng
To make the base that will carry the cardboard strips that we previously cut, we are going to take the cardboard strip of 44 centimeters long X 2 centimeters wide, as you can see in the image I had to cut it since mine had 5 of width, after this we are going to divide it into 17 centimeters long, then 5 centimeters, again 17 centimeters long and finally 5 centimeters, making a small double where we made the marks.

Esp
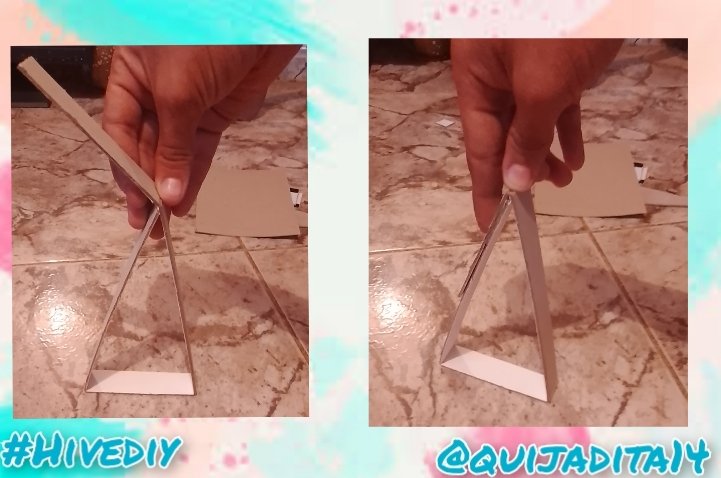
Esta misma tira de cartón de 44 centímetros de largo X 2 centímetros de ancho, luego de haberle realizado los dobles, le damos forma de triangulo y nos va a sobrar una solapa de 5 centímetros en la cual vamos agregar pega o silicona fría y la fijaremos a los otro 17 centímetros que le siguen, de esta manera quedara completamente fijada nuestra base, y como se pueden dar cuenta quedara proporcionalmente estable.
Eng
This same strip of cardboard 44 centimeters long X 2 centimeters wide, after having made the doubles, we shape it into a triangle and we will have a 5 centimeter flap left over in which we are going to add glue or cold silicone and we will fix it to the other 17 centimeters that follow, in this way our base will be completely fixed, and as you can see it will be proportionally stable.

Esp
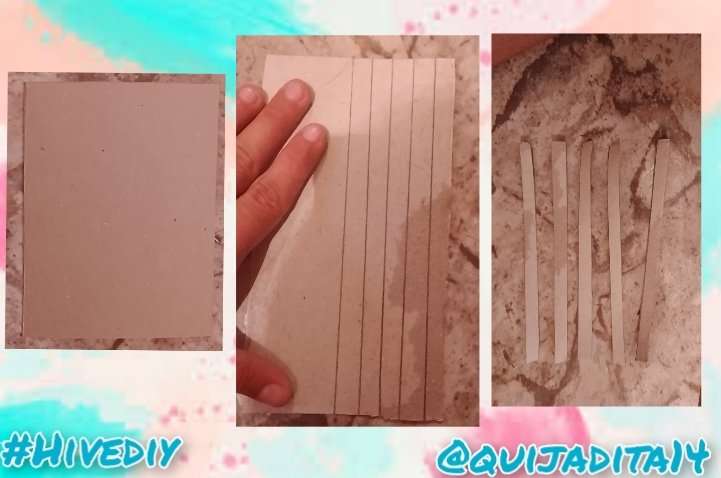
Ahora realizaremos la base donde estará fijada nuestra pirámide para colocar nuestros pendientes, es por ello que tomamos el cartón piedra y trazaremos líneas a lo largo de los 17 centímetros que posee X 2 centímetros de ancho, esto lo realizaremos con la regla y lápiz ya que es importante que queden rectas, al igual que al ser recortadas deberán seguir fijamente las líneas para que al ser colocadas en la base se vean pulcras y delicadas.
Eng
Now we will make the base where our pyramid will be fixed to place our earrings, that is why we take the cardboard and draw lines along the 17 centimeters that it has X 2 centimeters wide, we will do this with the ruler and pencil since It is important that they remain straight, just as when they are cut they must follow the lines firmly so that when they are placed on the base they look neat and delicate.

Esp
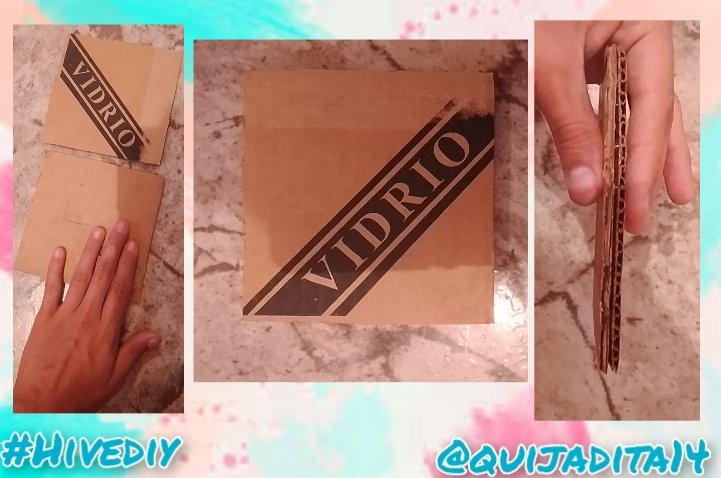
Seguimos armando nuestra base y tomamos los dos cuadrados de cartón de 12 centímetros X 12 centímetros, y los fijamos uno sobre otro ya sea con pega o silicona fría, es importante que los bordes quede bien unidos, es por ello que deberán hacer un poco de presión en los mismos.
Eng
We continue assembling our base and we take the two squares of cardboard of 12 centimeters X 12 centimeters, and we fix them one on top of the other either with glue or cold silicone, it is important that the edges are well joined, that is why they must do a little pressure on them.

Esp
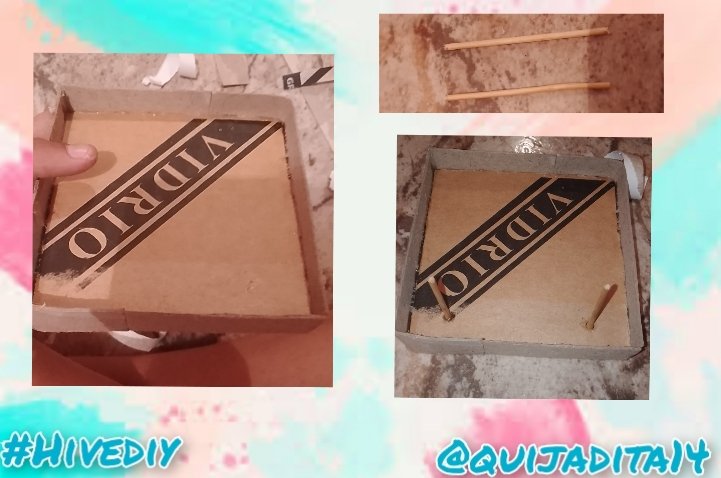
Para completar nuestra base tomamos las tiras que cortamos del cartón piedra de 2 centímetros X 17 centímetros y la fijaremos con pega o silicón frio en los extremos de los cuadrados que pegamos, las tiras del cartón piedra tienen que sobre salir y al mismo tiempo deben cubrir la orilla de los cuadros del cartón, acá también debemos hacer un poco de presión para que queden bien fijadas como se muestra en la imagen, luego tomamos el palillo de altura y medimos con la regla 5 centímetros y recortaremos des trozos de palillo de altura con esa medida, y vamos a fijarlos con silicón frio en la parte frontal de nuestra base, esto nos servirá para colocar los anillos, dejando reposar para que la pega o silicón frio terminen de fijar.
Eng
To complete our base we take the strips that we cut from the papier-mache of 2 centimeters X 17 centimeters and we will fix them with glue or cold silicone at the ends of the squares that we glue, the papier-mâché strips have to protrude and at the same time they must cover the edge of the cardboard squares, here we must also put a little pressure so that they are well fixed as shown in the image, then we take the height stick and measure 5 centimeters with the ruler and we will cut two pieces of height stick with that measure, and we are going to fix them with cold silicone on the front part of our base, this will help us to place the rings, letting them rest so that the glue or cold silicone finish fixing.

Esp
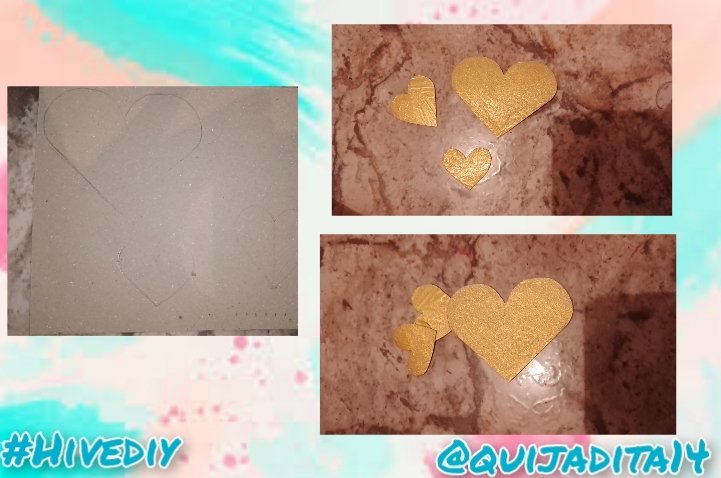
Mientras que la base se termina de fijar por completo, tomamos un pedazo de cartón piedra que nos sobro de las tiras y vamos a realizar tres corazones con tres tamaños diferentes, los recortamos con ayuda de las tijeras, una vez recortados vamos a tomar el pincel junto con la tempera dorada y pintaremos nuestros corazones para que se vean brillantes, los dejamos secar, una vez secos los vamos a pegar en forma de arco desde el mas grande al mas pequeño con la ayuda de pega o silicón frio, lo dejamos secar y avanzaremos con a base.
Eng
While the base is completely fixed, we take a piece of papier mâché that is left over from the strips and we are going to make three hearts with three different sizes, we cut them out with the help of scissors, once cut we are going to take the brush together with the golden tempera and we will paint our hearts so that they look bright, we let them dry, once dry we are going to paste them in the form of an arc from the largest to the smallest with the help of glue or cold silicone, we let it dry and we will advance with a base.

Esp
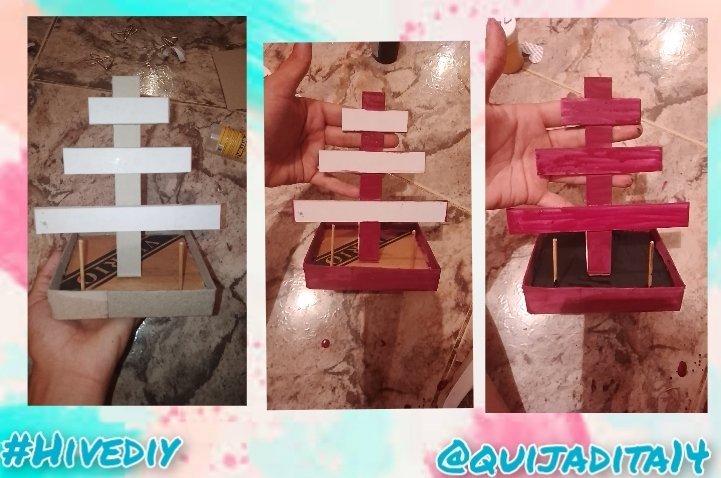
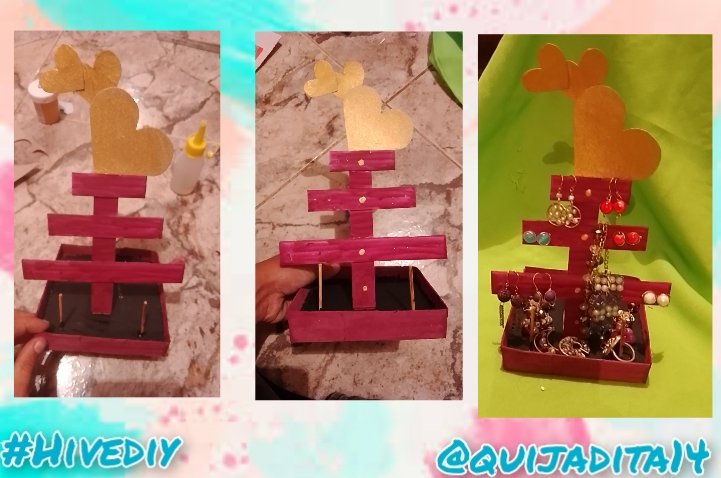
Para terminar de armar nuestro organizador vamos a tomar el rectángulo que realizamos anteriormente y las tiras de 5, 10 y 15 centímetros de largo y las fijaremos a el triangulo de manera descendente de abajo hacia arriba con la pega o silicón frio, de igual manera pegaremos este triangulo a la base que realizamos, una vez que ya se haya fijado por completo comenzaremos a pintar nuestro organizador, cabe destacar que los colores serán de su preferencia por lo que yo pinte todo el esqueleto de Vinotinto y el fondo de negro, lo deje secar por unos 30 minutos.
Eng
To finish assembling our organizer we are going to take the rectangle that we made previously and the strips of 5, 10 and 15 centimeters long and we will fix them to the triangle descending from the bottom to the top with the glue or cold silicone, in the same way we will glue this triangle to the base that we made, once it has been completely fixed we will begin to paint our organizer, it should be noted that the colors will be of your preference so that I paint the entire skeleton of Vinotinto and the background in black, I leave it dry for about 30 minutes.

Esp
Una vez seca nuestra base le vamos a pegar nuestro arco de corazones con pega o silicón caliente en el tope de la pirámide, de igual manera y con mucho cuidado tomamos la aguja y haremos los orificios para colocar los pendientes en los diferentes niveles de la pirámide, le agregamos unos detalles en dorado y listo hemos terminado nuestro organizador. listo para utilizar.
Eng
Once our base is dry we are going to stick our arch of hearts with glue or hot silicone on the top of the pyramid, in the same way and very carefully we take the needle and make the holes to place the earrings at the different levels of the pyramid , we add some details in gold and ready we have finished our organizer. ready to use.

Esp
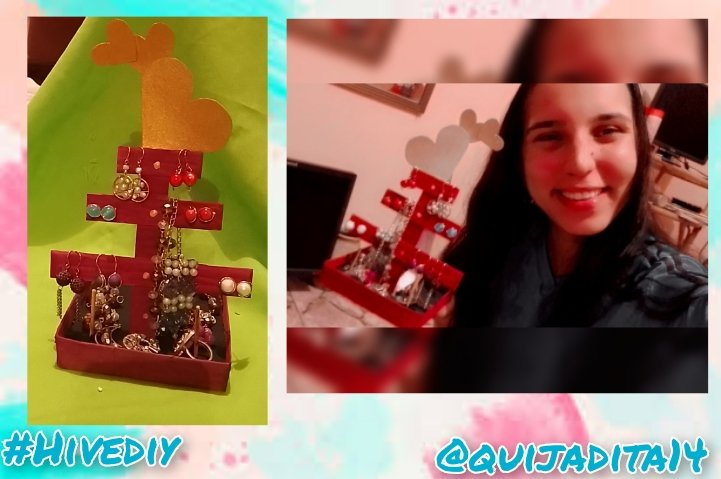
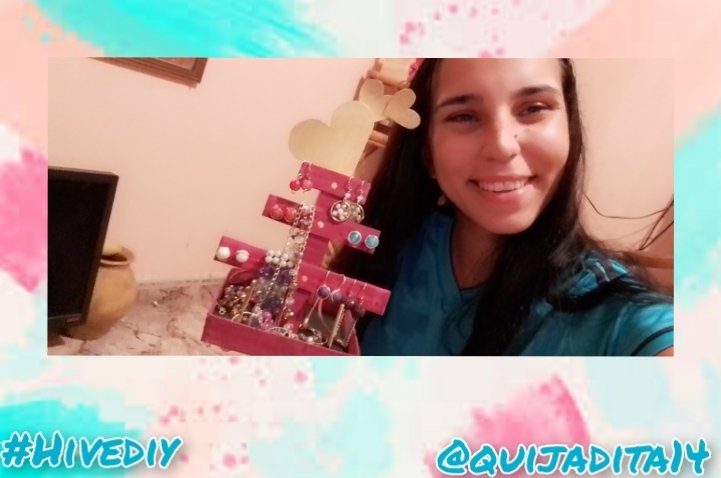
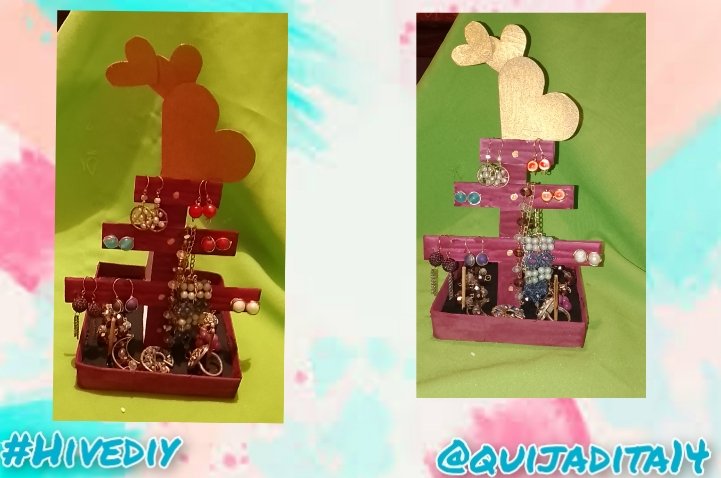
Acá les dejo estas dos fotos para que puedan apreciar este hermoso organizador, espero les haya gustado esta idea y no olviden votar, comentar y seguir, feliz día grandiosa familia. Saludos 😘
Eng
Here I leave these two photos so you can appreciate this beautiful organizer, I hope you liked this idea and don't forget to vote, comment and follow, happy day great family. Greetings 😘

Esp
Todas las imágenes son de mi autoría, tomadas con un Realme C21Y editadas en inCollage y el texto fue traducido al ingles en Google Translator. Acá les dejo la fuente de el separador de texto. Fuente
Eng
All the images are my own, taken with a Realme C21Y edited in inCollage and the text was translated into English in Google Translator. Here I leave the source of the text separator. Source
