Hello, hello!
Today I come to share with you a Santa Claus that I made with recyclable material, for my son's school.
My son's Crafts teacher, asked them to make, with the help of their parents, a Santa with a plastic bottle, paint it and fill it with candy to give it to some children of a little public school that is in a nearby neighborhood. Since my son was so sick and missed two weeks of school, he's been swamped with activities, so I had to get to work.
All the materials we usually have at home, so we don't have to spend a lot of money.
Materials
A 1.5 liter plastic bottle
Cutter
Brushes
Black cardboard
White cardboard
Moldable Fomi
Cotton
Cold paint (white, red and skin color)

The first thing we will do is draw a line around the bottle, both at the top and at the bottom. The same bottle has the design so that one can be guided. Then we cut with the cutter, to get rid of the middle part of the bottle. We will be left with only the top and the bottom.


Now let's paint the top of the bottle red. With two coats of paint, it covers perfectly. The top of the bottle is not going to be painted.
Then we will paint the bottom part white. Mira :👇


When painting the two coats it needs of paint, you have to let it dry. I let it dry overnight to be on the safe side, lest I damage the work if I touch it. The bottle cap is also painted white.

This morning after my son left for his high school, I set out to finish Santa's face.
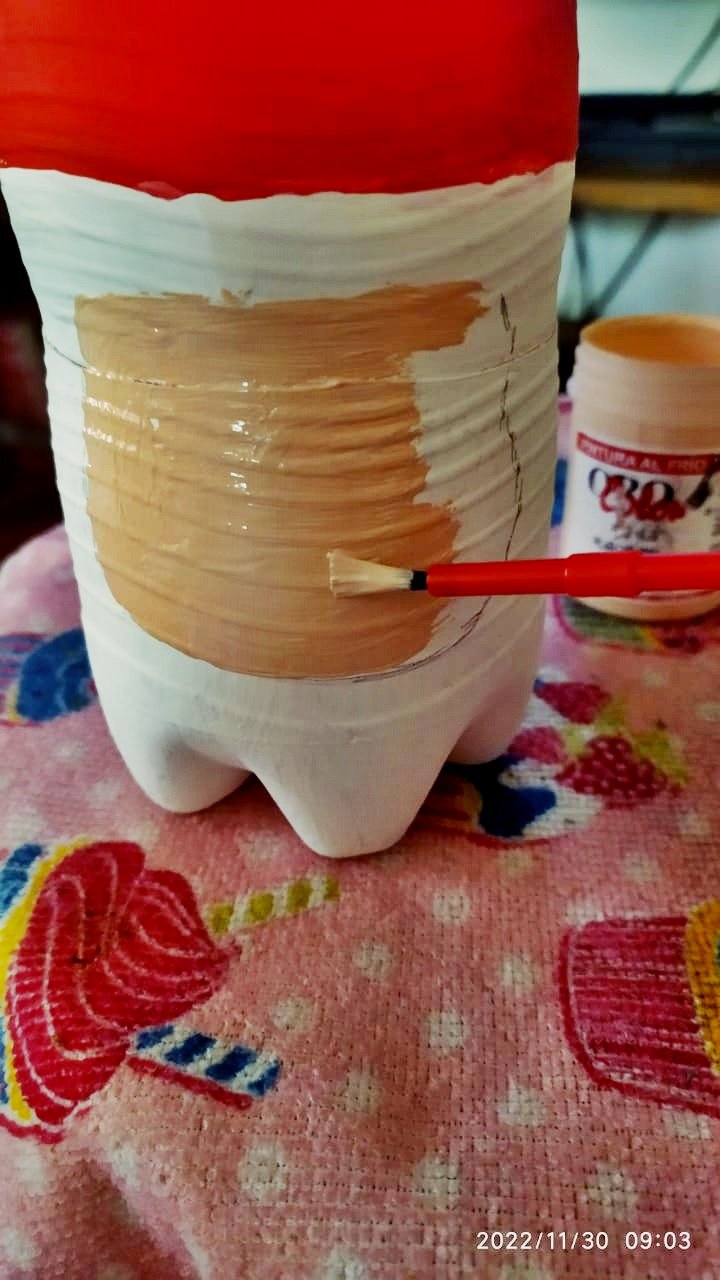
First I took a pencil and traced the outline of his face, then with a fine brush and skin colored paint, I began to paint that outline I had traced.

From this color, it took but one coat of paint. So as it dried, I started to think about whether I would draw the eyes, but I was a little afraid it would look bad and I would have to start all over again. The deadline is before next Friday, December 2nd. Besides that it did take me a while to cut the bottle.
I began to search through the things I had, that I had left over even a piece of black cardboard and I got exactly the piece I needed.
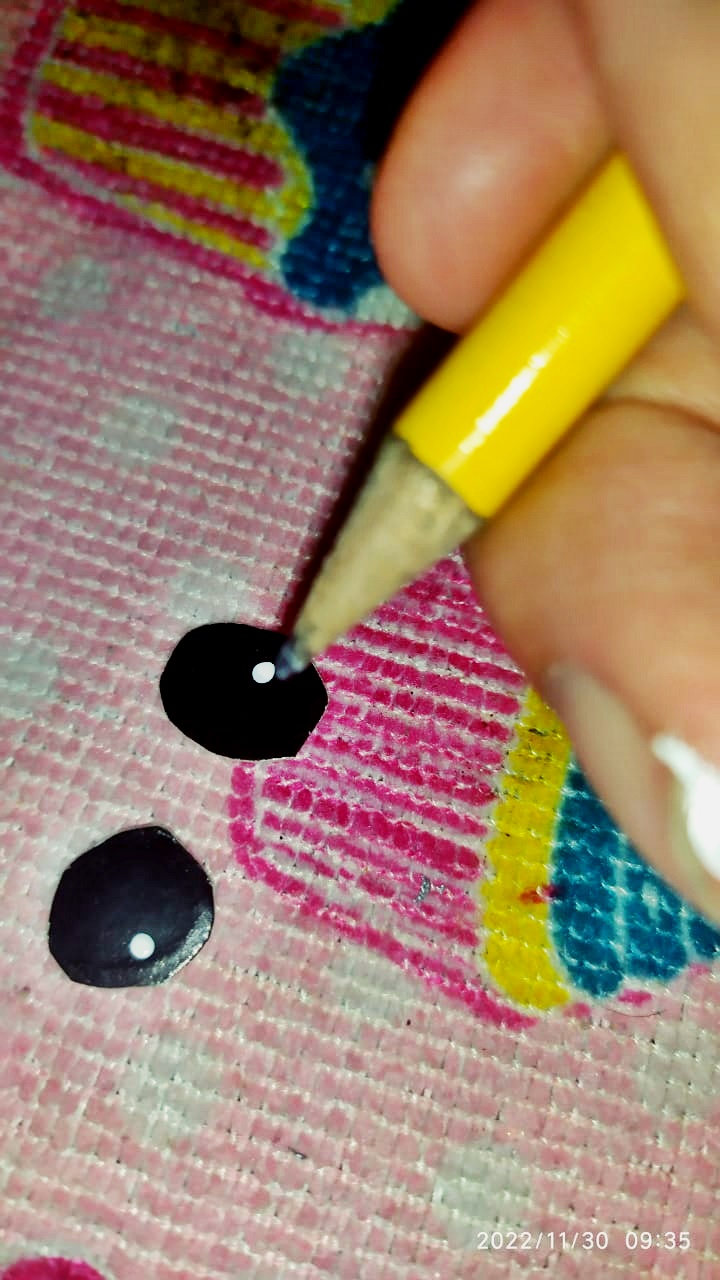
So, on the back of the cardboard, I made two circles of equal size and cut them out. Then with the tip of the pencil, I put a little dot of white on it.

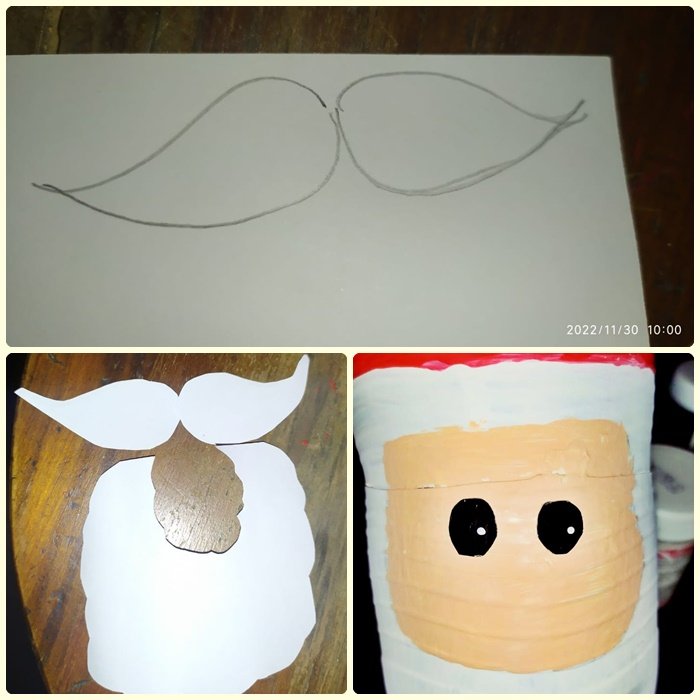
Then, on a white poster board, I drew something resembling Santa's whiskers and beard. Then I cut it out. Since the cream paint layer was already dry, I glued on the little eyes with white school glue.

Next, I glued the whiskers and the beard with the same glue. Then I put a little bit of molding clay to make the lips. Then I put absorbent cotton on the beard, as well as on the top of the cap and the bottle cap.

This is how it was coming out. Once I finished the details, I put inside the goodies I had at home for my son. I must confess that this is my first time making a Santa Claus and honestly I was a little scared of making a mistake and having to do it all over again 😕.

I liked the final result, for being my first time and for being an activity that is intended for my son's high school. I also made a very simple nativity scene, an activity that was also assigned to the child.

The nativity scene was made with moldable fomi and using a wooden base. I loved working with the moldable fomi, it's great, lightweight, easy to use. It is similar to play dough.

Everyone could use as a base to place the crib whatever they wanted, but the faces could not have eyes, mouth or nose and had to be made in this material. The teacher was very clear about that. I ignore the reasons, but I respected them. I didn't make the mule and the ox because I didn't have those colors in fomi.
The truth is that it was a relaxing work. I loved doing it. Tomorrow, Friday, my son is supposed to bring the Santa Claus. We'll see how he does.
Once again, thanks for reading me.
Group hug 🥰🤗

Español


¡Hola, hola!
Hoy vengo a compartirles un Santa Claus que hice con material reciclable, para el colegio de mi hijo.
La profesora de Manualidades de mi hijo, les pidió que hicieran, con la ayuda de sus padres, un Santa con una botella de plástico, la pintásemos y la llenásemos de caramelos para regalarlas a unos niños de una escuelita pública que está en un barrio cercano. Mi hijo como estuvo tan enfermo y faltó a clases durante dos semanas, está atacado de actividades, así que me tocó poner manos a la obra.
Todos los materiales generalmente solemos tenerlos en la casa, así que no hay que gastar.
Materiales
Una botella de plástico de 1.5 litros
Cutter
Pinceles
Cartulina negra
Cartulina blanca
Fomi moldeable
Algodón
Pintura al frío (blanca, roja y color piel)

Lo primero que haremos es trazar una línea alrededor de la botella, tanto en la parte de arriba, como en la de abajo. La misma botella tiene el diseño para que uno pueda guiarse. Luego cortamos con el cutter, para deshacernos de la parte del medio de la botella. Nos quedaremos solamente con la parte de arriba y la de abajo.


Ahora vamos a pintar de rojo la parte de arriba de la botella. Con dos capas de pintura, cubre perfectamente. La tapa de la botella no se va a pintar.
Después pintaremos la parte de abajo de color blanco. Mira :👇


Al pintar las dos capas que necesita de pintura, hay que dejar secar. Yo lo dejé secar toda la noche para estar más segura, no vaya a ser que dañara el trabajo si lo tocaba. La tapa de la botella, también va pintada de blanco.

Esta mañana después de que mi hijo se fuese a su liceo, me dispuse a terminar la cara de Santa.
Primero tomé un lápiz y tracé el contorno de su cara, después con un pincel fino y pintura de color piel, comencé a pintar ese contorno que había trazado.

De este color, no se necesitó sino una capa de pintura. Así que mientras se secaba, comencé a pensar si le dibujaría los ojos, pero me daba un poco de miedo que quedara mal y tener que comenzar todo de nuevo. El tiempo de entrega es antes del próximo viernes 2 de diciembre. Además que sí me costó un poco cortar la botella.
Comencé a buscar entre las cosas que tenía, que me haya sobrado aunque sea un trozo de cartulina negra y conseguí exactamente el pedazo que necesitaba.
Así que por la parte de atrás de la cartulina, hice dos círculos de igual tamaño y los corté. Luego con la punta del lápiz, le coloqué un puntito de color blanco.

Luego, en una cartulina blanca, dibujé algo parecido a los bigotes y barba de Santa. Luego lo corté. Como ya estaba seca la capa de pintura crema, le pegué los ojitos con pegamento escolar blanco.

Acto seguido, le pegué los bigotes y la barba con el mismo pegamento. Luego le puse un poquito de fomi moldeable para hacerle los labios. Después le coloqué a la barba algodón, así como a la parte de arriba en el gorro y en la tapa de la botella.

Así estaba quedando. Una vez que terminé los detalles, le coloqué adentro las chucherías que tenía en casa para mi hijo. Debo confesar que es mi primera vez que hago un Santa Claus y honestamente estaba un poco asustada de cometer algún error y tener que repetirlo todo 😕

El resultado final me gustó, por ser mi primera vez y por ser una actividad que está destinada al liceo de mi hijo. También hice un pesebre muy sencillo, actividad que también le fue asignada al niño.

El pesebre fue hecho con fomi moldeable y usando una base de madera. Me encantó trabajar con el fomi moldeable, es genial, liviano, fácil de usar. Es similar a la plastilina.

Cada quien podía usar como base para colocar el pesebre lo que deseara, pero los rostros no podían tener ojos, boca ni nariz y debía ser hecho en este material. La profesora fue muy clara con eso. Ignoro las razones, pero las respeté. No hice la mula y el buey porque no tenía esos colores en fomi.
La verdad es que fue un trabajo relajante. Me encantó hacerlo. Mañana viernes mi hijo debe llevar el Santa Claus. Ya veremos cómo le va.
Una vez más, gracias por haberme leído.
Abrazo grupal 🥰🤗

