¡Muy buenas, amigos de Hive!
Espero su semana vaya de maravilla.
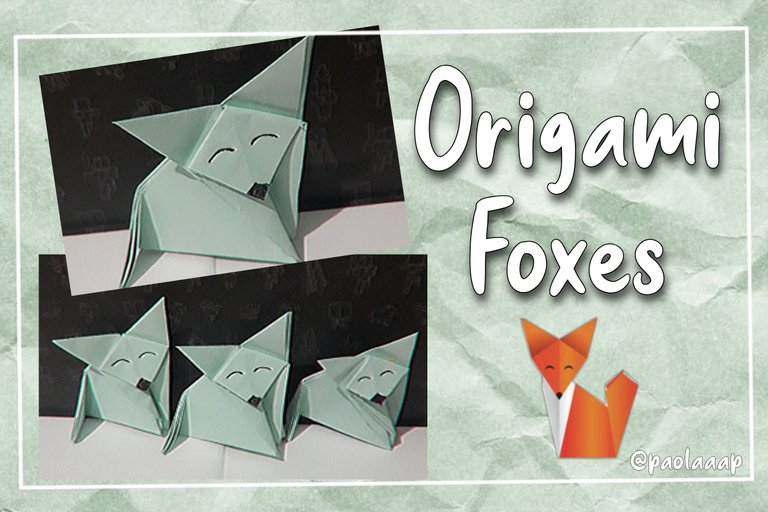
El día de hoy les traigo otro mini tutorial para hacer animales de Origami, pero en esta ocasión haremos un Zorro muy fácil y bonito. Descubrí que me gusta mucho hacer este tipo de manualidades y quiero compartir con ustedes como las hago.
¡Comencemos!
Hello, friends of Hive!
I hope your week is going great.
Today I bring you another mini tutorial to make Origami animals, but this time we will make a very easy and cute Fox. I discovered that I really like making this kind of crafts and I want to share with you how I make them.
Let's start!

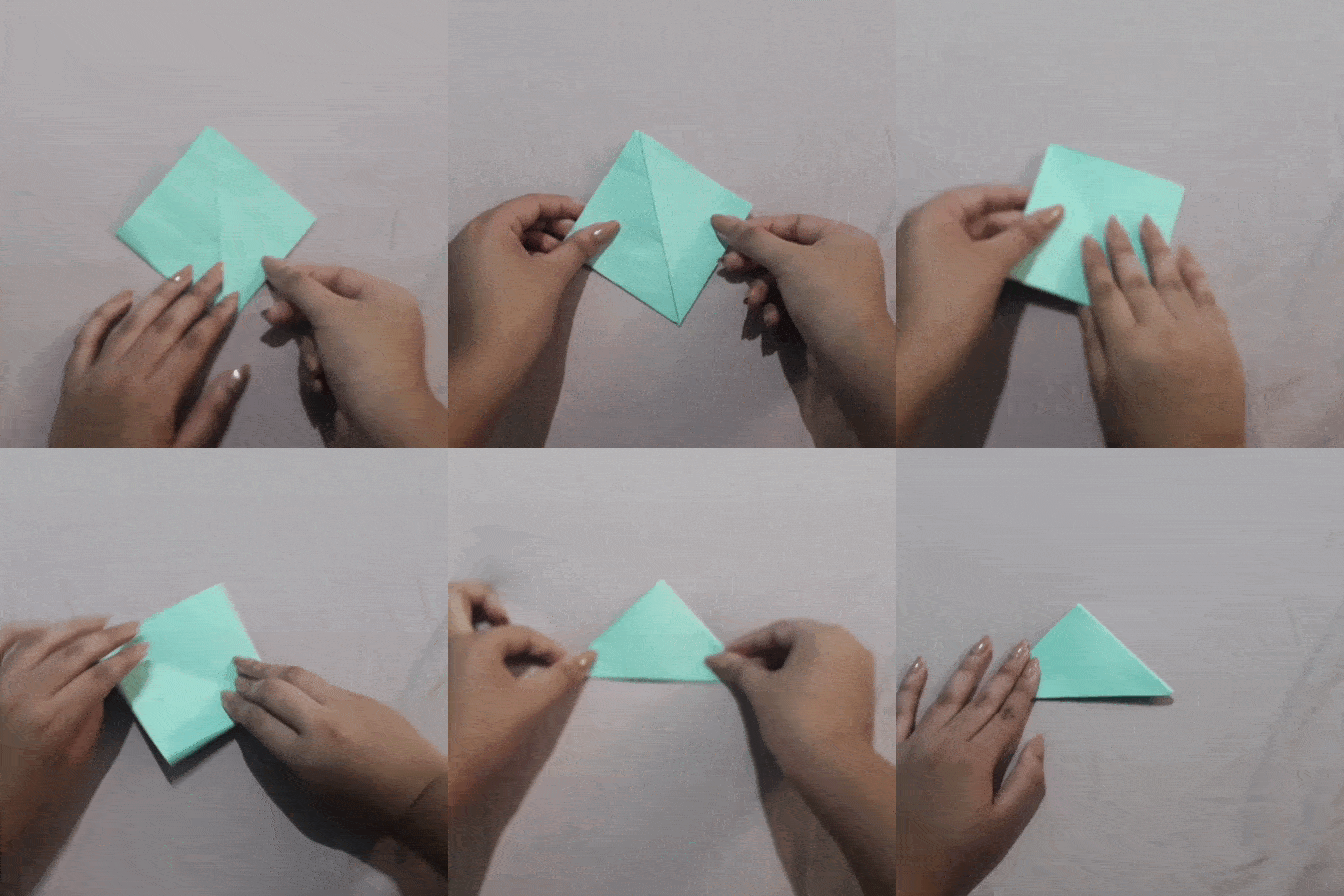
Comencé tomando una hoja de un papel color verde, de una material más fuerte que el de una hoja de maquina común, necesitaba que fuera cuadrado entonces lo recorte para obtener esta forma.
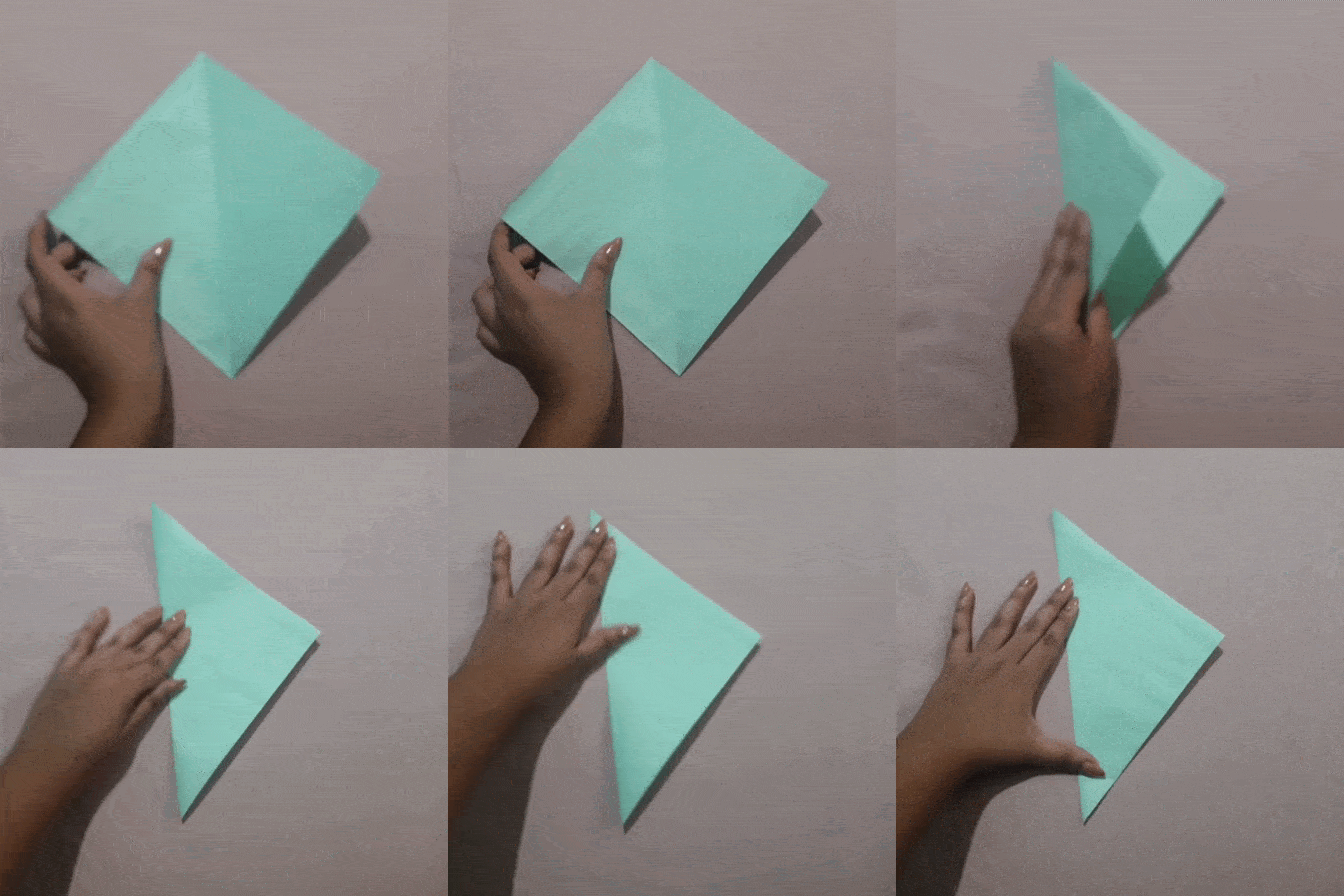
Ponemos el papel cuadrado en forma de diamante y lo doblamos por la mitad uniendo dos esquinas.
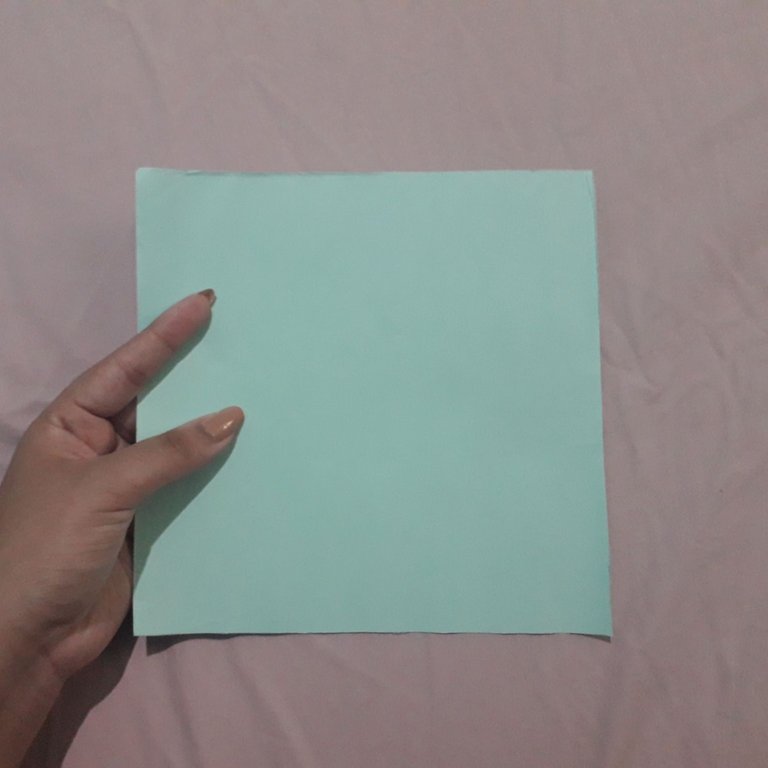
I started by taking a sheet of green colored paper, of a stronger material than a common machine sheet, I needed it to be square so I cut it to get this shape.
We put the square paper in a diamond shape and folded it in half joining two corners.
.

Luego al tener un triángulo, seguimos doblando las esquinas del mismo hasta formar un diamante, como se aprecia en el Gif.
Este diamante lo vamos a doblar por la mitad hasta obtener otro triángulo, de esta forma.
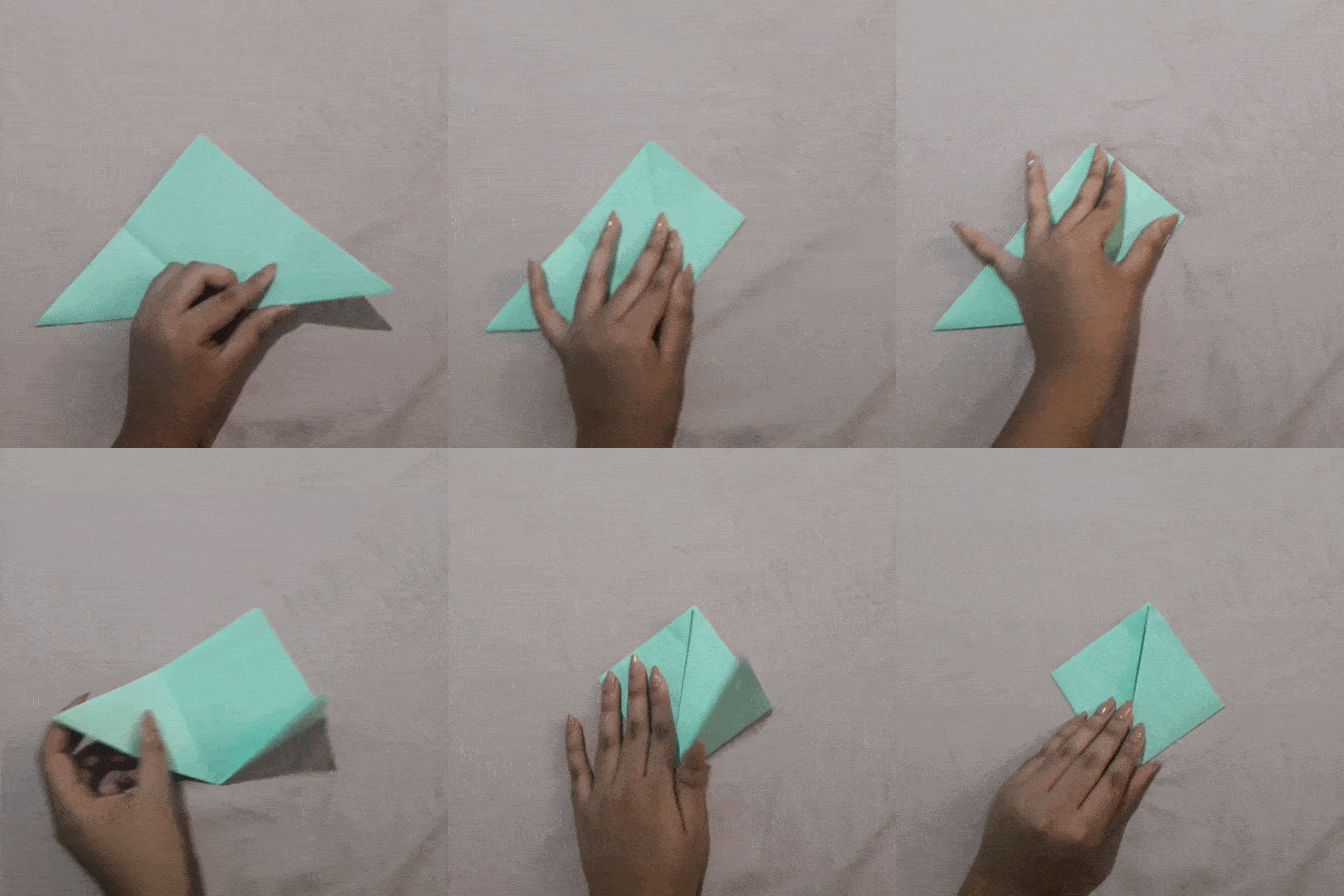
Then when we had a triangle, we continued folding the corners of the triangle to form a diamond, as shown in the Gif.
We are going to fold this diamond in half until we get another triangle, in this way.

Abrimos una de las esquinas del triángulo y la doblamos hacia un lado.
Doblamos la otra esquina del triángulo para hacer la cola.
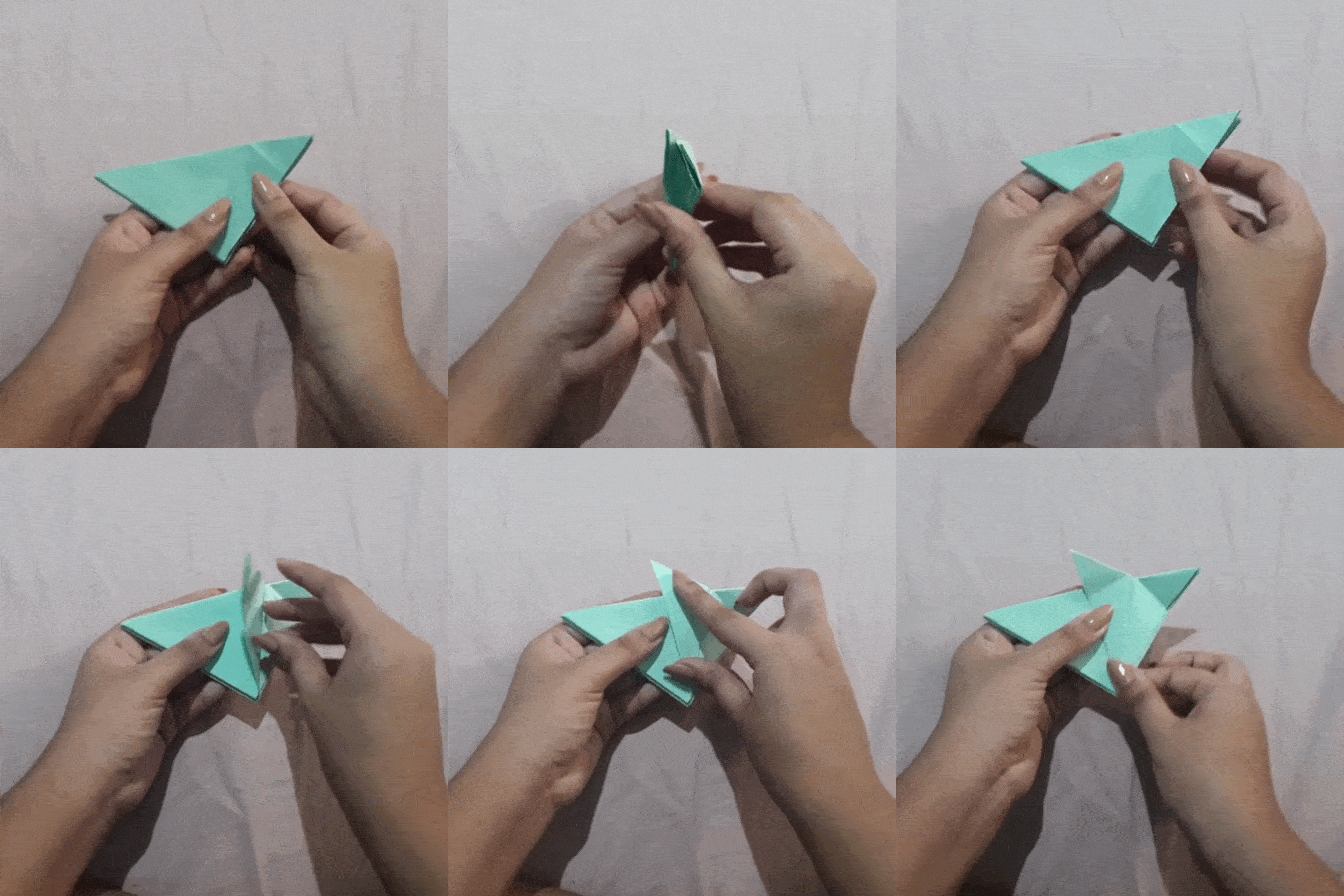
We open one of the corners of the triangle and fold it to one side.
Fold the other corner of the triangle to make the tail.
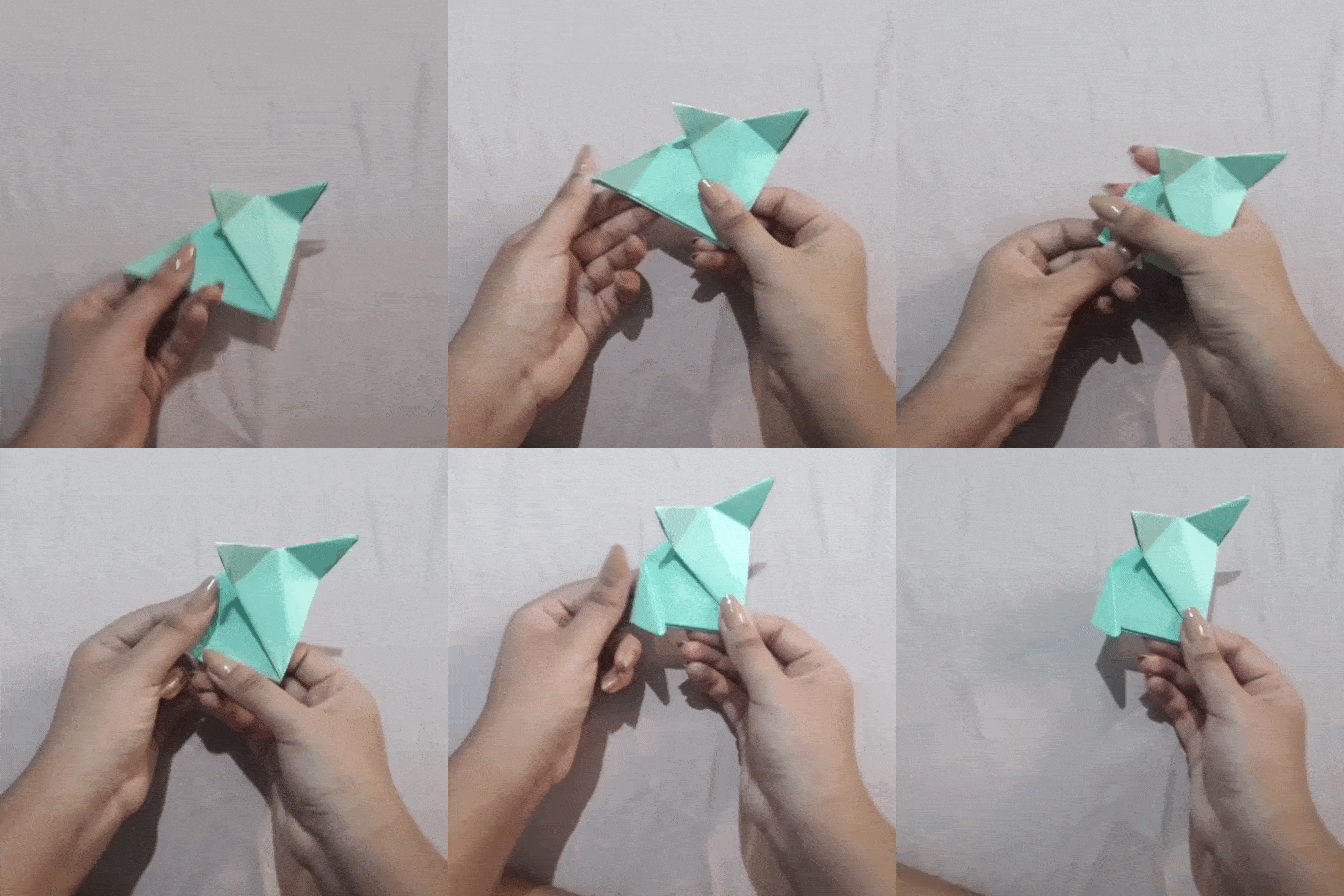

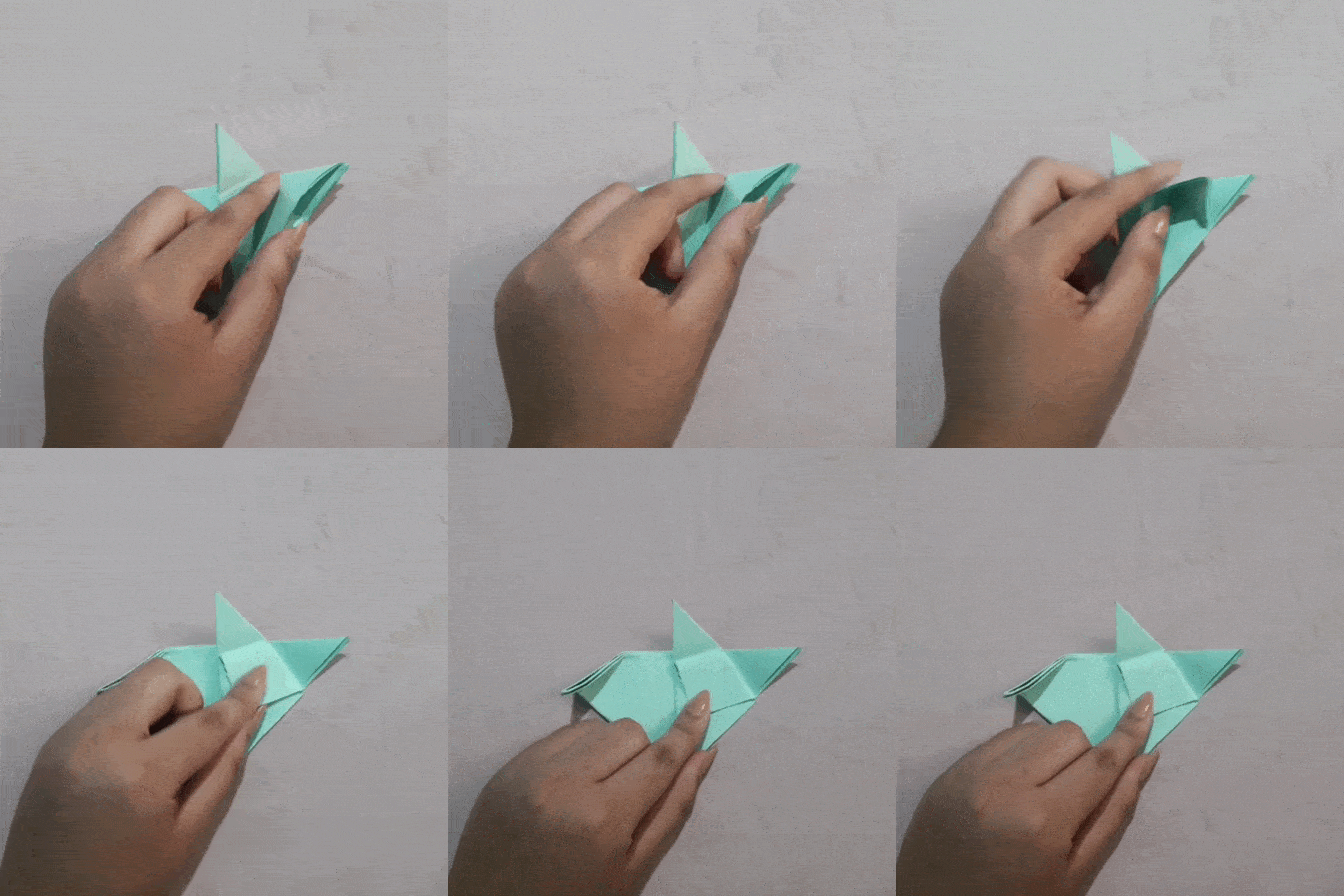
Nos queda un pliegue en el medio en la otra esquina y lo doblaremos de esta forma para hacer la cara del Zorro, y ¡listo!
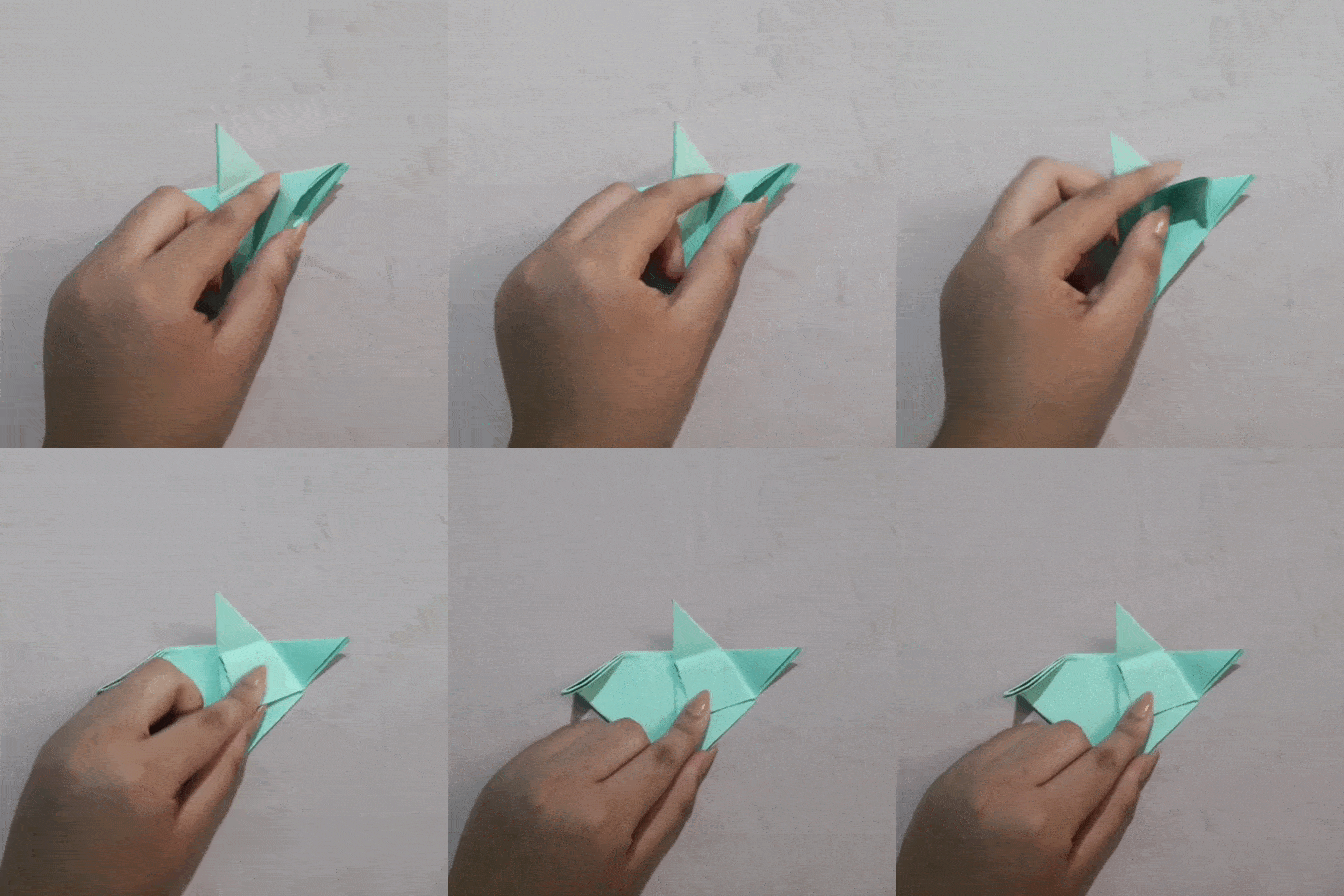
We are left with a fold in the middle at the other corner and we will fold it this way to make Fox's face, and that's it!
.

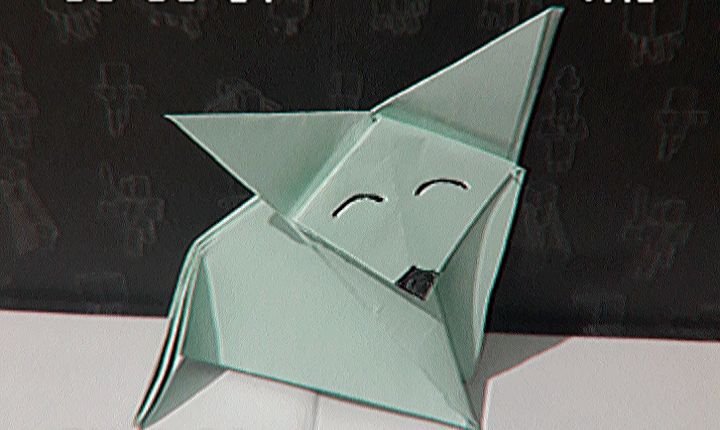
Este fue el resultado, decidí hacerle una nariz y ojitos en su carita para darle un toque más tierno y bonito, y me encantó.
Espero que también les haya gustado mucho y se animen a intentarlo.
¡Muchas gracias por leer!
This was the result, I decided to make a nose and eyes on his face to give it a more tender and cute touch, and I loved it.
I hope you also liked it a lot and I encourage you to try it.
Thank you very much for reading!
Fotos editadas en PicsArt | Photos edited in PicsArt
Traducción Deepl | Translation Deepl
GIFs hechos en Gif Converter | GIFs made in Gif Converter


