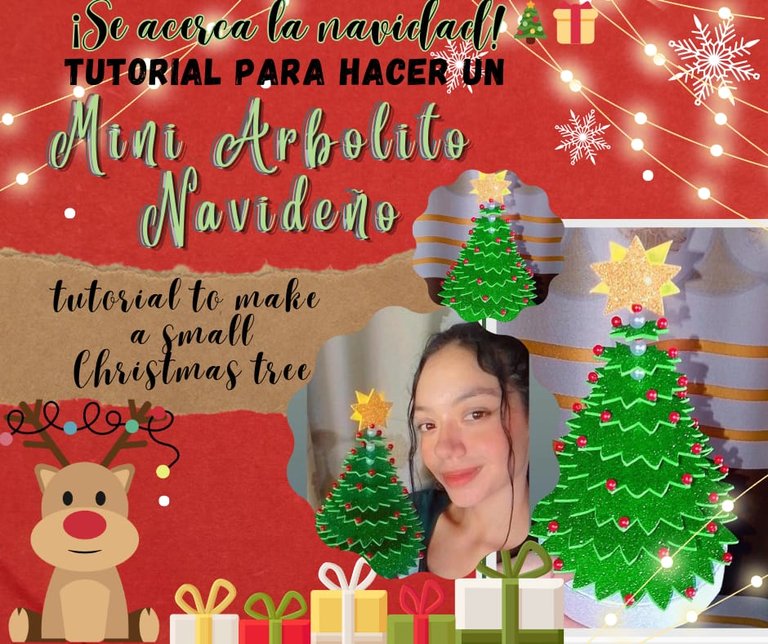
Happy day friends from @Diyhub, I hope you are doing well. Christmas is approaching and it is the best time to get creative and start making ornaments to decorate and give as gifts, here I share the step by step of these cute - and easy to do yourself - little trees🎄🤗
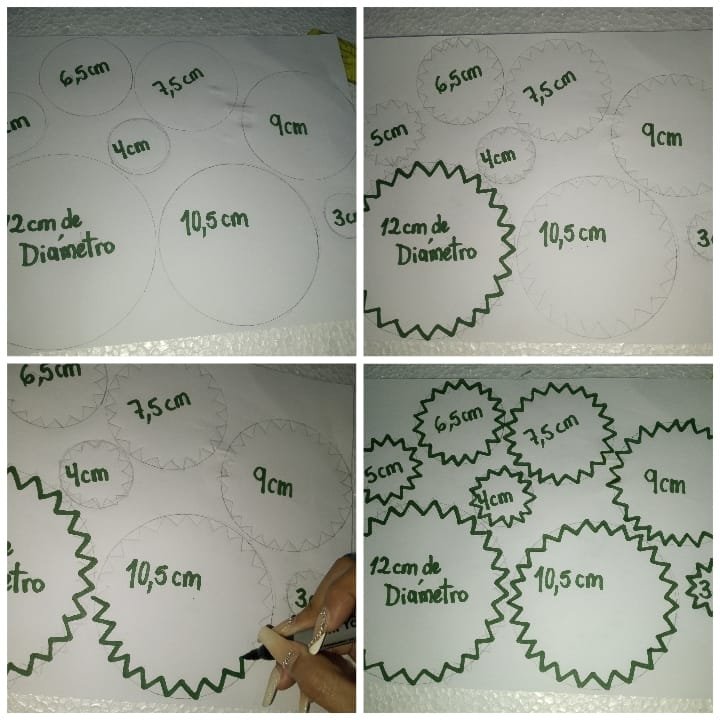
🌟 STEP 1🌟
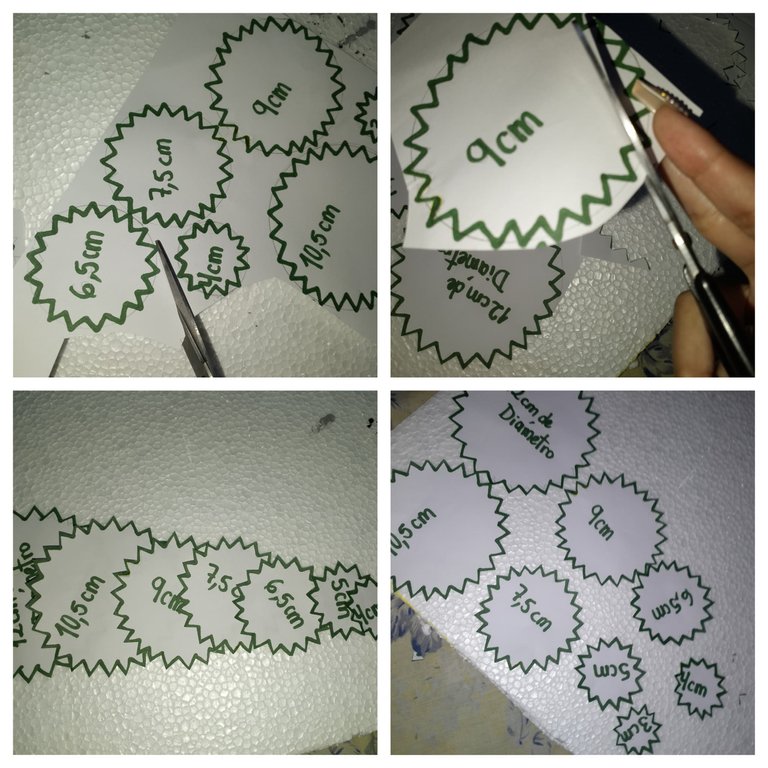
On a white sheet and with the help of some covers I drew 8 circles from largest to smallest, then with the help of a marker I drew some tips that will help give the tree a nice shape.
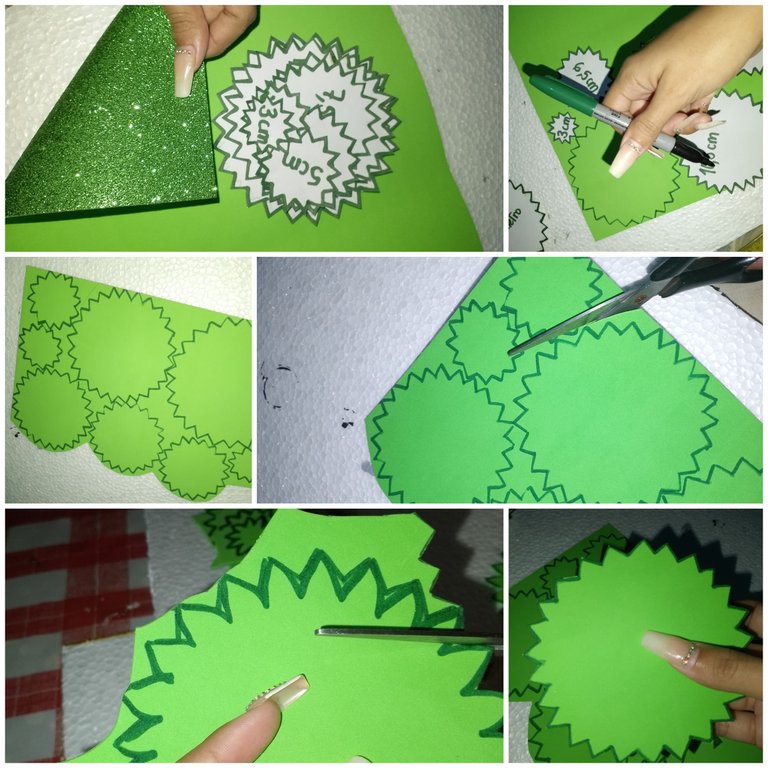
🌟 STEP 2🌟
Cut them all out to make them into the molds
🌟 STEP 3🌟
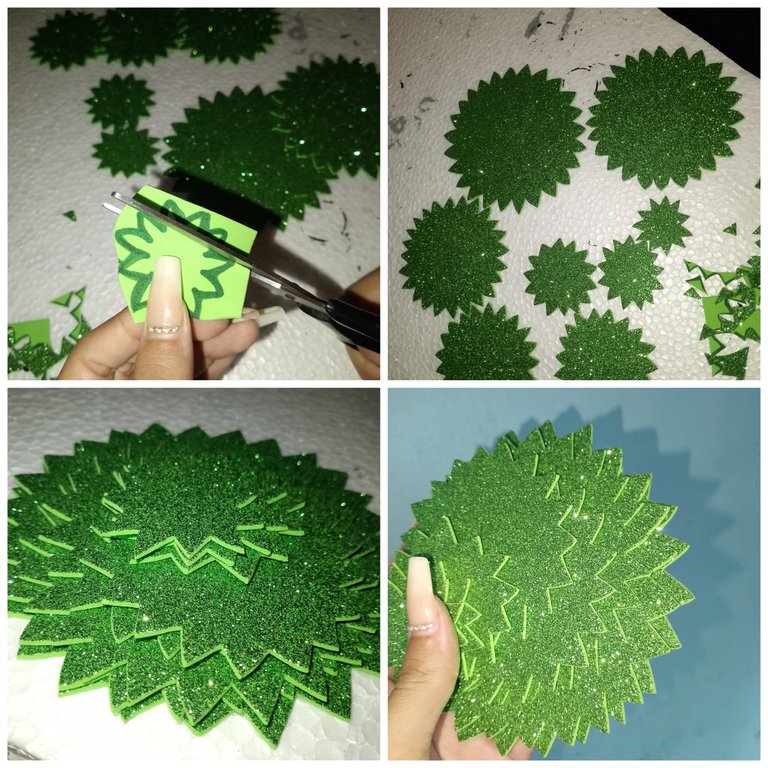
After cutting out the leaf molds, we move on to the foam, mark and cut out
🌟STEP 4🌟
We continue cutting each one, until we have them all ready
🌟STEP 5🌟
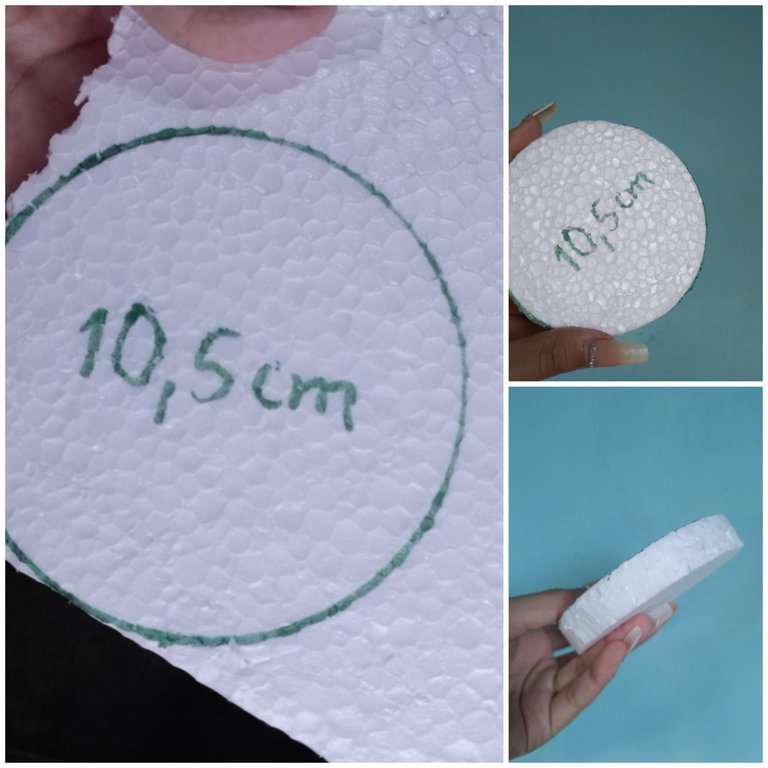
In a little piece of anime, cut out a small circle that will be the base of our little Christmas tree 🎄
🌟STEP 6🌟
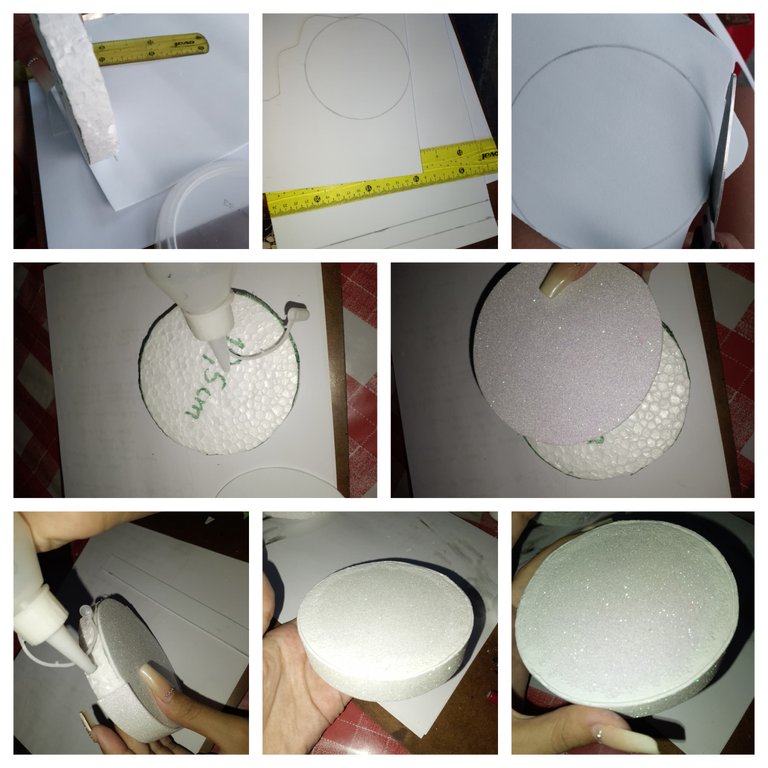
To not make it so simple, I cut out the measurements of the circle and the edges in foam and covered it by gluing it with liquid silicone.
🌟STEP 7🌟
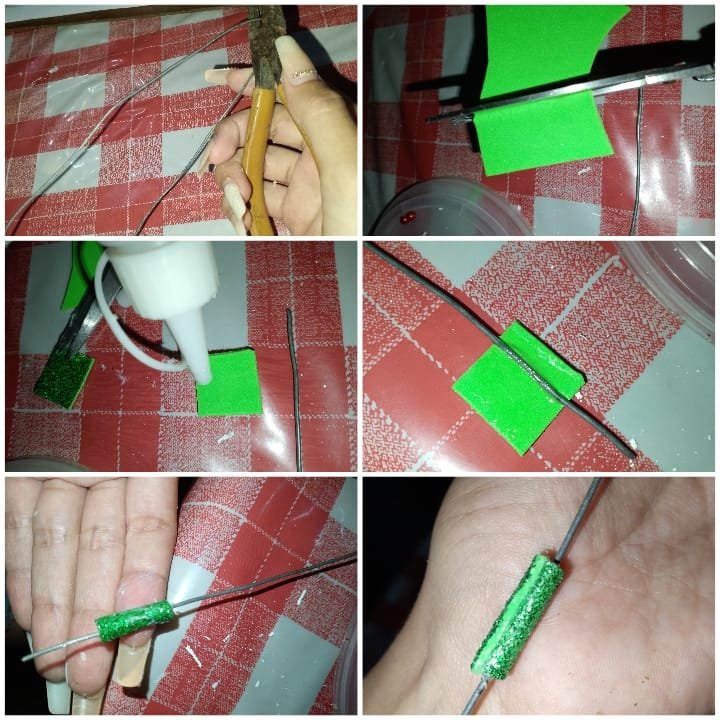
To have our structure or body of the tree, we cut the 20 cm of wire. We cut out a 2 × 2 cm square in green foam, and we are going to glue it, leaving 2cm uncovered at the beginning of the wire to help us join it to the base.
🌟STEP 8🌟
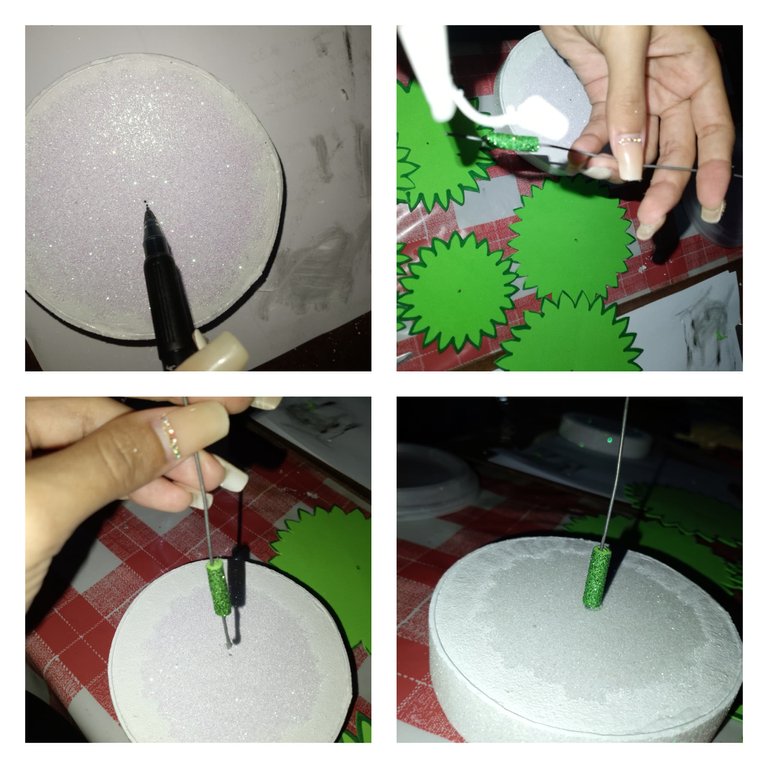
Then we mark the center of the base, and with the help of silicone we are going to introduce the little wire that was left uncovered to the base
🌟STEP 9🌟
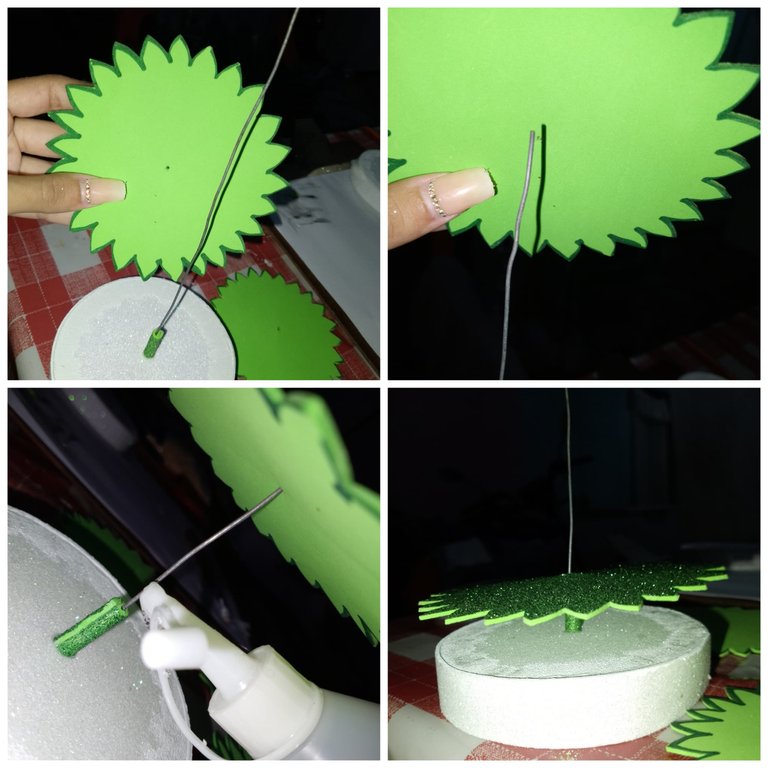
Now the most important thing, the time to assemble. First we place the largest one, and for that we also mark the center of each of the parts
🌟STEP 10🌟
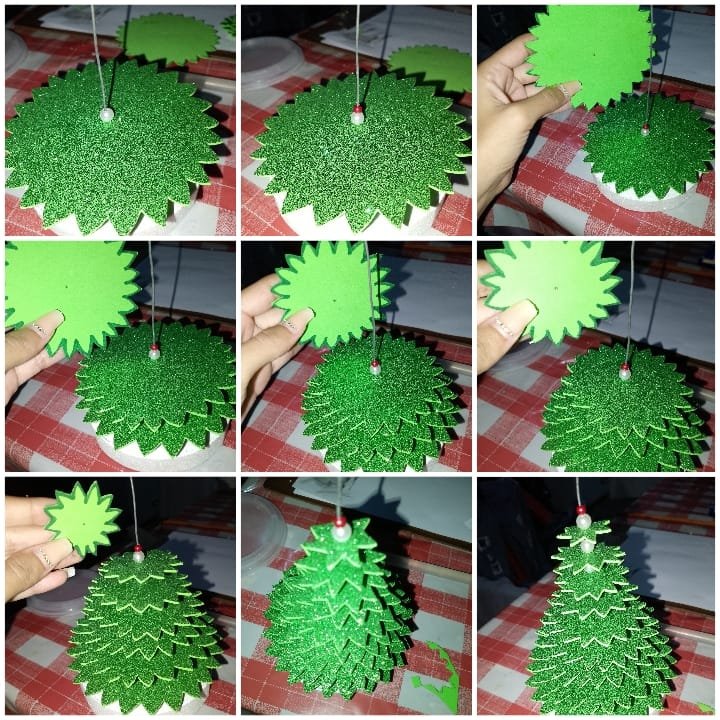
To separate this first layer from the others, between each one, I placed a white pearl and a smaller red one. So successively, we go from the largest until we reach the smallest, remembering to do the division between each one with 2 pearls
🌟STEP 11🌟
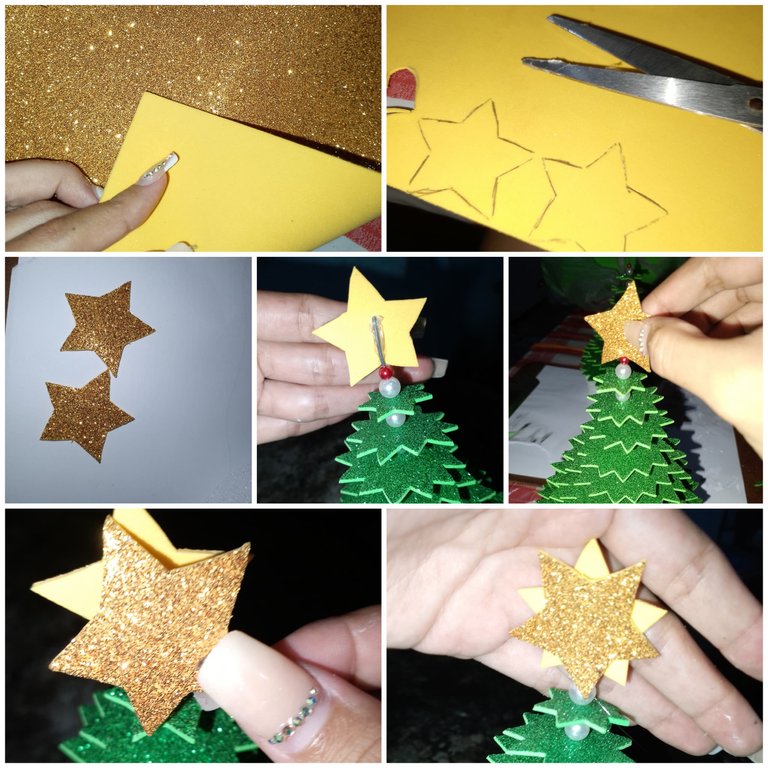
To give the final touch to the top of the tree, the famous little star could not be missing. For it, I drew 2 identical stars on the gold foam, cut out and then glued one on one side and one on the other so that the wire at the tip is not visible.
🌟STEP 12🌟
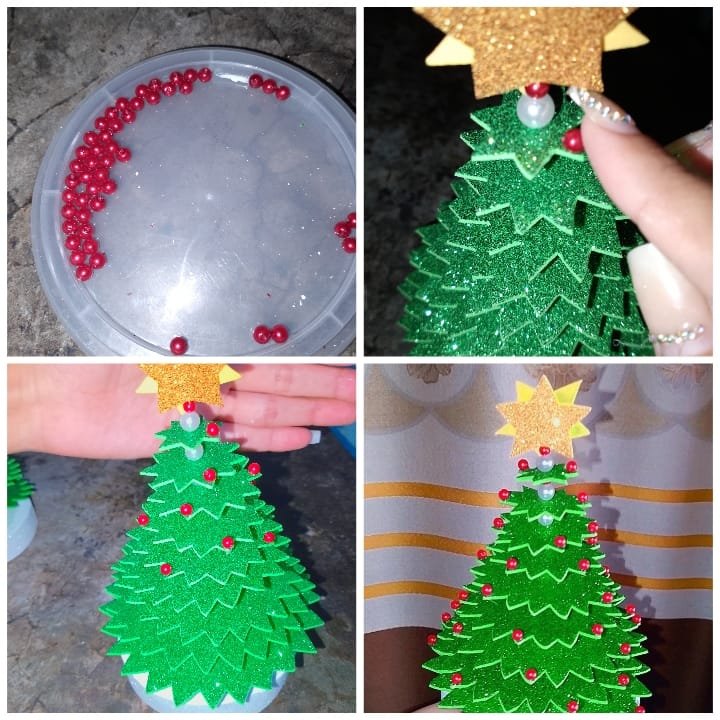
Now is the time to decorate with more beads and try to distribute them on all sides.
.
And ready, this is how we have this beautiful little tree, ideal to decorate a table, take to the work desk or give as a gift 🎄✨.

I took a lot of photos because the tree wanted a lot 🤗, I hope you like it☺️

Feliz día amigos de @Diyhub, espero estén muy bien. Ya se acercan las navidades y es el mejor momento para ponernos creativos y comenzar a hacer adornitos para decorar y regalar, acá les comparto el paso a paso de estos lindos - y fáciles de hacer - arbolitos🎄🤗

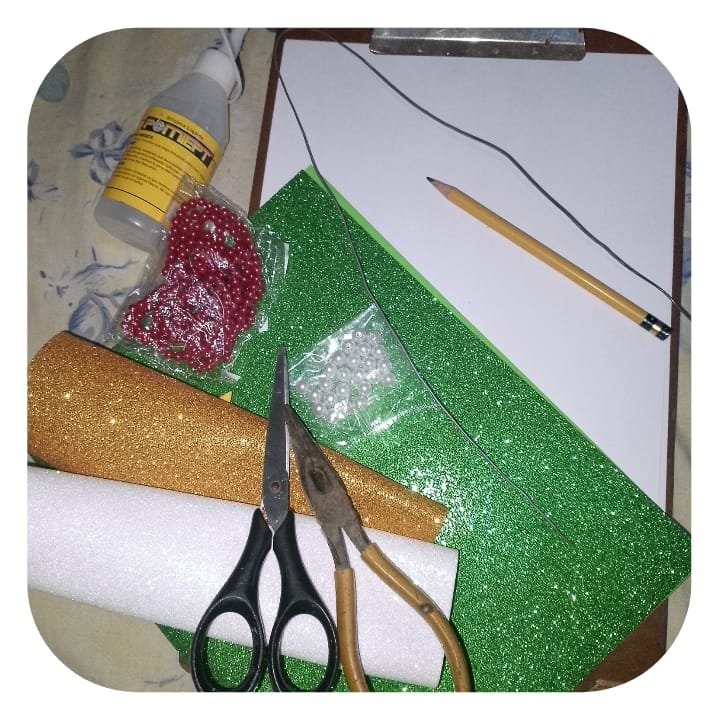
🌟foami escarchado verde
🌟 foami dorado
🌟foami blanco
🌟 20 cm de alambre
🌟silicón líquido
🌟perlas pequeñas en color blanco perlado y rojo
🌟tijeras y piqueta

🌟 PASO 1🌟
En una hoja blanca y con ayuda de algunas tapas, dibujé 8 círculos de más grande a más pequeño. Luego, con ayuda de un marcador, les fui dibujando unas puntas que ayudarán a darle forma linda al árbol

🌟 PASO 2🌟
Recorté todos para convertirlos en los moldes
🌟 PASO 3🌟
Luego de recortar los moldes de hoja, pasamos al foami, marcamos y recortamos

🌟PASO 4🌟
Seguimos recortando cada una, hasta tenerlas todas listas

🌟PASO 5🌟
En un pedacito de anime, recorté un círculo pequeño que será la base de nuestro arbolito 🎄

🌟PASO 6🌟
Para no dejarlo tan simple, recorté las medidas del círculo y los bordes en foami y los cubrí pegándolos con silicón líquido

🌟PASO 7🌟
Para tener nuestra estructura o tronco del arbolito, cortamos los 20 cm de alambre. Recortamos un cuadrito de 2 ×2 cm en foami verde, y lo vamos a pegar dejando 2cm sin cubrir en el inicio del alambre para que nos ayude a unir a la base

🌟PASO 8🌟
Luego marcamos el centro de la base, y con ayuda de silicón vamos a introducir a la base el pedacito alambre que quedó sin cubrir.

🌟PASO 9🌟
Ahora sí, lo más importante, el momento de armar. Primero colocamos el más grande, y para eso también marqué el centro de cada una de las partes

🌟PASO 10🌟
Para separar , primera capa de las otras entre cada una fui colocando una perla blanca y una roja de menor tamaño. Así sucesivamente, vamos desde el más grande hasta llegar al más pequeño, recordando hacer entre cada uno la división con las 2 perlitas

🌟PASO 11🌟
Para dar el toque final a la punta del árbol no podía faltar la famosa estrellita. Para ella, dibuje 2 estrellas iguales en el foami dorado, recorté y luego pegue una de un lado y una del otro de manera que no se vea el alambre en la punta

🌟PASO 12🌟
Llegó el momento de decorar con más perlitas y tratamos de distribuirlas por todos lados

Y listo, así nos queda este hermoso arbolito ideal para decorar una mesita, llevar al escritorio del trabajo o darlo de regalito 🎄✨.

Tomé muchas fotitos porque el arbolito quería muchas 🤗, espero les guste☺️

Thank you for visiting my blog and reading this far.
Gracias por visitar mi blog y llegar leyendo hasta acá.
Own photos taken with Tecno Spark 10C phone /Fotos propias tomadas con teléfono Tecno Spark 10C
The text in Spanish was created without AI The text in English I translated with Traductor Google
If you want you can follow me on my social networks😊
Si deseas puedes seguirme en mis redes sociales😊


