Español
Saludos amigos creadores🙋☀. Muchos son los juguetes que impactaron mi infancia, en especial, la matriuska de mi abuela. Que mientras para ella, era considerada una reliquia familiar decorativa, para mi era un juguete destellante de emociones en las visitas que le realizaba, pues me resultaba asombroso cómo con su apertura, iban saliendo muñequitas más pequeñitas. Mi abuela, alimentando mi fantasía, me decía que cada vez que abriera una, pidiera un deseo, y yo encantada con la muñequita rusa y queriendo que se cumplieran esos deseos que fueron numerosos, dedicaba mi tiempo a armarlas y desermarlas ilusionada.
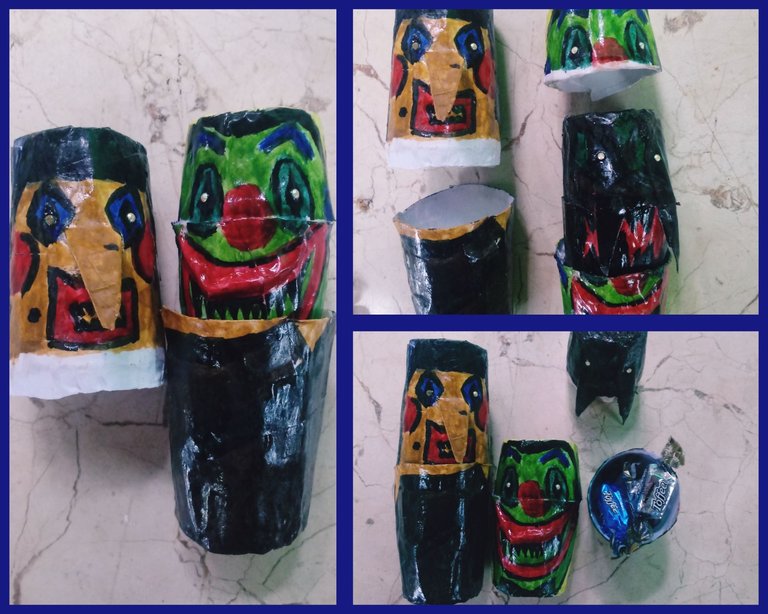
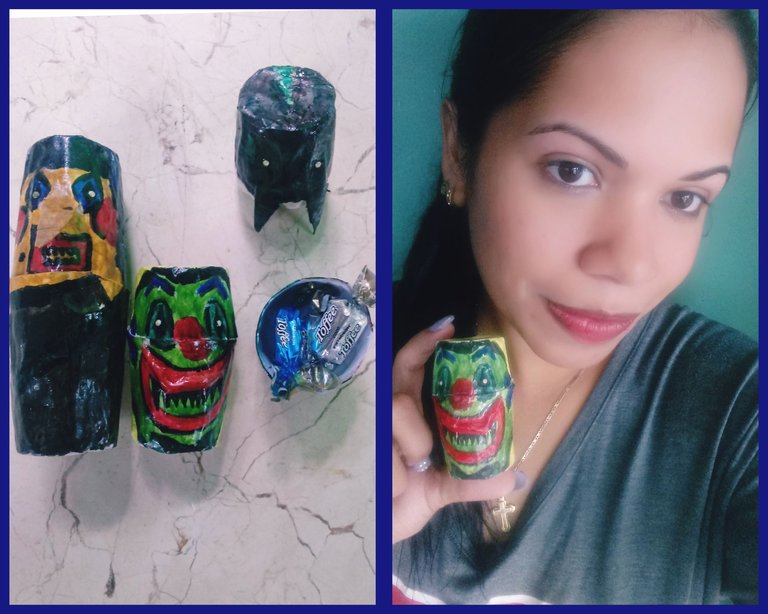
Esta sensación, he querido transmitírsela a mis sobrinos pequeños, con la confección de monstruitos sorpresas para Halloween.
En el tutorial de hoy amigos, tomando como referencia la estructura de las matriuska, les mostraré de forma sencilla como podemos hacer pequeños monstruos que vayan descendiendo en su tamaño.
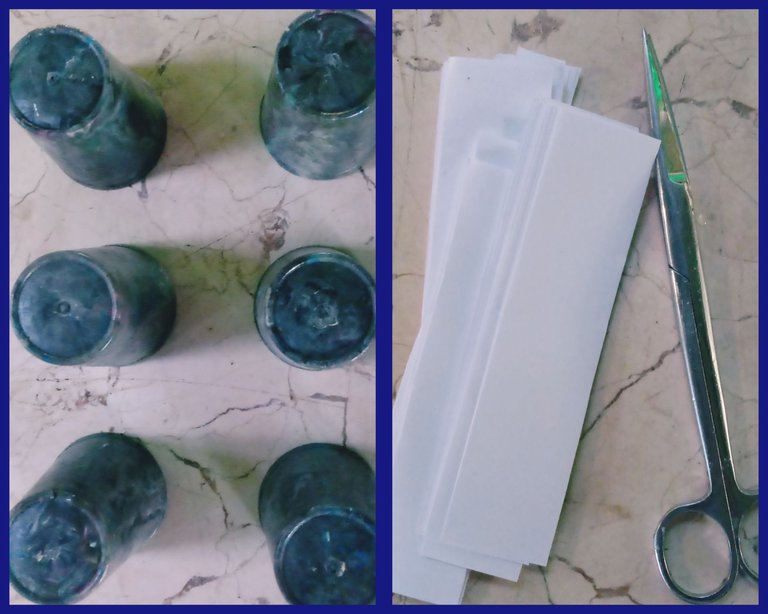
Materiales
.Moldes: Seis vasitos de igual diámetro
.Tiras de papel blanco
.Pega elaborada de harina
.Tijera
.Temperas
.Acuarelas
.Pincel
.Barníz
Modo de confección:
1-Tomar los vasitos y humedecerlos en su totalidad con agua.
2-Tomar tiras de papel blanco, y después de humedecidas en agua, darle una primera capa de empapelado a los vasitos.
3-Realizar dos capas de empapelado a los vasitos, con tiras de papel blanco y pega elaborada de harina. Dejar secar por doce horas.
4-Desmontar del molde cuidadosamente y cortar las tiritas sobrantes.
5-Colocar los vasitos por parejas: pareja uno, pareja dos, pareja tres. La pareja uno dejarla intacta, a la número dos, utilizando la tijera cortar dos centímetros menos que la pareja uno, y a la pareja tres, cortar dos centímetros menos que la dos.
6-Colocar los vasitos por parejas uno encima de otro, conformando una estructura cerrada.
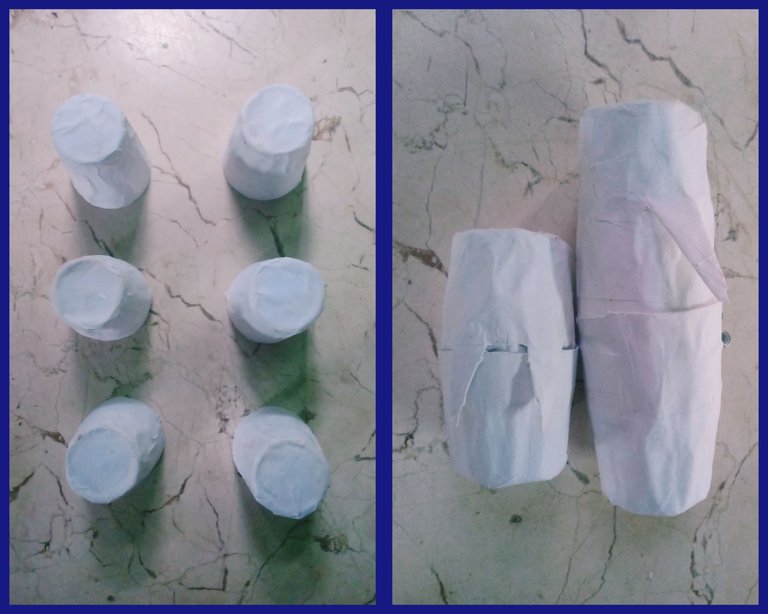
Ya tenemos nuestro base conformada para los monstruitos, y hemos logrado que quepan sin dificultad uno dentro del otro, descendiendo en tamaño.
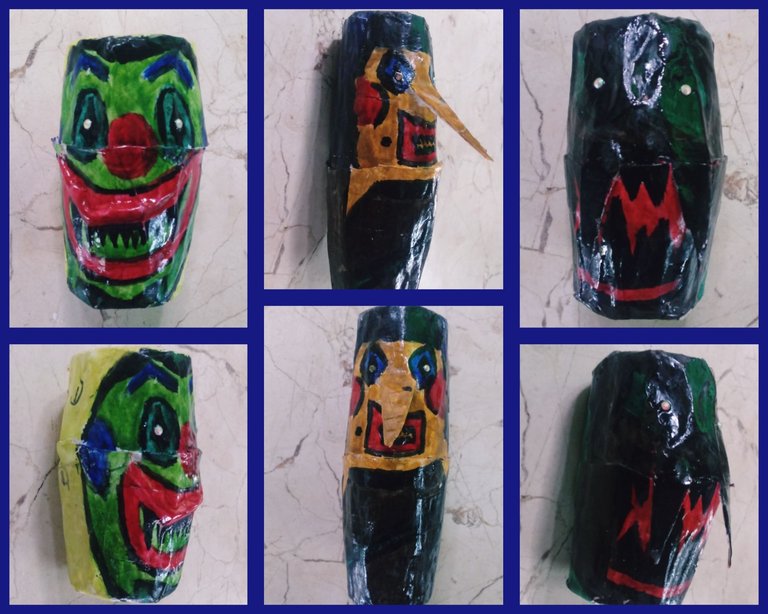
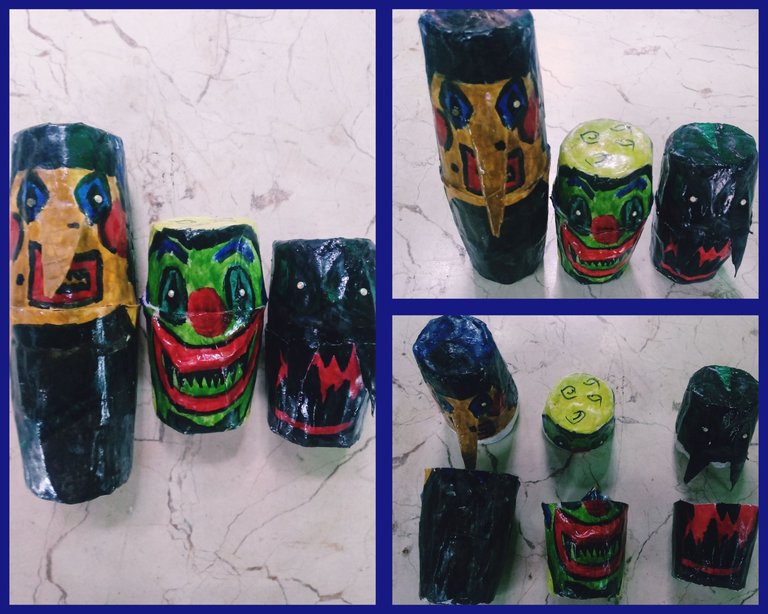
Ahora, venciendo amigos, nuestros miedos a los monstruos que en ocasiones protagonizan nuestras pesadillas, comenzamos a decorarlos con temperas y acuarelas.
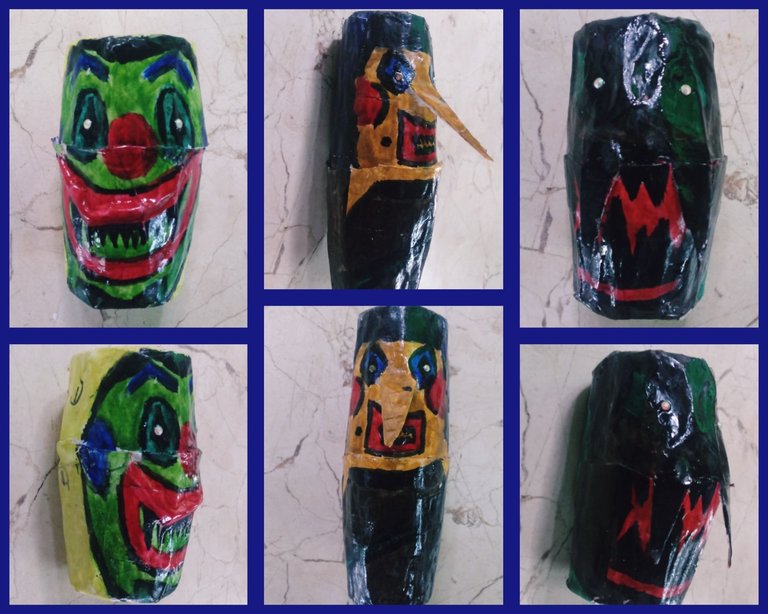
La bruja de Hanzel y Gretel, los payasos malvados, y el hombre lobo, son en los que me basé, mediante la combinación de colores, para darle vida a los pequeños monstruos .
Para darle su acabado brilloso, utilicé barníz.
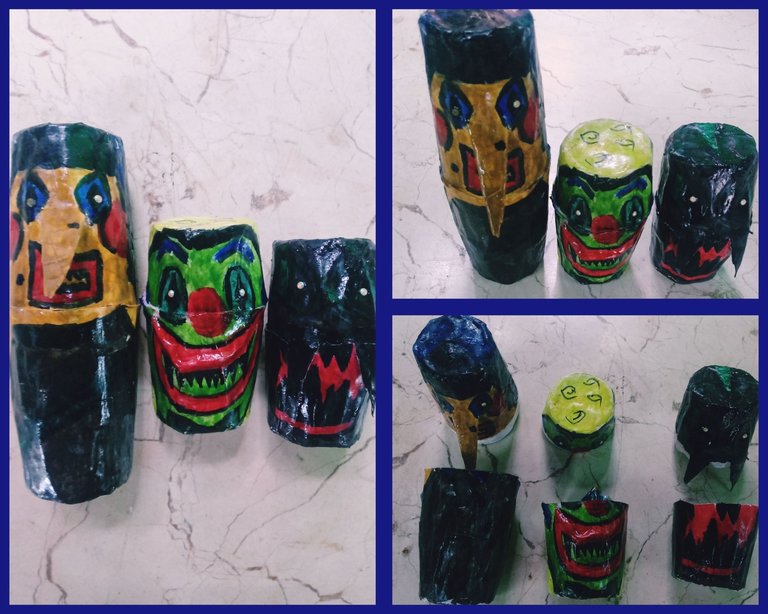
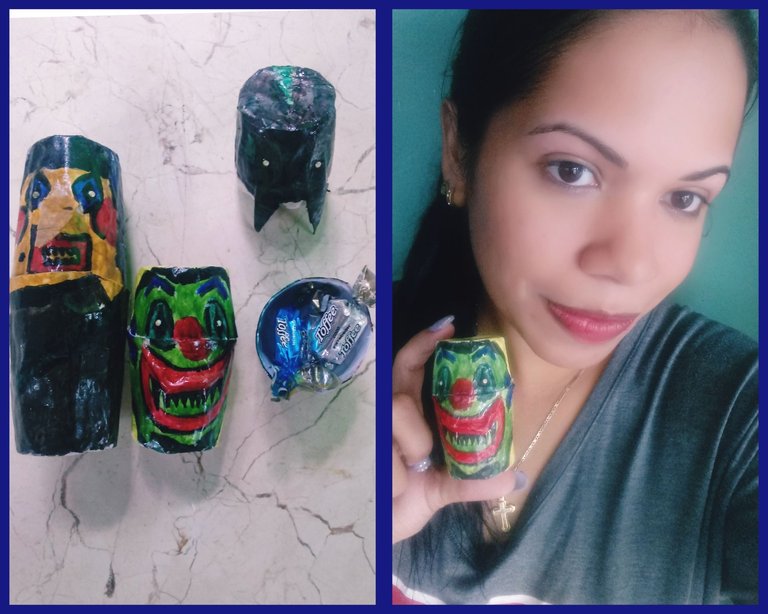
Un detalle amigos, para mantener la magia de Halloween y el espíritu de ilusión de los pequeños, al ir descubriendo cada uno de los monstruitos internos, les sugiero colocar dentro del más pequeño caramelitos , confituras o algún juguetico pequeño. Esto generará un ambiente familiar positivo y a los pequeños de la familia les encantará.
Espero que les haya gustado la confección de estos monstruos sorpresas, para Halloween, los exhorto a recrearlos y compartirlos en esta fecha cercana.
Excelentes y bendecidos días amigos. Gracias por sus bellas e inspiradoras creaciones compartidas. 🙋💖.
English
Greetings fellow creators🙋☀. There are many toys that impacted my childhood, especially my grandmother's matriushka. That while for her, it was considered a decorative family heirloom, for me it was a toy flashing with emotions in the visits I made to her, because it was amazing to me how with its opening, smaller dolls were coming out. My grandmother, feeding my fantasy, told me that every time I opened one, to make a wish, and I was delighted with the Russian doll and wanting those wishes to be fulfilled, which were numerous, I dedicated my time to putting them together and desarmarlas excited.
This feeling, I have wanted to transmit it to my little nephews, with the making of little monsters surprises for Halloween.
In today's tutorial friends, taking the structure of the matriuska as a reference, I will show you in a simple way how we can make small monsters that go down in size.
Materials
.Molds: Six cups of equal diameter
.White paper strips
.Paste made of flour
.Scissor
.Temperas
.Watercolors
.Brush
.Varnish
Mode of preparation:
1-Take the cups and moisten them completely with water.
2-Take strips of white paper, and after moistened in water, give a first layer of wallpaper to the glasses.
3-Make two layers of wallpaper to the cups, with strips of white paper and glue made of flour. Leave to dry for twelve hours.
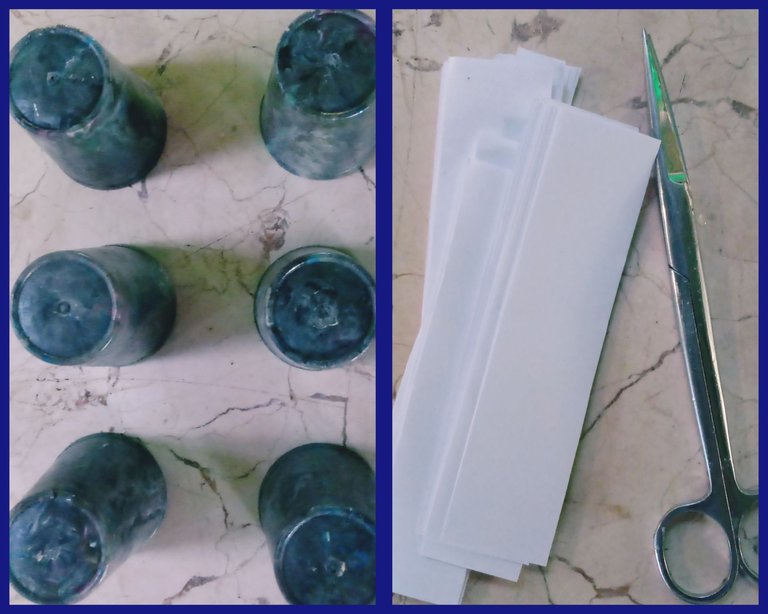
4-Remove from the mold carefully and cut the leftover plasters.
5-Place the cups in pairs: couple one, couple two, couple three. The couple one leave it intact, to the number two, using the scissors cut two centimeters less than the couple one, and to the couple three, cut two centimeters less than the two.
6-Place the cups in pairs one on top of the other, forming a closed structure.
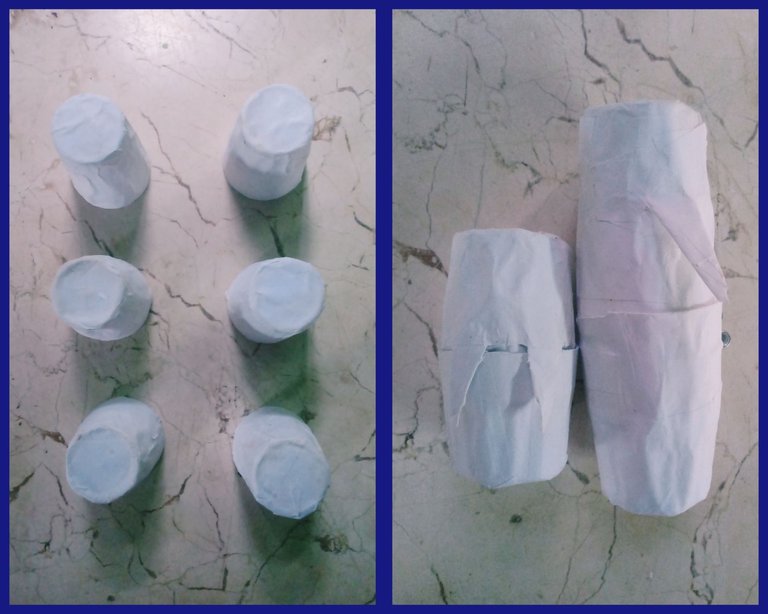
We have already formed our base for the little monsters, and we have managed to fit them without difficulty one inside the other, decreasing in size.
Now, overcoming friends, our fears of the monsters that sometimes star in our nightmares, we began to decorate them with tempera and watercolors.
The witch of Hanzel and Gretel, the evil clowns, and the wolf man, are the ones I based on, by combining colors, to bring the little monsters to life.
To give it its shiny finish, I used varnish.
A detail friends, to keep the magic of Halloween and the spirit of illusion of the little ones, as they discover each of the inner monsters, I suggest you to place inside the smallest candies, jams or some small toy. This will generate a positive family atmosphere and the little ones in the family will love
I hope you liked the making of these surprise monsters, for Halloween, I urge you to re-create them and share them on this near date.
Excellent and blessed days friends. Thank you for your beautiful and inspiring shared creations. 🙋💖.