Español
Saludos comunidad de creadores🙋🎆. Octubre, es uno de los meses que considero más hermosos del año, pues a parte de que festejo el nacimiento de varios miembros de mi familia, es costumbre en nosostros reunificarnos el 31, para celebrar Halloween.
Disfraces, dulces, escalofriantes historias tienen lugar ese día.
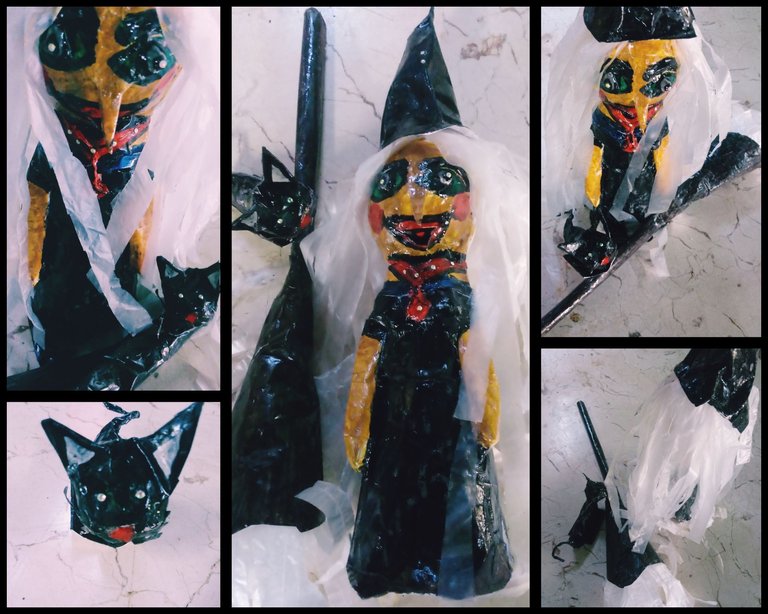
Inspirada en esta fecha cercana y queriendo darle vida a esas gustadas historias, quise confeccionar a la brujita Micaela, que junto a su gato negrito, Teodoro, y su escoba voladora, será la protagonista de sucesivos relatos aterradores en esa noche de brujas.
Amigos, los invito que me acompañen al tutorial de hoy, pues les mostraré de forma sencilla como mediante la técnica de papel maché podemos realizar brujitas, gatos y escobas, que nos sirven de colgantes decorativos para nuestros hogares en esta fecha aterradora, además de sernos muy útil a los amantes de crear y narrar historias producto de nuestra imaginación.
Materiales:
.Moldes: -Dos vasos, pequeño y mediano
-Pomo redondo
.Tiras de papel blanco
.Tijera
.Pega elaborada de harina
.Pegamento
.Nailon
.Cartulina
.Temperas
.Acuarelas
.Barníz
Modo de confección:
Para la brujita:
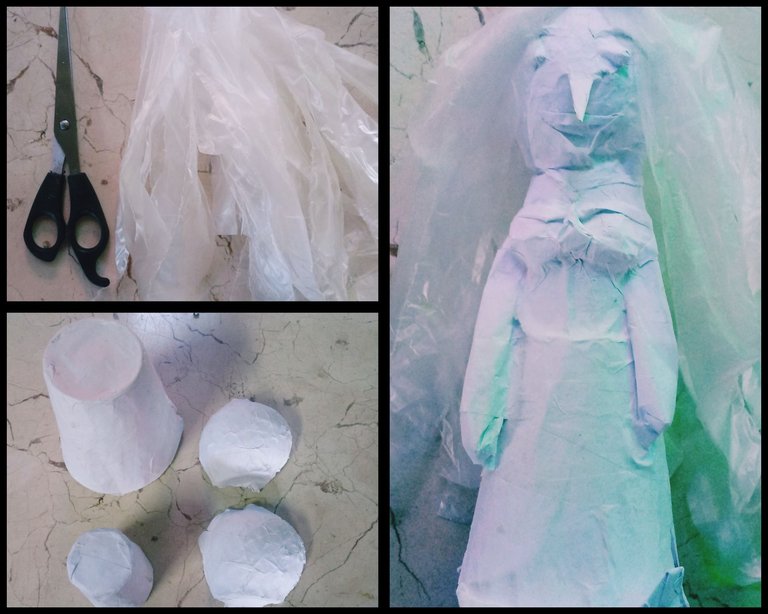
Cabeza:
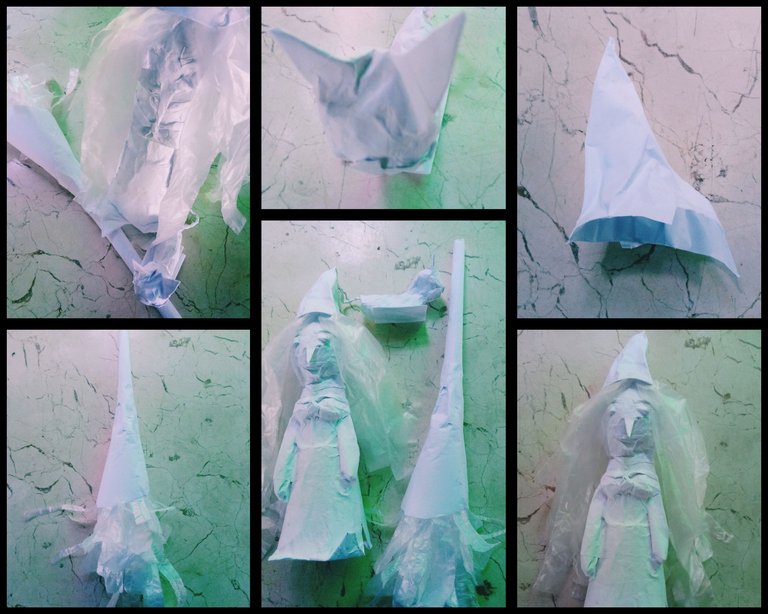
1-Tomar un pomito de estructura completamente redonda, y utilizando un algodonsito, impregnar toda su superficie con aceite.
2-Utilizando la técnica de papel maché con las tiras de papel blanco y la pega elaborada de harina, empapelamos dándole tres capas a la estructura, y dejamos secar por ocho horas.
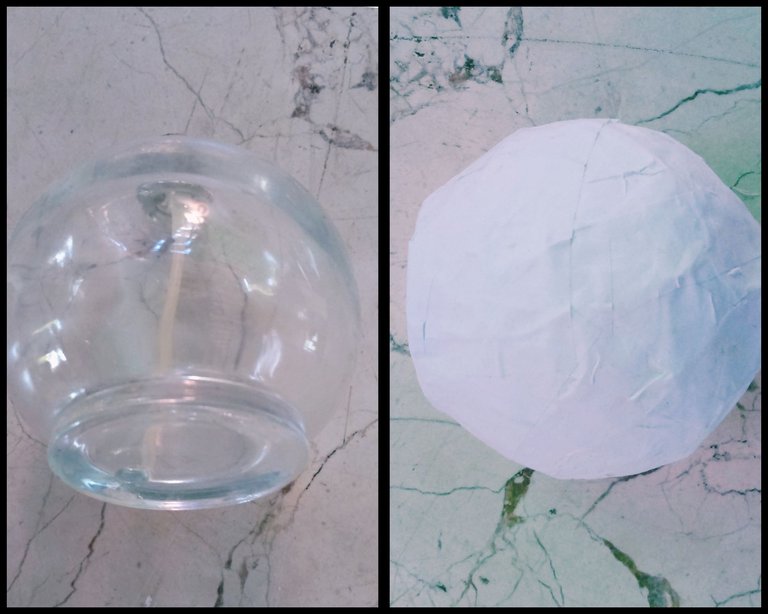
3-Realizar con la tijera cuidadosamente un corte por todo su medio, permitiéndonos desmontarlo del molde y obtener dos mitades redondas.
4-Unimos las dos mitades, utilizando la técnica de papel maché, dejándole un pequeño orificio en la parte superior, dónde llevará el cabello.
Cabello:
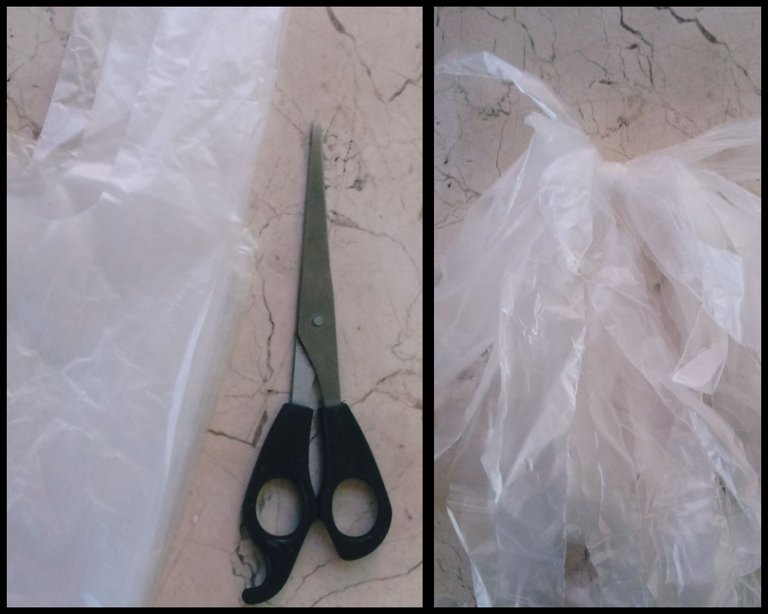
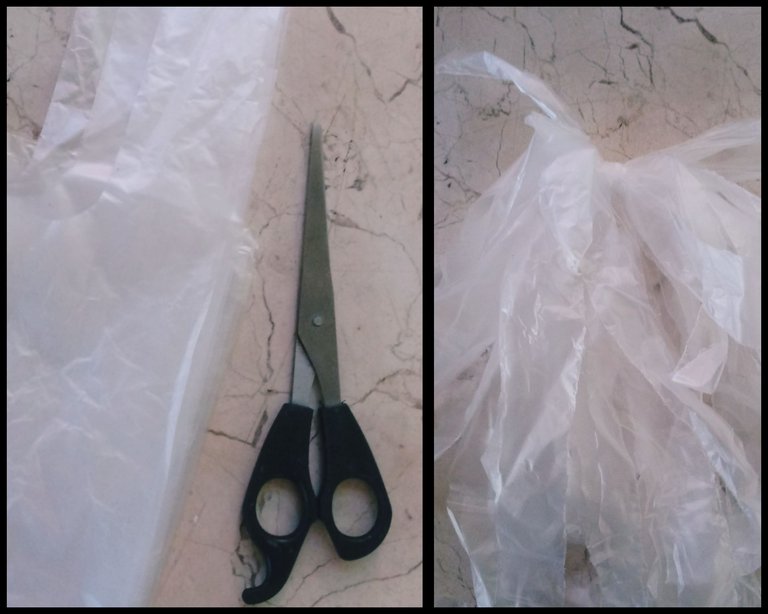
1-Tomar nailon y con la tijera, realizarle cortes conformando finas tiritas.
2-Amarrarlas por su centro y colocarlas en el orificio para el cabello.
Ojos y boca
1-Realizamos rollitos de papel pequeño en forma redonda, para sus ojos y de tabaquitos, para su boca y cejas prominentes.
2-Utilizando el pegamento adherirlos a la parte delantera de la cabeza.
Cuerpo:
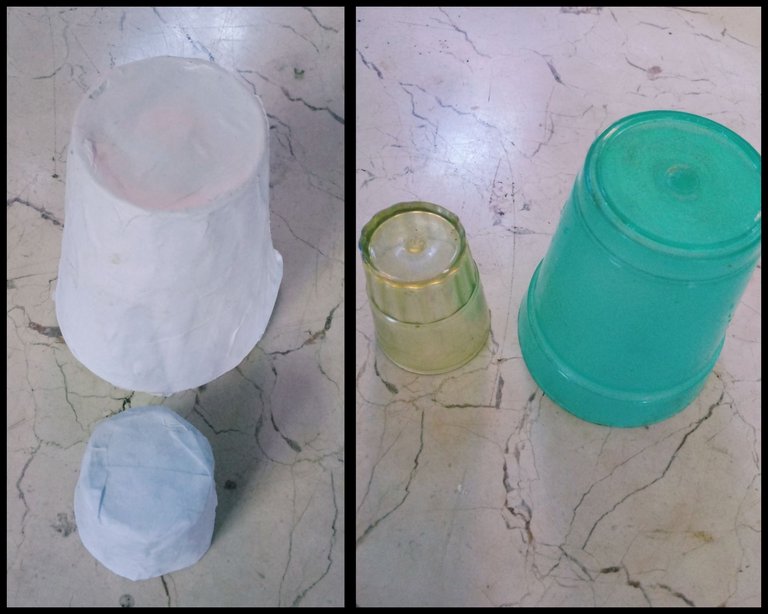
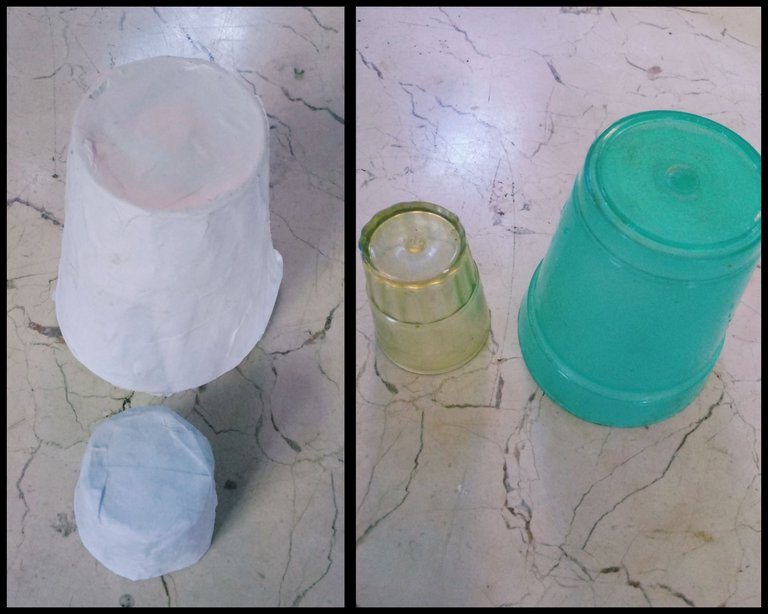
1-Tomar un algodonsito y humedecido en aceite impregnar toda la superficie de los dos vasitos de moldes.
2-Empapelar, utilizando las tiras de papel blanco y la pega elaborada de harina ambas estructuras, dándole tres capas y dejándolos secar por doce horas.
2-Desmontamos de los moldes cuidadosamente y con las tijeras cortamos las tiritas sobrantes.
3-Utilizando el pegamento, pegamos el vasito pequeño resultante de papel, sobre el otro mediano.
4-Empalemos completamente, obteniendo como resultado una extructura alargada.
Brazos:
1-Estrujar dos papel en forma alargada.
2-Utilizar la técnica de papel maché y empapelarlos generándole una superficie lisa.
Pies:
1-Marcar con un lápiz en la cartulina la forma en que deseamos pies o zapatos.
2-Cortarlos con la tijera siguiendo la guía trazada.
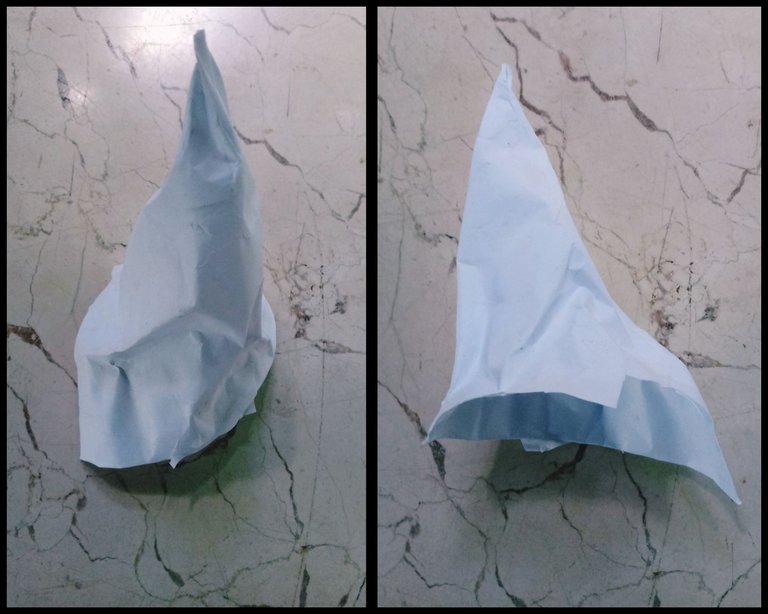
Sombrero:
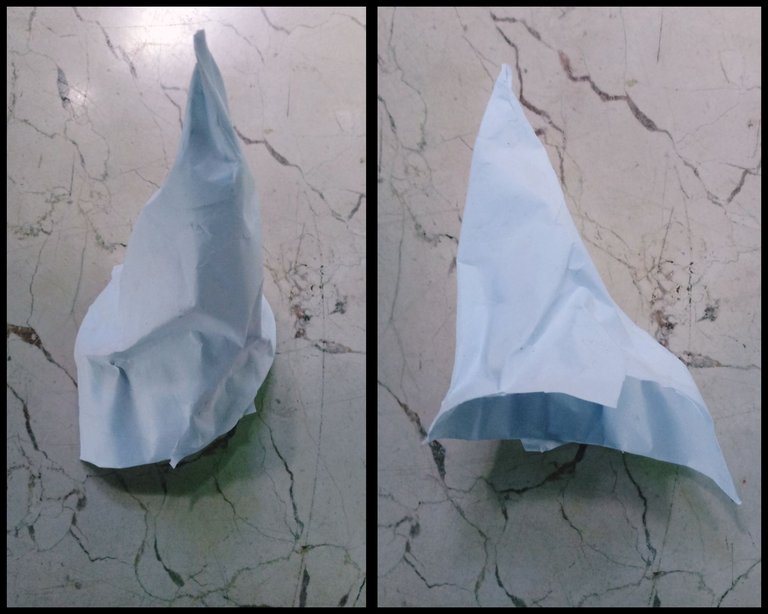
1-Cortar un cuadrado mediano.
2-Tomar una de las puntas y enrollar formando un pequeño cono.
3-Amoldar a nuestro gusto el sombrero.
4-Darle una capa de empapelado en su totalidad.
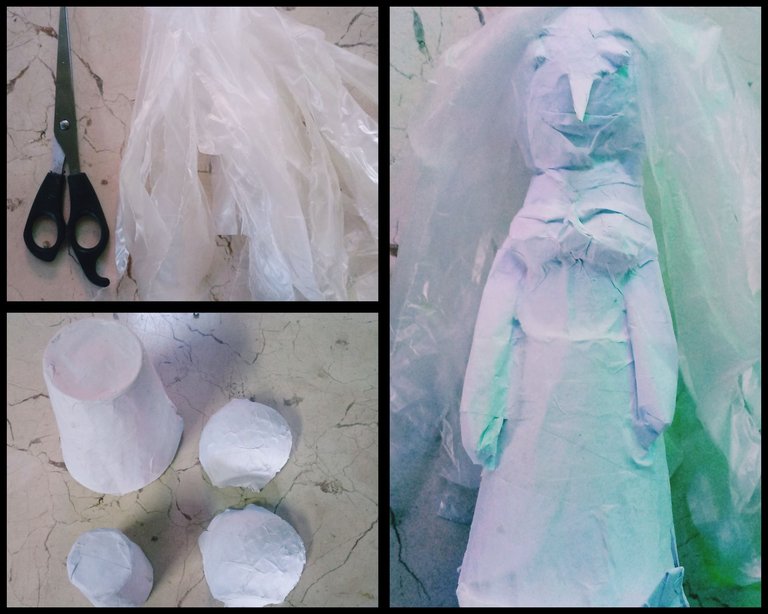
Ya teniendo todas las partes de nuestra brujita confeccionadas, con el pegamento las unificamos y luego, para generarle dureza, empapelamos completamente.
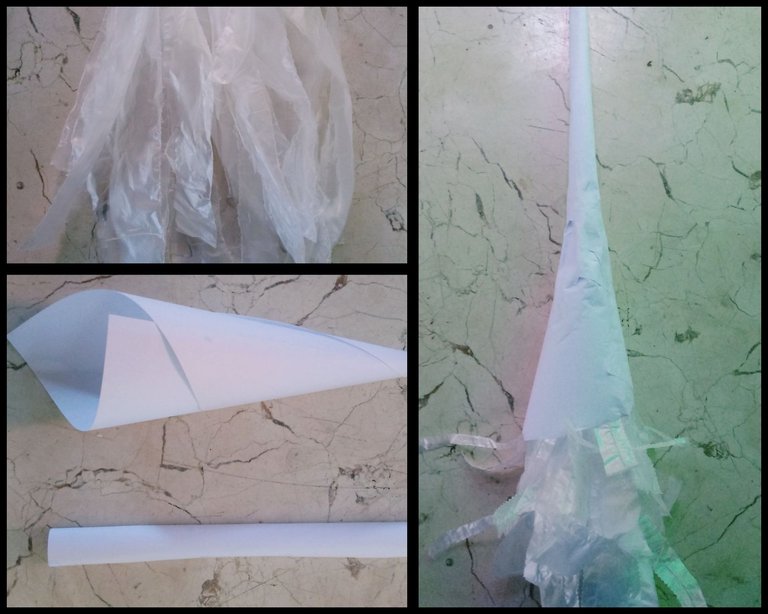
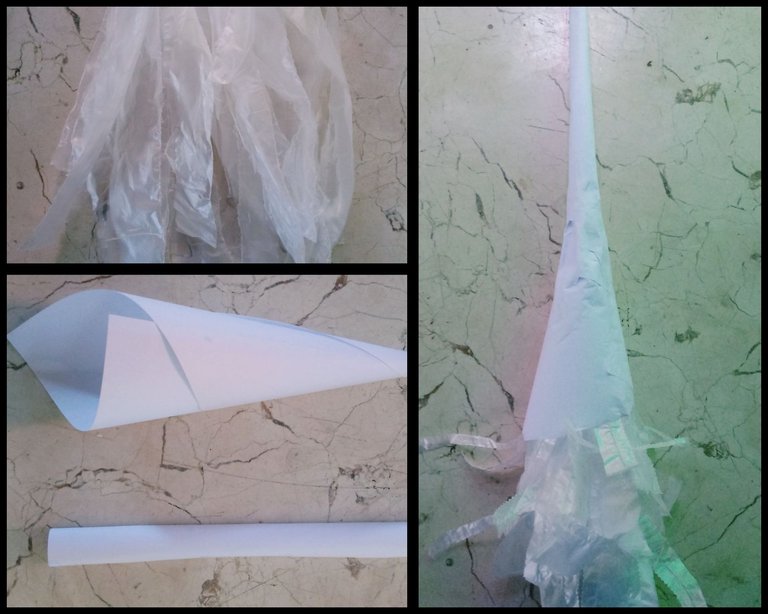
Para la escoba :
Base:
1-Cortar un cuadrado en la cartulina ó papel.
2-Tomar el cuadrado por uno de los vértices y enrollar conformando un cono .
3-Mantener la estructura cónica con el pegamento.
4-Cortar nailon en finas tiritas.
5-Adherir con el pegamento las tiras al cono.
Palo:
1-Cortar un rectángulo de papel o cartulina.
2-Enrollar en forma de tabaquito fino y largo.
3-Mantener la extructura utilizando el pegamento.
Unir palo y base confeccionadas, utilizando el pegamento, obtiendo así la escoba de nuestra brujita.
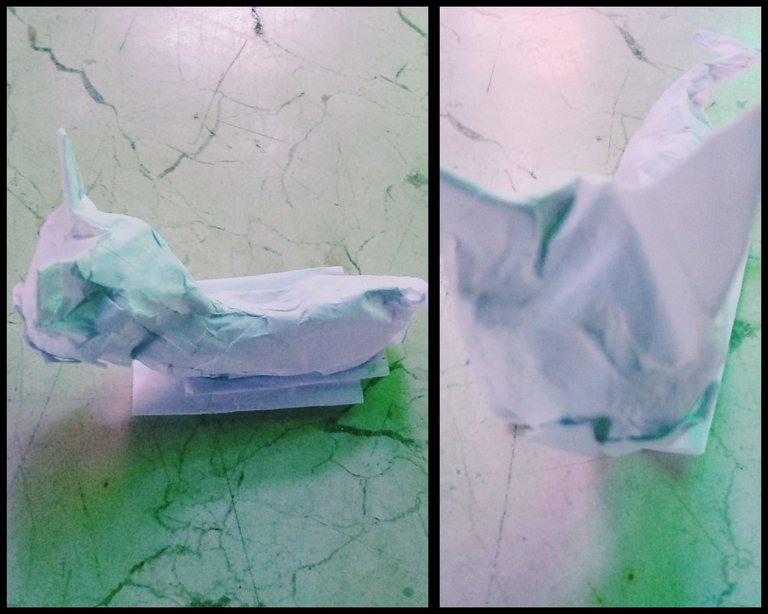
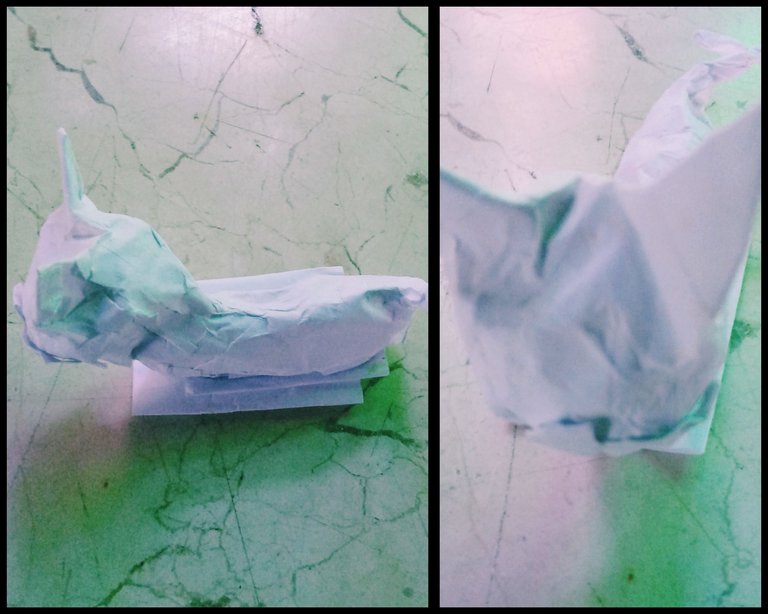
Para el gato:
Cabeza y cuerpo:
1-Estrujar dos papeles , uno en forma redonda para su cabeza y otro conformando un óvalo, para su cuerpo.
2-Unir cabeza y cuerpo utilizando el pegamento.
3-Realizar la técnica de papel maché enpapelando la estructura completa.
Orejas:
1-Marcar en una cartulina la forma deseada de las orejitas.
2-Recortar siguiendo las guías trazadas.
3-Adherir con el pegamento a la cabeza.
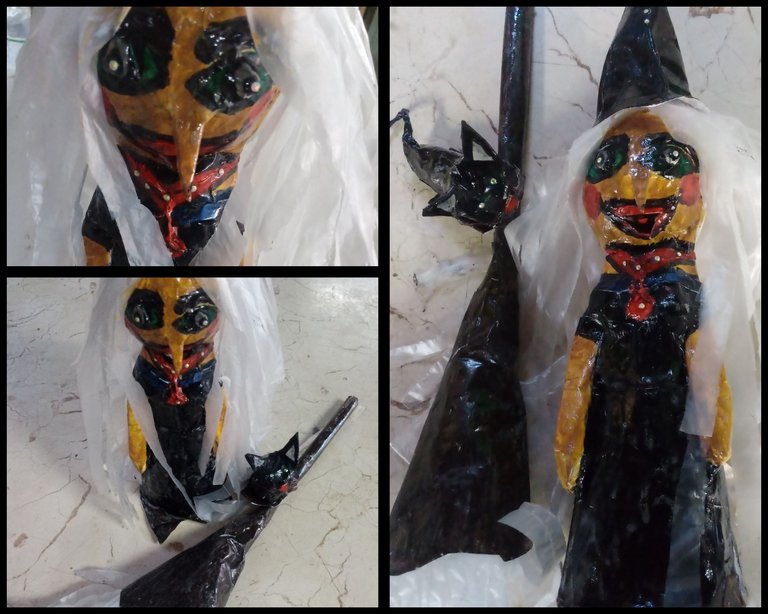
Amigos, ya tenemos conformada nuestra brujita con su escoba y pequeño gatico, ahora pasamos a sacar nuestros dotes de pintores con acuerelas y temperas recreando a esa brujita imaginaria que en ocasiones nos genera miedos.
Para su acabado utilizamos barníz, y si carecemos de este, podemos realizar el barníz casero, diluyendo poliespuma en una pequeña porción de gasolina.
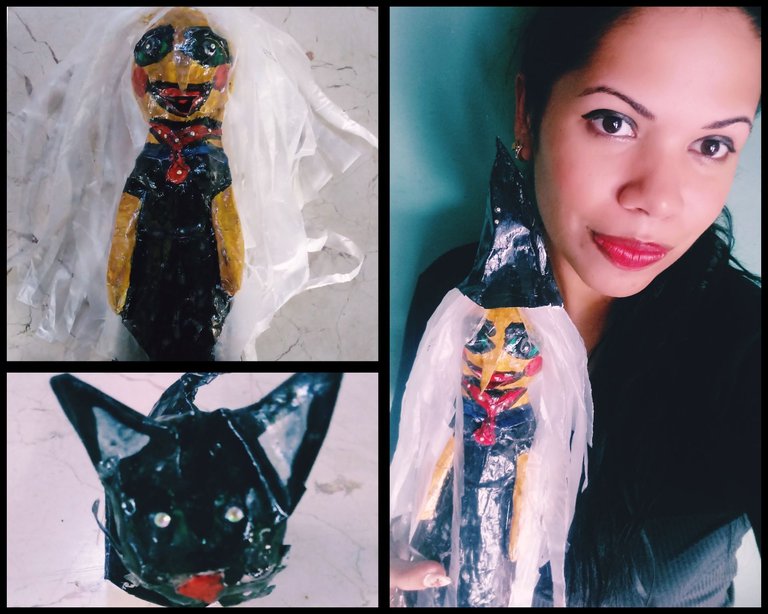
Espero que les haya gustado la confección de Micaela, la brujita bondadosa. Los exhorto a que se sumen a la creación de estos decorativos y comiencen a darle vida a sus personajes de historias, pues amigos, ya esta cerca dónde preguntaremos:¿ Dulce ó truco?.
Bendecidos y prósperos días comunidad.
Agradecerles a todos por sus publicaciones inspiradoras, capaces de instruír sobre diversas técnicas artesanales. Saludos🙋✨.
English
Greetings community of creators🙋🎆. October is one of the months that I consider the most beautiful of the year, because apart from celebrating the birth of several members of my family, it is customary for us to reunite on the 31st, to celebrate Halloween.
Costumes, sweets, chilling stories take place that day.
Inspired by this close date and wanting to give life to those beloved stories, I wanted to make the little witch Micaela, who together with her black cat, Teodoro, and her flying broom, will be the protagonist of successive terrifying stories on that Halloween.
Friends, I invite you to accompany me to today's tutorial, because I will show you in a simple way how using the papier mache technique we can make little witches, cats and brooms, which serve as decorative pendants for our homes on this scary date, besides being very useful to those who love to create and tell stories product of our imagination.
Materials:
.Molds:-Two glasses, small and medium
-Round knob
.White paper strips
.Scissor
.Paste made of flour
.Glue
.Nylon
.Cardboard
.Temperas
.Watercolors
.Varnish
Mode of preparation:
For the little witch:
Head:
1-Take a pomito of completely round structure, and using a cotton ball, impregnate its entire surface with oil.
2-Using the papier mache technique with the strips of white paper and the glue made of flour, we papered giving three layers to the structure, and let it dry for eight hours.
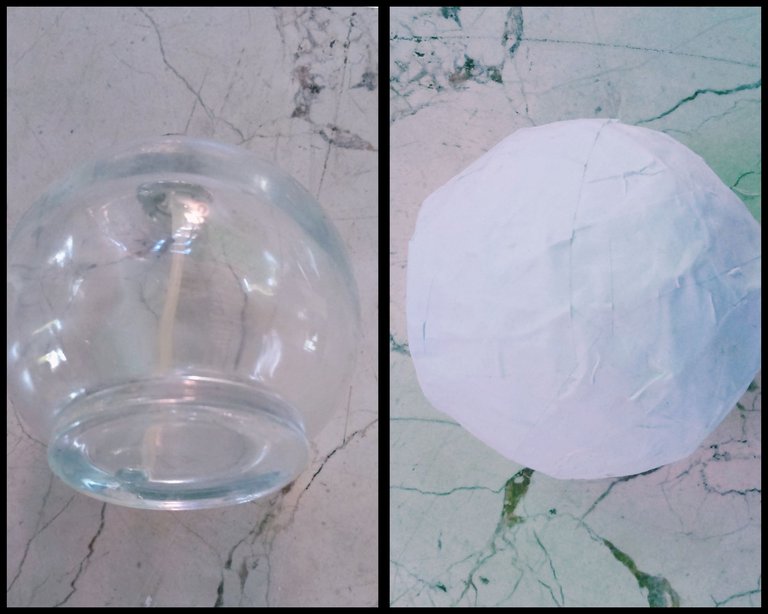
3-Make with the scissors carefully a cut all over its middle, allowing us to disassemble it from the mold and get two round halves.
4-Join the two halves, using the papier mache technique, leaving a small hole at the top, where the hair will take.
Hair:
1-Take nylon and with the scissors, make cuts forming thin plasters.
2-Tie them by their center and place them in the hair hole.
Eyes and mouth
1-We make small paper rolls in a round shape, for your eyes and tobacco, for your mouth and prominent eyebrows.
2-Using the glue stick them to the front of the head.
Body:
1-Take a cotton ball and moistened in oil impregnate the entire surface of the two cups of molds.
2-Wallpaper, using the strips of white paper and the glue made of flour both structures, giving it three layers and letting them dry for twelve hours.
2-We disassemble the molds carefully and with the scissors we cut the leftover plasters.
3-Using the glue, we stick the resulting small paper cup on the other medium one.
4-Let's splice completely, obtaining as a result an elongated structure.
Arms:
1-Squeeze two pieces of paper into an elongated shape.
2-Use the papier mache technique and wallpaper them generating a smooth surface.
Feet:
1-Mark with a pencil on the cardboard the way we want feet or shoes.
2-Cut them with the scissors following the traced guide.
Hat:
1-Cut a medium square.
2-Take one of the tips and roll it into a small cone.
3-To mold the hat to our liking.
4-Give it a layer of wallpaper in its entirety.
Already having all the parts of our little witch made, we unify them with the glue and then, to generate hardness, we completely wallpaper.
For the broom:
Base:
1-Cut a square on the cardboard or paper.
2-Take the square by one of the vertices and roll forming a cone.
3-Maintain the conical structure with the glue.
4-Cut nylon into thin strips.
5-Stick the strips to the cone with the glue.
Stick:
1-Cut a rectangle out of paper or cardboard.
2-Roll in the form of a thin and long tobacco.
3-Maintain the structure using the glue.
Join ready-made stick and base, using the glue, thus obtaining the broom of our little witch.
For the cat:
Head and body:
1-Squeeze two papers, one in a round shape for his head and the other forming an oval, for his body.
2-Join head and body using the glue.
3-Perform the papier-mâché technique onpaper the entire structure.
Ears:
1-Mark on a cardboard the desired shape of the little ears.
2-Cut following the traced guides.
3-Adhere with the glue to the head.
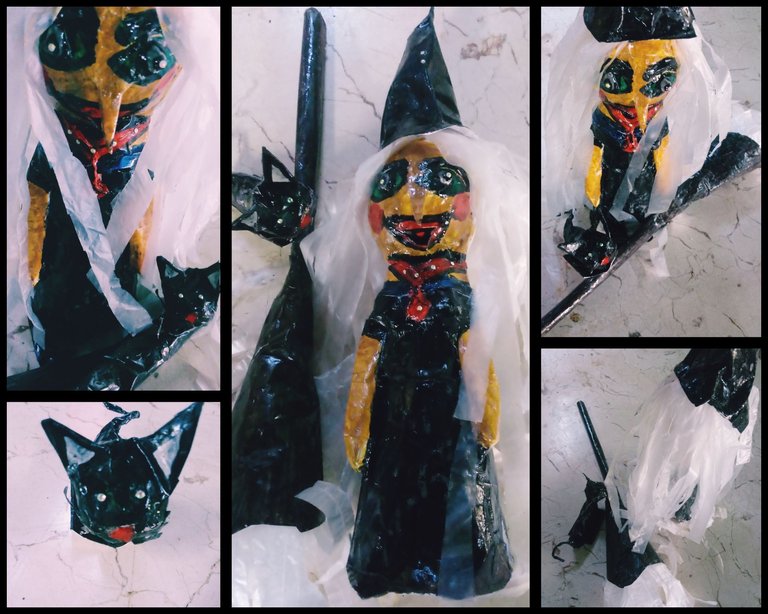
Friends, we have already formed our little witch with her broom and little kitty, now we are going to take out our skills as painters with accordions and tempera recreating that imaginary witch that sometimes generates fears for us.
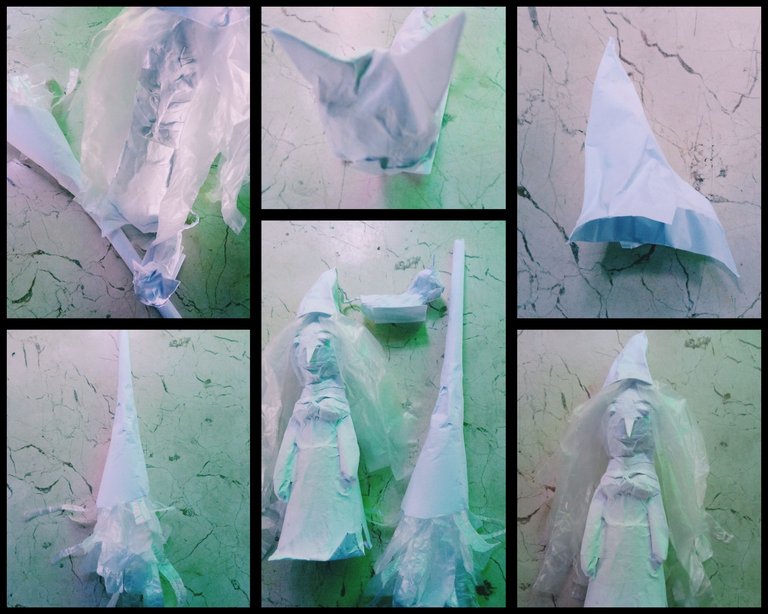
For its finishing we use varnish, and if we lack this, we can make homemade varnish, diluting polyfoam in a small portion of gasoline.
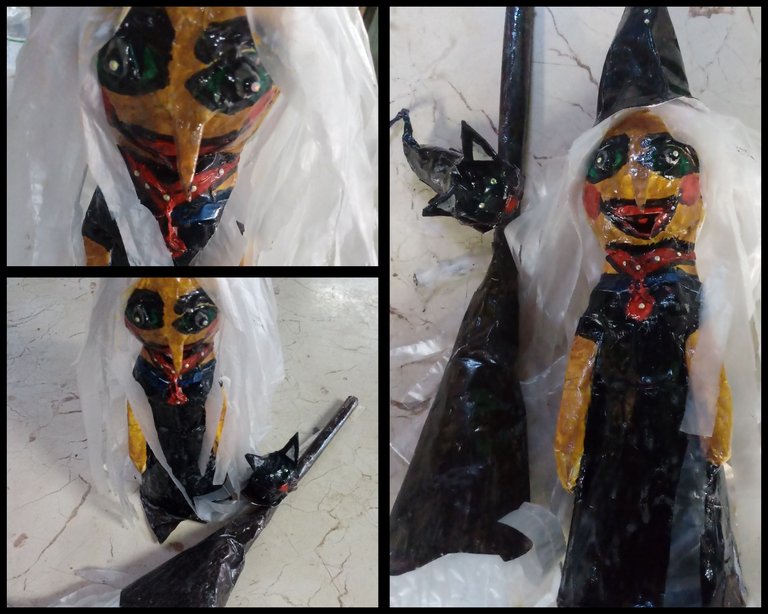
I hope you liked the making of Micaela, the kind-hearted little witch. I urge you to join the creation of these decorations and start giving life to your story characters, because friends, it's already close where we will ask: Trick or Treat?.
Blessed and prosperous days community.
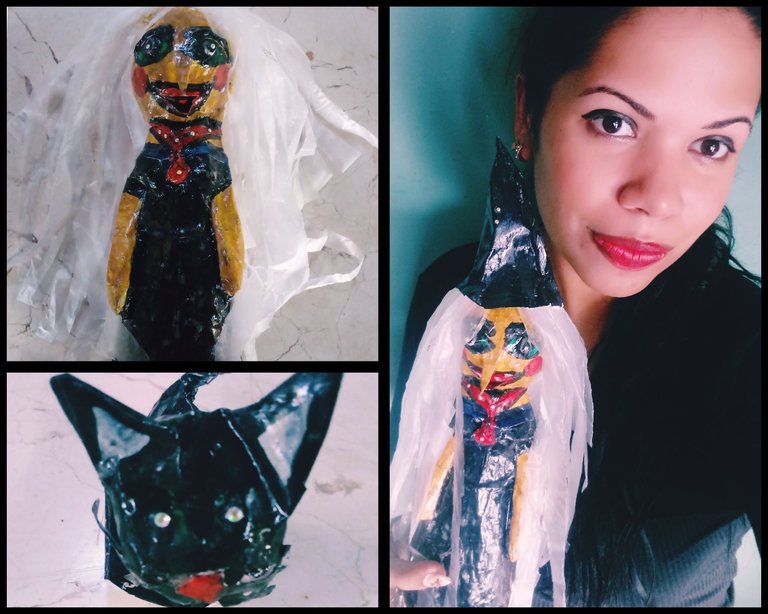
Thank you all for your inspiring posts, able to instruct on various craft techniques. Greetings🙋✨.

