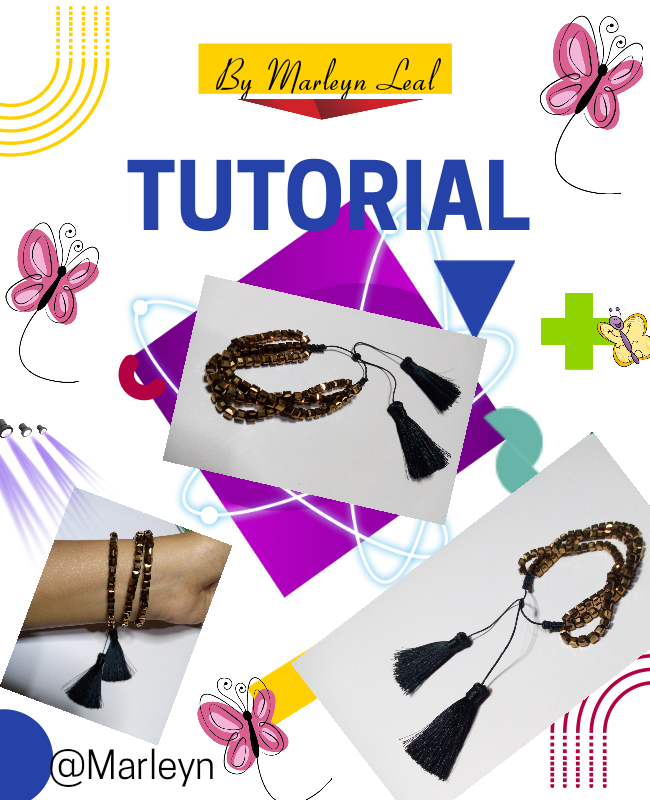
Feliz y bendecido día, ante todo espero estén super bien, viviendo a plenitud felices, con salud y abundancia hoy vamos a realizar un sencilla pulsera con borlas en las puntas, espero que sea de tu agrado te lo explicare paso a paso a través de una secuencia de imágenes, cualquier duda puedes dejarme un comentario y con gusto te ayudaré! O si lo deseas lo subo en un vídeo tutorial para tu comodidad, me lo puedes hacer saber a través de un comentario. Ante todo gracias por leerme, por estar aqui! Recuerda eres grandioso tal cual eres, nunca dejes de brillar.
Happy and blessed day, first of all I hope you are very well, living fully happy, with health and abundance today we are going to make a simple bracelet with tassels on the ends, I hope you like it I will explain it step by step through a sequence of images, any questions you can leave me a comment and I will gladly help you! Or if you wish, I'll upload it in a video tutorial for your convenience, you can let me know through a comment. First of all thanks for reading me, for being here! Remember you are great as you are, never stop shining.


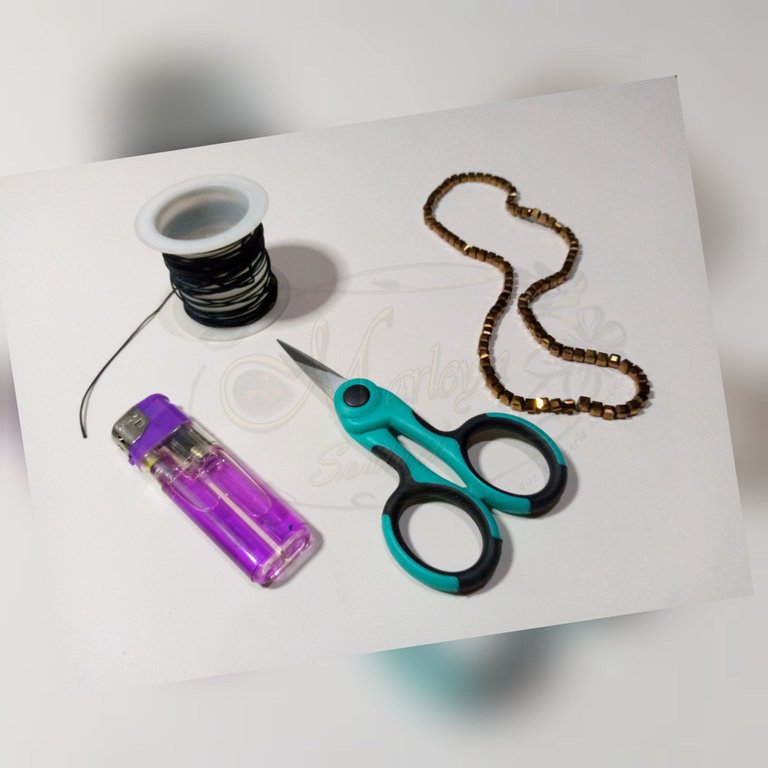
Materiales: 1 Tira completa de Cristales checos en forma de cubo color dorado fuerte, hilo chino negro, encendedor, tijera, cinta adhesiva, hilo chino, Aguja, Hilo de seda o de bordar, Amor y ganas por aprender.
Materials: 1 Full Strip of strong gold cube-shaped Czech Crystals, black Chinese thread, lighter, scissors, adhesive tape, Chinese thread, Needle, Silk or embroidery thread, Love and desire to learn.
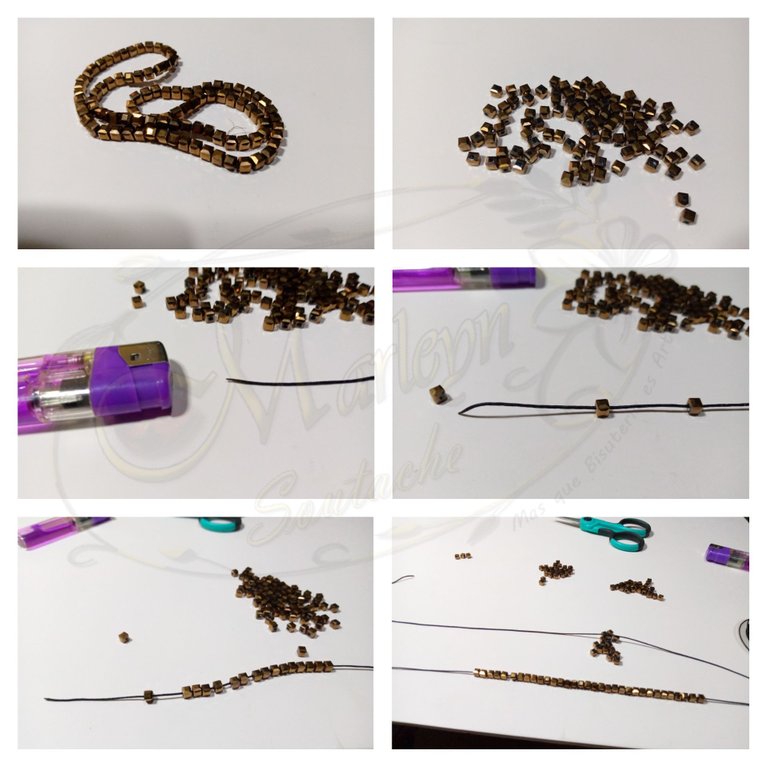
Paso 1: Separa los cristales en 3 partes iguales, corta 3 tiras de hilo chino cada uno de unos 26 centímetros de largo es mejor que te sobre hilo que te falte, así harás esta pulsera en masas después de hacer la primera toma las medidas exactas de sus hilos para que no pierdas materiales ya que eso repercute en tu productividad y tu ganancia. ahora bien quema las puntas de los hilos e introduce los cristales en cada uno de ellos separados en mismas cantidades en cada hilo.
Step 1: Separate the crystals into 3 equal parts, cut 3 strips of Chinese thread each about 26 centimeters long, it is better that you have extra thread that you lack, so you will make this bracelet in masses after making the first take the exact measurements of their threads so that you do not lose materials since that affects your productivity and your profit. Now, burn the ends of the threads and introduce the crystals in each of them, separated in equal quantities in each thread.
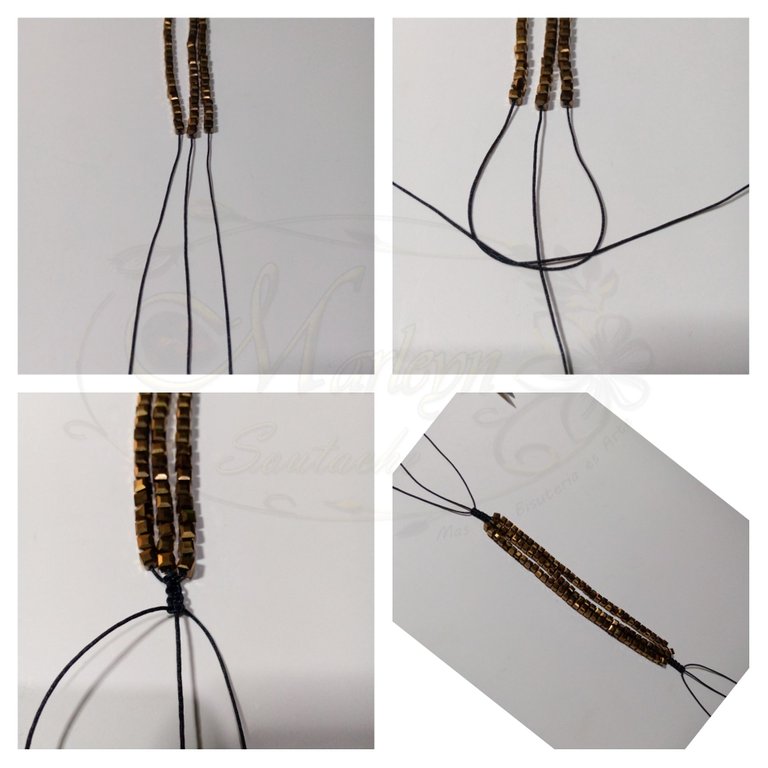
Paso 2: Al terminar de introducir los cristales, colocamos los 3 hilos juntos, separando que todo quede centrado, puedes pegar los hilos en la parte de arriba con cinta adhesiva mientras vamos a realizar un nudo plano de macrame en la parte de abajo, como ya lo e explicado varias veces te dejare el vídeo anterior abajo, allí lo explico sencillo y fácil de seguir, realizaremos 5 puntos.
Step 2: When we finish introducing the crystals, we place the 3 threads together, separating everything from being centered, you can stick the threads on the top with adhesive tape while we are going to tie a knot macrame plan at the bottom, as I have already explained several times, I will leave you the previous video below, there I explain it simple and easy to follow, we will make 5 points.

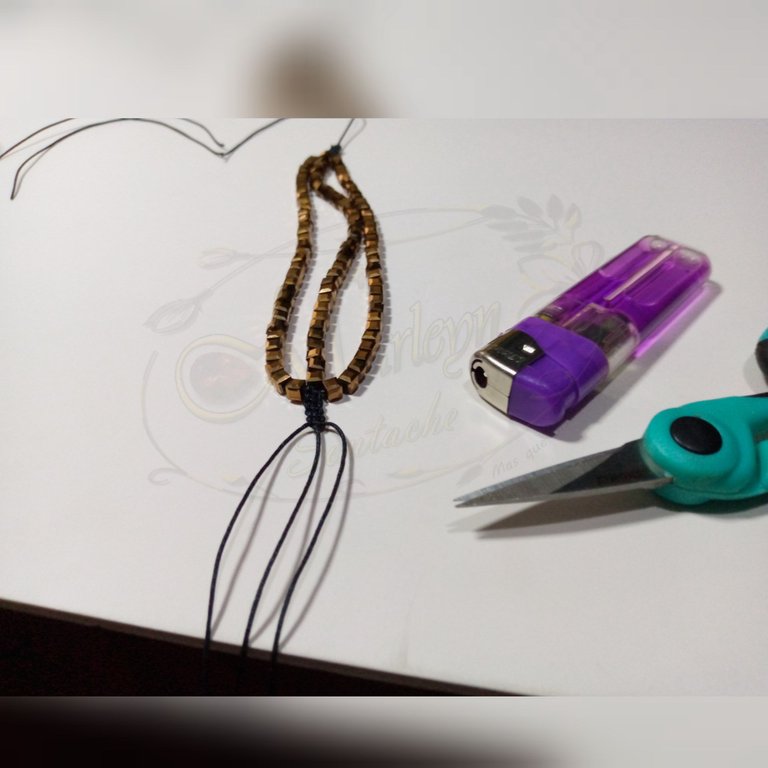
Paso 3: Mide la pulsera para el tamaño de tu muñeca, al terminar de realizar los nudos planos o nudo de simple de macrame para darle el largo deseado, corta los hilos sobrantes y quema las puntas, dejando solo el hilo central largo.
Step 3: Measure the bracelet for the size of your wrist, when you finish making the flat knots or simple macrame knots to give it the desired length, cut the excess threads and burn the ends , leaving only the long central thread.
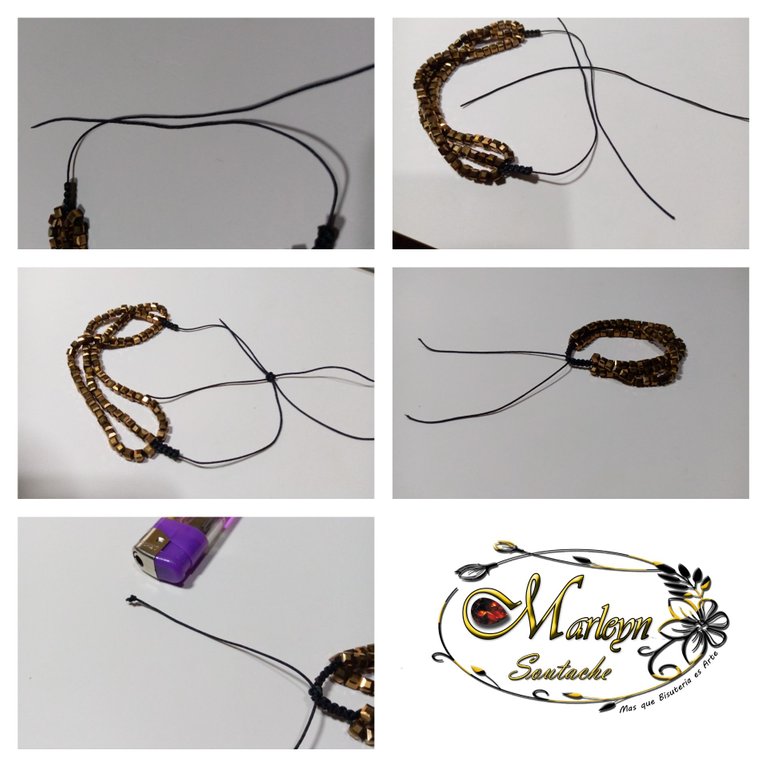
Paso 4: Dobla el hilo central uno sobre otro y procede a realizar nuevamente el nudo plano o simple con un hilo pequeño, puedes usar los sobrantes que se cortaron para de esta manera cerrar nuestra pulsera, realiza pocos nudos unos 4 o 3, corta los sobrantes y nuevamente quemar las puntas con el encendedor. En las puntas de la pulsera realiza un nudo simple para que al abrir o cerrar no se salga.
Step 4: Fold the central thread one over the other and proceed to make the flat or simple knot again with a small thread, you can use the leftovers that were cut to close our bracelet, make a few knots about 4 or 3, cut the excess and again burn the ends with the lighter. At the ends of the bracelet make a simple knot so that when opening or closing it does not come off.
***
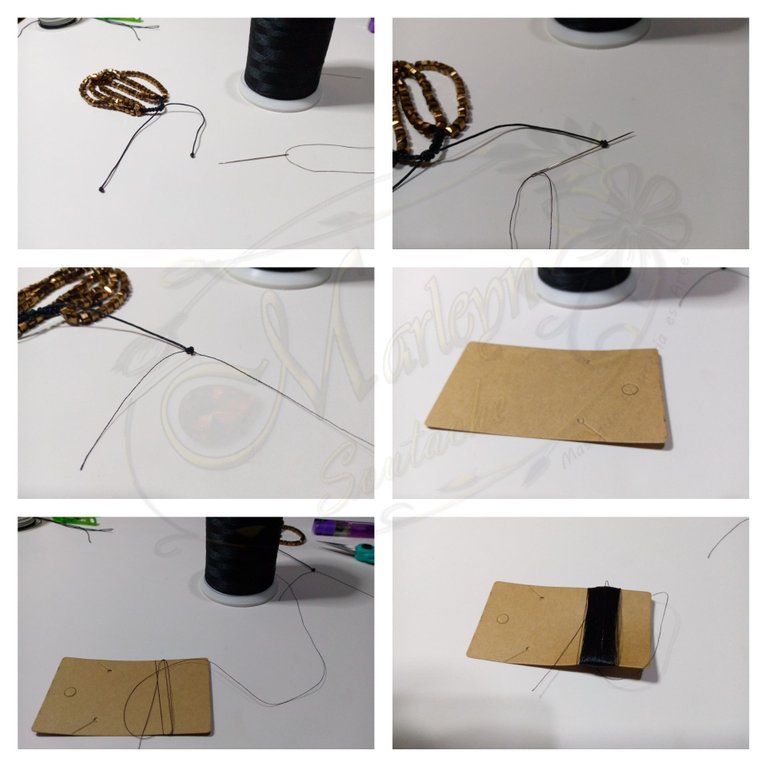
Paso 5: Esta es la parte que mas me gusta, ensarta en la aguja aproximadamente metro y medio de hilo negro de seda, realiza un nudo en la punta, ahora introducir la aguja por el centro del nudo que realizaste en la punta de la pulsera puedes guiarte con las imágenes, esto lo dejamos a un lado, toma un cartón yo estoy utilizando uno de 3 centímetros de largo y procederemos a realizar la borla, es fácil solo debemos darle vueltas con el hilo de bordar al cartón, te recomiendo las cuentes para que siempre te queden iguales yo realice 400 vueltas, ten paciencia, toma esto como una distracción y sin prisa quedara mas hermoso.
***
Step 5: This is the part that I like the most, thread about a meter and a half of black silk thread on the needle, make a knot at the end, now insert the needle through the center of the knot that you made at the end of the bracelet you can guide yourself with the images, we leave this aside, take a piece of cardboard I am using one 3 centimeters long and we will proceed to make the tassel, it is easy we just have to turn it around with the embroidery thread to cardboard, I recommend you count them so that they always stay the same, I did 400 laps, be patient, take this as a distraction and without haste it will be more beautiful.
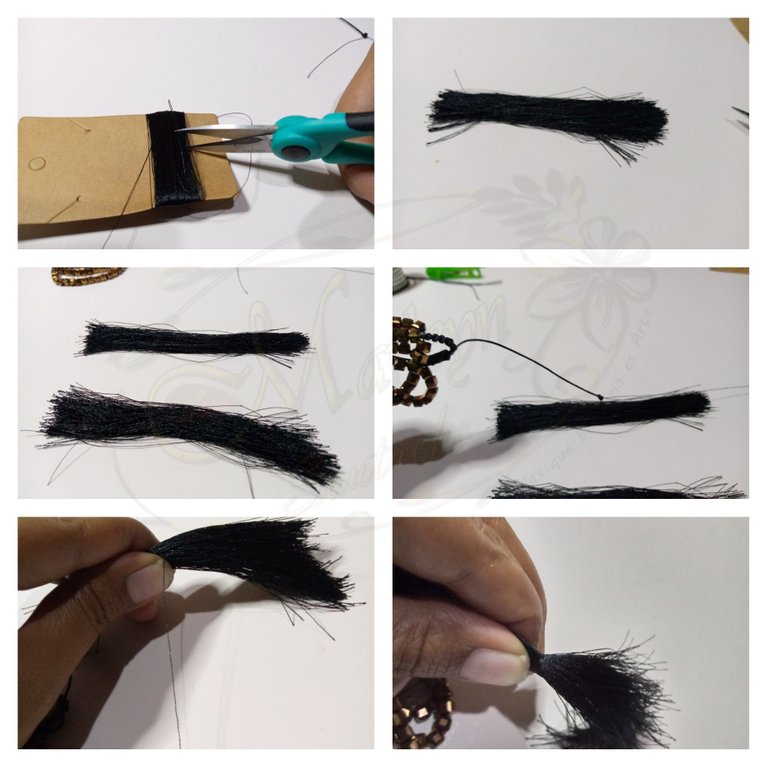
Paso 6: Al terminar las vueltas corta los hilos suavemente para que no se te separen, divide los hilos en dos al ojo por ciento no es necesario que sean exactamente iguales, coloca el nudo que realizamos a la pulsera encima de uno de los hilos, el hilo con la aguja que quede hacia un lado, y ahora coloca los otros hilos encima tapando el nudo, con el hilo con la aguja comienza a enrollarlo, que quede por encima del nudo del hilo de la pulsera como te muestro en las imágenes.
Step 6: At the end of the turns, cut the threads gently so that they do not separate, divide the threads in two to the eye of percent, it is not necessary that they are exactly the same, place the knot that we made to the bracelet on top of one of the threads, the thread with the needle to one side, and now place the other threads on top covering the knot, with the thread with the needle begin to wind it, so that it remains above the knot of the thread of the bracelet as I show you in the images.
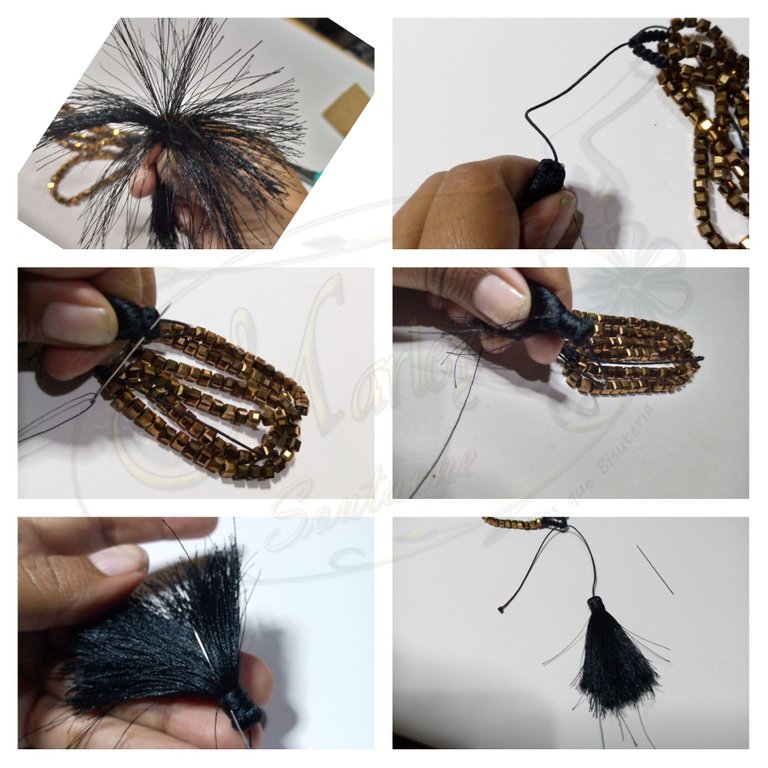
Paso 7: Con ayuda de la aguja amarra el hilo que acabas de enrollar, ahora como ves en la primera imagen pasa los hilos hacia abajo, arreglarlos muy bien, con paciencia, sin apresurarte,y vuelve a empezar a enrollar con el hilo que lleva la aguja, bien apretado, al terminar realiza unos nudos fuertes, varios preferiblemente para que no se suelten, baja la aguja por la parte central de la borla y corta.
Step 7: With the help of the needle tie the thread that you just wound, now as you see in the first image pass the threads down, fix them very well, with patience, without rushing, and start winding again with the thread that carries the needle, very tight, at the end make some strong knots, preferably several so that they do not come loose, lower the needle through the central part of the tassel and cut.
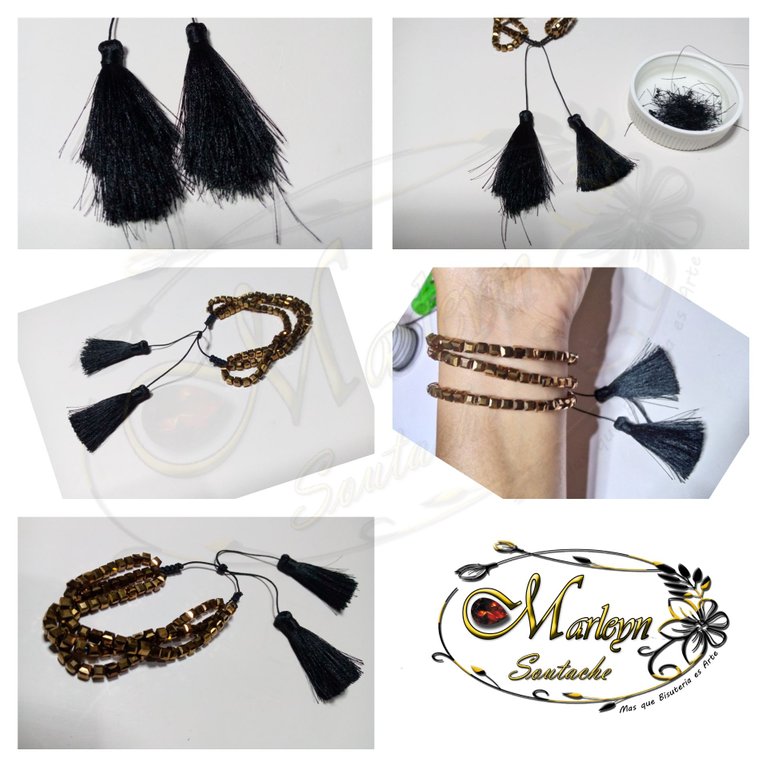
Paso 8: Realiza nuevamente los pasos anteriores para realizar la segunda borla, recuerda darle la misma cantidad de vueltas para que ambas borlas queden iguales, ahora corta con cuidado ambas borlas los hilos que están disparejos de esta manera quedara mejor con un acabado limpio. Es fácil y se ve hermoso! espero todo sea de tu agrado. Gracias por leerme.
Step 8: Carry out the previous steps again to make the second tassel, remember to give it the same number of turns so that both tassels are the same, now carefully cut both tassels the threads that are uneven from This way it will look better with a clean finish. It's easy and it looks beautiful! I hope everything is to your liking. Thanks for reading.

Si tienes una duda escríbeme un comentario, estaré feliz de ayudarte con cualquier detalle, Espero que mis diseños les gusten tanto como a mí me gusta, aprendan con placer ...!

Nunca olvides que el Poder es Querer y si quieres Puedes...
Eres Luz eres Energía, TU PUEDES ... Que el universo infinito Conspire para que todo siempre sea mejor ... Se les quiere ...

Venezuela FE
Somos Seres Abundantes! Qué las energías del universo vibren en sintonía con las de cada uno de nosotros en armonía! Cuidemos nuestras palabras, acciones y pensamientos!
If you have a question, write me a comment, I will be happy to help you with any details, I hope you like my designs as much as I like, learn with pleasure ...!

Never forget that Power is Wanting and if you want you can ...
You are Light, you are Energy, YOU CAN ... May the infinite universe Conspire so that everything is always better ... They are loved ...

Venezuela FAITH
We are Abundant Beings! May the energies of the universe vibrate in tune with those of each of us in harmony! Let's take care of our words, actions and thoughts!

Autoría del texto y todas las imágenes: @Marleyn , La edición de las imágenes las realicé yo misma, Por favor no Utilices mis fotos sin mi autorización, edites ni re-publiques mi material ¿Deseas ponerte en contacto conmigo? Escríbeme:
Correo electronico: Marleynl123@gmail.con
Discord #Marleyn#7821
Twitter: @marleynleal1
Imstagran: @MarleynSoutache
YouTube: https://youtube.com/c/marleynlealramos
Authorship of the text and all the images: @Marleyn, I did the editing of the images myself, Please do not use my photos without my authorization, edit or republish my material Do you want to contact me? Write me:
Email: Marleynl123@gmail.con
Discord #Marleyn#7821
Twitter: @marleynleal1
Imstagran: @MarleynSoutache
YouTube: https://youtube.com/c/marleynlealramos
 Mi trabajo es mi pasión y cuando tu trabajo es tu pasión nada es imposible / My work is my passion and when your work is your passion nothing is impossible


