
Muy buenas tardes comunidad Holozing saludos a todos los miembros creadores que hacen vida por acá, hoy comenzando la semana con buena energía, siendo positivos y optimistas en todo lo que nos propongamos. El día de hoy les quiero compartir una nueva creación en dónde el principal elemento es la imaginación, el foami y los personajes principales del juego.
Good afternoon Holozing community, greetings to all the creative members who make life here, today starting the week with good energy, being positive and optimistic in everything we propose. Today I want to share with you a new creation where the main element is imagination, foam and the main characters of the game.
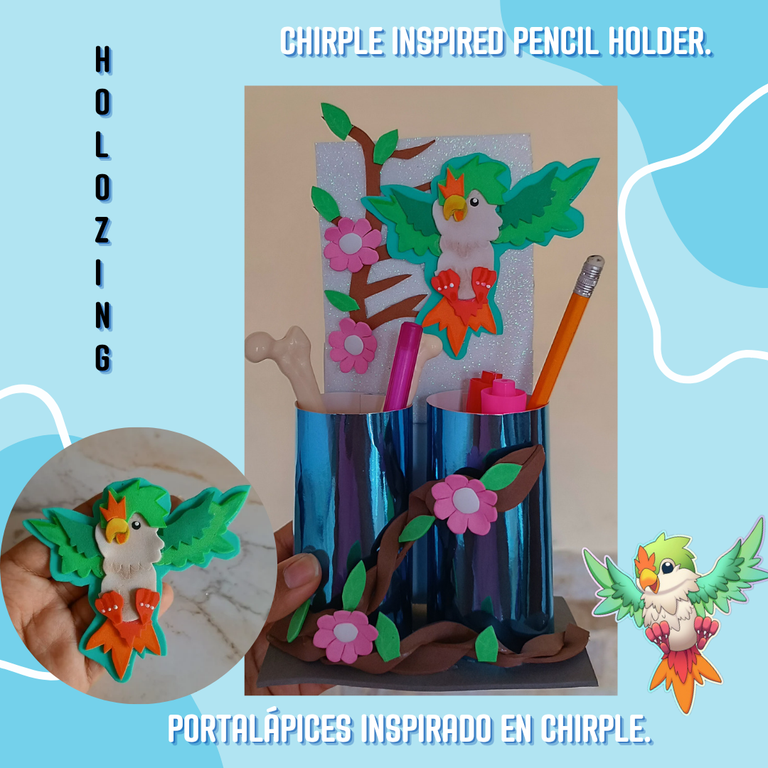
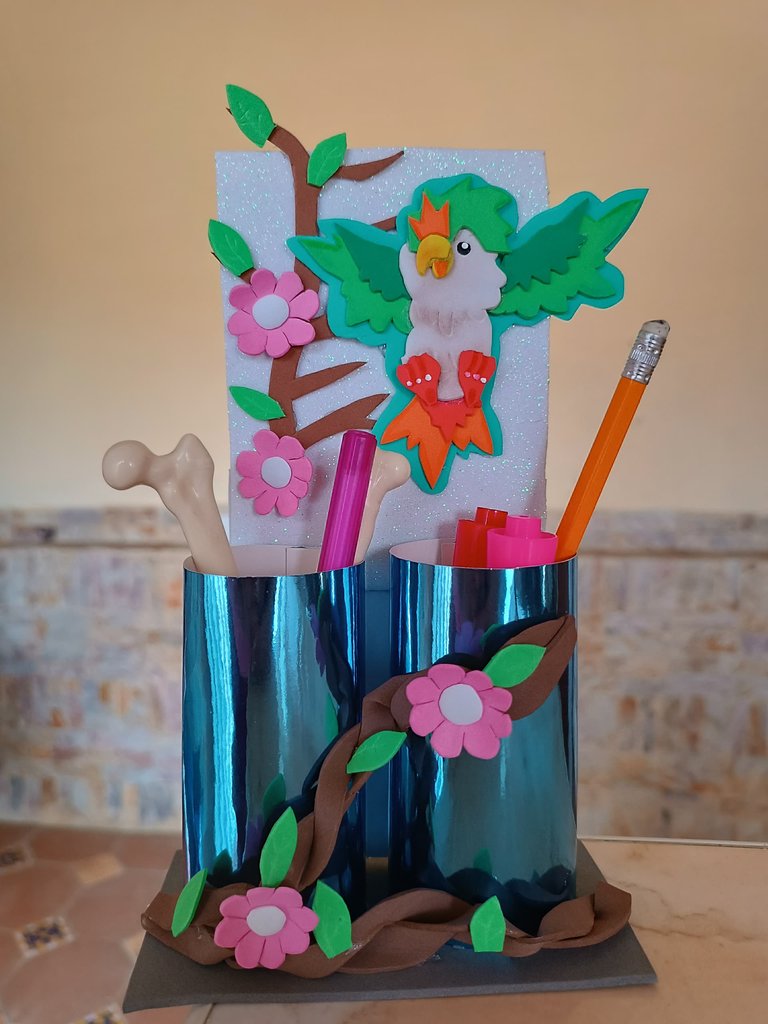
Me siento súper contenta en mostrarles este lindo portalápices inspirado en Chirple, realmente me gustó mucho el resultado quedó como lo imaginé, me agrada Chirple por sus características similares a un loro 🦜 será una criatura fascinante. A continuación les muestro el paso a paso y los materiales que utilicé.
I feel super happy to show you this cute pencil holder inspired by Chirple, I really liked the result, it turned out as I imagined, I like Chirple for its characteristics similar to a parrot it will be a fascinating creature. Below I show you the step by step and the materials I used.

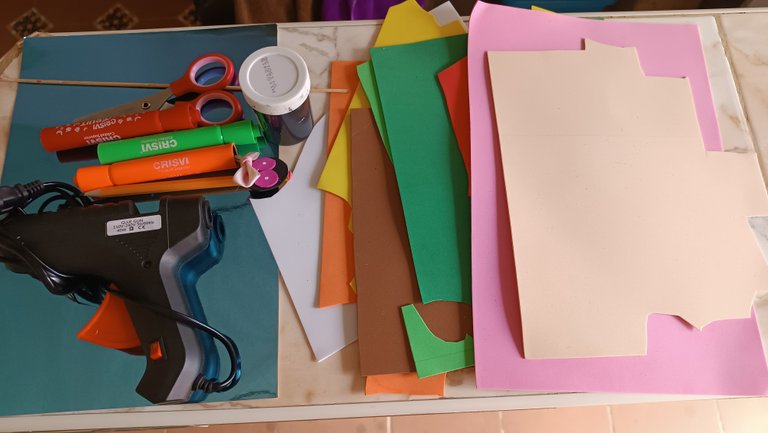
Materiales:
✅Cartulina metalizada.
✅Tijera.
✅Silicón.
✅Foami (verde, marrón, gris, blanco, rosado, naranja, amarillo, rojo).
✅Pintura blanca y negra.
✅Palillo.
✅Marcadores.
✅Sombra de ojos.
Materials:
Metallic cardboard.
Scissors.
Silicone.
Foami (green, brown, gray, white, pink, orange, yellow, red).
Black and white painting.
Toothpick.
Markers.
Shade.

Paso a paso / Step by Step
El primer paso es comenzar a realizar los compartimientos del portalápices en este caso voy a realizar dos utilizando la cartulina metalizada, voy a tomar una hoja completa la corté a la mitad y de esta mitad corte dos partes iguales, uní las puntas y las pegue con silicón.
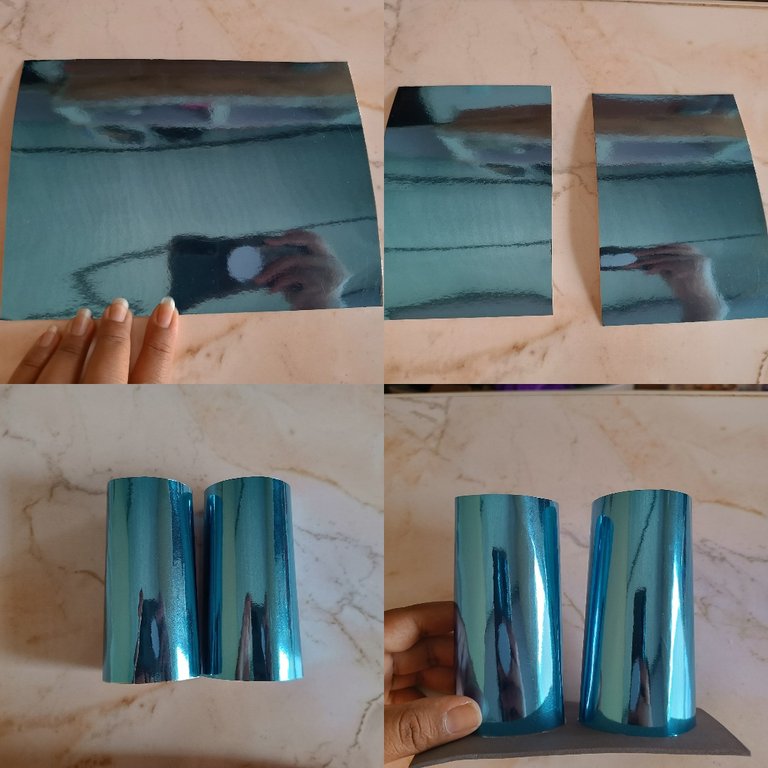
The first step is to start making the pencil holder compartments, in this case I am going to make two using the metallic cardboard, I am going to take a complete sheet, I cut it in half and from this half I cut two equal parts, I joined the tips and glued them with silicone.
Ya teniendo los dos compartimientos corte un retazo de foami gris que servirá como base, ubiqué estos dos compartimientos sobre el foami nos aseguramos que quede bien, ahora voy a proceder a realizar a Chirple en foami.
Once I had the two compartments, I cut a piece of gray foam that will serve as a base. I placed these two compartments on the foam, making sure it fits well. Now I am going to proceed to make Chirple in foam.
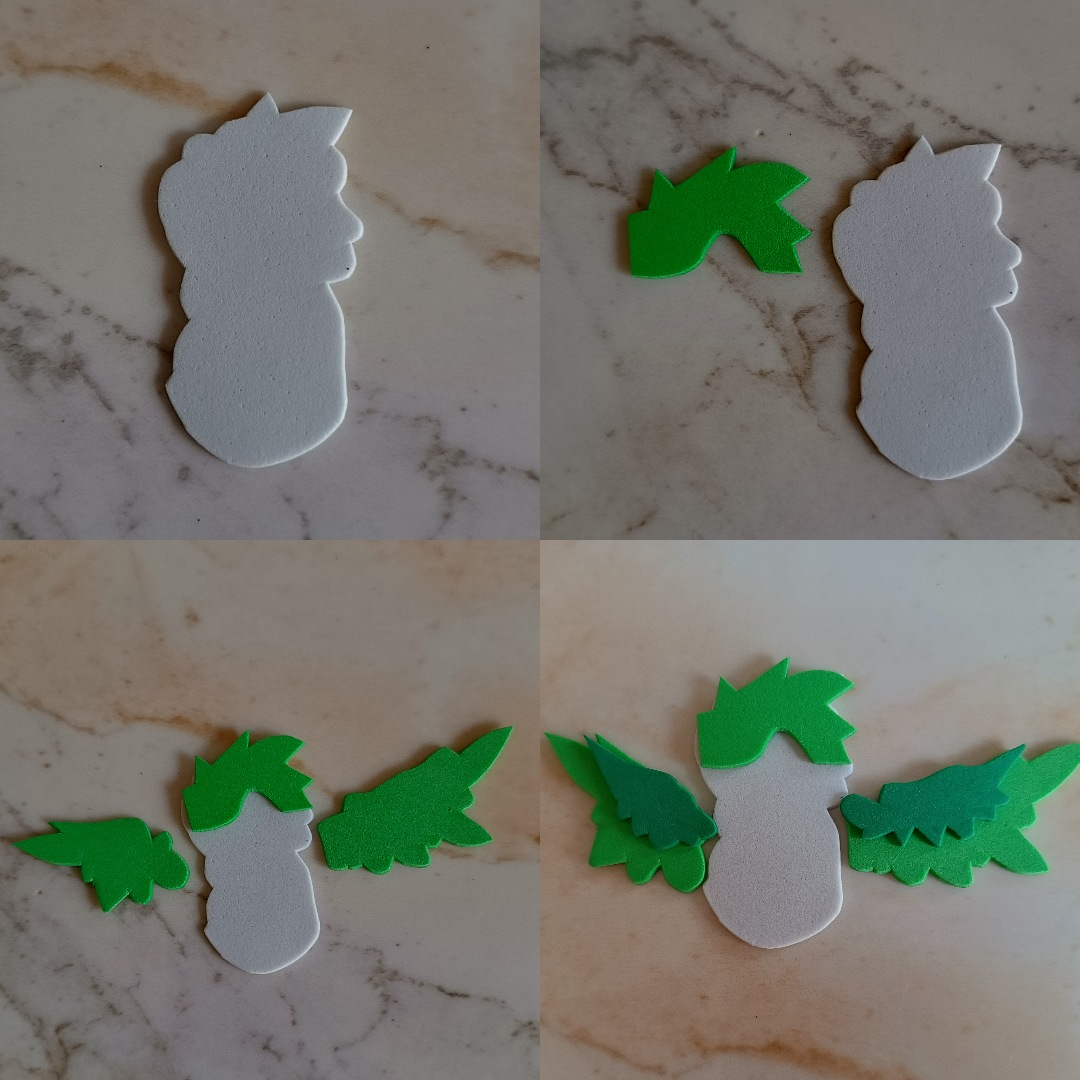
Para realizar la figura voy a dibujar sobre papel y de allí voy cortando cada parte para luego pasarlas al foami, realicé parte de su cuerpo en foami blanco, parte de su cara con foami verde claro y sus alas con foami verde claro y oscuro.
To make the figure I am going to draw on paper and from there I will cut each part and then transfer them to the foam, I made part of his body in white foam, part of his face with light green foam and his wings with light and dark green foam.
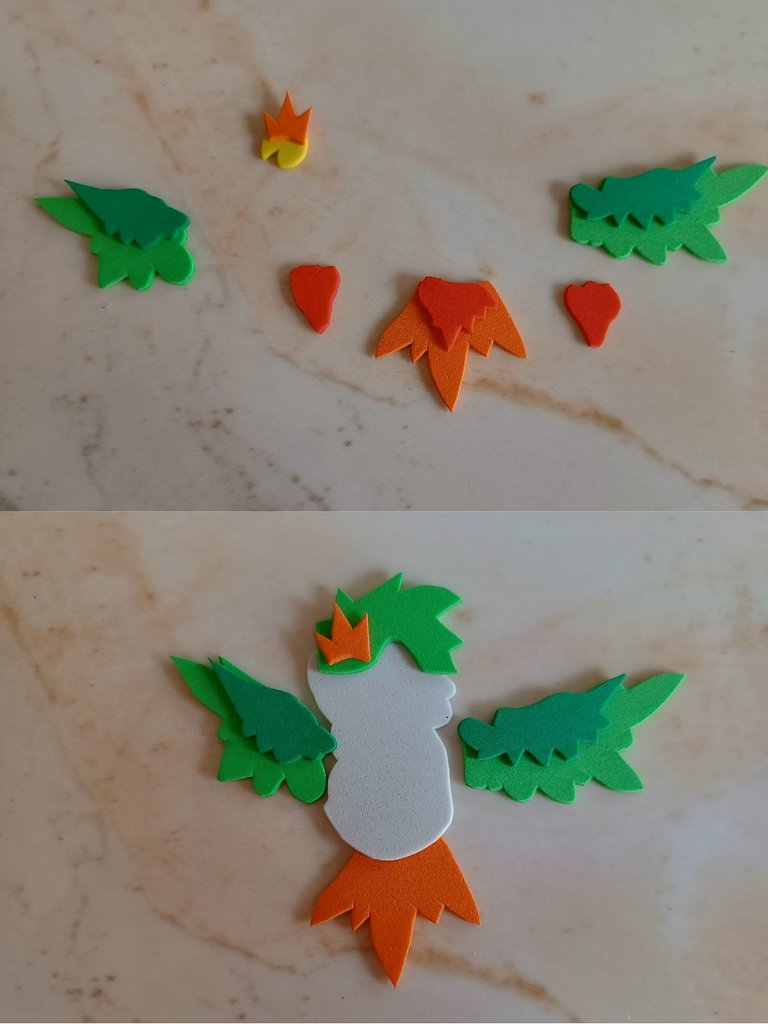
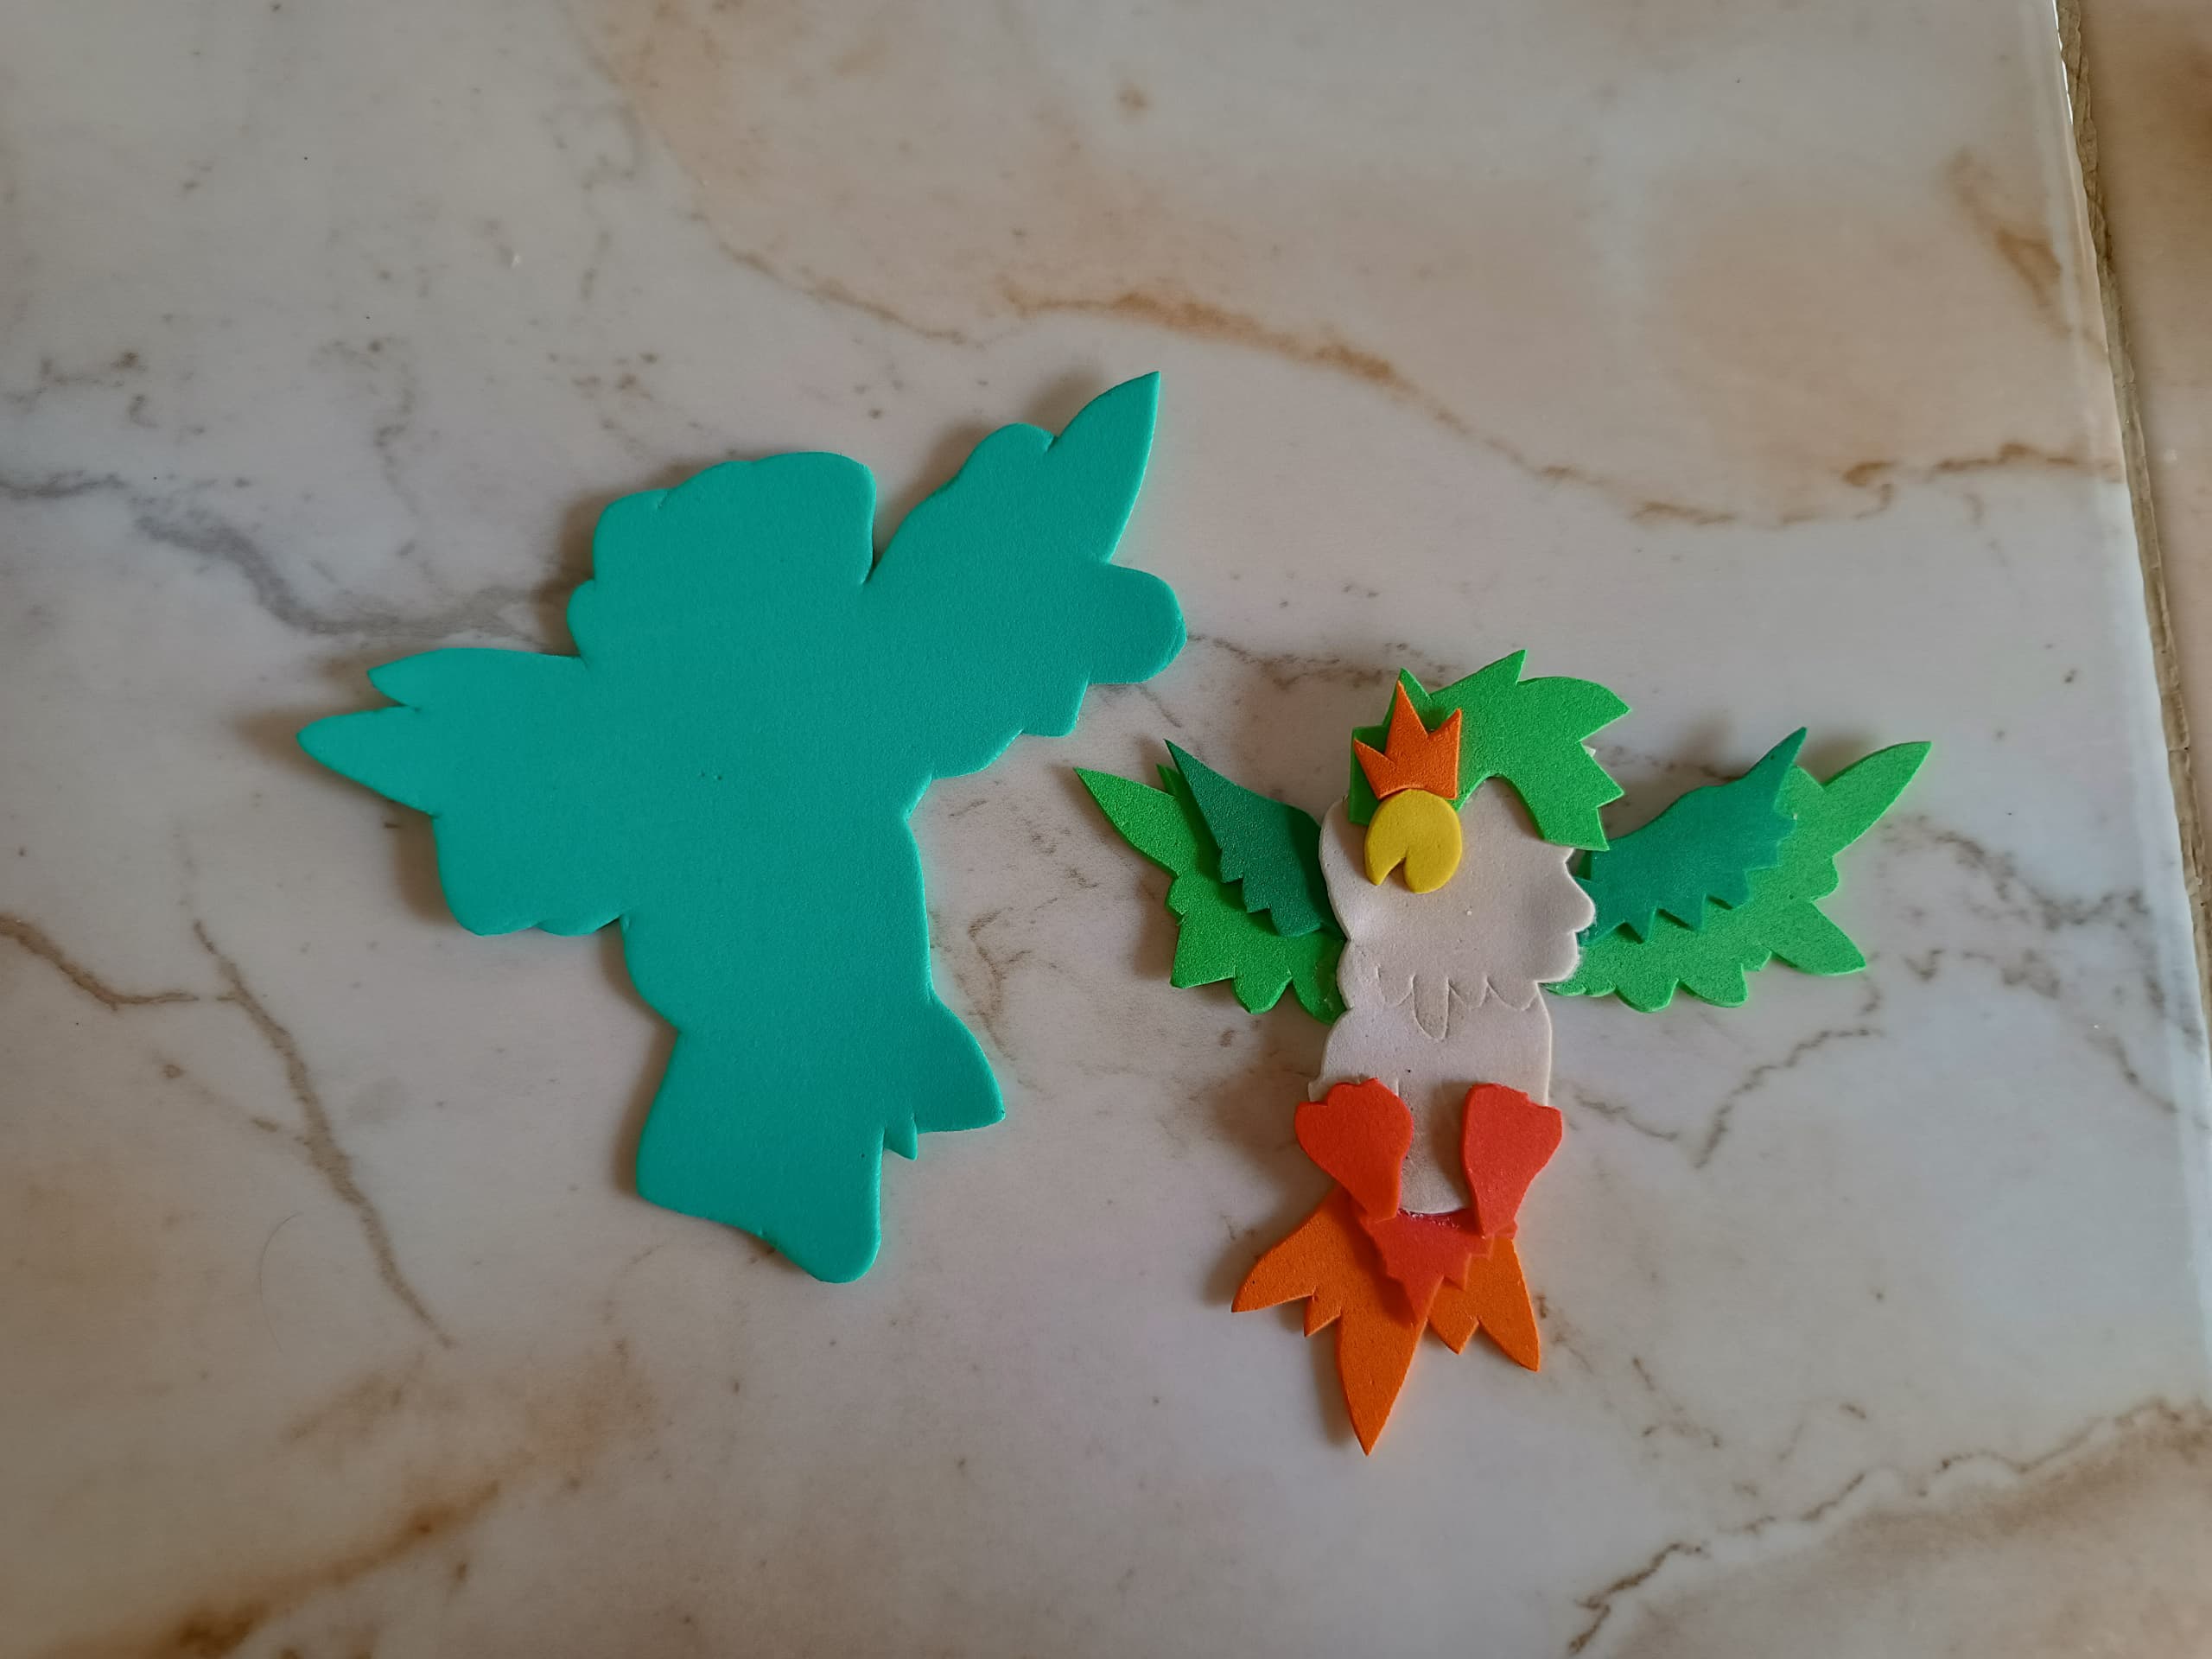
Ahora voy a realizar en foami naranja parte de su cola, sus garras en foami rojo y su pico con foami naranja y amarillo, teniendo todas las partes cortadas comenzamos a pegar con silicón en foami turquesa voy a dibujar su silueta el cual va a servir de fondo.
Now I am going to make part of its tail in orange foam, its claws in red foam and its beak with orange and yellow foam, having all the parts cut we begin to glue with silicone in turquoise foam, I am going to draw its silhouette which will serve as background.
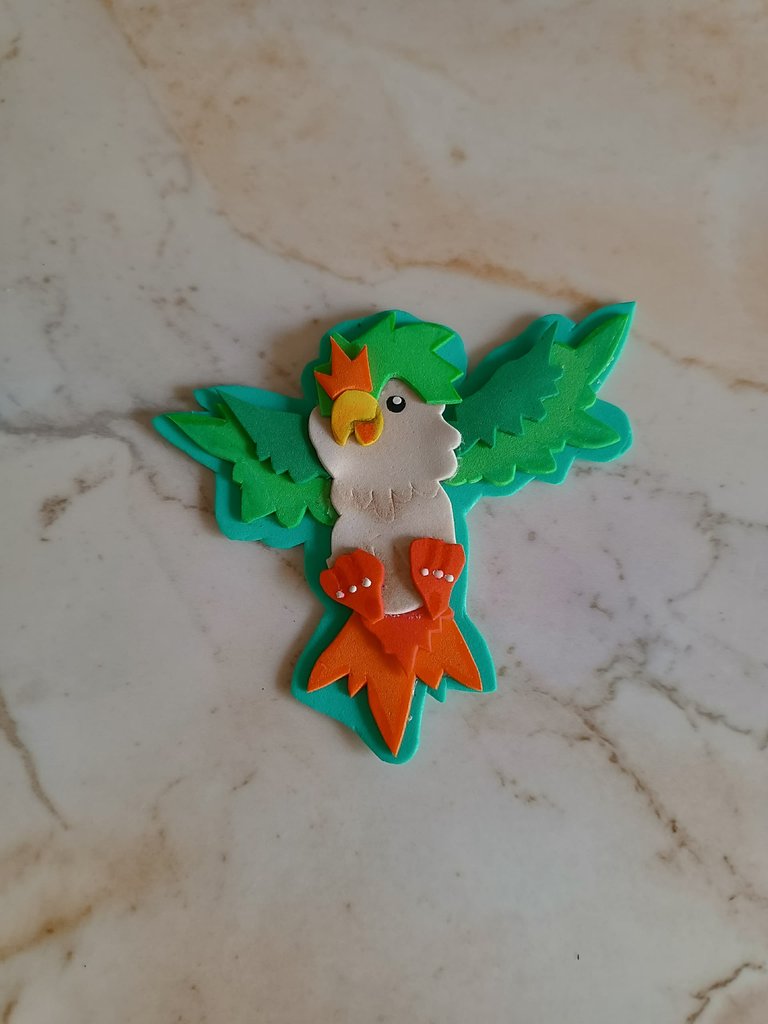
Para realizar los detalles utilicé sombras de ojos el cual apliqué en las alas, en parte de su cuerpo para dar un tono beige, también en su pico sombra color naranja con pintura negra marqué la forma del pico y utilicé también marcador naranja para pintar dentro de él, en sus garras hice pequeños puntos blancos, y por último sus ojos.
To make the details I used eye shadows which I applied on the wings, on part of its body to give a beige tone, also on its beak orange shadow with black paint I marked the shape of the beak and I also used orange marker to paint inside I made small white dots on his claws, and finally his eyes.

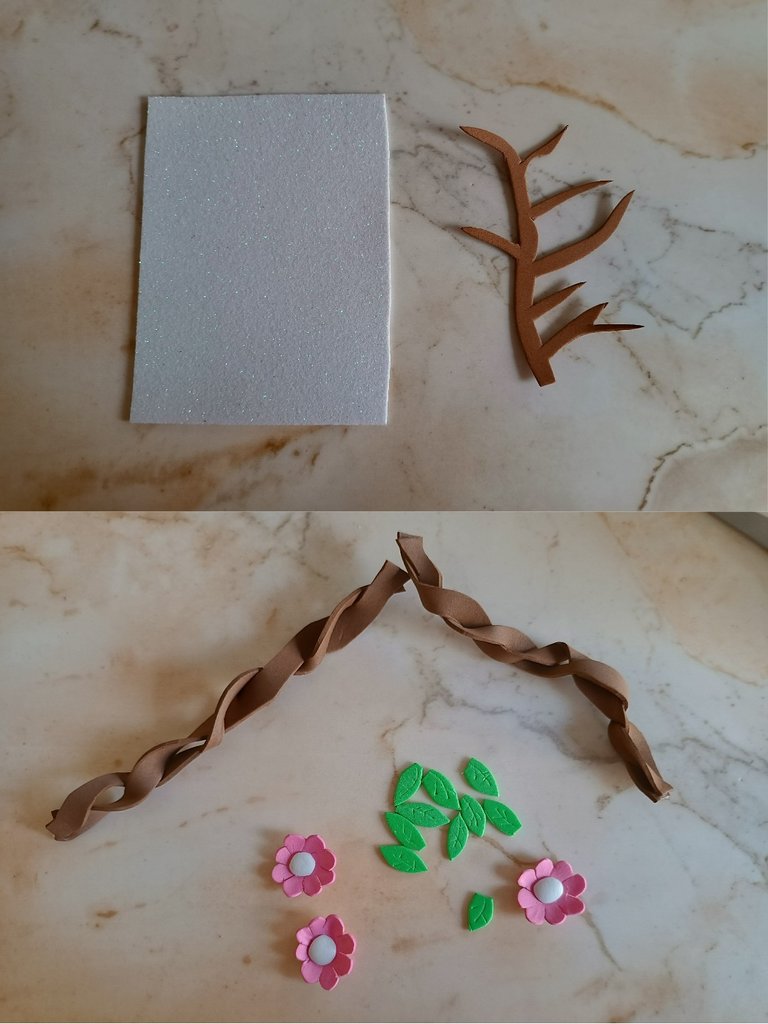
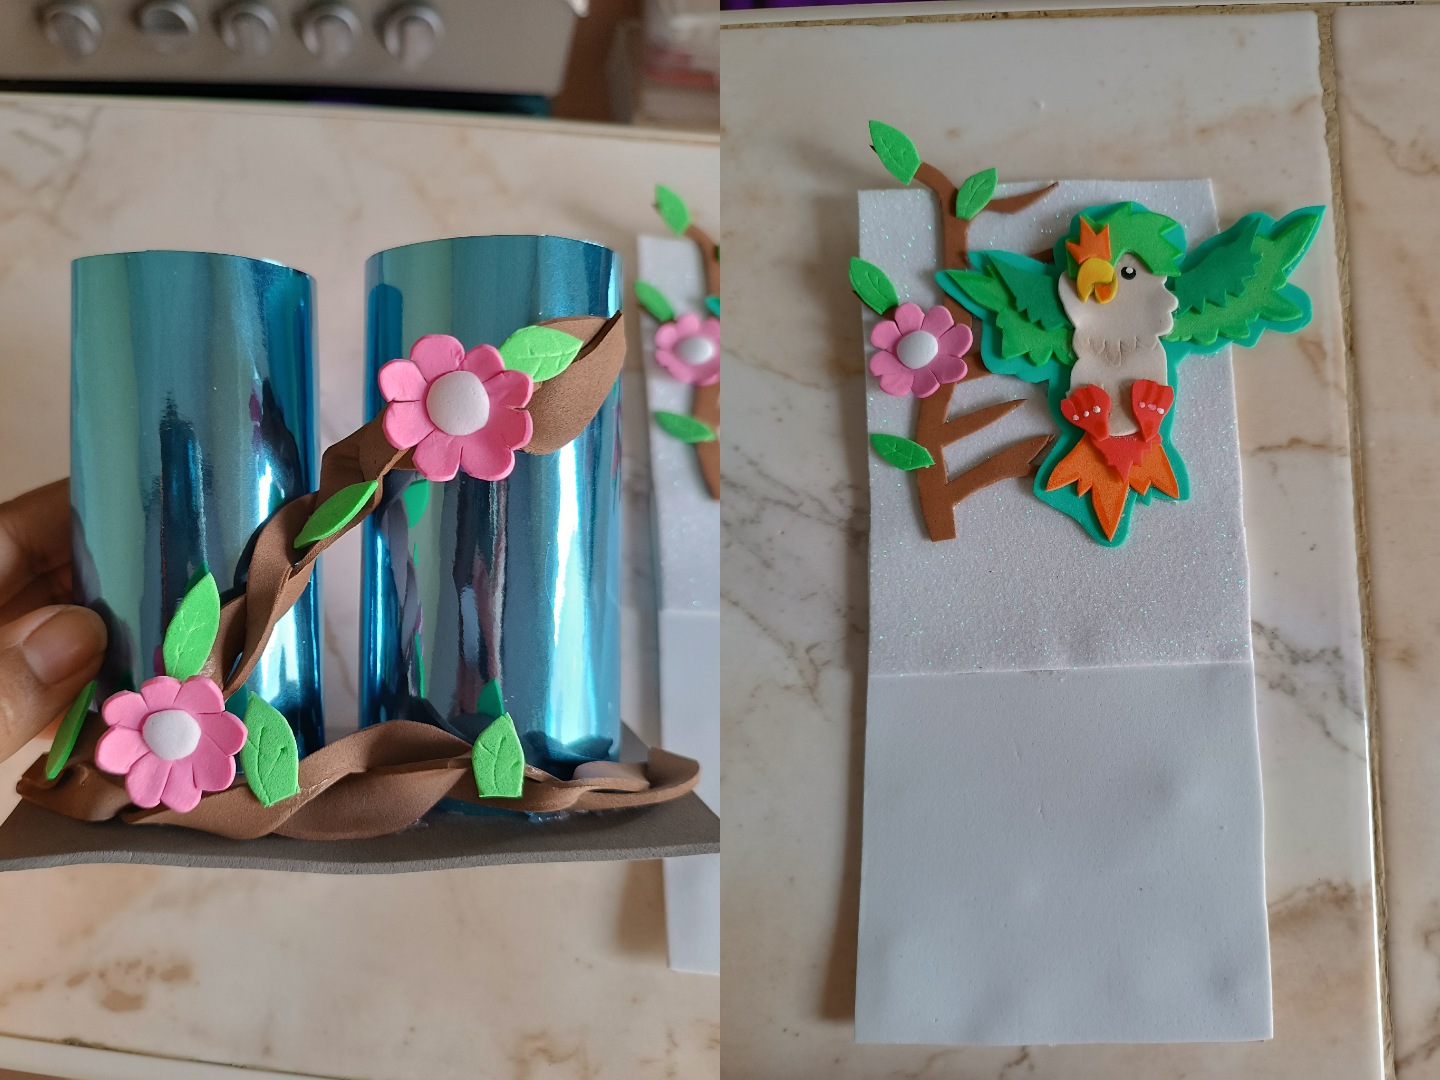
Para la decoración del escenario del portalápices realicé unas lindas y pequeñas flores en color rosa, ramas de árbol con foami marrón y hojas en color verde, ahora voy a tomar dos partes de foami blanco las voy a unir a lo largo corté un retazo de cartón del mismo tamaño para reforzar esta parte la voy a ubicar detrás de los compartimientos.
To decorate the stage of the pencil holder I made some cute little pink flowers, tree branches with brown foam and green leaves. Now I'm going to take two parts of white foam and I'm going to join them lengthwise. I cut a piece of cardboard. of the same size to reinforce this part I am going to place it behind the compartments.

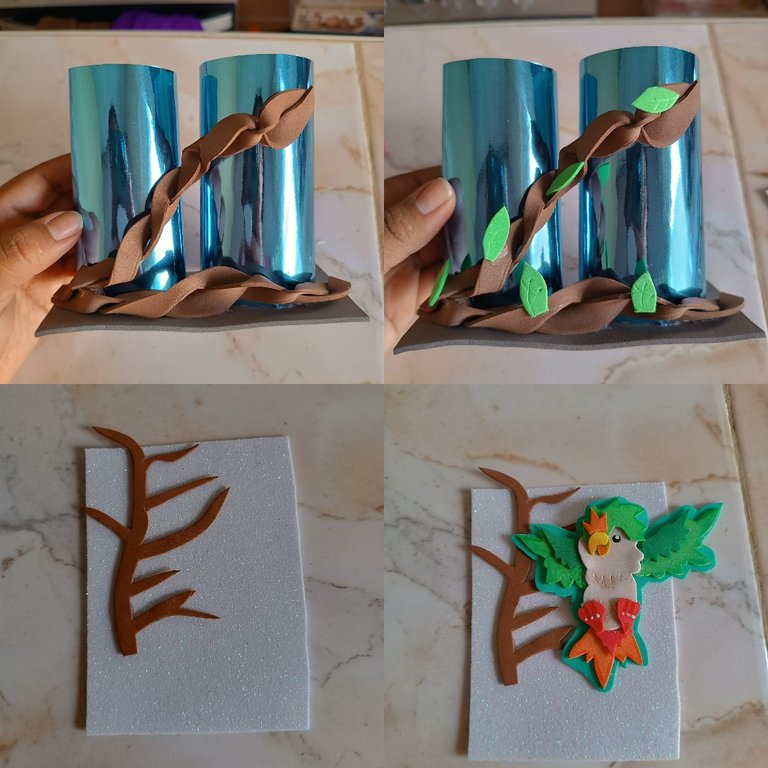
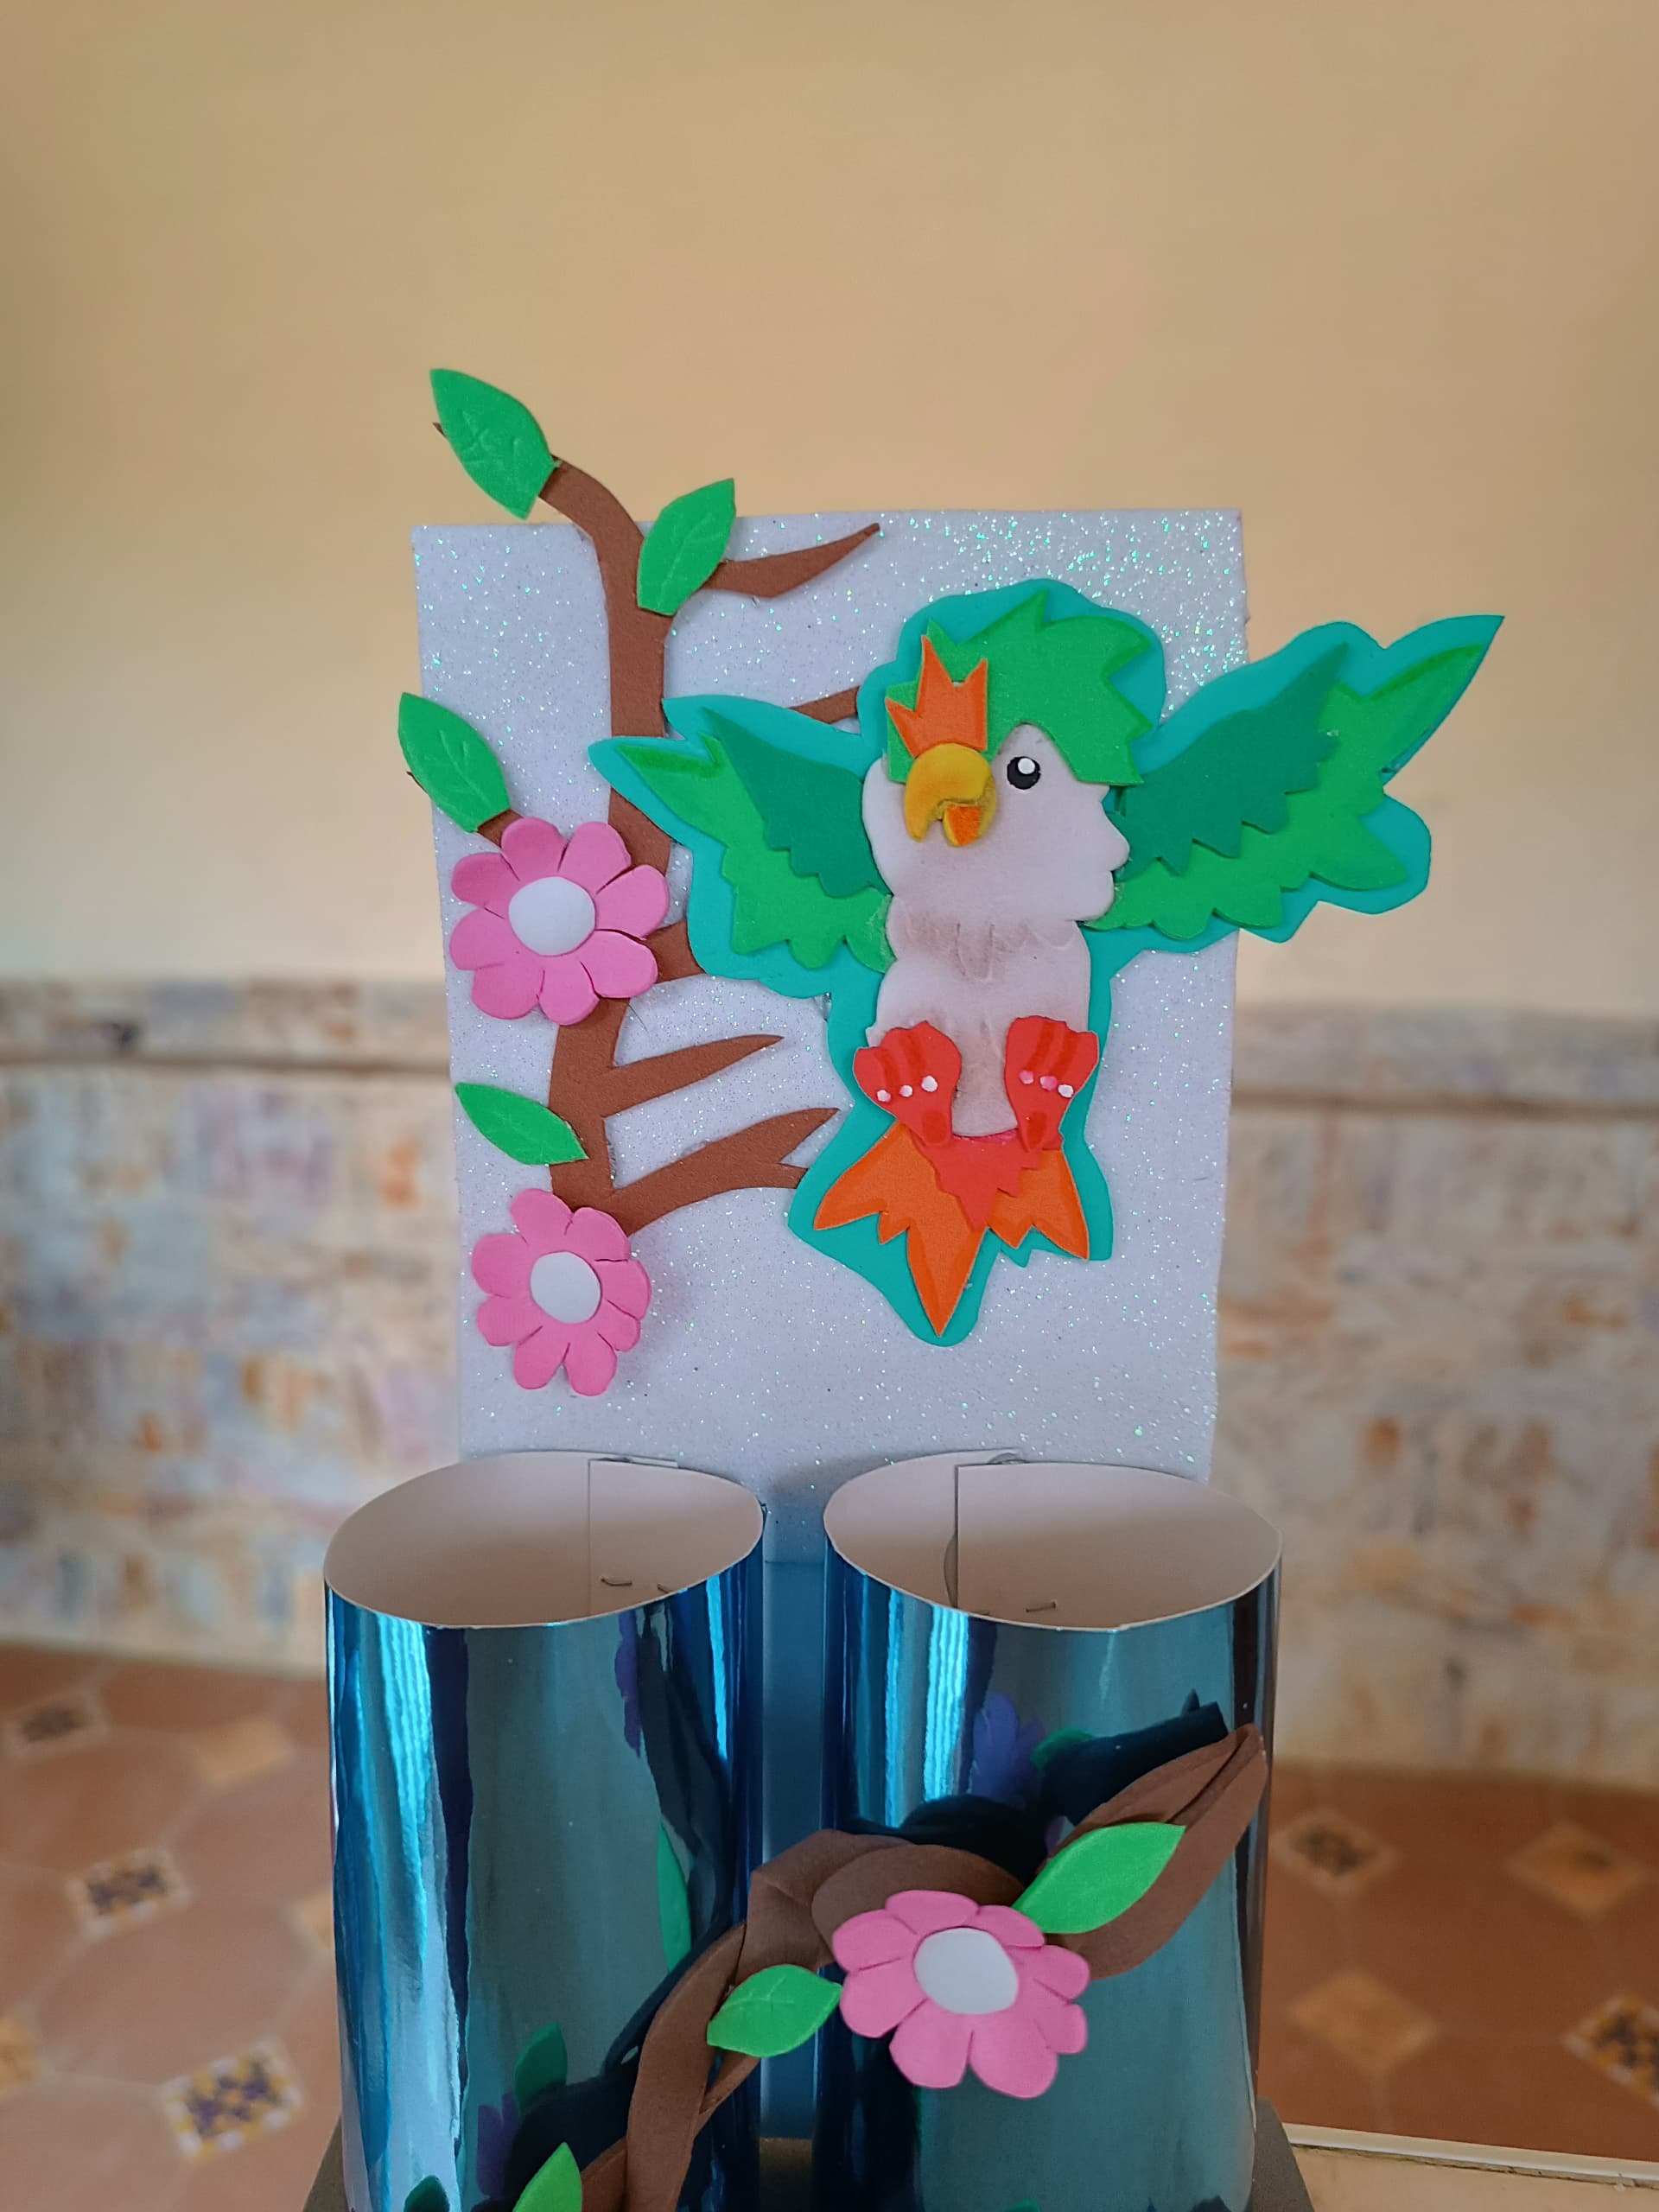
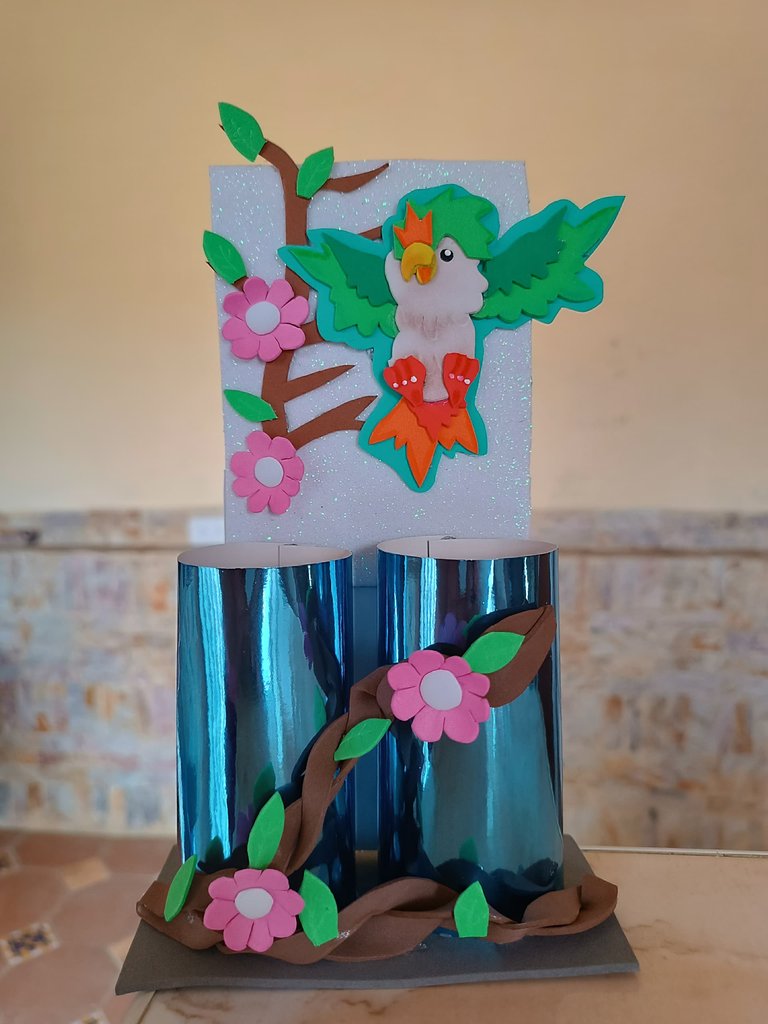
Comencé a decorar el escenario colocando las ramas, hojas flores y a Chirple en medio en los compartimientos también coloqué ramas y flores oara simular un bosque, y así queda este lindo portalápices listo para usar.
I began to decorate the stage by placing the branches, leaves, flowers and Chirple in the middle of the compartments. I also placed branches and flowers to simulate a forest, and this is how this cute pencil holder looks ready to use.

Espero les haya gustado, muchas gracias por visitar mi publicación nos vemos en una próxima oportunidad con más ideas.
I hope you liked it, thank you very much for visiting my publication, see you next time with more ideas.



Contenido original. - original content.
Los separadores y banner fueron realizados en Canva. - The dividers and banner were made in Canva.
Las fotografias son tomadas con mi teléfono Redmi Note 11s y editadas en PicsArt - The photographs are taken with my Redmi Note 11s phone and edited in PicsArt.
Traducción de: Google traductor - Translation of: Google translator.
