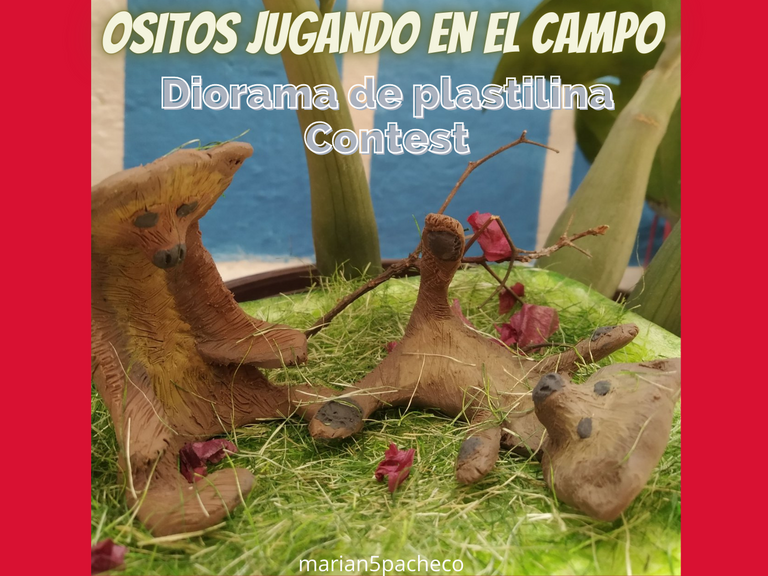
Hola Hivers!! Espero estén muy bien!
Estoy muy contenta de volver a participar en el Concurso de #HiveDIY, esta vez estoy más que complacida ya que una de las cosas que mas me gusta hacer y que considero tengo habilidad es el moldeo de plastilina, arcilla, y cualquier otro material moldeable y me encantó crear algo nuevo y bonito.
Incluso teniendo habilidad para mi fue un tremendo reto ya que quise hacer las figuras de la forma más realista posible para hacer algo diferente a lo que estamos acostumbrados y aprovechar las propiedades que tiene la plastilina en cuanto a maleabilidad y color.
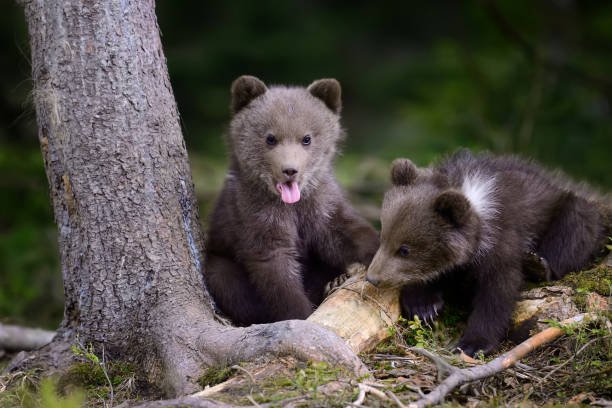
Para este diorama me inspiré en esta figura de ositos pardos reales:
Hello Hivers!!! I hope you are doing well!

I am very happy to participate again in the #HiveDIY Contest, this time I am more than pleased because one of the things I like to do and that I consider I have skill is molding plasticine, clay, and any other moldable material and I loved to create something new and beautiful.

Even having skill for me was a tremendous challenge because I wanted to make the figures as realistic as possible to make something different from what we are used to and take advantage of the properties that plasticine has in terms of malleability and color.

For this diorama I was inspired by this figure of real brown bears:
Manos a la obra!
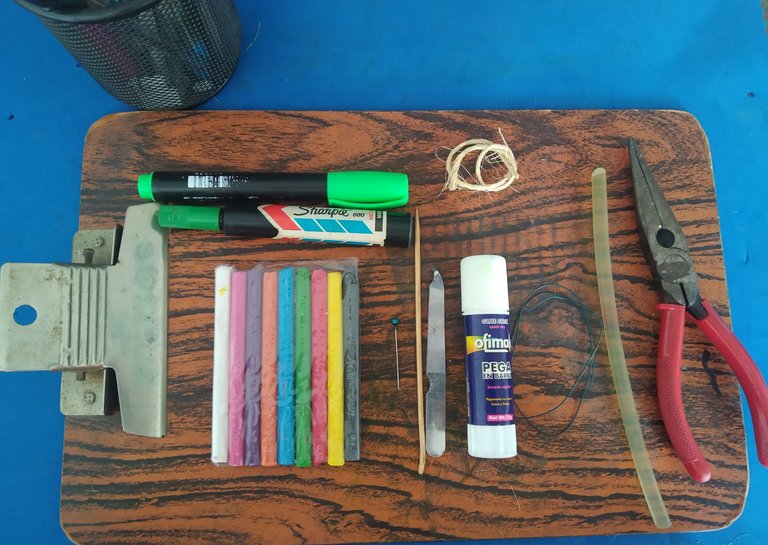
Materiales a utilizar:
- Plastilina
- Marcadores gruesos
- Alfiler, palito de altura y lima de metal, puede ser cualquier objeto puntiagudo que sirva para los detalles
- Pega en barra
- Alambre
- Alicate
- Yute o mecate
- Silicón
- Tijera
- Opcional: hojas y ramas naturales.
- Carpeta o algo de plástico para moldear la plastilina y no se pegue.
- Bandeja de anime o cartón para la base.
Materials to be used:
- Plasticine
- Thick markers
- Pin, height stick and metal file, it can be any pointed object that can be used for details.
- Glue stick
- Wire
- Pliers
- Jute or rope
- Silicone
- Scissors
- Optional: leaves and natural branches.
- Folder or something plastic to mold the plasticine so it doesn't stick.
Paso 1:
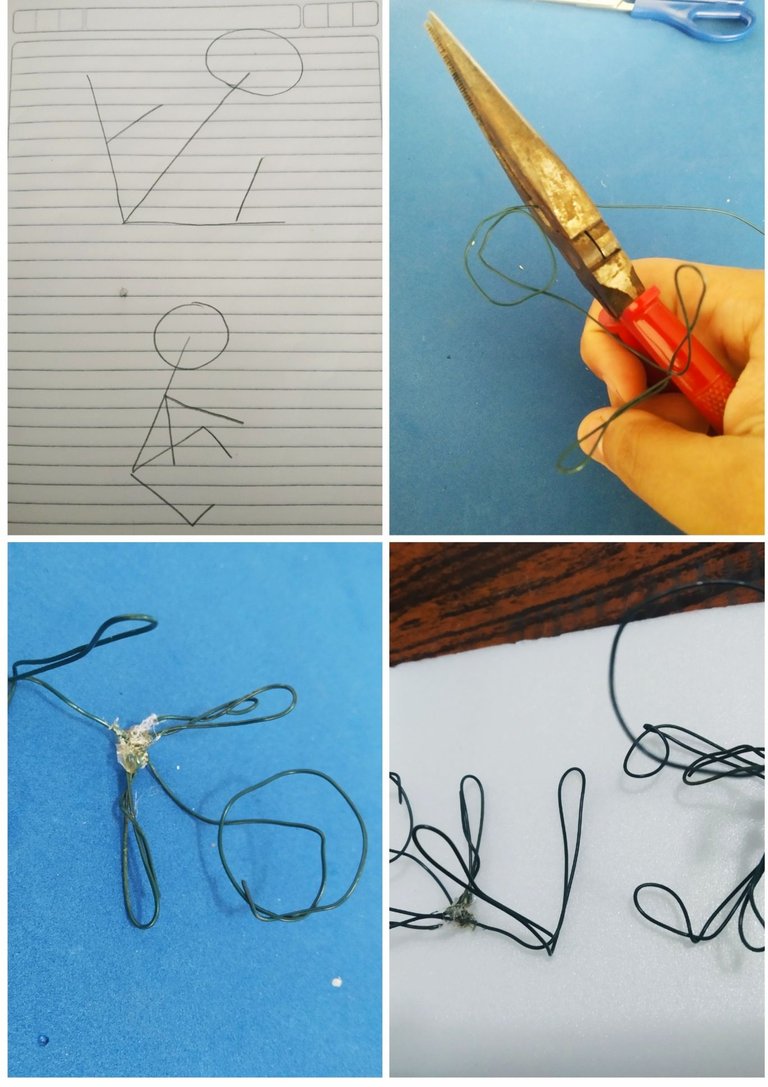
Yo escogí el alambre para hacer de esqueleto de mi figura y tal como recomendaron poder soportar el peso de la plastilina.
- Para hacerlo primero pensé en cómo sería el esqueleto y lo dibujé para tener una guía.
- Para los brazos les coloqué un punto de silicón para asegurar que los brazos no se moviesen y tener la estructura final.
Step 1:

I chose the wire to make the skeleton of my figure and as recommended to be able to support the weight of the plasticine.
- To do this I first thought about what the skeleton would look like and drew it to have a guide.
- For the arms I put a dot of silicone to ensure that the arms would not move and to have the final structure.
Paso 2
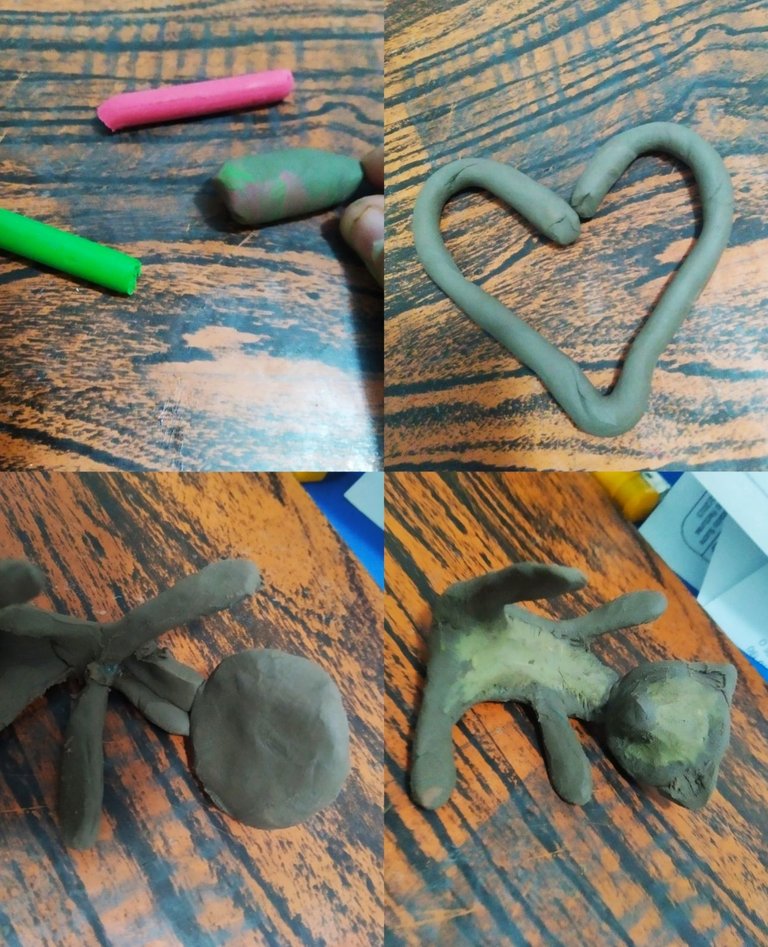
Para el Osito 1:
- Para comenzar a moldear mi primer osito usé la plastilina marrón que viene en la caja y como vi que no sería suficiente, mezclé el rojo con verde primero para dar marrón y luego lo mezclé con el original para tener un solo tono que tendría el osito.
- Comencé a moldear sobre el alambre capa por capa, procurando que todo el alambre se tapara y al mismo tiempo que tuviese el volumen que quería.
- Para dar un acabado distinto en el rostro, barriga y pecho, mezcle marrón con un poquito de blanco y amarillo, lo coloqué en esas partes que quería y lo empecé a difuminar con ayuda de mis dedos
Step 2

For the Teddy Bear 1:
-To start molding my first teddy bear I used the brown plasticine that comes in the box and as I saw that it would not be enough I mixed the red with green first to give brown and then I mixed it with the original to have only one tone that the teddy bear would have.
-I started to mold on the wire layer by layer, trying to cover all the wire and at the same time to have the volume I wanted.
-To give a different finish on the face, belly and chest, I mixed marran with a little bit of white and yellow, put it on the parts I wanted and started to blend it with my fingers.
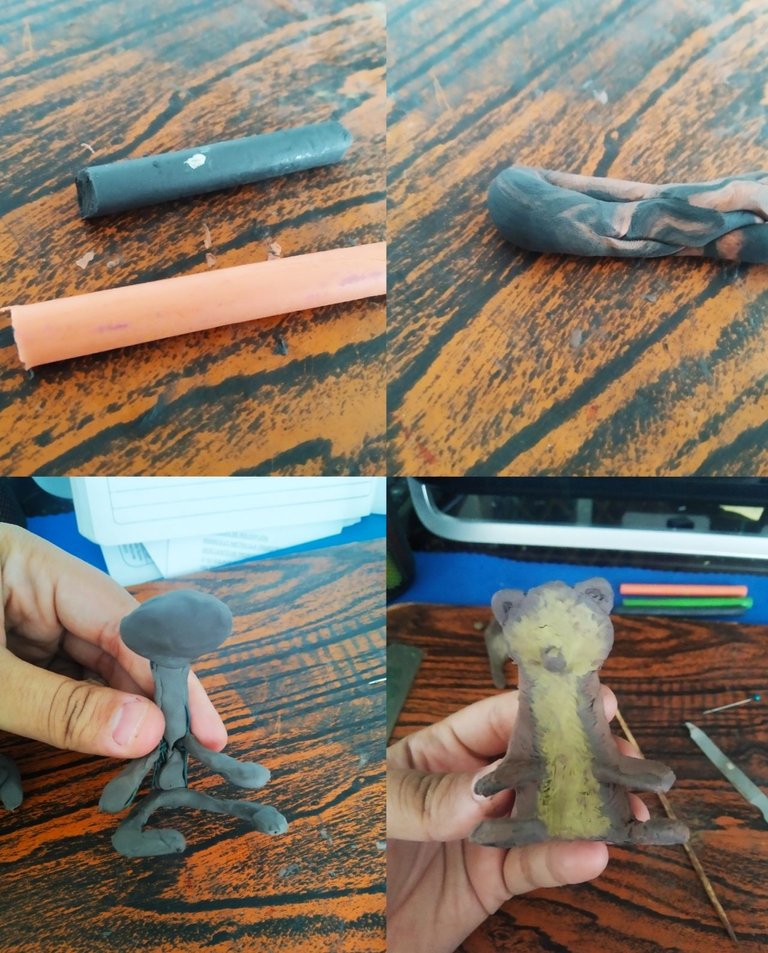
Para el Osito 2:
- Quise hacer unos distintos de marrón para este osito por lo que mezcle plastilina naranja con un poco de negro que sería la base un poco mas oscura.
- Al igual que con el otro osito mezcle marrón con blanco y amarillo y lo apliqué sobre el rostro y barriga igual difuminando.
- Para hacer un acabado distinto mezcle el marrón con un poco mas de naranja y lo utilicé mas que todo en los brazos y patas para así lograr 3 colores en el oso. De igual forma, difuminando con los dedos.
*Para el Osito 2:*
- Quise hacer unos distintos de marrón para este osito por lo que mezcle plastilina naranja con un poco de negro que sería la base un poco mas oscura.
- Al igual que con el otro osito mezcle marrón con blanco y amarillo y lo apliqué sobre el rostro y barriga igual difuminando.
- Para hacer un acabado distinto mezcle el marrón con un poco mas de naranja y lo utilicé mas que todo en los brazos y patas para así lograr 3 colores en el oso. De igual forma, difuminando con los dedos.
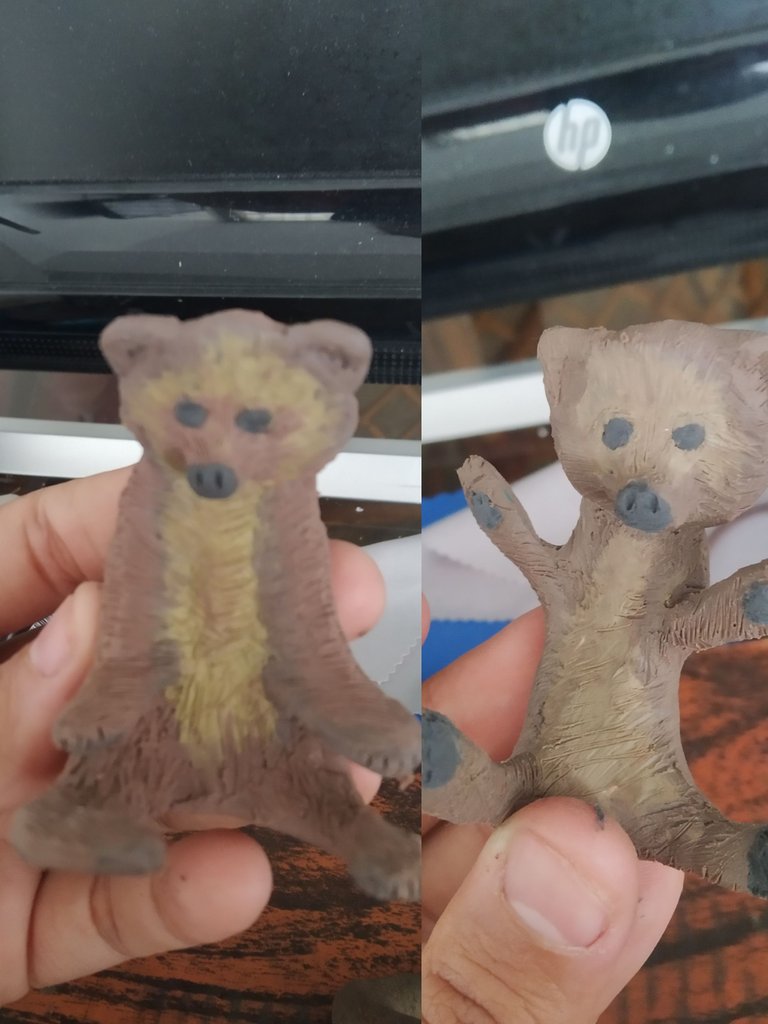
Paso 3: Los acabados
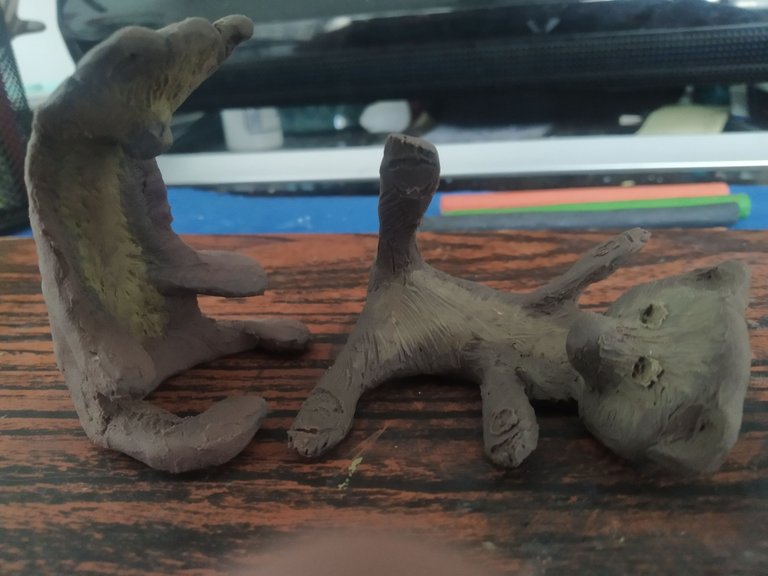
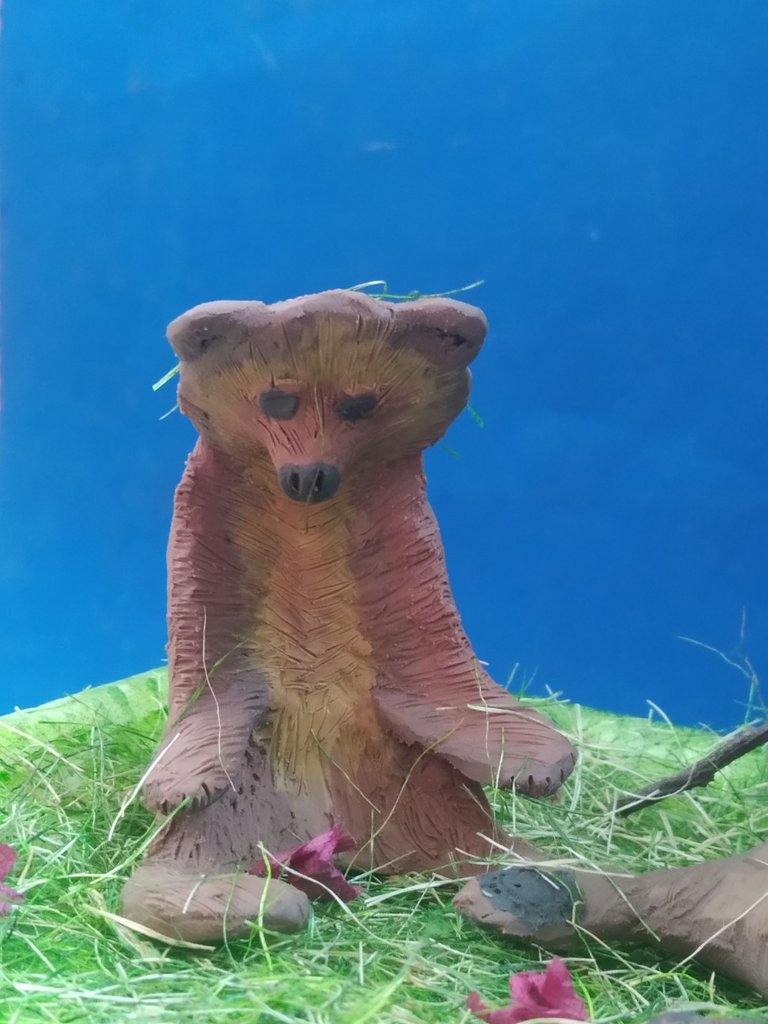
- Esta parte me costó un poco ya que quería lograr un poco de realismo sobre los ositos, que se vieran cachorros y también que tuvieran textura.
- Para los ojos utilicé el palito de altura para hundir un poco en la cara y crear la cuenca de los ojos
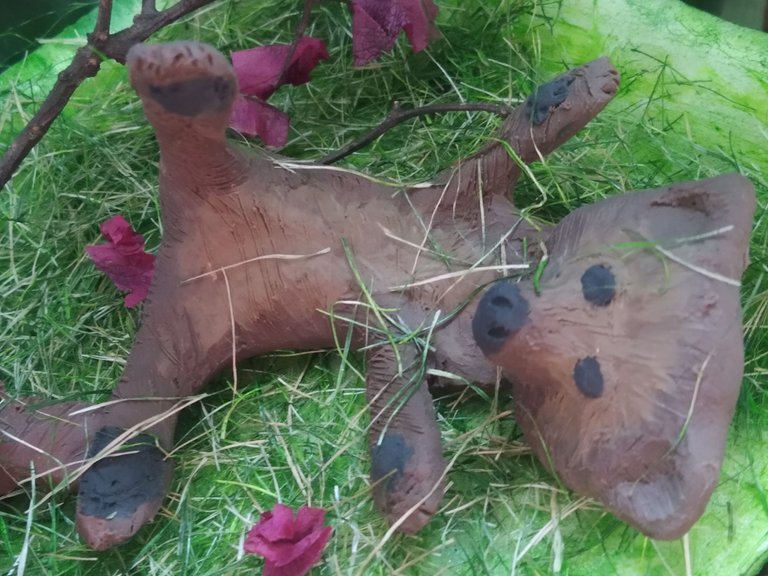
- Coloqué unos círculos de plastilina negra para los ojos, el hocico de los osos y las almohadillas de las patas del osito 1.
- Con el alfiler cree las texturas en la plastilina para simular el pelaje y también crear las garras en las patas.
Step 3: The finishing touches

- This part was a little difficult for me as I wanted to achieve a bit of realism on the bears, to make them look like puppies and also to give them texture.
- For the eyes I used the height stick to sink a little bit into the face and create the eye sockets.
- I placed some black play dough circles for the eyes, the bears snout and the paw pads for bear 1.
- With the pin I created the textures in the clay to simulate the fur and also to create the claws on the paws.
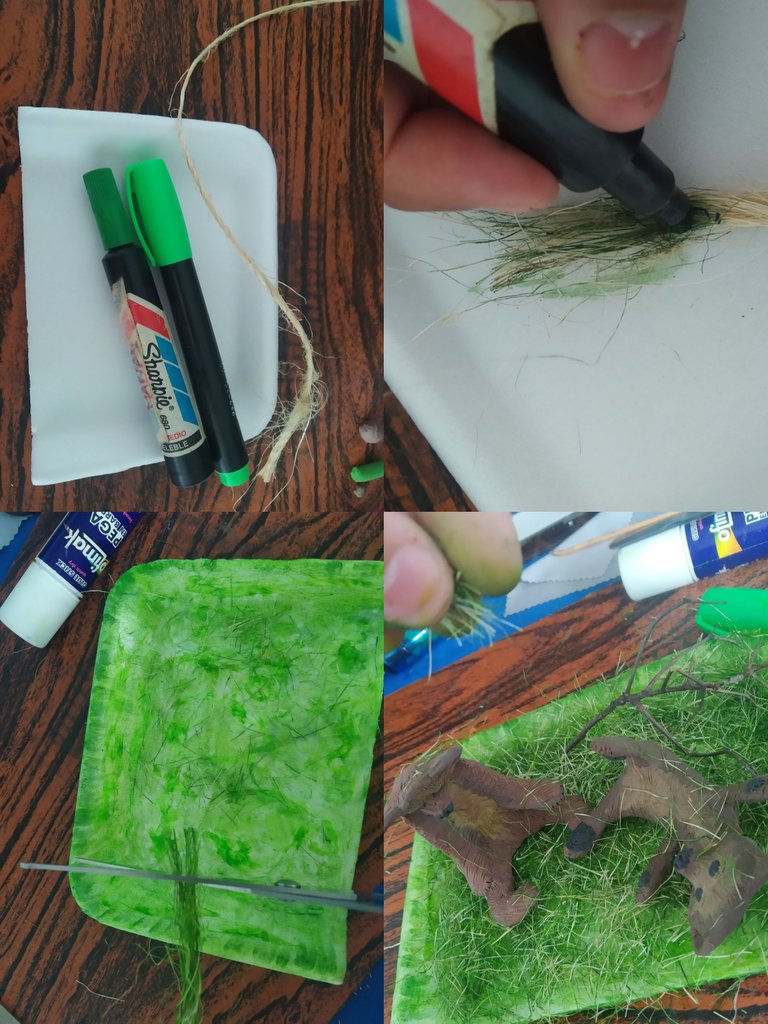
Paso 4: La base del diorama y el armado
Para este diorama escogí la mitad de una bandeja que tenía para material de reciclaje.
- Pinté el yute de color verde con el marcador
- Pinté la bandeja de verde con los dos tonos de marcadores que tenía disponible
- Le eché pega de barra a la bandeja ya pintada y empecé a cortar el yute pintado sobre la bandeja para simular la grama
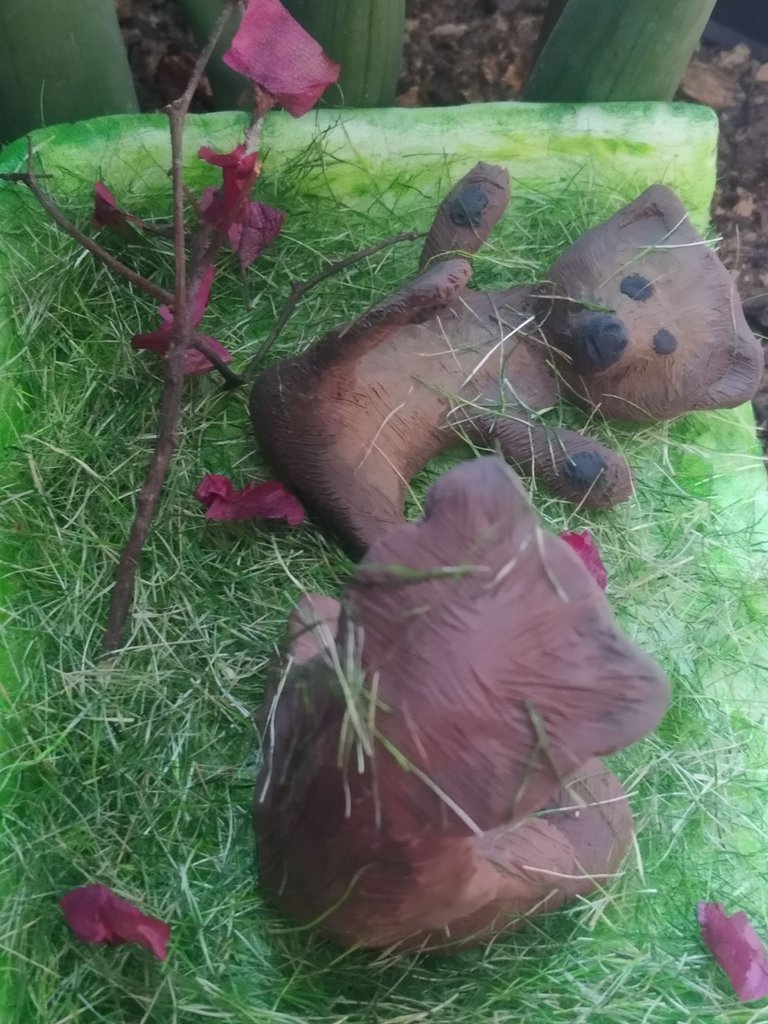
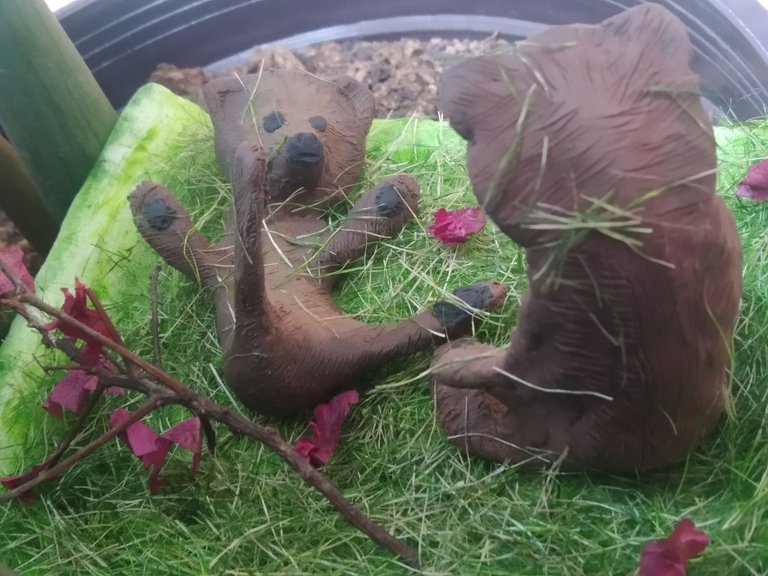
- Coloqué una rama de árbol que encontré en un jardín y los ositos en la posición que quería como si estuviesen jugando
- Les coloqué yute por encima a los ositos para hacer más realista la escena.
Step 4: The base of the diorama and assembly

For this diorama I chose half of a tray I had for recycling material.
- I painted the jute green with the marker.
- I painted the tray green with the two shades of markers I had available.
- I applied glue stick to the painted tray and started to cut the painted jute over the tray to simulate grass.
- I placed a tree branch I found in a garden and the bears in the position I wanted as if they were playing.
- I placed jute on top of the bears to make the scene more realistic.
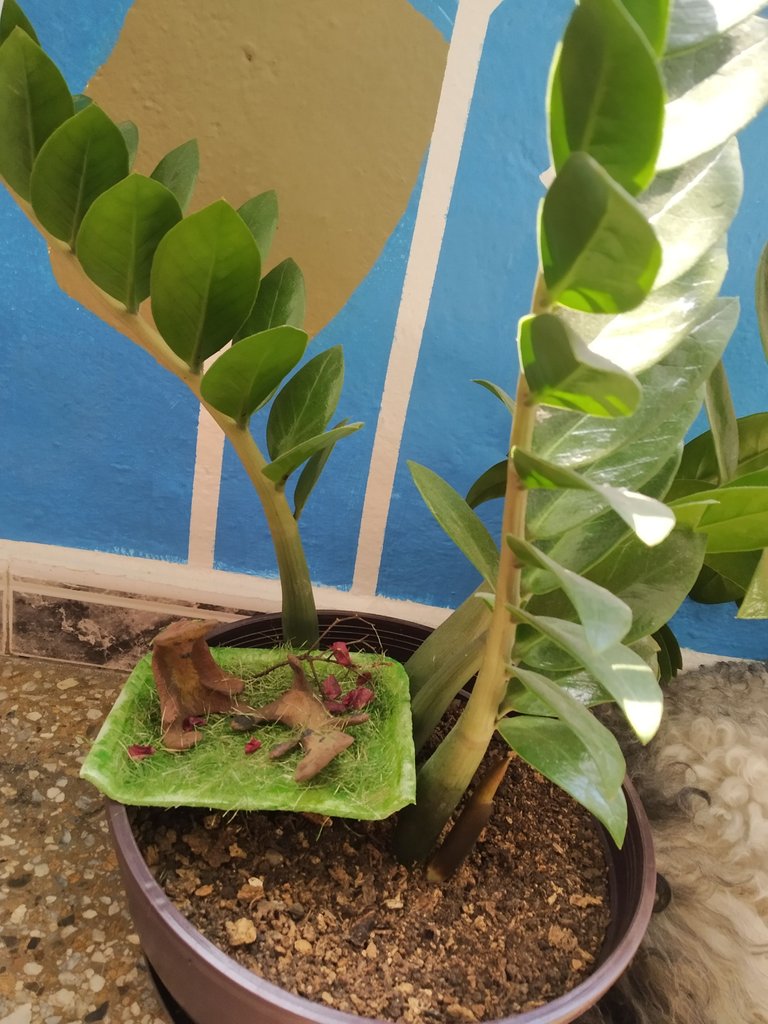
Paso 5: El escenario del diorama
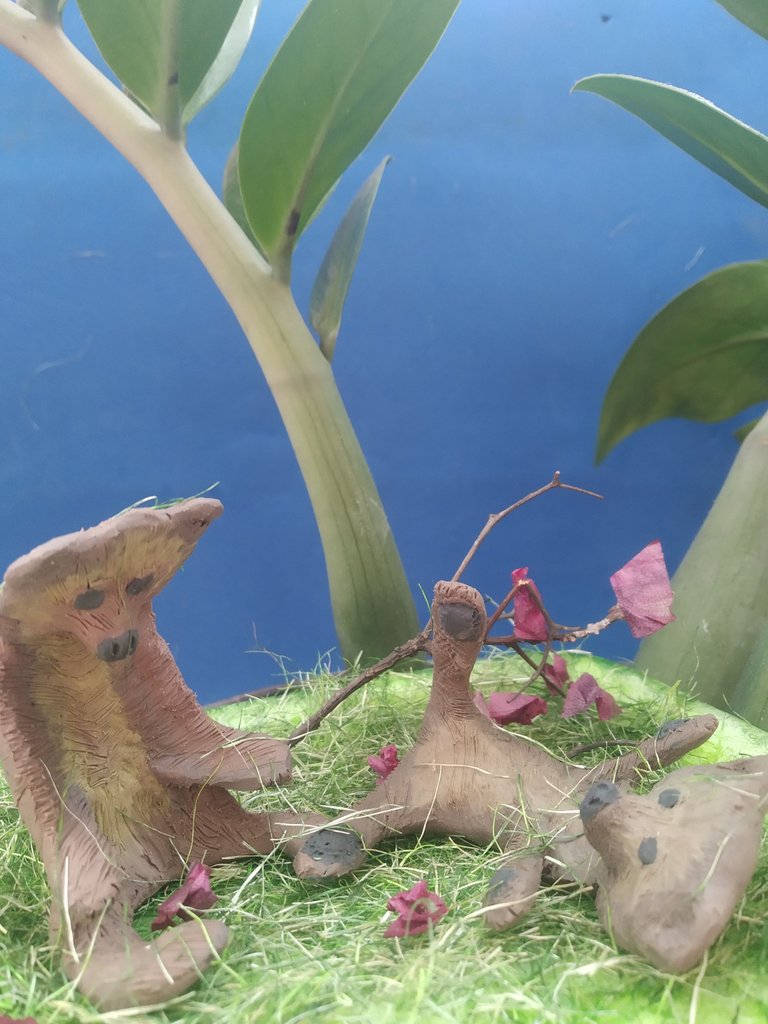
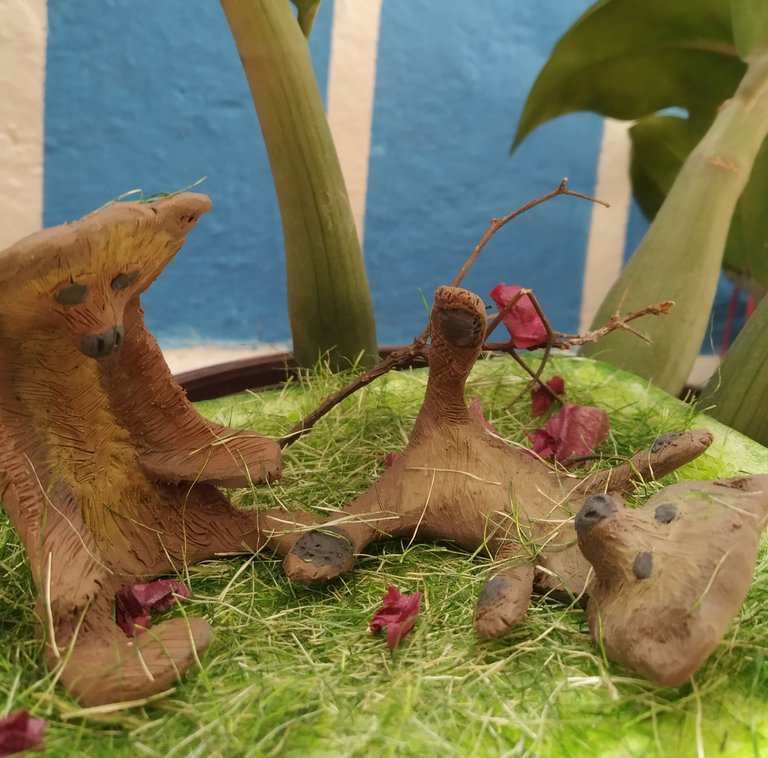
Quise montar la escena lo mas realista posible por lo que escogí una planta que tengo en mi casa y coloqué mi diorama de forma que se integrara a la escena.
Step 5: The setting of the diorama

I wanted to make the scene as realistic as possible so I chose a plant I have in my house and placed my diorama so that it would blend in with the scene.
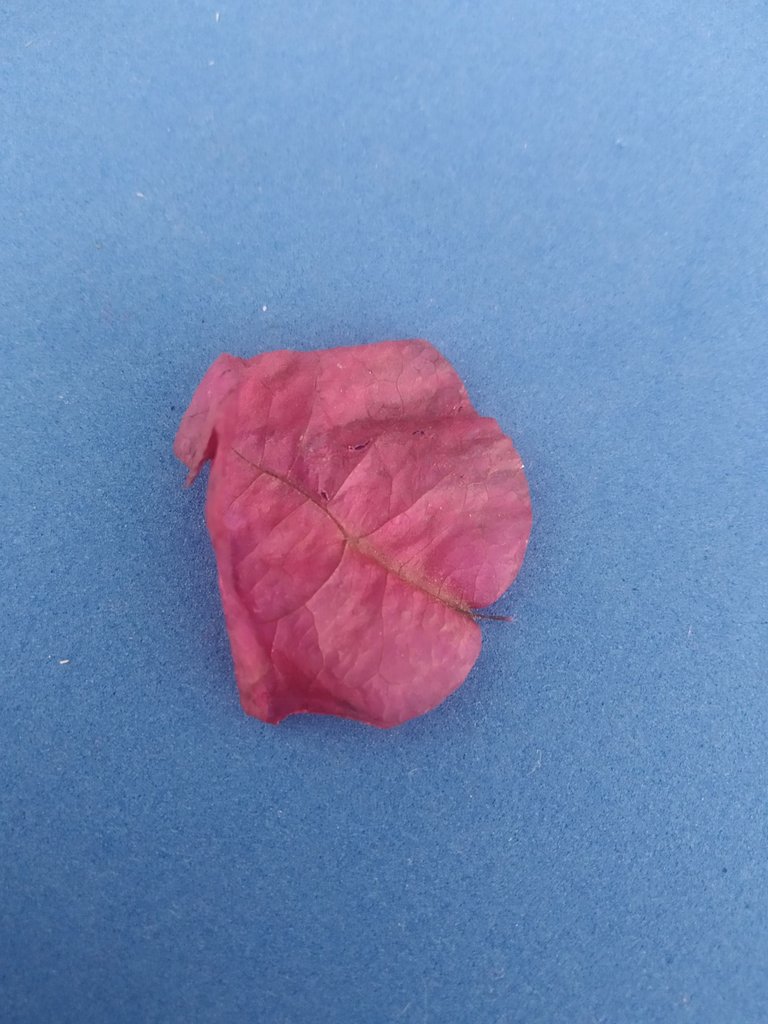
Un toque especial:
Tomé un pétalo de unas flores que recogí en el jardín donde estaba, lo piqué y lo integré al escenario, pueden ver el resultado a continuación:
A special touch:
I took a petal from some flowers I picked in the garden where I was, chopped it up and integrated it into the scenery, you can see the result below:
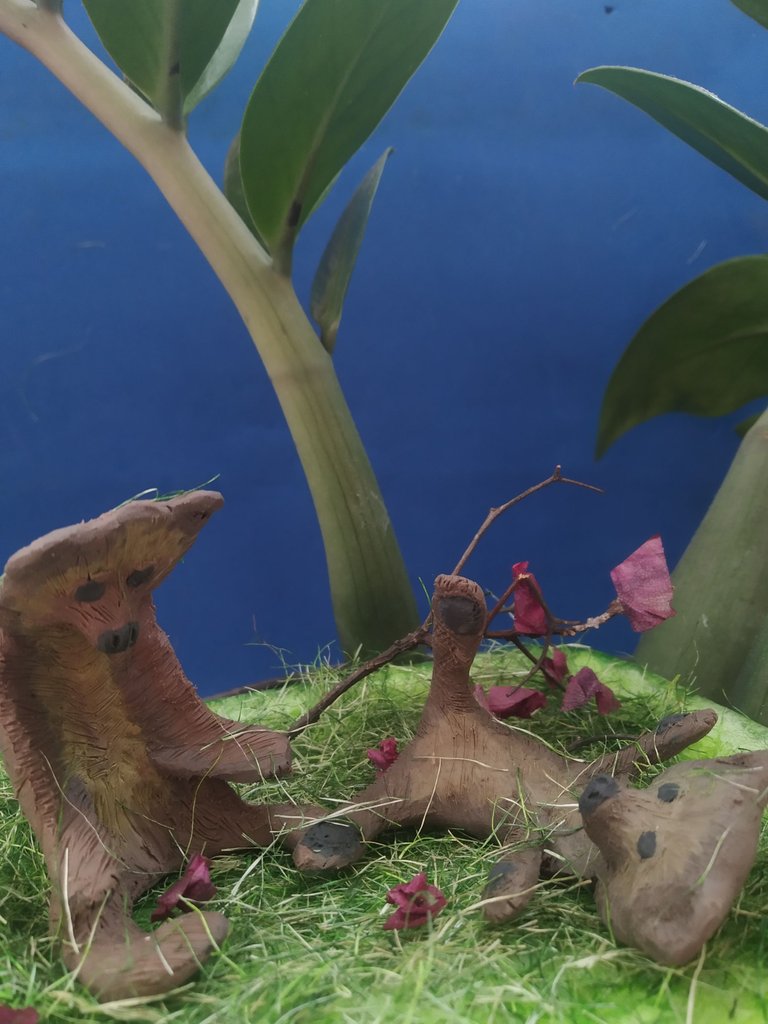
Les dejo fotos más de cerca para que vean los detalles:
Here are some close-up photos for you to see the details:
Muchas gracias por leerme hivers!
Espero les haya gustado.
Quisiera invitar a participar en el próximo concurso a @mariaced, estoy segura que le gustará participar en esta comunidad.
Si quieren ver las reglas del concurso y saber más de la comunidad click aquí
Fotos tomadas por mi con mi Xiaomi Redmi 7
Edición: Creative de Xiaomi y Canva
Traducción: DeepL
