
Bienvenidos mis queridos amigos amantes del arte y artista.
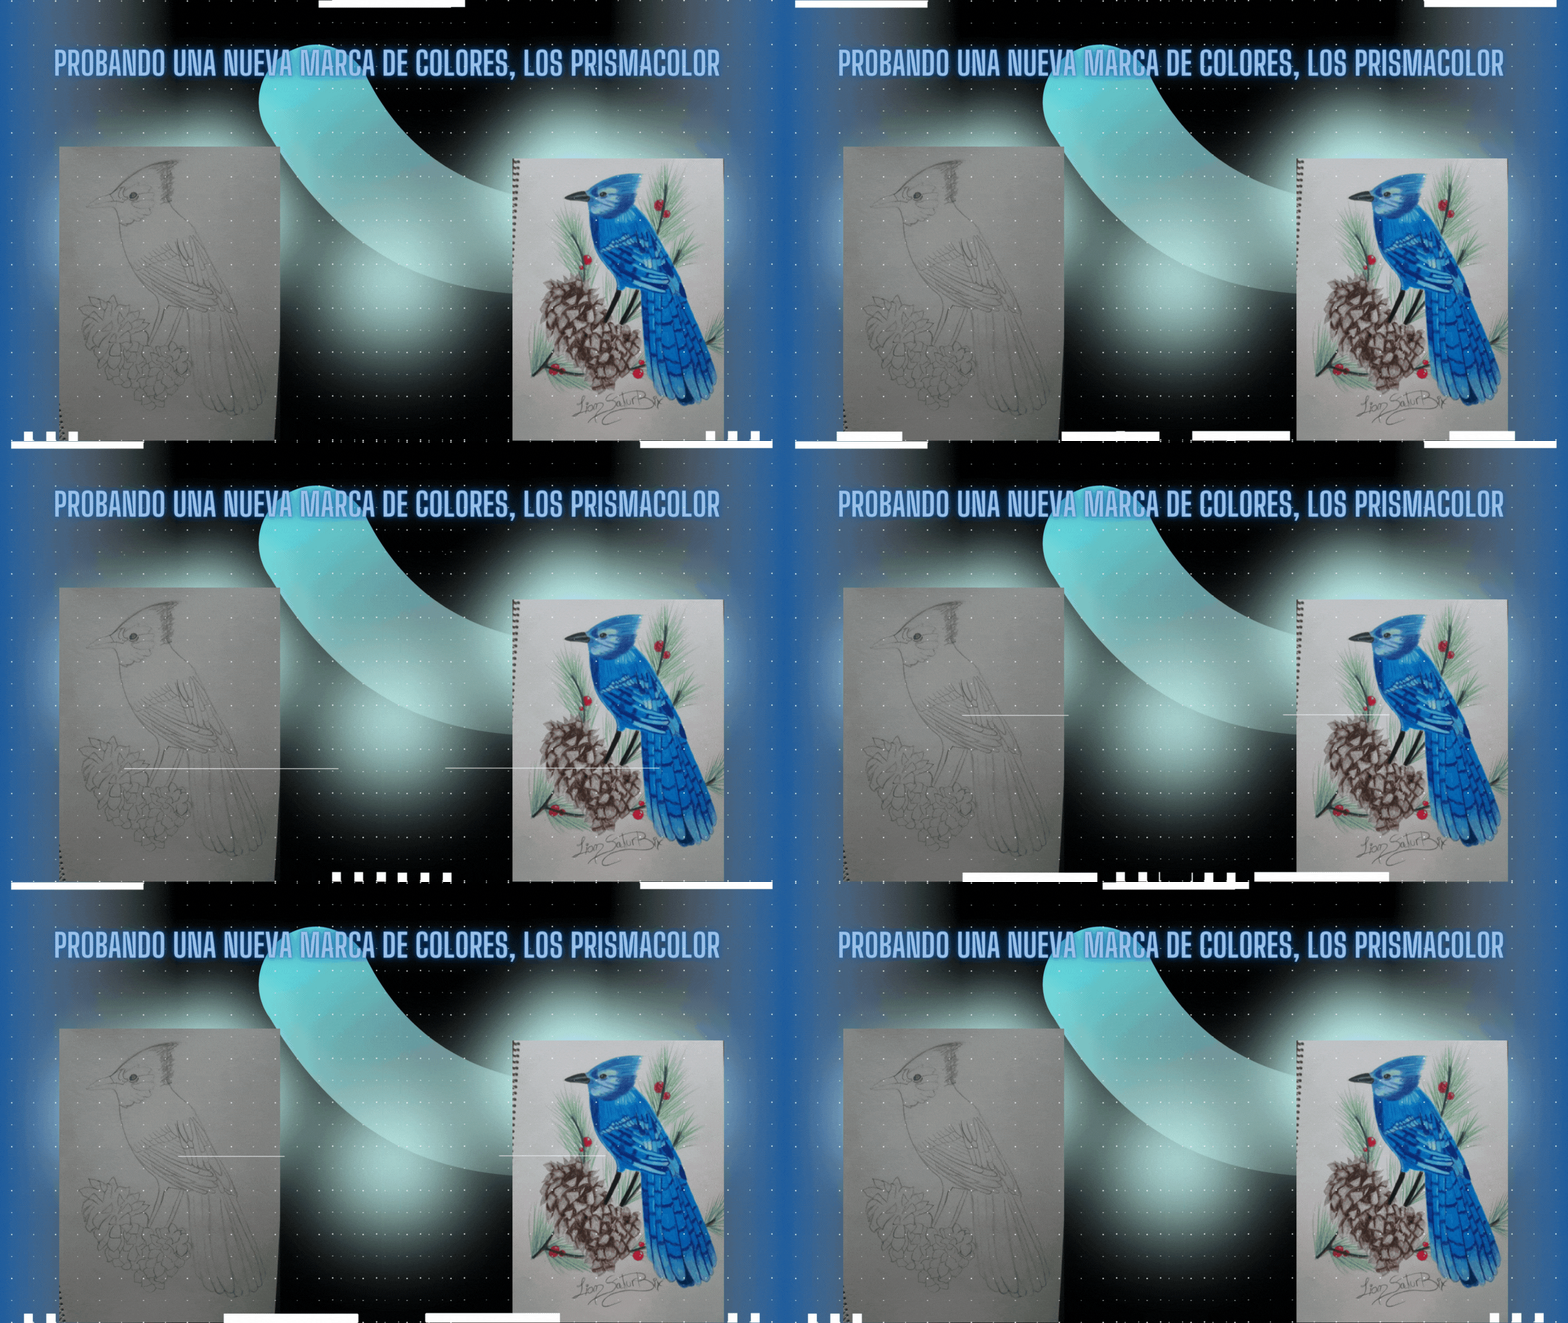
El día de hoy mis queridos amigos artistas, comencé a probar unos colores marca prismacolor que compre hace unos pocos días, puesto que explicaré mi experiencia con estos colores, notar también cuál es la diferencia de los colores marca Kores con estos prismacolor.
Así que quise probar estos colores con un dibujo sencillo, así que he elegido una pequeña ave posando en las ramas de un árbol de pino, veamos que tan bueno son estos colores.
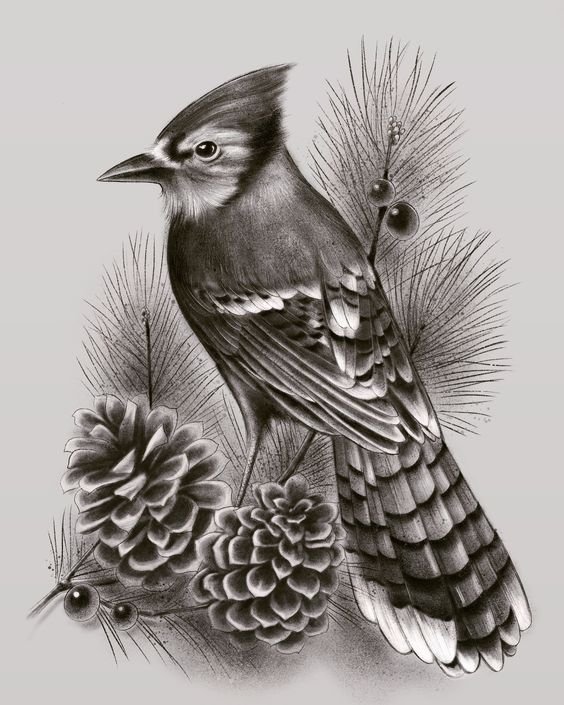
Al igual que en la mayoría de mis dibujos, las imágenes que utilizo en referencia son sacados de una gran página de ideas y diseños llamada Pinterest.
Welcome my dear art lovers and artist friends.
Today my dear artist friends, I started to test some prismacolor brand colors that I bought a few days ago, since I will explain my experience with these colors, notice also what is the difference of Kores brand colors with these prismacolor.
So I wanted to test these colors with a simple drawing, so I have chosen a small bird posing on the branches of a pine tree, let's see how good these colors are.
As with most of my drawings, the images I use in reference are taken from a great page of ideas and designs called Pinterest.


Los materiales que vamos a necesitar para elaborar nuestro dibujo son los siguientes:
*Un block de dibujo marca Caribe.
*Lápiz de grafito 2B.
*Sacapuntas con depósito.
*Borrador.
*Pañuelo.
*Regla.
Colores como:
*Azul oscuro.
*Azul claro.
*Café oscuro.
*Negro.
*Blanco.
*Rojo.
*Anaranjado.
*Verde pasto.
Para comenzar a realizar este dibujo, no utilice ninguna técnica que me permitiera realizar de manera fácil el boceto, ya que de por sí es un dibujo sumamente sencillo, honestamente como mencione anteriormente, en este dibujo estaré usando una nueva marca de colores con las que comenzaré a usarlo en algunos dibujos, también mencionaré mi primera experiencia con estos colores.
The materials that we are going to need to elaborate our drawing are the following:
*A Caribe sketch pad.
*2B graphite pencil.
*Pencil sharpener with reservoir.
*Pencil eraser.
*Handkerchief.
*Ruler.
Colors such as:
*Dark blue.
*Light blue.
*Dark brown.
*Black.
*White.
*Red.
*Orange.
*Grass green.
To begin to make this drawing, I didn't use any technique that allowed me to make the sketch in an easy way, since it is an extremely simple drawing, honestly as I mentioned before, in this drawing I will be using a new brand of colors with which I will begin to use it in some drawings, I will also mention my first experience with these colors.


Posteriormente, comencé a remarcar las orillas de esta peculiar ave azul, las orillas del plumaje de las alas lo hice de color azul oscuro para marcar una diferencia, para los ojos use el color negro al igual que el pico, solo que en el pico trace una pequeña línea que me servirá de guía para crear una separación de colores en esta parte, ya que más adelante usaré el color blanco para terminar de marcar el espacio.
Para las patas usé el mismo color negro, comencé a remarcar primero las líneas del ave para así saber que en que espacio va cada color, ya que mi imagen de referencia es en blanco y negro, pero he visto este tipo de ave antes y sé que son de color azul.
Pero antes de remarcar las líneas, es importante borrar las que habíamos marcado con nuestro lápiz de grafito de manera que sea casi visible, para que así al momento de usar el color sobre este no se pueda notar y manchar nuestro dibujo.
Later, I began to mark the edges of this peculiar blue bird, the edges of the plumage of the wings I did it in dark blue to make a difference, for the eyes I used black as well as the beak, only in the beak I drew a small line that will serve me as a guide to create a separation of colors in this part, since later I will use the white color to finish marking the space.
For the legs I used the same black color, I started to mark first the lines of the bird to know in which space each color goes, since my reference image is in black and white, but I have seen this kind of bird before and I know that they are blue.
But before highlighting the lines, it is important to erase the ones we had marked with our graphite pencil so that it is almost visible, so that at the moment of using the color over it, it can not be noticed and stain our drawing.


Después procedí a agregar la primera capa de color a esta peculiar ave, aquí si usé solamente el color azul claro para valorizar todo el cuerpo, recordemos que anteriormente habíamos remarcado con el color azul oscuro las líneas de las alas para que no se perdieran al agregar esta primera capa de color.
Por la parte del cuello, podemos notar que use el color azul oscuro, esto se debe a que hay una pequeña profundidad por esta zona.
Then I proceeded to add the first layer of color to this peculiar bird, here I used only the light blue color to enhance the whole body, remember that previously we had highlighted with dark blue color the lines of the wings so that they were not lost when adding this first layer of color.
On the neck, we can notice that I used the dark blue color, this is because there is a little depth in this area.


Después de haber agregado la primera capa de valorizado a nuestro dibujo, comencé a darle tres capas más a la cara de esta ave, podemos apreciar que usé tanto el color azul claro como azul oscuro, pero para poder hacer este efecto de plumaje, tuve que hacer pequeños trazos de izquierda a derecha para poder lograr este efecto, a la vez puedo notar inmediatamente como me va quedando este dibujo con estos colores.
Luego deje algunos espacios en blanco para posteriormente agregar el color blanco sobre estos espacios, así para crear plumas blancas y darle un efecto de brillo por algunas zonas.
Más adelante continúe la mitad del cuerpo del ave, usé la misma técnica de trazado, solamente que lo hice de arriba hacia abajo para poder crear el efecto de plumaje con los colores azul claro y azul oscuro, recuerden que también deben afincar bien el color para poder lograr este tono.
Para poder hacer las alas y la cola de esta hermosa ave, tuve que crear profundidades entre ellas con el color azul oscuro, también dejé algunas partes claras con el color azul claro, pero sin afincar mucho el crayón azul claro, posteriormente comencé a usar el color blanco para embellecer las puntas de algunas plumas.
También use el color negro para rellenar las zonas que antes había remarcado con dicho color, ya podemos notar como está quedando este dibujo.
Ahora bien, la diferencia entre estos colores prismacolor con los Kores, es que los prismacolor tienen tonalidades mucho más cremosas, en cambio, a los Kores son un poco más opaco, pero si me dan a elegir, prefiero los Kores, ya que para poder colorear con estos prismacolor hay que tener mucho cuidado, porque de lo contrario podemos cometer un error como me paso con un dibujo que antes había hecho para probar, otra cosa que no debemos hacer es que no podemos mezclar una marca de colores con otra, porque créanme que es una gran molestia, siempre recomiendo que cuando vayan a comprar unos colores, que sean de 24 unidades en vez de 12, ya que los de 24 tienen más colores que podemos usar para mezclar y crear perfectas combinaciones, ya que con los de 12 estaremos muy limitados.
After having added the first layer of valorized to our drawing, I began to give three more layers to the face of this bird, we can see that I used both light blue and dark blue, but in order to make this feathering effect, I had to make small strokes from left to right to achieve this effect, at the same time I can immediately notice how I am getting this drawing with these colors.
Then I left some spaces in white to later add the white color over these spaces, this way to create white feathers and to give it a shiny effect in some areas.
Later on continue with the middle of the bird's body, I used the same tracing technique, only I did it from top to bottom to create the plumage effect with the light blue and dark blue colors, remember that you must also fine tune the color to achieve this tone.
In order to make the wings and tail of this beautiful bird, I had to create depths between them with the dark blue color, I also left some light parts with the light blue color, but without sharpening too much the light blue crayon, then I started to use the white color to embellish the tips of some feathers.
I also used the black color to fill in the areas that I had previously highlighted with that color, we can already notice how this drawing is turning out.
Now, the difference between these prismacolor colors with the Kores, is that the prismacolor have much more creamy tonalities, on the other hand, the Kores are a little more opaque, but if they give me to choose, I prefer the Kores, since to be able to color with these prismacolor we must be very careful, because otherwise we can make a mistake as it happened to me with a drawing that before I had done to test, another thing we should not do is that we can not mix one brand of colors with another, because believe me it is a big hassle, I always recommend that when you go to buy some colors, that are 24 units instead of 12, because the 24 have more colors that we can use to mix and create perfect combinations, because with the 12 we will be very limited.


Para poder colorear los pinos si fue un poco complicado, ya que como no use técnicas para que me quedaran de manera perfecta, me quedaron un poco desproporcionados, pero es porque solamente quería mostrarle como es esta marca de color.
Para hacer las piñas del árbol de pino, primero comencé con la parte superior, dejando algunos reflejos claros con el color marrón oscuro, luego por la parte de en medio usé el mismo color, pero afincando más el crayón para darle profundidad al dibujo.
Una vez terminado de colorear las piñas, use el color blanco para agregarle una capa más a las partes que deje en marrón claro para darle más brillo, más adelante comencé a agregar las ramas del árbol de pino, luego agregue algunas cerezas según nos muestra nuestra imagen de referencia y por último agregue las hojas del árbol del pino.
De esta manera pude realizar y terminar este dibujo amigos, honestamente me gusto como me quedo el dibujo con esta marca de colores, pero prefiero más los Kores, aunque en ocasiones estaré usando esta marca de colores para poder gastar estos que tengo.
Recuerden esta frase, no es necesario ser un gran maestro para lograr ser un gran artista, palabras sabias de un buen amigo que quizás muchos conozcamos.
Las fotos fueron tomadas con la ayuda de mi teléfono Bison X Designed By Umidigi.
La imagen de referencia se encuentra en la parte inferior de este texto, debajo de ella podrán encontrar la fuente de la misma, el cual los llevara a la página que utilizo para encontrar las imágenes en referencia que uso para dibujar.
Y Así finaliza la publicación de hoy amigos, espero les sea de su agrado y que hayan aprendido algo nuevo el día de hoy con mi publicación, hasta la próxima.
To color the pine trees it was a little complicated, since I didn't use techniques to make them perfect, so they were a little disproportionate, but that's because I just wanted to show you how this color mark is.
To make the pine cones of the pine tree, first I started with the upper part, leaving some light reflections with the dark brown color, then for the middle part I used the same color, but using the crayon more to give depth to the drawing.
Once I finished coloring the pine cones, I used the white color to add one more layer to the parts I left in light brown to give it more brightness, later I started to add the branches of the pine tree, then I added some cherries as shown in our reference image and finally I added the leaves of the pine tree.
In this way I was able to make and finish this drawing friends, honestly I liked how I got the drawing with this brand of colors, but I prefer more the Kores, although sometimes I will be using this brand of colors to spend these that I have.
Remember this phrase, it is not necessary to be a great master to be a great artist, wise words of a good friend that maybe many of us know.
The pictures were taken with the help of my Bison X Designed By Umidigi phone.
The reference image is at the bottom of this text, below it you can find the source of it, which will take you to the page I use to find the reference images I use to draw.
And so ends today's publication friends, I hope you like it and that you have learned something new today with my publication, until next time.


Source / Fuente Castle of Castlevania
Source / Fuente Terra Blade of Terraria
Los separadores son de mi autoría, la imagen que use de referencia tiene su fuente, las ediciones del GIF son creados por mí.
The separators are of my authorship, the image I used as a reference has its source, the GIF edits are created by me.
Programas que utilicé para crear mi diseño es este:
This is the program I used to create my design:
Gif y portada cortesía de Canva
Gif and cover courtesy of Canva
Traducido por Deepl


