
Bienvenidos mis queridos amigos amantes del arte y artista.
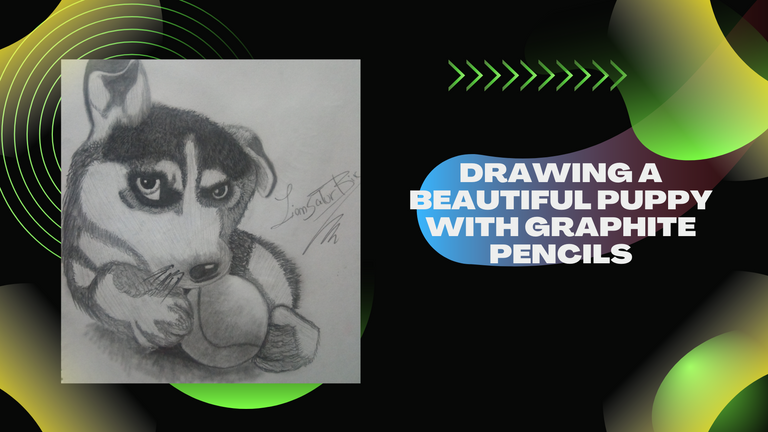
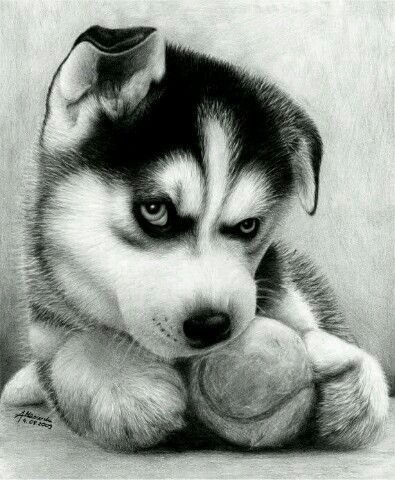
Hoy les vengo a compartir un dibujo que realizado a con lápices de grafito, puesto que he querido dibujar un hermoso cachorro, ya que soy amante de estos animales tan impresionantes, he inteligentes, este dibujo no se tratara agregando capas como anteriormente he realizado en mis dibujos, puesto que lo podemos hacer de manera directa y sin mucho esfuerzo, todo está en el boceto que implementaremos en este dibujo.
He querido ampliarme un poco más en mis dibujos, puesto que no solo he querido dibujar rostros realistas, sino que también quiero practicar con animales y hacerlos lo más realista posible.
Al igual que en la mayoría de mis dibujos, las imágenes que utilizo en referencia son sacados de una gran página de ideas y diseños llamada Pinterest.
Welcome my dear friends, art lovers and artist.
Today I come to share a drawing that I made with graphite pencils, since I wanted to draw a beautiful puppy, as I am a lover of these animals so impressive, I have smart, this drawing is not about adding layers as I have previously done in my drawings, since we can do it directly and without much effort, everything is in the sketch that we will implement in this drawing.
I have wanted to expand a little more in my drawings, since I have not only wanted to draw realistic faces, but I also want to practice with animals and make them as realistic as possible.
As in most of my drawings, the images I use in reference are taken from a great page of ideas and designs called Pinterest.


Los materiales que vamos a utilizar para crear nuestro dibujo son pocos, puesto que necesitaremos de:
*Un block de dibujo marca Caribe.
*Lápiz de grafito 2B y 6B
*Pañuelo.
*Sacapuntas con depósito.
*Hisopo.
*Algodón.
*Pinceles.
The materials that we are going to use to create our drawing are few, since we will need:
*A Caribe sketch pad.
*A 2B and 6B graphite pencil.
*Handkerchief.
*Pencil sharpener with reservoir.
*Hyssop.
*Cotton.
*Brushes.


Para comenzar a realizar nuestro dibujo, primero debemos utilizar las figuras geométricas, puesto que solamente usaremos el círculo, aunque un poco ovalado, estas las utilizaremos para las orejas, nariz, patas y la pelota.
Este paso es muy importante, ya que esto nos permitirá tener una percepción de como realizaremos nuestro dibujo, lo podemos hacer del tamaño que nosotros deseamos, en mi caso es del tamaño de la hoja de mi bloc de dibujo.
Luego, dentro del mismo boceto que anteriormente habíamos realizado, comenzaremos a darle forma a nuestro dibujo, esta parte es fácil de hacer, ya que gracias a las figuras geométricas ya tendremos una percepción de como comenzaremos a trabajar en él.
Después comenzaremos a darle forma a la parte superior de la cabeza de este cachorro, también remarqué las partes donde estará el pelaje mucho más oscuro.
To begin to make our drawing, first we must use the geometric figures, since we will only use the circle, although a little oval, we will use them for the ears, nose, paws and the ball.
This step is very important, since this will allow us to have a perception of how we will make our drawing, we can make it the size we want, in my case it is the size of the sheet of my sketch pad.
Then, within the same sketch that we had previously made, we will begin to shape our drawing, this part is easy to do, since thanks to the geometric figures we will already have a perception of how we will begin to work on it.
Then we will begin to shape the upper part of the head of this puppy, I also remarked the parts where the fur will be much darker.


Una vez que tengamos ya realizado las partes de nuestro cachorro, comenzaremos a valorizar nuestro dibujo, comenzando por los ojos y cabeza, es mejor que comencemos desde lo más oscuro a lo más claro, para cuando vayamos a difuminar rellene los espacios en blanco.
Luego daremos pequeños trazos en todo el cuerpo de nuestro dibujo, de esta manera podemos recrear el pelaje del mismo, ya que este es un animalito muy peludo, por lo tanto, debemos hacerlo tal cual, incluso podemos agregar todas las partes de profundidad, esto se logra agregando trazos un poco más oscuros que los otros.
Después con la ayuda de nuestro algodón, comenzaremos a difuminar todo nuestro dibujo, podemos notar que todo el dibujo quedo plano y el grafito de nuestro algodón relleno todas las partes que habíamos dejado en blanco, honestamente esto fue un problema para mí, ya que el algodón había que pasarlo suavemente para que no rellenara todo nuestro dibujo.
Once we have already made the parts of our puppy, we will begin to enhance our drawing, starting with the eyes and head, it is better to start from the darkest to the lightest, so that when we are going to blur fill in the blanks.
Then we will give small strokes all over the body of our drawing, in this way we can recreate the fur of it, since this is a very furry animal, therefore, we must do it as it is, we can even add all the parts of depth, this is achieved by adding strokes a little darker than the others.
Then with the help of our cotton, we will begin to blur all our drawing, we can notice that all the drawing was flat and the graphite of our cotton filled all the parts that we had left in white, honestly this was a problem for me, since the cotton had to pass it softly so that it did not fill all our drawing.


Ahora debemos crear el efecto de pelaje de nuestro cachorro, para eso debemos hacer pequeños trazos, uno por uno de esta manera, como observaran en la primera foto por la parte superior de este texto, también comencé a borrar algunas partes que me quedaron muy oscuras del dibujo.
Esto lo hice con la ayuda del borrador del mismo lápiz de grafito, debemos realizarlo en todas las partes de nuestro cachorro, ya que como había afincado mucho el algodón todas las partes me quedaron muy oscuras.
También remarqué el pelaje que está alrededor de todo el cachorro de la misma forma que hicimos con el pelaje en la parte superior de la cabeza.
Now we must create the fur effect of our puppy, for that we must make small strokes, one by one in this way, as you will see in the first photo at the top of this text, I also began to erase some parts that were very dark in the drawing.
This I did it with the help of the eraser of the same graphite pencil, we must do it in all the parts of our puppy, since as I had dipped the cotton a lot all the parts were very dark to me.
I also remarked the fur that is around the whole puppy in the same way that we did with the fur on the top of the head.


Luego comencé a agregar un poco de fondo para hacer que nuestro dibujo resaltara un poco más, podemos usar nuestro lápiz 6B para esto, ya que el grafito que desprende es de un tono más oscuro que el 2B, más adelante volvemos a pasar nuestro algodón para difuminar el fondo.
Quedando de la siguiente manera como podrán observar en la segunda fotografía que está en la parte superior de este texto.
Y por último pasaremos trazos, son afincar mucho nuestro lápiz 2B, así para que se pueda simular el pelaje del cachorro, también le dibuje el bigote de nuestro amiguito, no tengo mucha experiencia dibujando animales, así que he querido practicar mucho estos estilos de dibujo, en ocasiones dependiendo de la imagen de referencia que vayamos a utilizar, se encuentran estos bloques de tonalidades, pero en otros dibujos estos no deben estar, ya que si queremos que sea realista debemos desaparecer estos bloques de tonalidad.
Honestamente, el dibujo no me quedo tan igual que en la imagen de referencia, pero la práctica hace al maestro, por algo se comienza antes de llegar ser un gran artista, o bien como decía un viejo amigo de la televisión, no es necesario ser un maestro para lograr ser un gran artista.
Y de esta forma terminaremos nuestro dibujo, amigos artistas, estoy totalmente satisfecho con mi dibujo, honestamente no me costó mucho realizarlo, ya que tengo esta experiencia, la gran mayoría de los dibujos no me están costando de tanto de hacer.
Las fotos fueron tomadas con la ayuda de mi teléfono Bison X Designed By Umidigi.
La imagen de referencia se encuentra en la parte inferior de este texto, debajo de ella podrán encontrar la fuente de la misma, el cual los llevara a la página que utilizo para encontrar las imágenes en referencia que uso para dibujar.
Y Así finaliza la publicación de hoy amigos, espero les sea de su agrado y que hayan aprendido algo nuevo el día de hoy con mi publicación, hasta la próxima.
Then I started to add some background to make our drawing stand out a little more, we can use our 6B pencil for this, since the graphite it gives off is of a darker tone than the 2B, later we pass our cotton again to blur the background.
The result is as follows as you can see in the second picture that is at the top of this text.
And finally we will pass strokes, are to sharpen a lot our pencil 2B, so that the fur of the puppy can be simulated, I also drew the mustache of our little friend, I don't have much experience drawing animals, so I wanted to practice a lot these styles of drawing, sometimes depending on the reference image that we are going to use, these blocks of tonalities are found, but in other drawings these should not be, because if we want it to be realistic we must disappear these blocks of tonality.
Honestly, the drawing did not look the same as in the reference image, but the practice makes the master, for something you start before becoming a great artist, or as an old friend of the television said, it is not necessary to be a master to be a great artist.
And in this way we will finish our drawing, artist friends, I am totally satisfied with my drawing, honestly it did not cost me much to make it, since I have this experience, the great majority of the drawings are not costing me so much to make.
The pictures were taken with the help of my Bison X Designed By Umidigi phone.
The reference image is at the bottom of this text, below it you can find the source of it, which will take you to the page I use to find the reference images I use to draw.
And so ends today's publication friends, I hope you like it and that you have learned something new today with my publication, until next time.


Source / Fuente Castle of Castlevania
Source / Fuente Terra Blade of Terraria
Los separadores son de mi autoría, las fotos fueron tomadas con la ayuda de mi telefono, las ediciones del GIF son creados por mí.
The separators are of my authorship, the photos were taken with the help of my phone, the GIF editions are created by me.
Programas que utilicé para crear mi diseño es este:
This is the program I used to create my design:
Gif y portada cortesía de Canva
Gif and cover courtesy of Canva
Traducido por Deepl

