WELCOME TO MY BLOG
Helloaaa, helloaaaaaaa! My creative friends. Today I bring you a very easy tutorial to personalize pencils. For a long time I've had the idea of making this step by step, but I don't know why I always ended up doing something else, hahahahahaha. Things that happen. The thing is that I finally decided, I think my motivation is to see my daughter go out day by day to college and that she carries her personalized pencils is something very important because you can identify it from a distance. This reminds me of my school days, when I put the names on each pencil or coloring pencil, and even then they would arrive without one in their pencil case. I hope that now that they are women it won't happen to them in college. So if you have kids, or students at home, this tutorial is for you.
BIENVENIDOS A MI BLOG
¡Holaaaa, holaaaaa! Mis amigos creativos. El día de hoy les traigo un tutorial muy fácil para personalizar los lápices. Desde hace mucho tiempo he tenido la idea de realizar este paso a paso, pero no sé por qué siempre terminaba por hacer otra cosa, jajajajaja. Cosas que pasan. La cuestión es que por fin me decidí, creo que mi motivación es ver a mi hija salir día a día la universidad y que lleve sus lápices personalizados es algo muy importante porque podrás identificarlo a distancia. Esto me hace recordar los días d escuela, cuando le colocaba los nombres a cada lápiz de grafito o los de colorear, y aun así llegaban sin alguno en su cartuchera. Espero que ahora que ya son unas mujeres no les suceda en la universidad. Así que si tienes niños, o estudiantes en casa, este tutorial es para ti.
MATERIALS
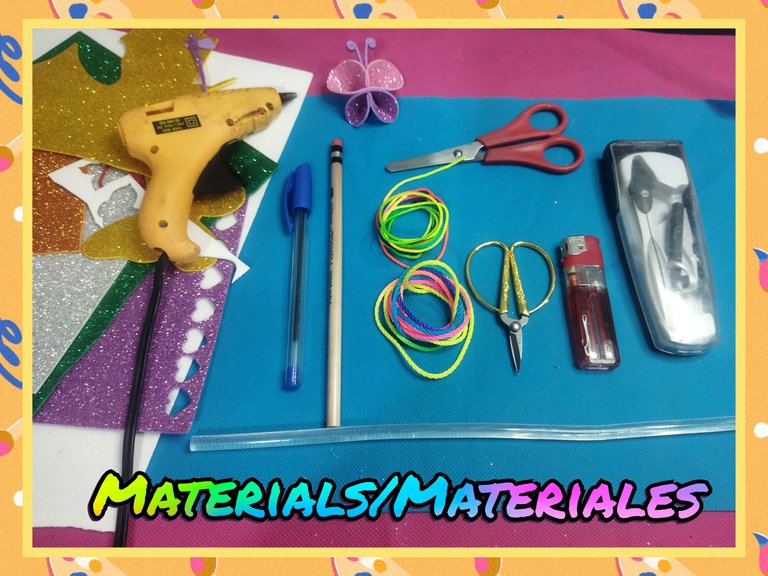
- Pencils
- Multicolored terlenca thread
- Foami in assorted colors
- Silicone stick and silicone gun
- Compass
- Scissors
- Lighter
- Sewing thread and sewing needle
MATERIALES
- Lápices
- Hilo terlenca multicolor
- Foami colores variados
- Silicón en barra y pistola de silicón
- Compás
- Tijeras
- Encendedor
- Hilo de coser y aguja de coser
STEP BY STEP // PASO A PASO
STEP #1
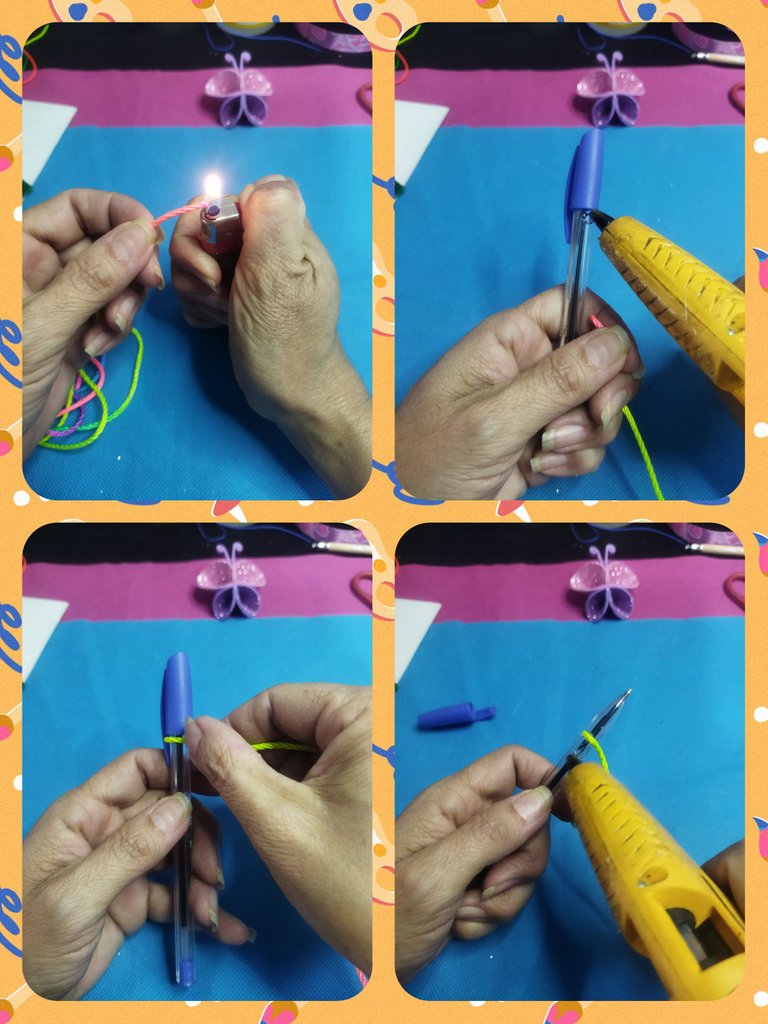
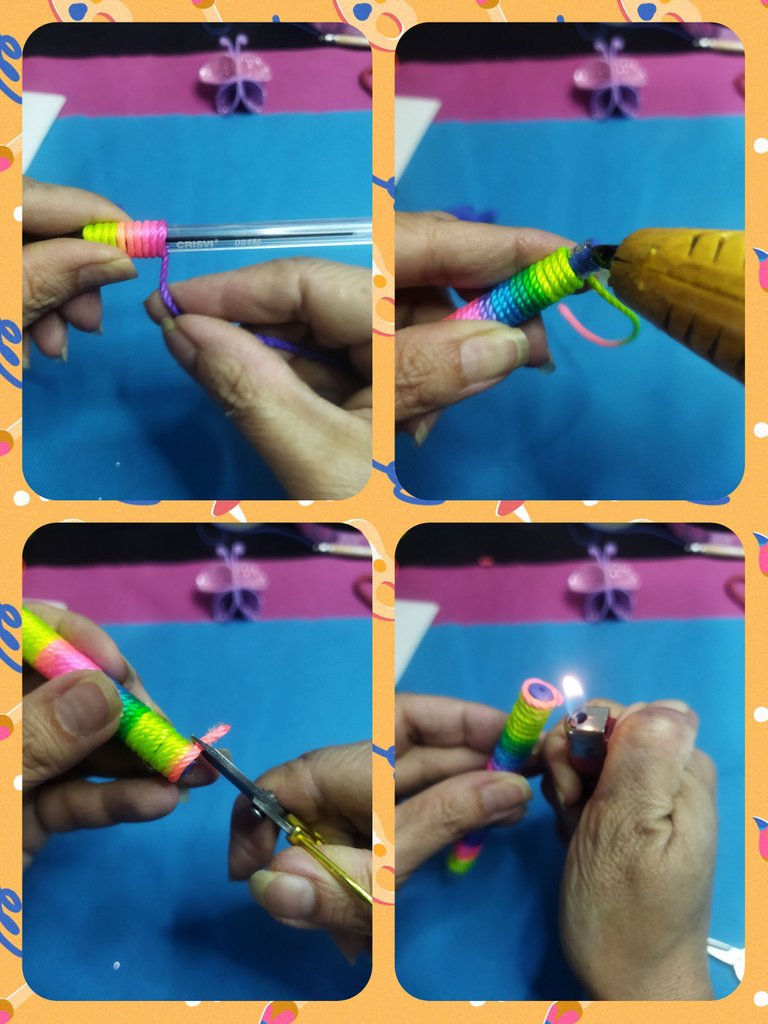
We will start by personalizing a pen or pencil.
Without removing the cap, we add a little silicone just below the cap and place the thread. From that line, we add a little more silicone to adjust the thread to the pen and begin to go all the way around. Once we reach the end we add more silicone and close. We cut the excess thread and with the lighter we seal the tip so that the thread does not open.
PASO #1
Comenzaremos personalizando un lapicero o bolígrafo.
Sin retirar la tapa, agregamos un poco de silicón justo debajo de la tapa y colocamos el hilo. A partir de esa línea, agregamos un poco más de silicón para ajustar el hilo el lapicero y comenzamos a rodear hasta el final. Una vez llegados al final agregamos más silicón y cerramos. Cortamos el exceso de hilo y con el encendedor sellamos la punta para que el hilo no se abra.
STEP #2
BUTTERFLY
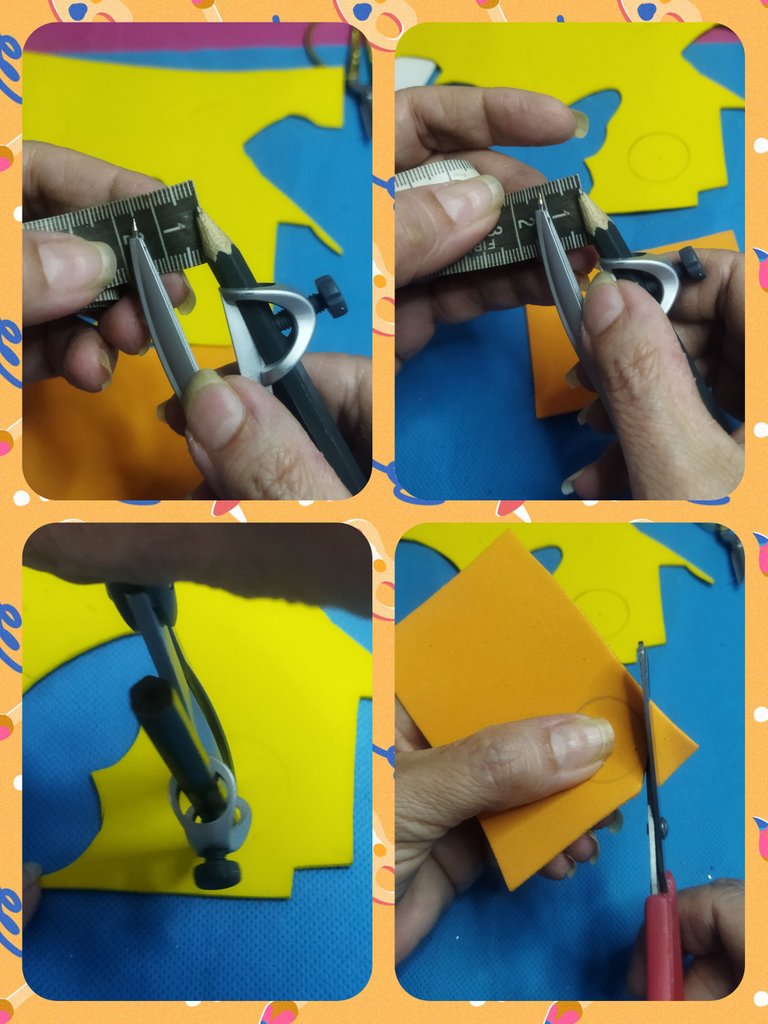
With the compass we make two small circles, one of 1.5 cm in diameter and the other of 1 cm in diameter, in two pieces of foami in the color of your choice. Then cut them out.
PASO #2
MARIPOSA
Con el compás realizamos dos círculos pequeños, uno de 1,5 cm de diámetro y otro de 1 cm de diámetro, en dos retazos de foami del color que desees. Luego los recortas.
STEP #3
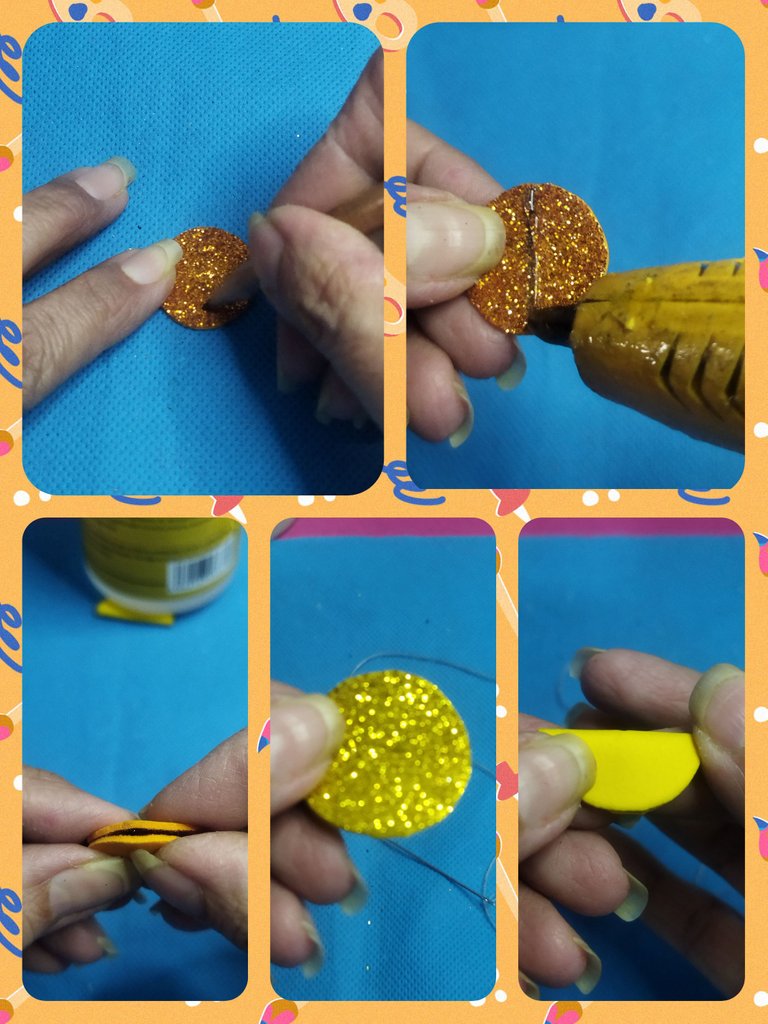
We mark a line down the center of both circles and on that line we add a little silicone. Then we fold in the same direction of the line.
PASO #3
Marcamos una línea por el centro de ambos círculos y sobre esa línea agregamos un poco de silicón. Luego doblamos en la misma dirección de la línea.
STEP #4
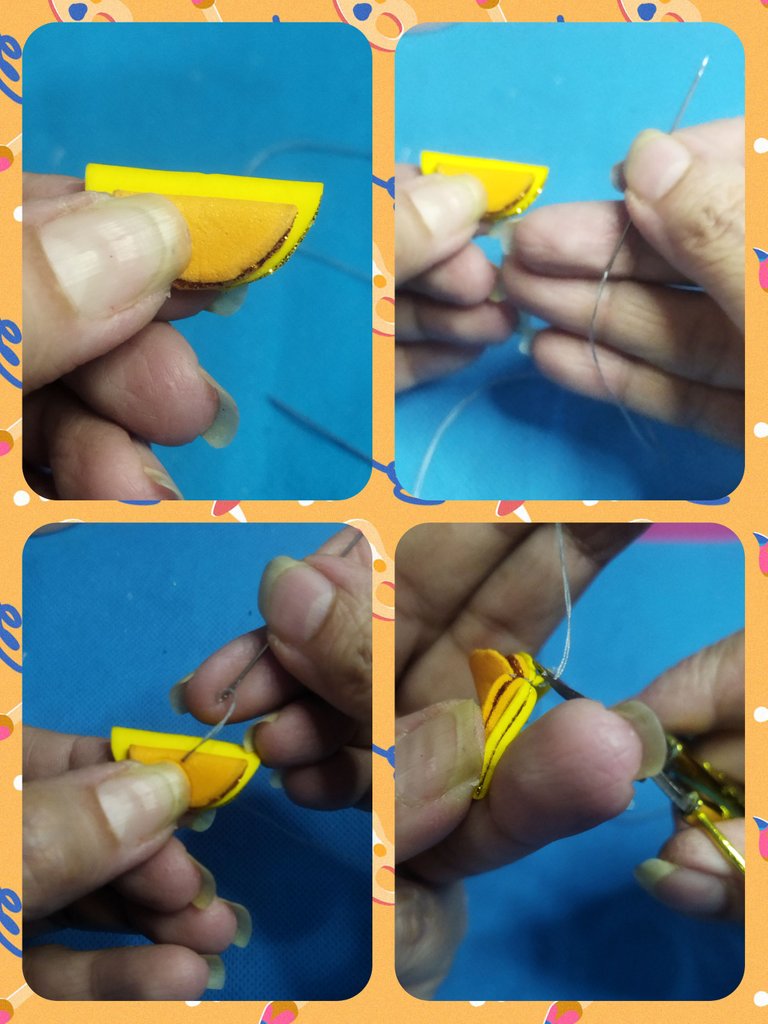
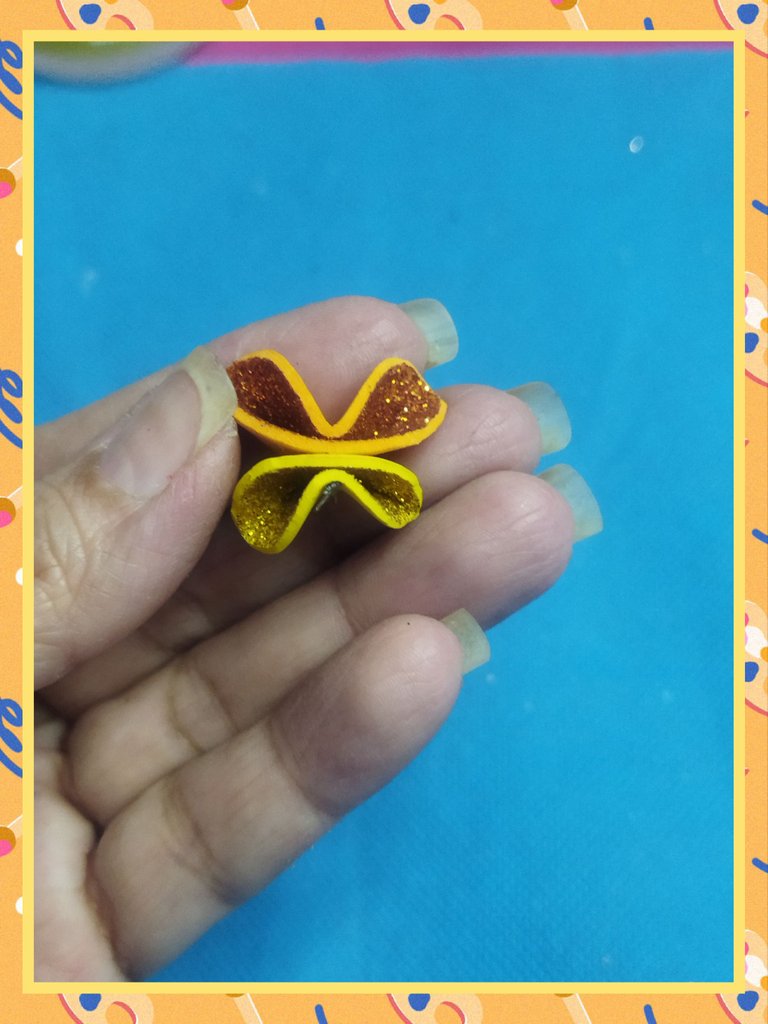
Once both pieces are glued together, we join them with thread, placing one on top of the other so that the circular edges are even, we make a seam in the center of both semicircles.
PASO #4
Ya con ambas piezas pegadas, las uniremos con hilo, colocando una sobre otra y que los bordes circulares queden parejos, realizamos una costura por el centro de ambos semicírculos.
STEP #5
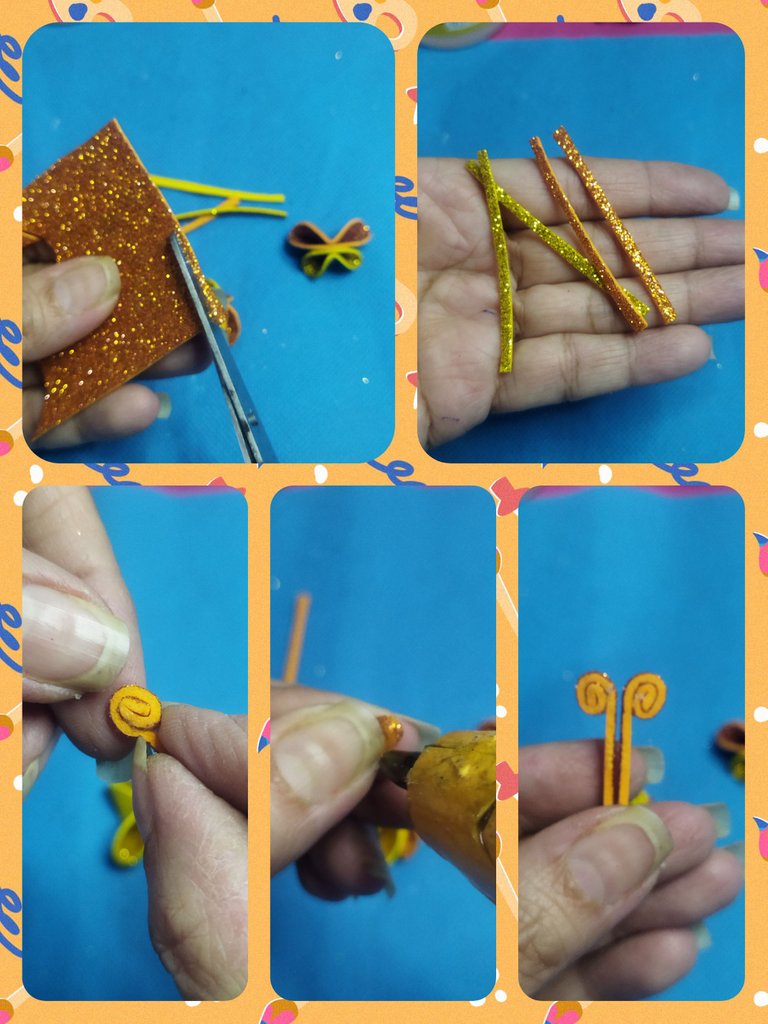
We make thin strips for the antennae of 0.2 mm. We make a small spiral and glue with silicone.
PASO #5
Realizamos tiritas delgadas para las antenas de 0,2 mm. Hacemos un espiral pequeño y pegamos con el silicón.
STEP #6
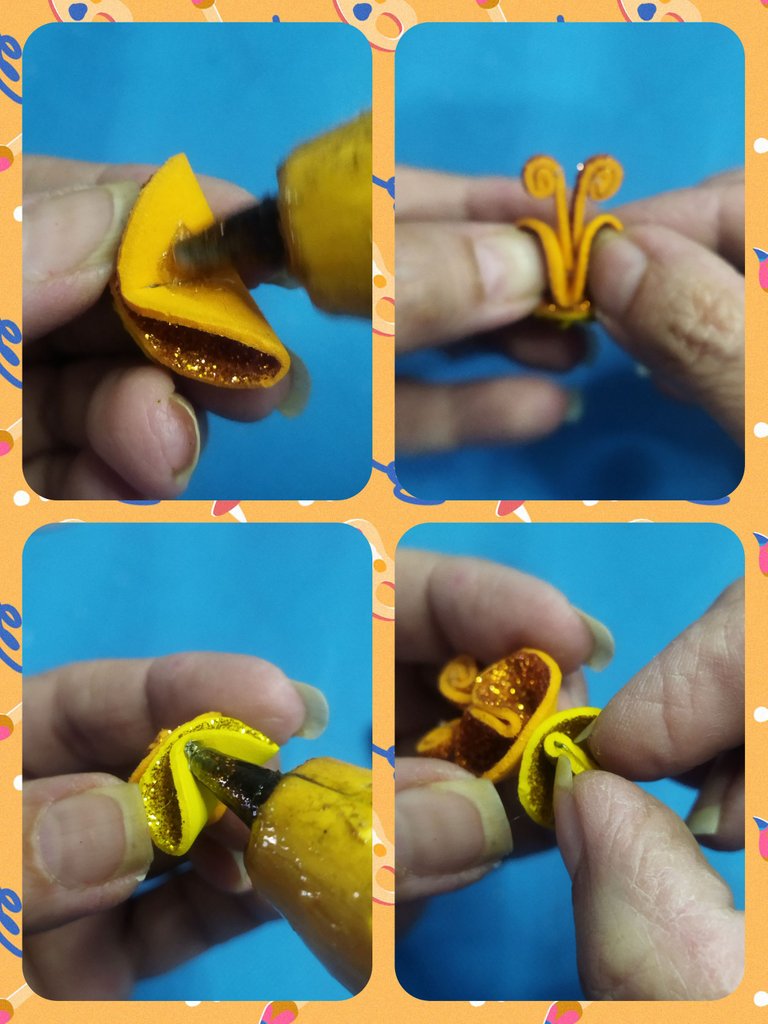
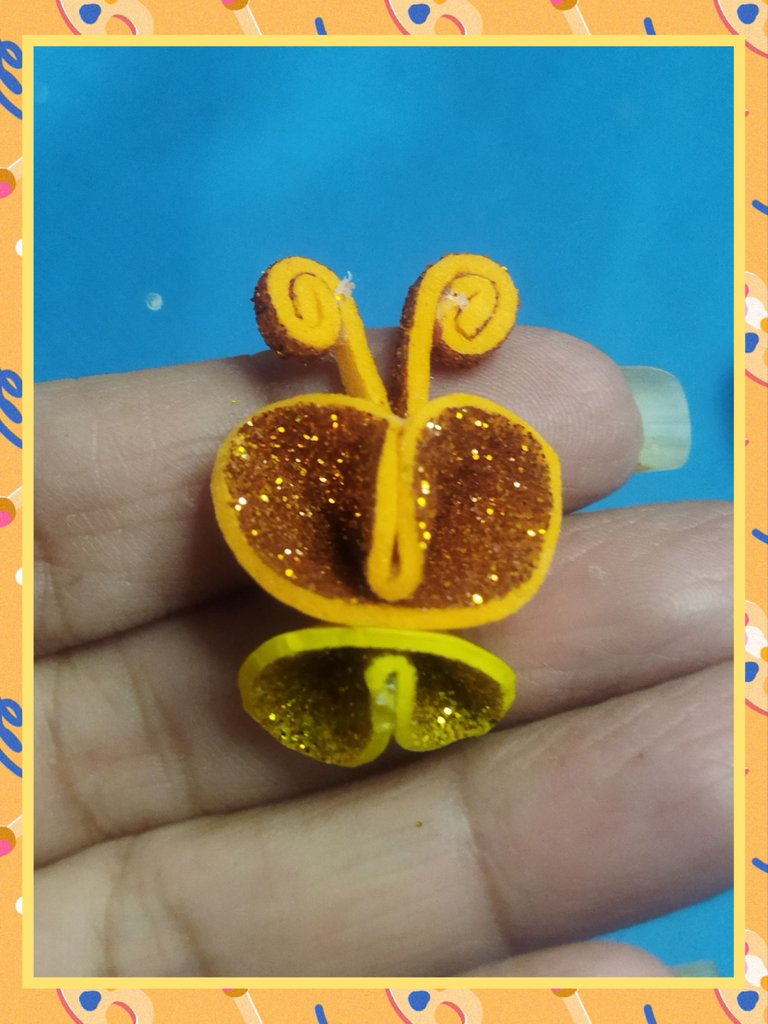
Place the antennae on the widest part of the butterfly by placing silicone on both sides of the wings, attach and let dry.
Then on the smallest part, we add a dot of silicone to give it the shape of wings.
PASO #6
Colocamos las antenas en la parte mas ancha de la mariposa colocando silicón en ambas caras de las alas, sujetamos y dejamos secar.
Luego en la parte más pequeña, agregamos un punto de silicón para darle forma de alas.
STEP #7
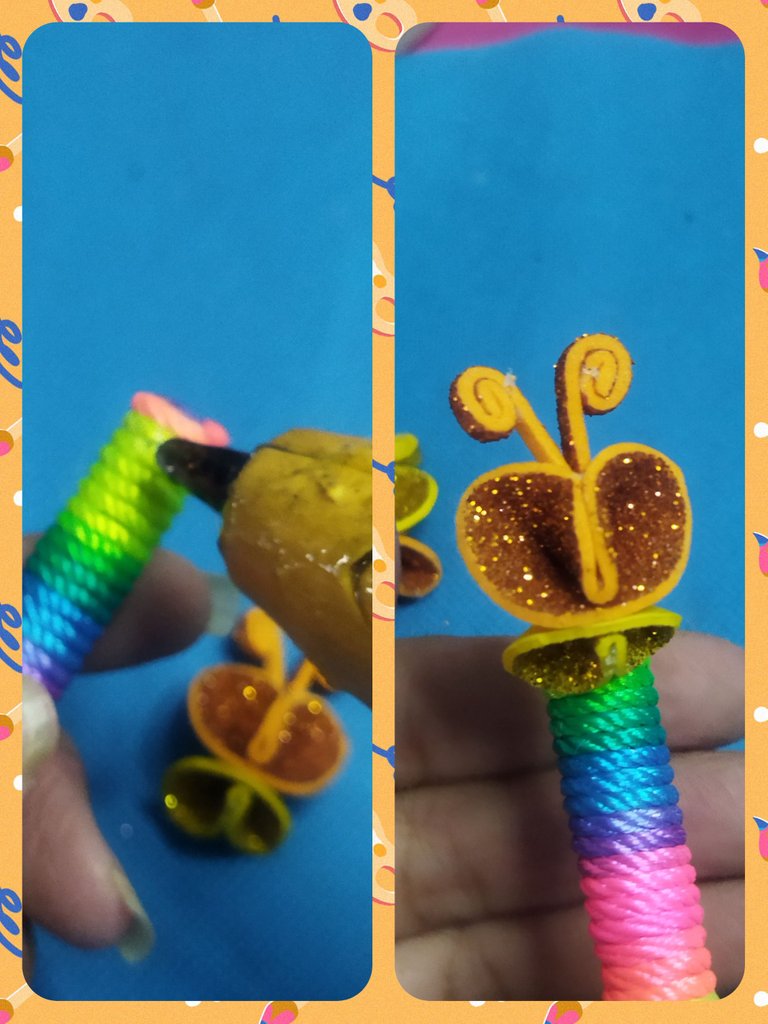
Add silicone on the end of the pencil, opposite to where the cap is, and glue the butterfly.
PASO #7
Agregamos silicón en el extremo del lapicero, contrario a donde está la tapa, y pegamos la mariposa.
STEP #8
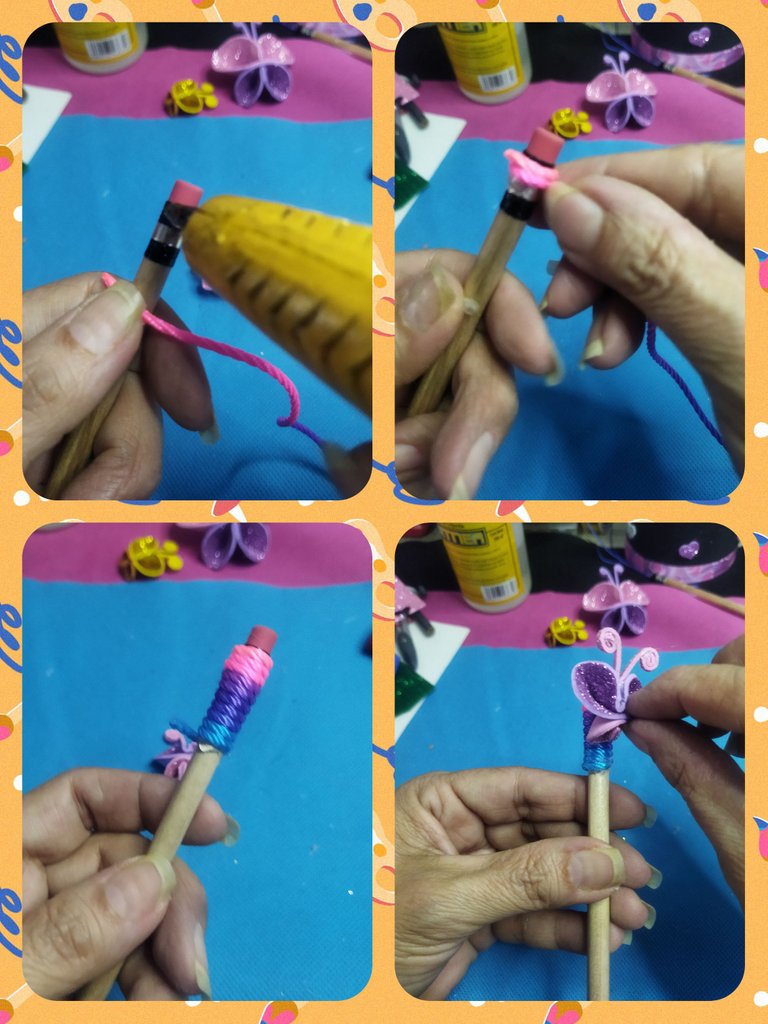
To customize the graphite pencil, we will only need 30 cm of thread, since we will only surround 2 cm of the pencil in the area where the eraser is.
We add a small amount of silicone, place the thread and surround it. Then we put a little bit of silicone and glue the butterfly that we have already made in foami.
PASO #8
Para personalizar el lápiz de grafito, sólo necesitaremos 30 cm de hilo, ya que solo rodearemos 2 cm del lápiz en la zona donde está el borrador.
Agregamos una pequeña cantidad de silicón, colocamos el hilo y rodeamos. Luego ponemos un poco de silicon y pegamos la mariposa que ya hemos realizado en foami.
**FINAL RESULT
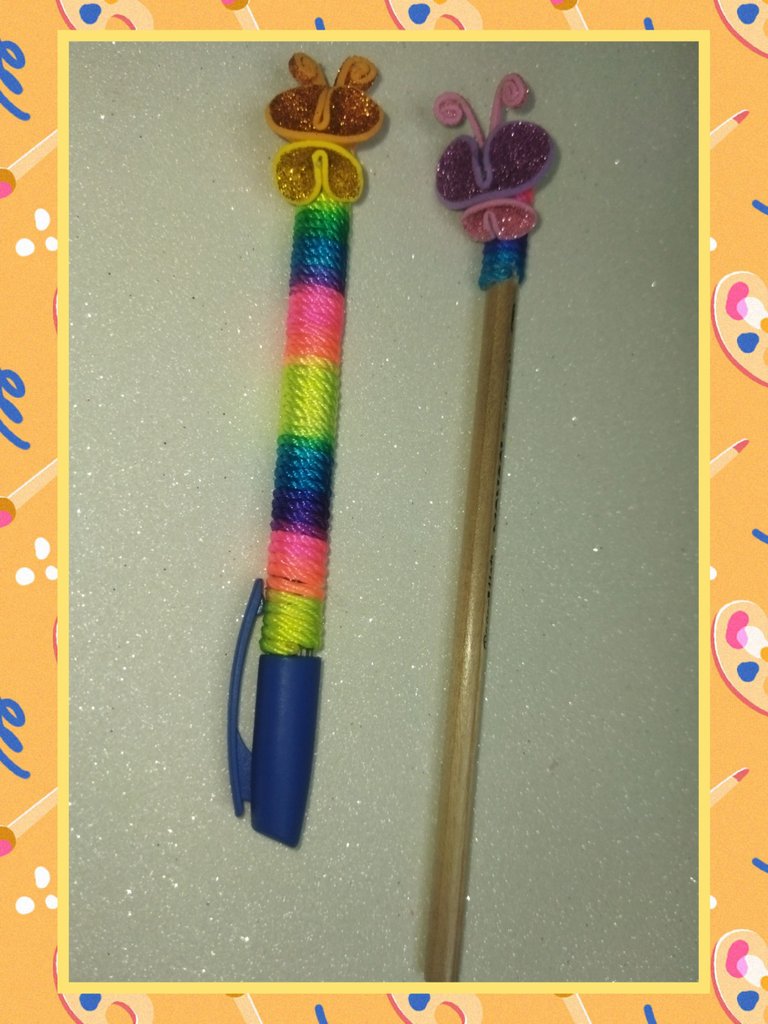
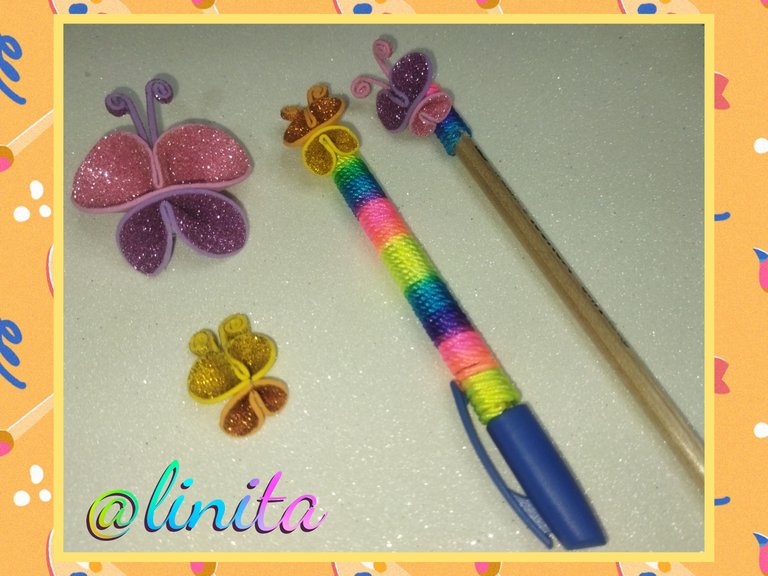
It is very easy to personalize our pencils with few materials, obviously these will be for girls, but if you have children, boys, at home you can place a detail like a little ball, a car, a cap, or the detail that is easier for you to make. I hope you liked it. See you next time.
RESULTADO FINAL
Es muy sencillo personalizar nuestros lápices con pocos materiales, obviamente estos serán para chicas, pero si tienes niños, varones, en casa puedes colocar un detalle como una pelotita, un carro, una gorra, o el detalle que se te haga más fácil realizar. Espero te haya gustado. Nos vemos en la próxima.
