MODIFICATIONS & REPLACEMENT PARTS
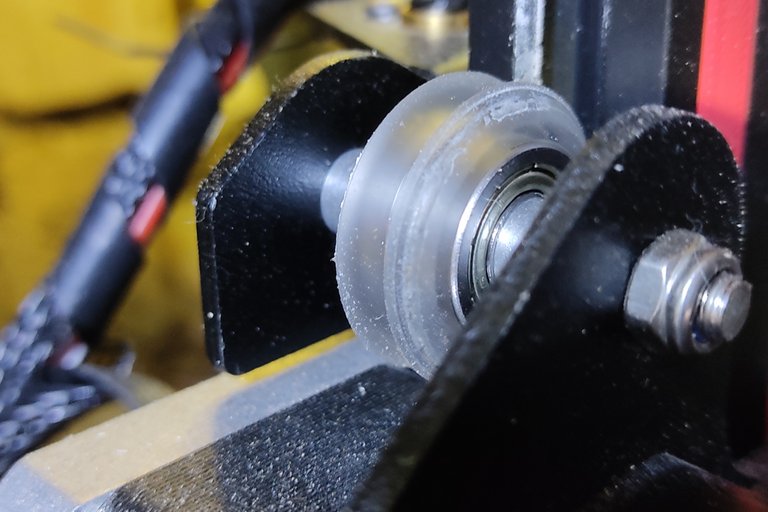
Every 3D printer is subject to a greater or lesser degree of wear. Quite a large mass is permanently moved with very high precision. Some components work at high temperatures. The X and Y axes are driven with toothed belts. All three axes run in the aluminium profiles on rollers made of plastic. So far I have not had to change the toothed belts, even after several hundred hours of printing. The rollers, however, have. The wear is quite high. This is visible to the naked eye after some time. Creality uses rollers made of POM, a hard rubber-like plastic. These castors sometimes have a "plate", i.e. they are dented in one place. This effect is particularly noticeable when the printer is not in use for a long time. I have currently installed rollers made of polycarbonate. None of the rollers has deformed so far. However, the abrasion is no less than with the POM rollers. The price for a set of rollers (13) is about 10€ for both versions. Replacing all the castors takes about half an hour. As soon as the print objects show shifts in the layers, you should first check whether the tension with which the rollers are pressed against the aluminium foil is set correctly and the movements are clean and even. If this is not the case despite correct tension, the rollers should be replaced.
Jeder 3D Drucker unterliegt einem mehr oder weniger großen Verschleiß. Es wird permanent eine recht große Masse mit sehr hoher Präzision bewegt. Einige Bauteile arbeiten mit hohen Temperaturen. Die X- und die Y-Achse werden mit Zahnriemen angetrieben. Alle drei Achsen laufen in den Aluprofilen auf Rollen aus Kunststoff. Die Zahnriemen musste ich bisher auch nach mehreren hundert Druckstunden nicht wechseln. Die Laufrollen allerdings schon. Der Abbrieb ist recht groß. Dieser ist mit bloßem Auge nach einiger Zeit sichtbar. Creality verbaut Rollen aus POM, einem hartgummiartigen Kunststoff. Diese Rollen haben zuweilen einen "Platten", sind also an einer Stelle eingedrückt. Gerade wenn der Drucker längere Zeit still steht tritt dieser Effekt auf. Ich habe aktuell Rollen aus Polycarbonat verbaut. Keine der Rollen hat sich bisher verformt. Der Abbrieb ist aber nicht geringer als bei den Rollen aus POM. Der Preis für einen Satz Rollen (13 Stück) beträgt für beide Varianten ca. 10€. Der Austausch aller Rollen dauert ungefähr eine halbe Stunde. Sobald die Druckobjekte Verschiebungen in den Layern aufweisen sollte man zuerst kontroliieren ob die Spannung, mit der die Rollen gegen die Alupforile gedrückt werden korrekt eingestellt ist und die Bewegungen sauber und gleichmäßig sind. Sollte das trotz korrketer Spannung nicht der Fall sein sollte man die Rollen austauschen.
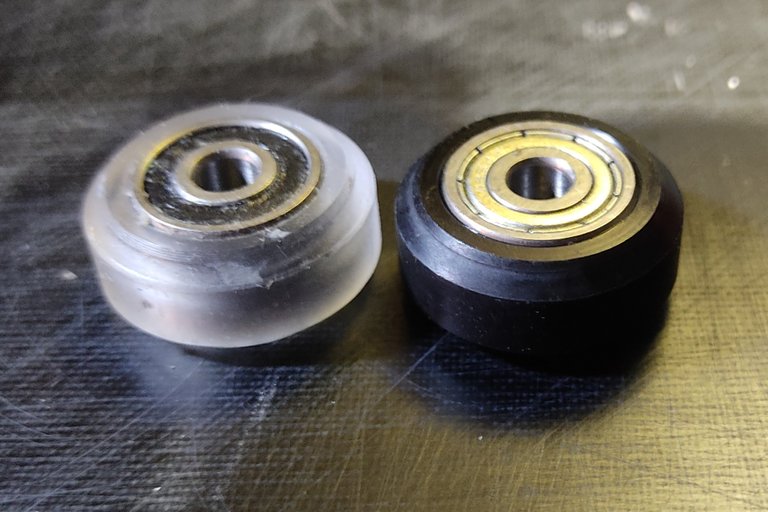
On the left of the picture is a roll made of PC, on the right one made of POM. Both have already completed several hours of printing. Some dealers sell PC rolls at a unit price of 5€. Whether these are actually more durable than the ones I use at a fraction of the price is something I cannot judge. However, I can hardly imagine that the expensive high-end rollers actually last five or even ten times as long as the cheap ones. Besides, I would find it a bit absurd to attach €65 worth of rollers to a 3D printer that costs €200 when new.
Links im Bild ist eine Rolle aus PC, rechts eine aus POM zu sehen. Beide haben schon etliche Druckstunden absolviert. Einige Händler verkaufen PC Rollen zum Stückpreis von 5€. Ob diese tatsächlich langlebiger sind als die von mir verwendeten Exemplare zu einem Bruchteil des Preises vermag ich nicht zu beurteilen. Ich kann mir allerdings kaum vorstellen, dass die teuren High End Rollen tatsächlich fünf oder gar zehnmal so lange halten wie die billigen. Außerdem fände ich es etwas absurd Rollen im Wert von 65€ an einen 3D Drucker zum Neupreis von 200€ anzubauen.

THE LIMIT SWITCHES
Mechanical limit switches are installed on all three axles. These determine the respective position 0. If these switches do not work precisely, the zero position is at a different place each time. In the case of the X and Y axes, this is not a problem. The only consequence is that the printed object is placed 0.1 mm too far to the left, right, front or back on the print bed. This does not matter for the print result. In the Z axis, a deviation of 0.1 or 0.2 mm is quite decisive for the success of the print. If the distance between the print nozzle and the print bed is too large, the material will not adhere well enough. If the distance is too small, it may not be possible to remove the object from the print bed after printing without damaging it.
An allen drei Achsen sind mechanische Endschalter verbaut. Diese bestimmen die jeweilige Position 0. Wenn diese Schalter nicht präzise arbeiten, ist die Nullstellung jedes Mal an einer anderen Stelle. Im Falle der X und Y Achse ist das nicht weiter problematisch. Die Folge ist dann nur, dass das gedruckte Objekt auf dem Druckbett 0,1 mm zu weit links, rechts, vorne oder hinten platziert ist. Für das Druckergebnis spielt das keine Rolle. In der Z Achse ist eine Abweichung von 0,1 oder 0,2mm durchaus ausschlaggebend für das Gelingen des Druckes. Ist der Abstand zwischen Druckdüse und Druckbett zu groß haftet das Material nicht ausreichend gut. Ist der Abstand zu klein kann man das Objekt nach dem Druck unter Umständen nicht zerstörungsfrei vom Druckbett entfernen.
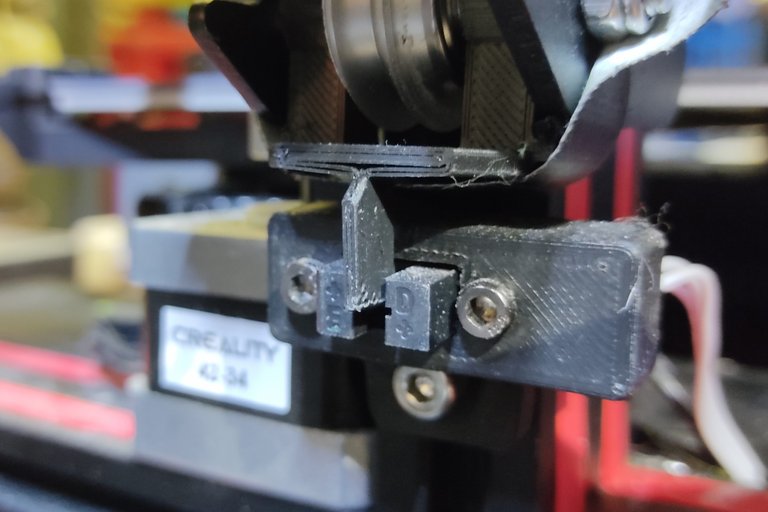
The mechanical limit switch on the Z axis of my Ender 3 V2 did not work precisely from the beginning. I cannot say whether my printer had a particularly bad one or whether this is a fundamental problem. Before testing two dozen different microswitches, I decided to build an optical switch on the Z axis. Because there are no mechanically bouncing parts, the repeatability is much higher. Since I installed the optical switch 3 years ago, I have never again had problems with deviations in the zero position. I printed a suitable housing and attached it to the aluminium profile. To actuate the optical switch, I printed a bar which then interrupts the light barrier. Sometimes a 3D printer is useful for making parts for the 3D printer. 😉
Der mechanissche Endschalter an der Z Achse meines Ender 3 V2 hat von anfang an nicht präzise gearbeitet. Ich kann nicht sagen, ob an meinem Drucker ein besonders schlechtes Exemplar verbaut war oder ob das ein grundsätzliches Problem ist. Bevor ich zwei Dutzend verschiedene Mikroschalter teste entschied ich mich dafür, einen optischen Schalter an die Z Achse zu bauen. Weil es keine mechanisch prellenden Teile gibt ist die Wiederholungsgenauigkeit ungleich größer. Seitdem ich vor 3 Jahren den optischen Schalter verbaut habe, hatte ich nie wieder Probleme mit Abweichungen der Nullstellung. Ich habe ein passendes Gehäuse gedruckt und dieses am Aluprofil befestigt. Um den optischen Schalter zu betätigen habe ich einen Steg, welcher dann die Lichtschranke unterbricht gedruckt. Zuweilen ist ein 3D Drucker ganz nützlich um Teile für den 3D Drucker herzustellen.

EXTRUDER & HOTEND
The Ender 3 V2 delivers good results "out of the box" and works reliably. If you only print PLA, a modification of the extruder and the hotend is not necessary. If you often use flexible material like I do, a Bowden system with a 30 cm long plastic tube between extruder and hotend is not a good solution. The long distance the material has to travel often leads to problems. The flexible material is compressed or stretched by the movements in the hose. On the one hand, this leads to blockages, and on the other hand, the amount of material that is extruded is not correct.
Der Ender 3 V2 liefert "out of the box" gute Ergebnisse und arbeitet zuverlässig. Wenn man ausschließlich PLA druckt ist ein Umbau des Extruders und des Hotends nicht nötig. Wenn man häufiger flexibles Material verarbeitet wie ich, ist ein Bowden System, bei welchem zwischen Extruder und Hotend ein 30 Zentimeter langer Kunststoffschlauch verbaut ist, keine gute Lösung. Durch den langen Weg, den das Material zurücklegen muss, kommt es oftmals zu Problemen. Das flexible Material wird durch die Bewegungen im Schlauch gestaucht bzw. gedehnt. Einerseits kommt es dann zu Verstopfungen, andererseits ist die Materialmenge, die extrudiert wird, nicht korrekt.
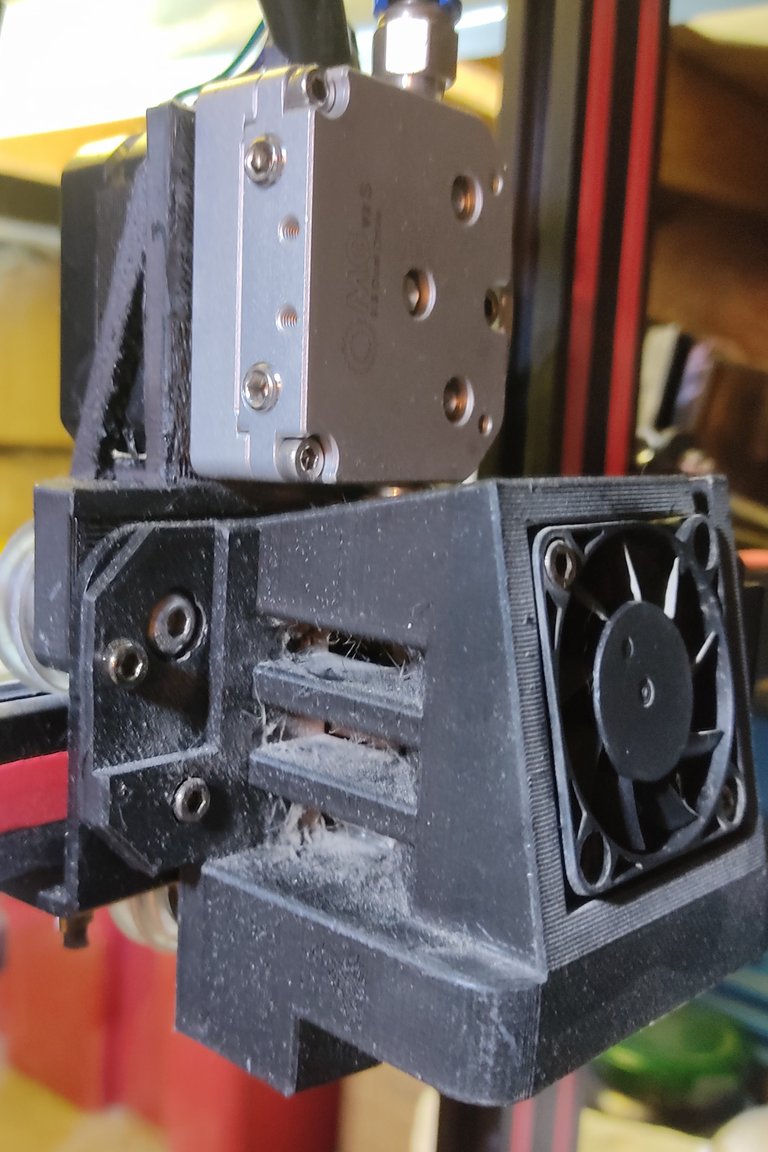
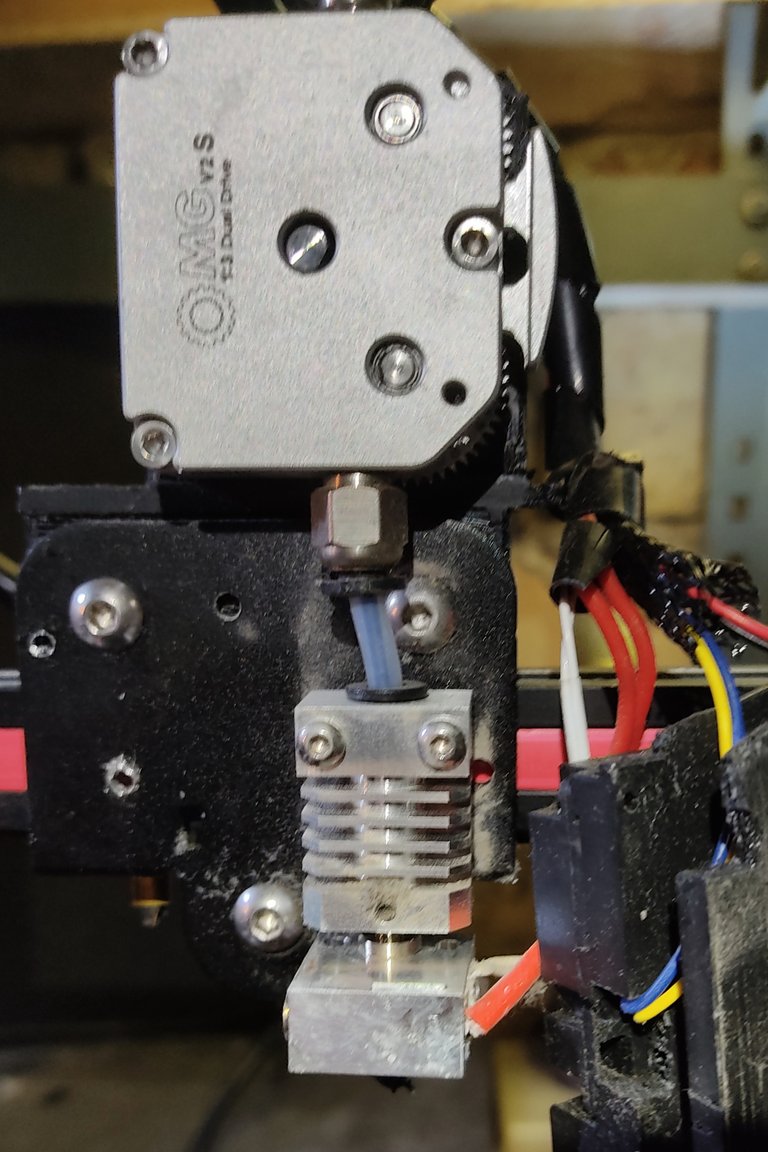
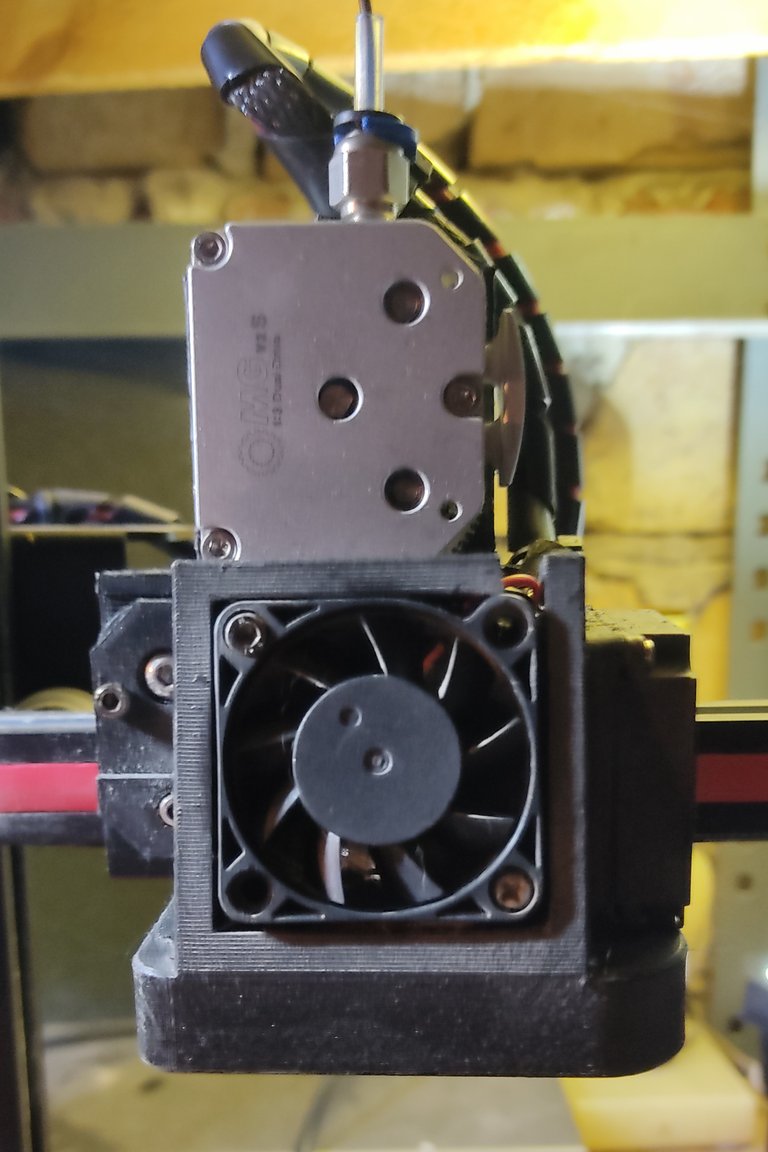
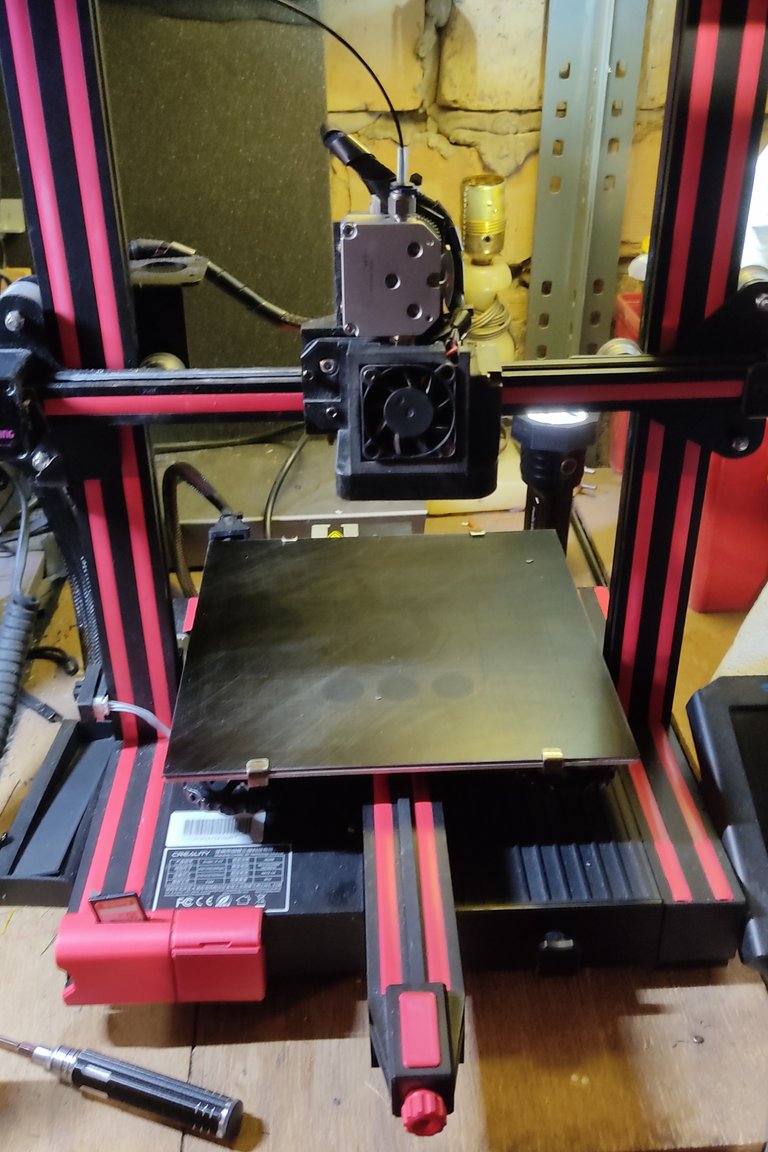
To solve these problems, I converted the printer to direct extrusion. The extruder now sits directly above the hotend. Basically, the conversion also works with the original components. But if I'm going to rebuild the printer, I want to do it properly. So I replaced the rickety plastic extruder with a metal one (OMG V2S). I also took the opportunity to replace the hotend. I installed a complete metal hotend (Microswiss). Instead of the plastic hose, which reaches up to the pressure nozzle, a bi-metal tube is installed. The maximum temperature that the hose can tolerate is 240°C. In the long run, the hose cannot withstand this temperature. If the hose melts in the hotend, the hotend and the pressure nozzle are a waste bin. The all-metal hotend can withstand higher temperatures, and the bi-metal tube can withstand higher temperatures.
Um diese Probleme zu beheben habe ich den Drucker auf Direktextrusion umgebaut. Der Extruder sitzt jetzt direkt über dem Hotend. Grundsätzlich funktioniert der Umbau auch mit den Originalkomponenten. Aber wenn ich den Drucker schonmal umbaue, dann gleich richtig. Ich habe also den klapprigen Kunststoffextruder durch ein Exemplar aus Metall ersetzt (OMG V2S). Auch das Hotend habe ich bei der Gelegenheit ausgetauscht. Ich habe ein Komplettmetall Hotend (Micro Swiss) verbaut. Bei diesem ist anstelle des Kunstoffschlauches, welcher bis an die Druckdüse reicht, ein Bi-Metall Rohr verbaut. Die maximale Temperatur, die der Schlauch toleriert liegt bei 240°C. Auf Dauer hält der Schlauch auch diese Temperatur nicht aus. Wenn der Schlauch im Hotend schmilzt ist das Hotend samt Druckdüse ein Fall für Mülleimer. Das Komplettmetall Hotend verträgt höhere Temperaturen und das Bi-Metall Rohr verschleißt nicht.
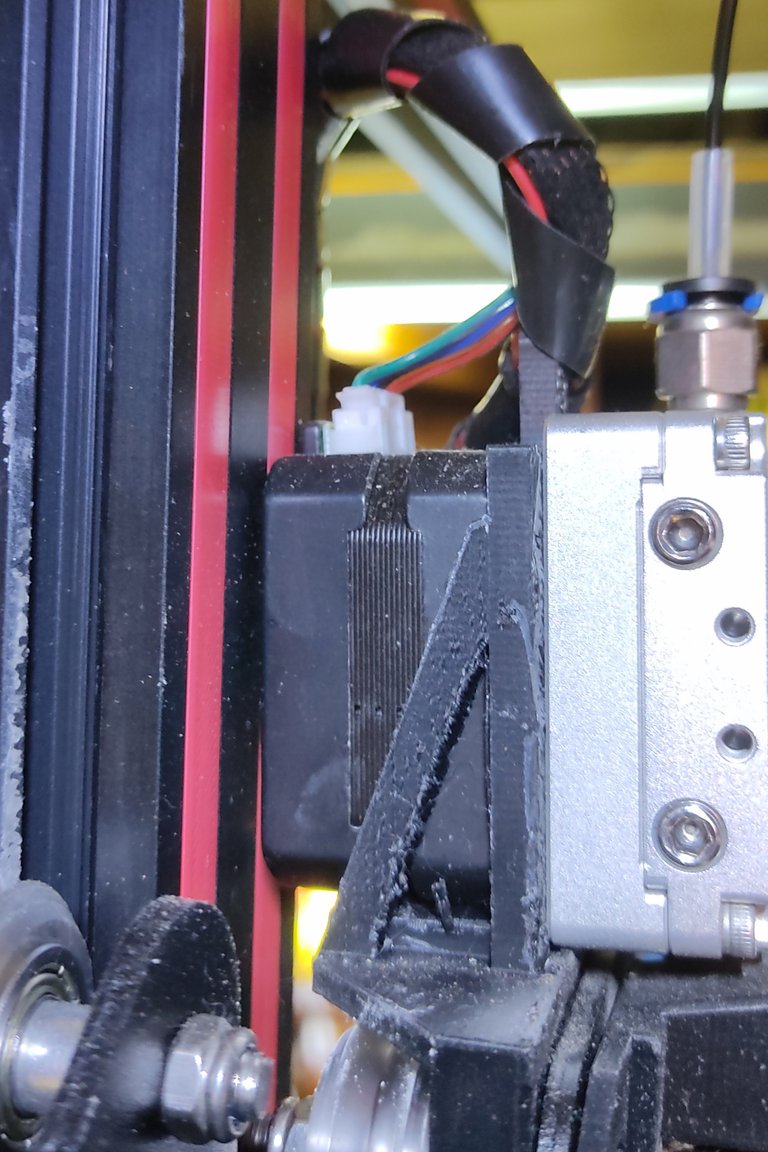
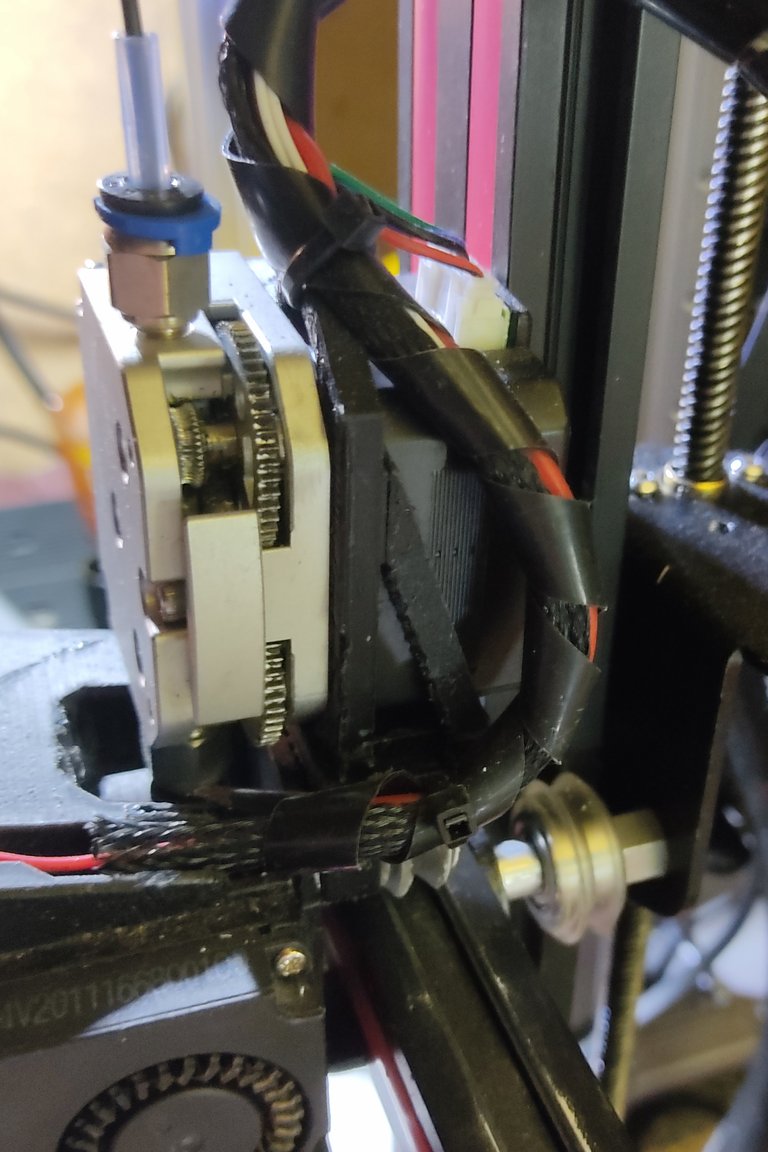
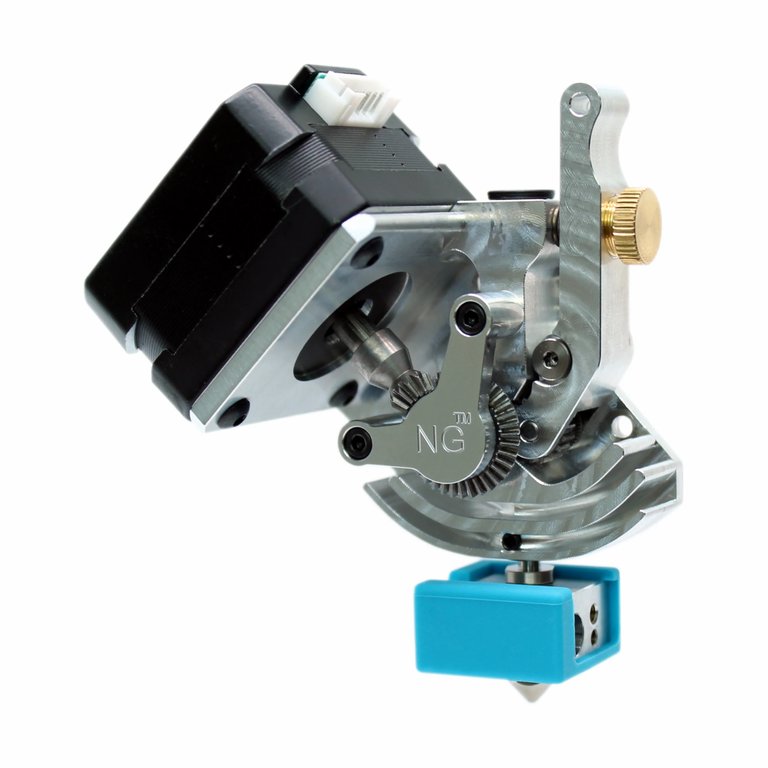
To fix the extruder and the hotend I printed a suitable holder. Since the stepper motor is too thick, it would not fit past the profile, I replaced it with a thinner stepper motor. In the meantime, there is a ready-made solution for the Ender 3 from Micro Swiss. Due to the even shorter material path with the NG, the printer should print even more precisely with TPU than with my variant. However, I have not tested this. But if my DIY solution dies, I will install the Micro Swiss NG.
Um Extuder und Hotend zu befestigen habe ich eine passende Halterung gedruckt. Da der Steppermotor zu dick ist, dieser würde nicht am Profil vorbei passen, habe ich diesen durch einen dünneren Steppermotor ausgetauscht. Mittlerweile gibt es von Micro Swiss eine fertige Lösung für den Ender 3. Durch den noch kürzeren Materialweg beim NG dürfte der Drucker noch präziser mit TPU drucken als mit meiner Variante. Getestet habe ich das allerdings nicht. Aber falls meine DIY Lösung das Zeitliche segnet, werde ich das Micro Swiss NG montieren.
Source: Micro Swiss
The cost of my conversion was about 100€. The conversion took about 4 hours. The NG costs about 120€ and should be much quicker to install.
Die Kosten für meinen Umbau lagen bei ungefähr 100€. Der Umbau hat ungefähr 4 Stunden gedauert. Das NG kostet ca. 120€ und dürfte deutlich schneller montiert sein.

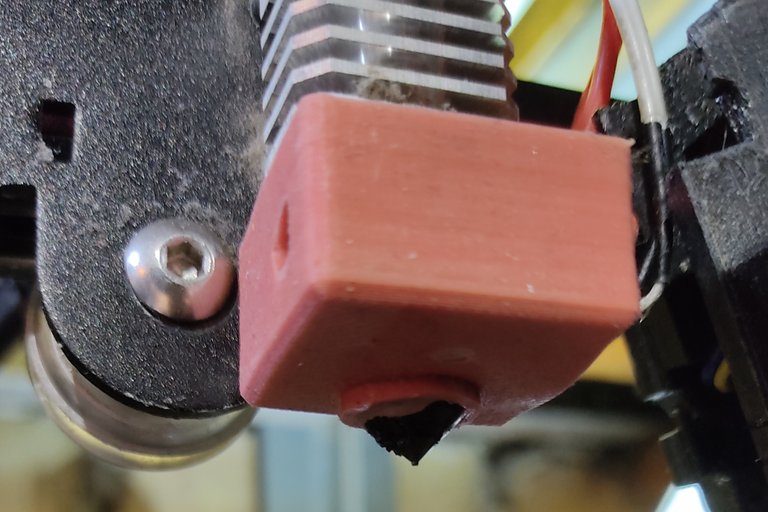
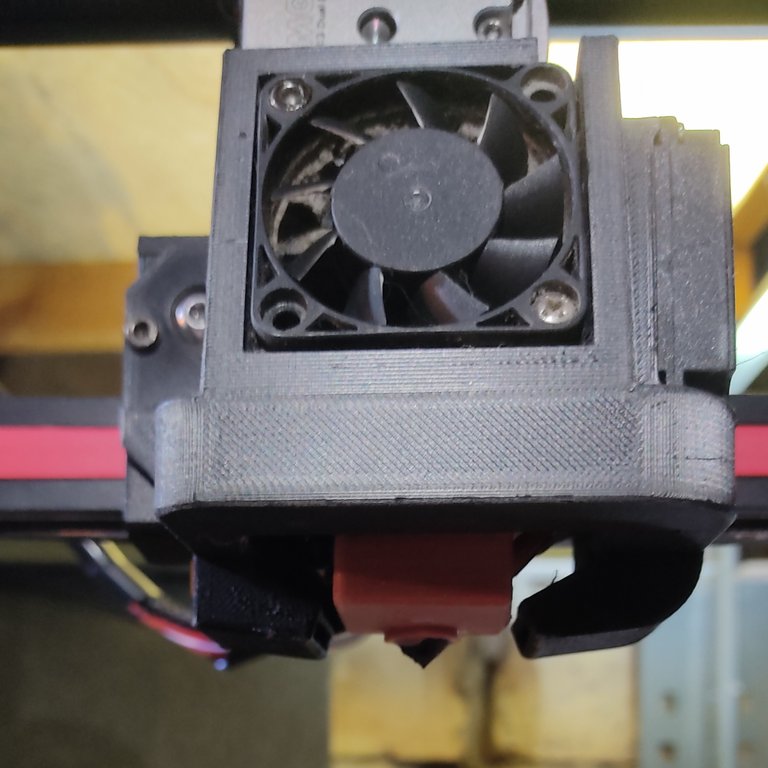
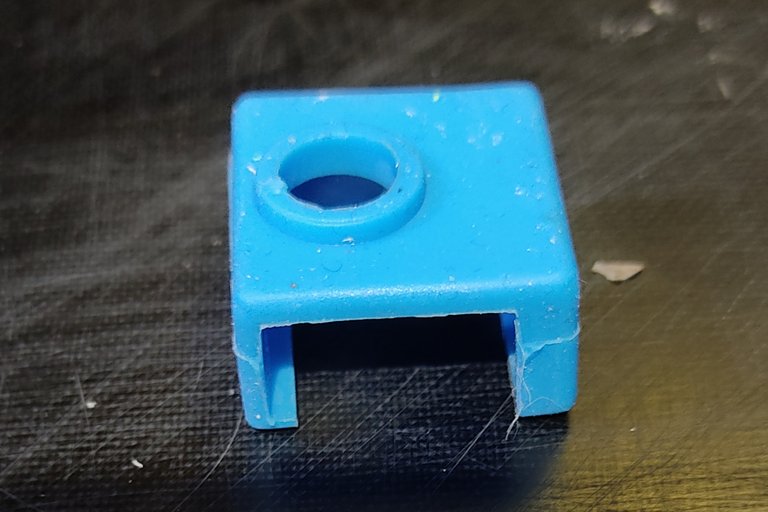
To keep the temperature at the hotend stable, I put a silicone sock over the heating block. In addition, excess filament no longer lands on the heating block and sticks there.
Um die Temperatur am Hotend stabil zu halten habe ich eine Silikon Socke über den Heizblock gezogen. Darüber hinaus landet überschüssiges Filament nicht mehr am Heizblock und verklebt dort.

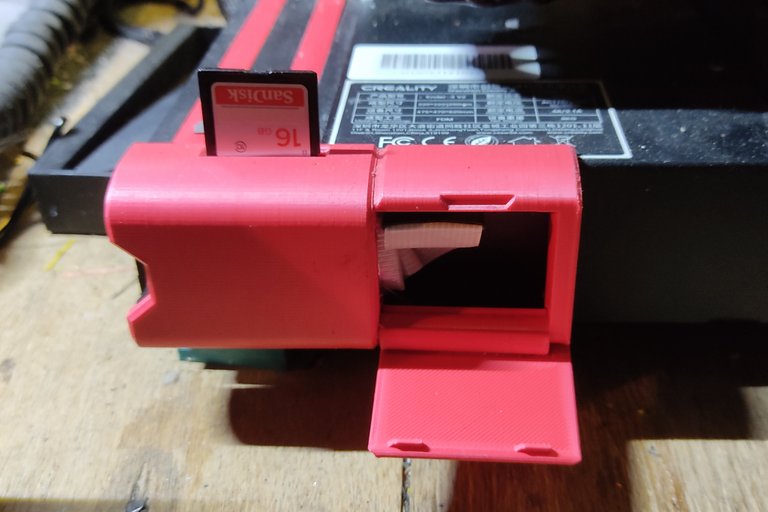
All other modifications, such as the adapter for SD cards and the covers for the profiles, have no influence on the printing results. Therefore, I will not go into this further here.
Alle anderen Umbauten, wie der Adapter für SD Karten und die Abdeckungen für die Profile, haben keinen Einfluss auf die Druckergebnisse. Deshalb werde ich das hier nicht weiter vertiefen.

WHAT IS LIGHT PAINTING?


LICHTKUNSTFOTO
If you like my art visit www.lichtkunstfoto.de for more Light Art Photography and informations about Light Painting. Join me on Flickr Twitter


For more great Light Art Photography, Light Painting and inspiration check these light painters: @marlasinger666 @fadetoblack @fastchrisuk @dawnoner @oddballgraphics @martbarras @stepko @rod.evans.visual @yo-hoho @maxpateau @gunnarheilmann @neilru75 @maximepateau @ryuslightworks @lightstabeu @candelart @lacelight

WE ARE LIGHT PAINTERS

To help and support the LightPainters community here on Hive I would appreciate your delegation of HivePower. Any amount is appreciated. It does not require much to get started, we are happy for any gesture. @lightpainters
How to delegate?
Delegate 50HivePower, [50HP]
Delegate 250HivePower, [250HP]
Delegate 500HivePower, [500HP]
Delegate 1000HivePower, [1000HP]
All the Hive Power will help to upvote the artist's contribution as part of the LightPainters community.
