.jpg)
Hola a todos mis amigos de esta querida comunidad de @hive, que gusto que estén por acá por este rinconcito donde se realizan manualidades con mucho cariño ya que se hacen desde el corazón, los meses de Agosto y Septiembre son de celebración en mi hogar, ya que toso cumplimos prácticamente juntos en estos dos meses solo con muy pocos días de diferencia, pues imagínense que mi hija Sophia y mi esposo cumplen el mismo día! Bien es sabido por ustedes a mi me encantan las Manualidades y por supuesto no podía dejar pasar esta oportunidad para hacer lo que me gusta y quise hacerle unos números 3D para celebrar el cumple #!11 de mi hija, a ella le encantan las Aventuras de Lady Bug y esa fue la temática, en el post de hoy les muestro como hice el numero 3D!
Hello to all my friends of this dear community @hive, what a pleasure to have you here in this little corner where crafts are made with love because they are made from the heart, the months of August and September are of celebration in my home, since we all meet practically together in these two months with only a few days of difference, imagine that my daughter Sophia and my husband have the same birthday! It is well known that I love crafts and of course I could not miss this opportunity to do what I like and I wanted to make some 3D numbers to celebrate my daughter's 11th birthday, she loves the Adventures of Lady Bug and that was the theme, in today's post I show you how I made the 3D number!
Materiales:
- 3 cajas de zapatos usadas
- Cartulina de los colores de tu preferencia para forrar las cajas
- 2 Carpetas manilas usadas
- Papel crepe de los colores de tu preferencia
- Base de madera pequeña
- Foamy de varios colores
- Silicón
- Tijeras
- 2 Hojas blancas recicladas
- Cartulina negra
Materials:
- 3 used shoeboxes
- Cardboard in the colors of your choice to line the boxes.
- 2 used manila folders
- Crepe paper of the colors of your choice * 2 used manila folders
- Small wooden base
- Foamy of various colors
- Silicone
- Scissors
- 2 recycled white sheets
- Black cardboard
Procedimiento:
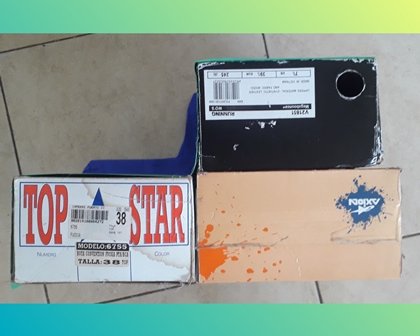
- Comenzamos colocando las tres cajas de zapatos que deberían ser del mismo tamaño tal y como se muestra en la foto de manera que se forme una escalera y las unimos pegándolas con silicón.
Procedure:
- We start by placing the three shoeboxes that should be of the same size as shown in the photo so as to form a ladder and we join them together by gluing them with silicone.
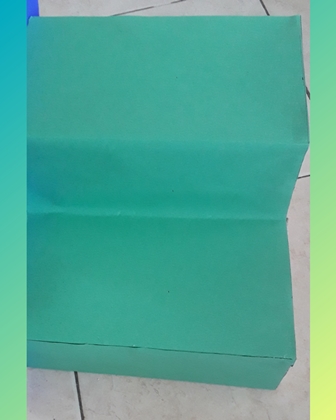
- Seguidamente forramos las cajas con cartulinas por la parte de arriba cubriendo toda la superficie.
- Then we line the boxes with cardboard on the top covering the entire surface.
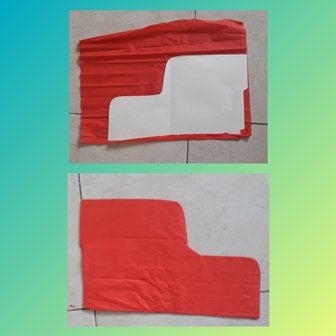
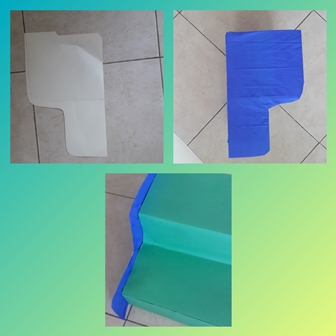
- Luego procedemos a crear los laterales, tomamos las carpetas manilas y tomando las cajas como base cortamos los laterales dejando un contorno mas elevado que puedan crear como una especie de barrera en el porta Cup Cake y los forramos con papel crepe para después pegarlos en los laterales.
- Then we proceed to create the sides, we take the manila folders and taking the boxes as a base we cut the sides leaving a higher contour that can create a kind of barrier on the Cup Cake holder and we line them with crepe paper and then glue them on the sides.
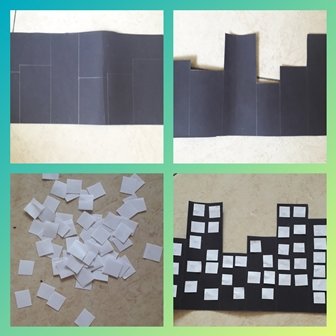
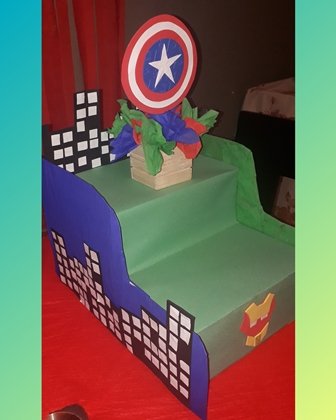
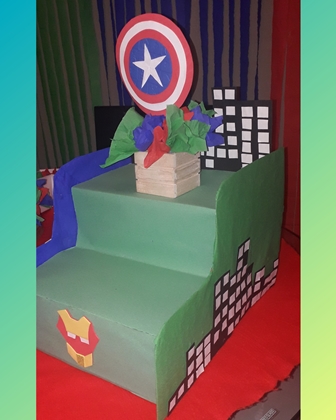
- Ahora crearemos los edificios que serán parte de nuestra decoración, en la cartulina negra creamos una serie de tubos verticales de diferentes tamaños y los cortamos por todo el contorno, para luego con las hojas blancas recicladas cortar pequeños cuadritos que serán nuestras ventanas, y las pegamos de forma aleatoria tal como se muestra en las fotos.
- Now we will create the buildings that will be part of our decoration, in the black cardboard we create a series of vertical tubes of different sizes and cut them all around the contour, then with the recycled white sheets cut small squares that will be our windows, and glue them randomly as shown in the photos.
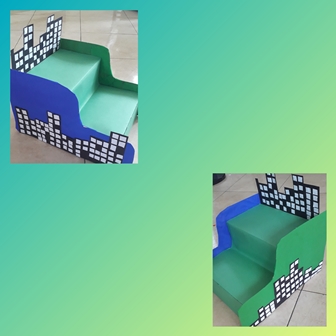
- Pegamos nuestros edificios en los laterales del Porta Cup cake y en la parte de atrás para darle un toque de profundidad!
- We glue our buildings on the sides of the Porta Cup Cake and on the back to give it a touch of depth!
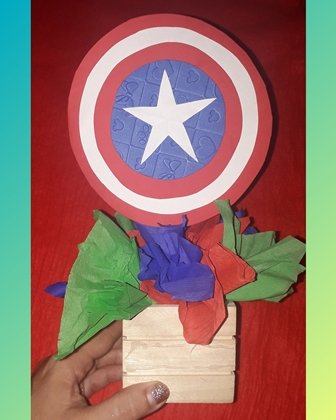
- Seguimos decorando y en esta ocasión trabajaremos con la base de madera pequeña la cual rellenaremos con papel crepe de los colores alusivos a la fiesta y como nuestro tema son los Avengers creamos el Escudo del Capitán América y lo colocamos en el centro con un palito de altura.
- We continue decorating and this time we will work with the small wooden base which we will fill with crepe paper of the colors allusive to the party and as our theme is the Avengers we create the shield of Captain America and place it in the center with a stick height.
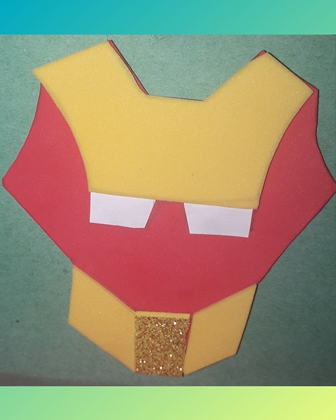
- Y para darle otro toque especial con foamy creamos la cara de Iron man y la pegamos en la base de nuestro porta cup cake!
- And to give it another special touch with foamy we created Iron Man's face and glued it on the base of our cup cake holder!
Y así de hermosa queda nuestra Porta Cup Cake alusiva a los Avengers, cabe destacar que tu la puedes hacer con la temática que prefieras solo tomas las ideas y le das rienda suelta a tu imaginación! A mi pequeño le encanto!
And this is how beautiful our Avengers Cup Cake Holder looks, it is worth mentioning that you can make it with any theme you prefer, just take the ideas and let your imagination run wild! My little one loved it!
.jpg)
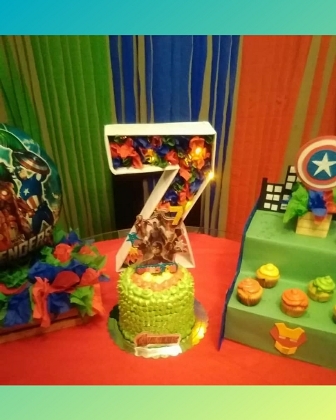
Es una manualidad muy fácil de hacer y el resultado es hermoso, no necesitas materiales costosos ya que gran parte de ellos son reciclados. Si tienes algún evento especial en la familia aprovecha y animante a realizar este hermoso proyecto y te aseguro que la satisfacción de hacer las cosas con tus propias manos no tiene precio y adicional que tus hijos te lo agradecerán y quedaran fascinados! Mi pequeño disfruto al máximo su fiesta de los Avengers!
It is a very easy craft to do and the result is beautiful, you don't need expensive materials since most of them are recycled. If you have a special event in the family, take advantage of this beautiful project and I assure you that the satisfaction of doing things with your own hands is priceless and your children will thank you and will be fascinated! My little one enjoyed his Avengers party to the fullest!
