Saluditos nietecitos de
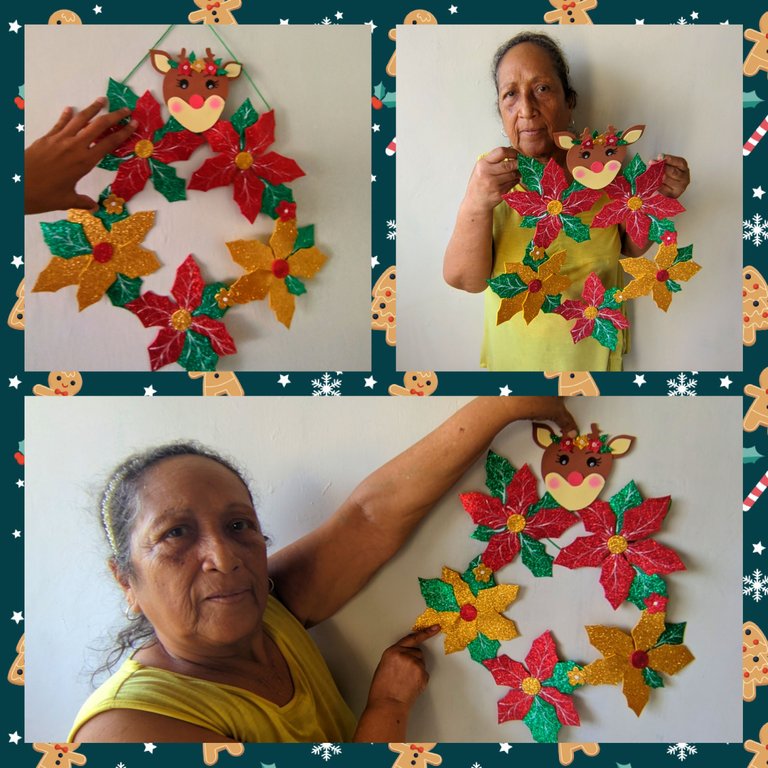
#hive el mejor ecosistema de todos, el único que nos permite mostrar nuestro contenido al mundo entero, guardando registro que realmente nos pertenece, hoy quiero mostrarles el paso a paso de una linda corona de navidad que hice, y fue básicamente realizada con flores típicas de la navidad y al final un lindo y sutil detalle de un reno amigable, que sin duda alguna le dan un toque hermoso a este trabajo.
Realmente es fácil de elaborar, y sobre todo cuando se trabaja con amor y pasión las cosas fluyen de manera natural, es por eso que esté trabajo de hoy, siento que me quedó más bonito, porque ame hacerlo, acá como siempre les dejo el paso a paso y las fotos finales.
❄️🦌❄️ MATERIALES ❄️🦌❄️
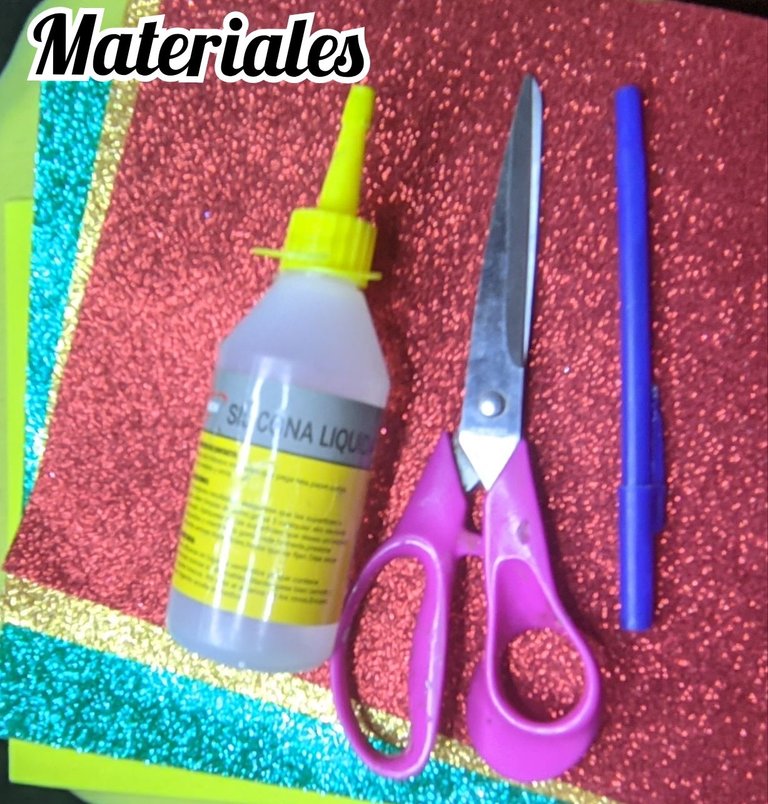
❄️ Foami escarchado amarillo.
🦌 Foami escuchado rojo.
❄️ Foami escarchado verde.
🦌 Foami marrón.
❄️ Foami crema.
🦌 Pintura al frío blanca.
❄️ Plumilla negra.
🦌 Silicón líquido.
❄️ Tijera.
🦌 Cartulina.
❄️ Lápiz.
🦌 Hilo nylon.
❄️🦌❄️Paso a paso❄️🦌❄️
🦌Paso 1:
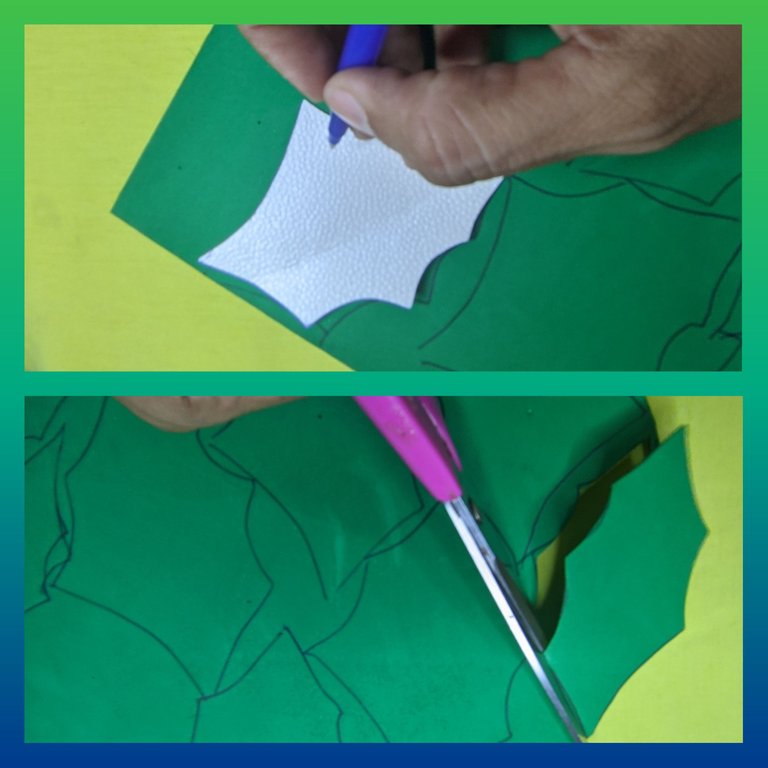
Para iniciar saque un patrón de la hoja en una cartulina y luego la coloque en el foami verde escarchado y con ayuda del lápiz dibujamos muchas hojas, asegurándose de no dejar espacios vacíos para aprovechar al máximo todos los espacios del foami.
Luego de dibujar, tomé la tijera y fui recortando una a una, hasta tenerlas todas, y guardamos.
❄️ Paso 2:
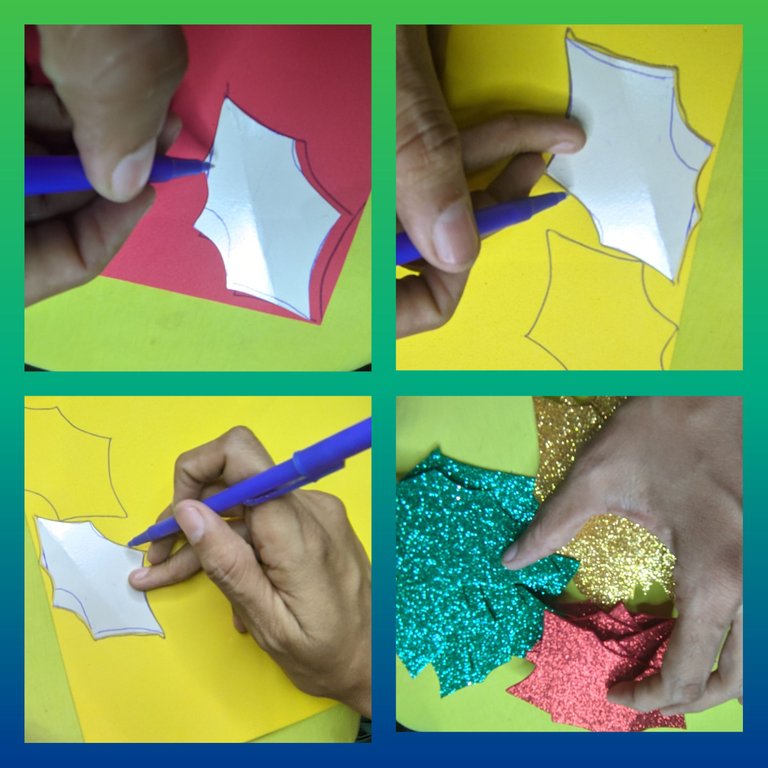
Ahora en otra cartulina dibuje los pétalos de la flor de navidad, que se parece a la hoja, pero está es más pequeña, al tener el patrón repetimos el paso anterior, colocamos el molde encima del foami amarillo y marcamos 10 pétalos y recortamos, hacemos el mismo procedimiento pero en el Foami rojo escarchado, solo que allí vamos. Amarcar 14 pétalos, y de igual manera recorte y guardamos.
🦌Paso 3:
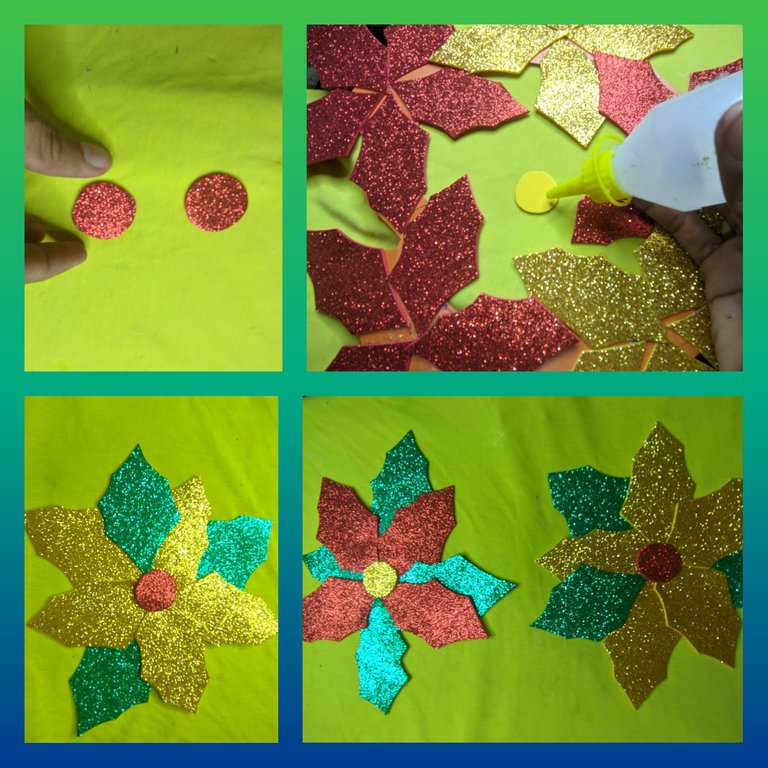
Recorte un círculo de cartulina y aplicó silicón líquido, luego voy pegando los pétalos uno por uno, en total coloque 5 pétalos en cada flor, también recorte pequeños círculos del foami amarillo y rojo que posteriormente le aplicó silicón líquido y pegamos en el centro de nuestras flores.
Luego de formar la flor, tomó las hojas y las vamos pegando en la flor, allí si es a gusto de cada quien, la posición donde las va a colocar, y dejamos secar bien.
❄️ Paso 4:
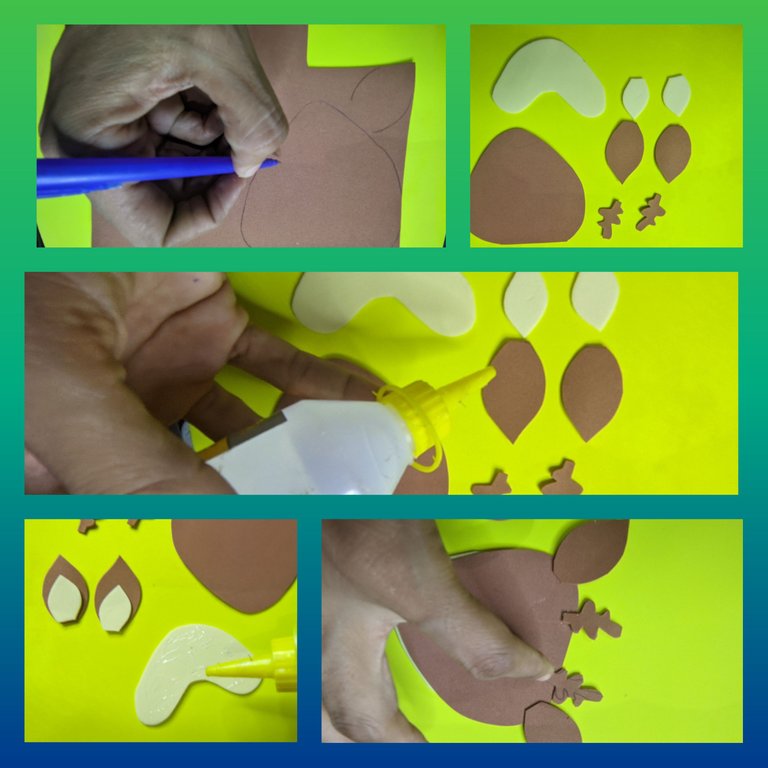
Ahora en el foami marrón dibujé y recorté la cara del venado, también las orejas y los asta, y en el Foami de color crema dibuje y recorte la parte de adentro de las orejas y el hocico del venado.
Cuando ya están todas las piezas, vamos a unirlas y con el silicón líquido pegamos, primero la parte de adentro de las orejas, y cuando están secas, pegamos de la cara del venado, después pegamos el hocico y finalmente pegamos las astas del venado.
🦌 Paso 5:
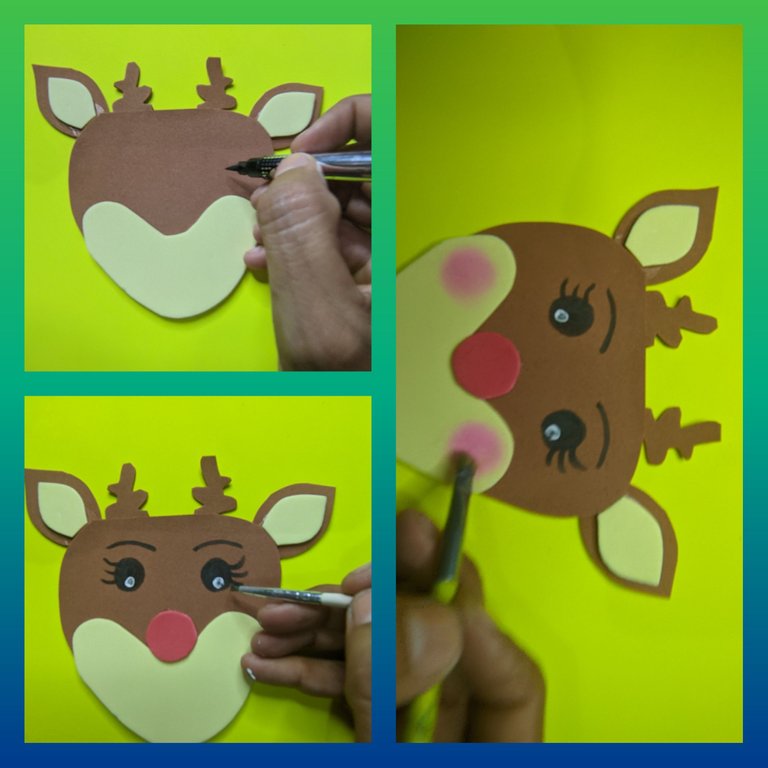
Con la plumilla dibujé los ojos, pestañas y cejas del venado, y con la pintura al frío blanca dibuje unos puntos en los ojos, luego con el rubor aplicamos para formar las mejillas del animalito, al terminar tomé un trocito de foami rojo, no escarchado y dibuje y recorte un círculo, luego le aplicó silicón líquido y pegamos, ya que será nuestra naríz.
❄️ Paso 6:
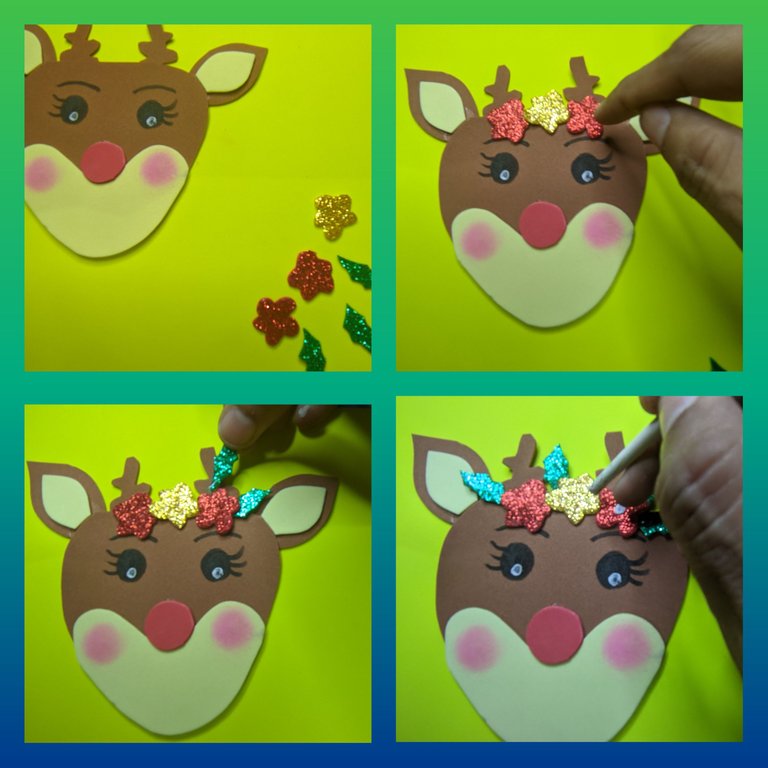
De los retazos que quedaron del foami escarchado dibujé y recorté 3 pequeñas flores, dos rojas y una amarilla y también recorté algunas hojitas las cuales pegamos en la cabeza del venado a modo de decoración, junto con las hojas.
Nuevamente con la pintura al frío blanca dibuje el centro de las florecitas.
🦌 Paso 7:
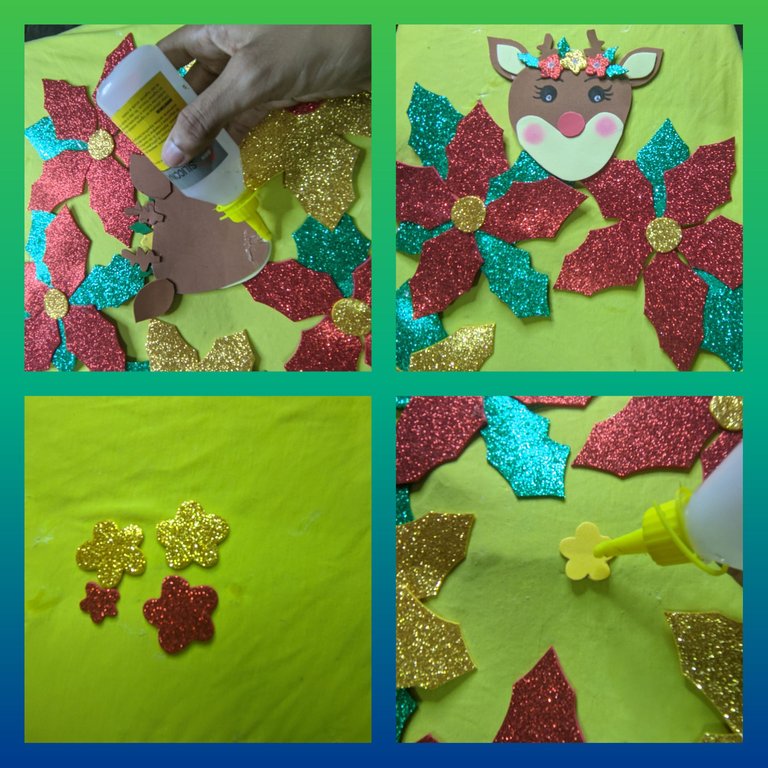
Cómo ya tenemos todas las piezas listas vamos a armar, y con ayuda del silicón líquido fuimos pegando las flores por los extremos de las hojas y pétalos hasta formar una corona, cuando ya está lista, pegamos nuestro venado en la parte de arriba.
Después recorté pequeñas flores que pegamos en diferentes partes de la corona.
❄️ Paso 8:
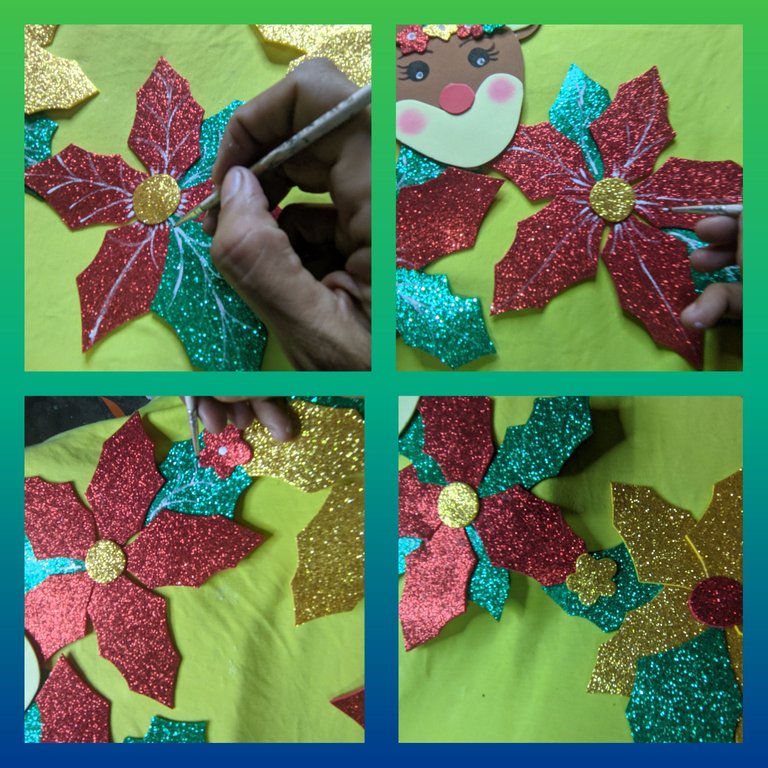
Para darle más realce a las flores, con la pintura blanca y el pincel fino delineamos las hojas y pétalos de las flores, logrando darle un efecto muy bonito.
🦌 Paso 9:
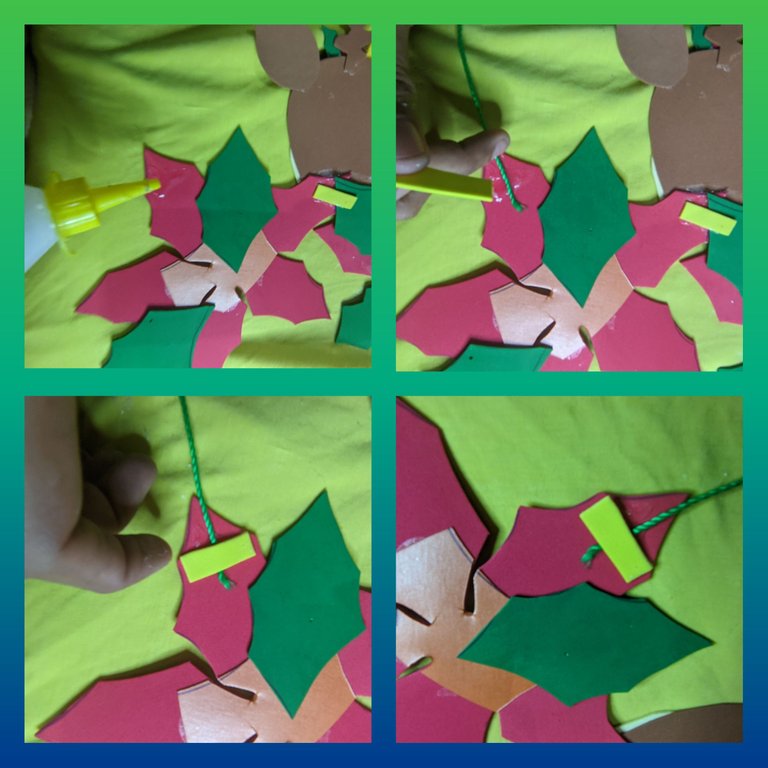
Finalmente con el silicón líquido pegamos el cordón de hilo nylon, eso sí lo fijamos con un pequeño rectángulo de foami que pegamos con silicón líquido encima del hilo, presionamos un poco y dejamos secar y listo.
❄️🦌❄️ FOTOS FINALES ❄️🦌❄️
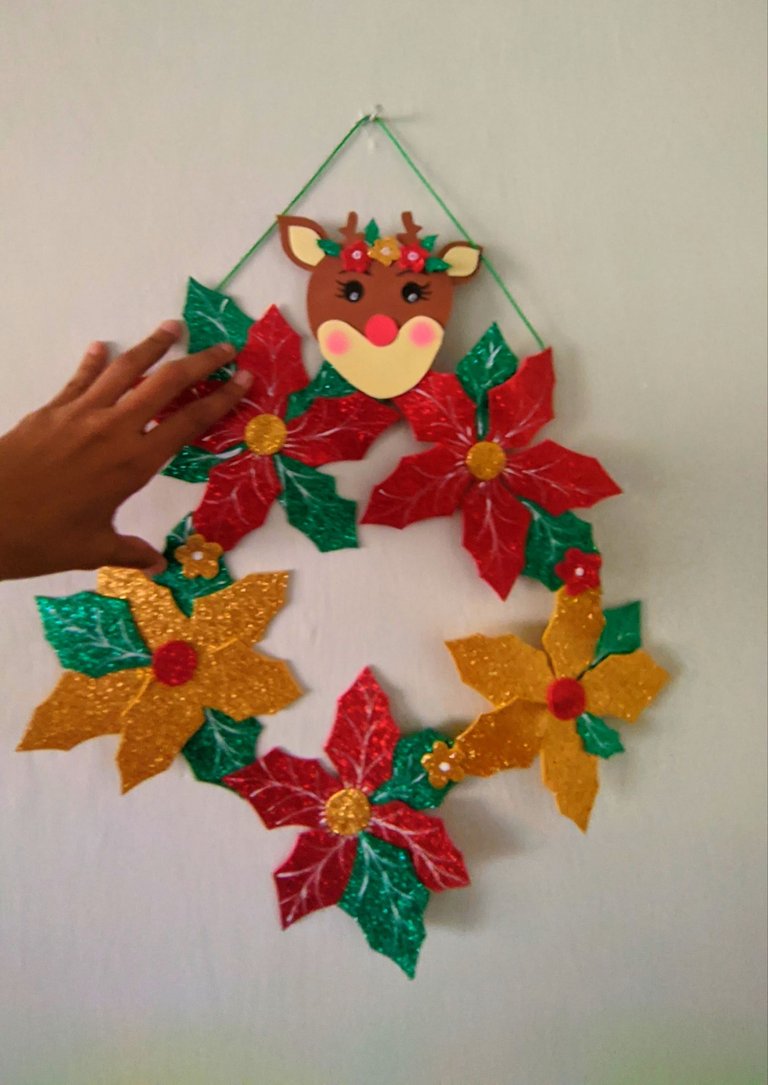
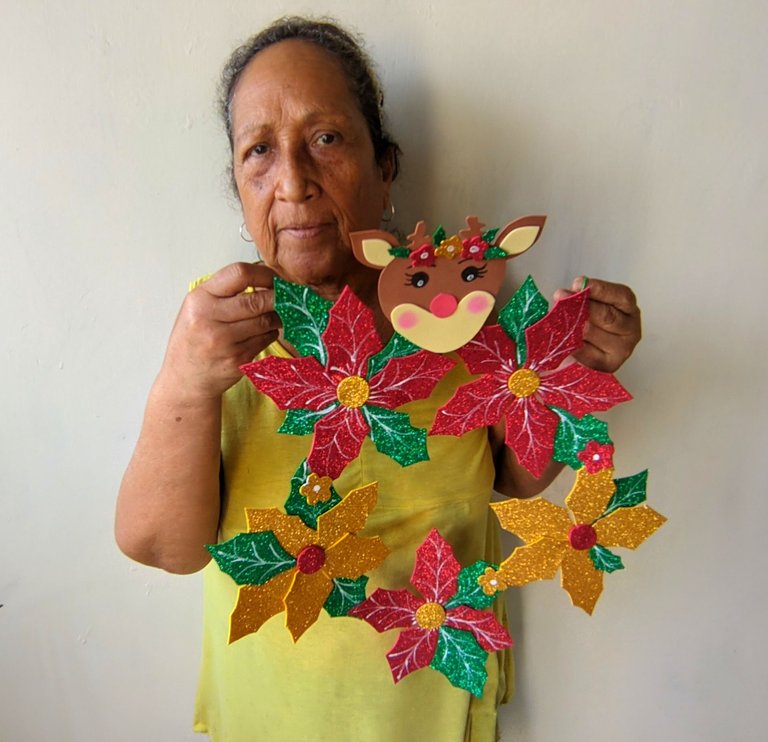
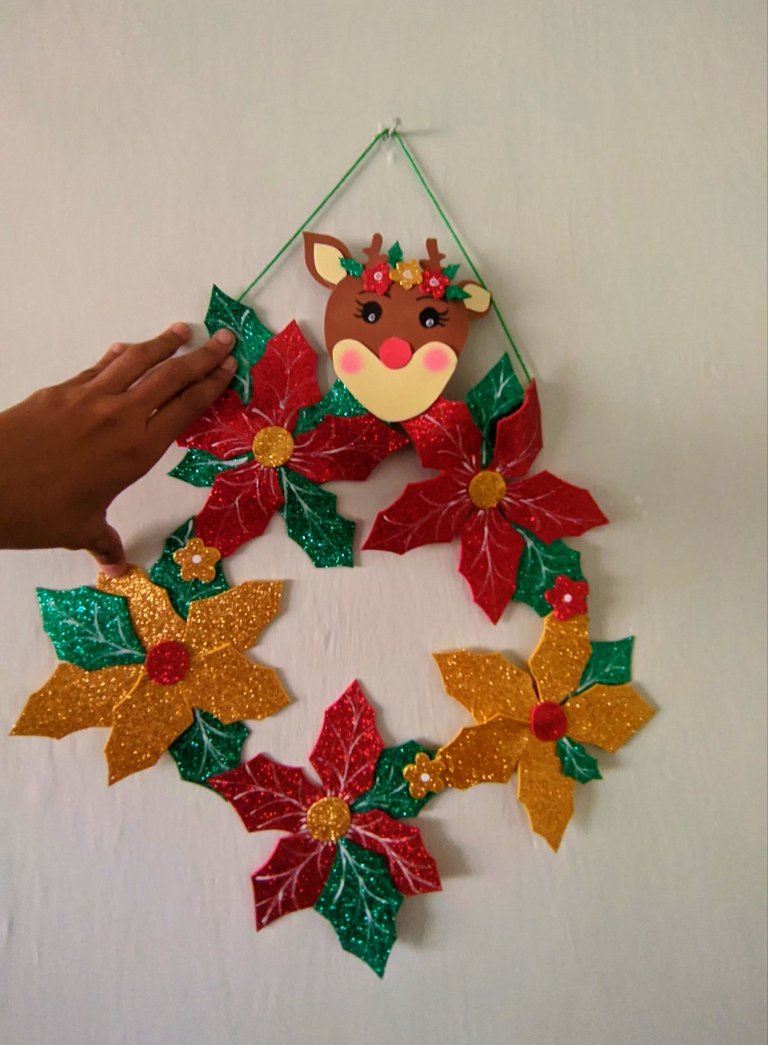
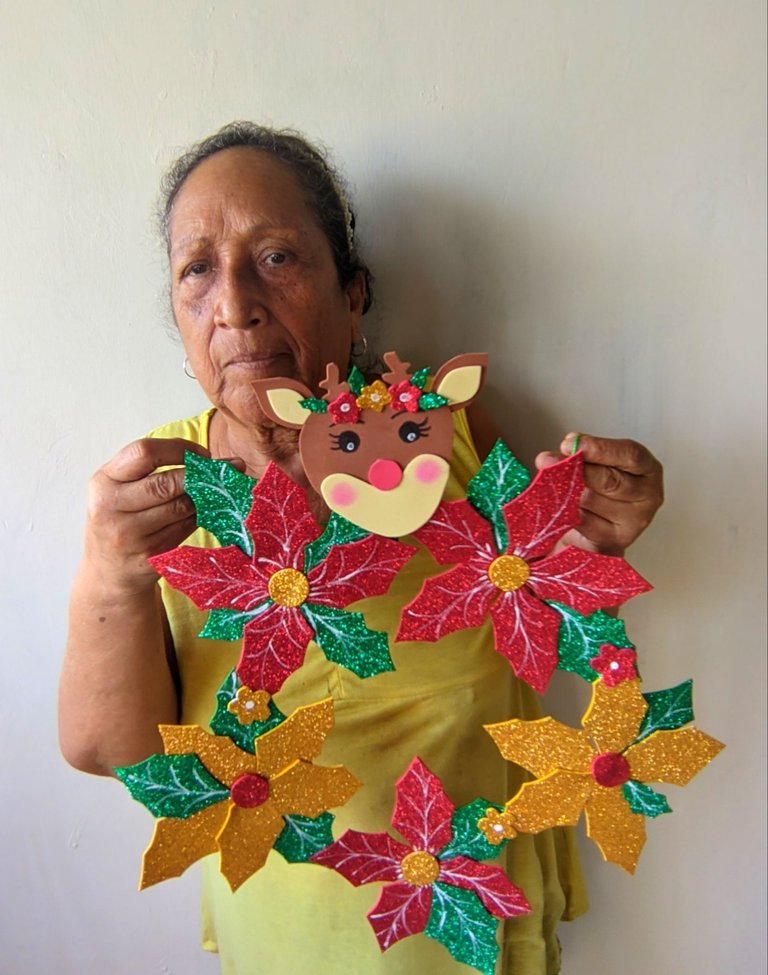
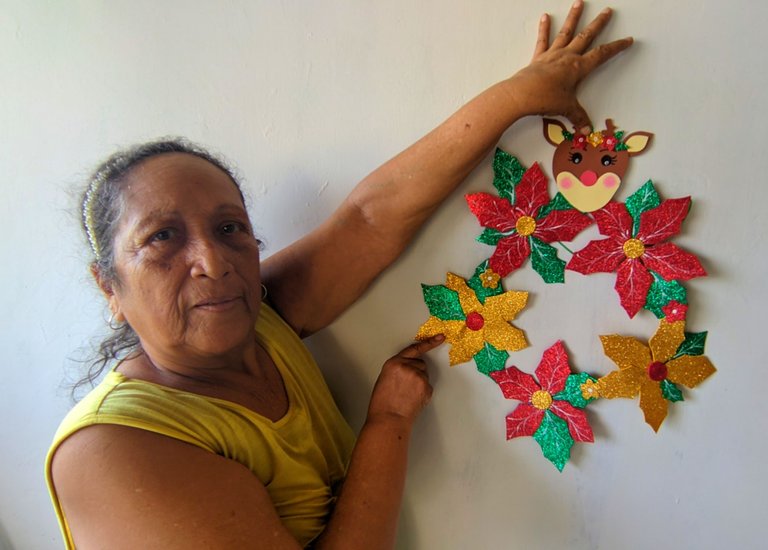
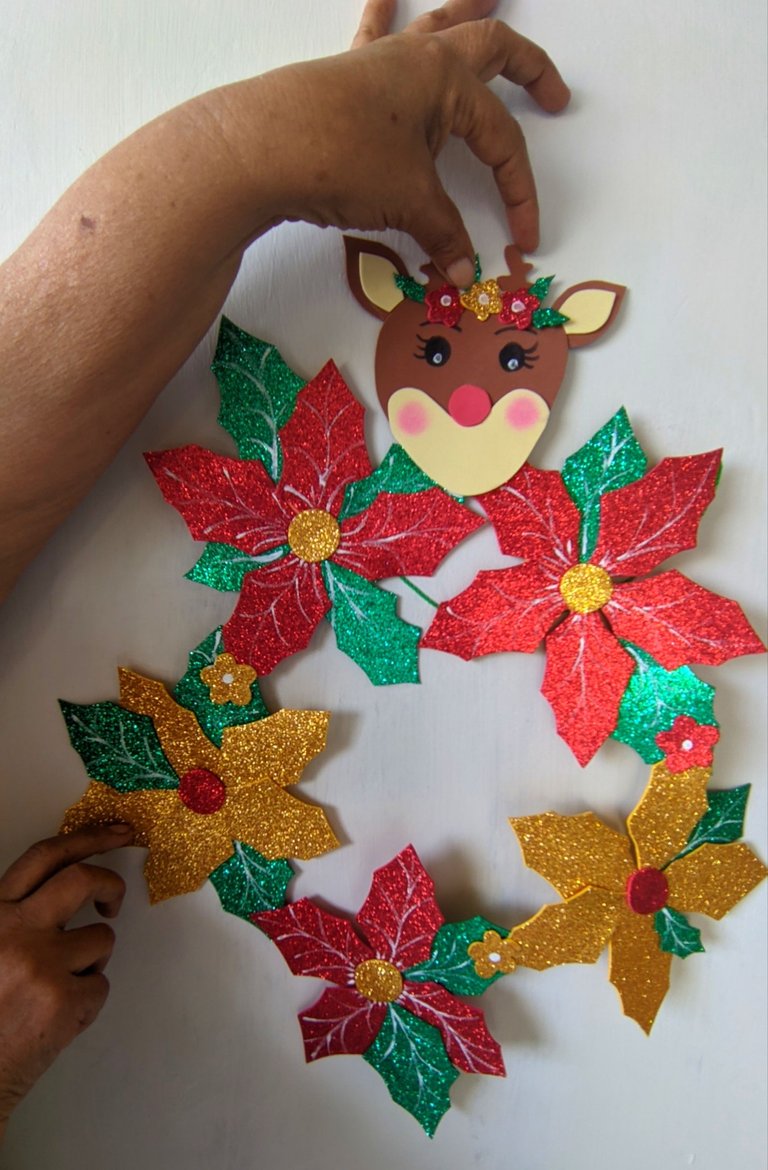
Díganme qué no quedó hermoso este trabajo, a mí me gustó mucho, en esta oportunidad trabajé el foami de manera normal, no le di dimensiones, pero el resultado me gusto igual, y a ti ¿Qué te parece?
Para este post use el programa polish de mi teléfono y también use el programa para traducir deepl versión gratis, y todas las fotos las tomé con mi teléfono Xiaomi redmi y son mías.
❄️🦌❄️Que Dios los bendiga. ❄️🦌❄️

❄️🦌❄️ ENGLISH ❄️🦌❄️

Saluditos nietecitos de
#hive the best ecosystem of all, the only one that allows us to show our content to the whole world, keeping record that really belongs to us, today I want to show you the step by step of a nice Christmas wreath I made, and was basically made with typical Christmas flowers and at the end a nice and subtle detail of a friendly reindeer, which undoubtedly give a beautiful touch to this work.
It really is easy to make, and especially when you work with love and passion things flow naturally, that's why this work today, I feel that it was more beautiful, because I loved doing it, here as always I leave you the step by step and the final photos.
❄️🦌❄️ MATERIALS ❄️🦌❄️

❄️ Yellow frosted foami.
🦌 Foami frosted red.
❄️ Green frosted foami.
🦌 Brown foami.
❄️ Cream foami.
🦌 White cold paint.
❄️ Black marker pen.
🦌 Liquid silicone.
❄️ Scissors.
🦌 Cardboard.
❄️ Pencil.
🦌 Nylon thread.
❄️🦌❄️Paso a paso❄️🦌❄️
🦌Step 1:

To start, draw a leaf pattern on a piece of cardboard and then place it on the frosted green foami and with the help of the pencil draw many leaves, making sure not to leave empty spaces to make the most of all the spaces on the foami.
After drawing, I took the scissors and cut them out one by one, until we had all of them, and we put them away.
❄️ Step 2:

Now on another cardboard draw the petals of the Christmas flower, which looks like the leaf, but this is smaller, having the pattern we repeat the previous step, we place the mold on top of the yellow foami and mark 10 petals and cut out, we do the same procedure but in the red frosted Foami, only there we go. We mark 14 petals, and in the same way we cut out and save.
🦌Step 3:

I cut out a circle of cardboard and applied liquid silicone, then I glued the petals one by one, in total I put 5 petals on each flower, I also cut out small circles of yellow and red foami which I then applied liquid silicone to and glued in the centre of our flowers.
After forming the flower, take the leaves and stick them on the flower, it is up to you to choose the position where you want to place them, and let them dry well.
❄️ Step 4:

Now on the brown foami I drew and cut out the deer's face, ears and antlers, and on the cream foami I drew and cut out the inside of the deer's ears and muzzle.
When all the pieces are ready, we are going to join them together and with the liquid silicone we glue, first the inside of the ears, and when they are dry, we glue the deer's face, then we glue the muzzle and finally we glue the deer's antlers.
🦌 Step 5:

With the pen I drew the eyes, eyelashes and eyebrows of the deer, and with the white cold paint I drew some dots in the eyes, then with the blush we applied to form the cheeks of the animal, at the end I took a small piece of red foami, not frosted and drew and cut out a circle, then I applied liquid silicone and we stuck it, as it will be our nose.
❄️ Step 6:

From the scraps left over from the frosted foami I drew and cut out 3 small flowers, two red and one yellow, and I also cut out some leaves which we stuck on the head of the deer as decoration, together with the leaves.
Again with the white cold paint I drew the centre of the little flowers.
🦌 Step 7:

As we have all the pieces ready we are going to assemble, and with the help of the liquid silicone we glued the flowers at the ends of the leaves and petals to form a crown, when it is ready, we glued our deer on the top.
Then I cut out small flowers that I glued on different parts of the wreath.
❄️ Step 8:

To make the flowers stand out more, with the white paint and the fine brush we outline the leaves and petals of the flowers, giving them a very beautiful effect.
🦌 Step 9:

Finally with the liquid silicone we glue the nylon thread cord, we fix it with a small rectangle of foami that we glue with liquid silicone on top of the thread, press a little and let it dry and that's it.
❄️🦌❄️ FINAL PHOTOS ❄️🦌❄️


Tell me what was not beautiful this work, I liked it a lot, this time I worked the foami in a normal way, I did not give it dimensions, but I liked the result anyway, and what do you think?
For this post I used the polish program on my phone and I also used the free version of the translation program deepl, and I took all the pictures with my Xiaomi redmi phone and they are mine.
❄️🦌❄️Que God bless you. ❄️🦌❄️


