(ENG)
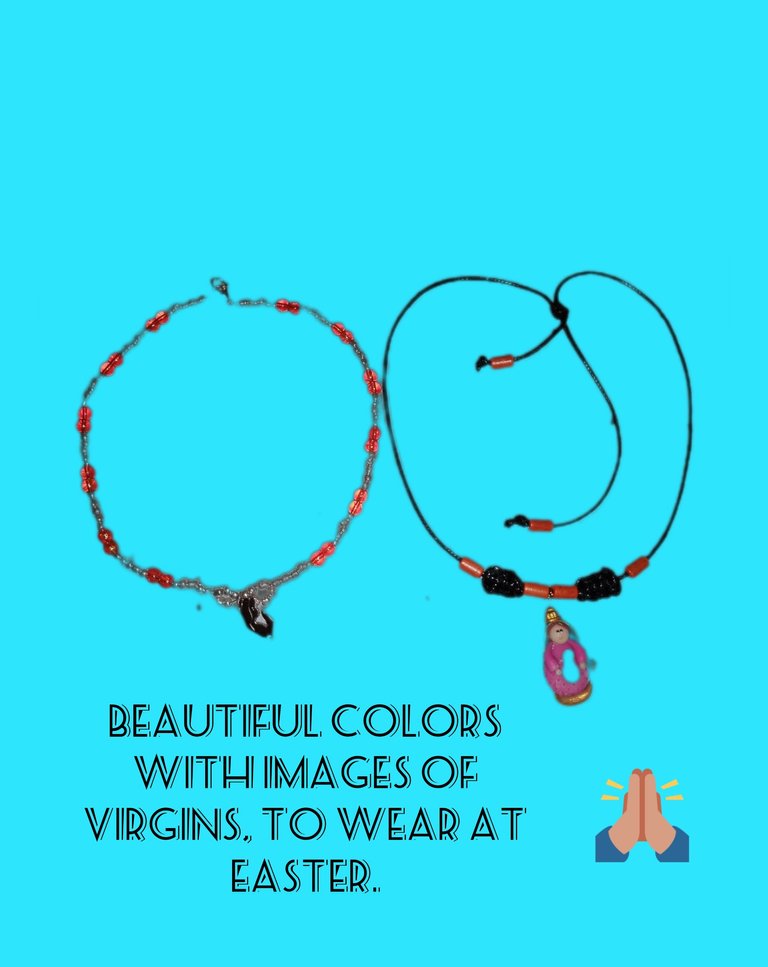
Hello everyone, I am pleased to be, once again with all of you, already preparing to attend the religious events in this major week, I have designed two necklaces with images of the holy virgin, just to wear on these Holy days, always asking the blessing and company of our great mother. Respecting the religion and beliefs of each of you in this community, below allow me to show you how to make them, I hope you like them, and you can be motivated to make yours, for a loved one, among others.
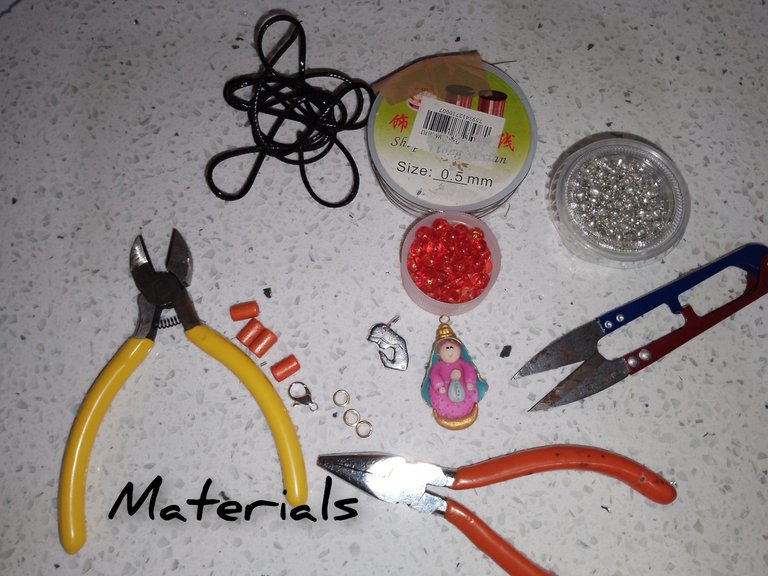
Materials:
. Image pendant of the Virgin made of flexible dough.
. Stainless steel virgin pendant.
. Round snakeskin leather, black.
. Wire n0.5.
. Gold mini staples.
. Necklace pin.
. Jewelry earrings.
. Orange glass beads n6.
. Golden beads.
. Orange wooden tubes.
. Jewelry tweezers.
. Scissors (not necessary) . Yeskero.
Steps:
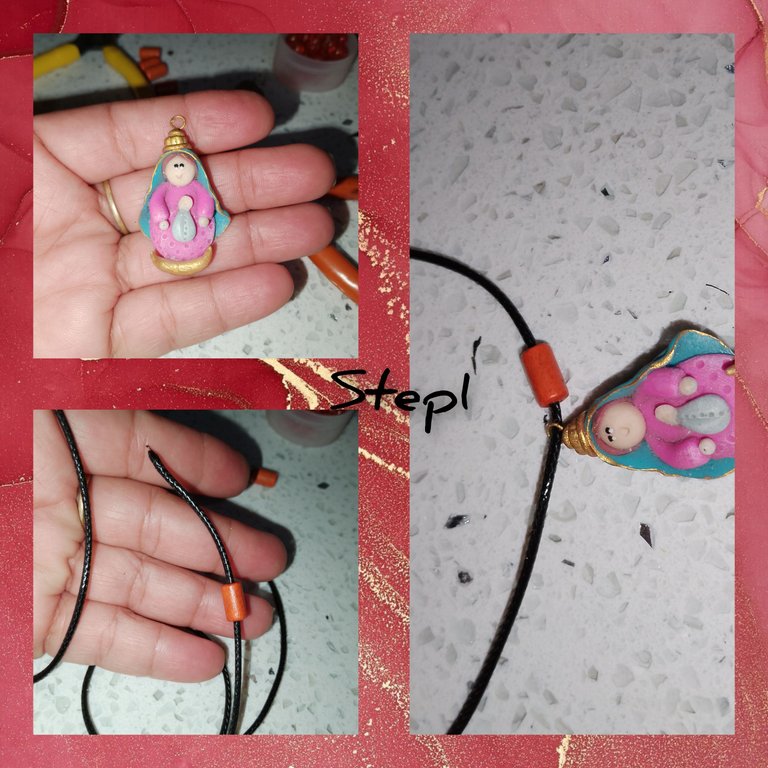
1.) cut taking the size of my neck, the leather, I put fire on both ends and stitch, both sides with the help of my fingers. I introduce a small wooden tube on one side and on the next I insert the image of the Virgin, then the next wooden tube.
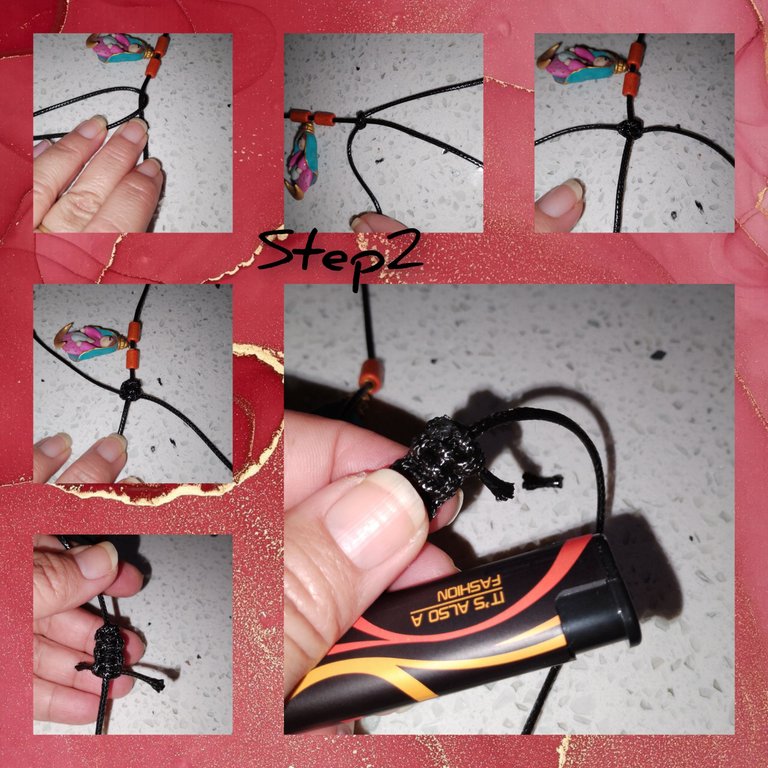
2/3) I cut two pieces of leather, I start by weaving four square flat knots in the macramé technique, I put a fire, to avoid celebrating and I repeat on the other side, allowing the pendant to be well adjusted to the wooden tubes and I have no mobility to the sides, then I place a small tube on each of the sides.
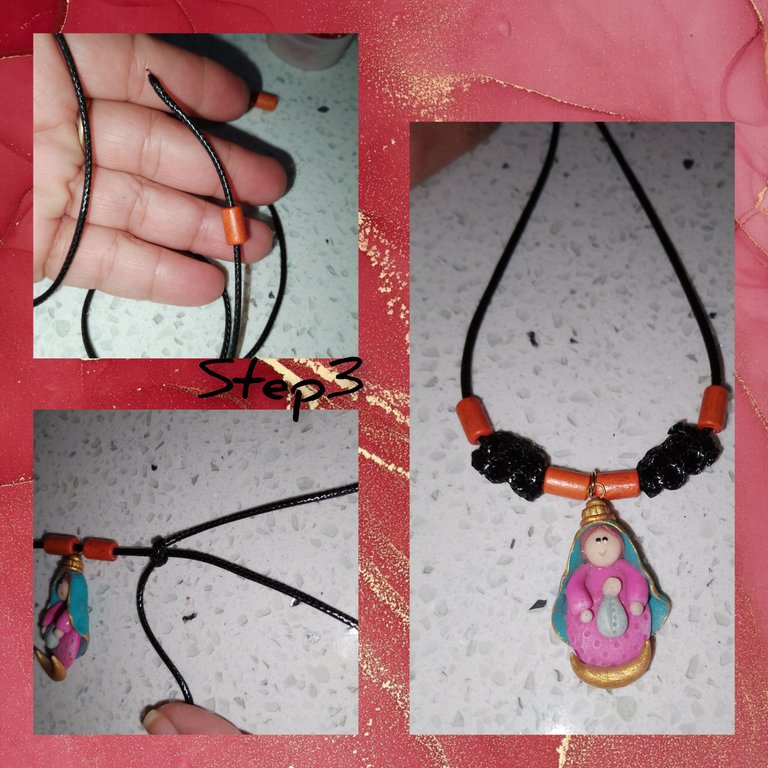
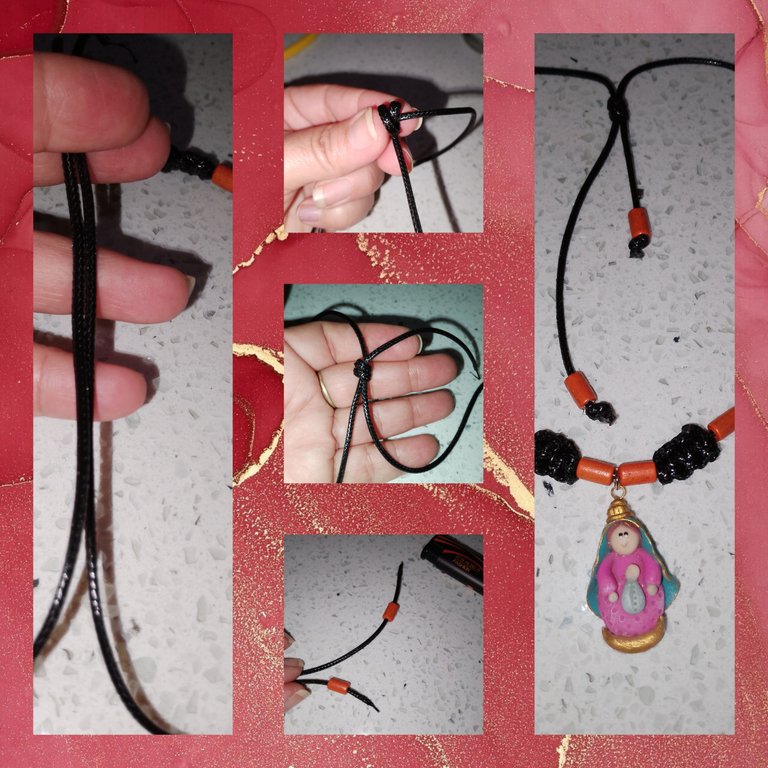
4.) center the pendant and the pieces, placed in the previous steps, and leaving one of the ends of the leather a little longer, with the intention of making a running knot with the longest one, which will allow the necklace to be adjusted to the neck. Once this is done, I put a small orange tube at each end and make a little nest, put a little heat and press. In this way, he made the first necklace of this collection.
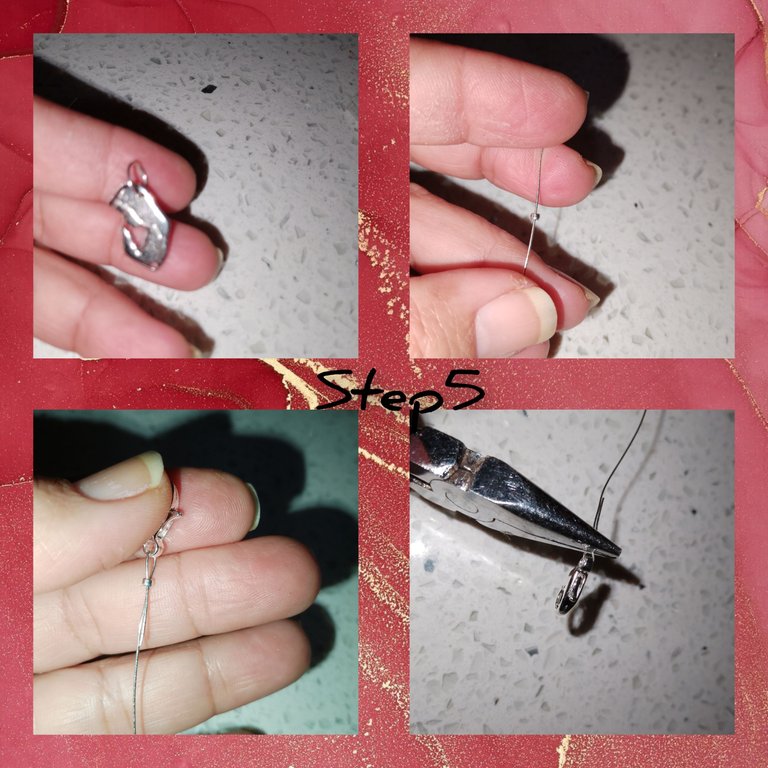
5.) for the steel pendant, I cut a piece of #1 wire. 0.5, I place a staple followed by the pin, I turn back and insert the wire through the staple, and apply pressure with the flat jewelry pliers.
6.) Start by placing five golden beads, separated by two glass beads, repeat six times, reaching the size of half the neck.
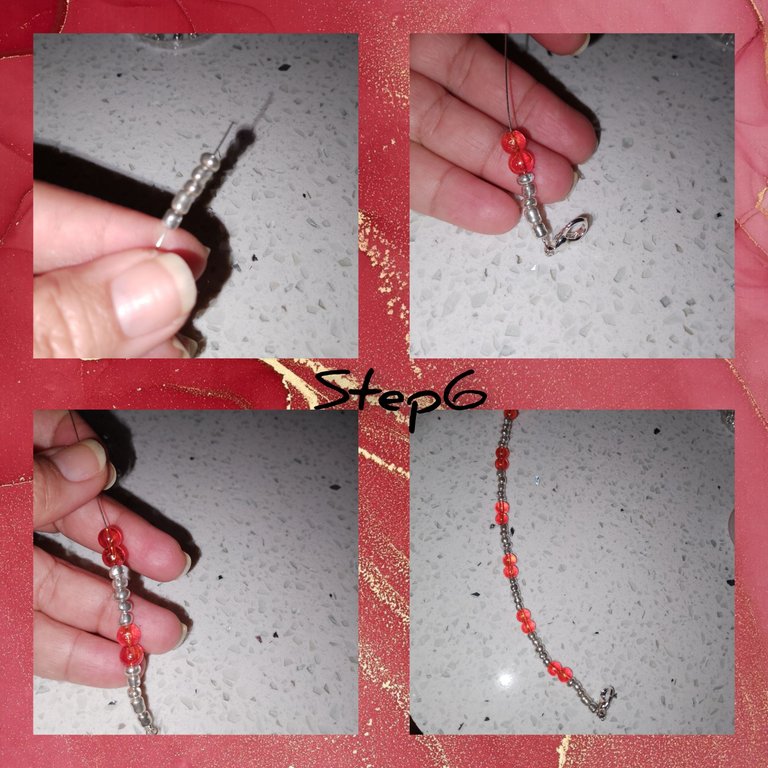
7.) then I introduce five more beads, I stop and return with the wire, passing inside the beads and placing myself in the center, forming a delicate circle, I repeat and form a secondcircle.
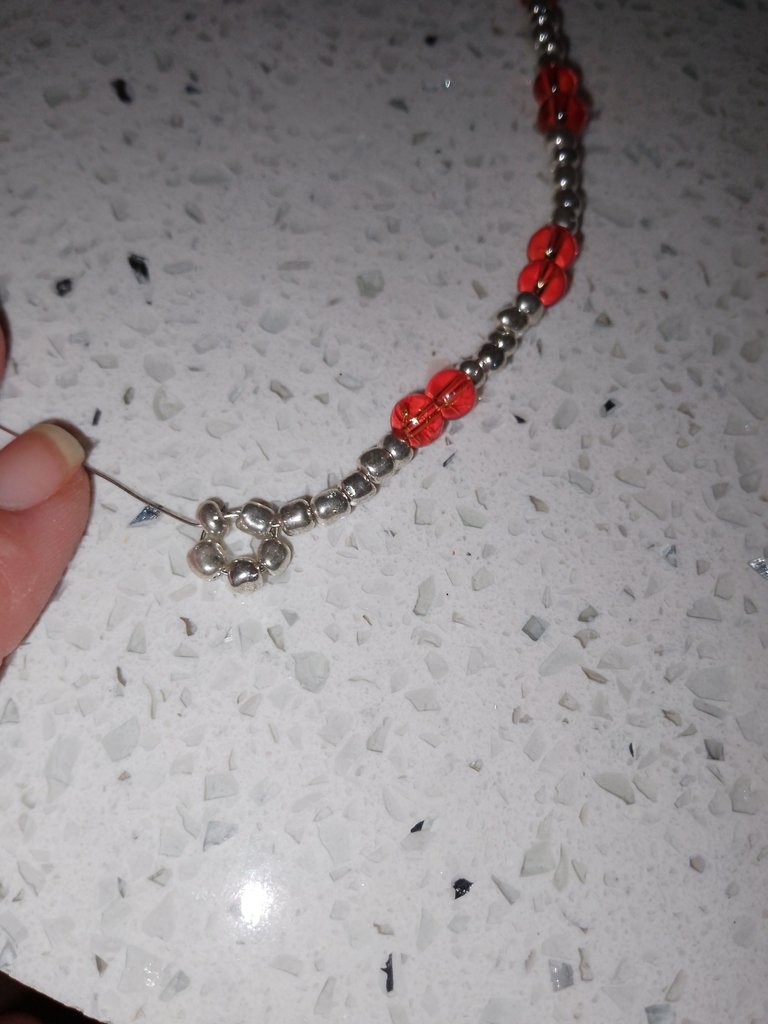
8.) Once the previous one is done, the next thing will be to repeat, which the initial route, to achieve equalization of the sides of the necklace, now I place the ring on this side, secure with the staple and cut the residual wire. With the help of the tweezers I open the ring of the pendant, and place it in the middle of the two central circles. Thus, the second necklace is ready.
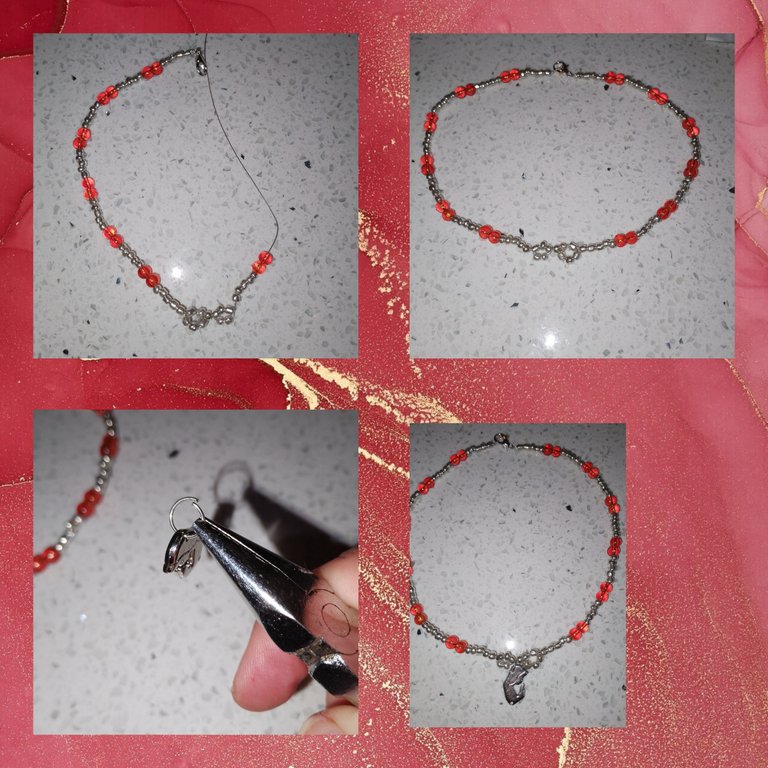
. All photos are my property, taken with my smartphone.
. Use incollage
. Use language translator.
Grateful for following me until the end, it is always a pleasure, your visit to my blog will be until the next opportunity.
(ESP)
Hola a todos, me complace estar, una vez más con todos ustedes,ya preparándome, para asistir a los actos religiosos en esta semana mayor, he diseñado dos collares con imágenes de la santísima virgen, justo para lucir en estos días Santos, pidiendo siempre la bendición y compañía de nuestra gran madre. Respetando la religión y creencias de cada uno de ustedes en esta comunidad, a continuación me permita mostrarles como hacerlas, deseo sea de su agrado, y puedan motivarse a hacer las suyas, para un ser queridos, entre otros.

Materiales:
. Dije de Imagen de la virgen de masa flexible.
. Dije de la virgen acero inoxidable.
. Cuerito redondo piel de serpiente, de color negro.
. Alambre n10.5.
. Mini grapas doradas.
. Pasador para collar.
. Aritos de bisutería.
. Cuentas de vidrio anaranjadas n6.
. Mostacillas doradas.
. Tubitos de madera anaranjados.
. Pinzas de bisutería.
. Tijeras (no necesario)
. Yeskero.

Pasos:
1.) corto tomando el tamaño de mí cuello, el cuerito, pongo fuego en ambos extremos y espunto, ambos lados con ayuda de mis dedos. Introduzco un tubito de madera por uno de los lados y por el siguiente introduzco la imagen la la virgen, luego el siguiente tubito de madera.

2/3) corto dos pedacitos de cuero, comienzo tejiendo cuatro nudos planos cuadrados en la técnica de macramé, pongo fuego, par evitar se festejan y repito en el otro lado, permitiendo el dije quedé bien ajustado a los tubos de madera y no tengo movilidad hacia los lados, luego coloco un tubito en cda uno de los lados.


4.) centro el dije y las piezas, colocadas en los pasos anteriores, y dejando un poco más largo uno de los extremos de el cuero, con la intención de hacer con el más largo un nudo corrido, que permitir ajustar el collar a el cuello. Hecho esto, pongo en cada extremo, un tubito anaranjado y hago un nidito, coloco un poco de fuego y presionó.
De esta manera, elaboró el primer collar, de esta colección.

5.) para el dije de acero, corto un trozo de alambre n. 0.5, coloco una grapa seguida de el pasador, me devuelvo e introduzco el alambre por la grapa, y hago presión con la pinza plana de bisutería.

6.) comienzo, colocando cinco mostacillas doradas, separadas por dos cuentas de vidrios, repito seis veces, alcanzado si el tamaño de la mitad de el cuello.

7.)luego introduzco cinco mostacillas más, hago un alto y me devuelvo con el alambre, pasando por dentro de las mostacillas y me ubico en el centro, formando un delicado círculos, repito y formó un segundo círculo.

8.) Hecho la anterior, lo siguiente será repetir, las cual el recorrido inicial, par lograr igualar los lados de el collar, ahora coloco el arito en este lado, aseguro con la grapa y corto el alambre residual. Con ayuda de la pinza abro el arito de el dije, y coloco en el medio de los dos círculos centrales. Quedando así listo el segundo collar.

. Todos las fotos son de mí propiedad, tomadas con mí teléfono inteligente.
. Use incollage
. Use traductor lenguaje.
Agradecida me haya seguido hasta el final, siempre es un placer, su visita a mí blog, será hasta una próxima oportunidad.