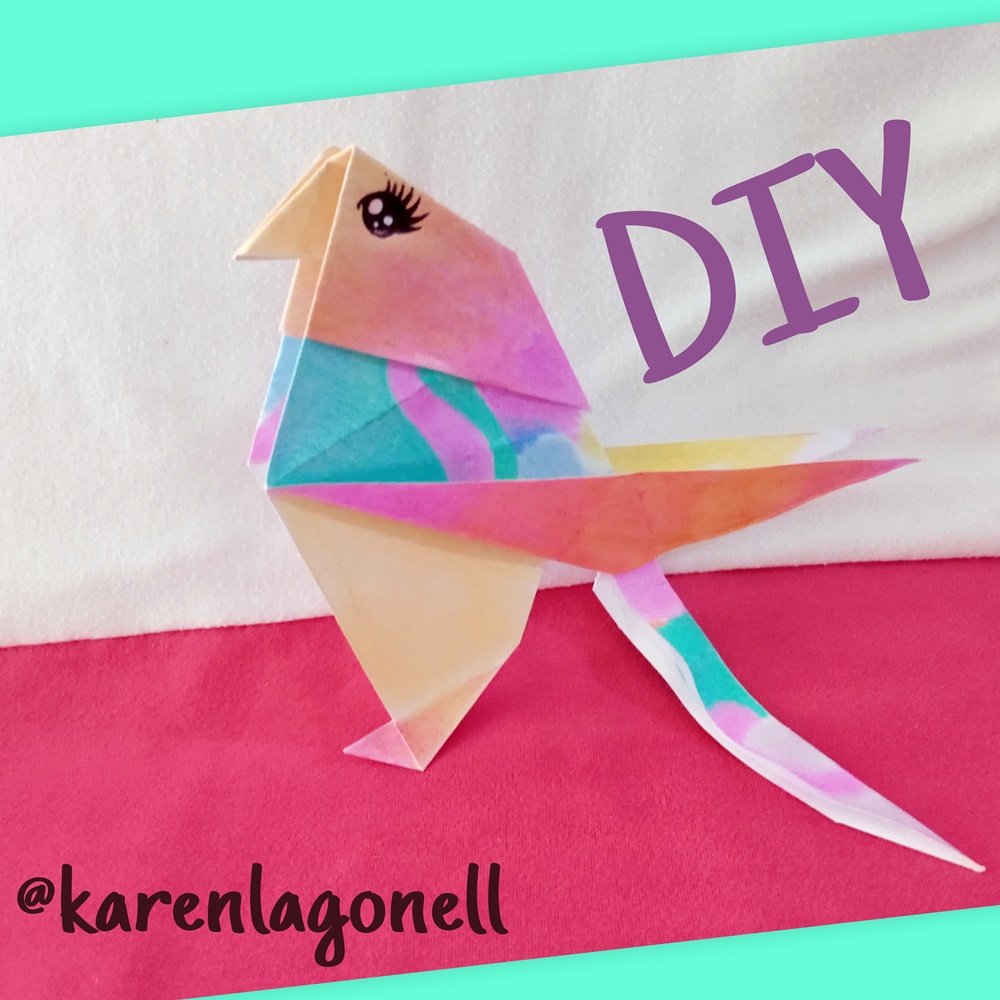
Últimamente me he enfocado en hacer manualidades que me relajen que me tranquilicen que me traigan paz, antes solía sobrepensar y preocuparme por todo y ahora que he de dejado ese mal habito atrás, no hay nada que valore más que la serenidad y el sentir que a pesar de las circunstancias todo va a estar bien, es por ello que de vez en cuando hago origamis porque me ayudan a enfocarme y además puedo decir que esta actividad también me ha ayudado a desarrollar mi paciencia y concentración por lo tanto se las recomiendo un montón. Ahora si continuemos con el paso a paso
Lately I have focused on making crafts that relax me, calm me down, bring me peace, before I used to overthink and worry about everything and now that I have left that bad habit behind, there is nothing I value more than serenity and feeling that Despite the circumstances, everything will be fine, that is why from time to time I do origami because it helps me focus and I can also say that this activity has also helped me develop my patience and concentration, therefore they are I highly recommend. Now if we continue with the step by step:
💛💚💙💜
🔹Materiales | Materials🔹
💜Hoja de papel
💜Lápices de colores
💙Tijera
💙Sheet of paper
💚Colored pencils
💚Scissors
🔹Proceso de creación | Creation process🔹
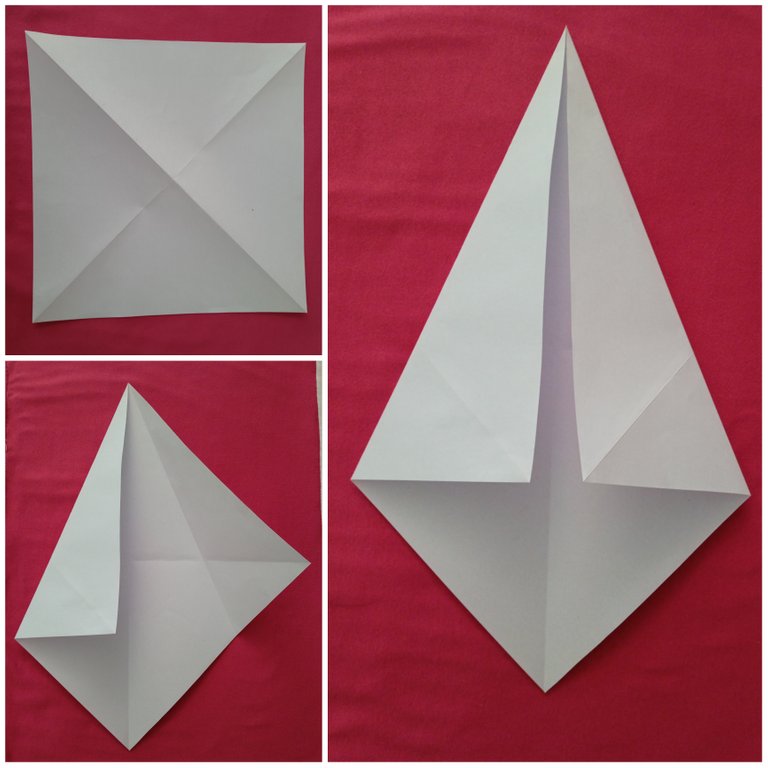
Para realizar esta pieza lo primero que tenemos que hacer es tomar un cuadrado de papel o cartulina y marcar las líneas diagonales (como podemos observar en la primera imagen). Luego vamos a llevar los dos laterales al centro de la hoja formando una especie de triangulo. El papel puede ser del tamaño que queramos lo importante es que tenga la forma de un cuadro.
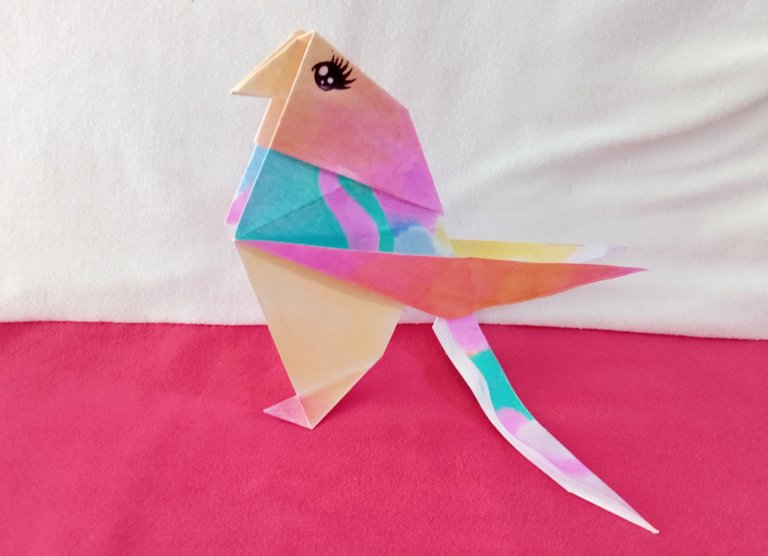
Primero que nada escogí la figura del pajarito porque fue una de las primeras piezas que aprendí a hacer eso fue hace muchísimos años pero sé que desde entonces comencé a enamorarme del arte de plegar papel y recuerdo muy bien que al principio me costó un mundo poder lograr hacer esta figura pero valió la pena ver como tomo esa bonita forma después de tanto ensayo y error.
To make this piece, the first thing we have to do is take a square of paper or cardboard and mark the diagonal lines (as we can see in the first image). Then we are going to bring the two sides to the center of the sheet, forming a kind of triangle. The paper can be the size we want, the important thing is that it has the shape of a box.
First of all I chose the figure of the little bird because it was one of the first pieces that I learned to do, that was many years ago, but I know that since then I began to fall in love with the art of folding paper and I remember very well that at At first it took me a world to make this figure but it was worth seeing how it took that beautiful shape after so much trial and error.
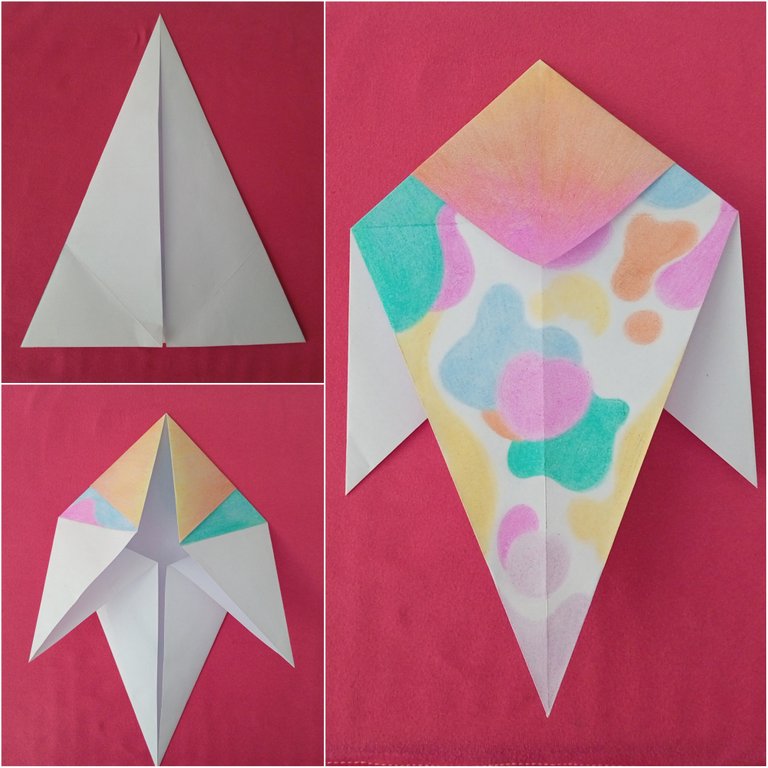
Seguidamente, en esta parte he decidido pausar un momento lo que estaba haciendo y darle vida al papel con colores, había planeado hacerle todos los detalles al pajarito cuando finalizara de plegar la pieza pero aquí me parece ideal comenzar a colorear... Seleccione únicamente colores pasteles estos tonos me parecen muy alegres y vivos y hacia eso quería llevar esta manualidad, dibuje distintas formas, combine varios colores y simplemente me deje llevar por la inspiración; el resultado me pareció una obra de arte abstracta, pero me gusto.
Next, in this part I have decided to pause what I was doing for a moment and give life to the paper with colors, I had planned to do all the details of the bird when I finished folding the piece but here it seems ideal to start coloring... Select only colors pastels these tones seem very happy and alive and that's what I wanted to take this craft towards, I drew different shapes, combined various colors and simply let myself be carried away by inspiration; The result seemed like an abstract work of art to me, but I liked it.

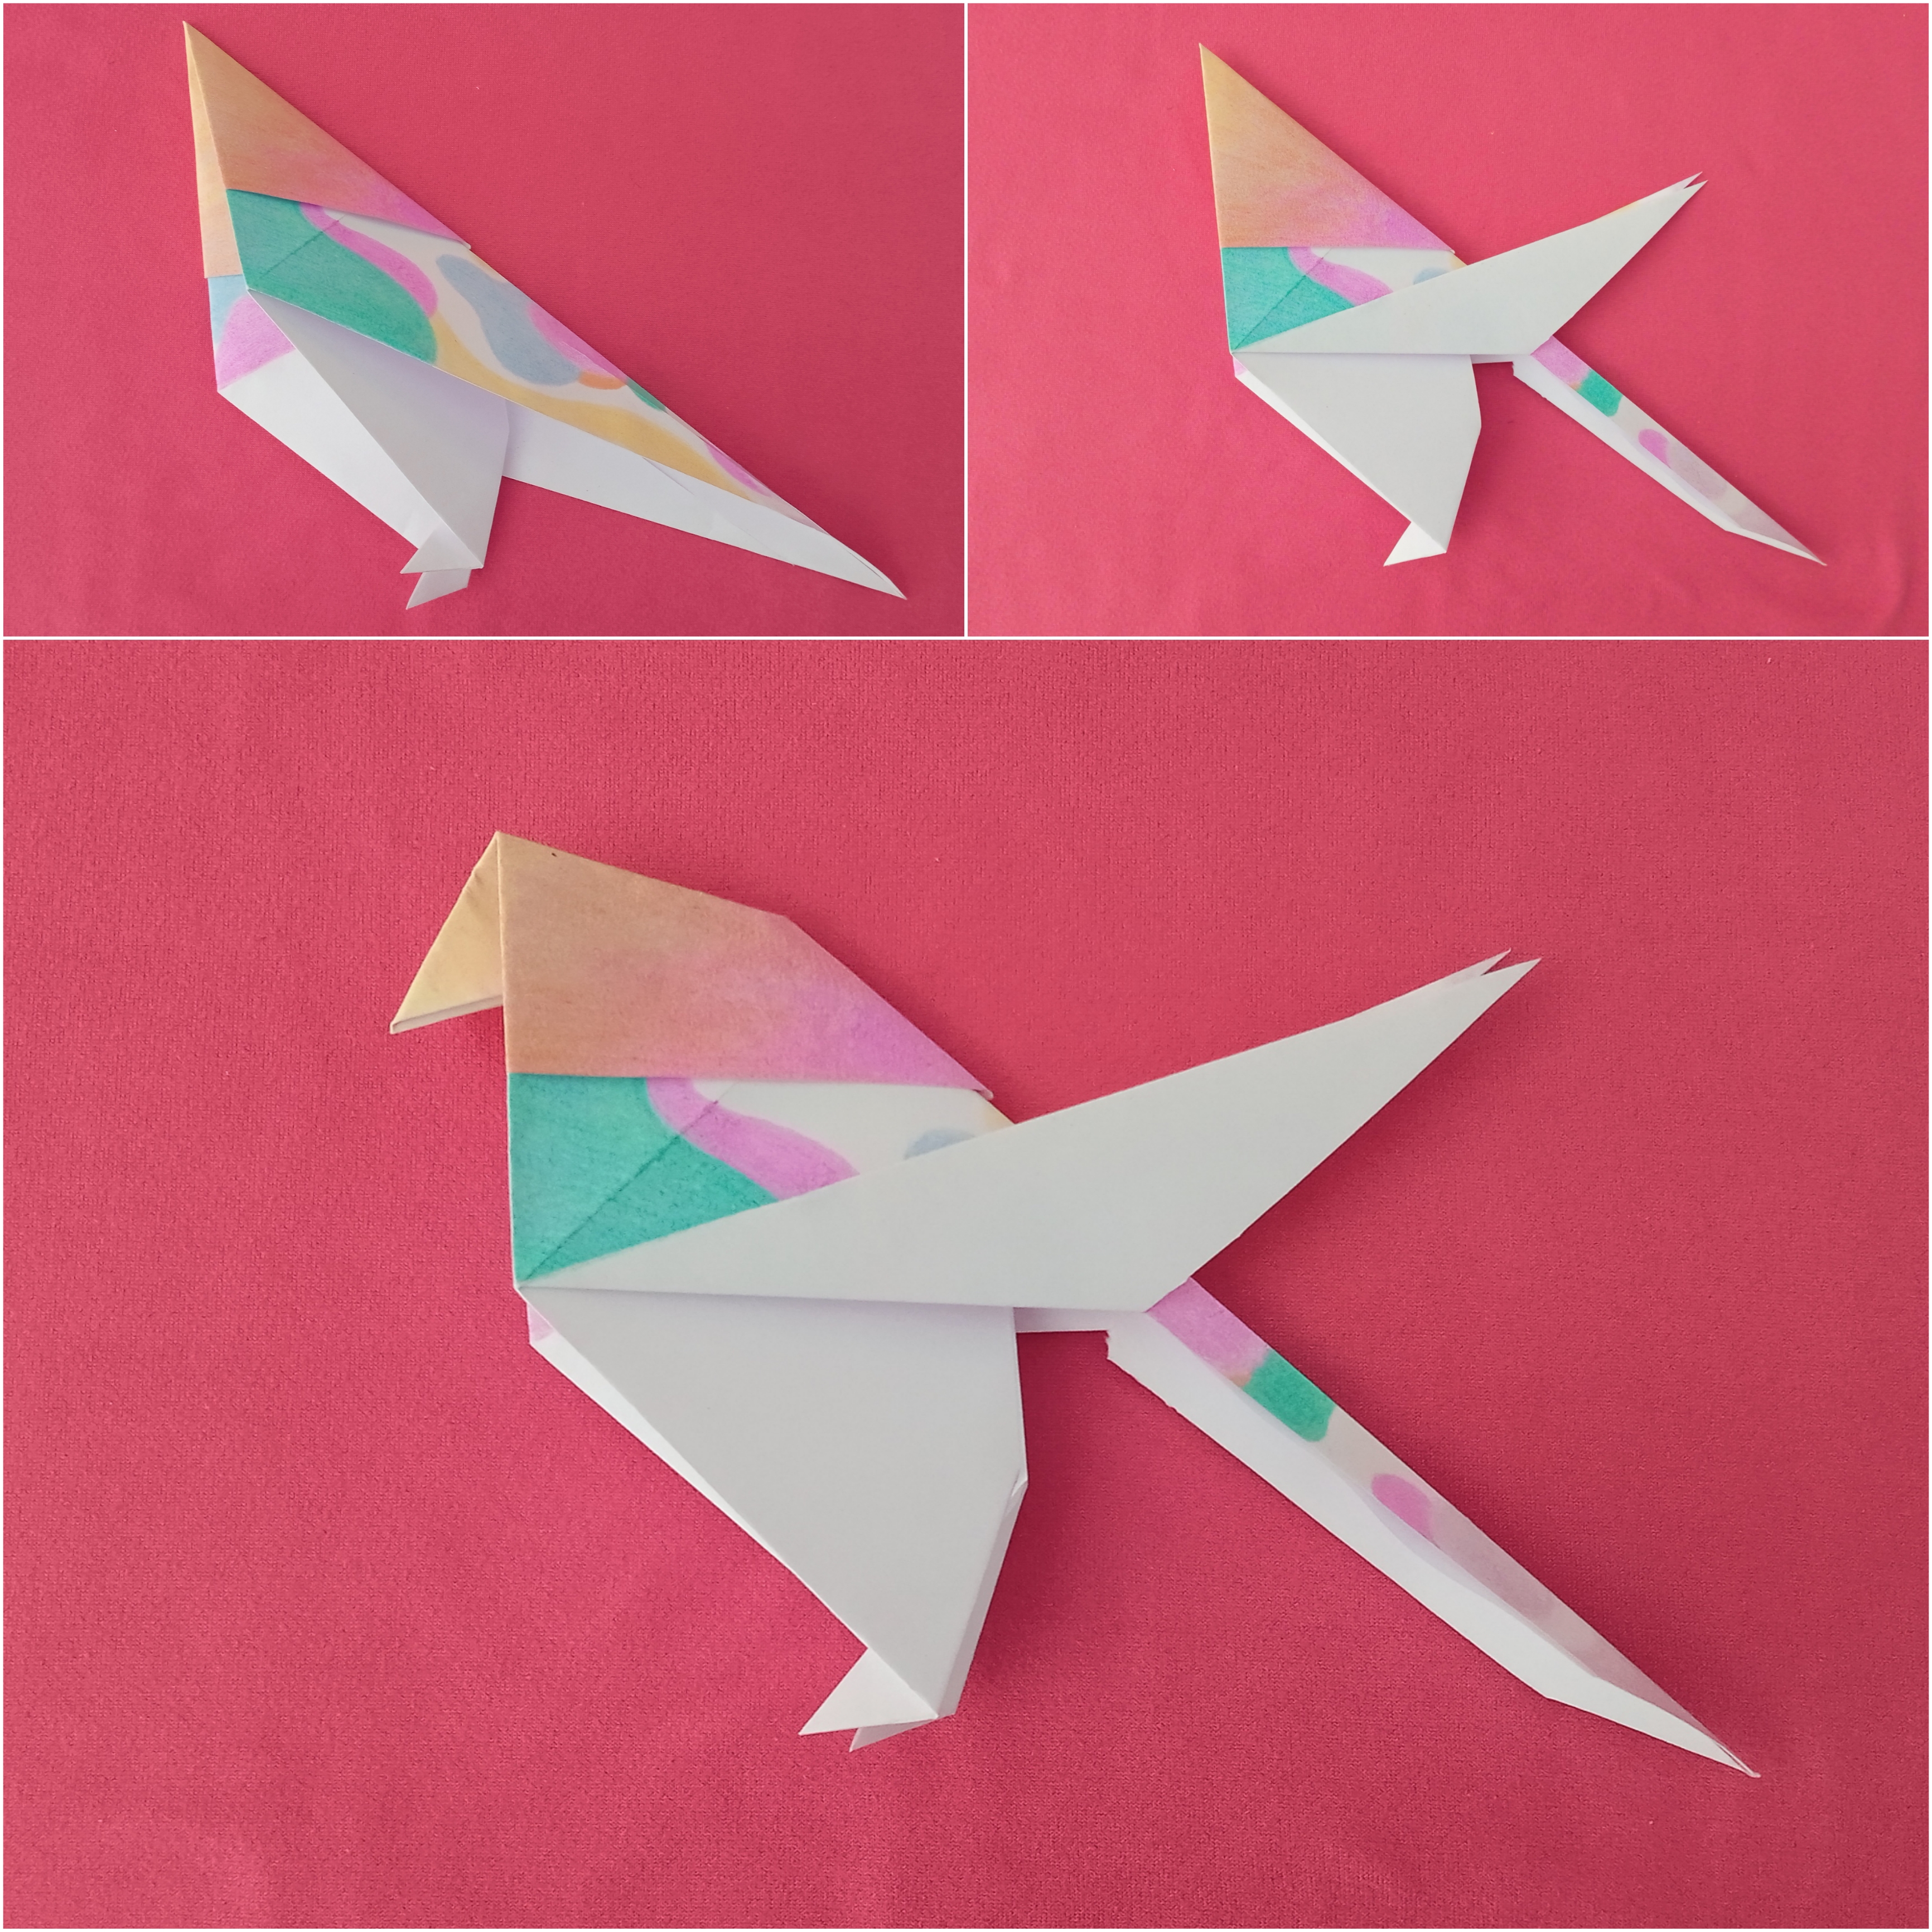
Ahora, vamos a continuar dándole forma a la pieza, como podemos ver en las siguientes imágenes el origami es intuitivo, no se requieren instrumentos, ni mediciones los pliegues dibujan las líneas y estas van indicando la secuencia de los pliegues es como si el papel hablara. En esta parte le di forma a sus patitas, utilice la tijera para cortar sus alas haciendo dos cortes, luego plegue la pieza por la mitad y le di forma a su pico hundiendo la punta. Para finalizar aplique color a sus alas y le añadí otros detalles.
Now, we are going to continue shaping the piece, as we can see in the following images, origami is intuitive, no instruments or measurements are required, the folds draw the lines and these indicate the sequence of the folds, it is as if the paper spoke . In this part I shaped its legs, I used scissors to cut its wings making two cuts, then folded the piece in half and shaped its beak by sinking the tip. To finish, I applied color to its wings and added other details.
🔹Final Result | Resultado Final🔹
💗Espero que hayan disfrutado del paso a paso! Les agradezco por quedarse y ver mi post. Recuerda que cualquier consejo o critica constructiva siempre es bienvenida😊💗
💗I hope you enjoyed the step by step! I thank you for sticking around and checking out my post. Remember that any advice or constructive criticism is always welcome😊💗
!Gracias por tu visita. Nos vemos en la proxima!
Thank you for your visit. See you next time!
❤️ ❤️ ❤️ ❤️ ❤️ ❤️❤️
Las imágenes fueron tomadas por mí con un Redmi 10📲 y editadas en Picsart💜. La traducción fue gracias al traductor de Google✌️
The images were taken by me with a Redmi 10📲 and edited on Picsart💜. The translation was thanks to Google translate✌️


