 Edited on Canva
"Of all flowers, methinks a rose is best.”
– William Shakespeare, The Two Noble Kinsmen
Like William Shakespeare, I think roses is the best flower. Despite the thorns it has that can hurt to anyone that touches its stem, roses became a symbol of love and were often used in romantic gestures between people in love.
However, for someone like me, a rose's thorns are not a concern. Unless, if it's the real one.
Me and the rest of the crochet world were able to appreciate the beauty of each bloom without hurting ourselves as we make them with our hands. Of course, crocheted thorns are not necessary. And even if we copy the real one and make a thorn-like crochet attached to its stem, the fact that we used soft yarn, still the outcome won't be as pointed and sharp compared to the real thorns.
I am very glad that despite not having my own garden of roses, the chances of crocheting them is still possible.
My first attempt in making crocheted rose was not a success, I didn't attempt to watch some video tutorial about it as I was too focused on some tulip and sunflower bouquet orders.
Then came my 1st rose bouquet commission.
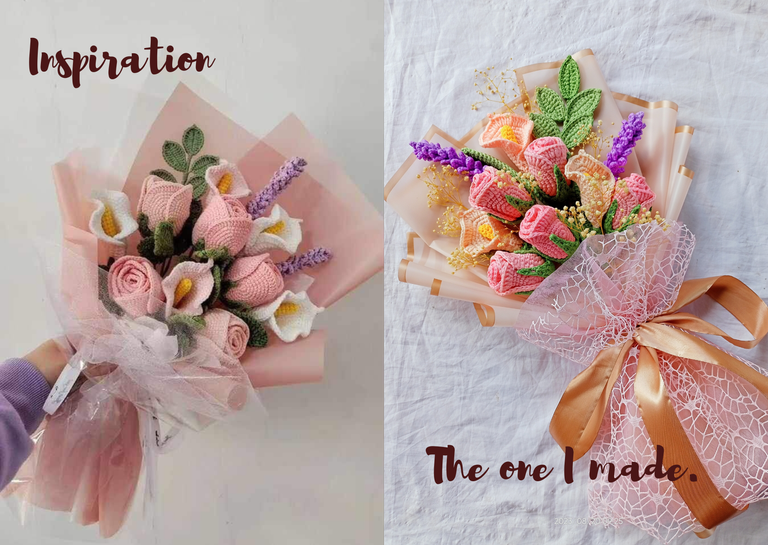
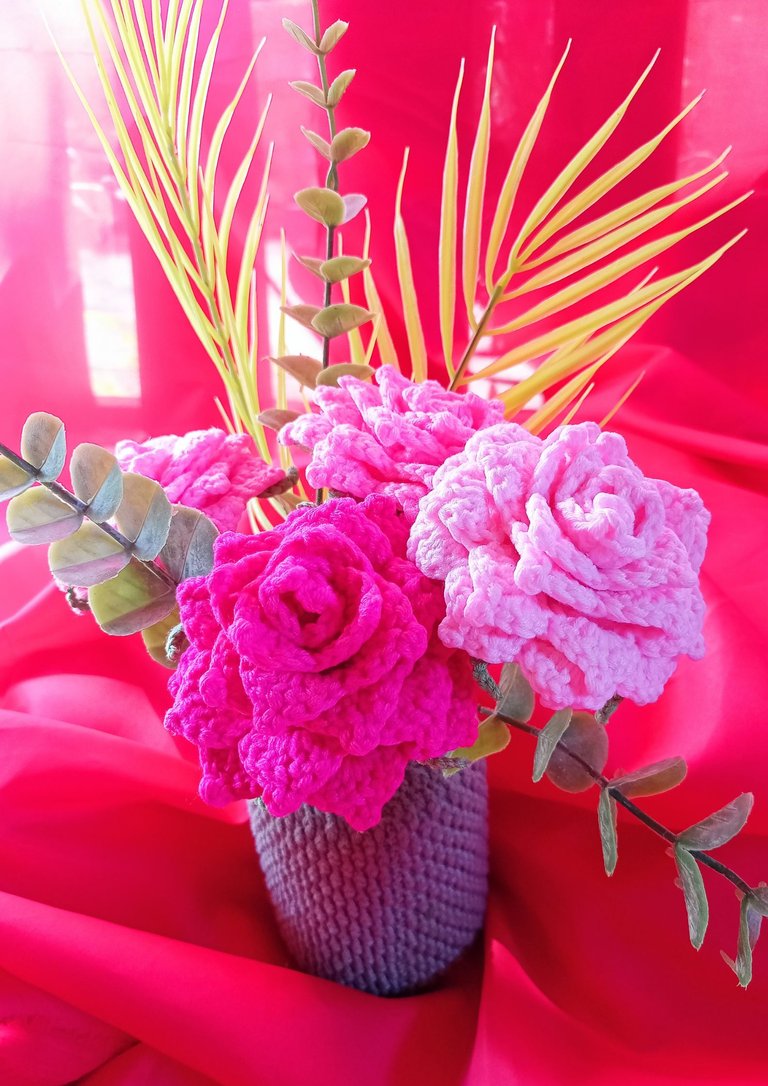
The customer had sent me a photo (left) of rose and calla lily bouquet as an inspiration. This roses were considered the realistic design and looks like a rose bud. I haven't tried it before and was uncertain if I would be able to replicate the one in the photo. By that time, I started to look for photos with step by step tutorial and found one and was very glad that I was able to make a not so perfect but pretty enough roses. (I would like to make another post about it, and a tutorial of this crocheted rose bud on my next post.)
I really like to make more of this rose design in different colors but was too occupied with some orders.
My 2nd rose bouquet commission.
The next rose bouquet order was coming from a friend of my cousin. She also sent to me a picture of roses (left, below) and wanted me to create those kinds of roses.

She asked me to wrap it like the usual flower bouquet I made but the colors and the designs of the flowers should be the same on the picture.
After two days of working on and off, I was able to finish the order and was delighted and very much satisfied with the outcome. The customer was very pleased to accept her order which made me happier.
My 3rd rose bouquet commission.
The 3rd order of roses was for her daughter that will be celebrating her 18th birthday. Her mother ordered 18 pieces of crocheted roses from me and some crocheted tiny tulip keychains for souvenirs.
This time I decided to take some pictures of the step-by-step procedures of how I made these roses.
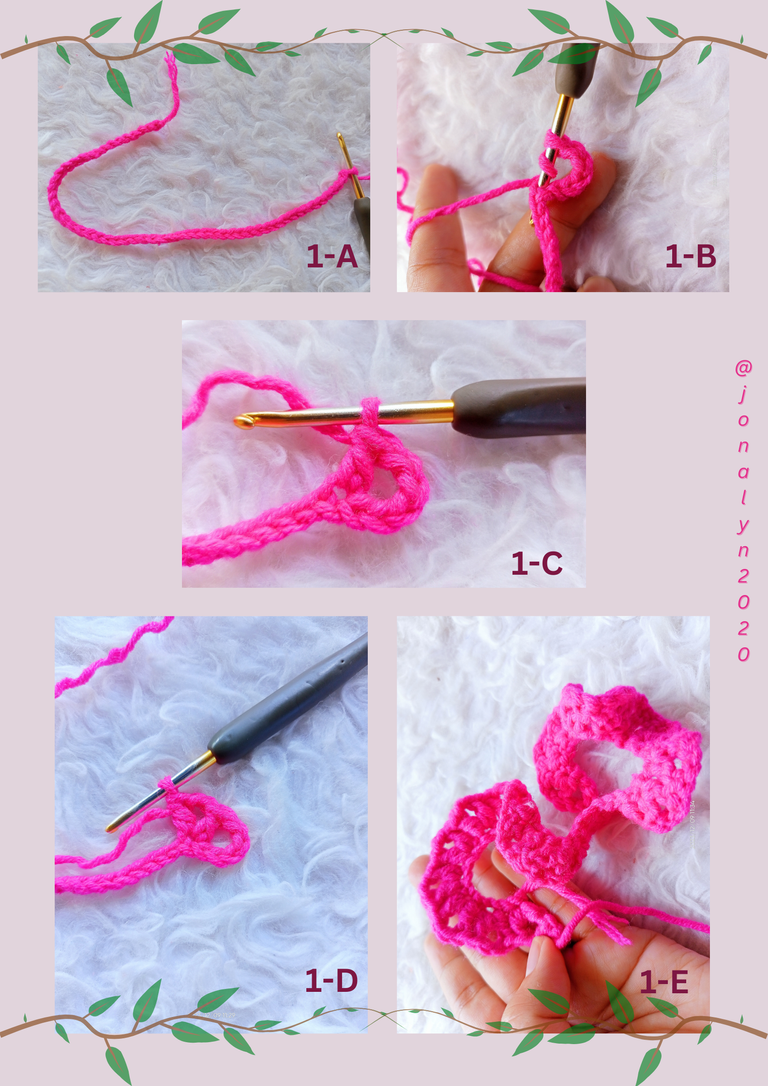
The Rose Petals Pattern:
 Edited on Canva
- Chain 54 (1-A)
- 1ST ROW
*Double crochet on the 6th chain, skipping 5 chains (1-B to 1-C)
*chain 2
*double crochet on the same stitch ("V" pattern)
*skip 1 stitch and repeat the "V" pattern until you reach the last stitch
 Edited on Canva
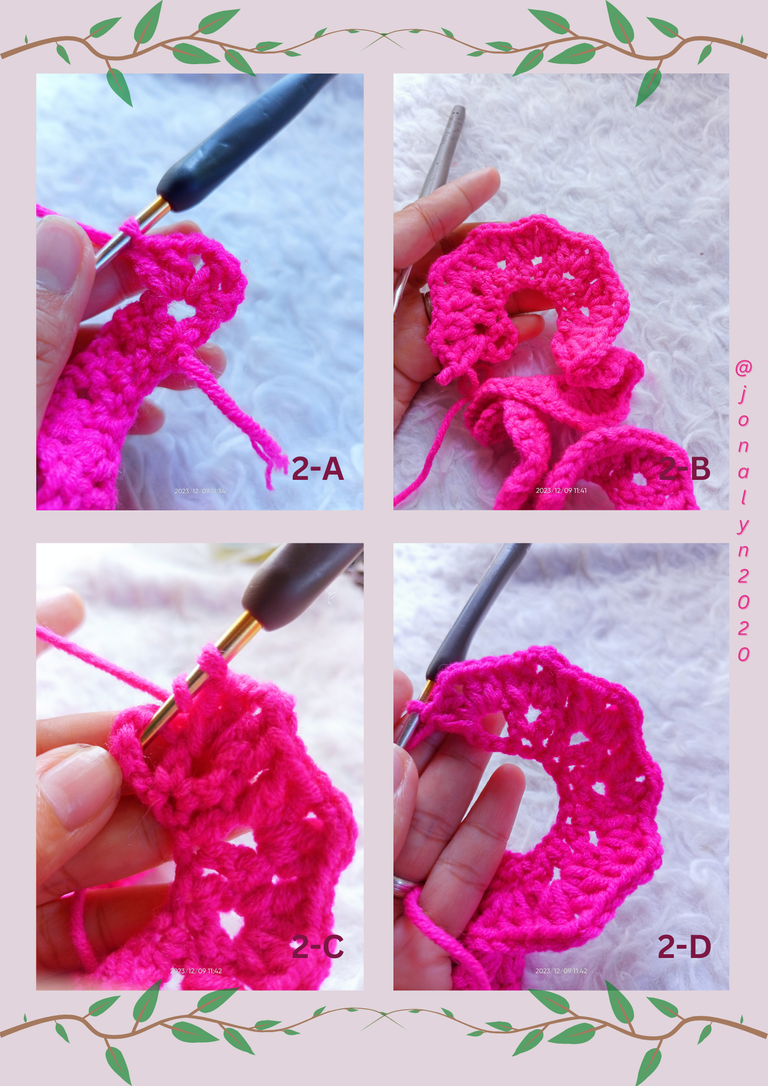
- 2ND ROW
*Chain 2 (then flip to the other side), Double crochet, chain 2, and 2dc on the first v-shaped pattern (2-A)
*repeat the 2dc-2chain-2dc in every v-shaped pattern (2-B) until the very last 'big hole' (2-C to 2-D).
 Edited on Canva
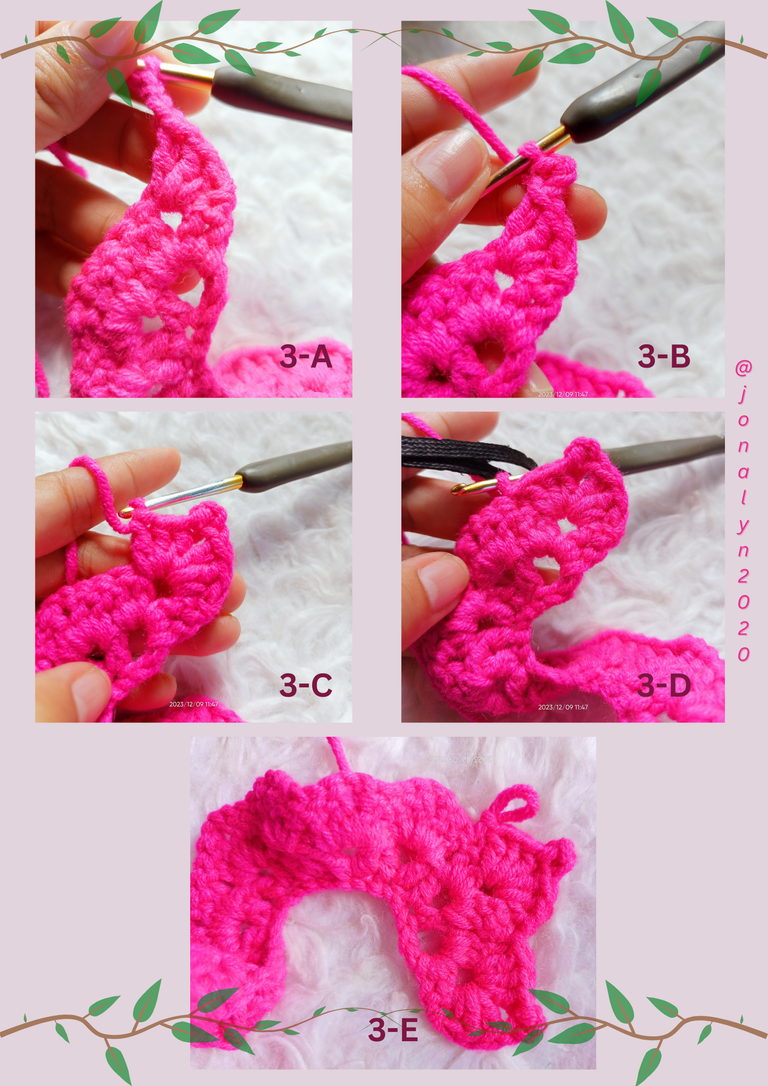
- 3RD ROW
*First petal - chain 1, (then flip to the other side),3dc , make a picot (from 3 chains - 3-A), then another 3dc (3-C), and ss on the 2nd stitch (3-D).
*Them, repeat every pattern on every petal.
 Edited on Canva
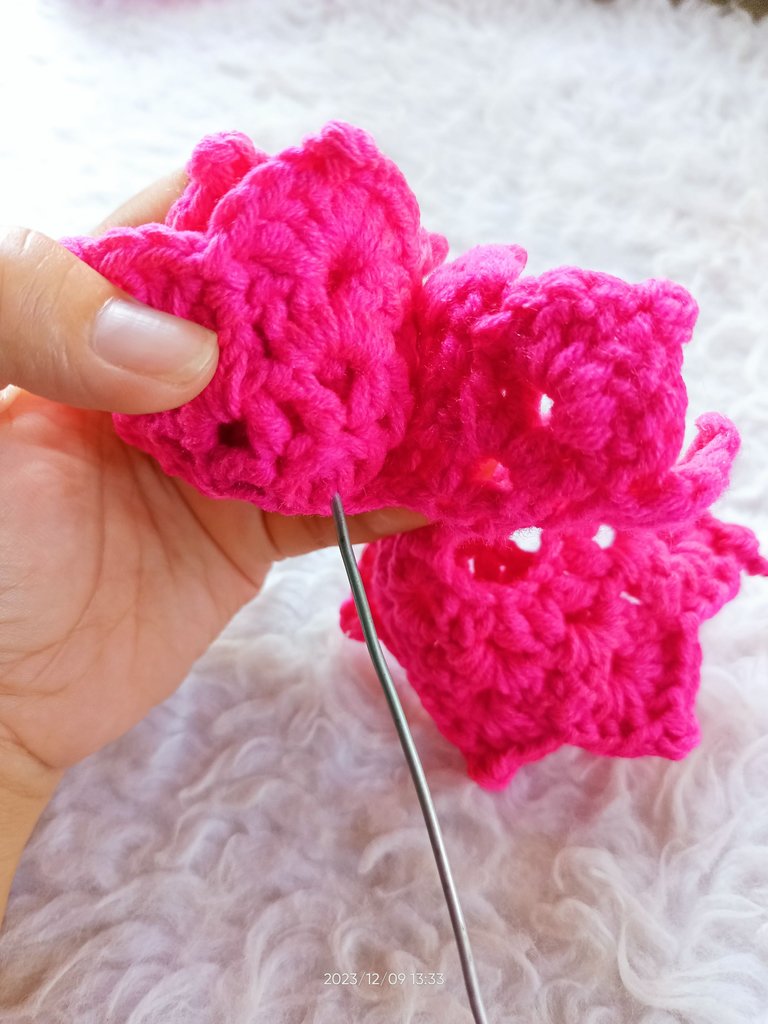
4-A This is what it looks like after. And there are two ways of how you want your rose flower assembled. Assembling the petals involves keeping the front of the third or last row inside, as shown in 4-B, and keeping the back of the third row inside, as shown in 4-C.
 IMG20231209133346
I prefered the 4-C method in arranging the petals on the stem wire with the used of glue stick and lighter. And cover the stem wire with the green yarn.
NOTE: The 3rd rose bouquet has a pointy petals (3dc-picot-3dc) unlike to the 2nd rose bouquet that has a shell pattern (7dc).
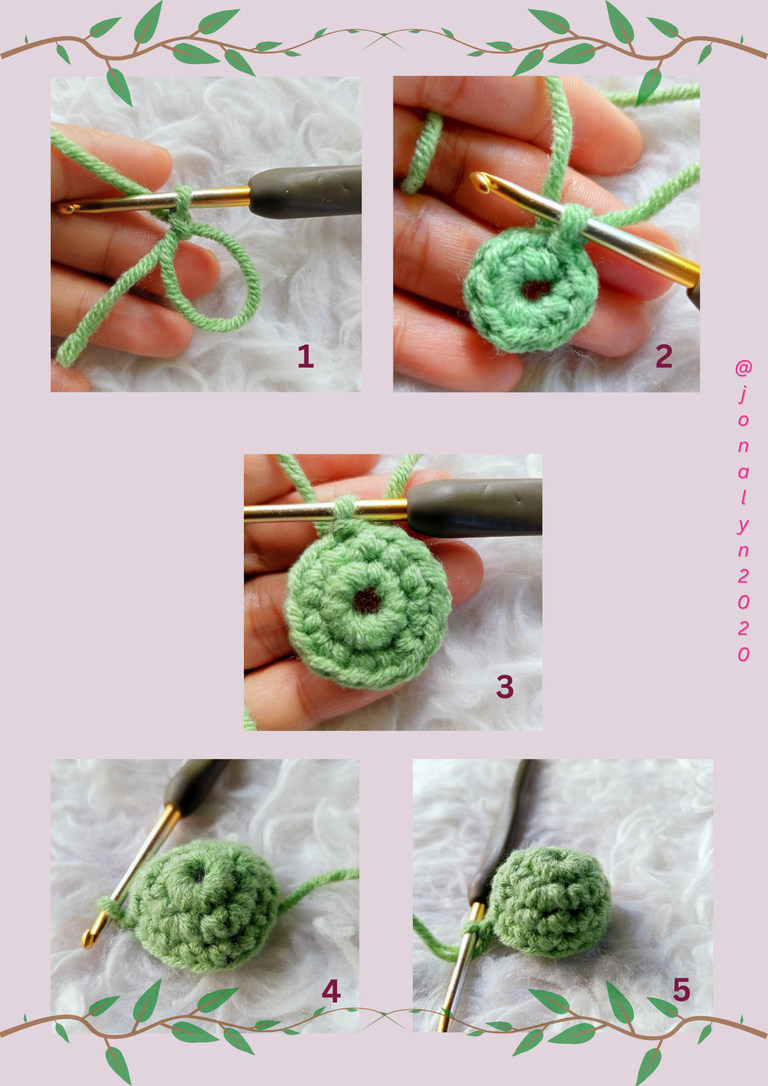
The Rosehip Pattern:
 Edited on Canva
1 - magic circle, chain 1
2 - make 9 sc, then slip stitch
3 - chain 1, 1sc, 2sc, 1sc, 2sc, 1sc, 2sc, 1sc, 2sc, 2sc, ss
4-5 - chain 1, 1sc in every stitch, ss
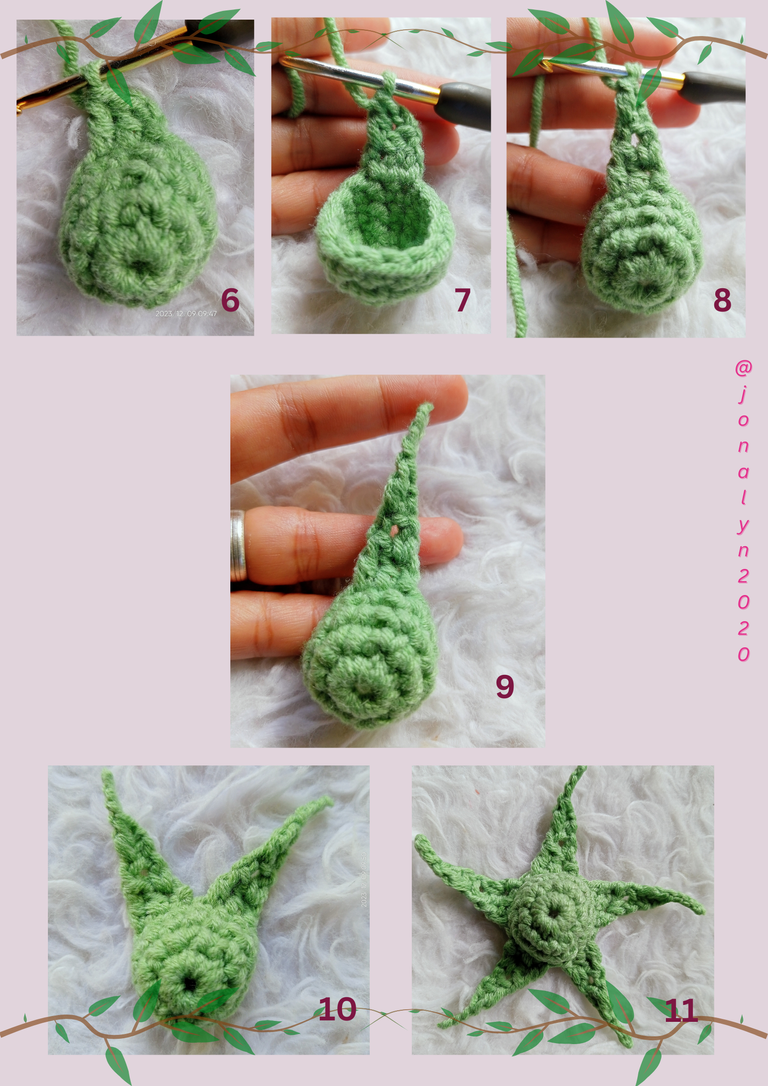
The Sepals Pattern:
 Edited on Canva
6 - chain 2, 1dc in 2 consecutive stitches
7 - chain 2, 1dc on the last stitch
8 - chain 1, 1dc on the last stitch (decrease)
9 - chain 4, then lock and cut the yarn
10 - 11 -Repeat procedure, making 5 sepals
Attach this after under the rose petals we had formed the rose petals on the stem wire with the used of glue stick.
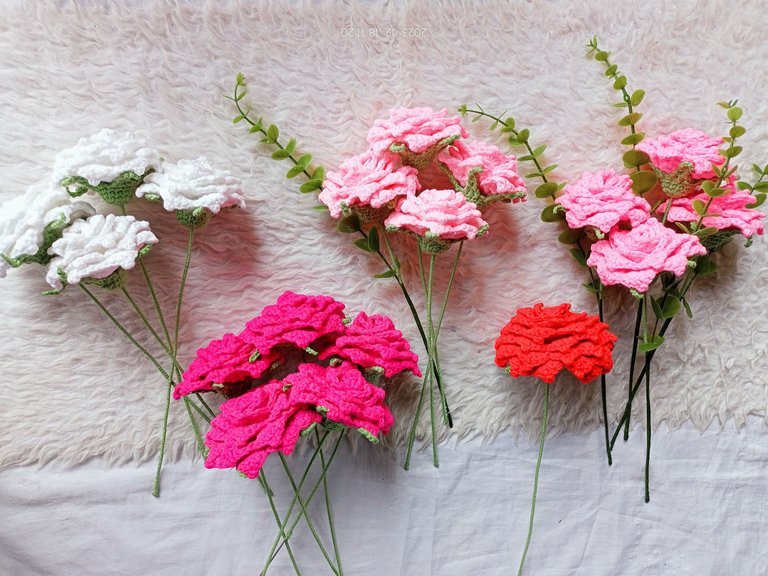 IMG20231218112009_01
Now these are the completed products of our latest rose pattern. I made 18 pieces of rose flowers in different color variations as requested by the customer.
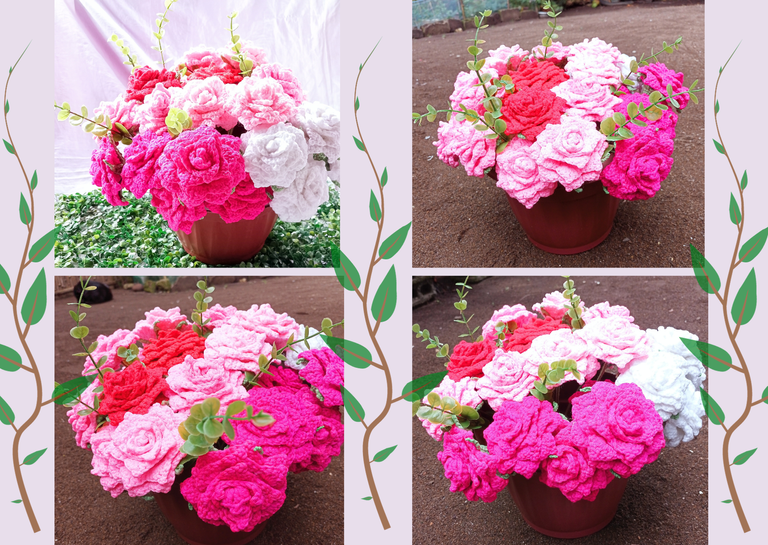 Edited on Canva
In order to add some positivity to every rose, I decided to add an artificial (plastic) leaf on each one (though not all of them are seen in these pictures).
I hope you like this post and I'll be glad if someone could make a crocheted rose from the above pattern I shared. Thank you and God bless.
HAPPY HOLIDAYS EVERYONE AND ENJOY EVERY MOMENT OF IT WITH YOUR FAMILY OR SPECIAL SOMEONE.
Yours truly,
@jonalyn2020 😘😘😘
Kung nagustuhan mo ang aking sinulat ngayon, Pakistan mo naman. 😍😉

For orders, please message me or visit these links.
To God Be The Glory
