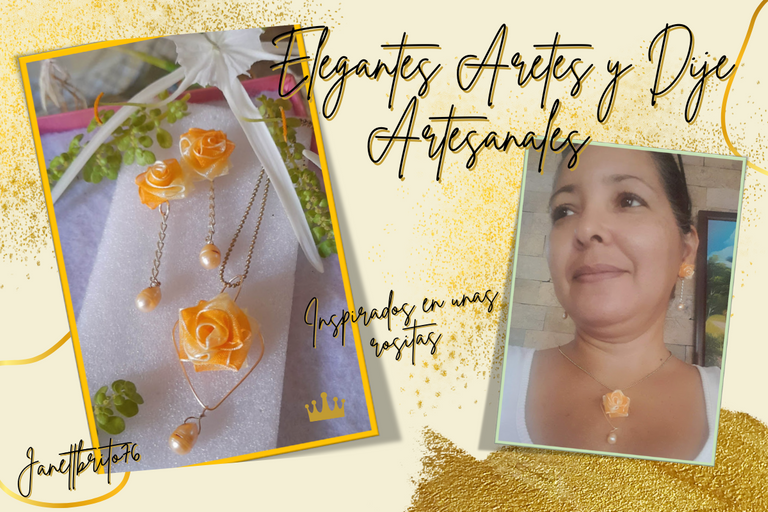

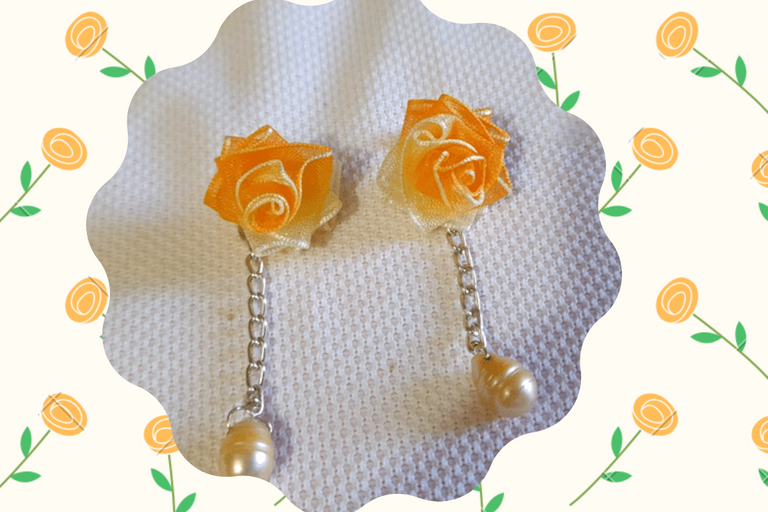
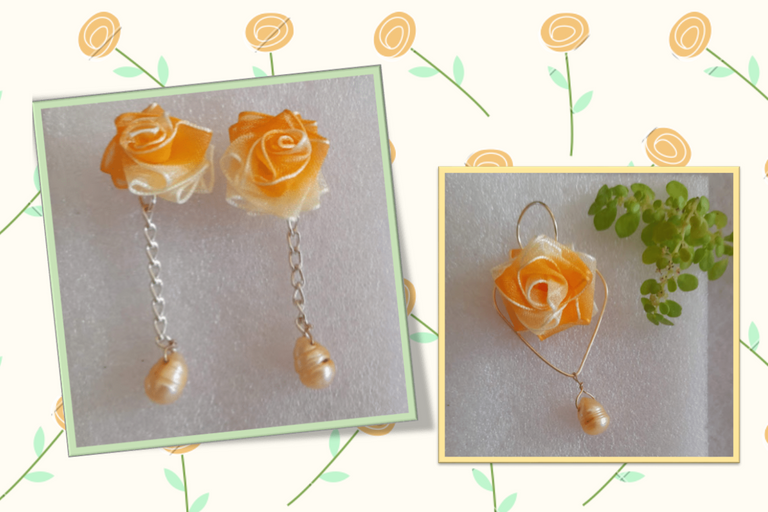
Hello, hello dear and appreciated friends, have a happy and blessed evening I hope you have gone chevére and productive this day, I had not been able to be with you since I was presenting problems with the internet .... But well here I am today and I am pleased to be back in this creative community of #Jewelry, tonight I want to show you the step by step of how we can make elegant and radiant handmade earrings and pendant inspired by a pretty little roses of organza ribbon.
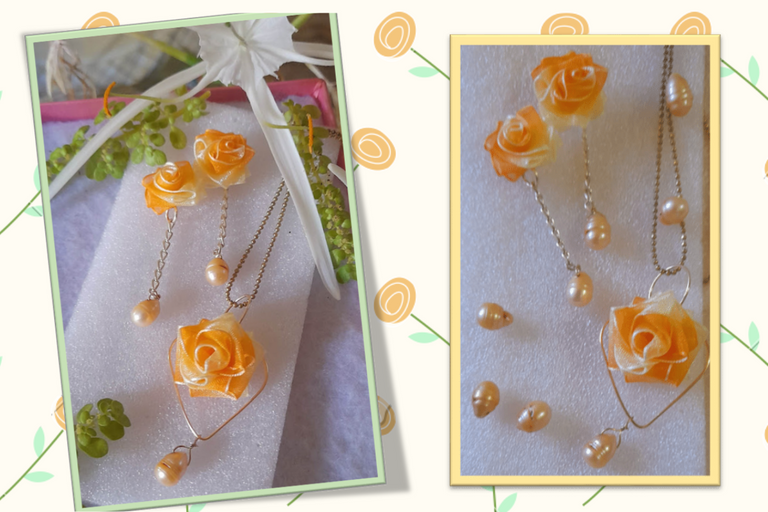
These elegant and radiant earrings are made with beautiful roses elaborated with yellow organza ribbon and pearls. I tell you that it is the first time I work with this type of ribbon and you can really make some beauties, as these same roses can be made to decorate the hooks for girls and even to develop a beautiful pins, plus they are ideal for gifts or sell and best of all is that you can make the color you want and the size you want because these ribbons come in different widths, these elegant earrings are inexpensive and easy to make and I'm almost sure you will love this great idea. Well friends I hope you like these radiant earrings!! then do not miss the step by step to make these handmade earrings, let's get to work!

Hola, hola queridas y apreciadas amigas, que tengan una feliz y bendecida noche espero que les haya ido chevére y productivo este día, no había podido estar con ustedes ya que estaba presentando problemas con el internet... Pero bueno aquí estoy hoy y me complace estar nuevamente en esta creativa comunidad de #Jewelry, esta noche les quiero mostrar el paso a paso de como podemos realizar unos elegantes y radiantes aretes y dije artesanales inspirados en unas lindas rositas de cinta de organza.
Estos elegantes y radiantes aretes están elaborados con unas hermosas rosas elaboradas en cinta de organza amarilla acompañada de unas lindas perlas. Les cuento que es primera vez que trabajo con este tipo de cinta y realmente se puede realizar unas bellezas, ya que estas mismas rositas las pueden realizar para decorar los ganchitos para las niñas e incluso para elaborar unas hermosos prendedores, ademas son ideales para regalar o vender y lo mejor de todo es que los puedes confeccionar del color que tu desees y del tamaño que quieras ya que estas cintas vienen de distinto ancho, estos elegantes aretes son económicos y sencillos de realizar y estoy casi segura que les va a encantar esta estupenda idea. Bueno amigas espero les sea de su agrado estos radiantes aretes!! entonces no te pierdas el paso a paso para hacer estos aretes artesanales.¡¡Manos a la obra!!


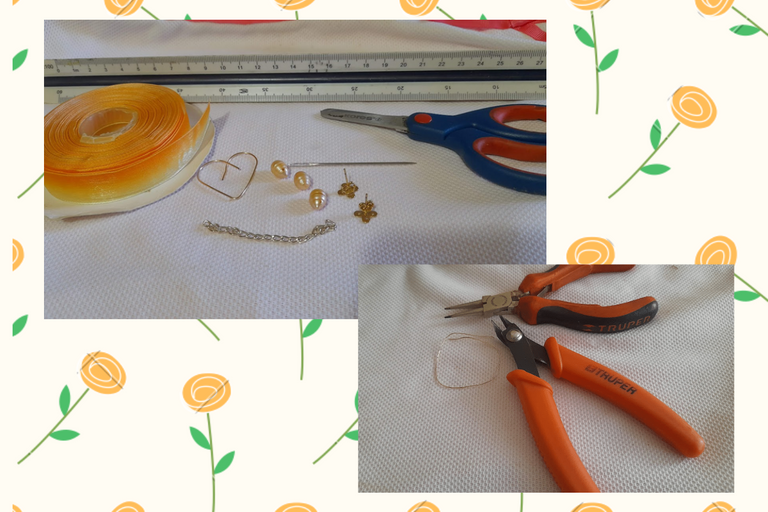
- Yellow gradient organza ribbon
- Beads #28 gauge wire
- Chain
- Needle
- Earrings base
- Wire heart
- Scissors
- Ruler or tape measure
- Round nose pliers
- Wire cutting pliers
- Lighter


- Cinta de organza en amarillo degradado
- Perlas
- Alambre calibre #28
- cadena
- Aguja
- Base para aretes
- Corazón de alambre
- Tijera
- Regla o cinta métrica
- Alicate punta redonda
- Alicate de corte de alambre
- Encendedor


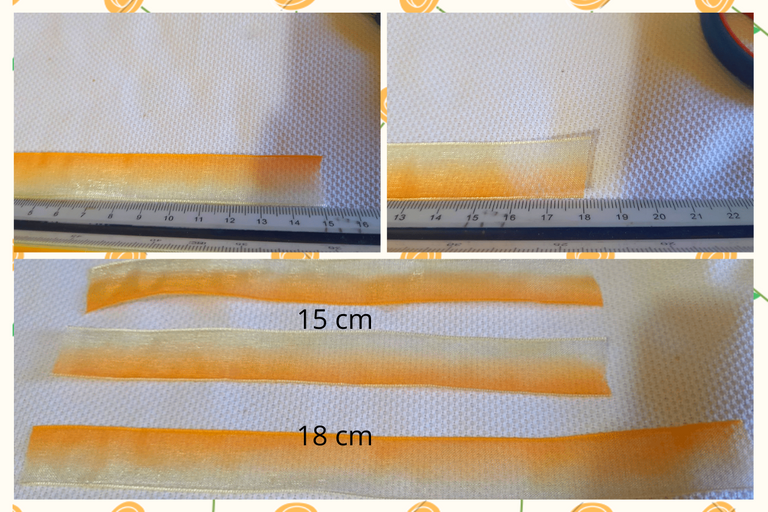
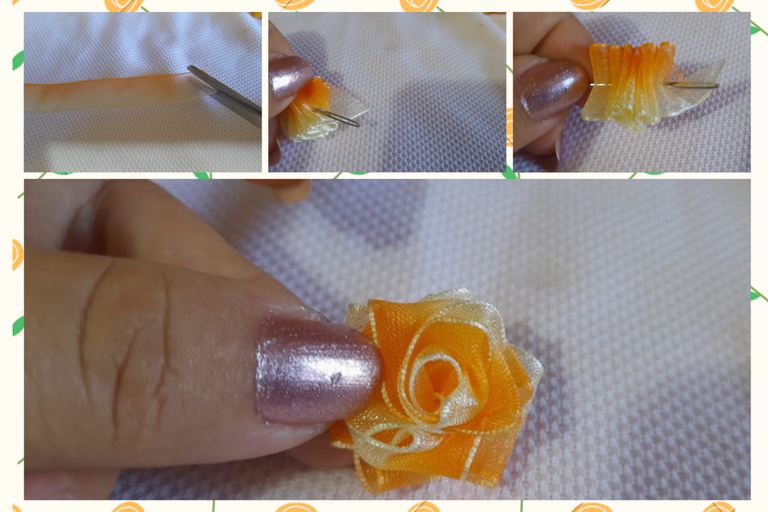
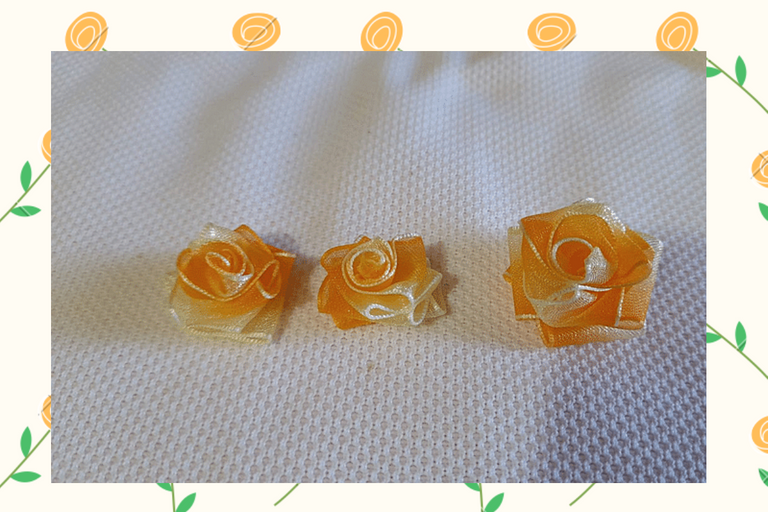
1: To make the roses, we start by cutting three strips of organza ribbon, two of them to make the roses of the earrings which are 15 centimeters long and the third ribbon we cut 18 centimeters long so that the roses will be a little bigger for the pendant.

1: Para realizar las rositas, comenzamos cortando tres tiras de cinta de organza, dos de ellas para realizar las rositas de los aretes las cuales miden 15 centímetros de largo y la tercera cinta la cortamos de 18 centímetros para que la rosita nos quede un poco mas grande para el dije.


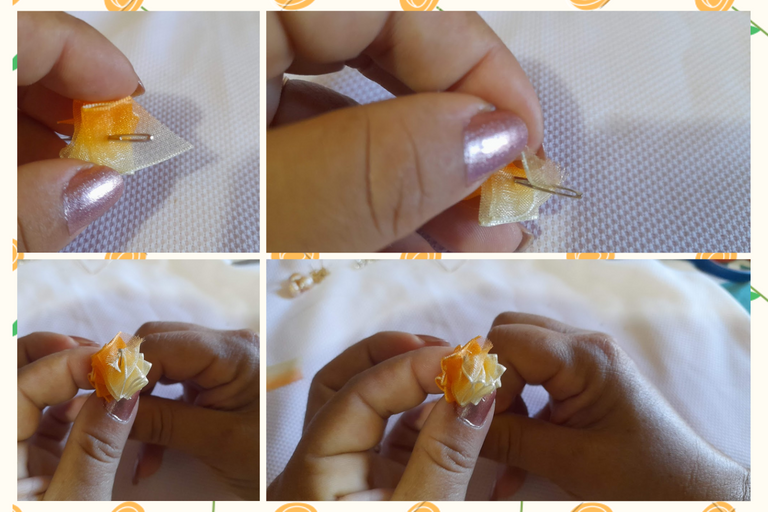
2: We take the tip of the ribbon and cut a little bit the tip in an inclined way, as you can see in the image, then we leave approximately 0.5 centimeters from that cut and we introduce the needle and we make stitches of approximately one centimeter until we reach the end of the ribbon, we verify that all the stitches are neat.

2: Tomamos la punta de la cinta y cortamos un poco la punta en forma inclinada, como pueden ver en la imagen, luego dejamos aproximadamente 0,5 centímetros desde ese corte e introducimos la aguja y vamos realizando puntadas de aproximadamente un centímetro hasta llegar al final de la cinta, verificamos que todas las puntadas estén ordenadas.
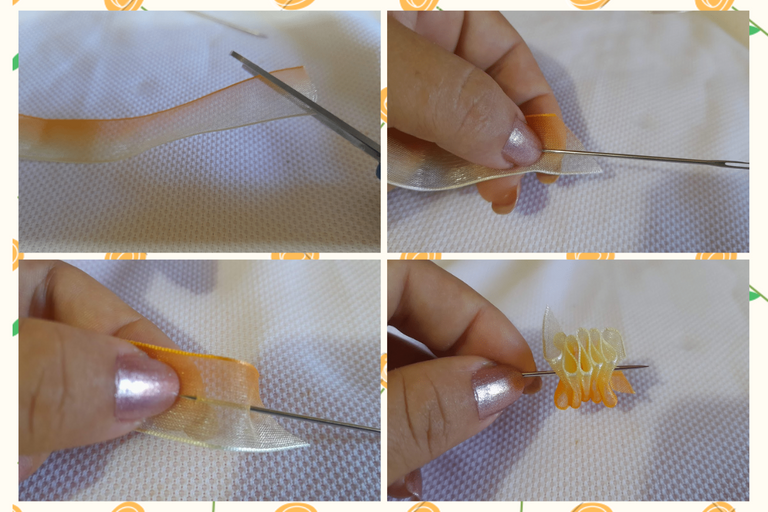


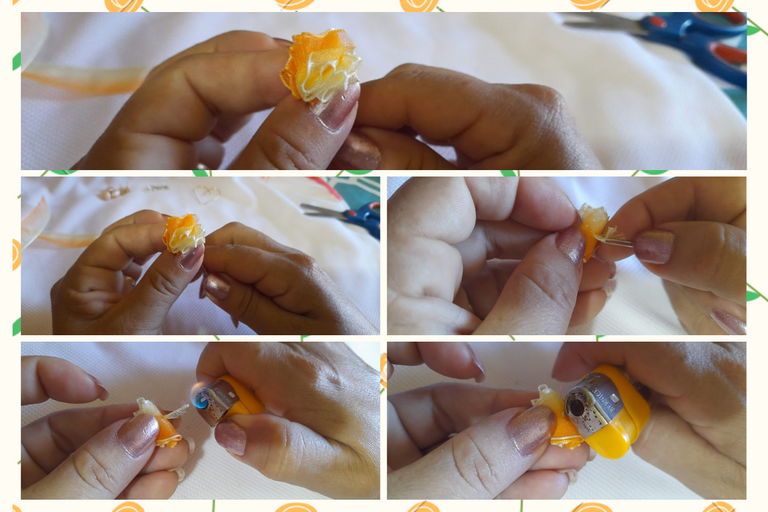
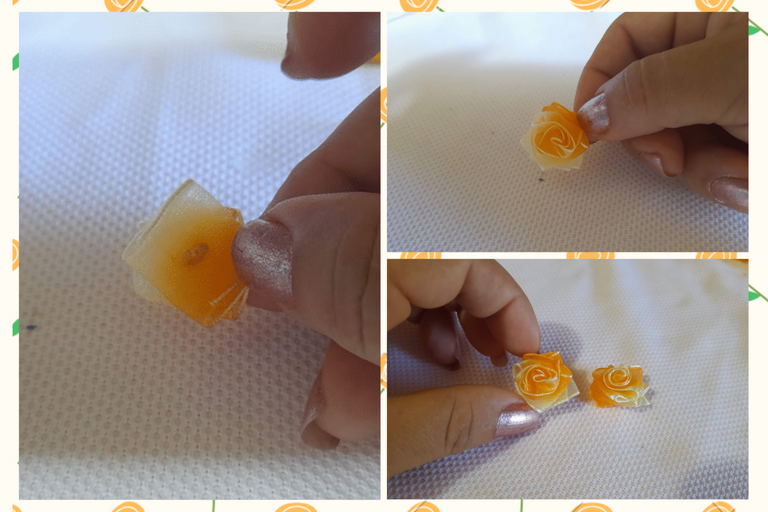
3: Once the ribbon is already ordered we proceed to introduce the tip of the ribbon through the hole of the needle (which should be a large needle with the hole more or less large to pass the ribbon) then proceed to turn the needle to form our rosita, as we are turning it around we pull the ribbon until we get the tip at the bottom and with a lighter proceed to burn the tip so that we do not desalme our rosita, then repeat the same procedure for the other rositas.

3: Una vez ya ordenada la cinta procedemos a introducir la punta de la cinta por el agujero de la aguja(la cual debe ser una aguja grande con el agujero mas o menos grande para poder pasar la cinta) seguidamente procedemos a darle vuelta a la aguja para ir formando nuestra rosita, a medida que se le vamos dando la vuelta vamos halando la cinta hasta obtener la punta por la parte de abajo y con un encendedor procedemos a quemar esa punta para que no se nos desalme nuestra rosita, luego repetimos el mismo procedimiento para las otras rositas.
 >
>


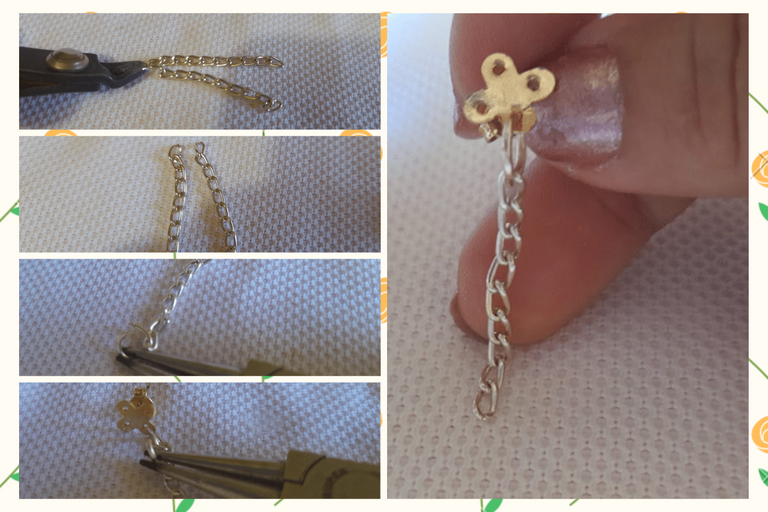
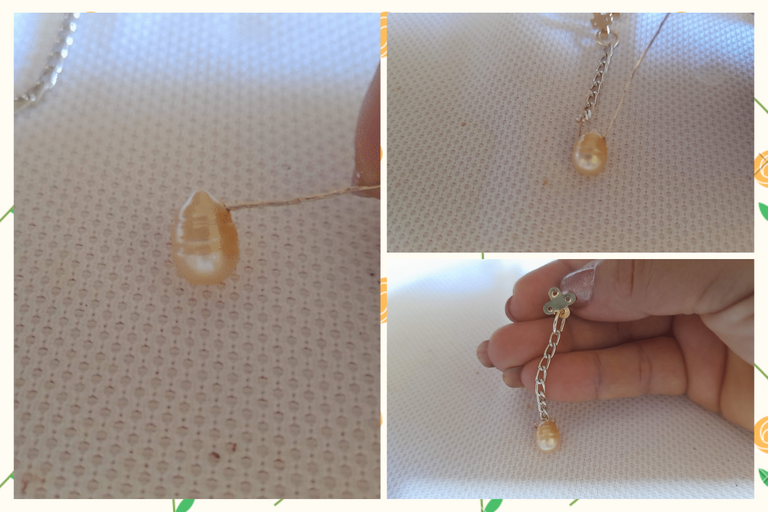
4: To assemble our earrings, we start by cutting with the cutting pliers two pieces of chain of 3 centimeters each, then we introduce a wire ring in one of the ends of the chain and we add the base of the earrings. Then we take the #28 gauge wire and we introduce a pearlite and we twist it to the other end of the chain as you can see in the pictures.

4: Para armar nuestros aretes, iniciamos cortando con la pinza de corte dos pedacitos de cadena de 3 centímetros cada uno, luego introducimos un arito de alambre en una de las punta de la cadena y le agregamos la base de los aretes. Después tomamos el alambre calibre #28 e introducimos una perlita y la entorchamos a la otra punta de la cadena como pueden observar en las imágenes.


5: To finish assembling our earrings we just need to put a drop of hot silicone on the back of the rose and glue them to the base of the earrings and ready, elegant and radiant earrings!

5: Para terminar de armar nuestros aretes solo nos queda colocarle una gota de silicon caliente por la parte de atrás de la rosita y pegarlos a nuestra base de los aretes y listo unos elegantes y radiantes aretes!
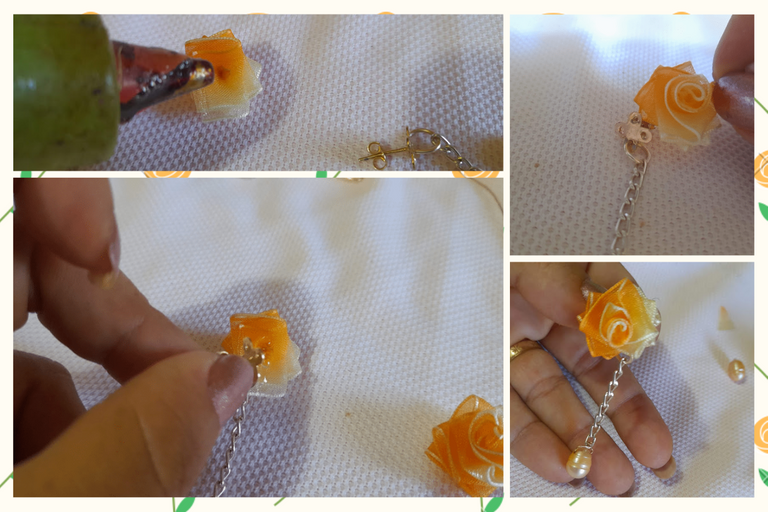


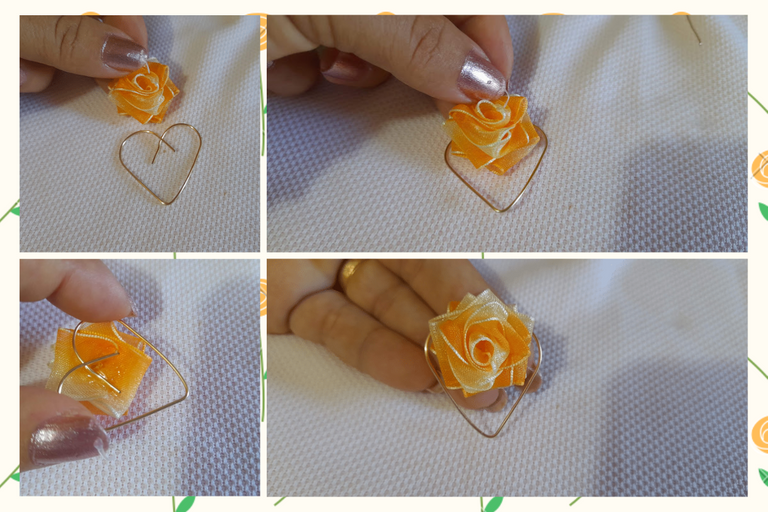
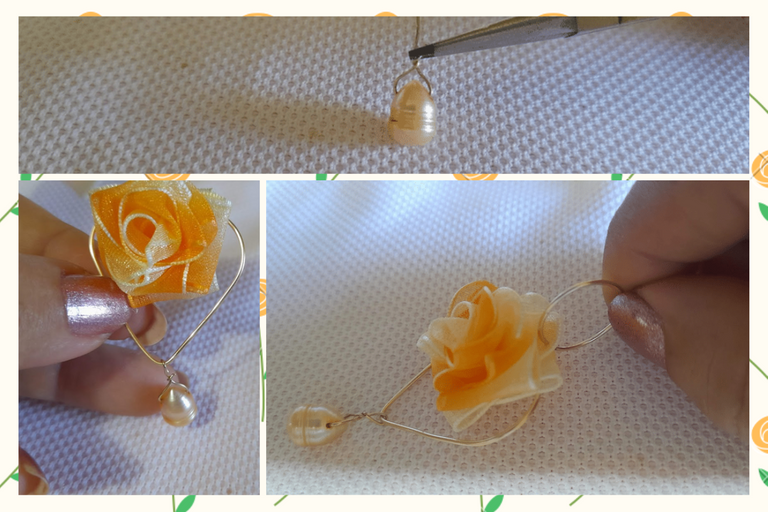
6: Then to assemble our pendant, we take the largest rose and put some hot silicone on the back and glue it to the base of the heart, then to decorate it a little more we put a pearl at the bottom of the heart and to finish it we insert a ring at the top of the rose.

6: Luego para armar nuestro dije, tomamos la rosita mas grande y le colocamos un poco de silicon caliente por la parte de atrás y la pegamos a la base de corazón, luego para decorarlo un poco mas le entorchamos una perlita en la parte inferior del corazón y para terminarlo le insertamos una argolla en la parte superior de la rosita.
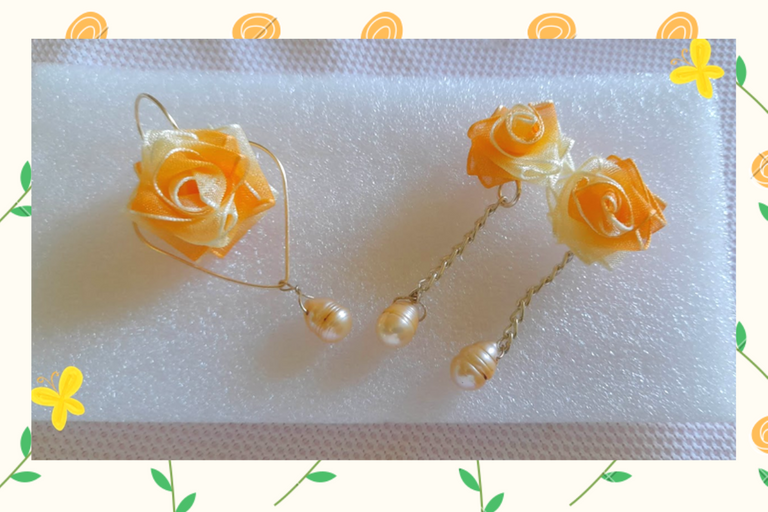


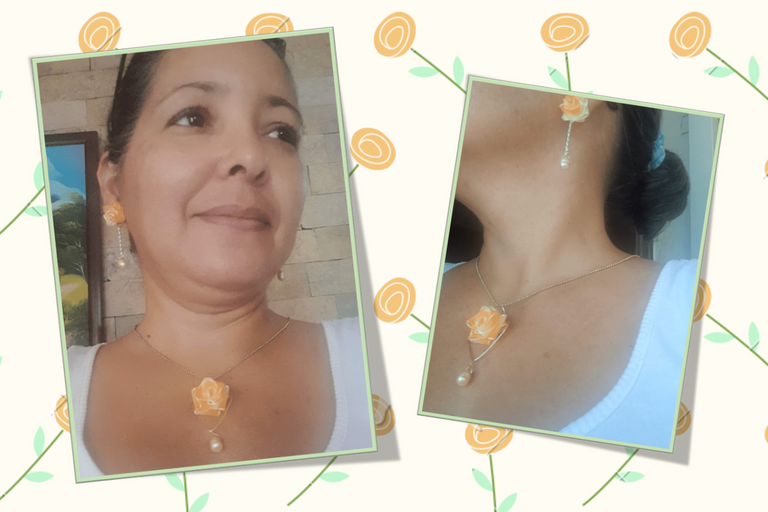
My dear friends, this is how elegant and radiant I got these beautiful earrings and I said, I was impressed with the result and how beautiful it is to work with this type of ribbon, I hope you liked it and you are encouraged to make some like these, remember that you can make them in the color of your choice!
Until next time!

Mis apreciadas amigas, así de elegantes y radiantes me quedaron estos hermosos aretes y dije, quede impresionada con el resultado y lo bello que se trabaja con este tipo de cinta. ¡Espero les haya sido de su agrado y se animen a realizar unos como estos, recuerden que los pueden realizar del color de su preferencia!
¡Hasta una próxima publicación!
Portada y plantillas elaboradas en canva
Fuente Separador

The photographs were taken with a Samsung A12 smartphone, the text was translated into English with the Deepl translator.link
The banner was designed on canvas link

Las fotografías fueron tomadas con un teléfono inteligente Samsung A12, el texto fue traducido al ingles con el traductor Deepl.link
El banner fue diseñado en canvas link


