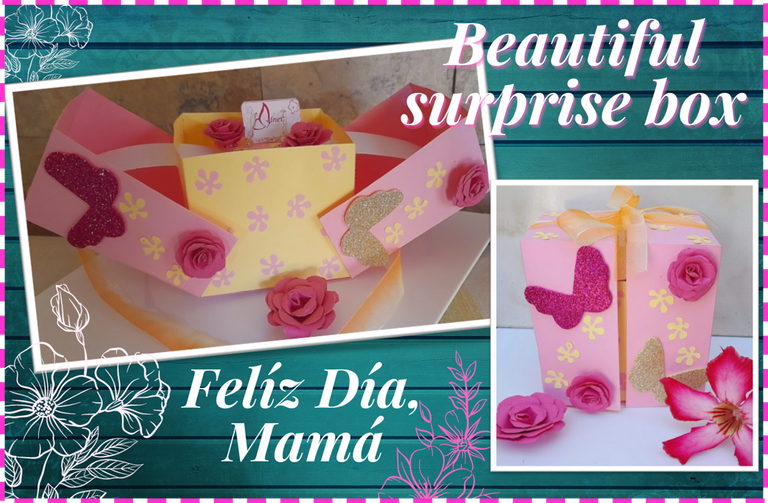

Blessed Wednesday to all my crafters, I hope you had an excellent and productive day, I wish this month to be very beautiful and productive to all of you, especially to those people who fulfill the role of being a Mother 💖 .
Today I will show you another great idea for that day that is coming soon as it is the 💖 Mothers 💖 Day 💖 .
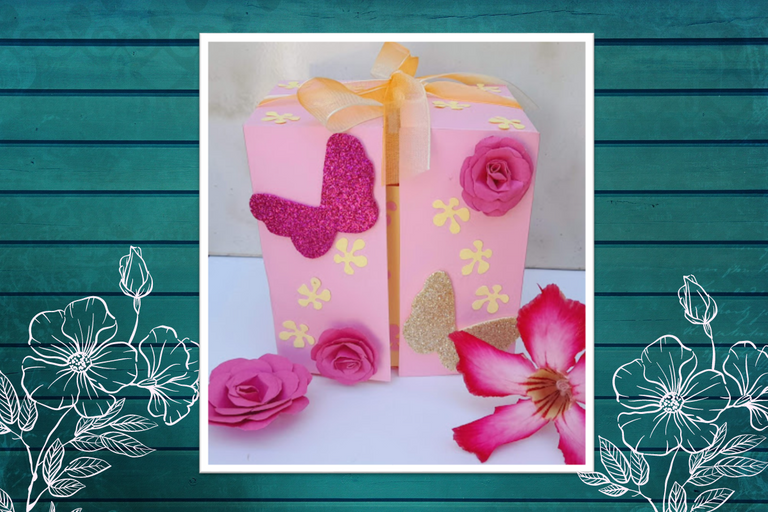
Mothers 💖 , this idea is about how we can make a beautiful and delicate surprise box to give that day as beautiful as it is Mother's Day, in Venezuela we will celebrate it this Sunday May 8. This cute little box is made with pink and yellow cardboard and decorated with paper roses and butterflies made with eva rubber, the best thing about this little surprise box is that you can also make it in acetate sheets for those who like transparency, or simply using the color of the cardboard that you like and you can decorate it with the theme that you like, you just have to let your imagination and creativity fly, and I'm sure you will get a spectacular result, plus this cute little surprise box can be used to give away on Father's Day, Children's Day because you can fill it with candy or you can simply give it as a gift with a nice detail to that special person on his or her birthday. Well my creative friends, here is the step by step to make this beautiful and delicate surprise box, let's get to work!

Bendecido miércoles para todos mis artesanos, espero hayan tenido un excelente y productivo día, les deseo que este mes les sea muy bello y productivo a todos, especialmente a esas personas que cumplen con el rol de ser Madre 💖 .
En el día de hoy les mostrare otra idea estupenda para ese día que ya esta próxima en llegar como lo es el día de las 💖
Madres 💖 , esta idea trata de como podemos hacer una bella y delicada caja sorpresa para obsequiar ese día tan hermosos como lo es el día de las madre, en Venezuela lo celebraremos este domingo 8 de mayo. Esta linda cajita esta elaborada con cartulinas rosadas y amarilla y decorada con unas rositas de papel y unas mariposas elaboradas con goma eva, lo mejor de esta cajita sorpresa es que la puedes realizar también en laminas de acetato para los que le gusta la transparencia, o simplemente utilizando el color de la cartulina que mas te guste y la puedes decorar con la temática que te agrade, solo tienes que echar a volar tu imaginación y creatividad, y estoy segura que obtendrás un resultado espectacular, ademas esta linda cajita sorpresa la puedes utilizar para regalar el día del padre, el día del niño porque la puedes rellenar de golosinas o simplemente la puedes obsequiarla con algún detalle lindo a esa persona especial el día de su cumpleaños. Bueno mis creativas amigas aquí les dejo el paso a paso para hacer esta hermosa y delicada caja sorpresa.¡¡Manos a la obra!!


Cardboard (yellow, pink and white)
Eva rubber (pink frosted and golden)
Stencils
Ruler
Cutters
Cold silicon
Yellow tape
Scissors

Cartulina (amarilla,rosada y blanca)
Goma eva (Rosado escarchado y dorado)
Plantillas
Regla
Cuters
Silicon fría
Cinta amarilla
Tijera
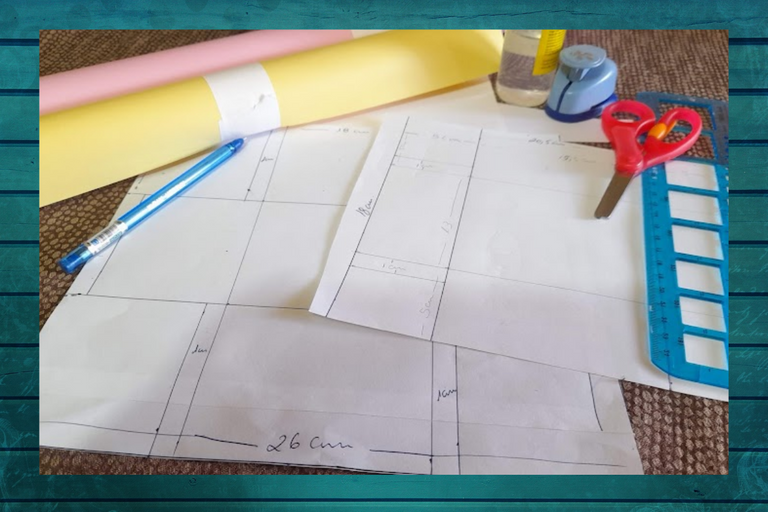


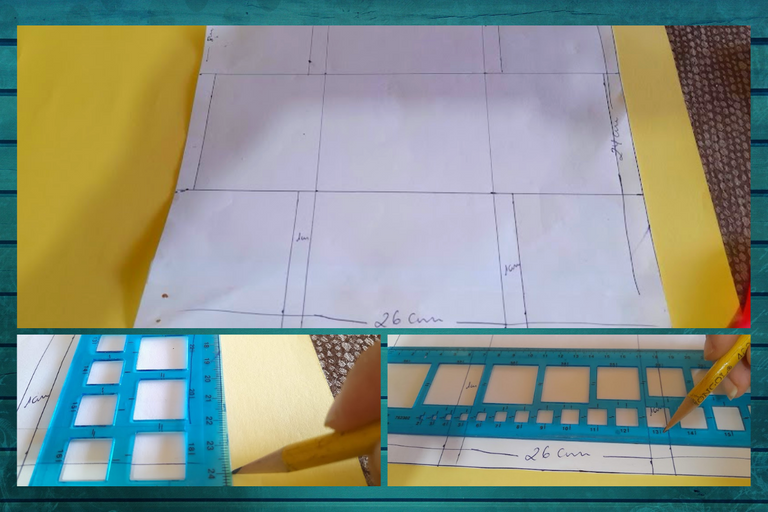
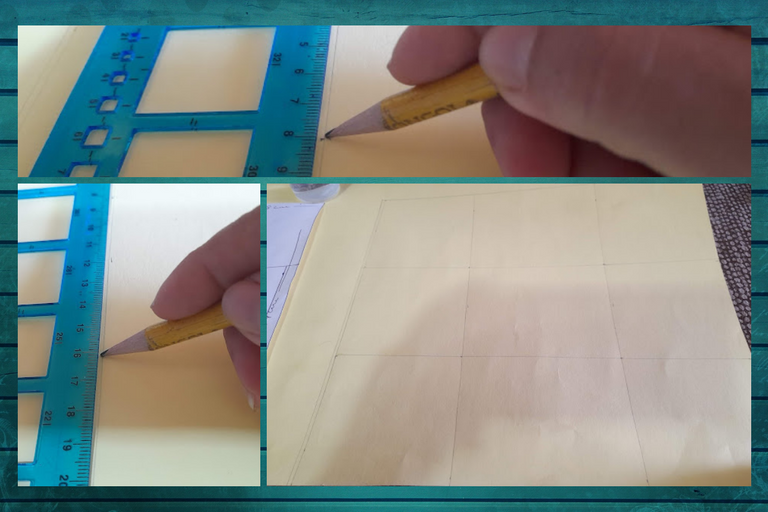
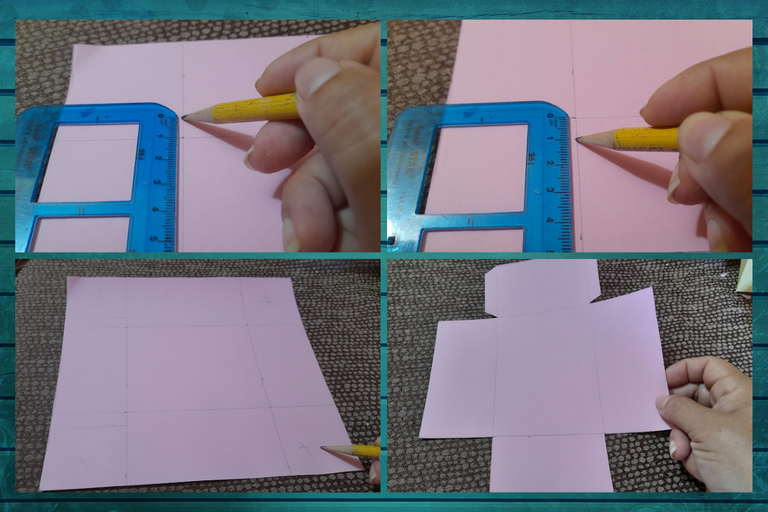
1: We start by marking a rectangle 26 centimeters wide by 24 centimeters high, then we mark a vertical line at 8 centimeters and another at 18 centimeters, then we make a horizontal line at 8 centimeters and another at 16 centimeters, leaving us a grid. Then we make four tabs with a thickness of one centimeter in the rectangles of the corners of the grid, then we make a line of one centimeter wide in the two rectangles that will be left next to the tabs, as you can see in the images.

1: Iniciamos marcando un rectángulo de 26 centímetros de ancho por 24 centímetros de alto, luego marcamos una linea vertical a los 8 centímetros y otra a los 18 centímetros, seguidamente realizamos una linea horizontal a los 8 centímetros y otra a los 16 centímetros quedándonos así una cuadricula. Después realizamos cuatro pestañas con un grosor de un centímetro en los rectángulos de las esquina de la cuadricula, luego realizamos una linea de un centímetro de ancho en los dos rectángulos que nos quedara al lado de las pestañas, como pueden observar en las imágenes.
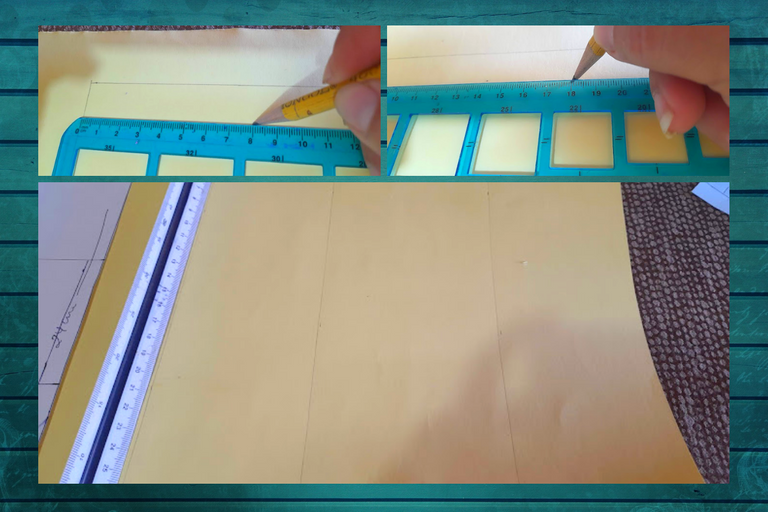
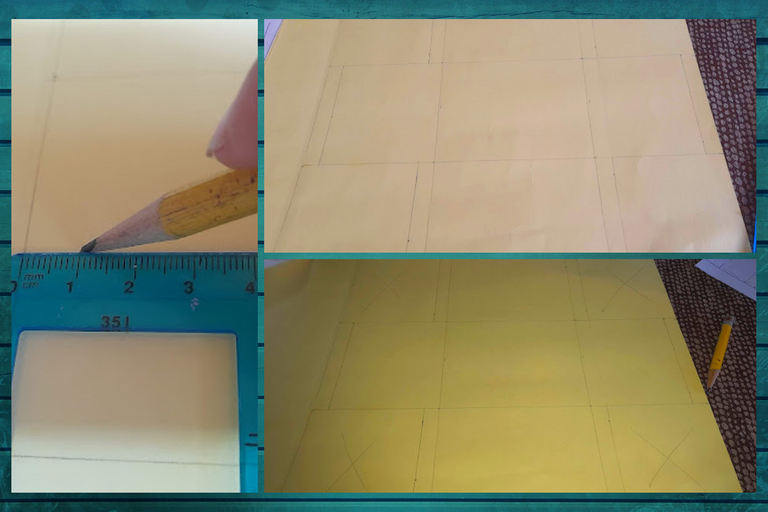


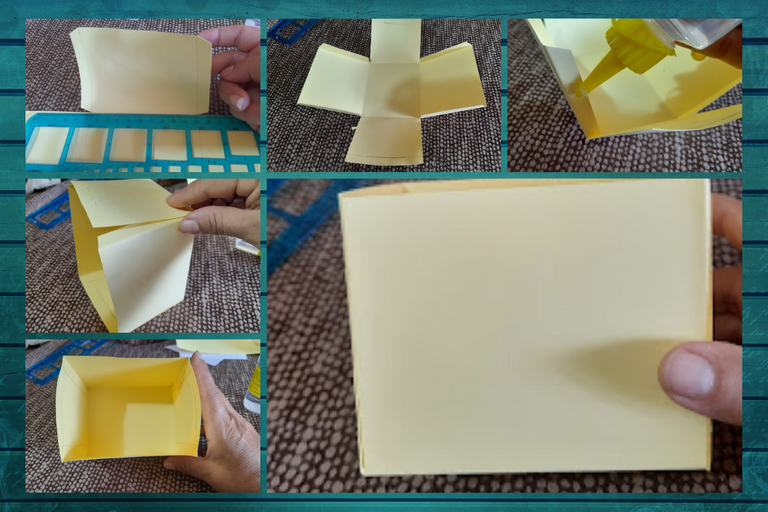
2: Now we cut out the four rectangles of the corners of our grid, then we mark a thicker line 4 centimeters long and with the help of the cutter we cut it out. With the ruler we proceed to mark each double of our internal box, then we proceed to attach with the silicone.

2: Ahora recortamos los cuatros rectángulos de las esquinas de nuestra cuadricula, luego marcamos una linea mas gruesa de 4 centímetros de largo y con la ayuda del cuters recortamos. Con la regla procedemos a marcar cada dobles de nuestra caja interna, seguidamente procedemos apegar con el silicon.
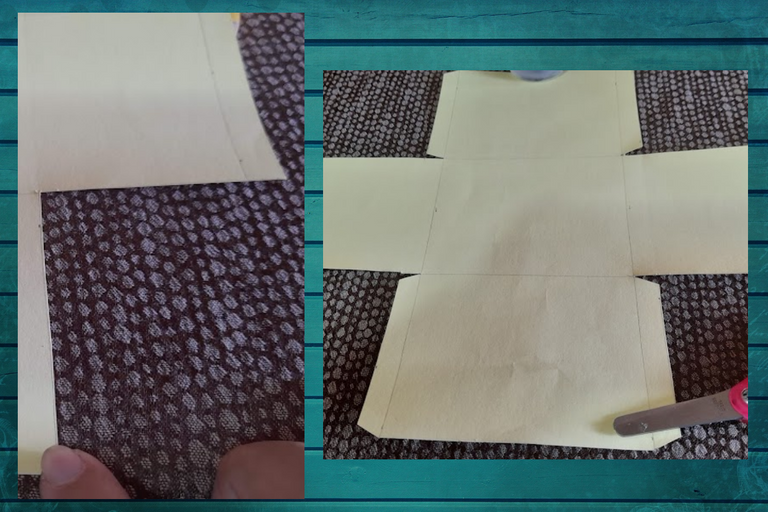


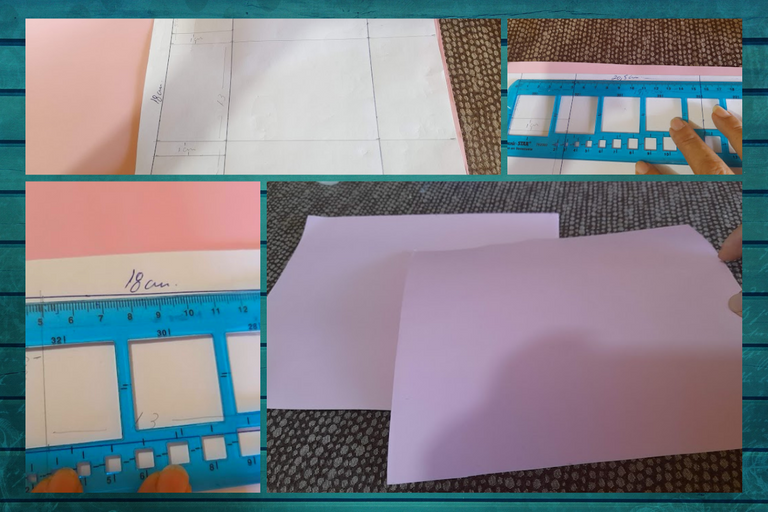
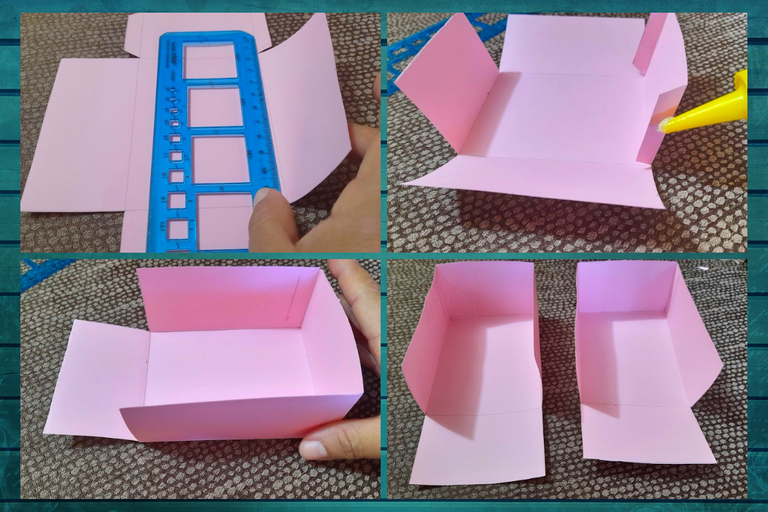
3: On the pink cardboard we mark a rectangle twice with the following measurements: 20.5 centimeters wide by 18 centimeters high and cut it out.

3: En la cartulina rosada marcamos un rectángulo dos veces de las siguientes medidas: 20,5 centímetro de ancho por 18 centímetros de alto y recortamos.


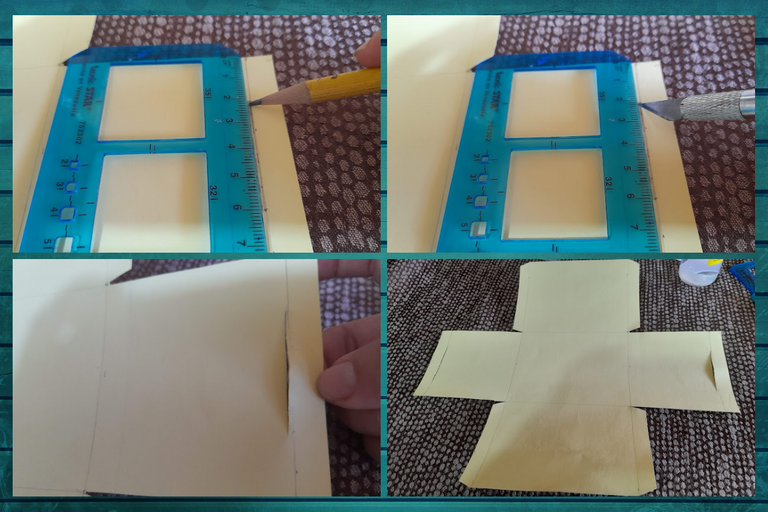
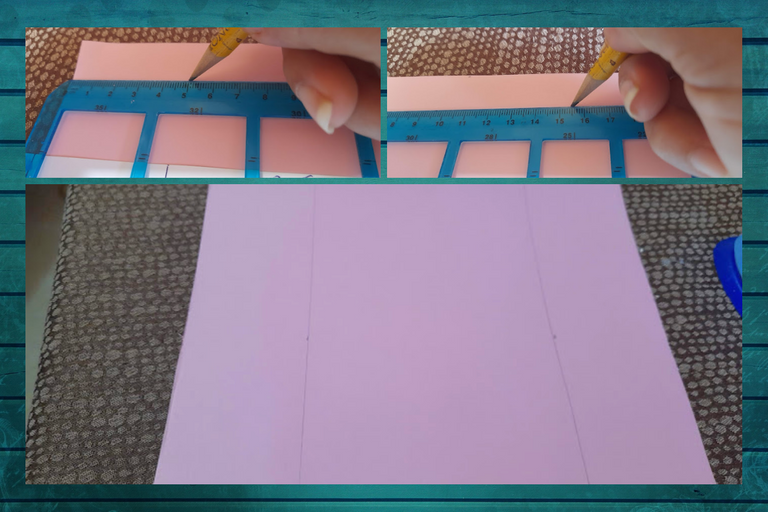
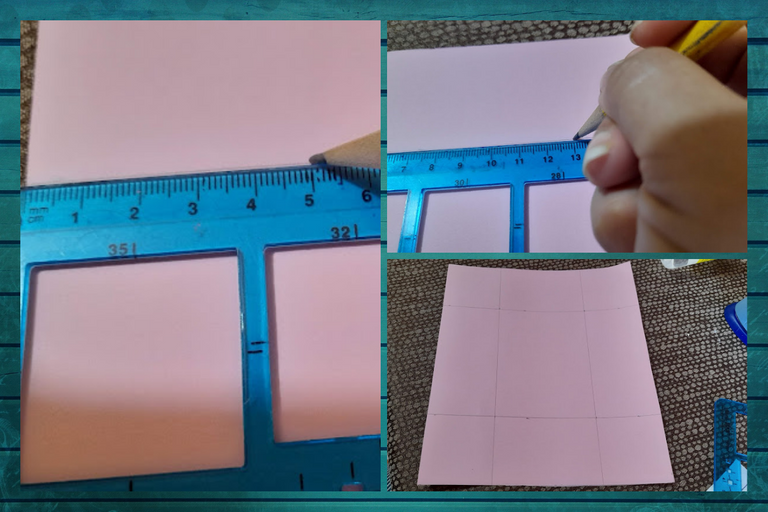
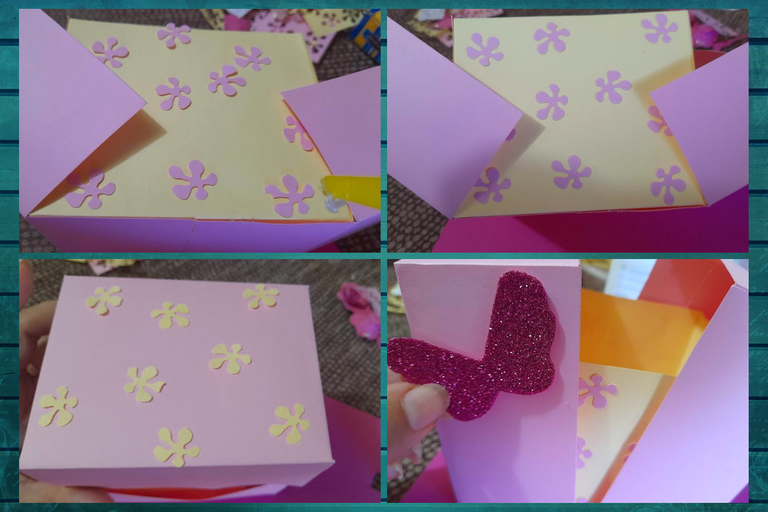
4: Then we proceed to mark a vertical line at 5 centimeters and another at 15.5 centimeters, then we mark a horizontal line at 5 centimeters and another at 13 centimeters, forming a grid. Then we add two tabs to the upper and lower rectangles on the left side of one centimeter wide as you can see in the images, then we cut the four rectangles of the corners of the grid. With the ruler we proceed to mark each double of the external boxes, then we proceed to attach with the silicone.

4: Luego procedemos a marcar una linea vertical a los 5 centímetros y otra a los 15,5 centímetros, seguidamente marcamos una linea horizontal a los 5 centímetros y la otra a los 13 centímetros, formando una cuadricula. Luego agregamos dos pestañas a los rectángulos superior e inferior del lado izquierdo de un centímetro de ancho como pueden ver en las imágenes, luego recortamos los cuatros rectángulos de las esquina de la cuadricula. Con la regla procedemos a marcar cada dobles de las cajas externas, seguidamente procedemos apegar con el silicon.


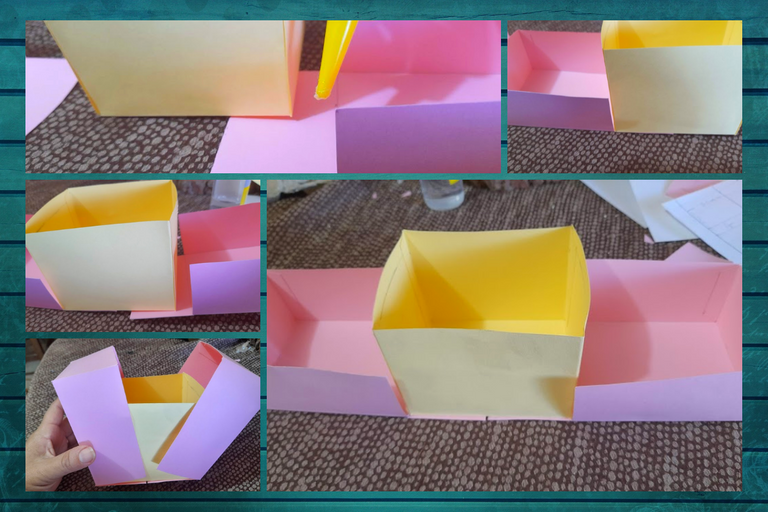
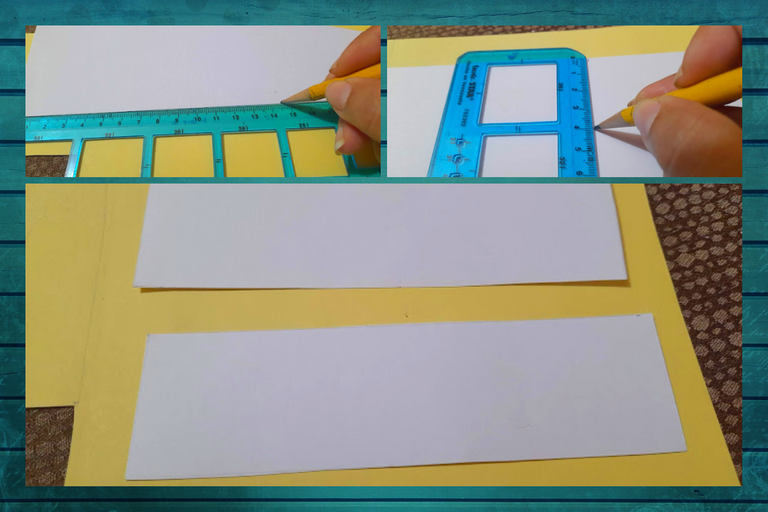
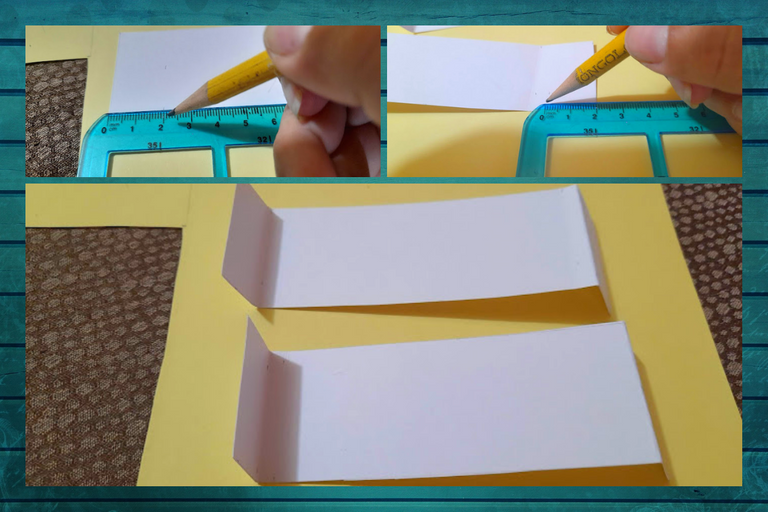
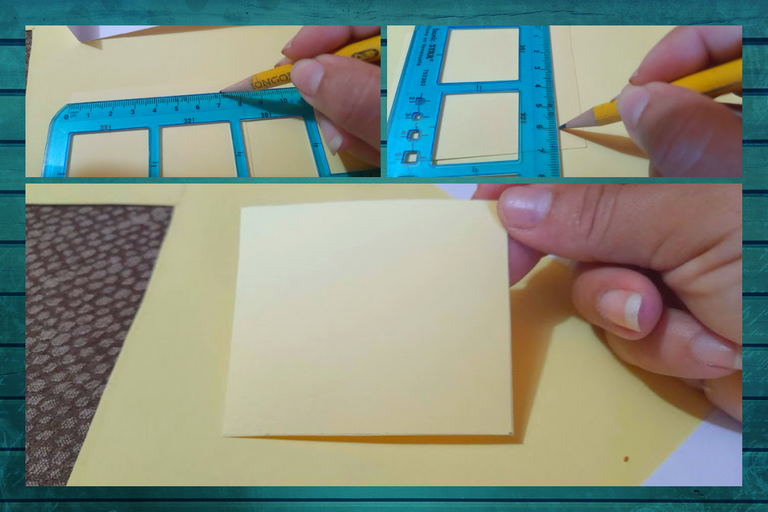
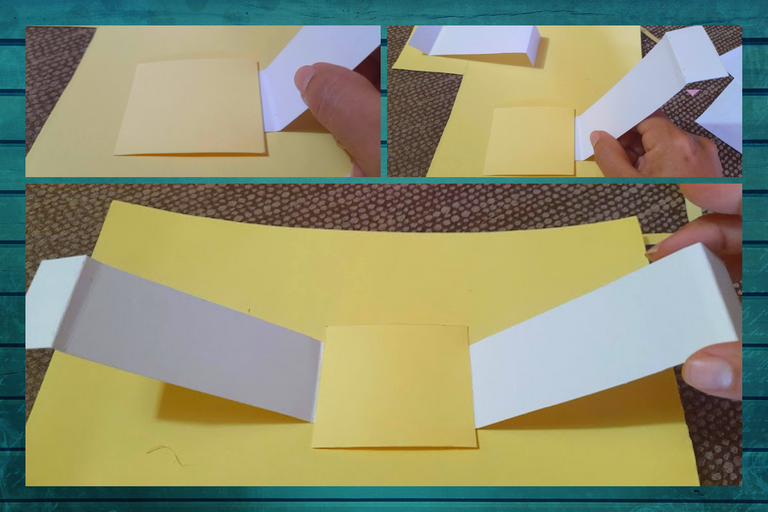
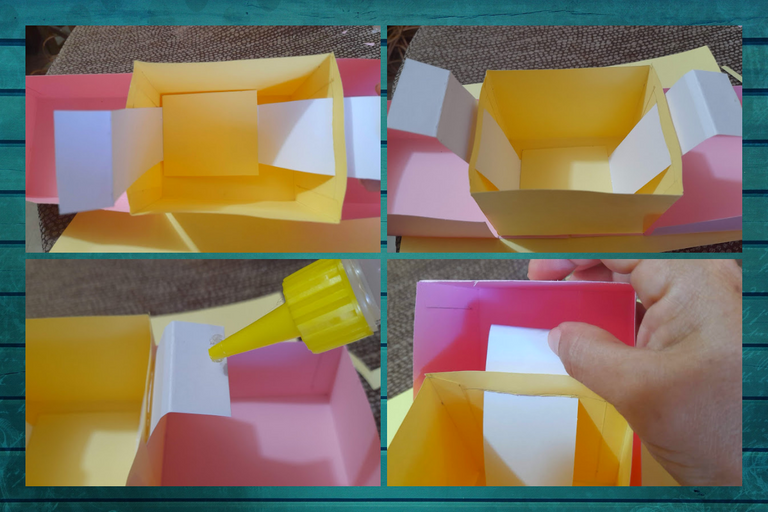
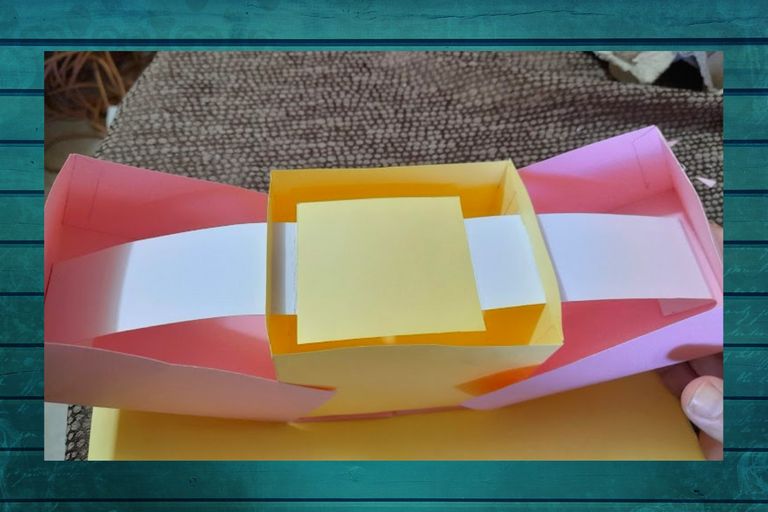
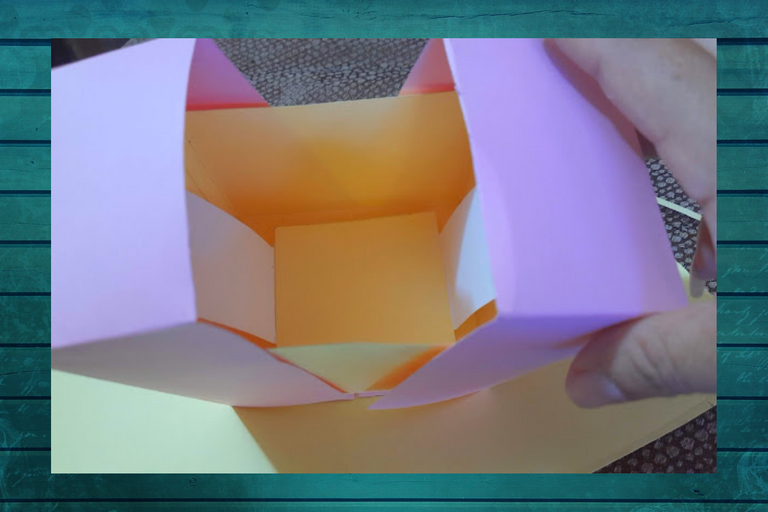
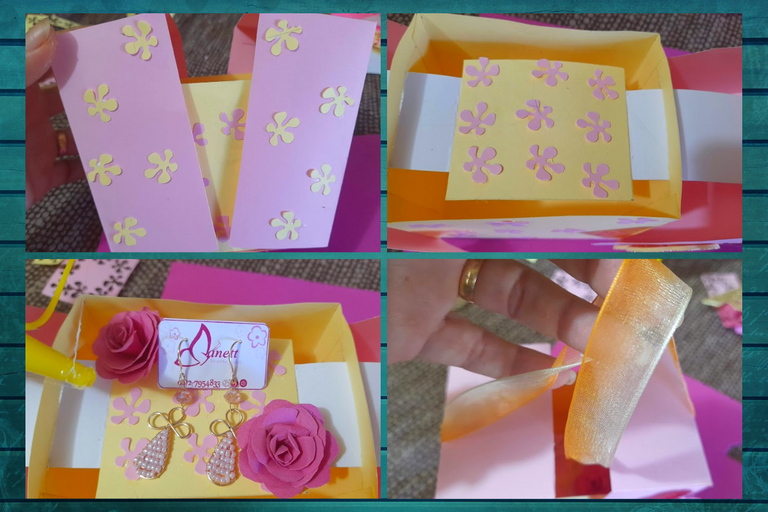
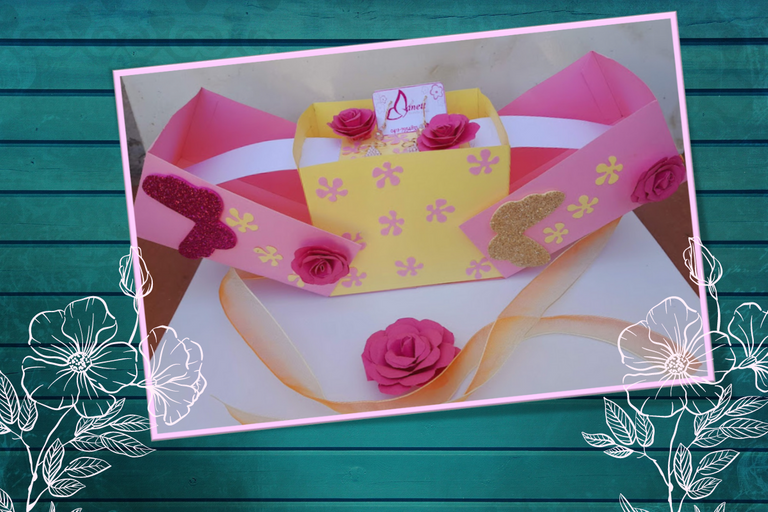
5: We proceed to glue the two pink boxes on the bottom of the yellow box, as you can see in the pictures, then we cut two strips of white cardboard 14.5 centimeters long by 4 centimeters wide, then we fold each end to 2 centimeters one up and one down, then we cut a yellow rectangle of 7 centimeters by 6 centimeters and glue the two white strips on the bottom. Then we pass this piece through the opening of the yellow box and glue the ends to each side of the pink box, as you can see in the pictures.

5: Procedemos a pegar las dos cajitas rosadas en la parte de abajo de la caja amarilla, como pueden ver en las imágenes, luego recortamos dos tira de cartulina blanca de 14,5 centímetro de largo por 4 centímetros de ancho, seguidamente doblamos cada extremo a 2 centímetros uno hacia arriba y otro hacia abajo, luego recortamos un rectángulo amarillo de 7 centímetro por 6 centímetro y pegamos las dos tiras blancas por la parte de abajo. Después esa pieza la pasamos por la abertura que tiene la caja amarilla y los extremos los pegamos a cada lado de la caja rosada, como pueden ver en las imágenes.


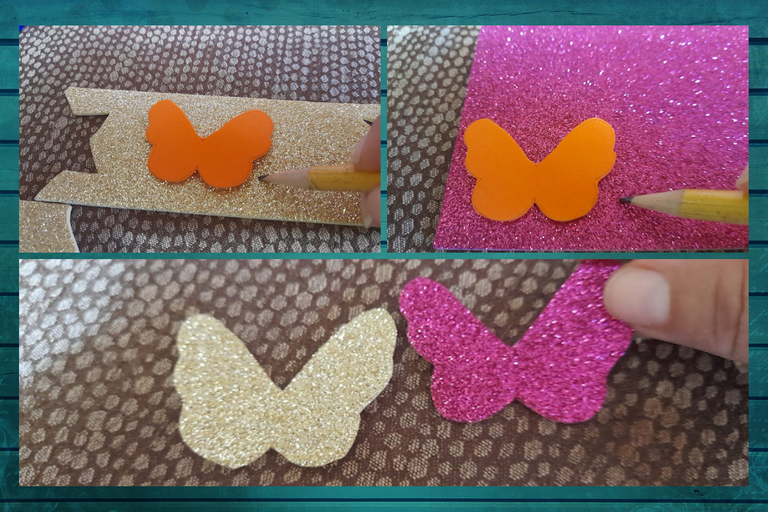
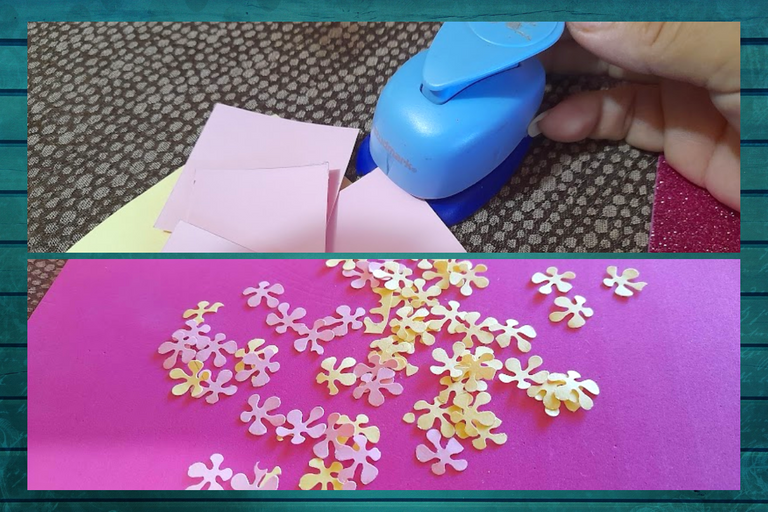
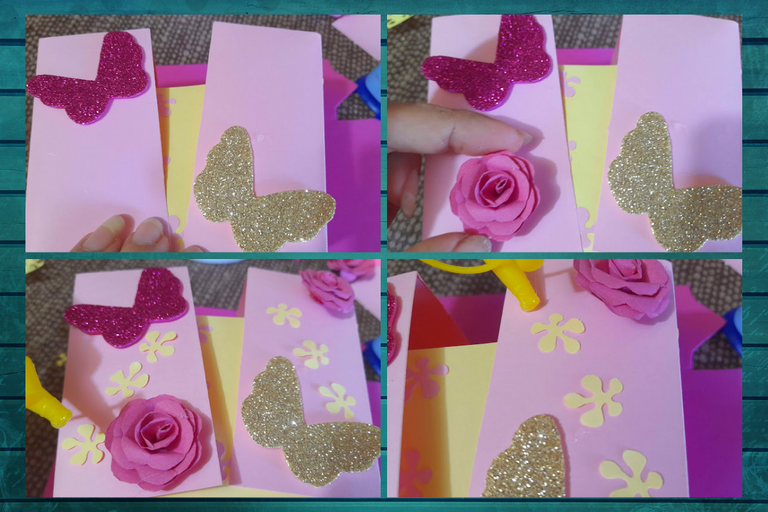
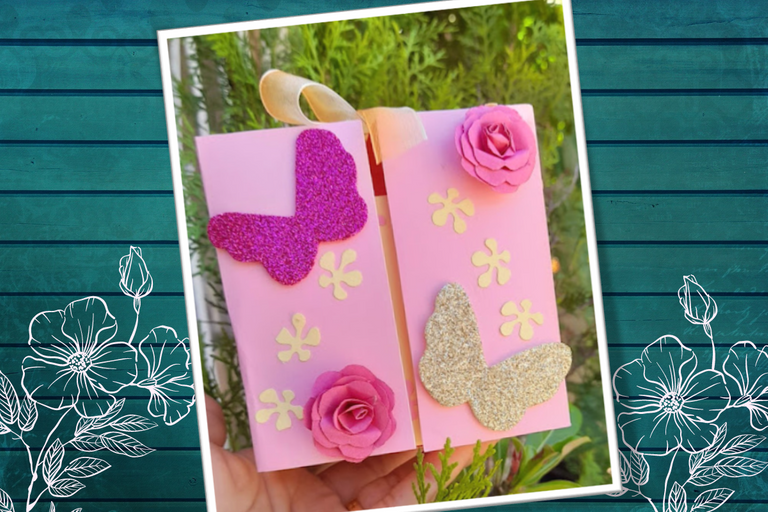
6: Finally we made some butterflies in pink and gold eva rubber and some small flowers in cardboard, which we glued them all over the outside of the box, and to hold the surprise box I placed the yellow ribbon as you can see.

6: Para finalizar realizamos unas mariposas en goma eva rosado y dorado y algunas pequeñas florecitas en cartulina, las cuales las pegamos por todo la parte de afuera de la caja, y para sujetar la cajita sorpresa le coloque la cinta amarilla como pueden observar.
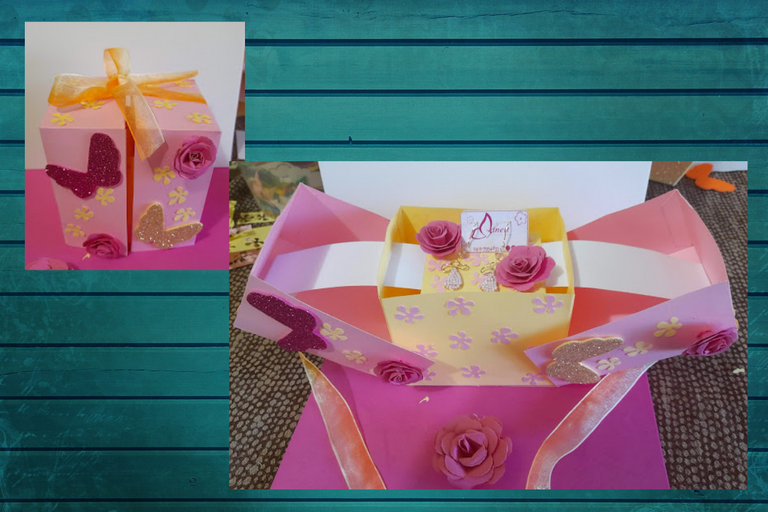


My creative friends, this is the result of my beautiful surprise box to give to my mom on her day, I'm sure you will love my project today!
Friends, see you in a future post!

Mis amigas creativas este es el resultado de mi bella caja sorpresa para obsequiar a mi mamá en su día. ¡Estoy segura que les va a encartar mi proyecto de hoy!
¡Amigas hasta una próxima publicación!
Portada y plantillas elaboradas en canva
Fuente Separador

The photographs were taken with a Samsung A12 smartphone, the text was translated into English with the Google translator.link
The banner was designed on canvas link

Las fotografías fueron tomadas con un teléfono inteligente Samsung A12, el texto fue traducido al ingles con el traductor de Google.link
El banner fue diseñado en canvas link


