Hello hivers!
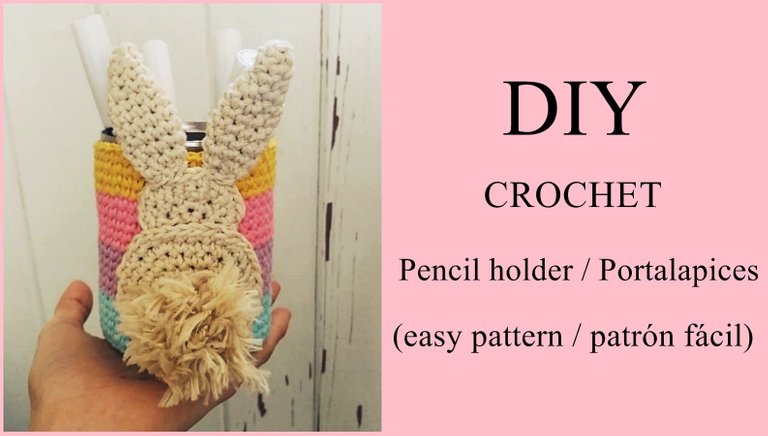
Welcome to this post on #NeedleWorkMonday. I'll show you how to crochet this pencil holder, using a recycled can.
I crocheted it in single crochet, because it's the easiest stitch and it looks really nice. If you are a beginner you can do it without any problem.
Hola hivers
Bienvenidos a este post en la comunidad #NeedleWorkMonday. Les voy a mostrar cómo hacer este portalapices a crochet, usando también un envase de lata reciclado.
El trabajo está tejido en punto bajo, que es el punto más fácil y queda muy bonito. Si eres principiante puedes hacerlo sin ningún problema.

Let's start
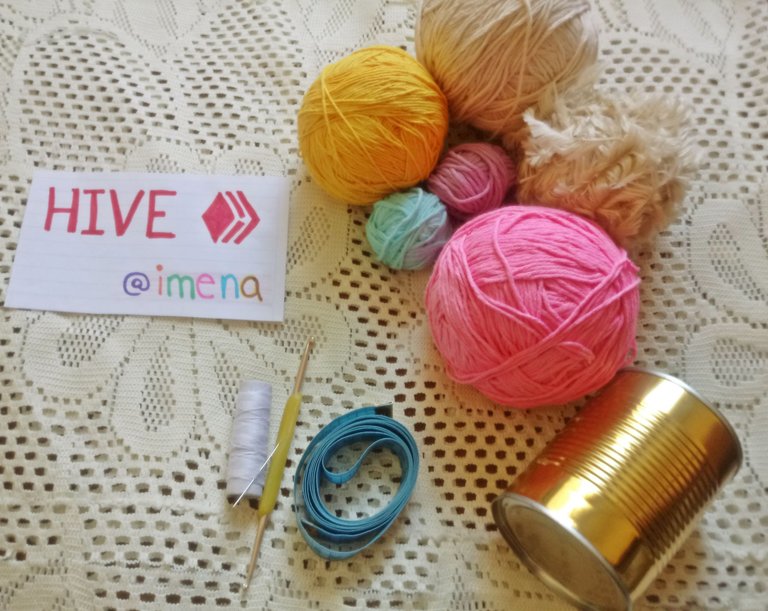
Materials:
- 50 grams of yarn of your 4 favourite colours (or just one colour)
- 50 grams of yarn in the colour you want your bunny to be
- crochet hook n 4
- an empty can of some food
- fabric glue OR needle and thread for sewing
- scissors
Comencemos
Materiales:
- 50 gramos de hilos de tus 4 colores favoritos (o un solo color)
- 50 grs hilo del color que deseas que sea tu conejito
- aguja de crochet n 4
- envase de lata vacío de algún alimento
- pegamento O aguja e hilo para coser
- tijera

Making the base:
Crochet a single crochet circle (video for beginners) the size of your can. This one measures 7.5 cm, so I had to make an 8 cm circle:
- Round 1: make a ring and cast on 6 single crochet stitches and join with slip stitch.
- Round 2: Crochet all stitches with one increase = 12
- Round 3: 1 single crochet, one increase (x6) = 18
- Round 4: 1 increase, 2 single crochet (x6) = 24
- Round 5: 3 single crochet, 1 increase (x6) = 30
- Round 6: 1 increase, 4 single crochet (x6) = 36
- Round 7: 5 single crochet, 1 increase (x6) = 42 and close with a slip stitch
Hacer la base:
Hacer un círculo en punto bajo (video para principiantes) de la medida de tu envase. El mío mide 7,5 cm, así que tuve que hacer un círculo de 8 cm:
- 1: hacer un anillo mágico y montar 6 puntos y unir con punto deslizado
- 2: tejer todos los puntos con un aumento = 12
- 3: 1 puntos bajos, un aumento (x6) = 18
- 4: 1 aumento, 2 puntos bajos (x6) = 24
- 5: 3 puntos bajos, 1 aumento (x6) = 30
- 6: 1 aumento, 4 puntos bajos (x6) = 36
- 7: 5 puntos bajos, 1 aumento (x6) = 42 y cerrar con punto deslizado
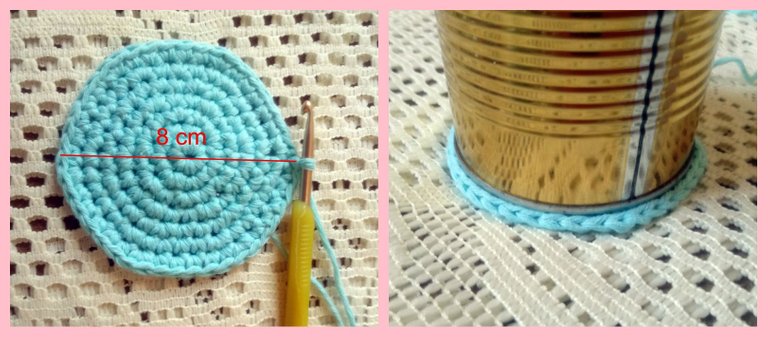

Now we will work all the stitches in single crochet, but ONLY ON THIS ROUND, we must pick up only one strand of the yarn, as in the picture. This is so that the work starts to "rise".
Ahora haremos todos los puntos en punto bajo, pero SOLO EN ESTA VUELTA debemos tomar solo una hebra del hilo, como en la foto. Esto es para que el trabajo comience a "subir".


We will continue working all the stitches with single crochet, combining your favourite yarns or making it in one colour, until reach the length you want.
My can measures 9,4 cm and I crocheted 5 rounds with light blue yarn, 5 rounds with purple yarn, 5 rounds with pink yarn and 4 rounds with yellow yarn.
Seguiremos tejiendo todos los puntos con punto bajo, combinando tus hilos favoritos o haciéndolo de un solo color, hasta alcanzar el largo que desees.
Mi recipiente mide 9,4 cm y yo tejí 5 vueltas con hilo celeste, 5 vueltas con hilo violeta, 5 vueltas con hijo rosa y 4 vueltas con hilo amarillo.


Bunny / Conejo
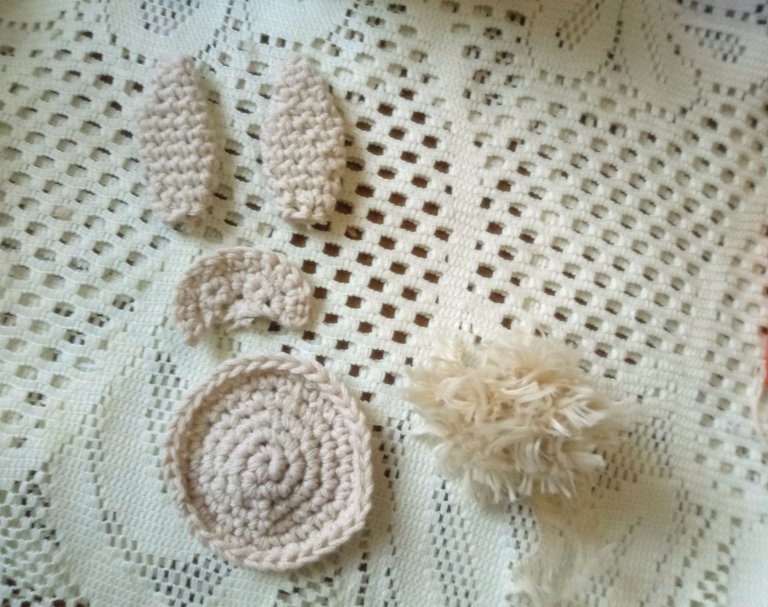

Body / Cuerpo
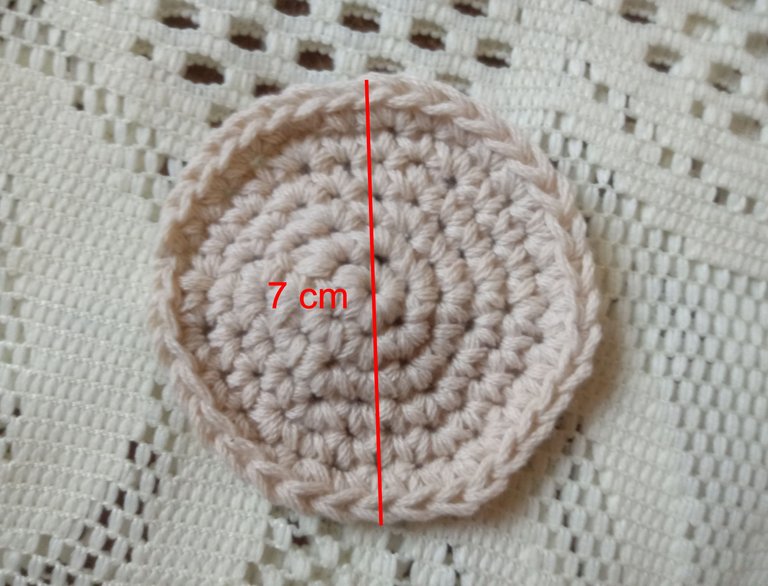
We must crochet a circle (with the same technique we did the base), with the colour you want.
It should measure 7 cm in diameter:
- 1: make a magic ring and cast on 6 single crochet and join with slip stitch.
- 2: Crochet all stitches with one increase = 12
- 3: 1 single crochet, one increase (x6) = 18
- 4: 1 increase, 2 single crochet (x6) = 24
- 5: 3 single crochet, 1 increase (x6) = 30
- 6: 1 increase, 4 single crochet (x6) = 36 and close with a slip stitch
Debemos tejer un círculo (con la misma técnica que hicimos la base), con el color que más te guste.
Debe medir 7 cm de diámetro:
- 1: hacer un anillo mágico y montar 6 puntos y unir con punto deslizado
- 2: tejer todos los puntos con un aumento = 12
- 3: 1 puntos bajos, un aumento (x6) = 18
- 4: 1 aumento, 2 puntos bajos (x6) = 24
- 5: 3 puntos bajos, 1 aumento (x6) = 30
- 6: 1 aumento, 4 puntos bajos (x6) = 36 y cerrar con punto deslizado

Head / Cabeza
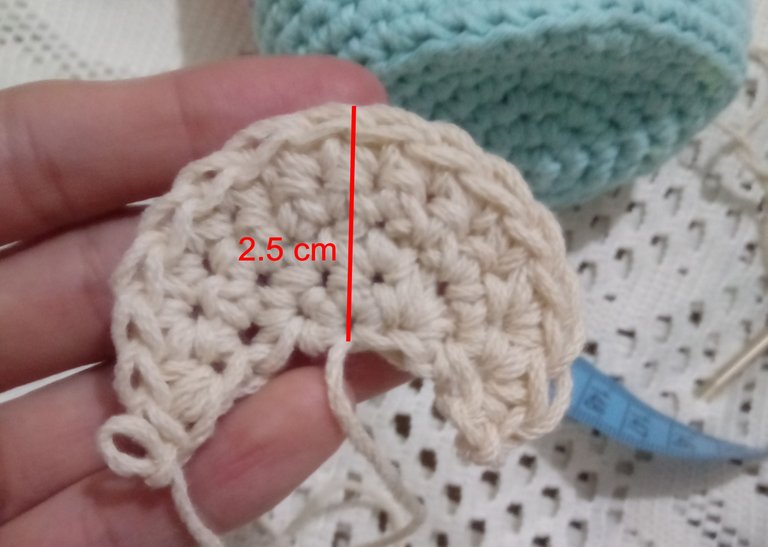
The head is a half circle, but with a variation to make it croissant-shaped
- 1: make a magic ring and cast on 3 simple crochets
- 2: 3 increases = 6
- 3: 2 chain stitches, 2 increases, 2 single crochets, 2 increases = 10
- 4: 2 chain stitches, 2 increases, 6 single crochets, 2 increases = 14 and close
La cabeza es un medio círculo, pero con una variación para que tenga forma de croissant
- 1: hacer un anillo mágico y montar 3 puntos bajos
- 2: 3 aumentos = 6
- 3: 2 cadenetas, 2 aumentos, 2 puntos bajos, 2 aumentos = 10
- 4: 2 cadenetas, 2 aumentos, 6 puntos bajos, 2 aumentos = 14 y cerrar

Ears / Orejas
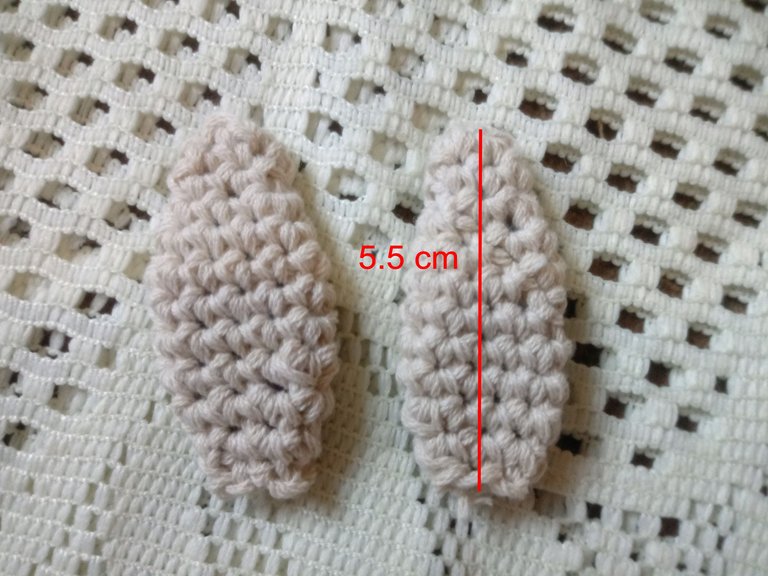
We have to start crocheting the ears with a circle to make them look nice.
- 1: make 4 chain stitches and join in a circle with slip stitch
- 2: 1 single crochet, 1 increase (x2) = 6
- 3: 6 single crochet
- 4: 2 single crochet, 1 increase (x2) = 8
- 5: 3 single crochet, 1 increase (x2) = 10
- 6: 10 single crochet
- 7: 10 single crochet
- 8: 10 single crochet
- 9: 3 single crochet, 1 decrease (x2) = 8
- 10: 2 single crochet, 1 decrease (x2) = 6 and close
Debemos comenzar a tejer las orejas con un circulo para que queden lindas.
- 1: hacer 4 cadenetas y unir con punto deslizado
- 2: 1 punto bajo, 1 aumento (x2) = 6
- 3: 6 puntos bajos
- 4: 2 puntos bajos, 1 aumento (x2) = 8
- 5: 3 puntos bajos, 1 aumento (x2) = 10
- 6: 10 puntos bajos
- 7: 10 puntos bajos
- 8: 10 puntos bajos
- 9: 3 puntos bajos, 1 disminución (x2) = 8
- 10: 2 puntos bajos, 1 disminución (x2) = 6 y cerrar

Tail / Cola
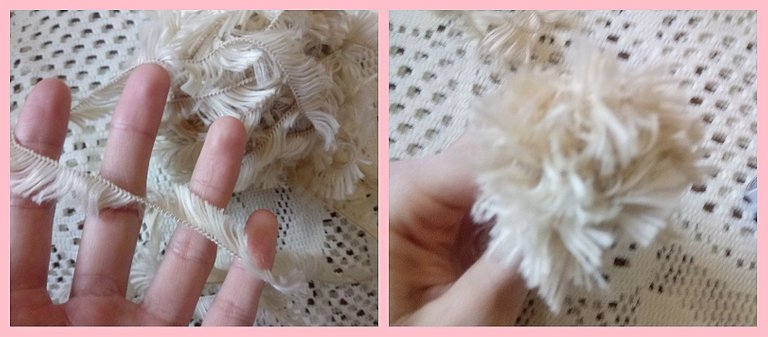
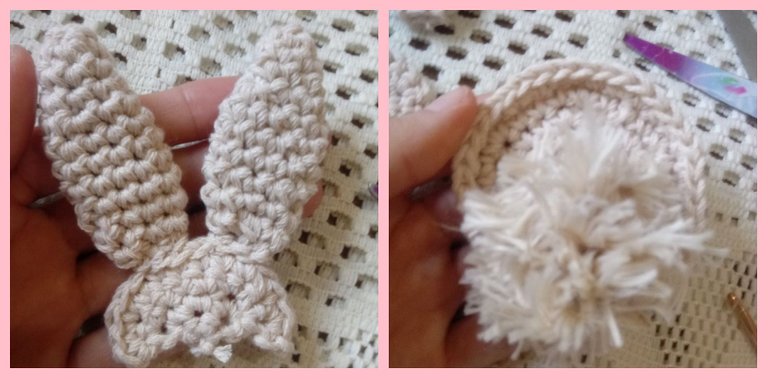
The tail is a pompom (how to make a pompom), I made it with a fur yarn, I didn't know what to do with it and I used it, but you can do it with the yarn you knitted the rabbit.
La cola es un pompón (cómo hacer un pompón), lo hice con un hilo de pelos que compré un día y no sabía qué hacer con él y lo aproveché, pero puedes hacerlo con el hilo que tejiste el conejo.

Now we have to sew the ears to the head and attach the pompon to the body.
Ahora debemos coser las orejas con la cabeza y unir el pompón con el cuerpo

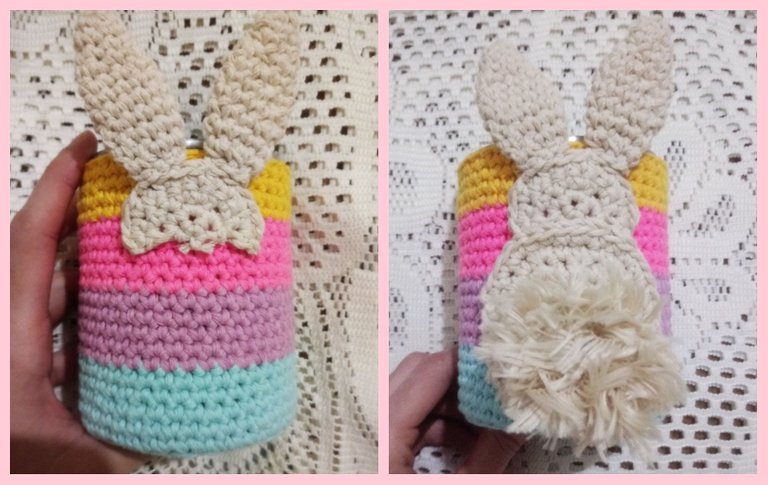
And finally, we come to the end: attaching the rabbit to the pencil holder.
You can do this with thread and a needle or with glue. To make it neat, first attach the head and then the body.
Y por fin, llegamos al final: pegar el conejo al portalápices.
Puedes hacerlo con hilo y una aguja o con pegamento. Para que quede prolijo, primero debes pegar la cabeza y luego el cuerpo.

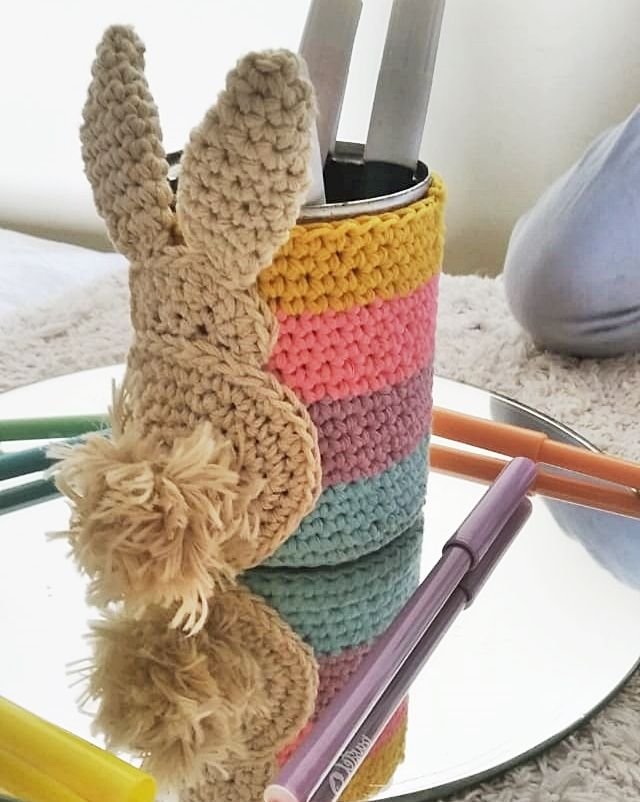
We have finished. Our pencil holder is ready to use.
Terminamos. Nuestro portalapices está listo para usar.

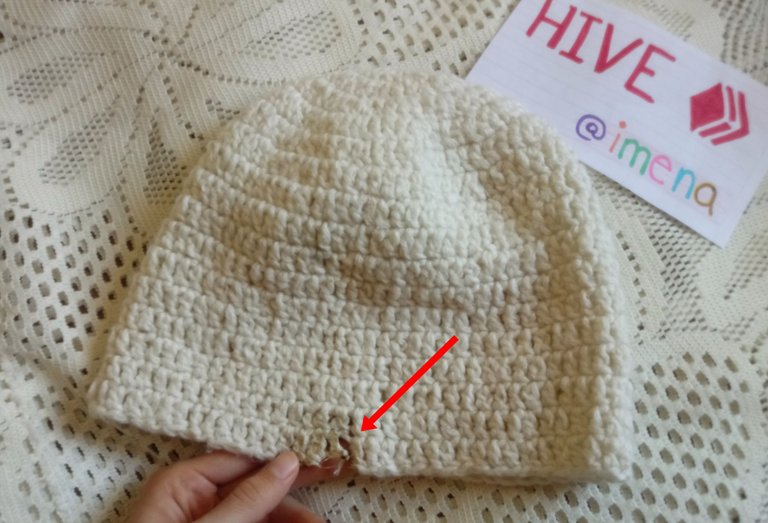
Now, a spoiler of my next work: I'll show you how I recycle this hat I found at home and it's burnt. I will use the yarn to make another accessory in my next post.
Ahora un spoiler de mi próximo post: voy a mostrarles cómo reciclo éste gorro que encontré en casa y está quemado. Voy a usar ese hilo para hacer otro accesorio.

I hope you enjoyed this post
Espero que hayas disfrutado este post
- I made this pattern myself
- I took the photos with my phone, and edited them in Photoscape.
- The text separator was edited by me in Photoscape.
- The videos shared are from youtube authors.
- Este patrón es de mi autoría
- Tomé las fotos con mi teléfono, y las edité en Photoscape.
- El separador de texto fue editado por mí en Photoscape.
- Los videos compartidos son de las usuarias de youtube

See you soon / Hasta pronto

